实现高并发秒杀的方式
- 引言
- 商品秒杀-超卖
- 解决商品超卖
- 方式一(改进版加锁)
- 方式二(AOP版加锁)
- 方式三(悲观锁一)
- 方式四(悲观锁二)
- 方式五(乐观锁)
- 方式六(阻塞队列)
- 方式七(Disruptor队列)
- 小结
1.引言
高并发场景在现场的日常工作中很常见,特别是在互联网公司中,这篇文章就来通过秒杀商品来模拟高并发的场景。文章末尾会附上文章的所有代码、脚本和测试用例。
- 本文环境: SpringBoot 2.5.7 + MySQL 8.0 X + MybatisPlus + Swagger2.9.2
- 模拟工具: Jmeter
- 模拟场景: 减库存->创建订单->模拟支付
2.商品秒杀-超卖
在开发中,对于下面的代码,可能很熟悉:在Service里面加上@Transactional事务注解和Lock锁
控制层:Controller
@ApiOperation(value="秒杀实现方式——Lock加锁")
@PostMapping("/start/lock")
public Result startLock(long skgId){
    try {
        log.info("开始秒杀方式一...");
        final long userId = (int) (new Random().nextDouble() * (99999 - 10000 + 1)) + 10000;
        Result result = secondKillService.startSecondKillByLock(skgId, userId);
        if(result != null){
            log.info("用户:{}--{}", userId, result.get("msg"));
        }else{
            log.info("用户:{}--{}", userId, "哎呦喂,人也太多了,请稍后!");
        }
    } catch (Exception e) {
        e.printStackTrace();
    } finally {

    }
    return Result.ok();
}
业务层:Service
@Override
@Transactional(rollbackFor = Exception.class)
public Result startSecondKillByLock(long skgId, long userId) {
    lock.lock();
    try {
        // 校验库存
        SecondKill secondKill = secondKillMapper.selectById(skgId);
        Integer number = secondKill.getNumber();
        if (number > 0) {
            // 扣库存
            secondKill.setNumber(number - 1);
            secondKillMapper.updateById(secondKill);
            // 创建订单
            SuccessKilled killed = new SuccessKilled();
            killed.setSeckillId(skgId);
            killed.setUserId(userId);
            killed.setState((short) 0);
            killed.setCreateTime(new Timestamp(System.currentTimeMillis()));
            successKilledMapper.insert(killed);

            // 模拟支付
            Payment payment = new Payment();
            payment.setSeckillId(skgId);
            payment.setSeckillId(skgId);
            payment.setUserId(userId);
            payment.setMoney(40);
            payment.setState((short) 1);
            payment.setCreateTime(new Timestamp(System.currentTimeMillis()));
            paymentMapper.insert(payment);
        } else {
            return Result.error(SecondKillStateEnum.END);
        }
    } catch (Exception e) {
        throw new ScorpiosException("异常了个乖乖");
    } finally {
        lock.unlock();
    }
    return Result.ok(SecondKillStateEnum.SUCCESS);
}
对于上面的代码应该没啥问题吧,业务方法上加事务,在处理业务的时候加锁。
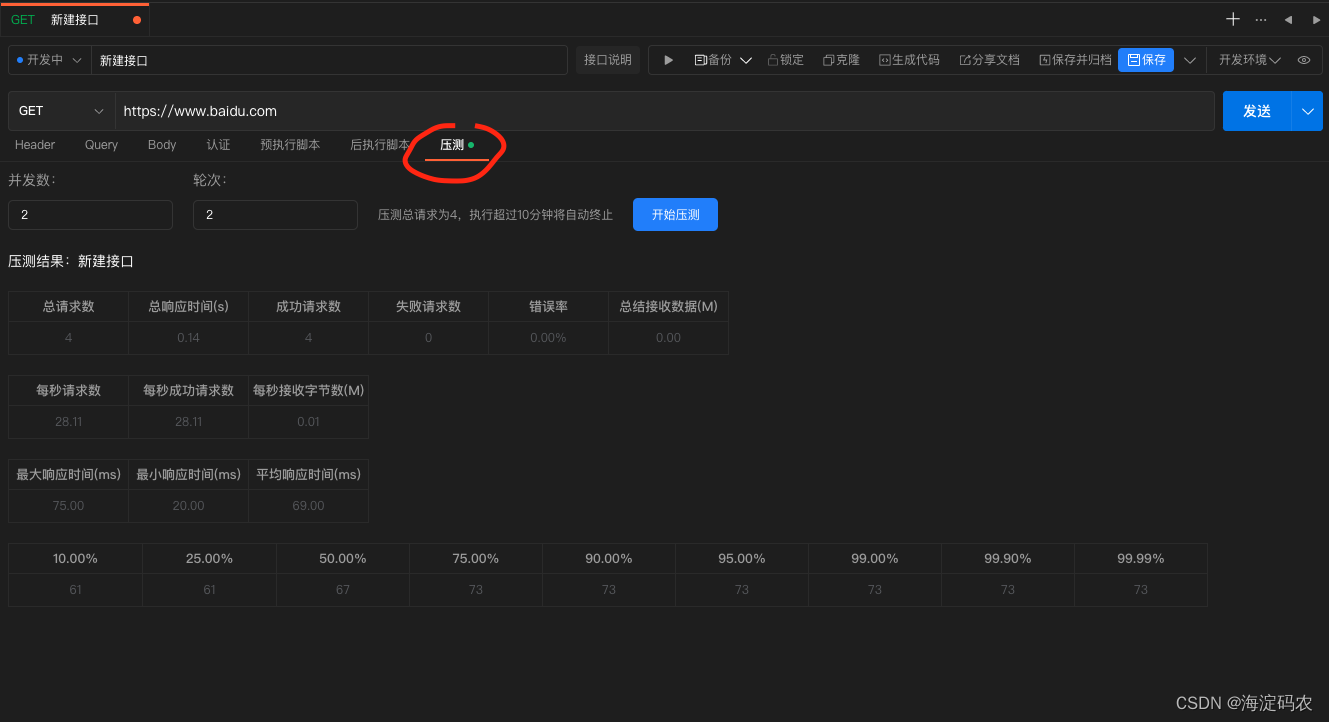
但上面这样写法是有问题的,会出现超卖的情况,看下测试结果:模拟1000个并发,抢100商品
Jmeter不了解的,可以参考这篇文章:
https://blog.csdn.net/zxd1435513775/article/details/106372446


这里在业务方法开始加了锁,在业务方法结束后释放了锁。但这里的事务提交却不是这样的,有可能在事务提交之前,就已经把锁释放了,这样会导致商品超卖现象。所以加锁的时机很重要!
3. 解决商品超卖
对于上面超卖现象,主要问题出现在事务中锁释放的时机,事务未提交之前,锁已经释放。(事务提交是在整个方法执行完)。如何解决这个问题呢,就是把加锁步骤提前
- 可以在controller层进行加锁
- 可以使用Aop在业务方法执行之前进行加锁
3.1 方式一(改进版加锁)
@ApiOperation(value="秒杀实现方式——Lock加锁")
@PostMapping("/start/lock")
public Result startLock(long skgId){
    // 在此处加锁
    lock.lock();
    try {
        log.info("开始秒杀方式一...");
        final long userId = (int) (new Random().nextDouble() * (99999 - 10000 + 1)) + 10000;
        Result result = secondKillService.startSecondKillByLock(skgId, userId);
        if(result != null){
            log.info("用户:{}--{}", userId, result.get("msg"));
        }else{
            log.info("用户:{}--{}", userId, "哎呦喂,人也太多了,请稍后!");
        }
    } catch (Exception e) {
        e.printStackTrace();
    } finally {
        // 在此处释放锁
        lock.unlock();
    }
    return Result.ok();
}
上面这样的加锁就可以解决事务未提交之前,锁释放的问题,可以分三种情况进行压力测试:
- 并发数1000,商品100
- 并发数1000,商品1000
- 并发数2000,商品1000
对于并发量大于商品数的情况,商品秒杀一般不会出现少卖的请况,但对于并发数小于等于商品数的时候可能会出现商品少卖情况,这也很好理解。
对于没有问题的情况就不贴图了,因为有很多种方式,贴图会太多

3.2 方式二(AOP版加锁)
对于上面在控制层进行加锁的方式,可能显得不优雅,那就还有另一种方式进行在事务之前加锁,那就是AOP
自定义AOP注解
@Target({ElementType.PARAMETER, ElementType.METHOD})
@Retention(RetentionPolicy.RUNTIME)
@Documented
public  @interface ServiceLock {
    String description()  default "";
}
定义切面类
@Slf4j
@Component
@Scope
@Aspect
@Order(1) //order越小越是最先执行,但更重要的是最先执行的最后结束
public class LockAspect {
    /**
     * 思考:为什么不用synchronized
     * service 默认是单例的,并发下lock只有一个实例
     */
    private static  Lock lock = new ReentrantLock(true); // 互斥锁 参数默认false,不公平锁

    // Service层切点     用于记录错误日志
    @Pointcut("@annotation(com.scorpios.secondkill.aop.ServiceLock)")
    public void lockAspect() {

    }

    @Around("lockAspect()")
    public  Object around(ProceedingJoinPoint joinPoint) {
        lock.lock();
        Object obj = null;
        try {
            obj = joinPoint.proceed();
        } catch (Throwable e) {
            e.printStackTrace();
   throw new RuntimeException();
        } finally{
            lock.unlock();
        }
        return obj;
    }
}
在业务方法上添加AOP注解
@Override
@ServiceLock // 使用Aop进行加锁
@Transactional(rollbackFor = Exception.class)
public Result startSecondKillByAop(long skgId, long userId) {

    try {
        // 校验库存
        SecondKill secondKill = secondKillMapper.selectById(skgId);
        Integer number = secondKill.getNumber();
        if (number > 0) {
            //扣库存
            secondKill.setNumber(number - 1);
            secondKillMapper.updateById(secondKill);
            //创建订单
            SuccessKilled killed = new SuccessKilled();
            killed.setSeckillId(skgId);
            killed.setUserId(userId);
            killed.setState((short) 0);
            killed.setCreateTime(new Timestamp(System.currentTimeMillis()));
            successKilledMapper.insert(killed);

            //支付
            Payment payment = new Payment();
            payment.setSeckillId(skgId);
            payment.setSeckillId(skgId);
            payment.setUserId(userId);
            payment.setMoney(40);
            payment.setState((short) 1);
            payment.setCreateTime(new Timestamp(System.currentTimeMillis()));
            paymentMapper.insert(payment);
        } else {
            return Result.error(SecondKillStateEnum.END);
        }
    } catch (Exception e) {
        throw new ScorpiosException("异常了个乖乖");
    }
    return Result.ok(SecondKillStateEnum.SUCCESS);
}
控制层:
@ApiOperation(value="秒杀实现方式二——Aop加锁")
@PostMapping("/start/aop")
public Result startAop(long skgId){
    try {
        log.info("开始秒杀方式二...");
        final long userId = (int) (new Random().nextDouble() * (99999 - 10000 + 1)) + 10000;
        Result result = secondKillService.startSecondKillByAop(skgId, userId);
        if(result != null){
            log.info("用户:{}--{}", userId, result.get("msg"));
        }else{
            log.info("用户:{}--{}", userId, "哎呦喂,人也太多了,请稍后!");
        }
    } catch (Exception e) {
        e.printStackTrace();
    }
    return Result.ok();
}
这种方式在对锁的使用上,更高阶、更美观!
3.3 方式三(悲观锁一)
除了上面在业务代码层面加锁外,还可以使用数据库自带的锁进行并发控制。
悲观锁,什么是悲观锁呢?通俗的说,在做任何事情之前,都要进行加锁确认。这种数据库级加锁操作效率较低。
使用for update一定要加上事务,当事务处理完后,for update才会将行级锁解除
如果请求数和秒杀商品数量一致,会出现少卖
@ApiOperation(value="秒杀实现方式三——悲观锁")
@PostMapping("/start/pes/lock/one")
public Result startPesLockOne(long skgId){
    try {
        log.info("开始秒杀方式三...");
        final long userId = (int) (new Random().nextDouble() * (99999 - 10000 + 1)) + 10000;
        Result result = secondKillService.startSecondKillByUpdate(skgId, userId);
        if(result != null){
            log.info("用户:{}--{}", userId, result.get("msg"));
        }else{
            log.info("用户:{}--{}", userId, "哎呦喂,人也太多了,请稍后!");
        }
    } catch (Exception e) {
        e.printStackTrace();
    }
    return Result.ok();
}
业务逻辑
@Override
@Transactional(rollbackFor = Exception.class)
public Result startSecondKillByUpdate(long skgId, long userId) {
    try {
        // 校验库存-悲观锁
        SecondKill secondKill = secondKillMapper.querySecondKillForUpdate(skgId);
        Integer number = secondKill.getNumber();
        if (number > 0) {
            //扣库存
            secondKill.setNumber(number - 1);
            secondKillMapper.updateById(secondKill);
            //创建订单
            SuccessKilled killed = new SuccessKilled();
            killed.setSeckillId(skgId);
            killed.setUserId(userId);
            killed.setState((short) 0);
            killed.setCreateTime(new Timestamp(System.currentTimeMillis()));
            successKilledMapper.insert(killed);

            //支付
            Payment payment = new Payment();
            payment.setSeckillId(skgId);
            payment.setSeckillId(skgId);
            payment.setUserId(userId);
            payment.setMoney(40);
            payment.setState((short) 1);
            payment.setCreateTime(new Timestamp(System.currentTimeMillis()));
            paymentMapper.insert(payment);
        } else {
            return Result.error(SecondKillStateEnum.END);
        }
    } catch (Exception e) {
        throw new ScorpiosException("异常了个乖乖");
    } finally {
    }
    return Result.ok(SecondKillStateEnum.SUCCESS);
}
Dao层
@Repository
public interface SecondKillMapper extends BaseMapper<SecondKill> {

    /**
     * 将此行数据进行加锁,当整个方法将事务提交后,才会解锁
     * @param skgId
     * @return
     */
    @Select(value = "SELECT * FROM seckill WHERE seckill_id=#{skgId} FOR UPDATE")
    SecondKill querySecondKillForUpdate(@Param("skgId") Long skgId);

}
上面是利用for update进行对查询数据加锁,加的是行锁
3.4 方式四(悲观锁二)
悲观锁的第二种方式就是利用update更新命令来加表锁
/**
 * UPDATE锁表
 * @param skgId  商品id
 * @param userId    用户id
 * @return
 */
@Override
@Transactional(rollbackFor = Exception.class)
public Result startSecondKillByUpdateTwo(long skgId, long userId) {
    try {

        // 不校验,直接扣库存更新
        int result = secondKillMapper.updateSecondKillById(skgId);
        if (result > 0) {
            //创建订单
            SuccessKilled killed = new SuccessKilled();
            killed.setSeckillId(skgId);
            killed.setUserId(userId);
            killed.setState((short) 0);
            killed.setCreateTime(new Timestamp(System.currentTimeMillis()));
            successKilledMapper.insert(killed);

            //支付
            Payment payment = new Payment();
            payment.setSeckillId(skgId);
            payment.setSeckillId(skgId);
            payment.setUserId(userId);
            payment.setMoney(40);
            payment.setState((short) 1);
            payment.setCreateTime(new Timestamp(System.currentTimeMillis()));
            paymentMapper.insert(payment);
        } else {
            return Result.error(SecondKillStateEnum.END);
        }
    } catch (Exception e) {
        throw new ScorpiosException("异常了个乖乖");
    } finally {
    }
    return Result.ok(SecondKillStateEnum.SUCCESS);
}
Dao层
@Repository
public interface SecondKillMapper extends BaseMapper<SecondKill> {

    /**
     * 将此行数据进行加锁,当整个方法将事务提交后,才会解锁
     * @param skgId
     * @return
     */
    @Select(value = "SELECT * FROM seckill WHERE seckill_id=#{skgId} FOR UPDATE")
    SecondKill querySecondKillForUpdate(@Param("skgId") Long skgId);

    @Update(value = "UPDATE seckill SET number=number-1 WHERE seckill_id=#{skgId} AND number > 0")
    int updateSecondKillById(@Param("skgId") long skgId);
}
3.5 方式五(乐观锁)
乐观锁,顾名思义,就是对操作结果很乐观,通过利用version字段来判断数据是否被修改
乐观锁,不进行库存数量的校验,直接做库存扣减
这里使用的乐观锁会出现大量的数据更新异常(抛异常就会导致购买失败)、如果配置的抢购人数比较少、比如120:100(人数:商品) 会出现少买的情况,不推荐使用乐观锁。
@ApiOperation(value="秒杀实现方式五——乐观锁")
@PostMapping("/start/opt/lock")
public Result startOptLock(long skgId){
    try {
        log.info("开始秒杀方式五...");
        final long userId = (int) (new Random().nextDouble() * (99999 - 10000 + 1)) + 10000;
        // 参数添加了购买数量
        Result result = secondKillService.startSecondKillByPesLock(skgId, userId,1);
        if(result != null){
            log.info("用户:{}--{}", userId, result.get("msg"));
        }else{
            log.info("用户:{}--{}", userId, "哎呦喂,人也太多了,请稍后!");
        }
    } catch (Exception e) {
        e.printStackTrace();
    }
    return Result.ok();
}
@Override
@Transactional(rollbackFor = Exception.class)
public Result startSecondKillByPesLock(long skgId, long userId, int number) {

    // 乐观锁,不进行库存数量的校验,直接
    try {
        SecondKill kill = secondKillMapper.selectById(skgId);
        // 剩余的数量应该要大于等于秒杀的数量
        if(kill.getNumber() >= number) {
            int result = secondKillMapper.updateSecondKillByVersion(number,skgId,kill.getVersion());
            if (result > 0) {
                //创建订单
                SuccessKilled killed = new SuccessKilled();
                killed.setSeckillId(skgId);
                killed.setUserId(userId);
                killed.setState((short) 0);
                killed.setCreateTime(new Timestamp(System.currentTimeMillis()));
                successKilledMapper.insert(killed);

                //支付
                Payment payment = new Payment();
                payment.setSeckillId(skgId);
                payment.setSeckillId(skgId);
                payment.setUserId(userId);
                payment.setMoney(40);
                payment.setState((short) 1);
                payment.setCreateTime(new Timestamp(System.currentTimeMillis()));
                paymentMapper.insert(payment);
            } else {
                return Result.error(SecondKillStateEnum.END);
            }
        }
    } catch (Exception e) {
        throw new ScorpiosException("异常了个乖乖");
    } finally {
    }
    return Result.ok(SecondKillStateEnum.SUCCESS);
}
@Repository
public interface SecondKillMapper extends BaseMapper<SecondKill> {

    /**
     * 将此行数据进行加锁,当整个方法将事务提交后,才会解锁
     * @param skgId
     * @return
     */
    @Select(value = "SELECT * FROM seckill WHERE seckill_id=#{skgId} FOR UPDATE")
    SecondKill querySecondKillForUpdate(@Param("skgId") Long skgId);

    @Update(value = "UPDATE seckill SET number=number-1 WHERE seckill_id=#{skgId} AND number > 0")
    int updateSecondKillById(@Param("skgId") long skgId);

    @Update(value = "UPDATE seckill  SET number=number-#{number},version=version+1 WHERE seckill_id=#{skgId} AND version = #{version}")
    int updateSecondKillByVersion(@Param("number") int number, @Param("skgId") long skgId, @Param("version")int version);
}
乐观锁会出现大量的数据更新异常(抛异常就会导致购买失败),会出现少买的情况,不推荐使用乐观锁
3.6 方式六(阻塞队列)
利用阻塞队类,也可以解决高并发问题。其思想就是把接收到的请求按顺序存放到队列中,消费者线程逐一从队列里取数据进行处理,看下具体代码。
阻塞队列:这里使用静态内部类的方式来实现单例模式,在并发条件下不会出现问题。
// 秒杀队列(固定长度为100)
public class SecondKillQueue {

    // 队列大小
    static final int QUEUE_MAX_SIZE = 100;

    // 用于多线程间下单的队列
    static BlockingQueue<SuccessKilled> blockingQueue = new LinkedBlockingQueue<SuccessKilled>(QUEUE_MAX_SIZE);

    // 使用静态内部类,实现单例模式
    private SecondKillQueue(){};

    private static class SingletonHolder{
        // 静态初始化器,由JVM来保证线程安全
        private  static SecondKillQueue queue = new SecondKillQueue();
    }

    /**
     * 单例队列
     * @return
     */
    public static SecondKillQueue getSkillQueue(){
        return SingletonHolder.queue;
    }

    /**
     * 生产入队
     * @param kill
     * @throws InterruptedException
     * add(e) 队列未满时,返回true;队列满则抛出IllegalStateException(“Queue full”)异常——AbstractQueue
     * put(e) 队列未满时,直接插入没有返回值;队列满时会阻塞等待,一直等到队列未满时再插入。
     * offer(e) 队列未满时,返回true;队列满时返回false。非阻塞立即返回。
     * offer(e, time, unit) 设定等待的时间,如果在指定时间内还不能往队列中插入数据则返回false,插入成功返回true。
     */
    public  Boolean  produce(SuccessKilled kill) {
        return blockingQueue.offer(kill);
    }
    /**
     * 消费出队
     * poll() 获取并移除队首元素,在指定的时间内去轮询队列看有没有首元素有则返回,否者超时后返回null
     * take() 与带超时时间的poll类似不同在于take时候如果当前队列空了它会一直等待其他线程调用notEmpty.signal()才会被唤醒
     */
    public  SuccessKilled consume() throws InterruptedException {
        return blockingQueue.take();
    }

    /**
     * 获取队列大小
     * @return
     */
    public int size() {
        return blockingQueue.size();
    }
}
消费秒杀队列:实现ApplicationRunner接口
// 消费秒杀队列
@Slf4j
@Component
public class TaskRunner implements ApplicationRunner{

    @Autowired
    private SecondKillService seckillService;

    @Override
    public void run(ApplicationArguments var){
        new Thread(() -> {
            log.info("队列启动成功");
            while(true){
                try {
                    // 进程内队列
                    SuccessKilled kill = SecondKillQueue.getSkillQueue().consume();
                    if(kill != null){
                        Result result = seckillService.startSecondKillByAop(kill.getSeckillId(), kill.getUserId());
                        if(result != null && result.equals(Result.ok(SecondKillStateEnum.SUCCESS))){
                            log.info("TaskRunner,result:{}",result);
                            log.info("TaskRunner从消息队列取出用户,用户:{}{}",kill.getUserId(),"秒杀成功");
                        }
                    }
                } catch (InterruptedException e) {
                    e.printStackTrace();
                }
            }
        }).start();
    }
}
@ApiOperation(value="秒杀实现方式六——消息队列")
@PostMapping("/start/queue")
public Result startQueue(long skgId){
    try {
        log.info("开始秒杀方式六...");
        final long userId = (int) (new Random().nextDouble() * (99999 - 10000 + 1)) + 10000;
        SuccessKilled kill = new SuccessKilled();
        kill.setSeckillId(skgId);
        kill.setUserId(userId);
        Boolean flag = SecondKillQueue.getSkillQueue().produce(kill);
        // 虽然进入了队列,但是不一定能秒杀成功 进队出队有时间间隙
        if(flag){
            log.info("用户:{}{}",kill.getUserId(),"秒杀成功");
        }else{
            log.info("用户:{}{}",userId,"秒杀失败");
        }
    } catch (Exception e) {
        e.printStackTrace();
    }
    return Result.ok();
}
注意:在业务层和AOP方法中,不能抛出任何异常, throw new
RuntimeException()这些抛异常代码要注释掉。因为一旦程序抛出异常就会停止,导致消费秒杀队列进程终止!
使用阻塞队列来实现秒杀,有几点要注意:
- 消费秒杀队列中调用业务方法加锁与不加锁情况一样,也就是seckillService.startSecondKillByAop()、seckillService.startSecondKillByLock()方法结果一样,这也很好理解
- 当队列长度与商品数量一致时,会出现少卖的现象,可以调大数值
- 下面是队列长度1000,商品数量1000,并发数2000情况下出现的少卖

3.7.方式七(Disruptor队列)
Disruptor是个高性能队列,研发的初衷是解决内存队列的延迟问题,在性能测试中发现竟然与I/O操作处于同样的数量级,基于Disruptor开发的系统单线程能支撑每秒600万订单。
// 事件生成工厂(用来初始化预分配事件对象)
public class SecondKillEventFactory implements EventFactory<SecondKillEvent> {

    @Override
    public SecondKillEvent newInstance() {
        return new SecondKillEvent();
    }
}
// 事件对象(秒杀事件)
public class SecondKillEvent implements Serializable {
    private static final long serialVersionUID = 1L;
    private long seckillId;
    private long userId;

 // set/get方法略

}
// 使用translator方式生产者
public class SecondKillEventProducer {

    private final static EventTranslatorVararg<SecondKillEvent> translator = (seckillEvent, seq, objs) -> {
        seckillEvent.setSeckillId((Long) objs[0]);
        seckillEvent.setUserId((Long) objs[1]);
    };

    private final RingBuffer<SecondKillEvent> ringBuffer;

    public SecondKillEventProducer(RingBuffer<SecondKillEvent> ringBuffer){
        this.ringBuffer = ringBuffer;
    }

    public void secondKill(long seckillId, long userId){
        this.ringBuffer.publishEvent(translator, seckillId, userId);
    }
}
// 消费者(秒杀处理器)
@Slf4j
public class SecondKillEventConsumer implements EventHandler<SecondKillEvent> {


    private SecondKillService secondKillService = (SecondKillService) SpringUtil.getBean("secondKillService");

    @Override
    public void onEvent(SecondKillEvent seckillEvent, long seq, boolean bool) {
        Result result = secondKillService.startSecondKillByAop(seckillEvent.getSeckillId(), seckillEvent.getUserId());
        if(result.equals(Result.ok(SecondKillStateEnum.SUCCESS))){
            log.info("用户:{}{}",seckillEvent.getUserId(),"秒杀成功");
        }
    }
}
public class DisruptorUtil {

    static Disruptor<SecondKillEvent> disruptor;

    static{
        SecondKillEventFactory factory = new SecondKillEventFactory();
        int ringBufferSize = 1024;
        ThreadFactory threadFactory = runnable -> new Thread(runnable);
        disruptor = new Disruptor<>(factory, ringBufferSize, threadFactory);
        disruptor.handleEventsWith(new SecondKillEventConsumer());
        disruptor.start();
    }

    public static void producer(SecondKillEvent kill){
        RingBuffer<SecondKillEvent> ringBuffer = disruptor.getRingBuffer();
        SecondKillEventProducer producer = new SecondKillEventProducer(ringBuffer);
        producer.secondKill(kill.getSeckillId(),kill.getUserId());
    }
}
@ApiOperation(value="秒杀实现方式七——Disruptor队列")
@PostMapping("/start/disruptor")
public Result startDisruptor(long skgId){
    try {
        log.info("开始秒杀方式七...");
        final long userId = (int) (new Random().nextDouble() * (99999 - 10000 + 1)) + 10000;
        SecondKillEvent kill = new SecondKillEvent();
        kill.setSeckillId(skgId);
        kill.setUserId(userId);
        DisruptorUtil.producer(kill);
    } catch (Exception e) {
        e.printStackTrace();
    }
    return Result.ok();
}
经过测试,发现使用Disruptor队列队列,与自定义队列有着同样的问题,也会出现超卖的情况,但效率有所提高。
4. 小结
对于上面七种实现并发的方式,做一下总结:
- 一、二方式是在代码中利用锁和事务的方式解决了并发问题,主要解决的是锁要加载事务之前
- 三、四、五方式主要是数据库的锁来解决并发问题,方式三是利用for
upate对表加行锁,方式四是利用update来对表加锁,方式五是通过增加version字段来控制数据库的更新操作,方式五的效果最差 - 六、七方式是通过队列来解决并发问题,这里需要特别注意的是,在代码中不能通过throw抛异常,否则消费线程会终止,而且由于进队和出队存在时间间隙,会导致商品少卖
上面所有的情况都经过代码测试,测试分一下三种情况:
- 并发数1000,商品数100
- 并发数1000,商品数1000
- 并发数2000,商品数1000
思考:分布式情况下如何解决并发问题呢?下次继续试验。


