基本概念
一、介绍
自定义的监控项默认不会自动报警
首页也不会提示错误
需要配置触发器与报警动作才可以自动报警
二、触发器
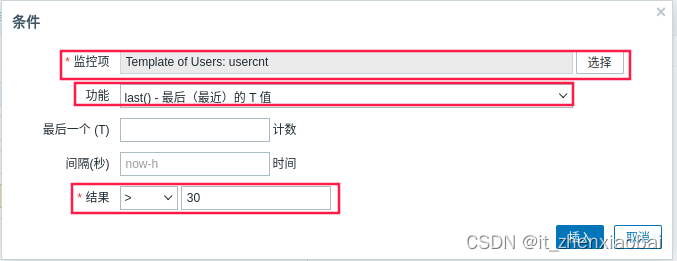
表达式,如内存不足300M,用户超过30个等
当触发条件发生后,会导致一个触发事件
触发事件会执行某个动作
三、动作
触发器的条件被触发后的行为
可以是发送邮件、也可以是重启某个服务等
告警设置
一、创建触发器
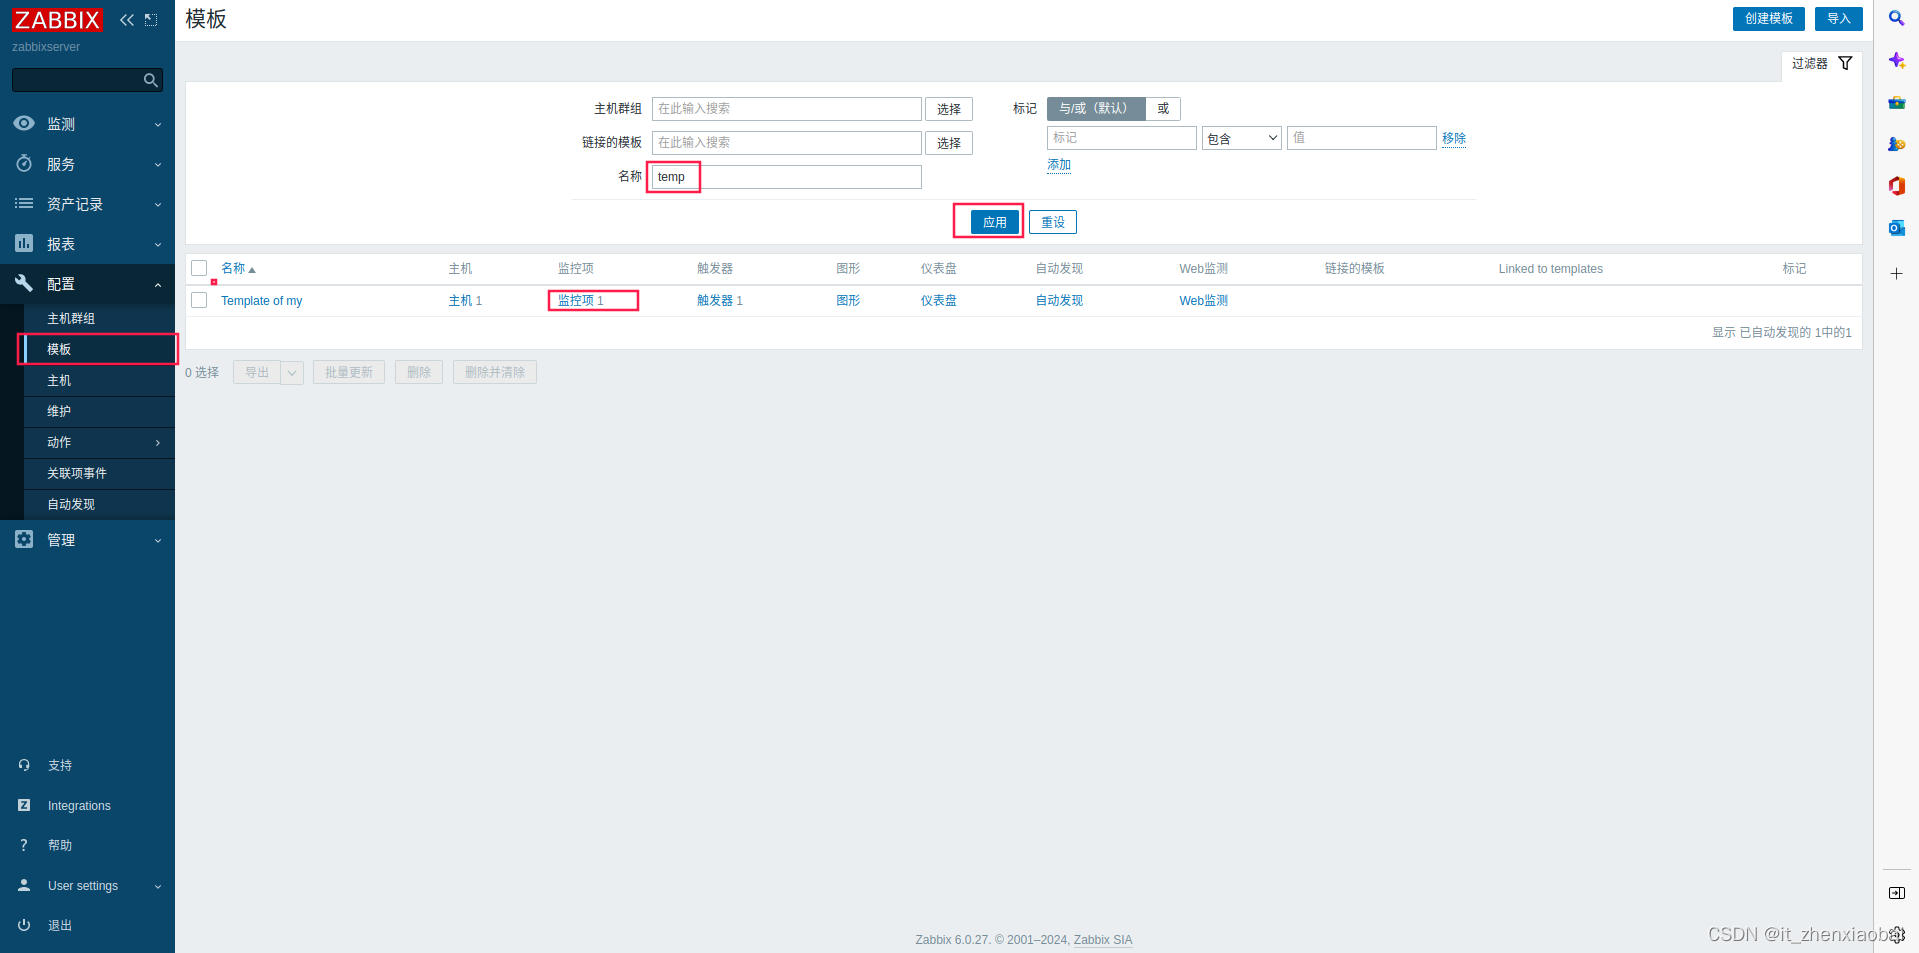
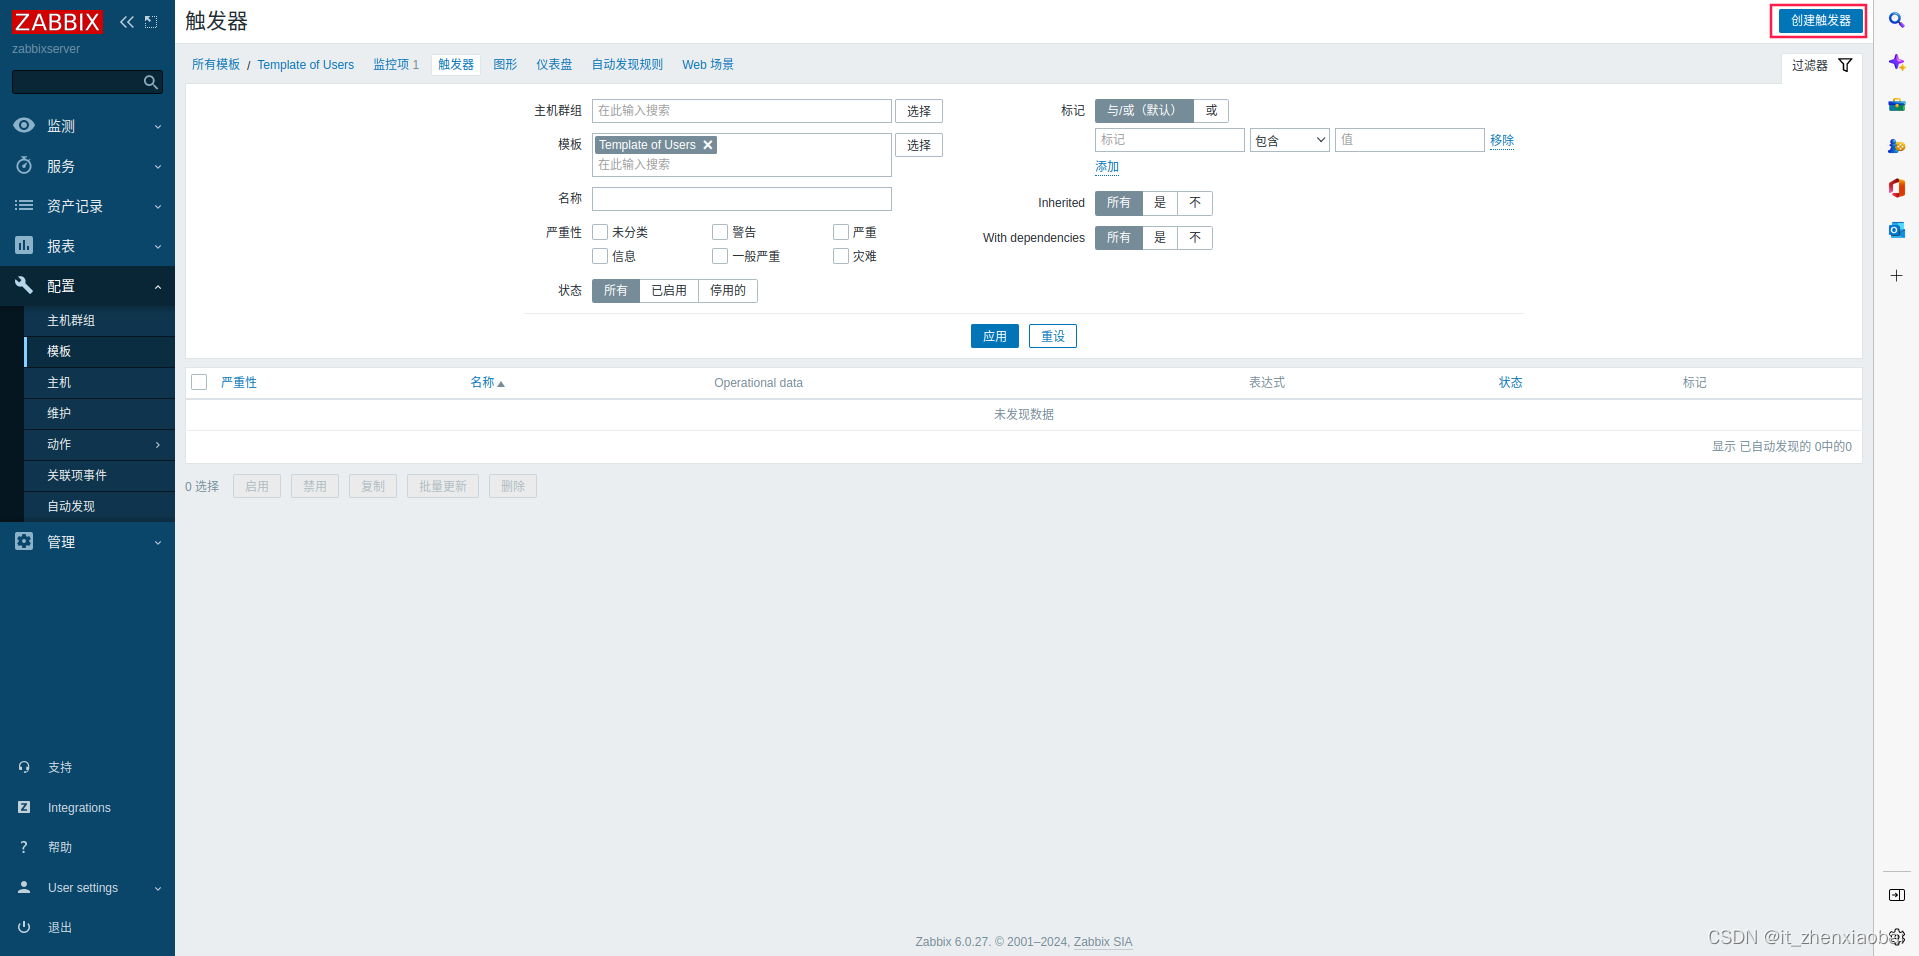
找到自定义模板
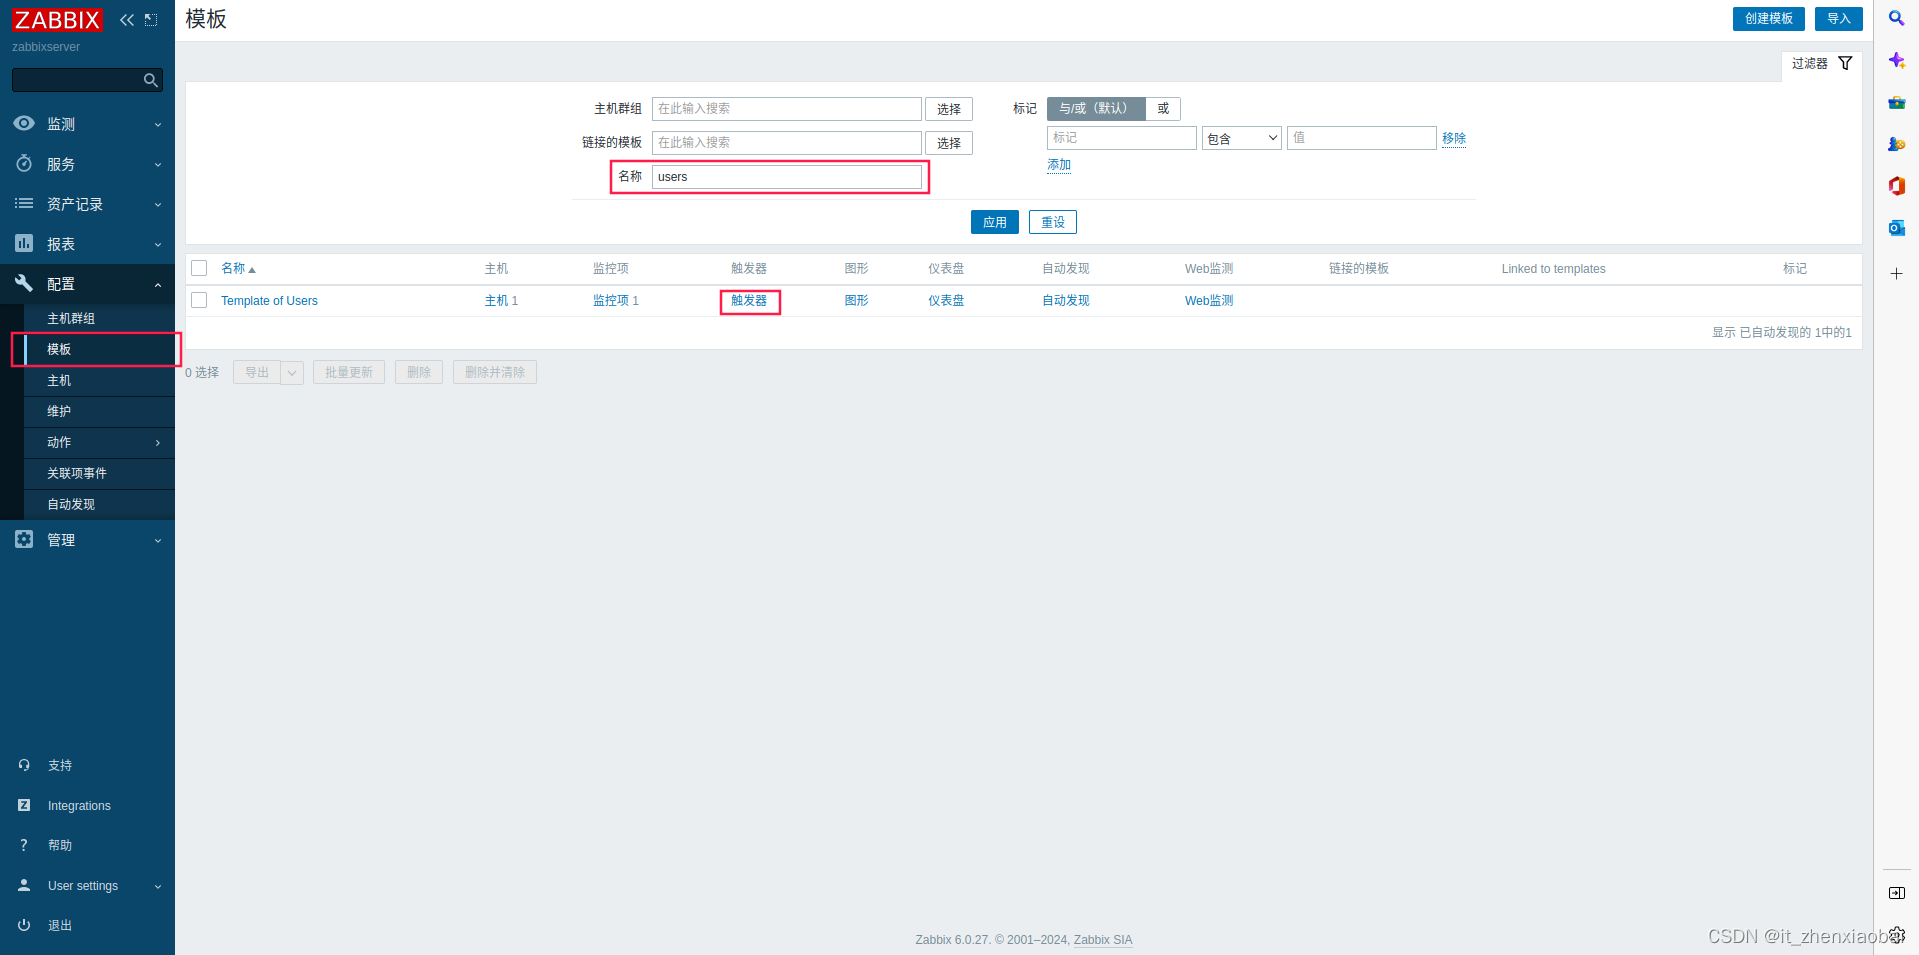
创建触发器
Expression表达式:触发异常的条件
二、设置邮件
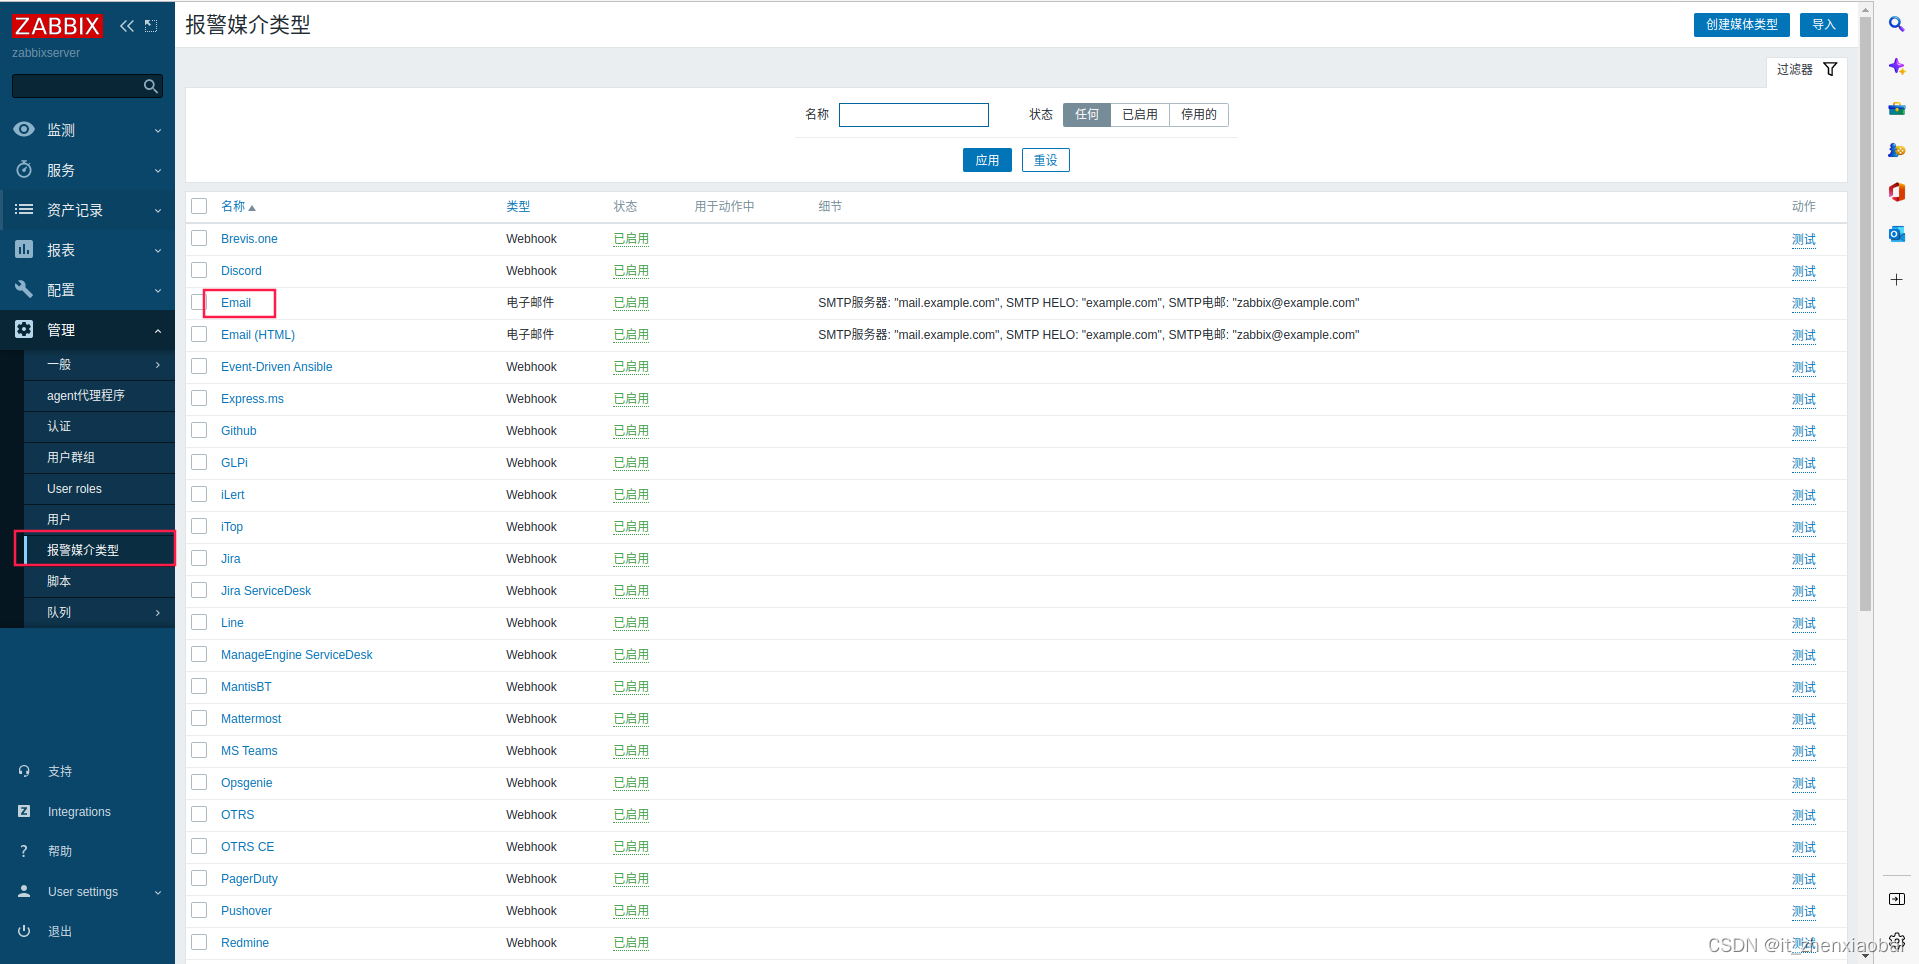
创建Media
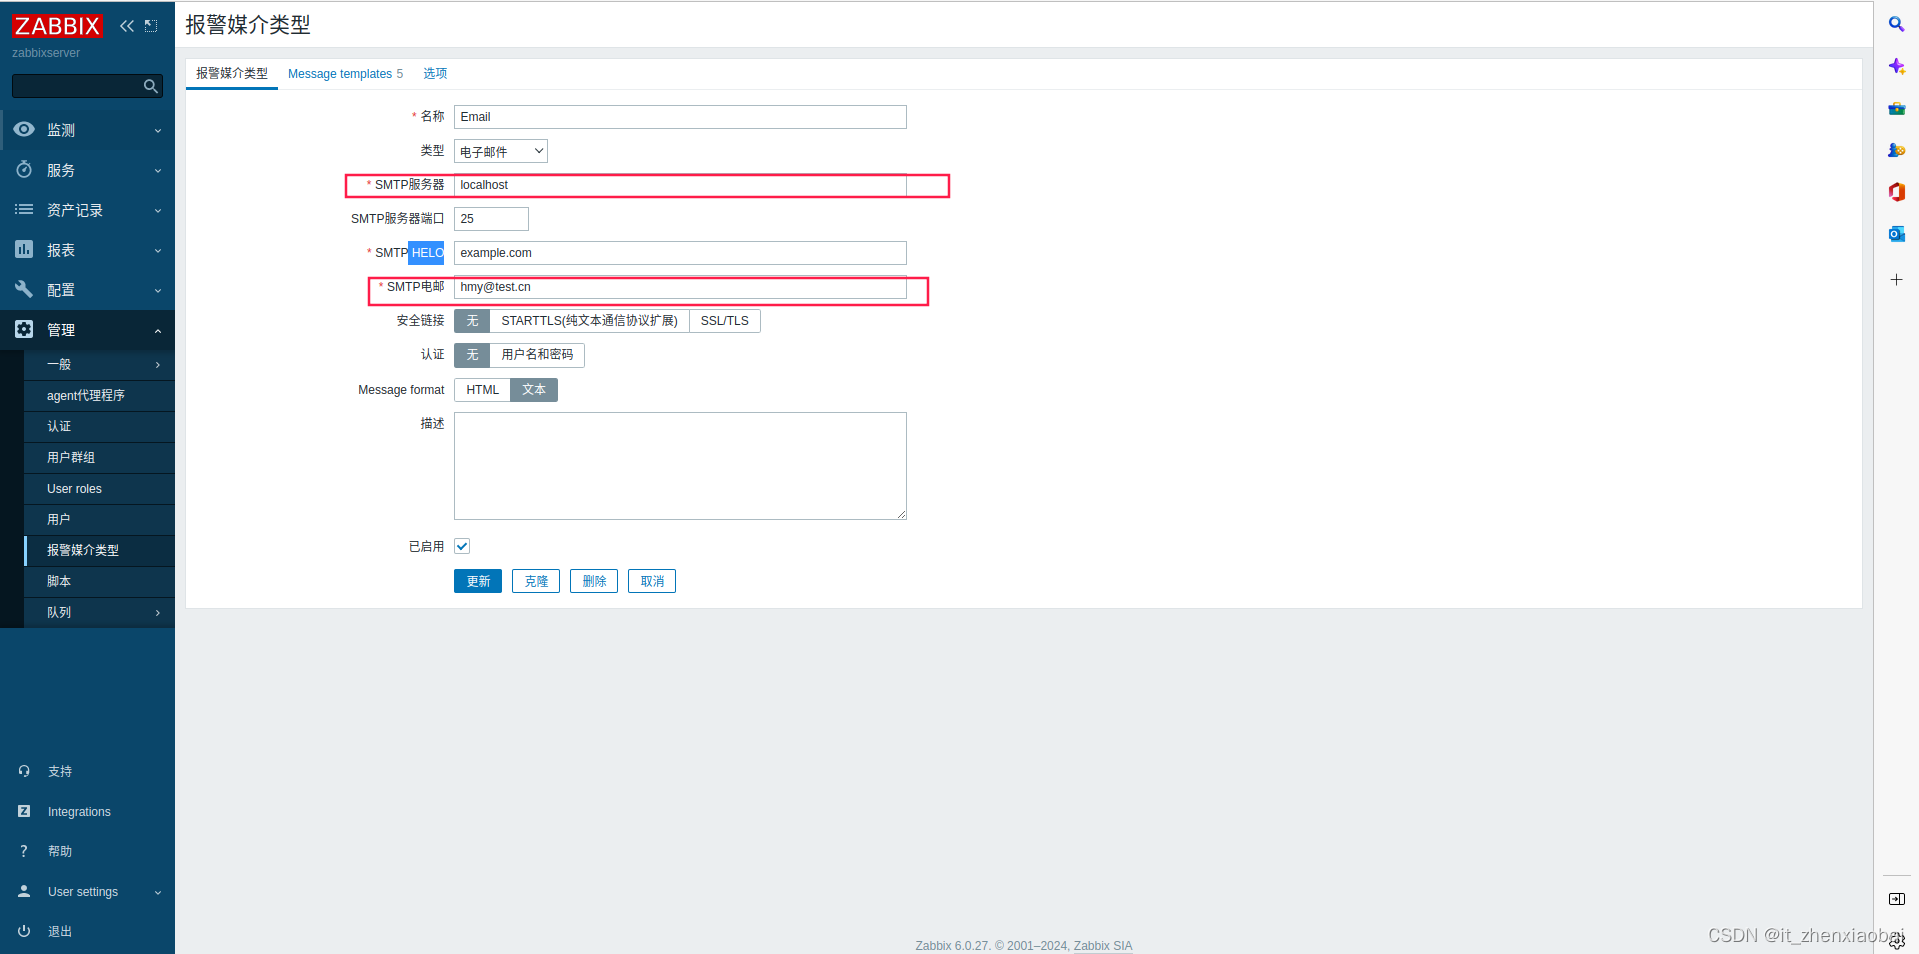
设置邮件服务器
配置邮件服务器参数
为用户设置收信邮箱
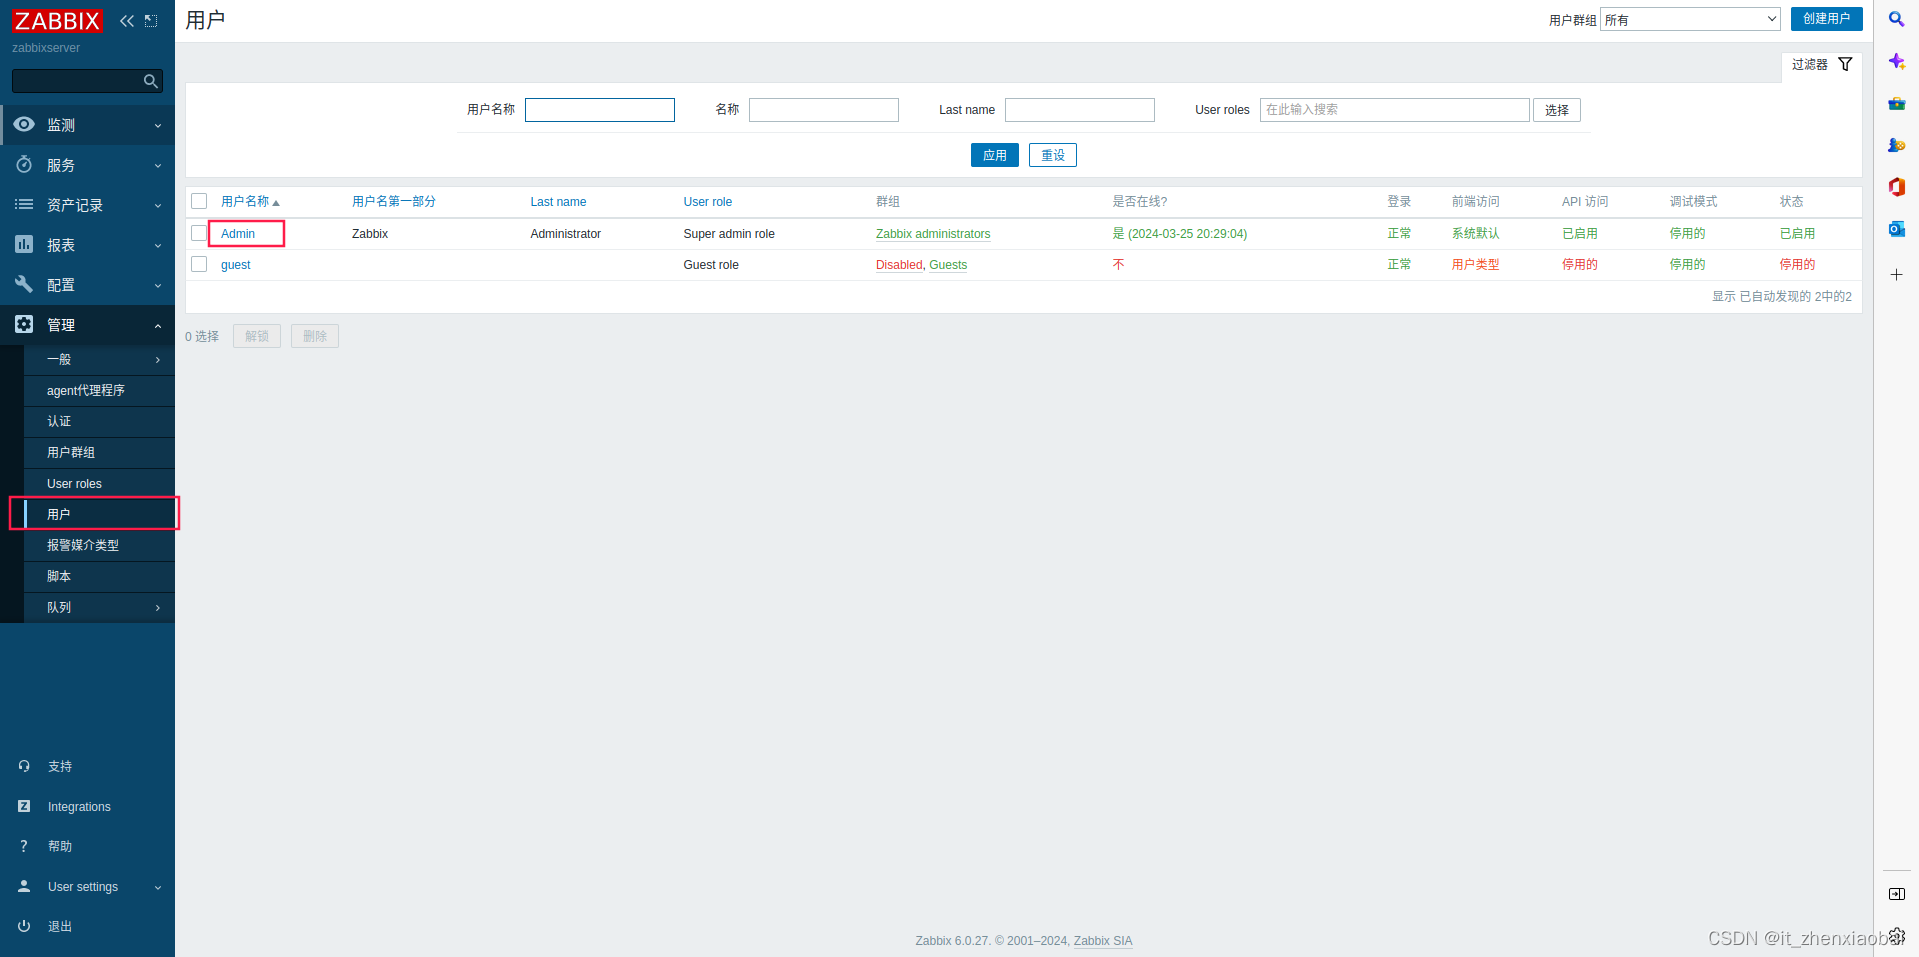

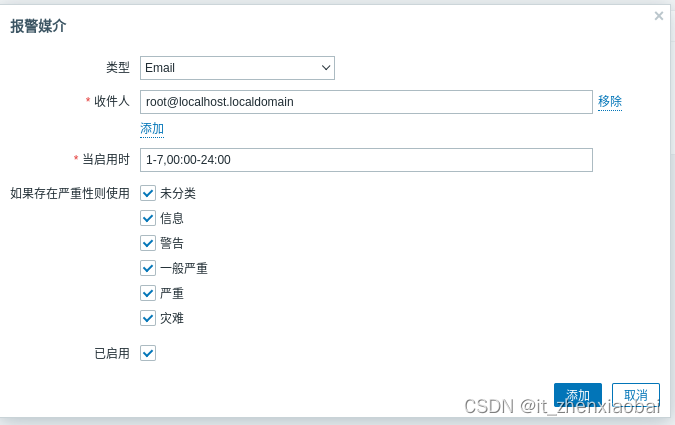
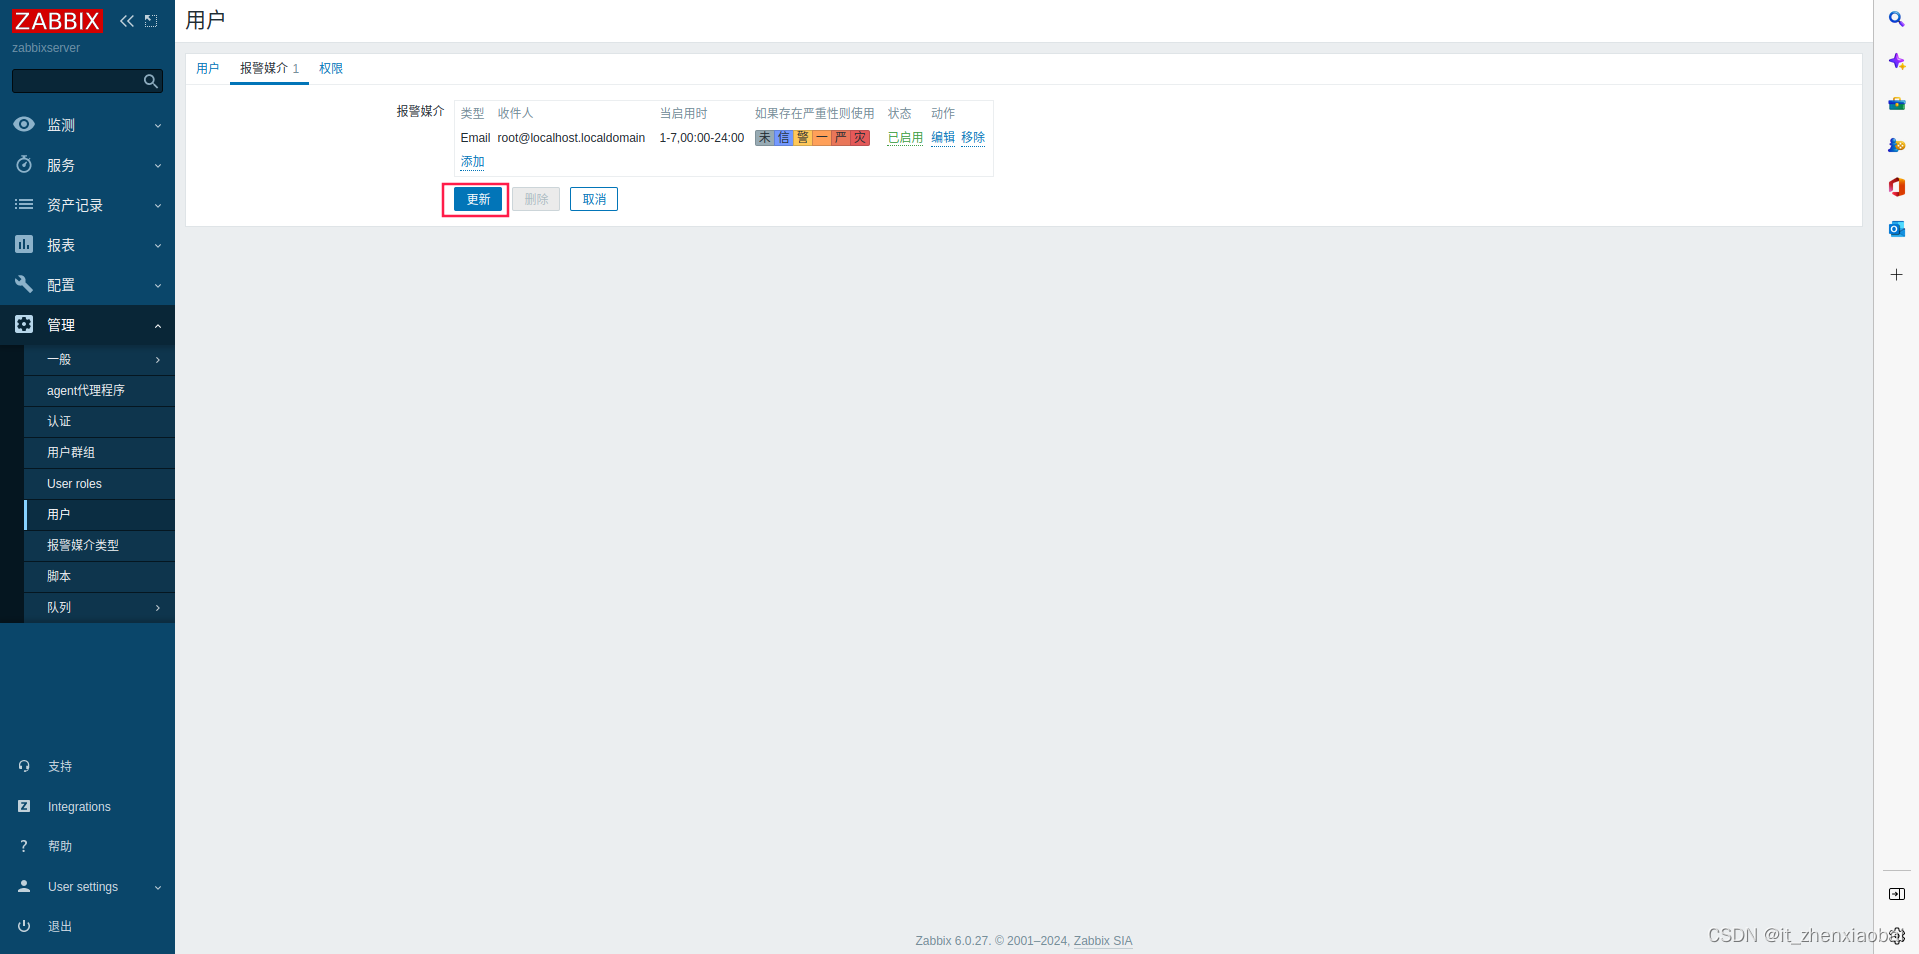
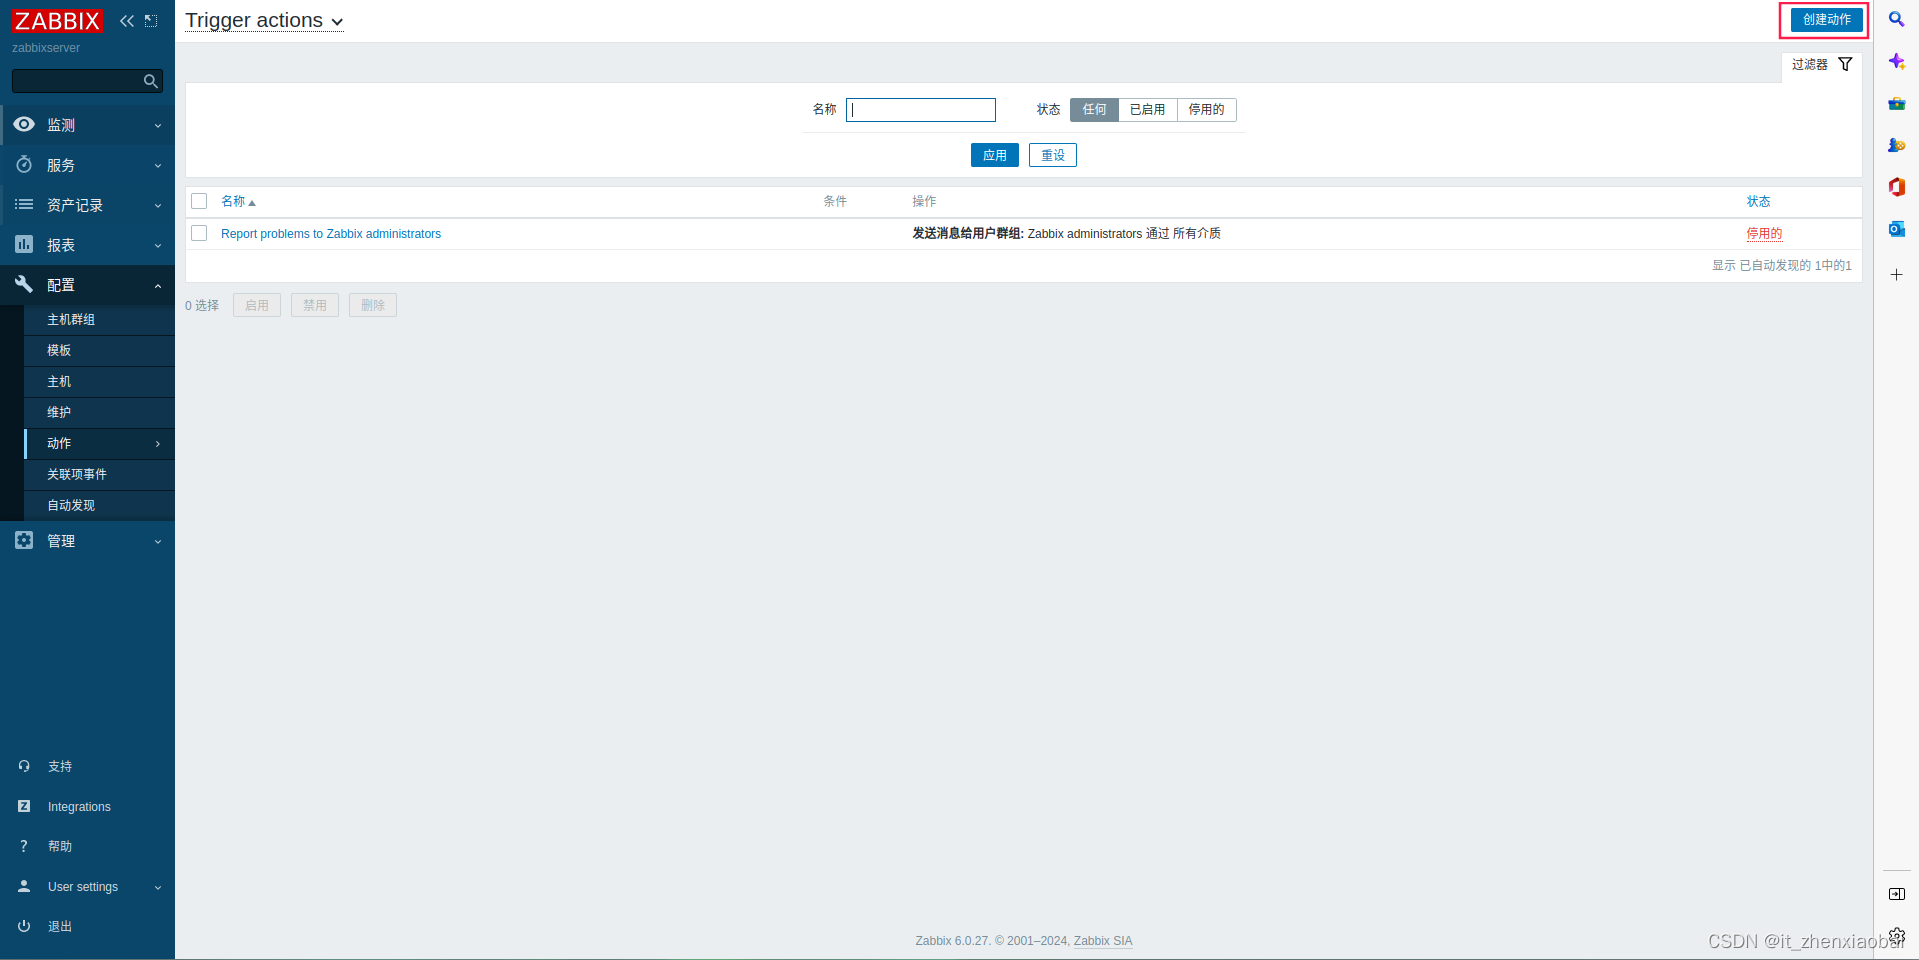
三、创建Action(行为)
定义当触发器被触发时,执行什么Action
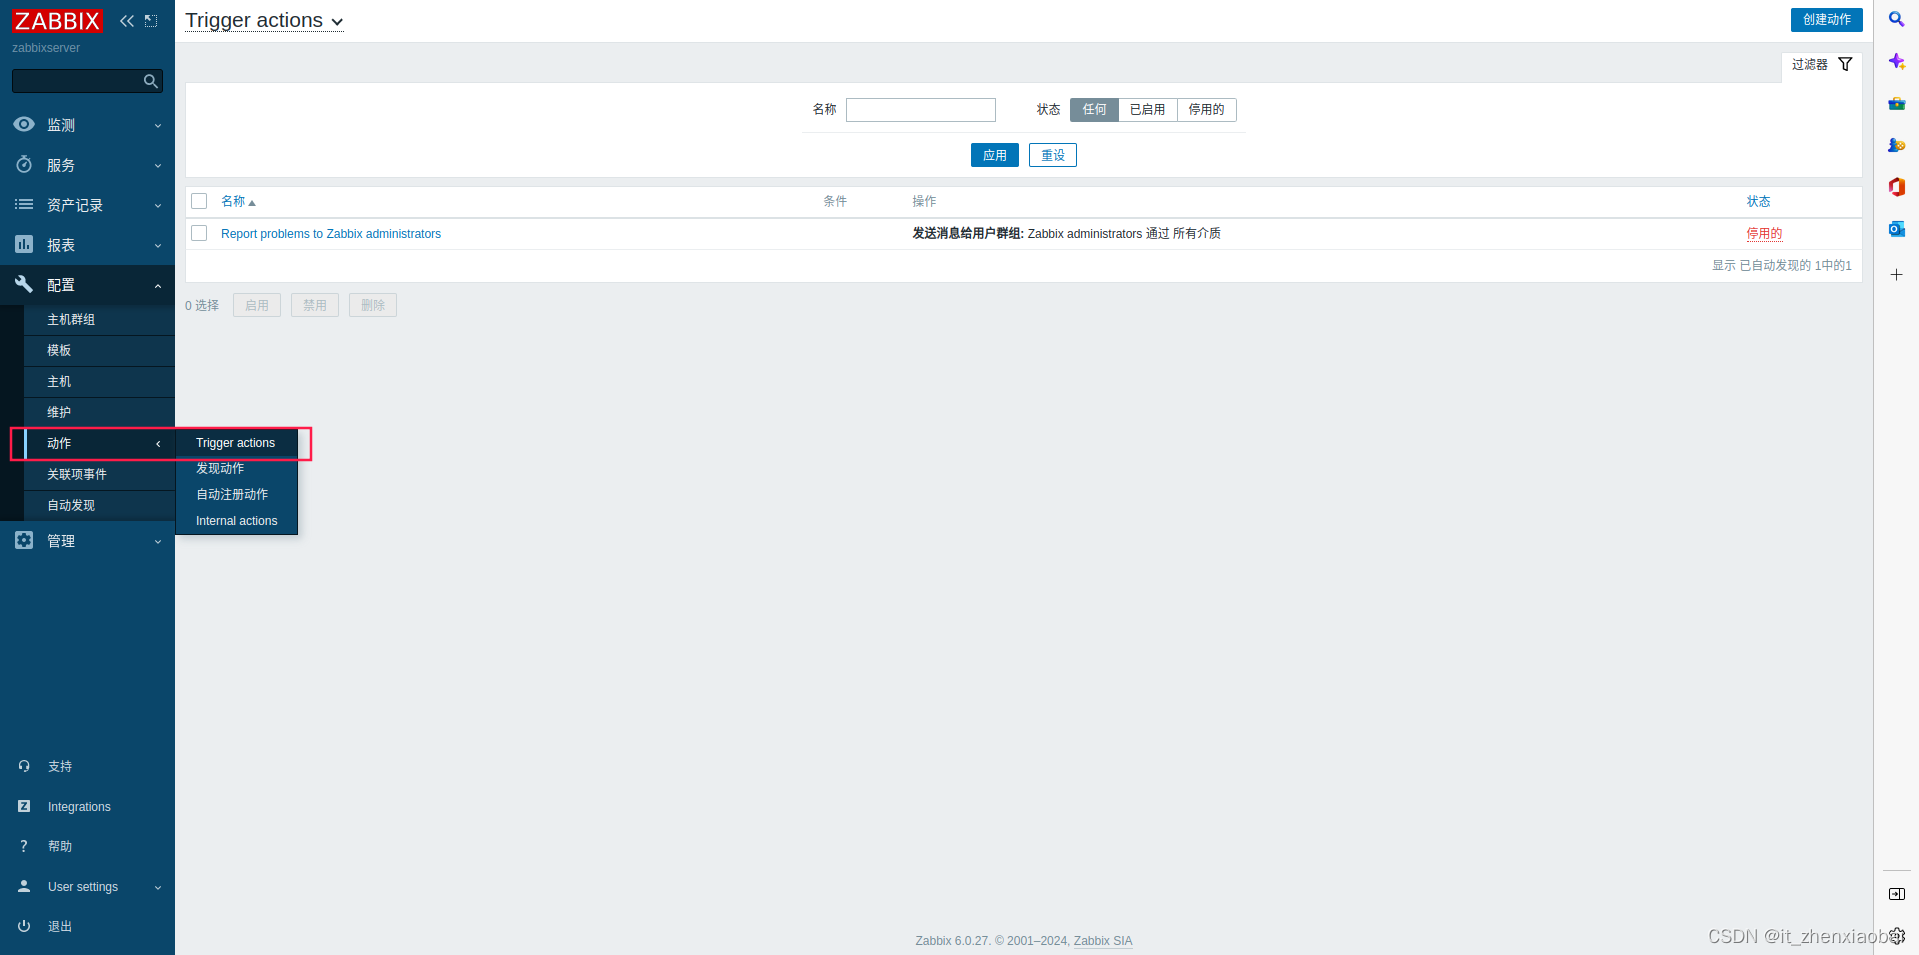
配置Action(填写名称)

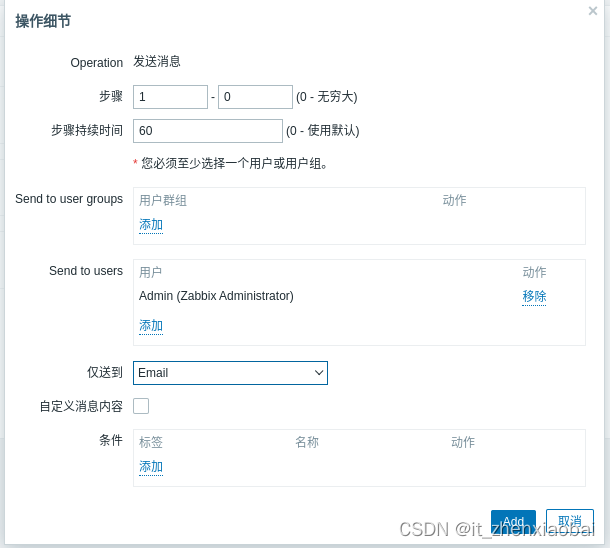
添加触发器条件

添加动作

四、验证告警配置
在zabbixserver上配置邮件服务
[root@zabbixserver ~]# yum -y install postfix mailx
[root@zabbixserver ~]# systemctl enable postfix --now
在web1创建用户,使总用户数超过30
[root@web1 ~]# for user in user{1..10}
> do
> useradd $user
> done
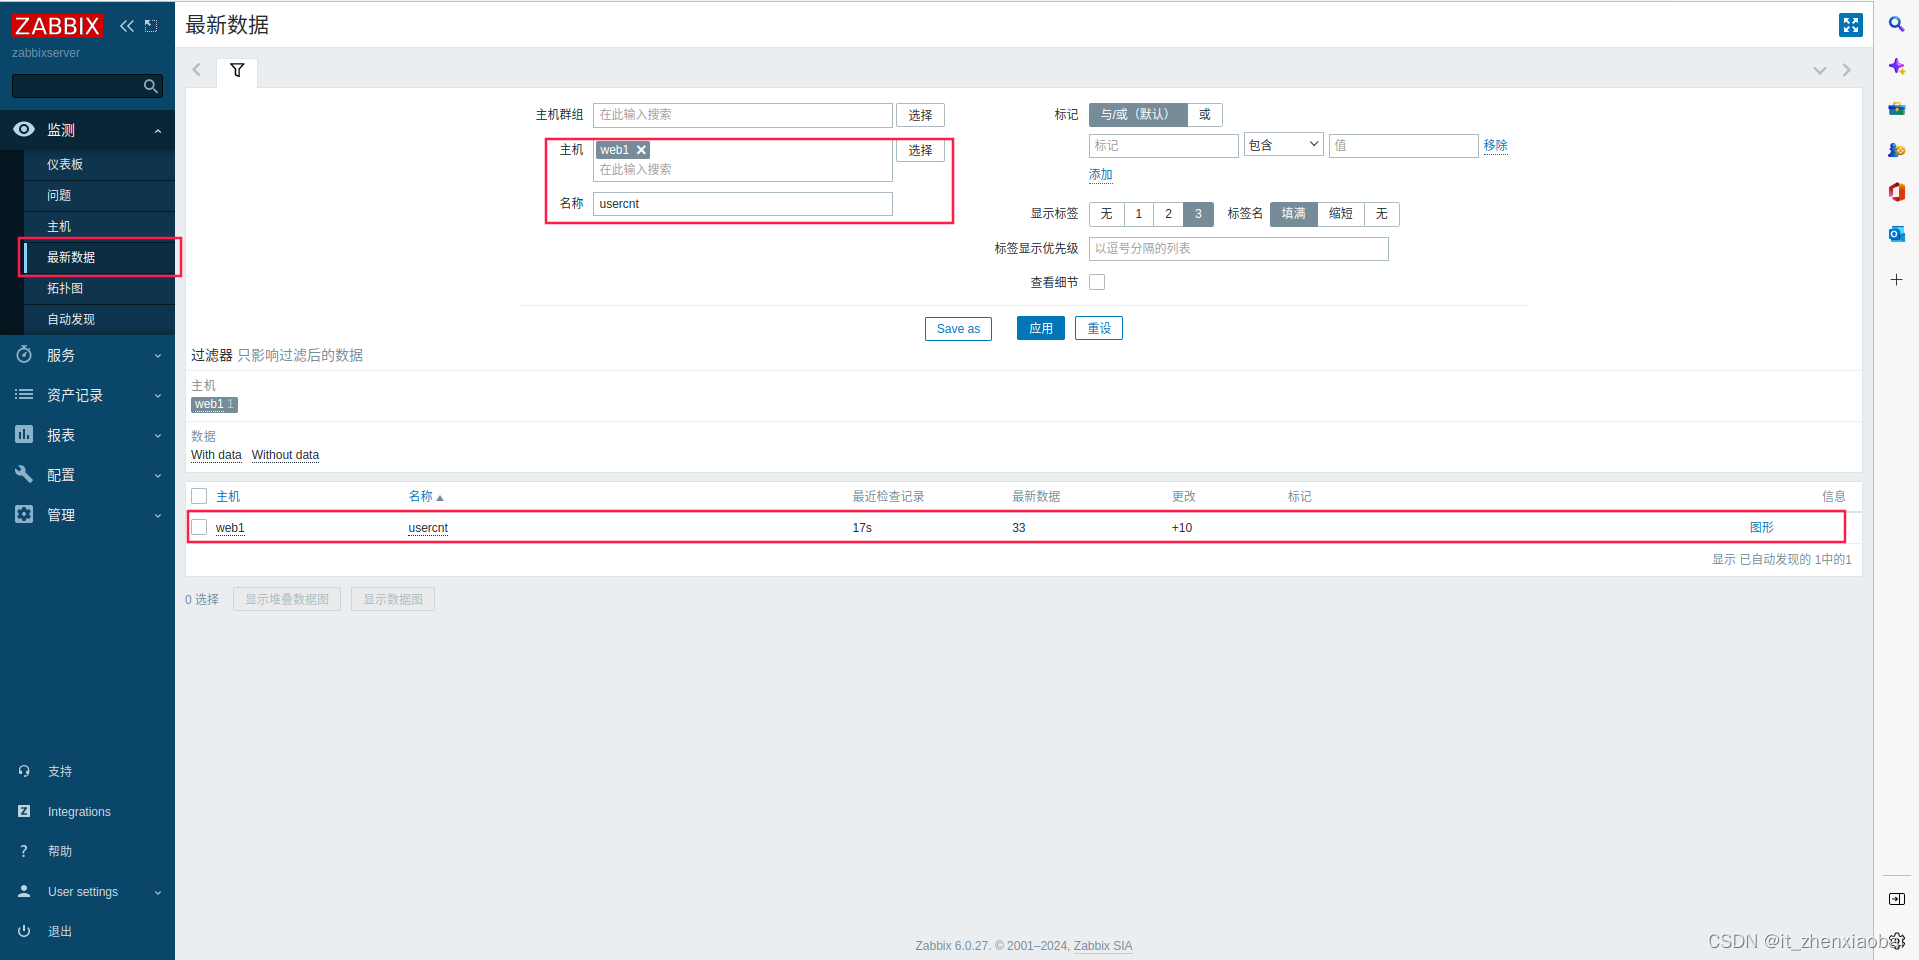
在zabbix web页面中查看
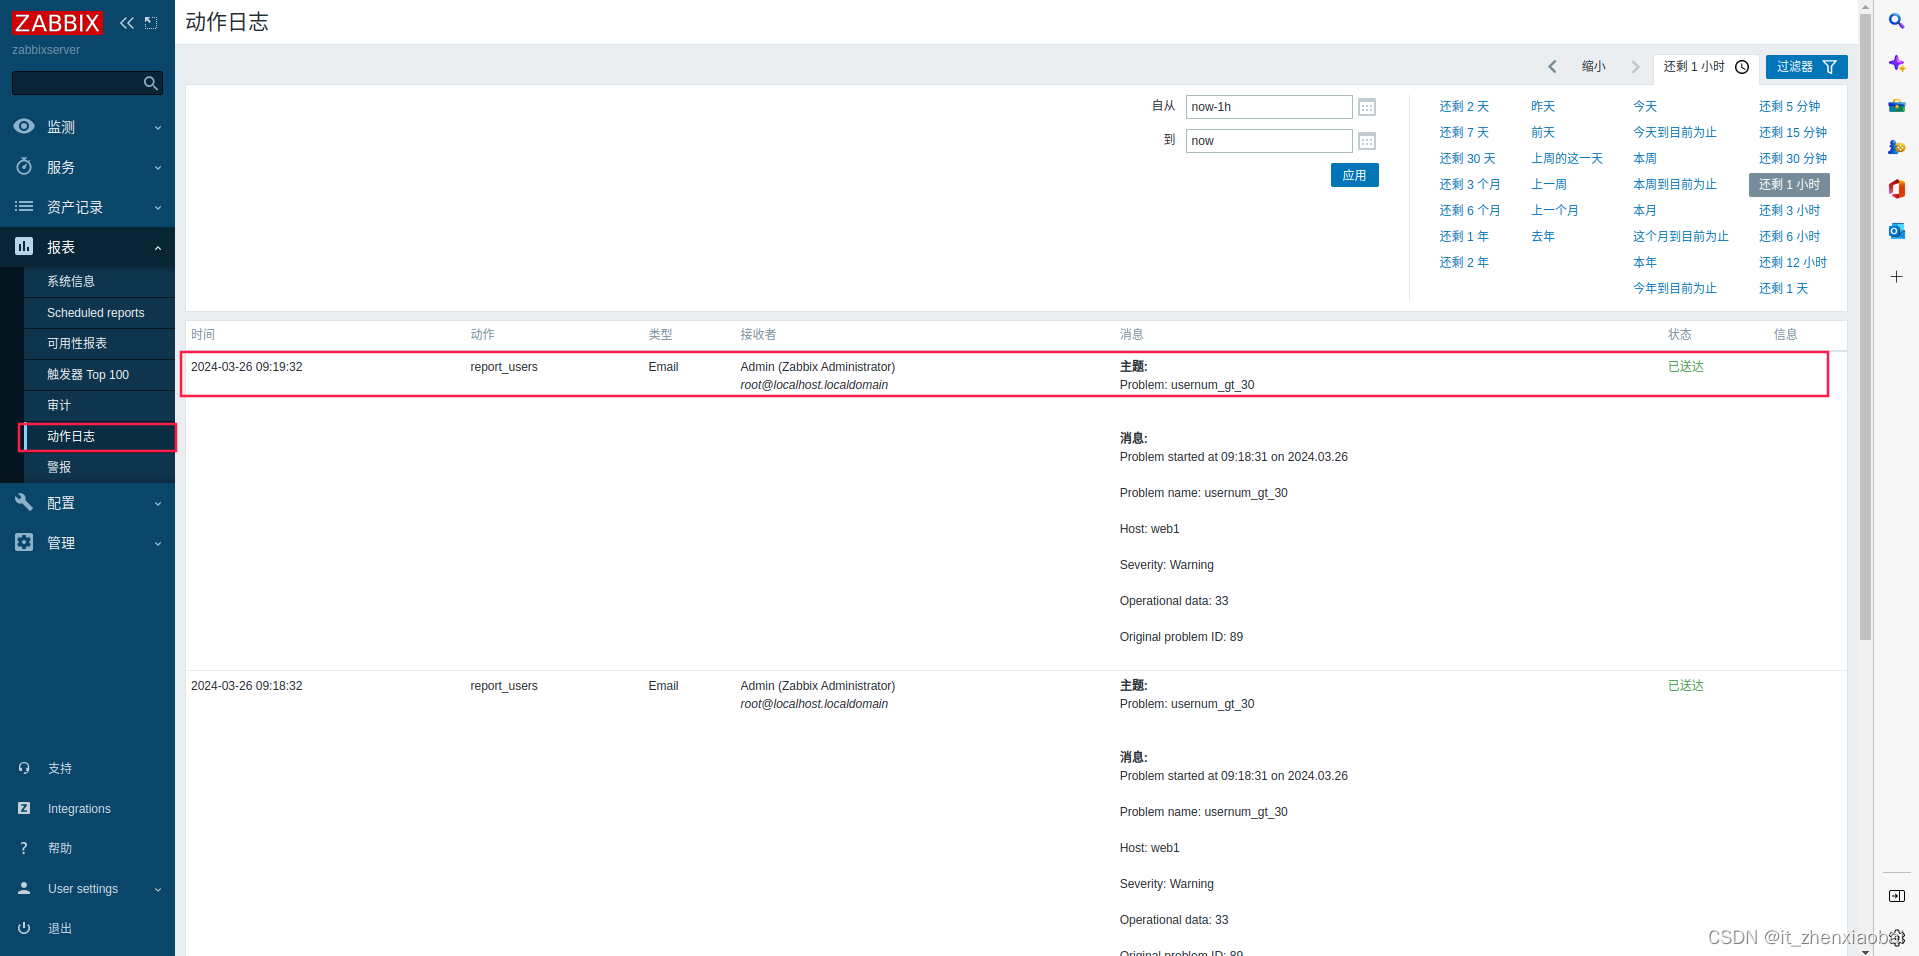
查看动作日志
在zabbixserver上查看邮件
[root@zabbixserver ~]# mail    # 查看邮件
Heirloom Mail version 12.5 7/5/10.  Type ? for help.
"/var/spool/mail/root": 5 messages 5 new
>N  1 hmy@test.cn           Tue Mar 26 09:15  21/927   "Problem: usernum_gt_30"
 N  2 hmy@test.cn           Tue Mar 26 09:18  21/927   "Problem: usernum_gt_30"
 N  3 hmy@test.cn           Tue Mar 26 09:19  21/927   "Problem: usernum_gt_30"
 N  4 hmy@test.cn           Tue Mar 26 09:20  21/927   "Problem: usernum_gt_30"
 N  5 hmy@test.cn           Tue Mar 26 09:21  21/927   "Problem: usernum_gt_30"
& 1    # 查看1号邮件
Message  1:
From hmy@test.cn  Tue Mar 26 09:15:33 2024
Return-Path: <hmy@test.cn>
X-Original-To: root@localhost.localdomain
Delivered-To: root@localhost.localdomain
From: <hmy@test.cn>
To: <root@localhost.localdomain>
Date: Tue, 26 Mar 2024 09:15:33 +0800
Subject: Problem: usernum_gt_30
Content-Type: text/plain; charset="UTF-8"
Status: R

Problem started at 09:15:31 on 2024.03.26
Problem name: usernum_gt_30
Host: web1
Severity: Warning
Operational data: 33
Original problem ID: 87
& q    # 输入q退出
自动发现
一、概述
1、自动发现
当zabbix需要监控的设备越来越多,手动添加监控设备越来越有挑战,此时,可以考虑使用自动发现功能
2、自动发现可以实现
发现主机、添加主机、添加主机到组、链接模板
3、自动发现流程
创建自动发现规则
创建Action动作(发现主机后自动执行什么动作)
通过动作,执行添加主机,链接模板到主机
二、自动发现规则
1、创建自动发现规则
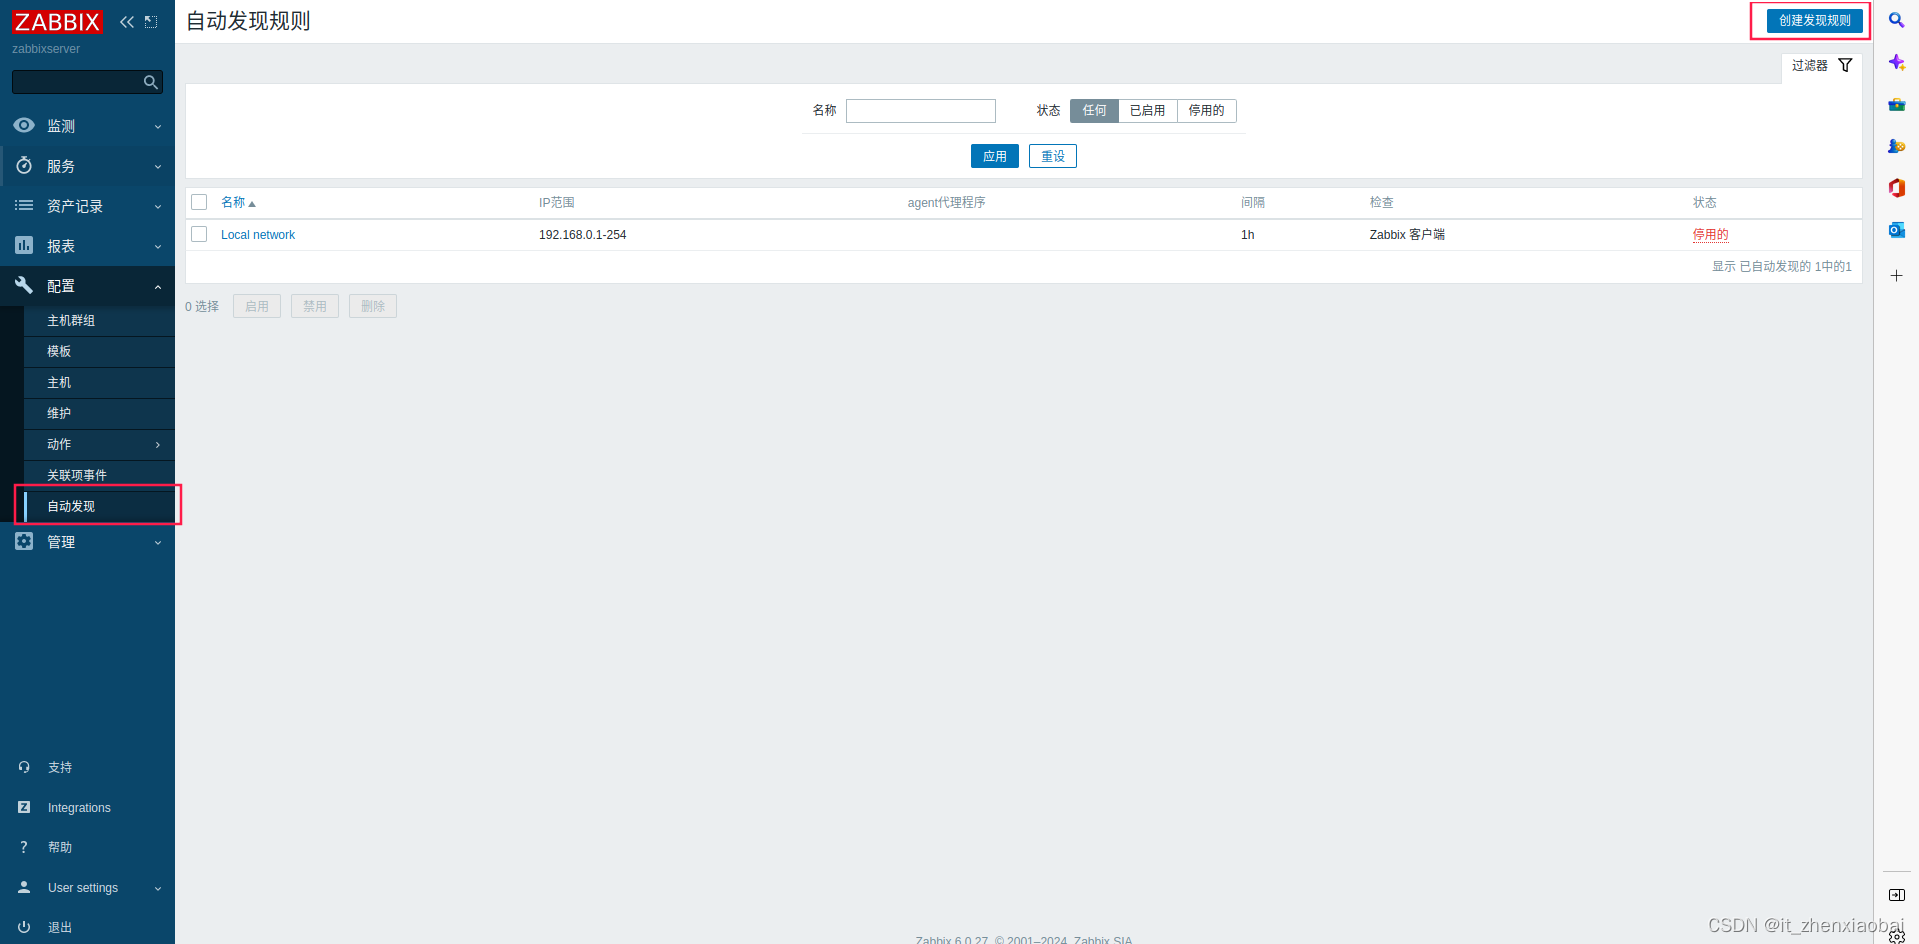
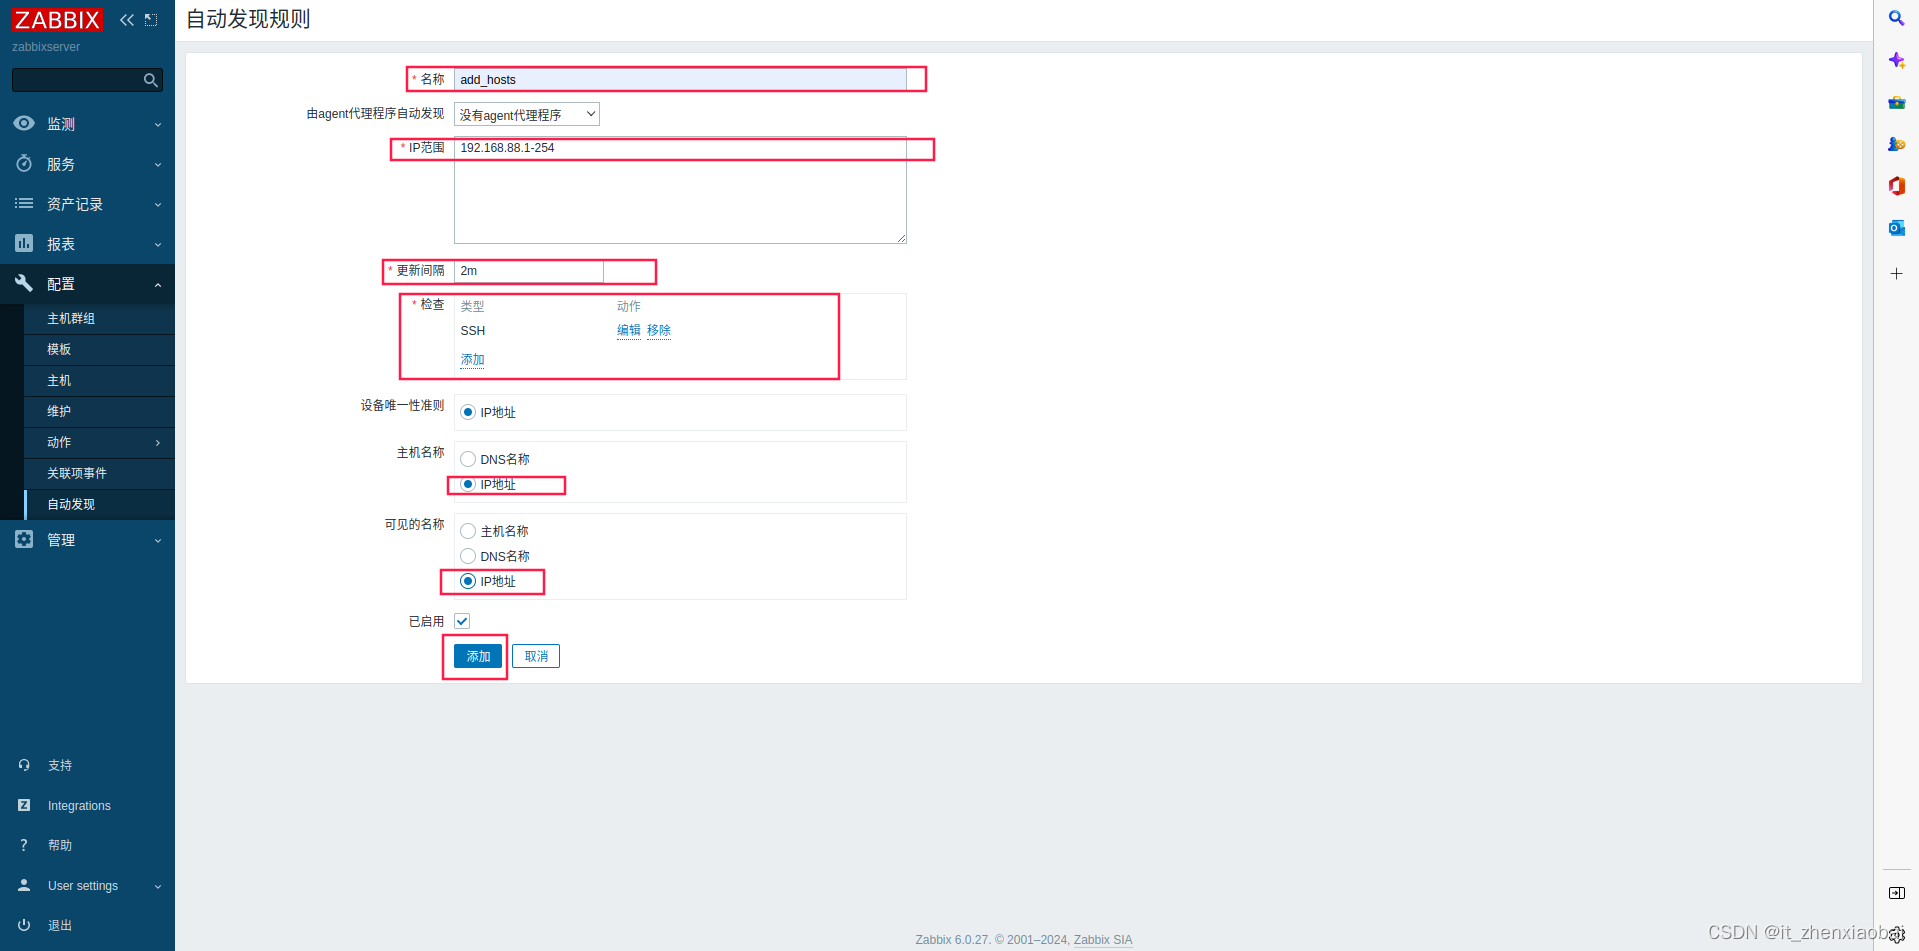
2、填写规则
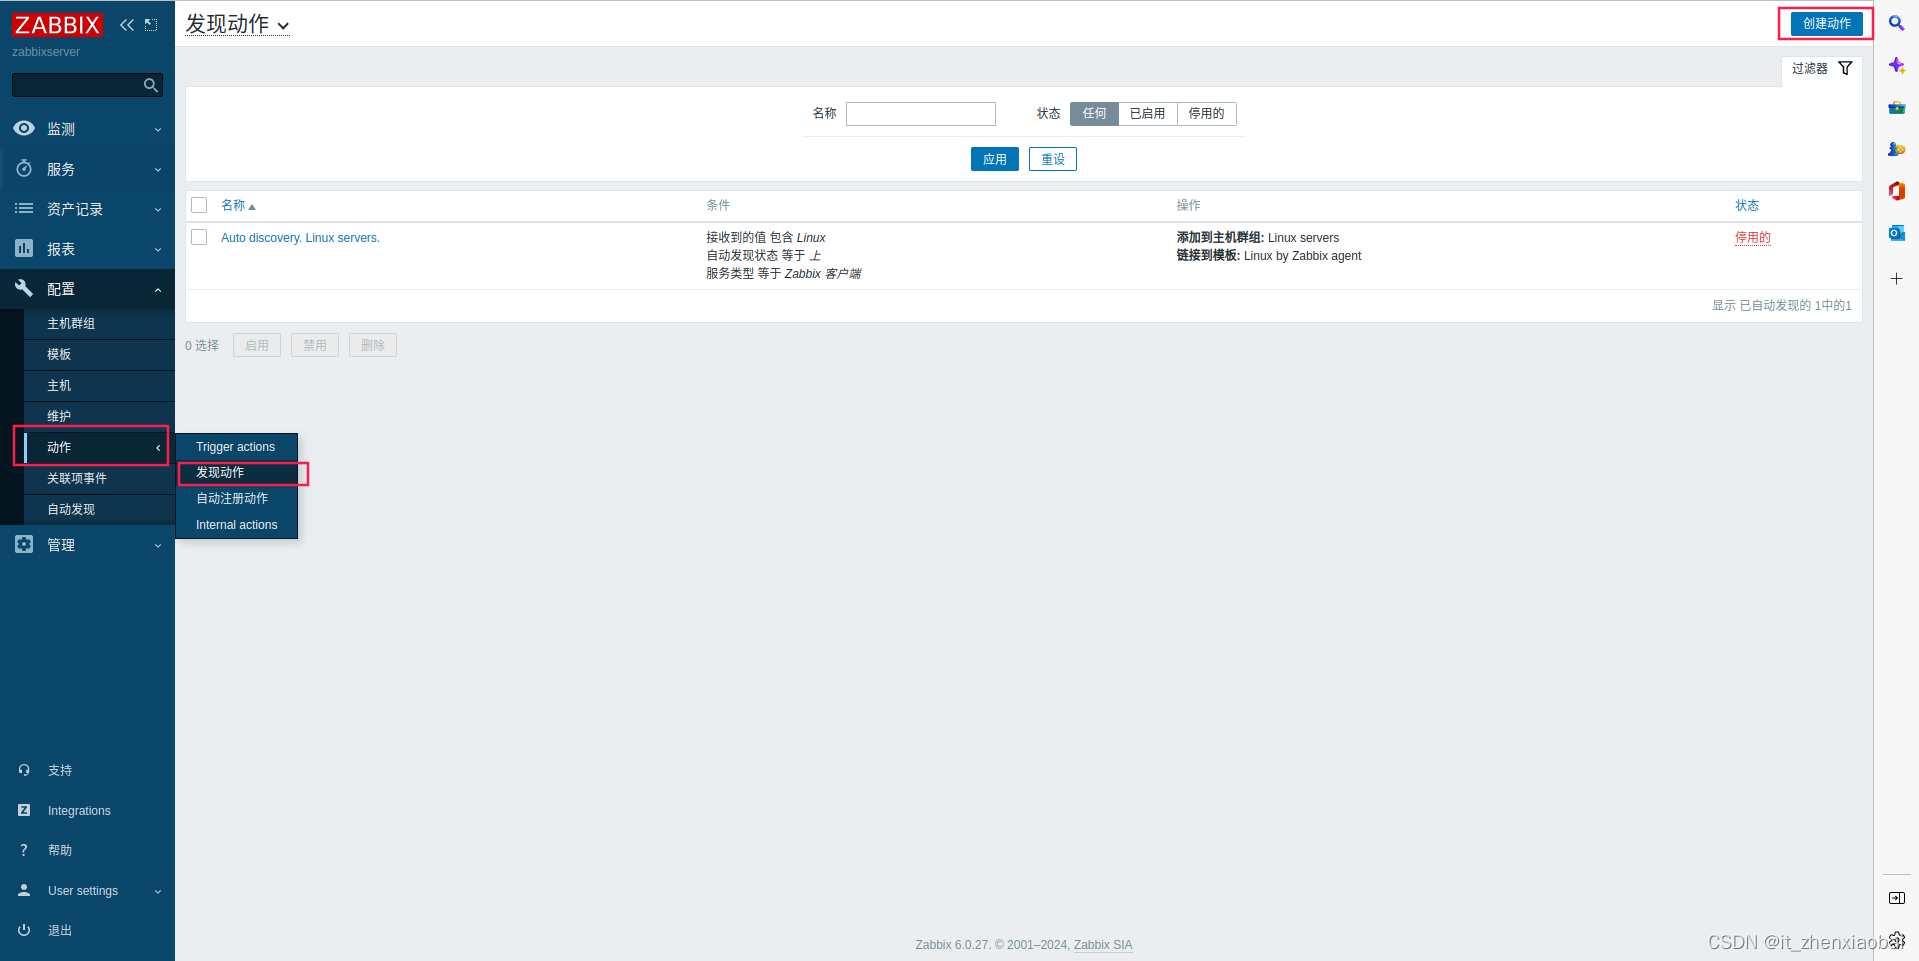
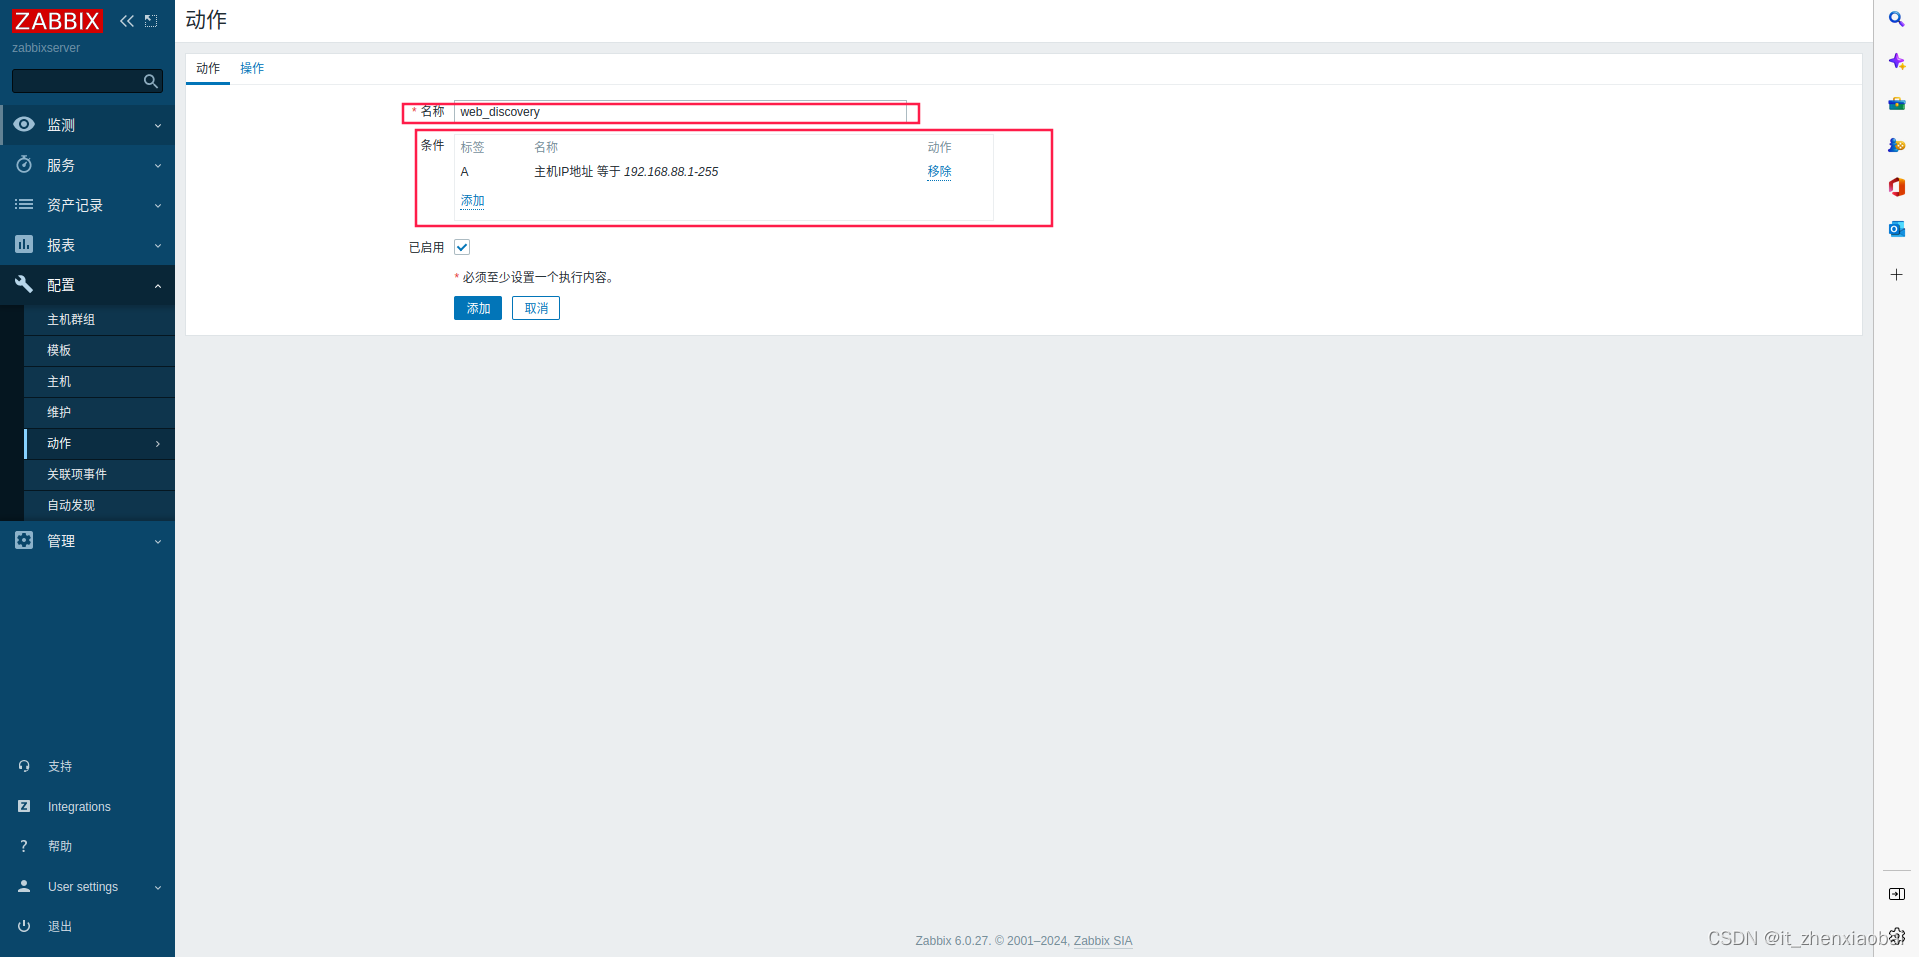
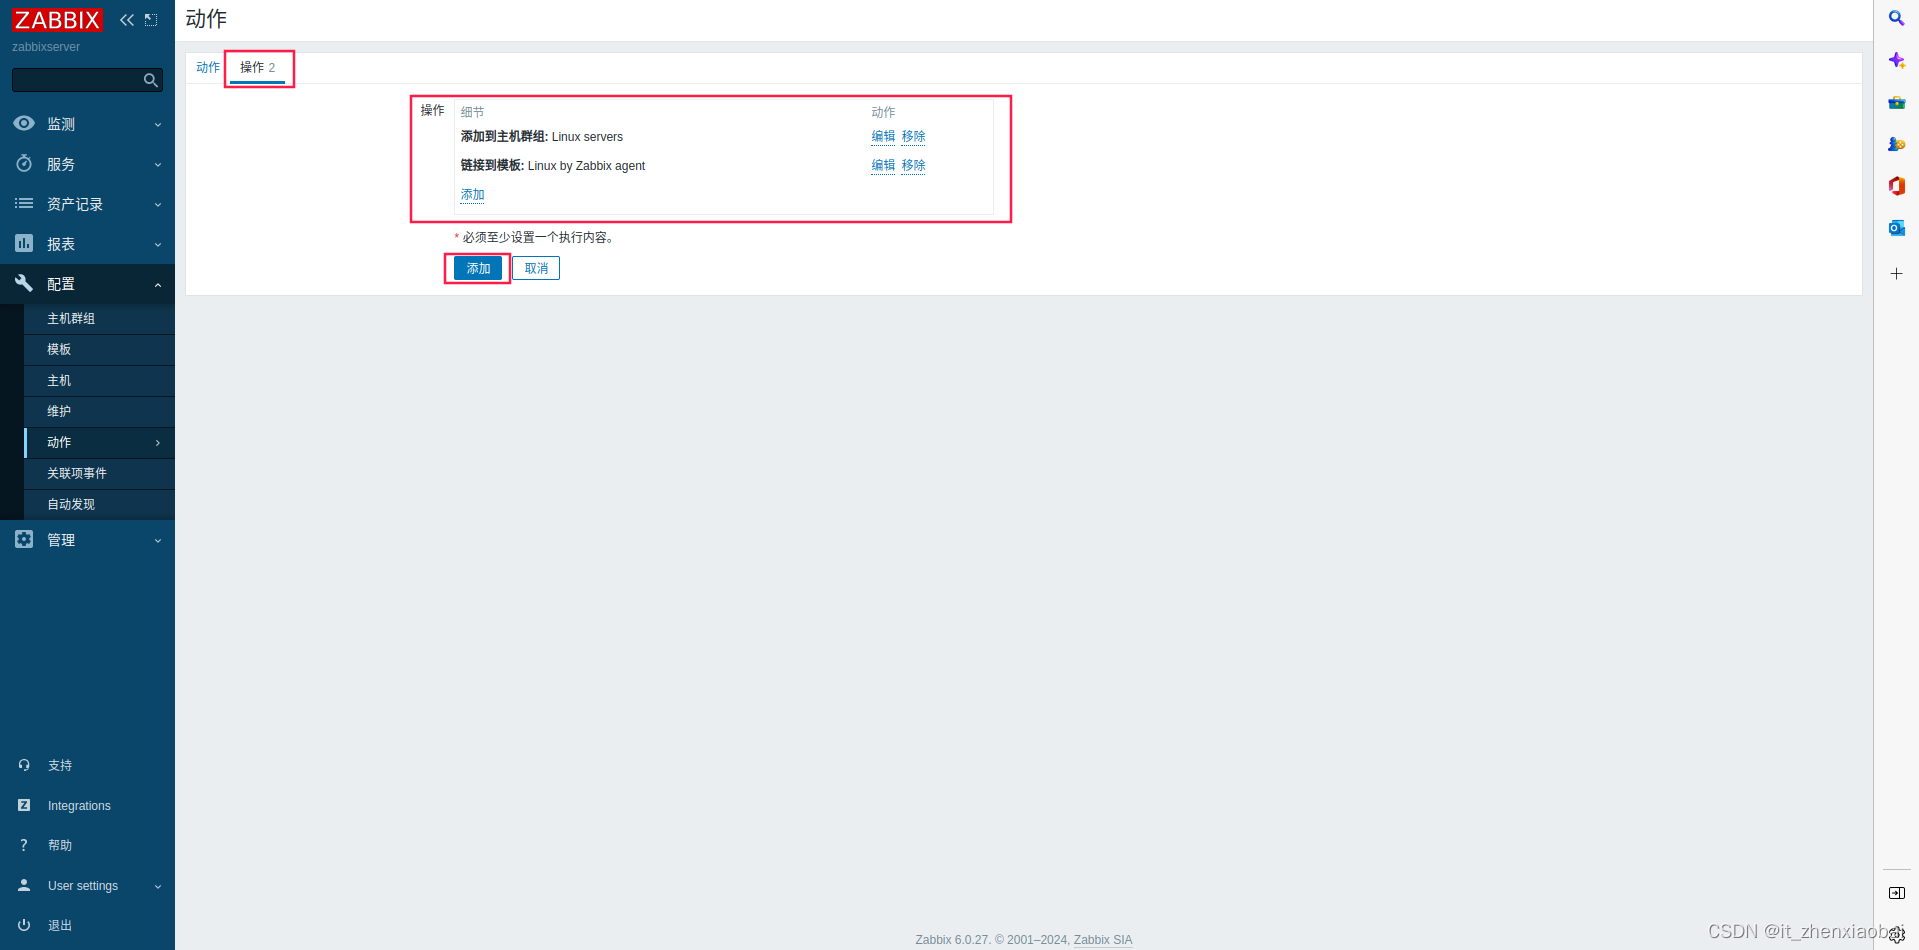
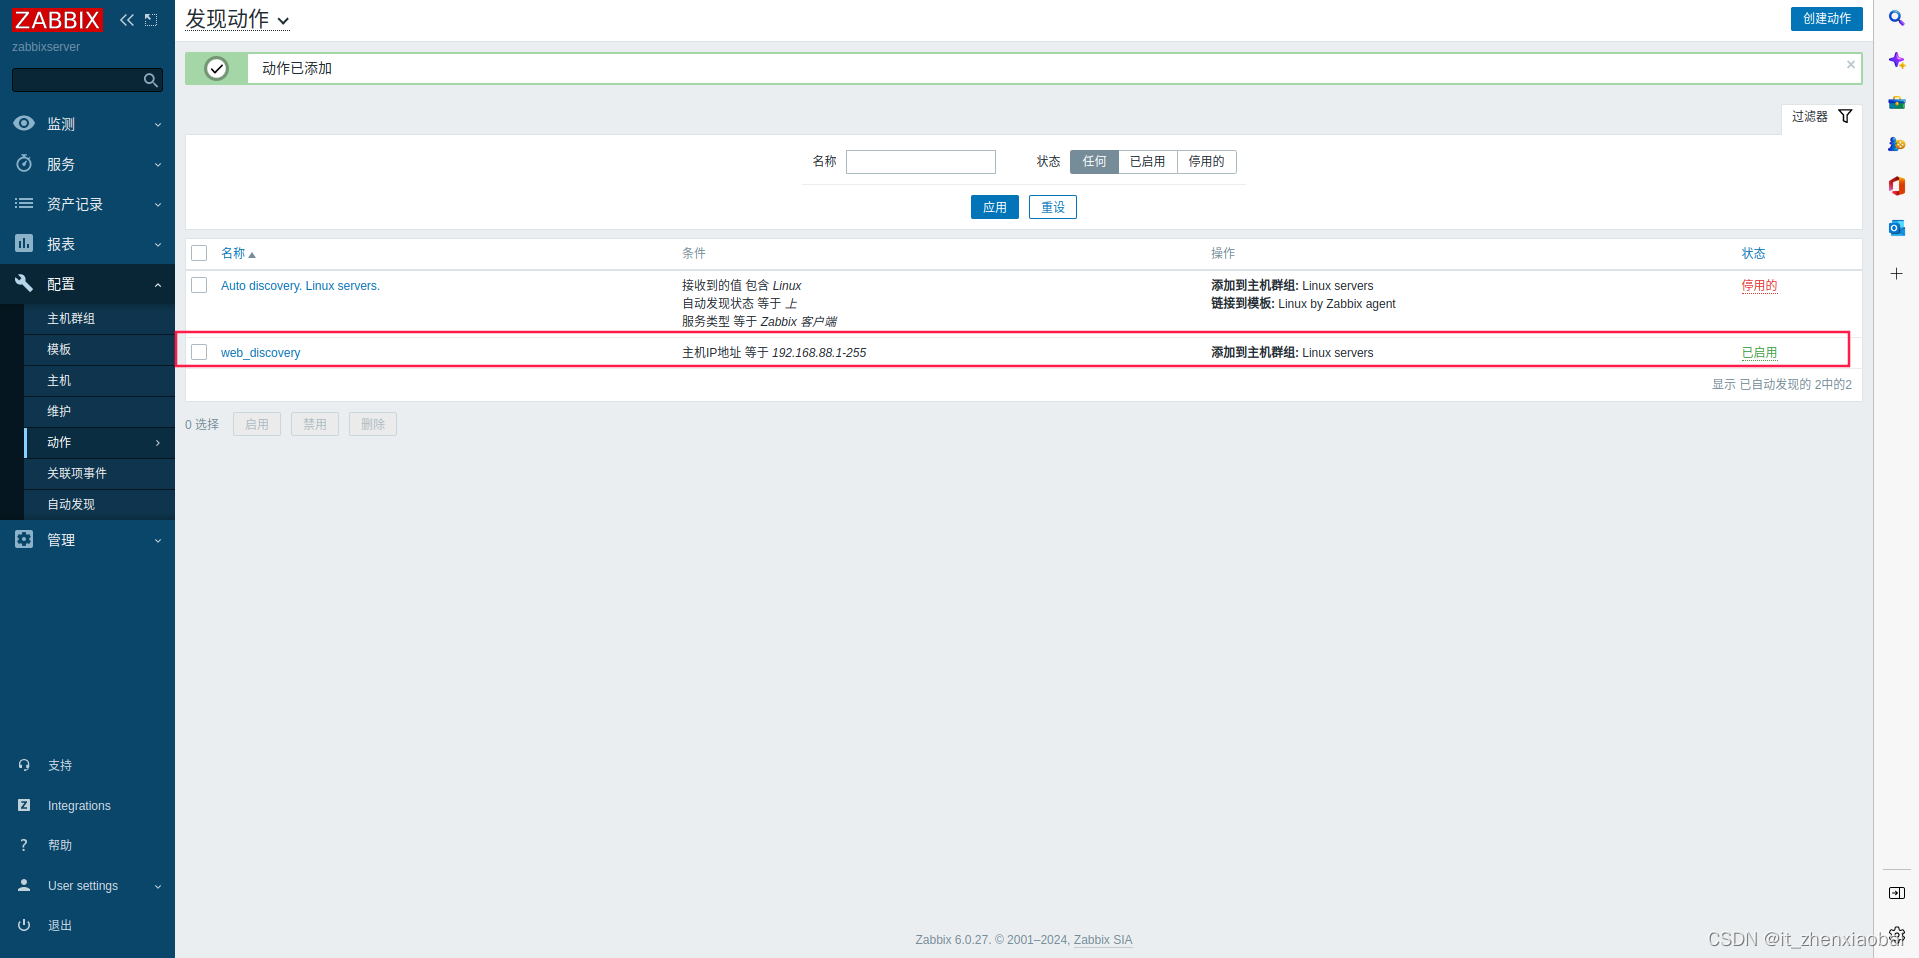
3、创建发现动作
4、验证
在web2上配置agent
[root@web2 ~]# vim /etc/zabbix/zabbix_agentd.conf
Server=127.0.0.1,192.168.88.5
Hostname=web2
[root@web2 ~]# systemctl enable zabbix-agent.service --now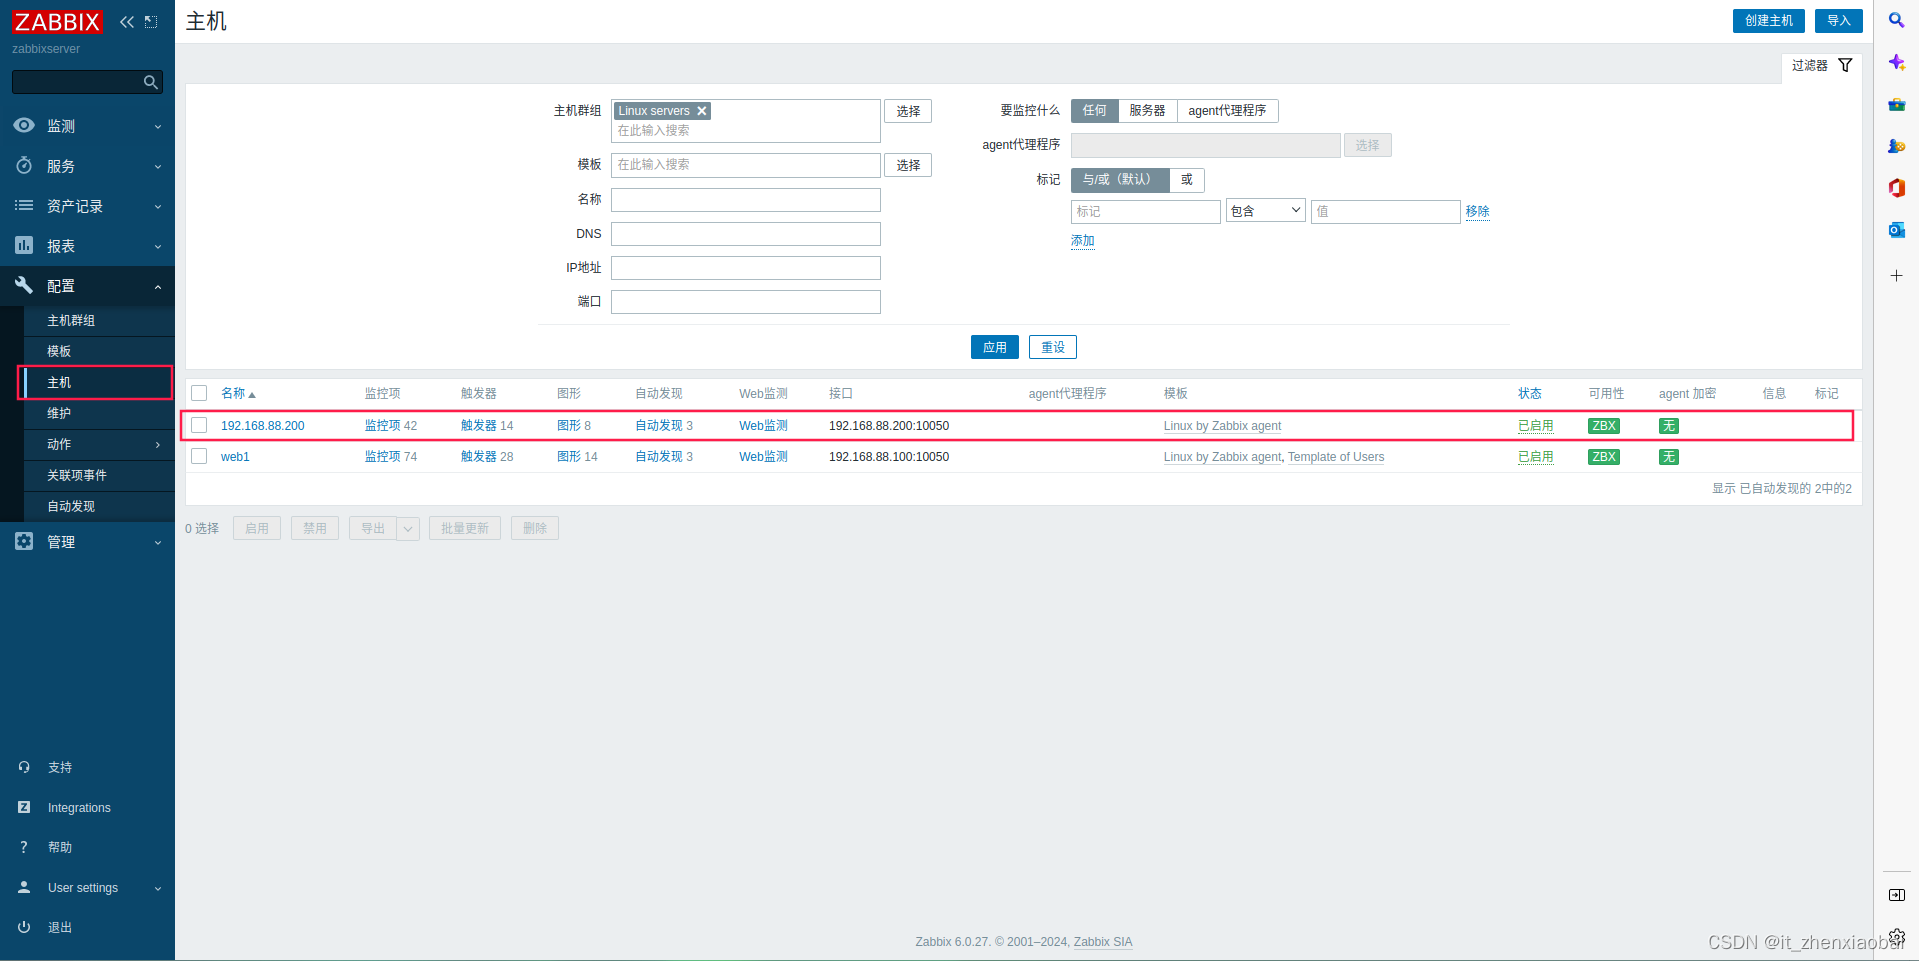
主被动监控
一、概述
主动和被动都是对被监控端主机而言的
默认zabbix采用的是被动监控
1、被动监控:
Server项Agent发起连接
2、主动监控:
gent项Server发起连接
3、区别:
Server不用每次需要数据都连接Agent,Agent会自己收集数据并处理数据,Server仅需要保存数据即可
二、配置web2为主动监控
修改配置文件,只使用主动监控
[root@web2 ~]# vim /etc/zabbix/zabbix_agentd.conf
#Server=127.0.0.1,192.168.88.5
StartAgents=0
ServerActive=192.168.88.5
RefreshActiveChecks=120
[root@web2 ~]# systemctl restart zabbix-agent.service
# 端口号消失
[root@web2 ~]# ss -ntulp | grep 10050
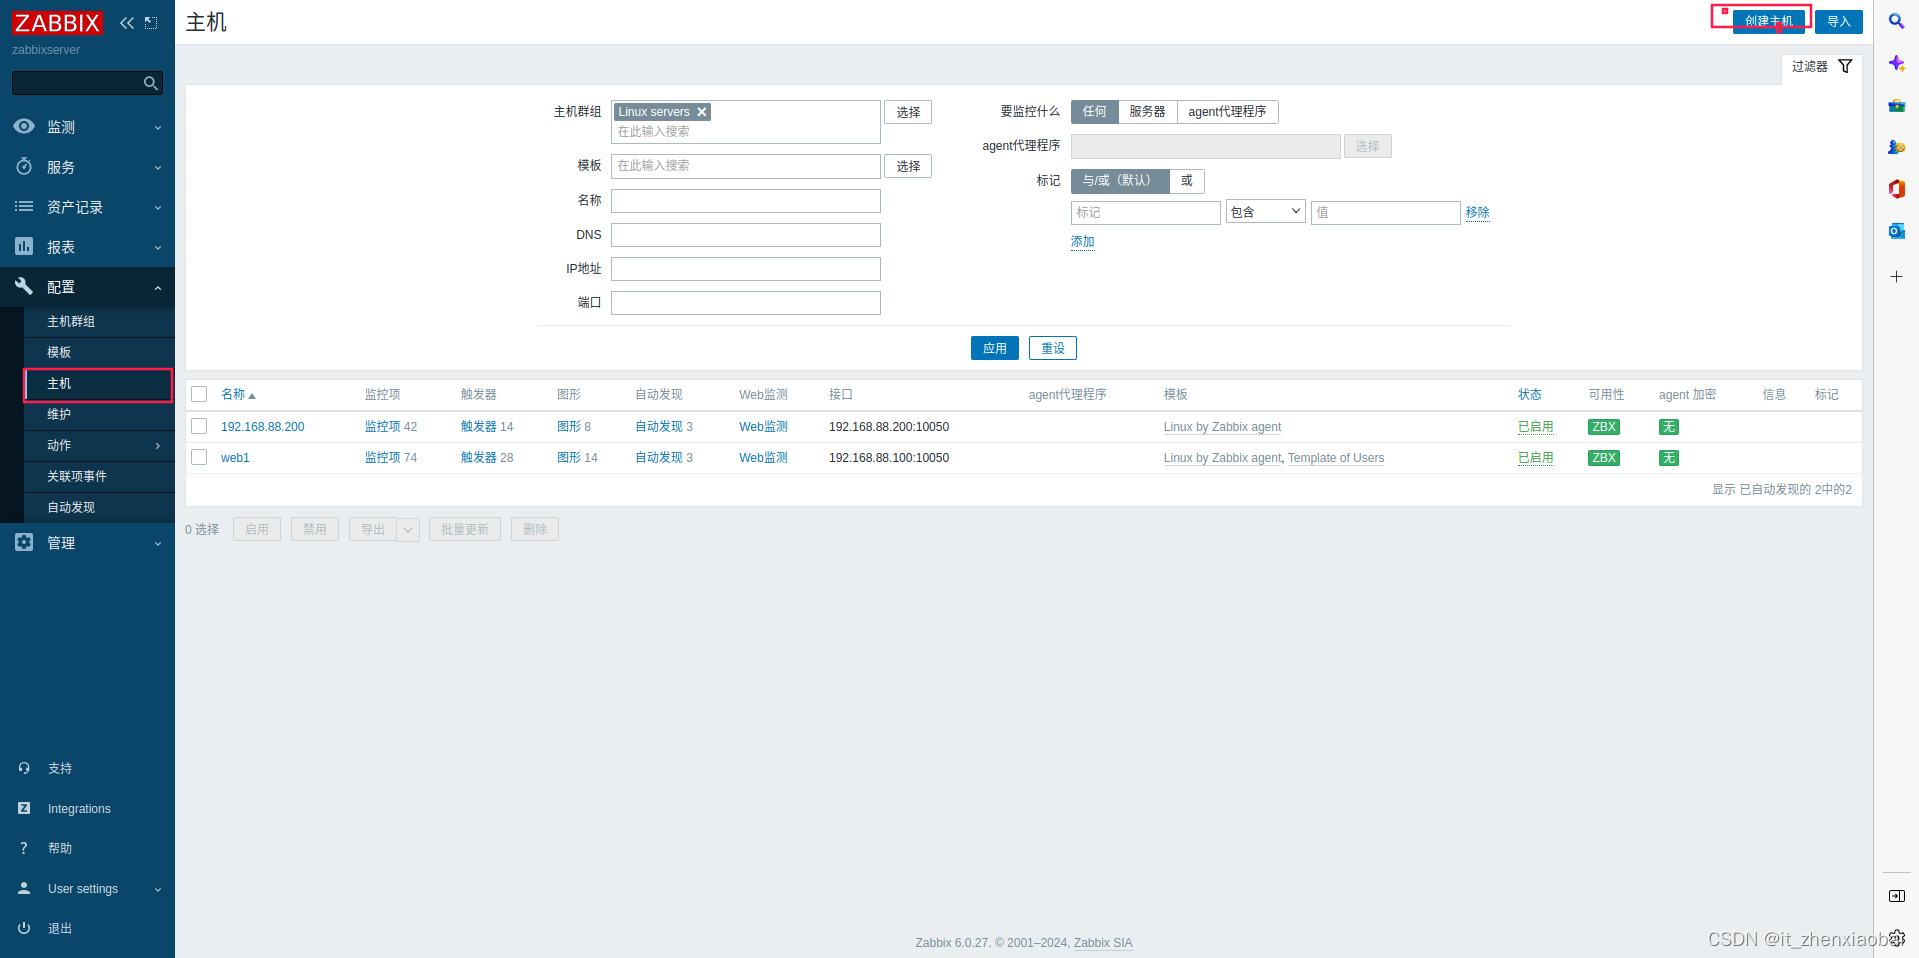
三、添加监控主机
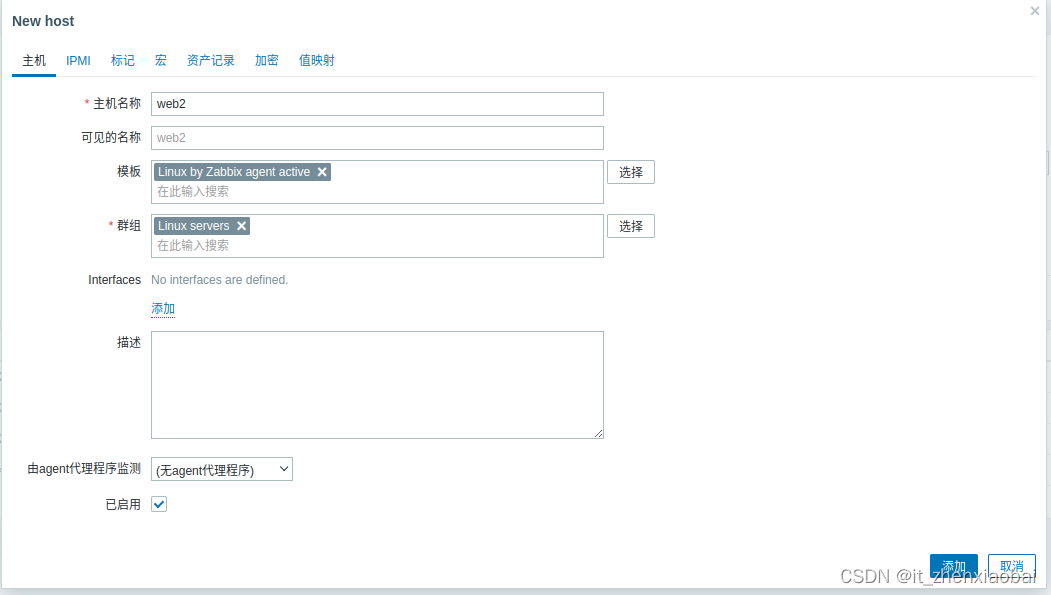
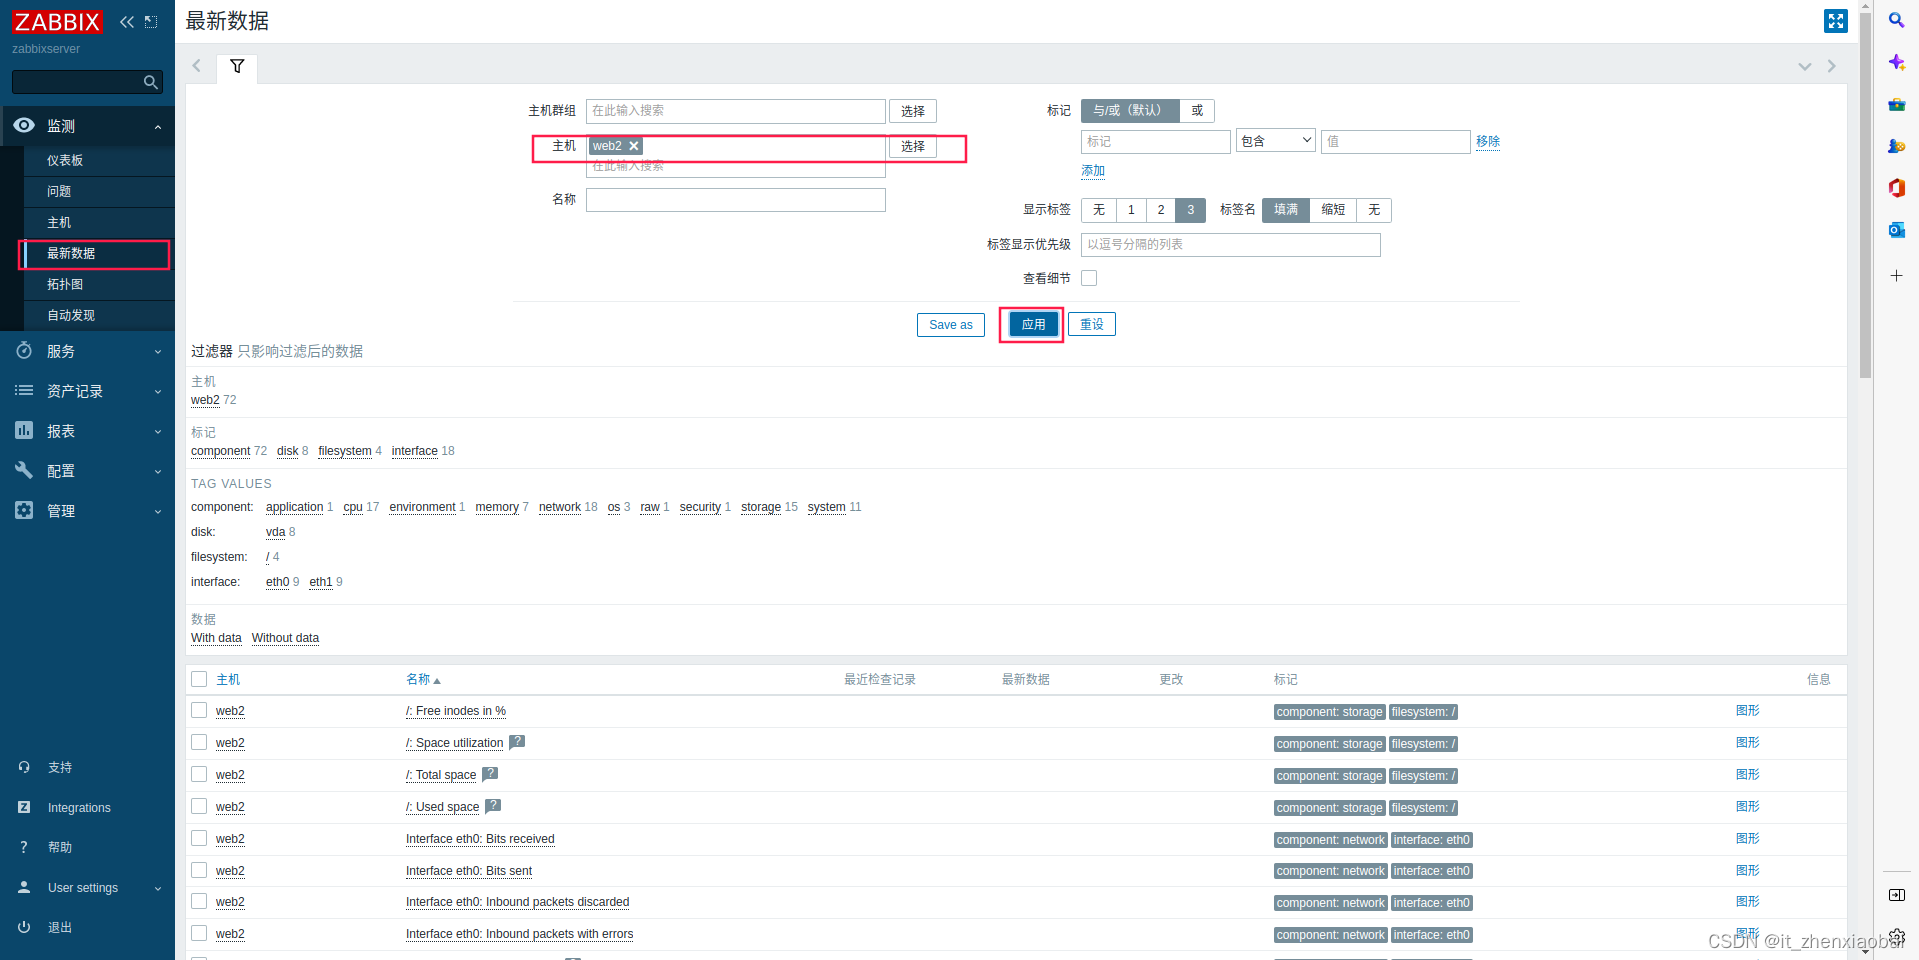
在zabbix监控服务器,添加被监控的主机(主动模式)

监控nginx
stub_status模块
用于实时监控nginx的网络连接,这个模块是nginx官方提供的一个模块
[root@web1 ~]# yum -y install nginx
[root@web1 ~]# vim /etc/nginx/nginx.conf
        location / {
        }

        location /status {            # 添加3行
                stub_status on;
        }

        error_page 404 /404.html;
            location = /40x.html {
        }
[root@web1 ~]# systemctl enable nginx.service --now

# 访问监控页面
[root@zabbixserver ~]# curl http://192.168.88.100/status
Active connections: 1
server accepts handled requests
 1 1 1
Reading: 0 Writing: 1 Waiting: 0
# Active connections:当前客户端与nginx之间的连接数。它等于下面Reading/Writing/Waiting之和
# accepts:自nginx启动之后,客户端访问的总量
# handled:自nginx启动之后,处理过的客户端连接总数,通常等于accepts的值
# requests:自nginx启动之后,处理过的客户端请求总数
# Reading:正在读取客户端的连接总数
# Writing:正在向客户端发送响应的连接总数
# Waiting:空闲连接

# 使用工具向服务器发起多个请求
[root@zabbixserver ~]# yum -y install httpd-tools
[root@zabbixserver ~]# ab -n1000 -c200 http://192.168.88.100/
[root@zabbixserver ~]# curl http://192.168.88.100/status
Active connections: 1
server accepts handled requests
 1158 1158 1003
Reading: 0 Writing: 1 Waiting: 0
编写脚本,用于获取各项数据
[root@web1 ~]# vim /usr/local/bin/nginx_status.sh
#!/bin/bash
case $1 in
active)
    curl -s http://192.168.88.100/status | awk '/Active/{print $NF}';;
waiting)
    curl -s http://192.168.88.100/status | awk '/Waiting/{print $NF}';;
accepts)
    curl -s http://192.168.88.100/status | awk 'NR==3{print $1}';;
esac

[root@web1 ~]# chmod +x /usr/local/bin/nginx_status.sh
[root@web1 ~]# nginx_status.sh active
1
[root@web1 ~]# nginx_status.sh accepts
1160
[root@web1 ~]# nginx_status.sh waiting
0
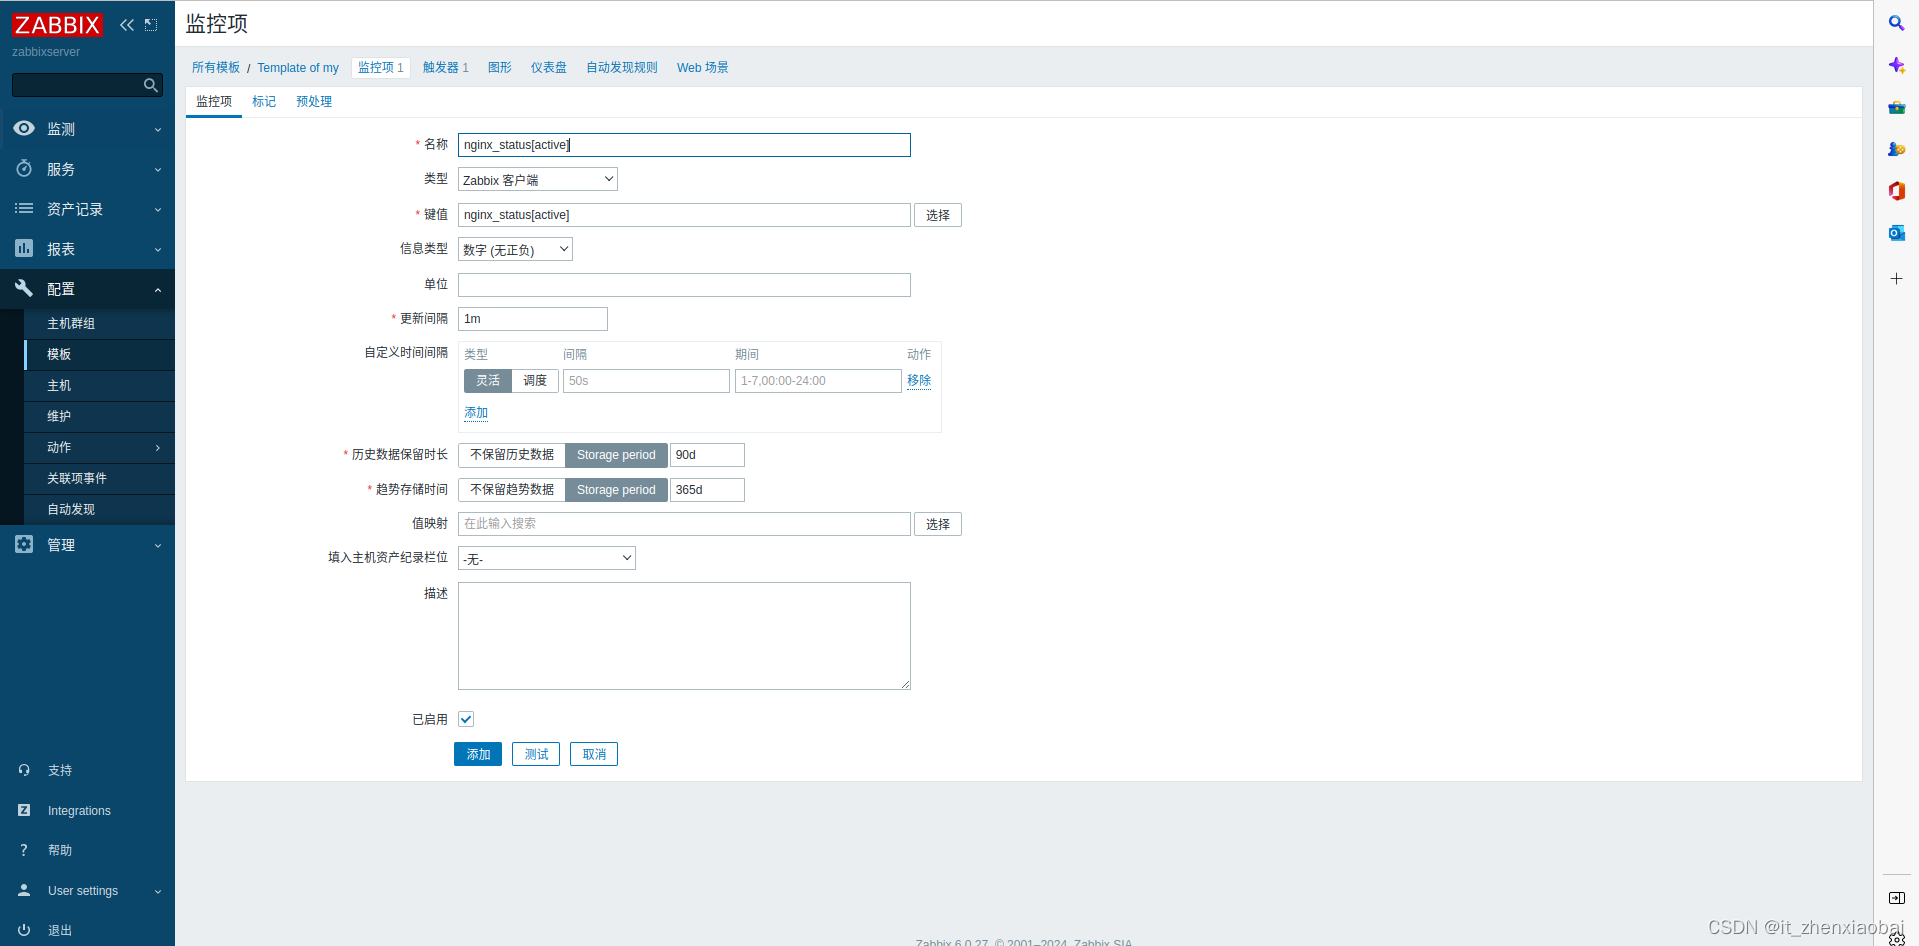
创建zabbix用到的key,获取各项数据
[root@web1 ~]# vim /etc/zabbix/zabbix_agentd.d/nginx_status.conf
UserParameter=nginx_status[*],/usr/local/bin/nginx_status.sh $1
[root@web1 ~]# systemctl restart zabbix-agent.service
[root@web1 ~]# zabbix_get -s 127.0.0.1 -k nginx_status[active]
1
[root@web1 ~]# zabbix_get -s 127.0.0.1 -k nginx_status[accepts]
1165
[root@web1 ~]# zabbix_get -s 127.0.0.1 -k nginx_status[waiting]
0
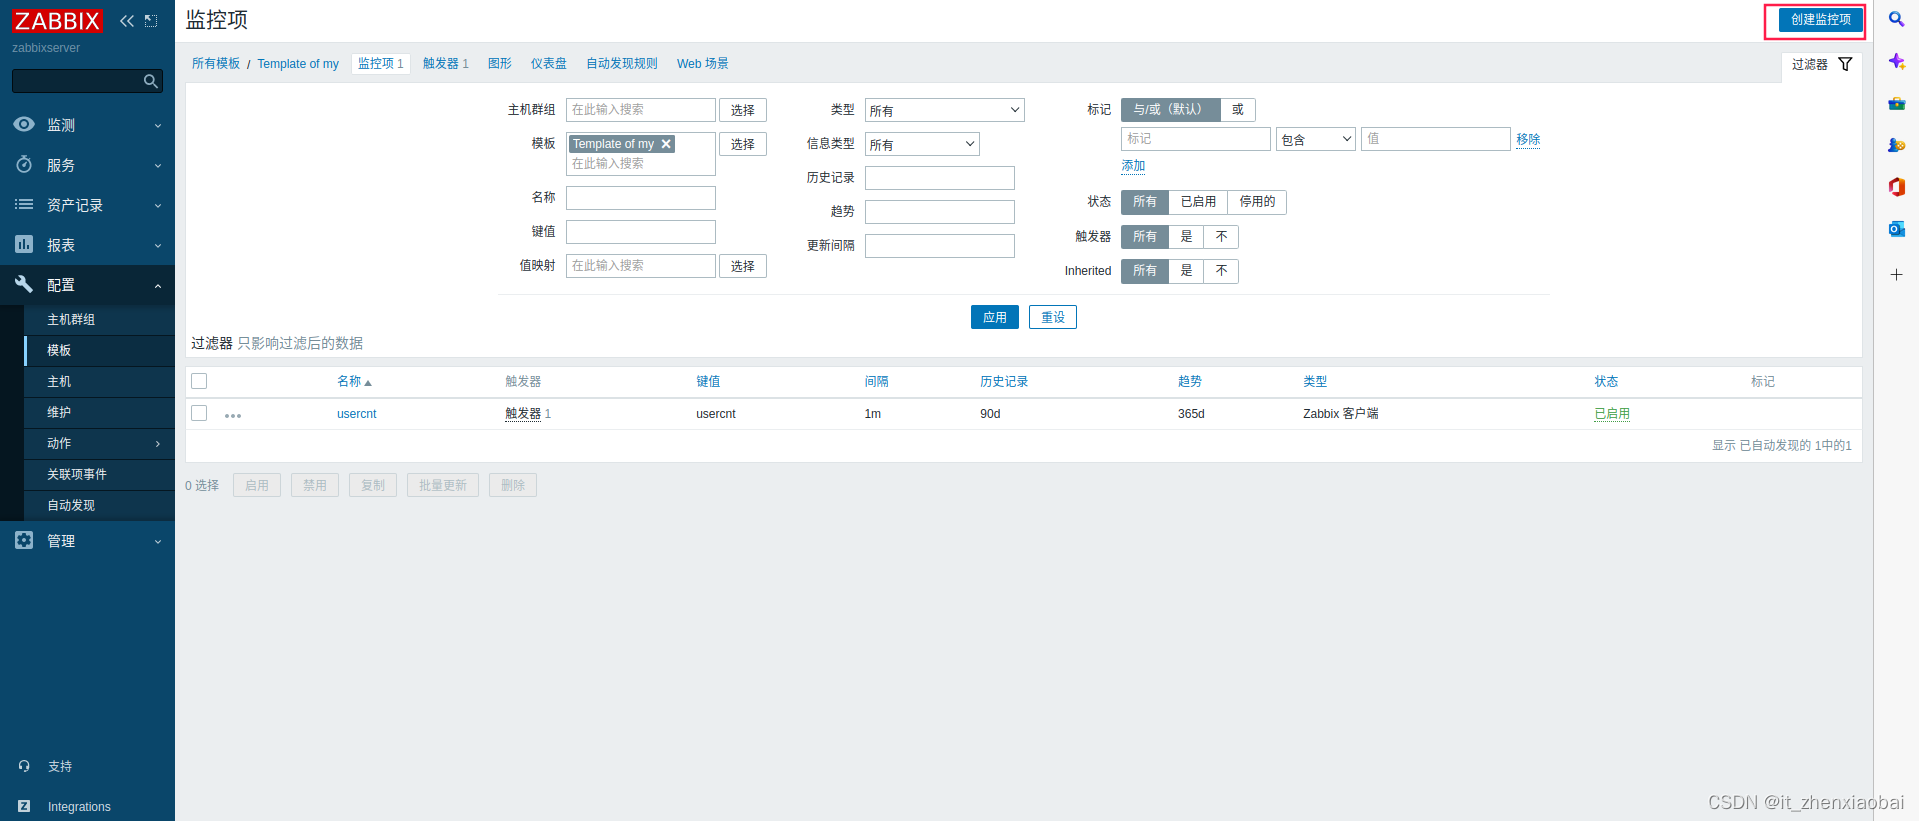
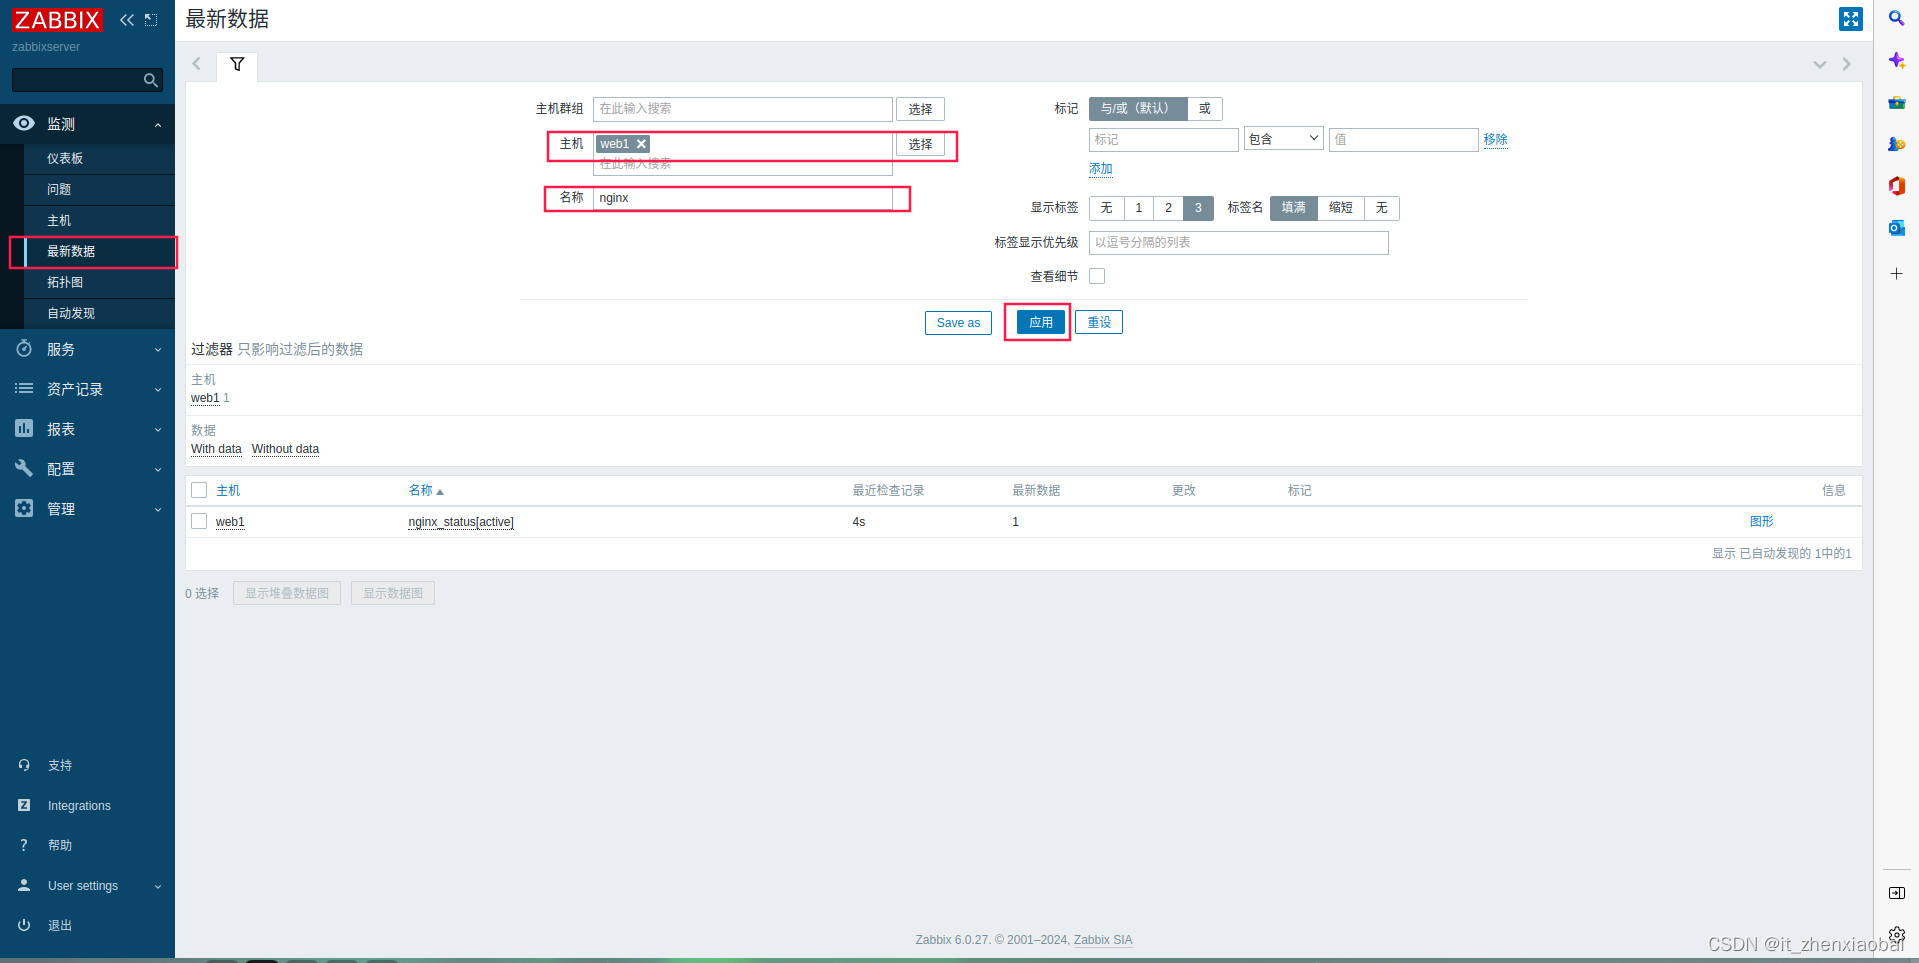
添加监控项
