yolov8直接调用zed相机实现三维测距(python)
- 1. 相关配置
- 2. 相关代码
- 3. 实验结果
相关链接
此项目直接调用zed相机实现三维测距,无需标定,相关内容如下:
1.yolov5直接调用zed相机实现三维测距(python)
2. yolov4直接调用zed相机实现三维测距
3. Windows+YOLOV8环境配置
4.具体实现效果已在哔哩哔哩发布,点击此链接跳转
本篇博文工程源码下载(麻烦github给个星星)
下载链接:https://github.com/up-up-up-up/zed-yolov8
附:Zed调用YOLOv7测距也已经实现,但是3060笔记本6G显存带不动,在大现存服务器上可以运行,可能是由于YOLOv7网络结构导致的,由于不具备普适性,就不再写相关文章了,有需要的可以仿照这个代码去改写
1. 相关配置
python==3.7
Windows-pycharm
zed api 具体配置见 (zed api 配置步骤)
由于我电脑之前python版本为3.7,yolov8要求python最低为3.8,所以本次实验直接在虚拟环境里进行,未配置gpu,可能看着卡卡的,有需要的可以配置一下,原理是一样的
2. 相关代码
主代码 zed-yolo.py,具体放置在yolov8主目录下
#!/usr/bin/env python3

import sys
import numpy as np

import argparse
import torch
import cv2
import pyzed.sl as sl
from ultralytics import YOLO

from threading import Lock, Thread
from time import sleep

import ogl_viewer.viewer as gl
import cv_viewer.tracking_viewer as cv_viewer

lock = Lock()
run_signal = False
exit_signal = False


def xywh2abcd(xywh, im_shape):
    output = np.zeros((4, 2))

    # Center / Width / Height -> BBox corners coordinates
    x_min = (xywh[0] - 0.5*xywh[2]) #* im_shape[1]
    x_max = (xywh[0] + 0.5*xywh[2]) #* im_shape[1]
    y_min = (xywh[1] - 0.5*xywh[3]) #* im_shape[0]
    y_max = (xywh[1] + 0.5*xywh[3]) #* im_shape[0]

    # A ------ B
    # | Object |
    # D ------ C

    output[0][0] = x_min
    output[0][1] = y_min

    output[1][0] = x_max
    output[1][1] = y_min

    output[2][0] = x_max
    output[2][1] = y_max

    output[3][0] = x_min
    output[3][1] = y_max
    return output

def detections_to_custom_box(detections, im0):
    output = []
    for i, det in enumerate(detections):
        xywh = det.xywh[0]

        # Creating ingestable objects for the ZED SDK
        obj = sl.CustomBoxObjectData()
        obj.bounding_box_2d = xywh2abcd(xywh, im0.shape)
        obj.label = det.cls
        obj.probability = det.conf
        obj.is_grounded = False
        output.append(obj)
    return output


def torch_thread(weights, img_size, conf_thres=0.2, iou_thres=0.45):
    global image_net, exit_signal, run_signal, detections

    print("Intializing Network...")

    model = YOLO(weights)

    while not exit_signal:
        if run_signal:
            lock.acquire()

            img = cv2.cvtColor(image_net, cv2.COLOR_BGRA2RGB)
            # https://docs.ultralytics.com/modes/predict/#video-suffixes
            det = model.predict(img, save=False, imgsz=img_size, conf=conf_thres, iou=iou_thres)[0].cpu().numpy().boxes

            # ZED CustomBox format (with inverse letterboxing tf applied)
            detections = detections_to_custom_box(det, image_net)
            lock.release()
            run_signal = False
        sleep(0.01)


def main():
    global image_net, exit_signal, run_signal, detections

    capture_thread = Thread(target=torch_thread, kwargs={'weights': opt.weights, 'img_size': opt.img_size, "conf_thres": opt.conf_thres})
    capture_thread.start()

    print("Initializing Camera...")

    zed = sl.Camera()

    input_type = sl.InputType()
    if opt.svo is not None:
        input_type.set_from_svo_file(opt.svo)

    # Create a InitParameters object and set configuration parameters
    init_params = sl.InitParameters(input_t=input_type, svo_real_time_mode=True)
    init_params.coordinate_units = sl.UNIT.METER
    init_params.depth_mode = sl.DEPTH_MODE.ULTRA  # QUALITY
    init_params.coordinate_system = sl.COORDINATE_SYSTEM.RIGHT_HANDED_Y_UP
    init_params.depth_maximum_distance = 50

    runtime_params = sl.RuntimeParameters()
    status = zed.open(init_params)

    if status != sl.ERROR_CODE.SUCCESS:
        print(repr(status))
        exit()

    image_left_tmp = sl.Mat()

    print("Initialized Camera")

    positional_tracking_parameters = sl.PositionalTrackingParameters()
    # If the camera is static, uncomment the following line to have better performances and boxes sticked to the ground.
    # positional_tracking_parameters.set_as_static = True
    zed.enable_positional_tracking(positional_tracking_parameters)

    obj_param = sl.ObjectDetectionParameters()
#    obj_param.detection_model = sl.OBJECT_DETECTION_MODEL.CUSTOM_BOX_OBJECTS
    obj_param.enable_tracking = True
    zed.enable_object_detection(obj_param)

    objects = sl.Objects()
    obj_runtime_param = sl.ObjectDetectionRuntimeParameters()

    # Display
    camera_infos = zed.get_camera_information()
    camera_res = camera_infos.camera_resolution
    # Create OpenGL viewer
    viewer = gl.GLViewer()
    point_cloud_res = sl.Resolution(min(camera_res.width, 720), min(camera_res.height, 404))
    point_cloud_render = sl.Mat()
    viewer.init(camera_infos.camera_model, point_cloud_res, obj_param.enable_tracking)
    point_cloud = sl.Mat(point_cloud_res.width, point_cloud_res.height, sl.MAT_TYPE.F32_C4, sl.MEM.CPU)
    image_left = sl.Mat()
    # Utilities for 2D display
    display_resolution = sl.Resolution(min(camera_res.width, 1280), min(camera_res.height, 720))
    image_scale = [display_resolution.width / camera_res.width, display_resolution.height / camera_res.height]
    image_left_ocv = np.full((display_resolution.height, display_resolution.width, 4), [245, 239, 239, 255], np.uint8)

    # # Utilities for tracks view
    # camera_config = camera_infos.camera_configuration
    # tracks_resolution = sl.Resolution(400, display_resolution.height)
    # track_view_generator = cv_viewer.TrackingViewer(tracks_resolution, camera_config.fps, init_params.depth_maximum_distance)
    # track_view_generator.set_camera_calibration(camera_config.calibration_parameters)
    # image_track_ocv = np.zeros((tracks_resolution.height, tracks_resolution.width, 4), np.uint8)
    # Camera pose
    cam_w_pose = sl.Pose()

    while viewer.is_available() and not exit_signal:
        if zed.grab(runtime_params) == sl.ERROR_CODE.SUCCESS:
            # -- Get the image
            lock.acquire()
            zed.retrieve_image(image_left_tmp, sl.VIEW.LEFT)
            image_net = image_left_tmp.get_data()
            lock.release()
            run_signal = True

            # -- Detection running on the other thread
            while run_signal:
                sleep(0.001)

            # Wait for detections
            lock.acquire()
            # -- Ingest detections
            zed.ingest_custom_box_objects(detections)
            lock.release()
            zed.retrieve_objects(objects, obj_runtime_param)

            # -- Display
            # Retrieve display data
            zed.retrieve_measure(point_cloud, sl.MEASURE.XYZRGBA, sl.MEM.CPU, point_cloud_res)
            point_cloud.copy_to(point_cloud_render)
            zed.retrieve_image(image_left, sl.VIEW.LEFT, sl.MEM.CPU, display_resolution)
            zed.get_position(cam_w_pose, sl.REFERENCE_FRAME.WORLD)

            # 3D rendering
            viewer.updateData(point_cloud_render, objects)
            # 2D rendering
            np.copyto(image_left_ocv, image_left.get_data())
            cv_viewer.render_2D(image_left_ocv, image_scale, objects, obj_param.enable_tracking)
            global_image = image_left_ocv
            # global_image = cv2.hconcat([image_left_ocv, image_track_ocv])
            # # Tracking view
            # track_view_generator.generate_view(objects, cam_w_pose, image_track_ocv, objects.is_tracked)

            cv2.imshow("ZED | 2D View and Birds View", global_image)
            key = cv2.waitKey(10)
            if key == 27:
                exit_signal = True
        else:
            exit_signal = True

    viewer.exit()
    exit_signal = True
    zed.close()


if __name__ == '__main__':
    parser = argparse.ArgumentParser()
    parser.add_argument('--weights', type=str, default='yolov8n.pt', help='model.pt path(s)')
    parser.add_argument('--svo', type=str, default=None, help='optional svo file')
    parser.add_argument('--img_size', type=int, default=416, help='inference size (pixels)')
    parser.add_argument('--conf_thres', type=float, default=0.4, help='object confidence threshold')
    opt = parser.parse_args()

    with torch.no_grad():
        main()
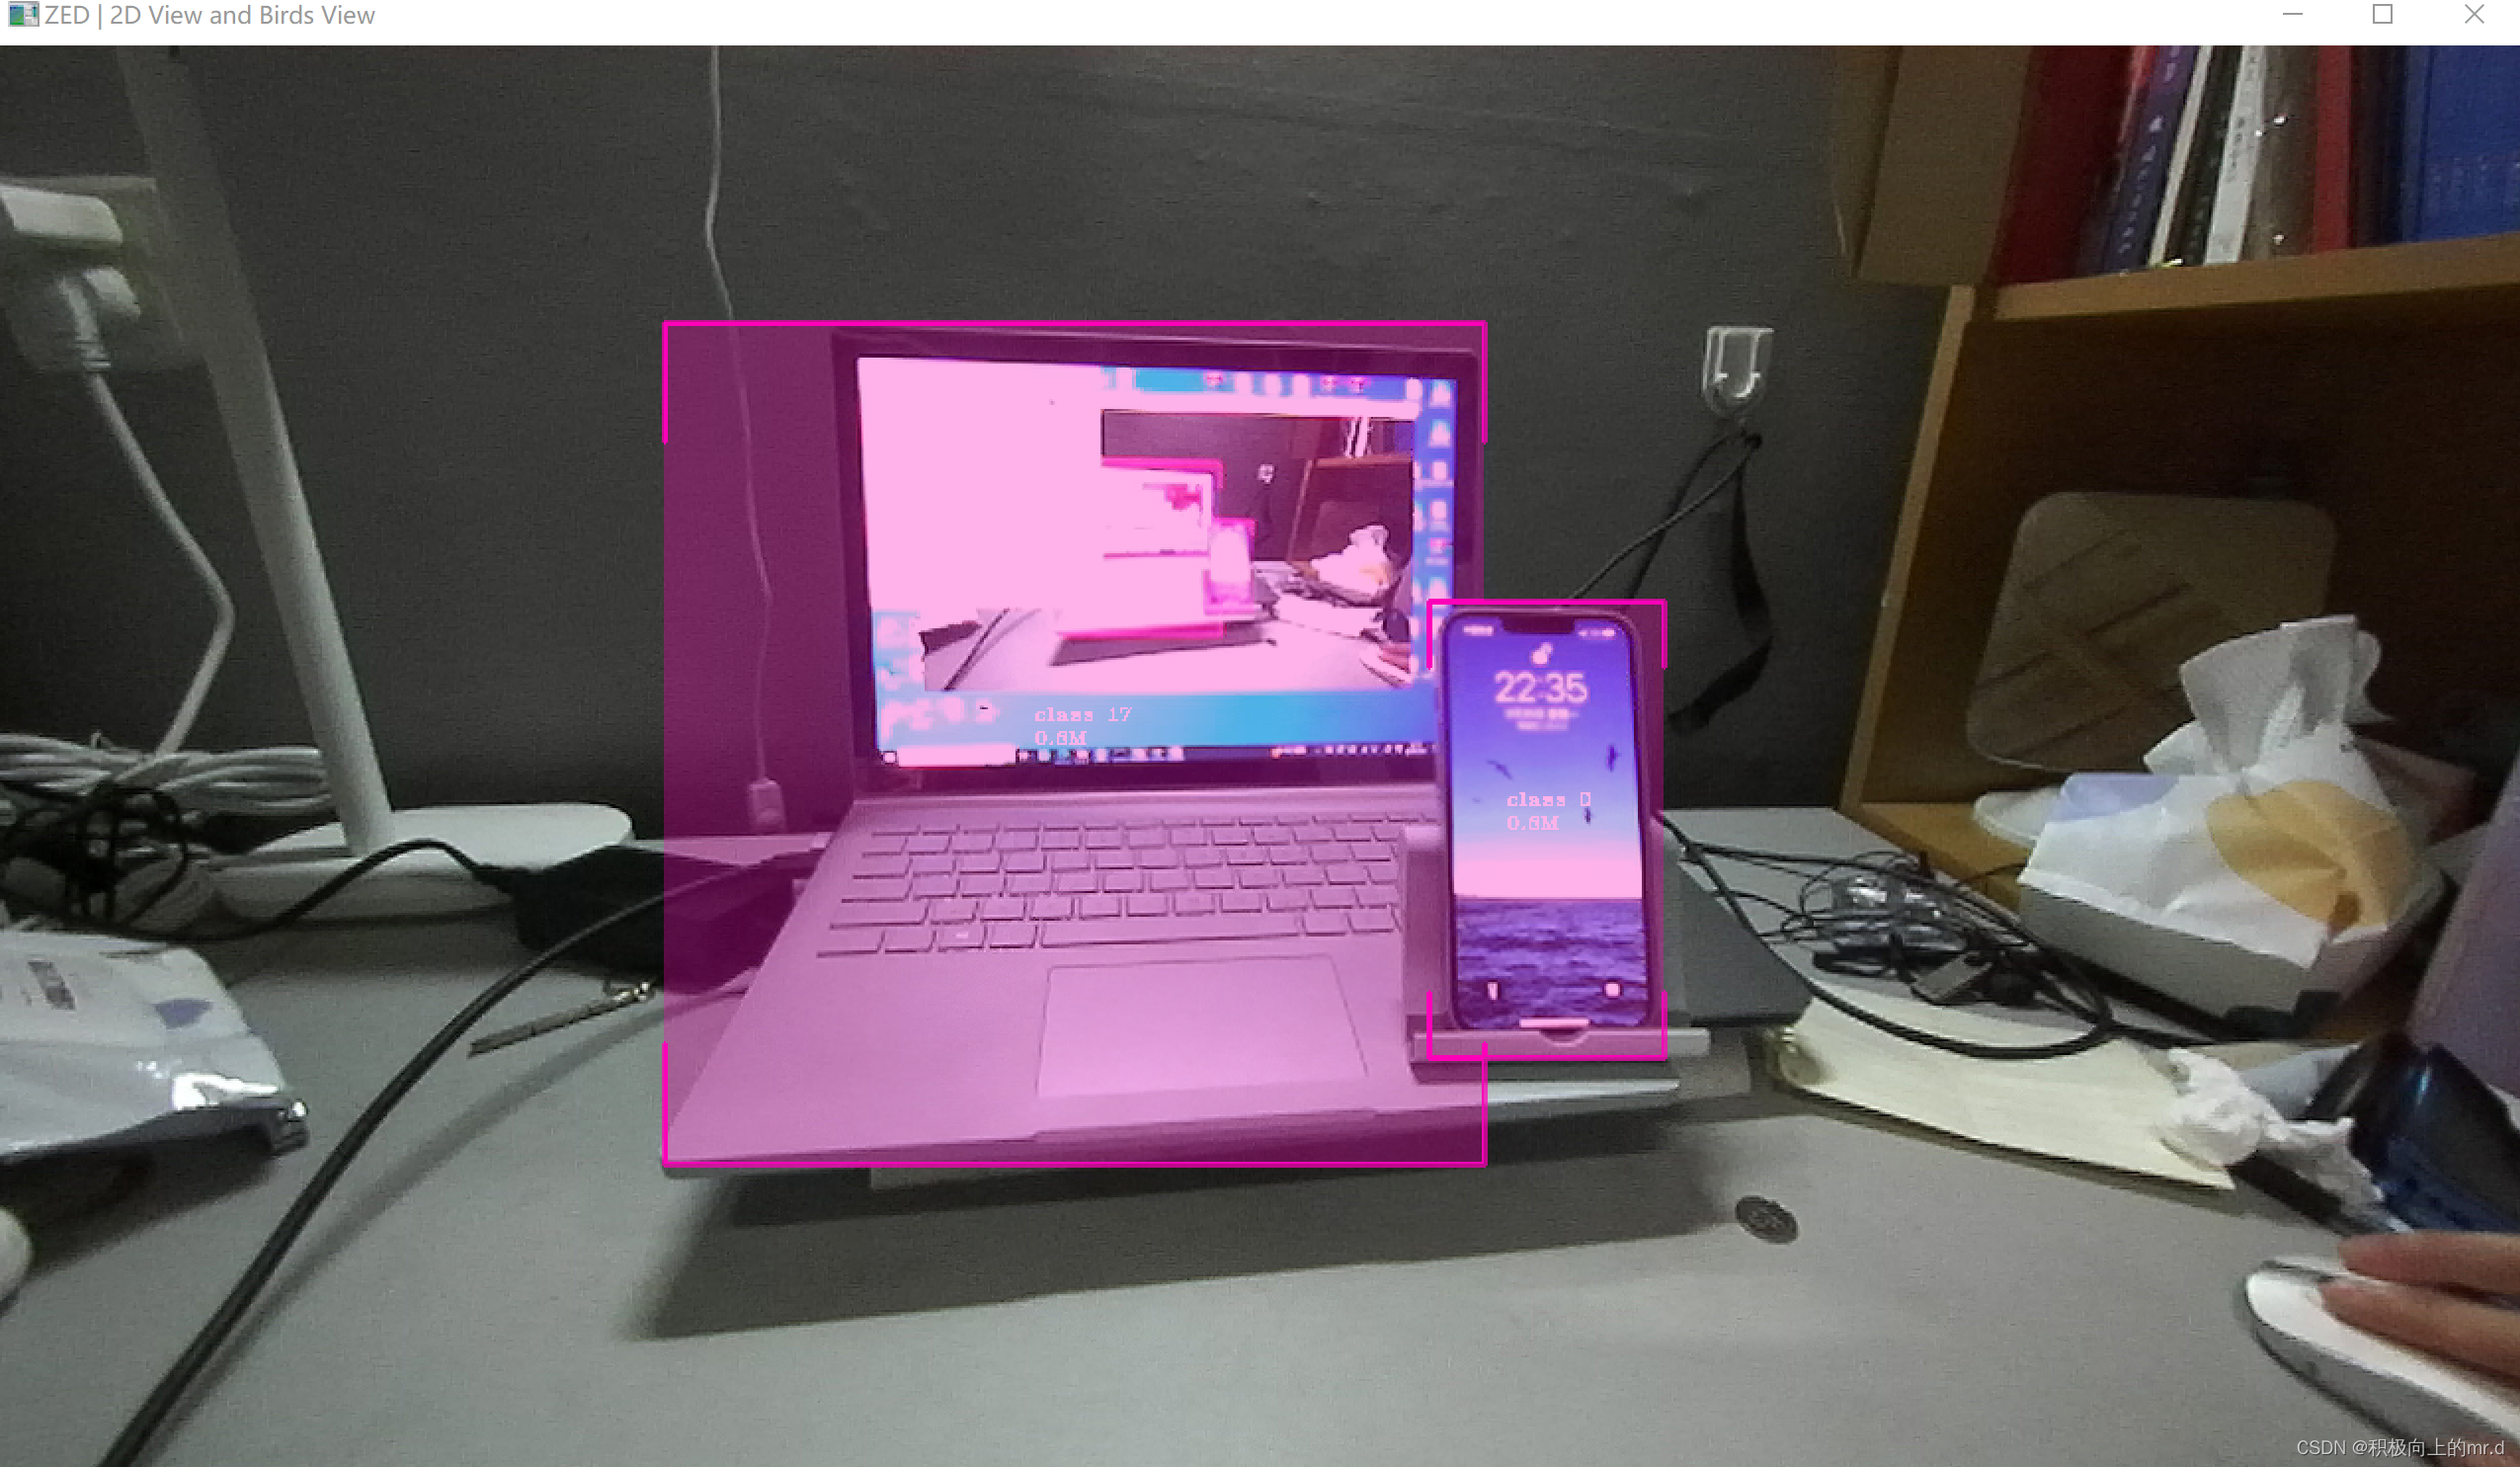
3. 实验结果
测距图(感觉挺精准的)
视频展示:
Zed相机+YOLOv8目标检测跟踪