一、描述
本模块提供通过不同的url访问不同的页面,包括跳转到应用内的指定页面、用应用内的某个页面替换当前页面、返回上一页面或指定的页面等。
二、导入模块
import router from '@ohos.router'三、router.pushUrl
1、描述
跳转到应用内的指定页面。
router.pushUrl这种方式的回调方式有两种,一种是Promise,另一种的callback。我们接下来已Promise回调方式为列。
2、接口
Promise方式:router.pushUrl(options: RouterOptions):Promise<void>
Callback方式:router.pushUrl(options: RouterOptions, callback: AsyncCallback<void> ):void
Promise方式:router.pushUrl(options: RouterOptions, mode: RouterMode):Promise<void>
Callback方式:router.pushUrl(options: RouterOptions, , mode: RouterMode , callback:AsyncCallback<void> ):void
3、参数
| 参数名 | 类型 | 说明 |
|---|---|---|
| options | RouterOptions | 跳转页面描述信息。 |
| mode | RouterMode | 跳转页面使用的模式。 |
| callback | AsyncCallback<void> | 异常相应回调。 |
RouterOptions类说明:
| 名称 | 类型 | 必填 | 说明 |
|---|---|---|---|
| url | string | 是 | 表示目标页面的Url,可以使用一下两种格式: --页面绝对路径,由配置文件中pages列表提供,例如:“pages/index/index”等。 --特殊值,如果url的值是“/”,则跳转到首页。 |
| params | object | 否 | 表示路由调转时要同时传递到目标页面的数据,切换到其它页面时,当前接收的数据无效。跳转到目标页面后使用router.getParams()获取传递的参数,并且是自行构建object类型对象进行传递的。 |
RouterMode枚举类说明:
| 名称 | 说明 |
|---|---|
| Standard | 多实例模式,也是默认情况下的跳转模式。目标页面会被添加到页面栈顶,无论栈中是否存在相同的url的页面。 说明: 不使用路由跳转模式时,则按照默认的多实例模式进行跳转。 |
| Single | 单实例模式。如果目标页面的url已经存在于页面栈中,则该url页面移动到栈顶。如果目标页面的url不存在于页面栈中,则按照默认的多实例默认进行跳转。 |
4、示例
示例1-Promise(一个参数):
// 导入模块
import router from '@ohos.router';

@Entry
@Component
struct RouterPage {
  @State message: string = 'router.pushUrl-跳转到应用内的指定页面'

  build() {
    Row() {
      Column() {
        Text(this.message)
          .fontSize(20)
          .fontWeight(FontWeight.Bold)
          .width("96%")

        // router.pushUrl的回调方式有两种,一种的Promise、一种的callback
        Button("router.pushUrl").width("96%").fontSize(22).margin({ top: 12 }).onClick(() => {
          router.pushUrl({
            url: "pages/api/PushUrlSecondPage",
            params: {
              msg: "message RouterPage",
              coreEntity: {
                coreArray: [80, 36, 88]
              }
            }
          }).then(() => {
            console.info("router.pushUrl Promise success")
          })
            .catch((err) => {
              console.error(`router.pushUrl Promise failed, code is ${err.code}, message is ${err.message}`);
            })
        })

      }
      .width('100%')
      .height("100%")
    }
    .height('100%')
  }
}
示例1-callback(两个参数)
......
Button("router.pushUrl-callback").width("96%").fontSize(22).margin({ top: 12 }).onClick(() => {
          router.pushUrl({
            url: "pages/api/PushUrlSecondPage",
            params: {
              msg: "message RouterPage",
              coreEntity: {
                coreArray: [80, 36, 88]
              }
            }
          }, (error) => {
            if (error) {
              console.error(`router.pushUrl callback failed, code is ${error.code}, message is ${error.message}`);
            }
          });
        });
......
示例3-Promise(两个参数,增加跳转模式):
Button("router.pushUrl-RouterMode").width("96%").fontSize(22).margin({ top: 12 }).onClick(() => {
          router.pushUrl({
            url: "pages/api/PushUrlSecondPage",
            params: {
              msg: "message RouterPage",
              coreEntity: {
                coreArray: [80, 36, 88]
              }
            }
          }, router.RouterMode.Single)
        })
打印结果:

四、router.replaceUrl
1、描述
用应用内的某个页面替换当前页面,并销毁被替换的页面。(其实就是跳转时关闭当前页并打开新的页面,当再点击返回按钮时就会回到上上个页面了)
outer.replaceUrl这种方式的回调方式有两种,一种是Promise,另一种的callback。我们接下来已Promise回调方式为列。
2、接口
Promise方式:router.replaceUrl(options: RouterOptions):Promise<void>
Callback方式:router.replaceUrl(options: RouterOptions, callback: AsyncCallback<void> ):void
Promise方式:router.replaceUrl(options: RouterOptions, mode: RouterMode):Promise<void>
Callback方式:router.replaceUrl(options: RouterOptions, , mode: RouterMode , callback:AsyncCallback<void> ):void
3、参数
参数RouterOptions、RouterMode参数内容同上。
4、示例
        // 一个参数,只有替换页面描述信息
        Button("router.replaceUrl").width("96%").fontSize(22).margin({ top: 12 }).onClick(() => {
          router.replaceUrl({
            url: "pages/api/router/PushUrlSecondPage",
            params: {
              msg: "message RouterPage",
              coreEntity: {
                coreArray: [80, 36, 88]
              }
            }
          })
            .then(() => {
              console.info("router.replaceUrl Promise success")
            })
            .catch((err) => {
              console.error(`router.replaceUrl Promise failed, code is ${err.code}, message is ${err.message}`);
            })

        })

        // 两个参数,增加跳转模式
        Button("router.replaceUrl-RouterMode").width("96%").fontSize(22).margin({ top: 12 }).onClick(() => {
          router.replaceUrl({
            url: "pages/api/router/PushUrlSecondPage",
            params: {
              msg: "message RouterPage",
              coreEntity: {
                coreArray: [80, 36, 88]
              }
            }
          }, router.RouterMode.Standard)
        })
五、router.back
1、描述
返回上一页面或指定的页面。
2、接口
router.back(options?: RouterOptions): void
3、参数
参数RouterOptions、RouterMode参数内容同上。
4、示例
        // 返回上一个页面
        Button("router.back").margin({ top: 12 }).width("96%").onClick(() => {
          router.back()
        })

        // 跳转指定页面
        Button("router.back-url").margin({ top: 12 }).width("96%").onClick(() => {
          router.back({
            url: "pages/api/BaseApiPage"
          })
})说明:返回页面描述信息,其中参数url指路由跳转时会返回到指定url的界面,如果页面栈上没有url页面,则不响应该情况。如果url未设置,则返回上一页,页面不会重新构建,页面栈里面的page不会回收,出栈后会被回收。
六、其它路由接口
1、router.clear
clear(): void
清空页面栈中的所有历史页面,仅保留当前页面作为栈顶页面。
示例:
router.clear(); 2、router.getLength
getLength(): string
获取当前在页面栈内的页面数量。
返回值 - string - 页面数量,页面栈支持最大数量是32.
示例:
let size = router.getLength();
console.log('pages stack size = ' + size);
上述两个接口总体代码:
        // 获取当前在页面栈内的页面数量。
        Button("router.getLength").margin({ top: 12 }).fontSize(22).width("96%").onClick(() => {
          let size = router.getLength();
          console.log('zhangRouter router.getLength result size = ' + size);
        })

        //清空页面栈中的所有历史页面,仅保留当前页面作为栈顶页面。
        Button("router.clear").margin({ top: 12 }).fontSize(22).width("96%").onClick(() => {
          router.clear();
          console.log('zhangRouter onClick router.clear()');
        })
打印结果:

3、router.getState
getState(): RouterState
获取当前页面的状态信息。
返回值RouterState说明:
| 名称 | 类型 | 必填 | 说明 |
|---|---|---|---|
| index | number | 是 | 表示当前页面在页面栈中的索引。从栈底到栈顶,index从1开始递增。 |
| name | string | 否 | 表示当前页面的名称,即对应文件名。 |
| path | string | 是 | 表示当前页面的路径。 |
示例:
        // 获取当前页面的状态信息
        Button("router.getState").margin({ top: 12 }).fontSize(22).width("96%").onClick(() => {
          let rState = router.getState();
          console.log('zhangState current index = ' + rState.index);
          console.log('zhangState current name = ' + rState.name);
          console.log('zhangState current path = ' + rState.path);
        })
打印结果:

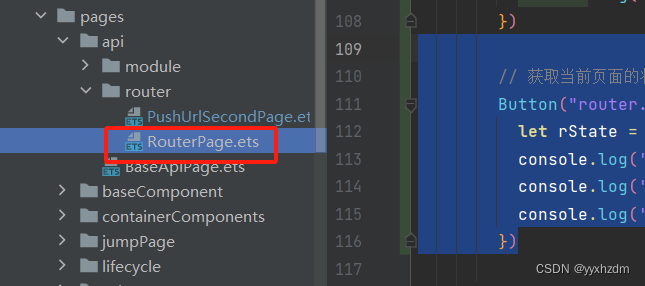
路径:
4、router.showAlertBeforeBackPage
showAlertBeforeBackPage(options: EnableAlertOptions): void
开启页面返回询问对话框。
参数:
| 参数名称 | 类型 | 必填 | 说明 |
| options | EnableAlertOptions | 是 | 文本弹窗信息描述。 |
EnableAlertOptions说明:
| 名称 | 类型 | 必填 | 说明 |
|---|---|---|---|
| message | string | 是 | 询问对话框内容。 |
示例:
  // 开启页面返回询问对话框
        Button("router.showAlertBeforeBackPage").margin({ top: 12 }).fontSize(22).width("96%").onClick(() => {
          router.showAlertBeforeBackPage({
            message: "Message Info"
          })
})说明:在该页面调用showAlertBeforeBackPage接口之后,在该页面返回时弹出一个提示框,提示框提示内容是“message”对应内容,并且还有两个按钮,一个“取消”,一个“确定”,点击取消还停留在该页面,点击确定,返回到上一页。(注意:这个功能点击后只有效一次)
5、router.hideAlertBeforeBackPage
hideAlertBeforeBackPage(): void
禁用页面返回询问对话框。
示例:
router.hideAlertBeforeBackPage(); 6、router.getParams
getParams(): Object
获取发起跳转的页面往当前页传入的参数。
返回值说明:
| 类型 | 说明 |
|---|---|
| object | 发起跳转的页面往当前页传入的参数。 |
示例:
第一个页面传数据:
 router.pushUrl({
            url: "pages/api/router/PushUrlSecondPage",
            params: {
              msg: "message RouterPage",
              coreEntity: {
                coreArray: [80, 36, 88]
              }
            }
第二个页面接受数据:
@State paramsMsg: string = router.getParams()["msg"];
@State coreEntity: object = router.getParams()["coreEntity"];
......
 Text(this.paramsMsg)
          .fontSize(20)
          .width("96%")
          .margin({ top: 12 })

Text("传递的coreArray第一条数据:" + this.coreEntity["coreArray"][0])
          .fontSize(20)
          .width("96%")
          .margin({ top: 12 })
至此,关于Router页面路由相关接口就全部讲解完了,如果有写错的地方或者有需要交流的地方,大家可以留言。

