一、下载JMeter安装包
Jmeter是Java开发的,需要依赖JDK环境,因此我们需提前安装好JDK。
Jmeter是开源的工具,我们直接到官网下载即可。
最新版本下载地址:Apache JMeter - Download Apache JMeter
二、安装JMeter
#新建jmeter文件夹
mkdir jmeter


#解压文件
tar -xzvf apache-jmeter-5.2.1.tgz
三、下载及安装easyNmon
github:https://github.com/mzky/easyNmon
#新建easyNmon文件夹
mkdir easyNmon


#解压文件
tar -zxvf easyNmon.tar.gz
解压完成后,打开文件夹easyNmon,通过如下命令启动:(选中自己合适方式)
./easyNmon  #前台启动,控制台断开服务停止
./easyNmon &  #后台启动,控制台断开服务同样停止
nohup ./easyNmon > easyNmon.log &  #后台启动,控制台断开服务仍正常运行

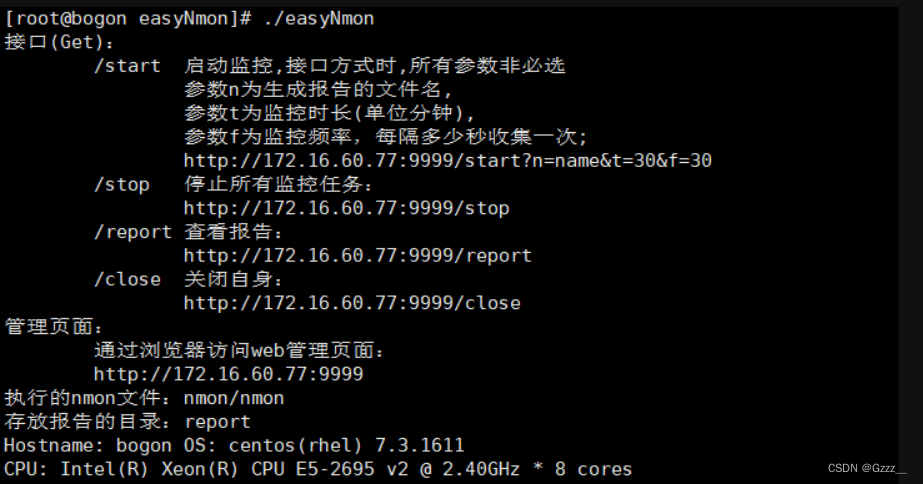
在easyNmon目录下,输入 ./easyNmon -h 查看相关信息
一般使用 ./easyNmon & 即可,默认端口为9999
四、jmx配置
<!--线程组-->
<ThreadGroup guiclass="ThreadGroupGui" testclass="ThreadGroup" testname="测试" enabled="true">
    <stringProp name="ThreadGroup.on_sample_error">continue</stringProp>
    <elementProp name="ThreadGroup.main_controller" elementType="LoopController" guiclass="LoopControlPanel" testclass="LoopController" testname="循环控制器" enabled="true">
        <boolProp name="LoopController.continue_forever">false</boolProp>
        <intProp name="LoopController.loops">-1</intProp>
    </elementProp>
    <stringProp name="ThreadGroup.num_threads">50</stringProp> <!--并发数-->
    <stringProp name="ThreadGroup.ramp_time">1</stringProp>    <!--1sec完成-->
    <boolProp name="ThreadGroup.scheduler">true</boolProp>     <!--调度器开关-->
    <stringProp name="ThreadGroup.duration">300</stringProp>   <!--持续时间,sec为单位-->
    <stringProp name="ThreadGroup.delay"></stringProp>         <!--启动延时,sec为单位-->
</ThreadGroup>
<!--http sample API-->
<HTTPSamplerProxy guiclass="HttpTestSampleGui" testclass="HTTPSamplerProxy" testname="HTTP请求" enabled="true">
  <boolProp name="HTTPSampler.postBodyRaw">true</boolProp>
  <elementProp name="HTTPsampler.Arguments" elementType="Arguments">
    <collectionProp name="Arguments.arguments">
      <elementProp name="" elementType="HTTPArgument">
        <boolProp name="HTTPArgument.always_encode">false</boolProp>
        <stringProp name="Argument.value">=</stringProp>
        <stringProp name="Argument.metadata">=</stringProp>
      </elementProp>
    </collectionProp>
  </elementProp>
  <stringProp name="HTTPSampler.domain">192.168.96.168</stringProp>    <!--服务器名称或者ip-->
  <stringProp name="HTTPSampler.port">80</stringProp>       <!--请求端口-->
  <stringProp name="HTTPSampler.protocol">http</stringProp>         <!--请求协议-->
  <stringProp name="HTTPSampler.contentEncoding">utf-8</stringProp>     <!--内容编码-->
  <stringProp name="HTTPSampler.path">web/ab.html</stringProp>      <!--请求路径-->
  <stringProp name="HTTPSampler.method">GET</stringProp>        <!--请求方法-->
  <boolProp name="HTTPSampler.follow_redirects">true</boolProp>     <!--跟随重定向开关-->
  <boolProp name="HTTPSampler.auto_redirects">false</boolProp>      <!--自动重定向开关-->
  <boolProp name="HTTPSampler.use_keepalive">true</boolProp>            <!--使用keepalive开关-->
  <boolProp name="HTTPSampler.DO_MULTIPART_POST">false</boolProp>       <!--使用多个/表单数据进行发布-->
  <stringProp name="HTTPSampler.embedded_url_re"></stringProp>
  <stringProp name="HTTPSampler.connect_timeout"></stringProp>    <!--连接超时-->
  <stringProp name="HTTPSampler.response_timeout"></stringProp>   <!--响应超时-->
</HTTPSamplerProxy>
<stringProp name="HTTPSampler.domain">192.168.1.1</stringProp>
<stringProp name="HTTPSampler.port">8080</stringProp>
<stringProp name="HTTPSampler.protocol">http</stringProp>
<stringProp name="HTTPSampler.contentEncoding">utf-8</stringProp>
<stringProp name="HTTPSampler.path">/api/v1/test</stringProp>
<stringProp name="HTTPSampler.method">POST</stringProp><!--easyNmon配置-->
<HTTPSamplerProxy guiclass="HttpTestSampleGui" testclass="HTTPSamplerProxy" testname="执行监控" enabled="true">
<elementProp name="HTTPsampler.Arguments" elementType="Arguments" guiclass="HTTPArgumentsPanel" testclass="Arguments" testname="用户定义的变量" enabled="true">
<collectionProp name="Arguments.arguments"/>
</elementProp>
<stringProp name="HTTPSampler.domain">192.168.227.198</stringProp> <!--easyNmon IP-->
<stringProp name="HTTPSampler.port">9999</stringProp> <!--easyNmon 端口-->
<stringProp name="HTTPSampler.protocol">http</stringProp>
<stringProp name="HTTPSampler.contentEncoding"></stringProp>
<stringProp name="HTTPSampler.path">/start?n=${__strReplace(${__TestPlanName},.jmx,-,)}&amp;t=10</stringProp>
<stringProp name="HTTPSampler.method">GET</stringProp>
<boolProp name="HTTPSampler.follow_redirects">true</boolProp>
<boolProp name="HTTPSampler.auto_redirects">false</boolProp>
<boolProp name="HTTPSampler.use_keepalive">true</boolProp>
<boolProp name="HTTPSampler.DO_MULTIPART_POST">false</boolProp>
<stringProp name="HTTPSampler.embedded_url_re"></stringProp>
<stringProp name="HTTPSampler.connect_timeout"></stringProp>
<stringProp name="HTTPSampler.response_timeout"></stringProp>
</HTTPSamplerProxy>五、运行
进入jmeter下的bin目录下运行脚本,未配置jmeter环境变量的条件下,运行的命令:
./jmeter -n -t a.jmx -l res.jtl其中a.jmx是准备好的jmeter脚本,res.jtl是测试结果文件。
六、查看easyNmon报告
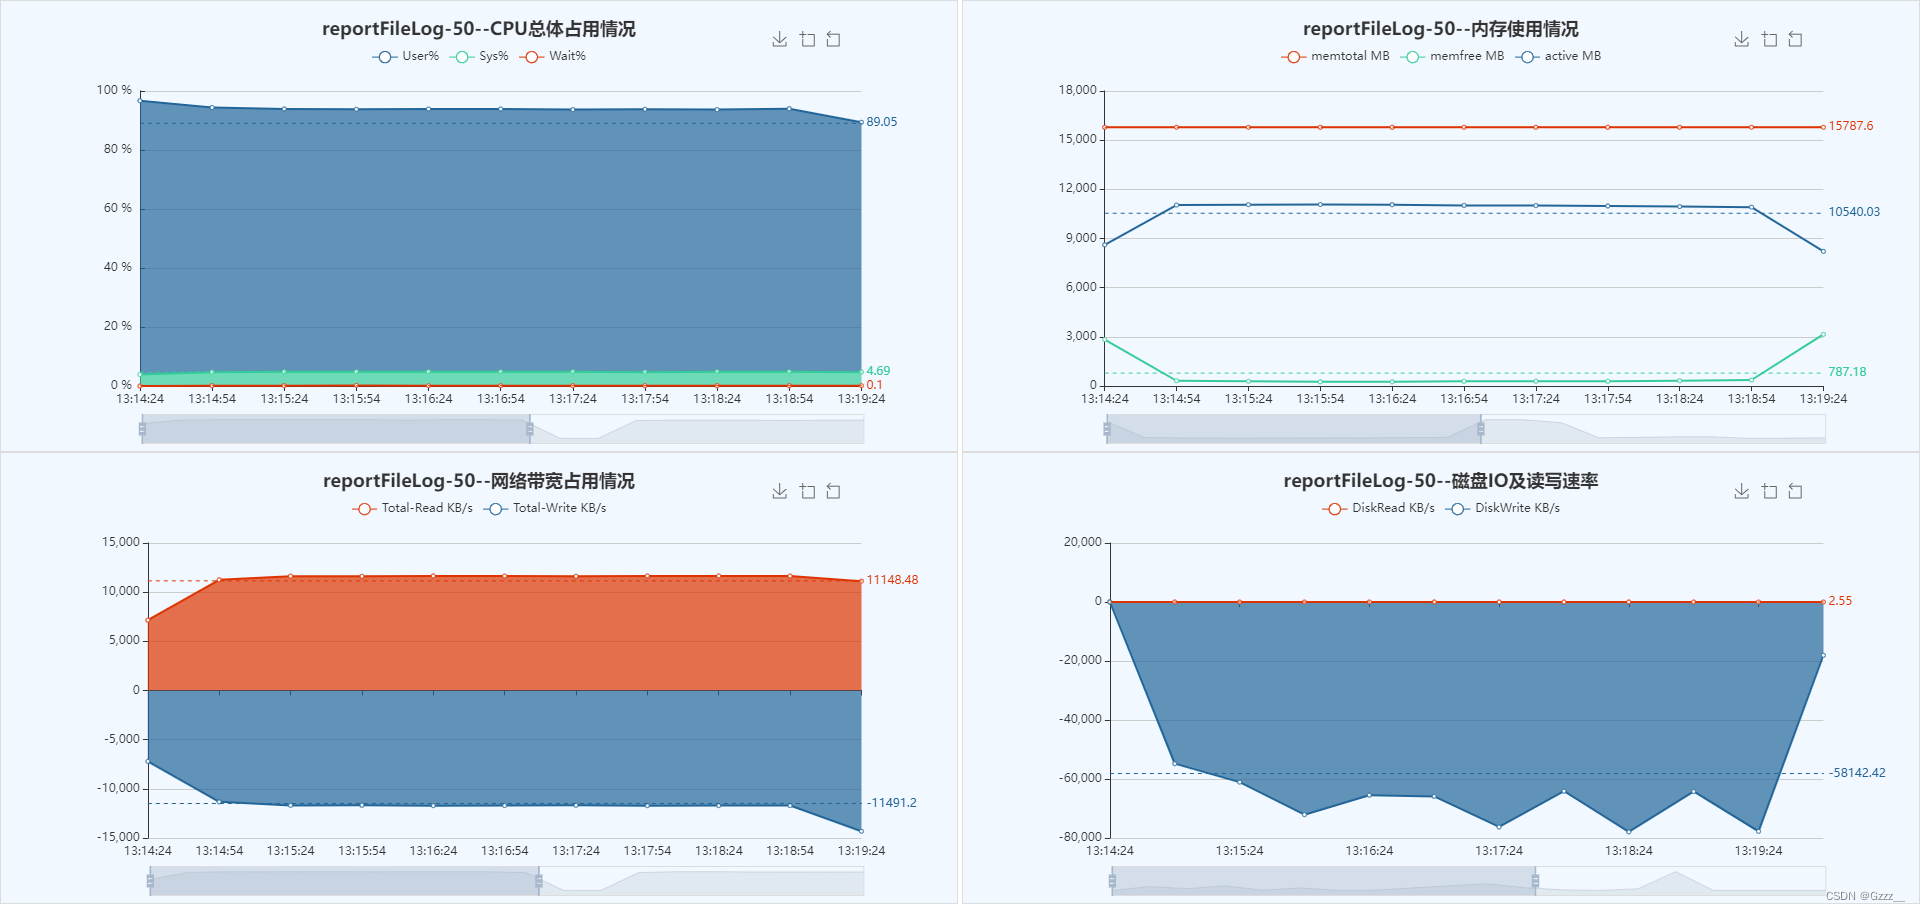
登录 http://{easyNmon部署地址}:9999/report/,查看报告。
