本文来源公众号“OpenCV与AI深度学习”,仅用于学术分享,侵权删,干货满满。
原文链接:实战 | 基于YOLOv9和OpenCV实现车辆跟踪计数(步骤 + 源码)
导 读
本文主要介绍使用YOLOv9和OpenCV实现车辆跟踪计数(步骤 + 源码)。
实现步骤
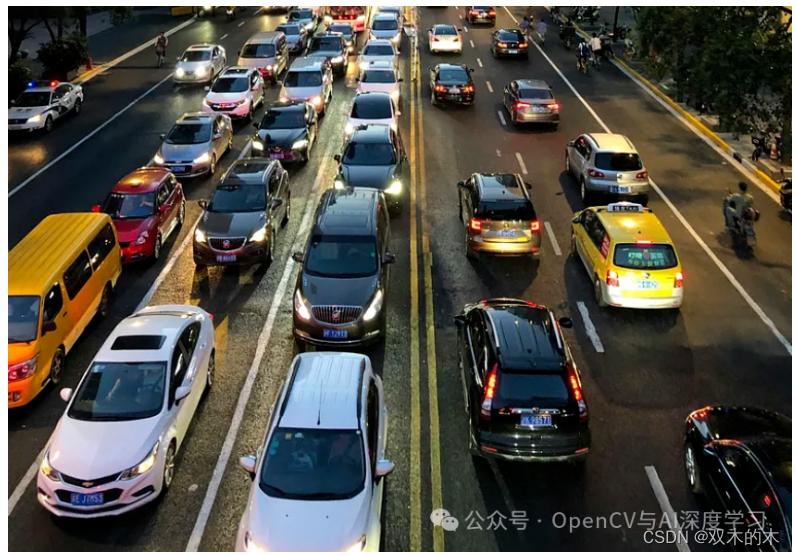
监控摄像头可以有效地用于各种场景下的车辆计数和交通流量统计。先进的计算机视觉技术(例如对象检测和跟踪)可应用于监控录像,以识别和跟踪车辆在摄像机视野中移动。
【1】安装ultralytics,因为它拥有直接使用 YoloV9 预训练模型的方法。
pip install ultralytics【2】完成后,就可以创建跟踪器函数来跟踪对象了。我们只是为此创建了一个名为tracker.py的python文件。
import math

class CustomTracker:
    def __init__(self):
        # Store the center positions of the objects
        self.custom_center_points = {}
        # Keep the count of the IDs
        # each time a new object id detected, the count will increase by one
        self.custom_id_count = 0

    def custom_update(self, custom_objects_rect):
        # Objects boxes and ids
        custom_objects_bbs_ids = []

        # Get center point of new object
        for custom_rect in custom_objects_rect:
            x, y, w, h = custom_rect
            cx = (x + x + w) // 2
            cy = (y + y + h) // 2

            # Find out if that object was detected already
            same_object_detected = False
            for custom_id, pt in self.custom_center_points.items():
                dist = math.hypot(cx - pt[0], cy - pt[1])

                if dist < 35:
                    self.custom_center_points[custom_id] = (cx, cy)
                    custom_objects_bbs_ids.append([x, y, w, h, custom_id])
                    same_object_detected = True
                    break

            # New object is detected we assign the ID to that object
            if same_object_detected is False:
                self.custom_center_points[self.custom_id_count] = (cx, cy)
                custom_objects_bbs_ids.append([x, y, w, h, self.custom_id_count])
                self.custom_id_count += 1

        # Clean the dictionary by center points to remove IDS not used anymore
        new_custom_center_points = {}
        for custom_obj_bb_id in custom_objects_bbs_ids:
            _, _, _, _, custom_object_id = custom_obj_bb_id
            center = self.custom_center_points[custom_object_id]
            new_custom_center_points[custom_object_id] = center

        # Update dictionary with IDs not used removed
        self.custom_center_points = new_custom_center_points.copy()
        return custom_objects_bbs_ids
【3】编写车辆计数的主要代码。
# Import the Libraries
import cv2
import pandas as pd
from ultralytics import YOLO
from tracker import *
导入所有必要的库后,就可以导入模型了。我们不必从任何存储库下载模型。Ultralytics 做得非常出色,让我们可以更轻松地直接下载它们。
model=YOLO('yolov9c.pt')这会将 yolov9c.pt 模型下载到当前目录中。该模型已经在由 80 个不同类别组成的 COCO 数据集上进行了训练。现在让我们指定类:
class_list = ['person', 'bicycle', 'car', 'motorcycle', 'airplane', 'bus', 'train', 'truck', 'boat', 'traffic light', 'fire hydrant', 'stop sign', 'parking meter', 'bench', 'bird', 'cat', 'dog', 'horse', 'sheep', 'cow', 'elephant', 'bear', 'zebra', 'giraffe', 'backpack', 'umbrella', 'handbag', 'tie', 'suitcase', 'frisbee', 'skis', 'snowboard', 'sports ball', 'kite', 'baseball bat', 'baseball glove', 'skateboard', 'surfboard', 'tennis racket', 'bottle', 'wine glass', 'cup', 'fork', 'knife', 'spoon', 'bowl', 'banana', 'apple', 'sandwich', 'orange', 'broccoli', 'carrot', 'hot dog', 'pizza', 'donut', 'cake', 'chair', 'couch', 'potted plant', 'bed', 'dining table', 'toilet', 'tv', 'laptop', 'mouse', 'remote', 'keyboard', 'cell phone', 'microwave', 'oven', 'toaster', 'sink', 'refrigerator', 'book', 'clock', 'vase', 'scissors', 'teddy bear', 'hair drier', 'toothbrush']现在,下一步是加载您要使用的视频。
tracker=CustomTracker()
count=0

cap = cv2.VideoCapture('traffictrim.mp4')

# Get video properties
fps = int(cap.get(cv2.CAP_PROP_FPS))
width = int(cap.get(cv2.CAP_PROP_FRAME_WIDTH))
height = int(cap.get(cv2.CAP_PROP_FRAME_HEIGHT))

# Create VideoWriter object to save the modified frames
output_video_path = 'output_video.mp4'
fourcc = cv2.VideoWriter_fourcc(*'mp4v')  # You can use other codecs like 'XVID' based on your system
out = cv2.VideoWriter(output_video_path, fourcc, fps, (width, height))
在这里,我们在加载视频后获取视频属性,因为它们对于使用计数器重新创建视频并最终将其存储在本地非常有用。
# Looping over each frame and Performing the Detection

down = {}
counter_down = set()
while True:
    ret, frame = cap.read()
    if not ret:
        break
    count += 1

    results = model.predict(frame)

    a = results[0].boxes.data
    a = a.detach().cpu().numpy()
    px = pd.DataFrame(a).astype("float")
    # print(px)

    list = []

    for index, row in px.iterrows():
        #        print(row)
        x1 = int(row[0])
        y1 = int(row[1])
        x2 = int(row[2])
        y2 = int(row[3])
        d = int(row[5])
        c = class_list[d]
        if 'car' in c:
            list.append([x1, y1, x2, y2])

    bbox_id = tracker.custom_update(list)
    # print(bbox_id)
    for bbox in bbox_id:
        x3, y3, x4, y4, id = bbox
        cx = int(x3 + x4) // 2
        cy = int(y3 + y4) // 2
        # cv2.circle(frame,(cx,cy),4,(0,0,255),-1) #draw ceter points of bounding box
        # cv2.rectangle(frame, (x3, y3), (x4, y4), (0, 255, 0), 2)  # Draw bounding box
        # cv2.putText(frame,str(id),(cx,cy),cv2.FONT_HERSHEY_COMPLEX,0.8,(0,255,255),2)

        y = 308
        offset = 7

        ''' condition for red line '''
        if y < (cy + offset) and y > (cy - offset):
            ''' this if condition is putting the id and the circle on the object when the center of the object touched the red line.'''

            down[id] = cy  # cy is current position. saving the ids of the cars which are touching the red line first.
            # This will tell us the travelling direction of the car.
            if id in down:
                cv2.circle(frame, (cx, cy), 4, (0, 0, 255), -1)
                #cv2.putText(frame, str(id), (cx, cy), cv2.FONT_HERSHEY_COMPLEX, 0.8, (0, 255, 255), 2)
                counter_down.add(id)

                # # line
    text_color = (255, 255, 255)  # white color for text
    red_color = (0, 0, 255)  # (B, G, R)

    # print(down)
    cv2.line(frame, (282, 308), (1004, 308), red_color, 3)  # starting cordinates and end of line cordinates
    cv2.putText(frame, ('red line'), (280, 308), cv2.FONT_HERSHEY_SIMPLEX, 0.5, text_color, 1, cv2.LINE_AA)


    downwards = (len(counter_down))
    cv2.putText(frame, ('Vehicle Counter - ') + str(downwards), (60, 40), cv2.FONT_HERSHEY_SIMPLEX, 0.5, red_color, 1,
                cv2.LINE_AA)

    cv2.line(frame,(282,308),(1004,308),red_color,3)  #  starting cordinates and end of line cordinates
    cv2.putText(frame,('red line'),(280,308),cv2.FONT_HERSHEY_SIMPLEX, 0.5, text_color, 1, cv2.LINE_AA)

    # This will write the Output Video to the location specified above
    out.write(frame)
在上面的代码中,我们循环遍历视频中的每个帧,然后进行检测。然后,由于我们仅对车辆进行计数,因此仅过滤掉汽车的检测结果。
之后,我们找到检测到的车辆的中心,然后在它们穿过人工创建的红线时对它们进行计数。我们可以在下面的视频快照中清楚地看到它们。
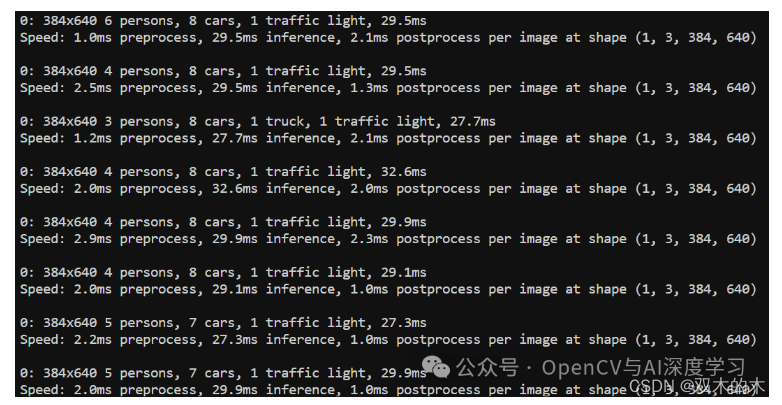
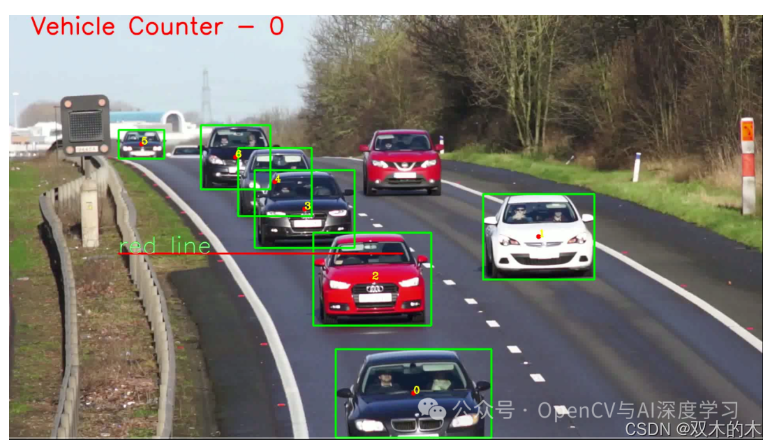
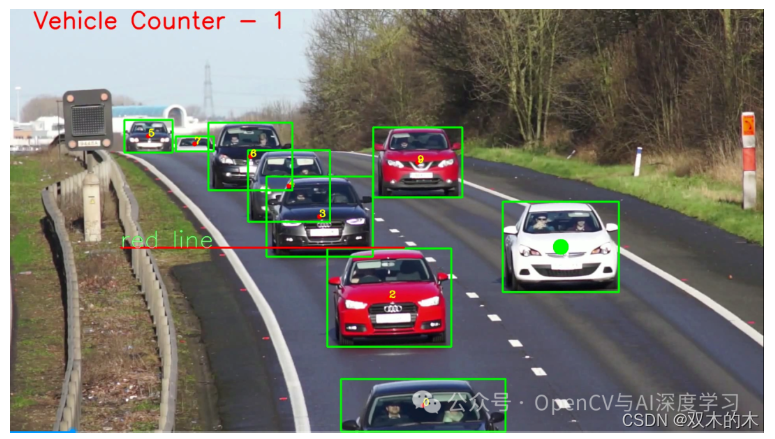


我们可以看到,当车辆越过红线时,视频左上角的计数器不断增加。
THE END!
文章结束,感谢阅读。您的点赞,收藏,评论是我继续更新的动力。大家有推荐的公众号可以评论区留言,共同学习,一起进步。

