【嵌入式——QT】QPainter基本绘图
- QPainter与QPaintDevice
- paintEvent事件和绘图区
- QPainter主要属性
- QPen主要功能
- QBrush主要功能
- QPainter绘制基本图形方法
- 图示
- 代码示例
QPainter与QPaintDevice
QPainter是用来进行绘图操作的类,QPaintDevice是一个可以使用QPainter进行绘图的抽象的二维界面,QPaintEngine给QPainter提供在不同设备上绘图的接口,QPaintEngine类由QPainter和QPaintDevice内部使用,应用程序一般无需和QPaintEngine打交道,除非要创建自己的设备类型。
paintEvent事件和绘图区
QWidget类及其子类是最常用的绘图设备,从QWidget类继承的类都有paintEvent事件,要在设备上绘图,只需重定义此事件并编写相应代码。
QPainter主要属性
- pen属性:是一个QPen对象,用于控制线条的颜色、宽度、线型等;
- brush属性:是一个QBrush对象,用于设置一个区域的填充特性,可以设置填充颜色、填充方式、渐变特性;
- font属性:是一个QFont对象,用于绘制文字时,设置文字的字体样式、大小等属性;
QPen主要功能
- setColor(const QColor &color):设置画笔颜色,即线条颜色;
- setWidth(int width):设置线条宽度;
- setStyle(Qt::PenStyle style):设置线条样式;
- setCapStyle(Qt::PenCapStyle style):设置线条端点样式;
- setJoinStyle(Qt::PenJoinStyle style):设置连接方式;
QBrush主要功能
- setColor(const QColor &color):设置画刷颜色;
- setStyle(Qt::BrushStyle style):设置画刷样式;
- setTexture(const QPixmap &pixmap):设置一个QPixmap类型的图片作为画刷的图片;
- setTextureImage(const QImage &image):设置一个QImage类型的图片作为画刷的图片;
QPainter绘制基本图形方法
- drawArc():画弧线;
- drawChord():画一段弦;
- drawConvexPolygon():画凸多边形;
- drawEllipse:画椭圆;
- drawImage():绘制图片;
- drawLine(const QLineF &line):画直线;
- drawLines(const QLineF *lines, int lineCount):画一批直线;
- drawPath(const QPainterPath &path):绘制由QPainterPath对象定义的路线;
- drawPie(const QRectF &rectangle, int startAngle, int spanAngle):绘制扇形;
- drawPixmap(int x, int y, const QPixmap &pixmap):绘制QPixmap类型图片;
- drawPoint(int x, int y):绘制一个点;
- drawPoints:绘制一批点;
- drawPolygon:绘制多边形,最后一个点和第一个点闭合;
- drawPolyline:绘制多点连接的线,最后一个点不会和第一个点连接;
- drawRect(int x, int y, int width, int height):画矩形;
- drawRoundedRect:绘制圆角矩形;
- drawText(int x, int y, const QString &text):绘制文本,只能绘制单行文字;
- fillRect(int x, int y, int width, int height, const QBrush &brush):填充一个矩形,无边框线;
- eraseRect:擦除某个矩形区域;
- fillPath:填充某个QPainterPath定义的绘图路径 但是轮廓线不显示;
- fillRect:填充一个矩形,无边框线;
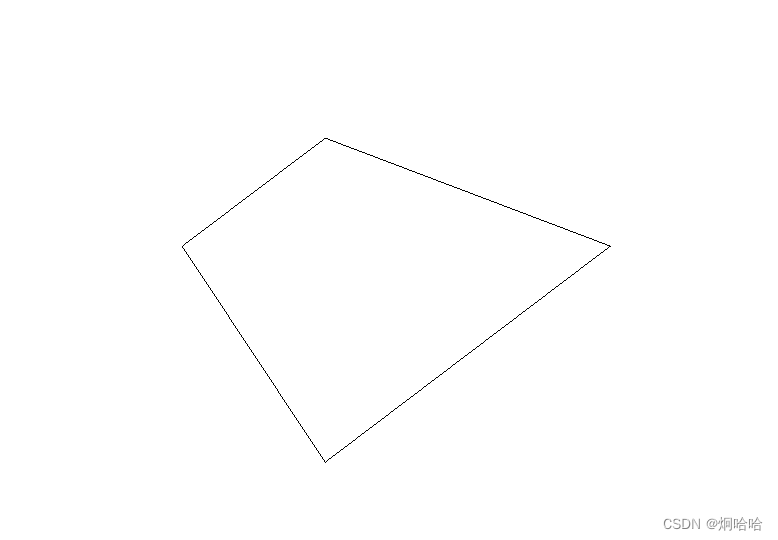
图示
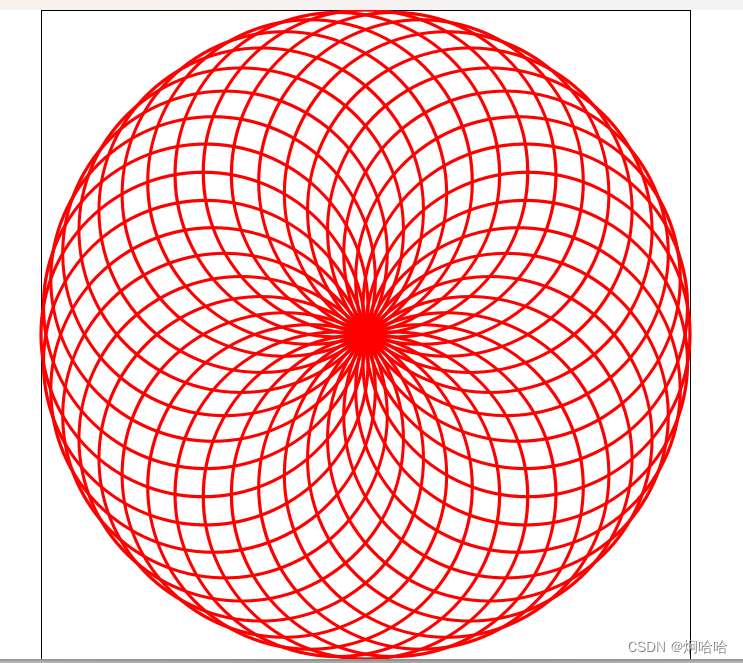
随便截了两张图片,代码中均有实现,不一一列举图片了。
代码示例
QPainterForm.h
#ifndef QPAINTERFORM_H
#define QPAINTERFORM_H

#include <QWidget>

namespace Ui
{
    class QPainterForm;
}

class QPainterForm : public QWidget
{
    Q_OBJECT

public:
    explicit QPainterForm(QWidget* parent = nullptr);
    ~QPainterForm();

    void paintEvent(QPaintEvent* event) Q_DECL_OVERRIDE;


    void drawArcDemo();
    void drawChordDemo();
    void drawConvexPolygonDemo();
    void drawEllipseDemo();
    void drawImageDemo();
    void drawLineDemo();
    void drawLinesDemo();
    void drawPathDemo();
    void drawPieDemo();
    void drawPixmapDemo();
    void drawPointDemo();
    void drawPointsDemo();
    void drawPolygonDemo();
    void drawPolylineDemo();
    void drawRectDemo();
    void drawRoundedRectDemo();
    void dratTextDemo();
    void eraseRectDemo();
    void fillPathDemo();
    void fillRectDemo();

    void fivePointedStar();

    void viewPortAndWindow();


private:
    Ui::QPainterForm* ui;
};

#endif // QPAINTERFORM_H
QPainterForm.cpp
#include "QPainterForm.h"
#include "ui_QPainterForm.h"
#include <QPainter>
QPainterForm::QPainterForm(QWidget* parent)
    : QWidget(parent)
    , ui(new Ui::QPainterForm)
{
    ui->setupUi(this);
    //设置窗口背景为白色
    setPalette(QPalette(Qt::white));
    setAutoFillBackground(true);
}

QPainterForm::~QPainterForm()
{
    delete ui;
}

void QPainterForm::paintEvent(QPaintEvent* event)
{
    QPainter painter(this);
    painter.setRenderHint(QPainter::Antialiasing);
    painter.setRenderHint(QPainter::TextAntialiasing);
    //宽
    int w = this->width();
    //高
    int h = this->height();
    #if 0
    //中间区域矩形块
    QRect rect(w/4, h/4, w/2, h/2);
    //画笔
    QPen pen;
    pen.setWidth(3);//线宽
    pen.setColor(Qt::red);//线条红色
    pen.setStyle(Qt::DashLine);//线的样式,实线、虚线
    pen.setCapStyle(Qt::FlatCap);//线的断点样式
    pen.setJoinStyle(Qt::BevelJoin);//线的连接点样式
    painter.setPen(pen);
    //画刷
    QBrush brush;
    brush.setColor(Qt::yellow);//画刷颜色
    //Qt::BrushStyle
    brush.setStyle(Qt::CrossPattern);//画刷填充样式
    painter.setBrush(brush);
    //绘图
    painter.drawRect(rect);
    #endif
    #if 0
    QPainter painter2(this);
    /**
    QRadialGradient(qreal cx, qreal cy, qreal radius, qreal fx, qreal fy);
    cx xy 辐射填充的中心点,radius 是辐射填充区的半径,fx fy是焦点坐标
    **/
    QRadialGradient radialGrad(w/2, h/2, qMax(w/8, h/8), w/2, h/2);
    //0表示起点
    radialGrad.setColorAt(0, Qt::green);
    //1表示终点
    radialGrad.setColorAt(1, Qt::blue);
    radialGrad.setSpread(QGradient::ReflectSpread);
    painter2.setBrush(radialGrad);
    painter2.drawRect(this->rect());
    #endif
    // drawArcDemo();
    // drawChordDemo();
    // drawConvexPolygonDemo();
    // drawEllipseDemo();
    // drawImageDemo();
    // drawLineDemo();
    // drawLinesDemo();
    // drawPathDemo();
    // drawPieDemo();
    // drawPixmapDemo();
    // drawPointDemo();
    // drawPointsDemo();
    // drawPolygonDemo();
    // drawPolylineDemo();
    // drawRectDemo();
    // drawRoundedRectDemo();
    // dratTextDemo();
    // eraseRectDemo();
    // fillPathDemo();
    // fillRectDemo();
    // fivePointedStar();
    viewPortAndWindow();
}

void QPainterForm::drawArcDemo()
{
    //宽
    int w = this->width();
    //高
    int h = this->height();
    QRect rect(w/4, h/4, w/2, h/2);
    int startAngle = 90 * 16;
    int spanAngle = 90*16;
    QPainter painter(this);
    //画弧线
    painter.drawArc(rect, startAngle, spanAngle);
}

void QPainterForm::drawChordDemo()
{
    //宽
    int w = this->width();
    //高
    int h = this->height();
    QRect rect(w/4, h/4, w/2, h/2);
    int startAngle = 90 * 16;
    int spanAngle = 90*16;
    QPainter painter(this);
    //画一段弦
    painter.drawChord(rect, startAngle, spanAngle);
}

void QPainterForm::drawConvexPolygonDemo()
{
    //宽
    int w = this->width();
    //高
    int h = this->height();
    QPoint points[4] = {QPoint(5*w/12, h/4), QPoint(3*w/4, 5*h/12), QPoint(5*w/12, 3*h/4), QPoint(w/4, 5*h/12)};
    QPainter painter(this);
    //根据给定的点画凸多边形
    painter.drawConvexPolygon(points, 4);
}

void QPainterForm::drawEllipseDemo()
{
    //宽
    int w = this->width();
    //高
    int h = this->height();
    QRect rect(w/4, h/4, w/2, h/2);
    QPainter painter(this);
    //画椭圆
    painter.drawEllipse(rect);
}

void QPainterForm::drawImageDemo()
{
    //宽
    int w = this->width();
    //高
    int h = this->height();
    QRect rect(w/4, h/4, w/2, h/2);
    QImage image("图片地址");
    QPainter painter(this);
    //在指定区域内绘制图片
    painter.drawImage(rect, image);
}

void QPainterForm::drawLineDemo()
{
    //宽
    int w = this->width();
    //高
    int h = this->height();
    QLine line(w/4, h/4, w/2, h/2);
    QPainter painter(this);
    //画直线
    painter.drawLine(line);
}

void QPainterForm::drawLinesDemo()
{
    //宽
    int w = this->width();
    //高
    int h = this->height();
    QRect rect(w/4, h/4, w/2, h/2);
    QVector<QLine> lines;
    lines.append(QLine(rect.topLeft(), rect.bottomRight()));
    lines.append(QLine(rect.topRight(), rect.bottomLeft()));
    lines.append(QLine(rect.topLeft(), rect.bottomLeft()));
    lines.append(QLine(rect.topRight(), rect.bottomRight()));
    QPainter painter(this);
    //画一批直线
    painter.drawLines(lines);
}

void QPainterForm::drawPathDemo()
{
    //宽
    int w = this->width();
    //高
    int h = this->height();
    QRect rect(w/4, h/4, w/2, h/2);
    QPainterPath path;
    path.addEllipse(rect);
    path.addRect(rect);
    QPainter painter(this);
    //绘制由QPainterPath定义的路线
    painter.drawPath(path);
}

void QPainterForm::drawPieDemo()
{
    //宽
    int w = this->width();
    //高
    int h = this->height();
    QRect rect(w/4, h/4, w/2, h/2);
    int startAngle = 40*16;
    int spanAngle = 120*16;
    QPainter painter(this);
    //绘制扇形
    painter.drawPie(rect, startAngle, spanAngle);
}

void QPainterForm::drawPixmapDemo()
{
    //宽
    int w = this->width();
    //高
    int h = this->height();
    QRect rect(w/4, h/4, w/2, h/2);
    QPixmap pixmap("图片地址");
    QPainter painter(this);
    //绘制QPixmap类型的图片
    painter.drawPixmap(rect, pixmap);
}

void QPainterForm::drawPointDemo()
{
    //宽
    int w = this->width();
    //高
    int h = this->height();
    QPainter painter(this);
    //绘制一个点
    painter.drawPoint(QPoint(w/2, h/2));
}

void QPainterForm::drawPointsDemo()
{
    //宽
    int w = this->width();
    //高
    int h = this->height();
    QPoint points[] = {QPoint(5*w/12, h/4), QPoint(3*w/4, 5*h/12), QPoint(2*w/4, 5*h/12)};
    QPainter painter(this);
    //绘制一批点
    painter.drawPoints(points, 3);
}

void QPainterForm::drawPolygonDemo()
{
    //宽
    int w = this->width();
    //高
    int h = this->height();
    QPoint points[] = {QPoint(5*w/12, h/4), QPoint(3*w/4, 5*h/12), QPoint(5*w/12, 3*h/4), QPoint(2*w/4, 5*h/12)};
    QPainter painter(this);
    //绘制多边形,最后一个点和第一个点闭合
    painter.drawPolygon(points, 4);
}

void QPainterForm::drawPolylineDemo()
{
    //宽
    int w = this->width();
    //高
    int h = this->height();
    QPoint points[] = {QPoint(5*w/12, h/4), QPoint(3*w/4, 5*h/12), QPoint(5*w/12, 3*h/4), QPoint(2*w/4, 5*h/12)};
    QPainter painter(this);
    //绘制多点连接的线,最后一个点不会和第一个点连接
    painter.drawPolyline(points, 4);
}

void QPainterForm::drawRectDemo()
{
    //宽
    int w = this->width();
    //高
    int h = this->height();
    QRect rect(w/4, h/4, w/2, h/2);
    QPainter painter(this);
    //绘制矩形
    painter.drawRect(rect);
}

void QPainterForm::drawRoundedRectDemo()
{
    //宽
    int w = this->width();
    //高
    int h = this->height();
    QRect rect(w/4, h/4, w/2, h/2);
    QPainter painter(this);
    //绘制圆角矩形
    painter.drawRoundedRect(rect, 20, 20);
}

void QPainterForm::dratTextDemo()
{
    //宽
    int w = this->width();
    //高
    int h = this->height();
    QRect rect(w/4, h/4, w/2, h/2);
    QFont font;
    font.setPointSize(30);
    font.setBold(true);
    QPainter painter(this);
    painter.setFont(font);
    //绘制文本
    painter.drawText(rect, "Hello Qt");
}

void QPainterForm::eraseRectDemo()
{
    //宽
    int w = this->width();
    //高
    int h = this->height();
    QRect rect(w/4, h/4, w/2, h/2);
    QPainter painter(this);
    //擦除某个矩形区域
    painter.eraseRect(rect);
}

void QPainterForm::fillPathDemo()
{
    //宽
    int w = this->width();
    //高
    int h = this->height();
    QRect rect(w/4, h/4, w/2, h/2);
    QPainterPath path;
    path.addEllipse(rect);
    path.addRect(rect);
    QPainter painter(this);
    //填充某个QPainterPath定义的绘图路径 但是轮廓线不显示
    painter.fillPath(path, Qt::red);
}

void QPainterForm::fillRectDemo()
{
    //宽
    int w = this->width();
    //高
    int h = this->height();
    QRect rect(w/4, h/4, w/2, h/2);
    QPainter painter(this);
    //填充一个矩形,无边框线
    painter.fillRect(rect, Qt::green);
}
//坐标变换 五角星
void QPainterForm::fivePointedStar()
{
    QPainter painter(this);
    painter.setRenderHint(QPainter::Antialiasing);
    painter.setRenderHint(QPainter::TextAntialiasing);
    qreal r = 100;
    const qreal pi = 3.14159;
    qreal deg = pi*72/180;
    QPoint points[5]= {
        QPoint(r, 0),
        QPoint(r*std::cos(deg), -r*std::sin(deg)),
        QPoint(r*std::cos(2*deg), -r*std::sin(2*deg)),
        QPoint(r*std::cos(3*deg), -r*std::sin(3*deg)),
        QPoint(r*std::cos(4*deg), -r*std::sin(4*deg))
    };
    //设置字体
    QFont font;
    font.setPointSize(12);
    font.setBold(true);
    painter.setFont(font);
    //设置画笔
    QPen penLine;
    penLine.setWidth(2);//线宽
    penLine.setColor(Qt::blue); //线颜色
    penLine.setStyle(Qt::SolidLine); //线的类型
    penLine.setCapStyle(Qt::FlatCap);//线端点样式
    penLine.setJoinStyle(Qt::BevelJoin);//线连接点样式
    painter.setPen(penLine);
    //设置画刷
    QBrush brush;
    brush.setColor(Qt::yellow);
    brush.setStyle(Qt::SolidPattern);
    painter.setBrush(brush);
    QPainterPath starPath;
    starPath.moveTo(points[0]);
    starPath.lineTo(points[2]);
    starPath.lineTo(points[4]);
    starPath.lineTo(points[1]);
    starPath.lineTo(points[3]);
    starPath.closeSubpath();//闭合路径,最后一个点与第一个点相连
    starPath.addText(points[0], font, "0");
    starPath.addText(points[1], font, "1");
    starPath.addText(points[2], font, "2");
    starPath.addText(points[3], font, "3");
    starPath.addText(points[4], font, "4");
    //绘图
    painter.save();//保存坐标状态
    painter.translate(100, 120); //平移
    painter.drawPath(starPath);//画星星
    painter.drawText(0, 0, "S1");
    painter.restore();//恢复坐标状态
    painter.translate(300, 120); //平移
    painter.scale(0.8, 0.8); //缩放
    painter.rotate(90);//顺时针旋转90度
    painter.drawPath(starPath);
    painter.drawText(0, 0, "S2");
    painter.resetTransform();//复位所有坐标变换
    painter.translate(500, 120); //平移
    painter.rotate(-145);//逆时针旋转145度
    painter.drawPath(starPath);
    painter.drawText(0, 0, "S3");
}

//视口 窗口
void QPainterForm::viewPortAndWindow()
{
    QPainter painter(this);
    //宽
    int w = this->width();
    //高
    int h = this->height();
    int side =qMin(w, h);
    QRect rect((w-side)/2, (h-side)/2, side, side);
    painter.drawRect(rect);
    painter.setViewport(rect);//设置viewport 图案就在这个矩形框之内
    painter.setWindow(-100, -100, 200, 200);
    painter.setRenderHint(QPainter::Antialiasing);
    QPen pen;
    pen.setWidth(1);
    pen.setColor(Qt::red);
    pen.setStyle(Qt::SolidLine);
    painter.setPen(pen);
    for(int i=0; i<36; i++) {
        //画椭圆
        painter.drawEllipse(QPoint(50, 0), 50, 50);
        //顺时针旋转10度
        painter.rotate(10);
    }
}

