1.什么是广播

2.标准广播
BroadStandardActivity.java
package com.tiger.chapter09;

import androidx.appcompat.app.AppCompatActivity;

import android.content.Intent;
import android.content.IntentFilter;
import android.os.Bundle;
import android.view.View;

import com.tiger.chapter09.receiver.StandardReceiver;

public class BroadStandardActivity extends AppCompatActivity implements View.OnClickListener {

    private StandardReceiver standardReceiver;

    @Override
    protected void onCreate(Bundle savedInstanceState) {
        super.onCreate(savedInstanceState);
        setContentView(R.layout.activity_broad_standard);
        findViewById(R.id.btn_send_standard).setOnClickListener(this);
    }

    @Override
    public void onClick(View v) {
        //发送标准广播  相当于主题
        Intent intent = new Intent(StandardReceiver.STRING);


        sendBroadcast(intent);
    }


    @Override
    protected void onStart() {
        super.onStart();
        standardReceiver = new StandardReceiver();
        //代表上下文 注册 广播接收者  相当于订阅
        IntentFilter intentFilter = new IntentFilter(StandardReceiver.STRING);
        //注册接收器,注册之后才能正常接收广播
        registerReceiver(standardReceiver,intentFilter);
    }

    @Override
    protected void onStop() {
        super.onStop();
        //在Activity不用的时候就不需要 广播订阅了,先注销接收者
        unregisterReceiver(standardReceiver);


    }
}
xml
<LinearLayout xmlns:android="http://schemas.android.com/apk/res/android"
    android:layout_width="match_parent"
    android:layout_height="match_parent"
    android:orientation="vertical"
    android:padding="5dp">

    <Button
        android:id="@+id/btn_send_standard"
        android:layout_width="match_parent"
        android:layout_height="wrap_content"
        android:gravity="center"
        android:text="发送标准广播"
        android:textColor="@color/black"
        android:textSize="17sp" />

</LinearLayout>
receiver
package com.tiger.chapter09.receiver;

import android.content.BroadcastReceiver;
import android.content.Context;
import android.content.Intent;
import android.util.Log;

//定义一个标准广播的接收器
public class StandardReceiver extends BroadcastReceiver {

    public static final String STRING ="com.tiger.chapter09.standard";
    //一旦接收到标准广播,马上触发接收器的onReceive方法
    @Override
    public void onReceive(Context context, Intent intent) {
        //先当于订阅主题
        if (intent!=null&&intent.getAction().equals(STRING)){
            Log.d("ning","收到了标准广播");
        }
    }
}
3.有序广播

BroadOrderActivity.java
package com.tiger.chapter09;

import androidx.appcompat.app.AppCompatActivity;

import android.content.Intent;
import android.content.IntentFilter;
import android.os.Bundle;
import android.view.View;

import com.tiger.chapter09.receiver.OrderAReceiver;
import com.tiger.chapter09.receiver.OrderBReceiver;

public class BroadOrderActivity extends AppCompatActivity implements View.OnClickListener {

    public static final String ORDER_ACTION = "com.tiger.chapter09.order";
    private OrderAReceiver orderAReceiver;
    private OrderBReceiver orderBReceiver;

    @Override
    protected void onCreate(Bundle savedInstanceState) {
        super.onCreate(savedInstanceState);
        setContentView(R.layout.activity_broad_order);
        findViewById(R.id.btn_send_order).setOnClickListener(this);

    }

    @Override
    public void onClick(View v) {
        //创建一个指定动作的意图
        Intent intent  =new Intent(ORDER_ACTION);
        //发送有序广播
        sendOrderedBroadcast(intent,null);
    }

    @Override
    protected void onStart() {
        super.onStart();
        //多个接收器处理有序广播的顺序规则为:
        //1.优先级越大的2接收器,越早收到有序广播
        //2.优先级相同的时候,越早注册的接收器越早收到有序广播
        orderAReceiver = new OrderAReceiver();
        IntentFilter filterA = new IntentFilter(ORDER_ACTION);
        filterA.setPriority(8);
        registerReceiver(orderAReceiver,filterA);

        orderBReceiver = new OrderBReceiver();
        IntentFilter filterB = new IntentFilter(ORDER_ACTION);
        filterB.setPriority(10);
        registerReceiver(orderBReceiver,filterB);


    }

    @Override
    protected void onStop() {
        super.onStop();
        unregisterReceiver(orderAReceiver);
        unregisterReceiver(orderBReceiver);
    }
}
AOrder
package com.tiger.chapter09.receiver;

import android.content.BroadcastReceiver;
import android.content.Context;
import android.content.Intent;
import android.util.Log;

import com.tiger.chapter09.BroadOrderActivity;

public class OrderAReceiver extends BroadcastReceiver {
    @Override
    public void onReceive(Context context, Intent intent) {
        if (intent!=null&&intent.getAction().equals(BroadOrderActivity.ORDER_ACTION)){
            Log.d("ning","接收器A 收到了有序广播");
        }


    }
}
BOrder
package com.tiger.chapter09.receiver;

import android.content.BroadcastReceiver;
import android.content.Context;
import android.content.Intent;
import android.util.Log;

import com.tiger.chapter09.BroadOrderActivity;

public class OrderBReceiver extends BroadcastReceiver {
    @Override
    public void onReceive(Context context, Intent intent) {
        if (intent!=null&&intent.getAction().equals(BroadOrderActivity.ORDER_ACTION)){
            Log.d("ning","接收器B 收到了有序广播");
            abortBroadcast();//中断广播,此时后面的接收器无法收到该广播
        }


    }
}
4.广播的静态注册

activity
package com.tiger.chapter09;

import androidx.appcompat.app.AppCompatActivity;

import android.content.ComponentName;
import android.content.Intent;
import android.os.Bundle;
import android.view.View;

import com.tiger.chapter09.receiver.ShockReceiver;

public class BroadStaticActivity extends AppCompatActivity implements View.OnClickListener {

    @Override
    protected void onCreate(Bundle savedInstanceState) {
        super.onCreate(savedInstanceState);
        setContentView(R.layout.activity_broad_static);
        findViewById(R.id.btn_send_shock).setOnClickListener(this);
    }

    @Override
    public void onClick(View v) {
        //Android8.0 之后 删除了大部分静态注册,防止退出App后仍在接收广播
        //为了让应用能够继续接收静态广播,需要给静态注册的广播指定包名

        String fullName = "com.tiger.chapter09.receiver.ShockReceiver";
        Intent intent = new Intent(ShockReceiver.SHOCK_ACTION);

        ComponentName componentName = new ComponentName(this, fullName);

        intent.setComponent(componentName);

        sendBroadcast(intent);

    }
}
ShockReceiver
package com.tiger.chapter09.receiver;

import android.content.BroadcastReceiver;
import android.content.Context;
import android.content.Intent;
import android.os.VibrationEffect;
import android.os.Vibrator;
import android.util.Log;

public class ShockReceiver extends BroadcastReceiver {

    public static final String SHOCK_ACTION="com.jmj.shock";
    @Override
    public void onReceive(Context context, Intent intent) {
        if (intent!=null&&intent.getAction().equals(SHOCK_ACTION)){
            Log.d("ning","震动一下");
            //从系统服务中获取震动管理器
            Vibrator vb = (Vibrator) context.getSystemService(Context.VIBRATOR_SERVICE);
            //震动需要权限,开启清单权限就不会报错了
                vb.vibrate(VibrationEffect.createOneShot(500,50));
        }

    }
}
清单文件
<?xml version="1.0" encoding="utf-8"?>
<manifest xmlns:android="http://schemas.android.com/apk/res/android">

<!--    震动需要系统权限 -->
    <uses-permission android:name="android.permission.VIBRATE"/>


    <application
        android:allowBackup="true"
        android:icon="@mipmap/ic_launcher"
        android:label="@string/app_name"
        android:roundIcon="@mipmap/ic_launcher_round"
        android:supportsRtl="true"
        android:theme="@style/Theme.MyApplication">
        <receiver
            android:name=".receiver.ShockReceiver"
            android:enabled="true"
            android:exported="true">
            <intent-filter>
                <action android:name="com.jmj.shock"/>
            </intent-filter>

        </receiver>


        <activity
            android:name=".BroadStaticActivity"
            android:exported="true">
            <intent-filter>
                <action android:name="android.intent.action.MAIN" />

                <category android:name="android.intent.category.LAUNCHER" />
            </intent-filter>
        </activity>
    </application>

</manifest>
5.系统分钟到达广播
Activity
package com.tiger.chapter09;

import androidx.appcompat.app.AppCompatActivity;

import android.content.Intent;
import android.content.IntentFilter;
import android.os.Bundle;

public class SystemMinuteActivity extends AppCompatActivity {

    private TimeReceiver timeReceiver;

    @Override
    protected void onCreate(Bundle savedInstanceState) {
        super.onCreate(savedInstanceState);
        setContentView(R.layout.activity_system_minute);
    }


    @Override
    protected void onStart() {
        super.onStart();
        //创建一个分钟变更的广播接收器
        timeReceiver = new TimeReceiver();
        IntentFilter filter = new IntentFilter(Intent.ACTION_TIME_TICK);
        registerReceiver(timeReceiver,filter);

    }

    @Override
    protected void onStop() {
        super.onStop();
        unregisterReceiver(timeReceiver);
    }
}
TimeReceiver
package com.tiger.chapter09;

import android.content.BroadcastReceiver;
import android.content.Context;
import android.content.Intent;
import android.util.Log;

public class TimeReceiver extends BroadcastReceiver {
    @Override
    public void onReceive(Context context, Intent intent) {
        if (intent!=null){
            Log.d("ning","收到一个分钟到达广播");
        }
    }
}
6.系统网络变更广播

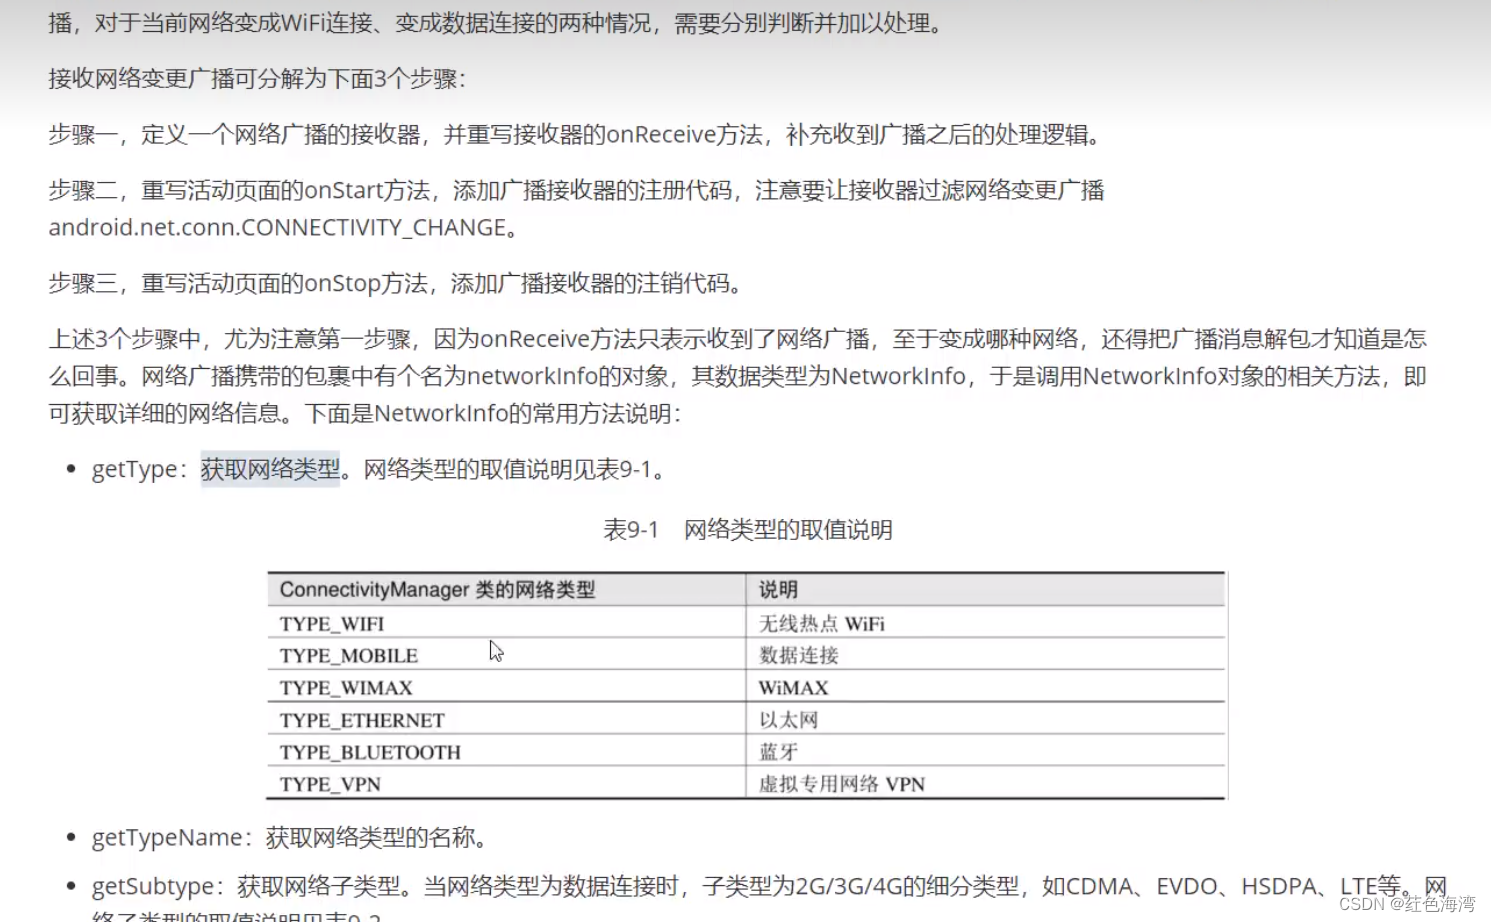
SystemNetWorkActivity
package com.tiger.chapter09;

import androidx.appcompat.app.AppCompatActivity;

import android.content.Intent;
import android.content.IntentFilter;
import android.os.Bundle;

import com.tiger.chapter09.receiver.NetWorkReceiver;

public class SystemNetWorkActivity extends AppCompatActivity {

    private NetWorkReceiver netWorkReceiver;

    @Override
    protected void onCreate(Bundle savedInstanceState) {
        super.onCreate(savedInstanceState);
        setContentView(R.layout.activity_system_net_work);
    }


    @Override
    protected void onStart() {
        super.onStart();
        netWorkReceiver = new NetWorkReceiver();
        IntentFilter filter = new IntentFilter("android.net.conn.CONNECTIVITY_CHANGE");
        registerReceiver(netWorkReceiver,filter);

    }

    @Override
    protected void onStop() {
        super.onStop();
        unregisterReceiver(netWorkReceiver);

    }
}
NetWorkReceiver
package com.tiger.chapter09.receiver;

import android.content.BroadcastReceiver;
import android.content.Context;
import android.content.Intent;
import android.net.NetworkInfo;
import android.os.Parcelable;
import android.util.Log;

import com.tiger.chapter09.util.NetworkUtil;

public class NetWorkReceiver extends BroadcastReceiver {
    @Override
    public void onReceive(Context context, Intent intent) {
        if (intent != null) {
            NetworkInfo networkInfo = intent.getParcelableExtra("networkInfo");
            // 收到一个网络变更广播,网络大类为MOBILE,网络小类为HSPA,网络制式为3G,网络状态为DISCONNECTED
            // 收到一个网络变更广播,网络大类为WIFI,网络小类为,网络制式为未知,网络状态为CONNECTED
            String text = String.format("收到一个网络变更广播,网络大类为%s," +
                            "网络小类为%s,网络制式为%s,网络状态为%s",
                    networkInfo.getTypeName(),
                    networkInfo.getSubtypeName(),
                    NetworkUtil.getNetworkClass(networkInfo.getSubtype()),
                    networkInfo.getState().toString());

            Log.d("ning", text);

        }

    }
}
NetWorkUtil
package com.tiger.chapter09.util;

import android.telephony.TelephonyManager;

public class NetworkUtil {
    // 获取数据连接的制式类型
    public static String getNetworkClass(int subType) {
        switch (subType) {
            case TelephonyManager.NETWORK_TYPE_GPRS:
            case TelephonyManager.NETWORK_TYPE_EDGE:
            case TelephonyManager.NETWORK_TYPE_CDMA:
            case TelephonyManager.NETWORK_TYPE_1xRTT:
            case TelephonyManager.NETWORK_TYPE_IDEN:
                return "2G";
            case TelephonyManager.NETWORK_TYPE_UMTS:
            case TelephonyManager.NETWORK_TYPE_EVDO_0:
            case TelephonyManager.NETWORK_TYPE_EVDO_A:
            case TelephonyManager.NETWORK_TYPE_HSDPA:
            case TelephonyManager.NETWORK_TYPE_HSUPA:
            case TelephonyManager.NETWORK_TYPE_HSPA:
            case TelephonyManager.NETWORK_TYPE_EVDO_B:
            case TelephonyManager.NETWORK_TYPE_EHRPD:
            case TelephonyManager.NETWORK_TYPE_HSPAP:
                return "3G";
            case TelephonyManager.NETWORK_TYPE_LTE:
                return "4G";
            case TelephonyManager.NETWORK_TYPE_NR:
                return "5G";
            default:
                return "未知";
        }
    }
}
7. alarm定时器广播
package com.tiger.chapter09.receiver;

import android.app.AlarmManager;
import android.app.PendingIntent;
import android.content.BroadcastReceiver;
import android.content.Context;
import android.content.Intent;
import android.content.IntentFilter;
import android.os.Build;
import android.util.Log;

public class AlarmReceiver extends BroadcastReceiver {

    public static final String ALARM_ACTION="com.tiger.chapter09.alarm";
    private Context mContext;

    public AlarmReceiver(Context mContext) {
        this.mContext = mContext;
    }

    @Override
    public void onReceive(Context context, Intent intent) {
        if (intent != null&&intent.getAction().equals(ALARM_ACTION)){
            Log.d("ning","收到闹钟广播");
            sendAlarm();
        }
    }


    //发送闹钟广播的方法
    public void sendAlarm(){
        Intent intent = new Intent(ALARM_ACTION);
        // 创建一个用于广播的延迟意图
        // 针对 S+(版本 10000 及更高版本)要求在创建 PendingIntent 时指定 FLAG_IMMUTABLE 或 FLAG_MUTABLE 之一。
        // 强烈考虑使用 FLAG_IMMUTABLE,仅当某些功能依赖于 PendingIntent 是可变的时才使用 FLAG_MUTABLE
        PendingIntent pendingIntent = PendingIntent.getBroadcast(mContext, 0, intent, PendingIntent.FLAG_IMMUTABLE);
        // 从系统服务中获取闹钟管理器
        AlarmManager alarmManager = (AlarmManager) mContext.getSystemService(Context.ALARM_SERVICE);

        if (Build.VERSION.SDK_INT >= Build.VERSION_CODES.M){
            // 允许在空闲时发送广播,Android6.0之后新增的方法
            alarmManager.setAndAllowWhileIdle(AlarmManager.RTC_WAKEUP, 1000, pendingIntent);
        }else{
            // 设置一次性闹钟,延迟若干秒后,携带延迟意图发送闹钟广播(但Android6.0之后,set方法在暗屏时不保证发送广播,
            // 必须调用setAndAllowWhileIdle方法)
            alarmManager.set(AlarmManager.RTC_WAKEUP, 1000, pendingIntent);
        }


        // 设置重复闹钟,每隔一定间隔就发送闹钟广播(但从Android4.4开始,setRepeating方法不保证按时发送广播)
//        alarmMgr.setRepeating(AlarmManager.RTC_WAKEUP, System.currentTimeMillis(),
//                1000, pIntent);


    }
}
package com.tiger.chapter09;

import androidx.appcompat.app.AppCompatActivity;

import android.content.IntentFilter;
import android.os.Bundle;
import android.view.View;

import com.tiger.chapter09.receiver.AlarmReceiver;

public class AlarmActivity extends AppCompatActivity implements View.OnClickListener {

    private AlarmReceiver alarmReceiver;

    @Override
    protected void onCreate(Bundle savedInstanceState) {
        super.onCreate(savedInstanceState);
        setContentView(R.layout.activity_alarm);
        findViewById(R.id.btn_alarm).setOnClickListener(this);
    }

    @Override
    public void onClick(View v) {
        alarmReceiver.sendAlarm();
    }


    @Override
    protected void onStart() {
        super.onStart();
        alarmReceiver = new AlarmReceiver(getApplicationContext());
        IntentFilter filter = new IntentFilter(AlarmReceiver.ALARM_ACTION);
        registerReceiver(alarmReceiver,filter);

    }

    @Override
    protected void onStop() {
        super.onStop();
        unregisterReceiver(alarmReceiver);
    }
}
8.竖屏与横屏切换

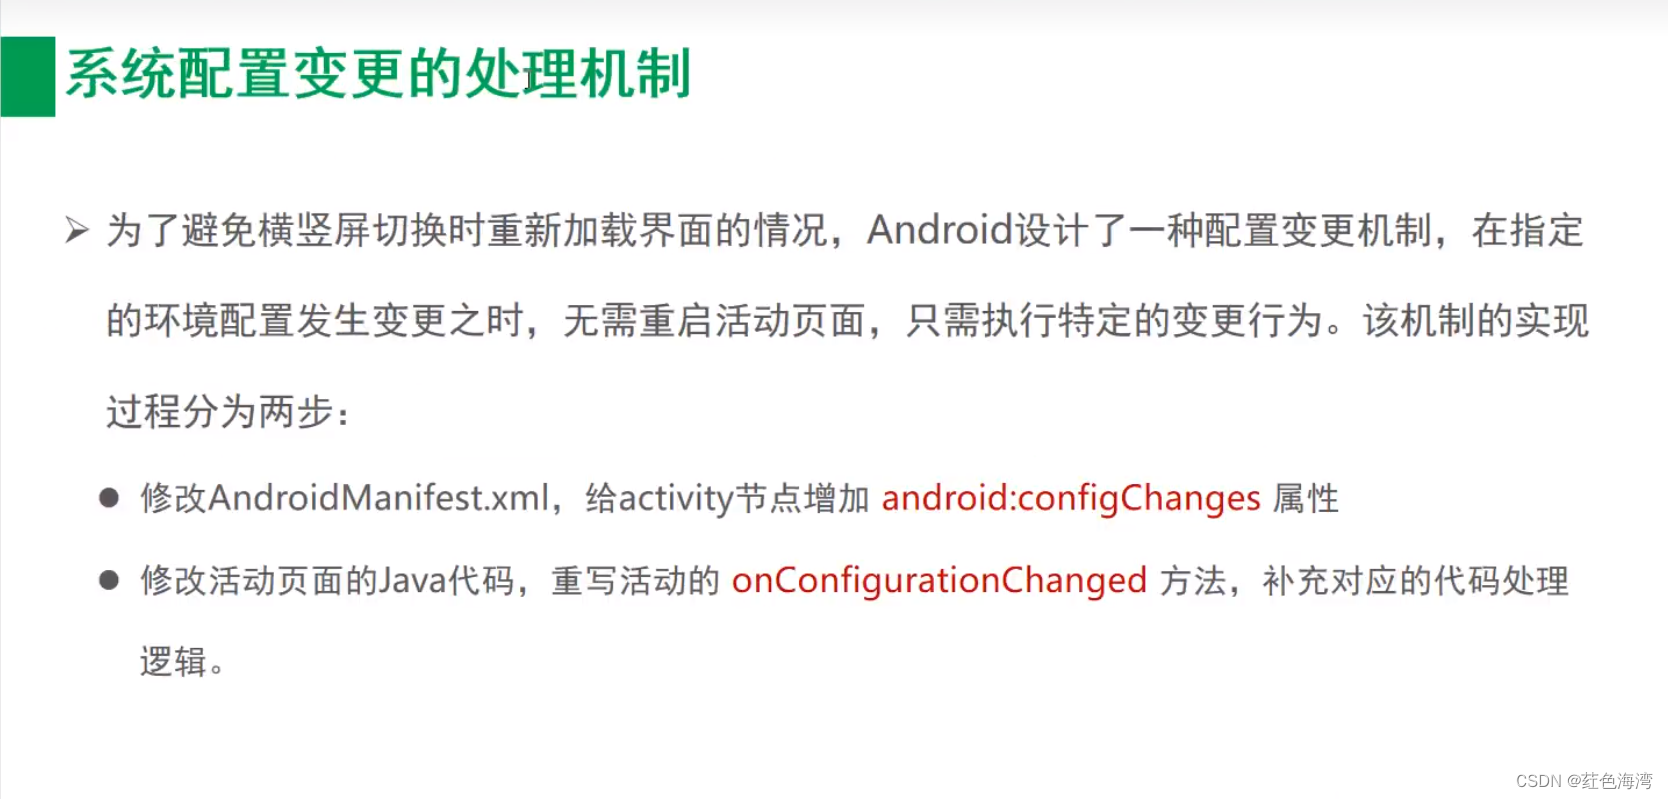

package com.tiger.chapter09;

import androidx.annotation.NonNull;
import androidx.appcompat.app.AppCompatActivity;

import android.content.res.Configuration;
import android.os.Bundle;
import android.util.Log;
import android.view.View;
import android.widget.TextView;

public class ChangeDirectionActivity extends AppCompatActivity {

    private TextView tv_monitor;

    @Override
    protected void onCreate(Bundle savedInstanceState) {
        super.onCreate(savedInstanceState);
        setContentView(R.layout.activity_change_direction);
        tv_monitor = findViewById(R.id.tv_monitor);
        Log.d("ning","onCreate");//只执行一次,在屏幕旋转之后
    }

    //在配置项变更是触发。比如屏幕方向发生变更等等
    @Override
    public void onConfigurationChanged(@NonNull Configuration newConfig) {
        super.onConfigurationChanged(newConfig);
        switch (newConfig.orientation){
            case Configuration.ORIENTATION_PORTRAIT:
                tv_monitor.setText("当前屏幕为竖屏方向");
                break;
            case Configuration.ORIENTATION_LANDSCAPE:
                tv_monitor.setText("当前屏幕为横屏方向");
                break;
            default:
                break;
        }

    }
}
<?xml version="1.0" encoding="utf-8"?>
<manifest xmlns:android="http://schemas.android.com/apk/res/android">
<!-- 震动需要系统权限 -->
<uses-permission android:name="android.permission.VIBRATE" />
<application
android:allowBackup="true"
android:icon="@mipmap/ic_launcher"
android:label="@string/app_name"
android:roundIcon="@mipmap/ic_launcher_round"
android:supportsRtl="true"
android:theme="@style/Theme.MyApplication">
<receiver
android:name=".receiver.ShockReceiver"
android:enabled="true"
android:exported="true">
<intent-filter>
<action android:name="com.jmj.shock" />
</intent-filter>
</receiver>
<activity
android:name=".ChangeDirectionActivity"
android:exported="true"
android:configChanges="orientation|screenLayout|screenSize">
<intent-filter>
<action android:name="android.intent.action.MAIN" />
<category android:name="android.intent.category.LAUNCHER" />
</intent-filter>
</activity>
</application>
</manifest>设置只能竖屏或者横屏
 <activity
            android:name=".ChangeDirectionActivity"
            android:exported="true"
            android:configChanges="orientation|screenLayout|screenSize"
            android:screenOrientation="portrait">
            <intent-filter>
                <action android:name="android.intent.action.MAIN" />

                <category android:name="android.intent.category.LAUNCHER" />
            </intent-filter>
        </activity>
screenOrientation = portrait | landscape
9.回到桌面和使用任务列表
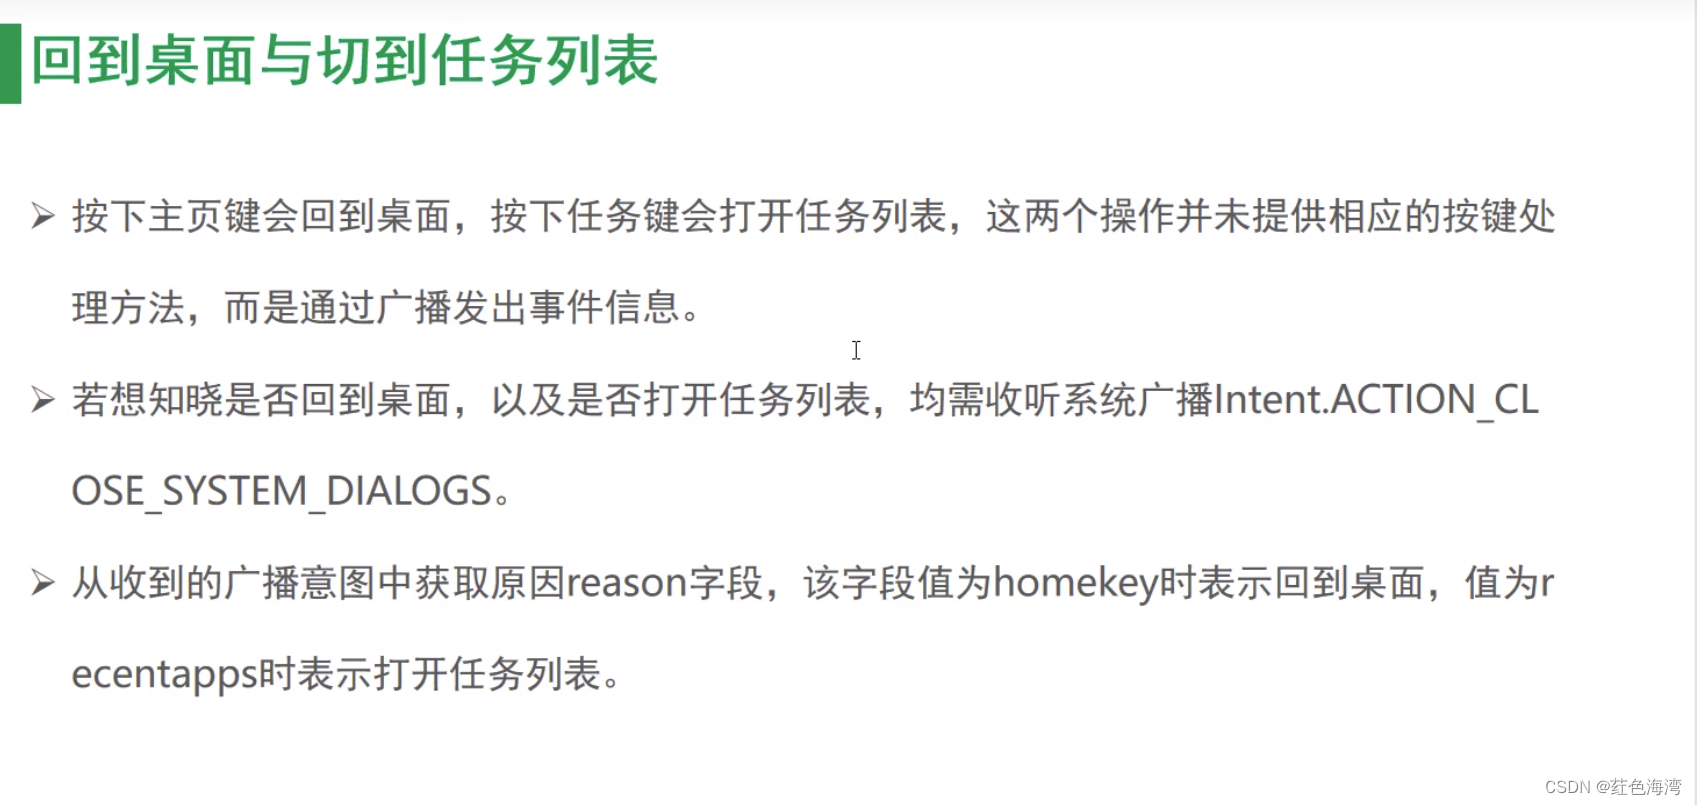
package com.tiger.chapter09;

import androidx.annotation.NonNull;
import androidx.appcompat.app.AppCompatActivity;

import android.app.PictureInPictureParams;
import android.content.BroadcastReceiver;
import android.content.Context;
import android.content.Intent;
import android.content.IntentFilter;
import android.content.res.Configuration;
import android.os.Build;
import android.os.Bundle;
import android.text.TextUtils;
import android.util.Log;
import android.util.Rational;

public class ReturnDesktopActivity extends AppCompatActivity {

    private DesktopReceiver desktopReceiver;

    @Override
    protected void onCreate(Bundle savedInstanceState) {
        super.onCreate(savedInstanceState);
        setContentView(R.layout.activity_return_desktop);
    //因为按了Home或任务键 所以要在onCreate 和 Destroy 来注册 广播 要不然,stop就监听不到了
        desktopReceiver = new DesktopReceiver();
        IntentFilter filter = new IntentFilter(Intent.ACTION_CLOSE_SYSTEM_DIALOGS);
        registerReceiver(desktopReceiver,filter);

    }

    @Override
    protected void onDestroy() {
        super.onDestroy();
        unregisterReceiver(desktopReceiver);
    }

    //在进入画中画模式或退出画中画模式时触发
    @Override
    public void onPictureInPictureModeChanged(boolean isInPictureInPictureMode, @NonNull Configuration newConfig) {
        super.onPictureInPictureModeChanged(isInPictureInPictureMode, newConfig);
        if (isInPictureInPictureMode){
            //进入了画中画模式
            Log.d("ning","进入了画中画模式");
        }else {
            //退出了画中画模式
            Log.d("ning","退出了画中画模式");
        }

    }

    //定义一个返回到桌面的广播接收器
    private class DesktopReceiver extends BroadcastReceiver {

        @Override
        public void onReceive(Context context, Intent intent) {
            if (intent != null && intent.getAction().equals(Intent.ACTION_CLOSE_SYSTEM_DIALOGS)) {
                //回到桌面或者切换到任务列表的主题广播
                String reason = intent.getStringExtra("reason");
                if (!TextUtils.isEmpty(reason)
                        && (reason.equals("homekey") || reason.equals("recentapps"))) {
                    //Android 8.0 开始才提供画中画模式

                    if (Build.VERSION.SDK_INT >= Build.VERSION_CODES.O && !isInPictureInPictureMode()) {
                        //进入画中画模式 创建画中画模式的参数构造器
                        PictureInPictureParams.Builder builder = new PictureInPictureParams.Builder();
                        //设置宽高比例值,第一个参数表示分子,第二个参数表示分母
                        // 下面的10/5 =2,表示画中画窗口的宽度是高度的两倍
                        Rational rational = new Rational(10, 5);//宽 高 10 : 5
                        builder.setAspectRatio(rational);
                        //进入画中画模式
                        enterPictureInPictureMode(builder.build());
                    }
                }
            }
        }
    }


}
清单文件 开启画中画支持
<?xml version="1.0" encoding="utf-8"?>
<manifest xmlns:android="http://schemas.android.com/apk/res/android">
    <!-- 震动需要系统权限 -->
    <uses-permission android:name="android.permission.VIBRATE" />

    <application
        android:allowBackup="true"
        android:icon="@mipmap/ic_launcher"
        android:label="@string/app_name"
        android:roundIcon="@mipmap/ic_launcher_round"
        android:supportsRtl="true"
        android:theme="@style/Theme.MyApplication">


        <receiver
            android:name=".receiver.ShockReceiver"
            android:enabled="true"
            android:exported="true">
            <intent-filter>
                <action android:name="com.jmj.shock" />
            </intent-filter>
        </receiver>

        <activity
            android:name=".ReturnDesktopActivity"
            android:configChanges="orientation|screenLayout|screenSize"
            android:exported="true"
            android:screenOrientation="portrait"
            android:supportsPictureInPicture="true">
            <intent-filter>
                <action android:name="android.intent.action.MAIN" />

                <category android:name="android.intent.category.LAUNCHER" />
            </intent-filter>
        </activity>
    </application>

</manifest>