官方参考网站如下:https://antv-x6.gitee.io/zh/docs/tutorial/about
安装x6
输入以下命令
npm install @antv/x6 --save引用插件代码如下:
import { Graph } from '@antv/x6';创建绘制区域
this.guiX6 = new Graph({
    container: document.querySelector('.guix6'),
    width: 800,
    height: 600,
    background: {
    color: '#fffbe6', // 设置画布背景颜色
    },
    grid: {
        size: 10,      // 网格大小 10px
        visible: true, // 渲染网格背景
    },
  });
插入数据并渲染
this.guiX6.fromJSON({
  // 节点
  nodes: [
    {
      id: 'node1', // String,可选,节点的唯一标识
      x: 40,       // Number,必选,节点位置的 x 值
      y: 40,       // Number,必选,节点位置的 y 值
      width: 80,   // Number,可选,节点大小的 width 值
      height: 40,  // Number,可选,节点大小的 height 值
      label: '开始~~' // String,节点标签
    },
    {
      id: 'node2', // String,节点的唯一标识
      x: 160,      // Number,必选,节点位置的 x 值
      y: 180,      // Number,必选,节点位置的 y 值
      width: 80,   // Number,可选,节点大小的 width 值
      height: 40,  // Number,可选,节点大小的 height 值
      label: '结束' // String,节点标签
    },
  ],
  // 边
  edges: [
    {
      source: 'node1', // String,必须,起始节点 id
      target: 'node2' // String,必须,目标节点 id
    }
  ]
})
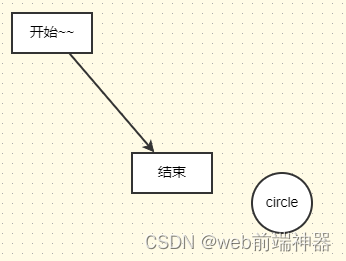
效果如下图:
添加新节点
let data = new Shape.Circle({
        id: 'node3',
        x: 280,
        y: 200,
        width: 60,
        height: 60,
        label: 'circle',
        zIndex: 2,
    })
this.guiX6.addNode(data)
这里的data打印出来结构如下

连接节点
这里的node1与node2则为以上节点的id,节点连接是根据id来连接的。
const rect = this.guiX6.addEdge({
  shape: 'edge', // 指定使用何种图形,默认值为 'edge'
  source: node1,
  target: node2,
})
Graph内置常用函数
根据id获取节点对象
有时候节点不断的添加,节点会越来越多,如果要改某个节点就需要一个函数来查询节点信息。这里的节点信息与以上new Shape.cilcle的结构一样。
this.guiX6.getCellById('node1')
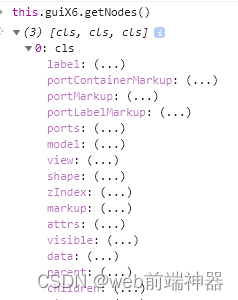
获取所有对象
this.guiX6.getNodes()如下图
获取整个节点json
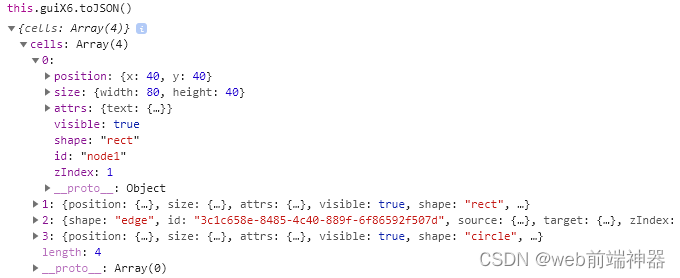
流程配置好之后,我们需要将配置好的数据返回给后端,后端制定相关流程,所以需要导出数据才行,如果是以上导出对象,则处理起来非常复杂,可用以下内置json函数导出
this.guiX6.toJSON()以下json数据存储到服务器即可。
节点内置函数
更新节点
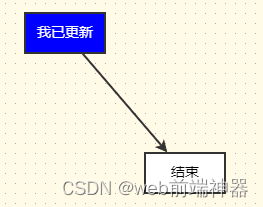
流程图处理基础的添加数据,渲染数据以外还避免不了交互。比如点击某个按钮需要改变节点的状态,所以这里不得不再学习一下更新节点的函数。
先通过id获取要更新的节点,然后设置其属性内容即可
let node1 = this.getCellById('node1')
node1.attr({
    body: {
      fill: 'blue',
    },
    label: {
      text: '我已更新',
      fill: 'white',
    },
  })
如下图:
