config
config-概述
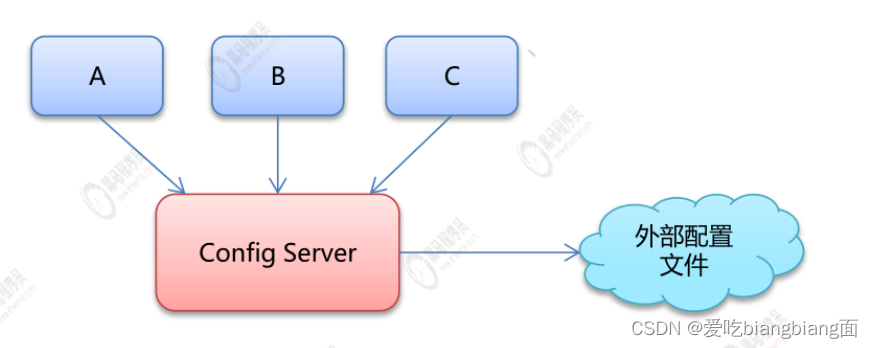
• Spring Cloud Config
解决了在分布式场景下多环境配置文件的管理和维护。
•
好处:
- 集中管理配置文件
- 不同环境不同配置,动态化的配置更新
- 配置信息改变时,不需要重启即可更新配置信息到服务
config-快速入门
gitee搭建远程仓库
1.
编写仓库名称、仓库路径、公开(公开的比较方便)
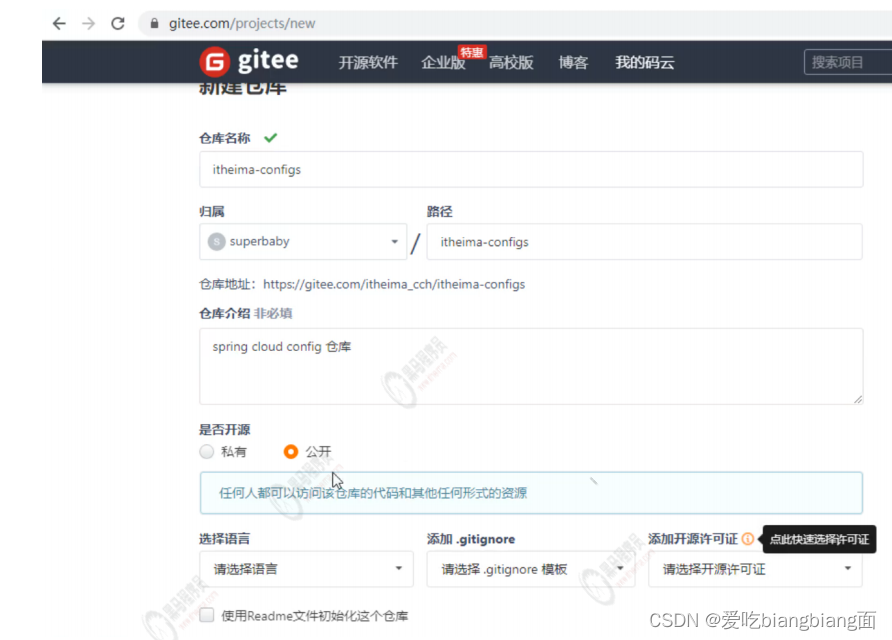
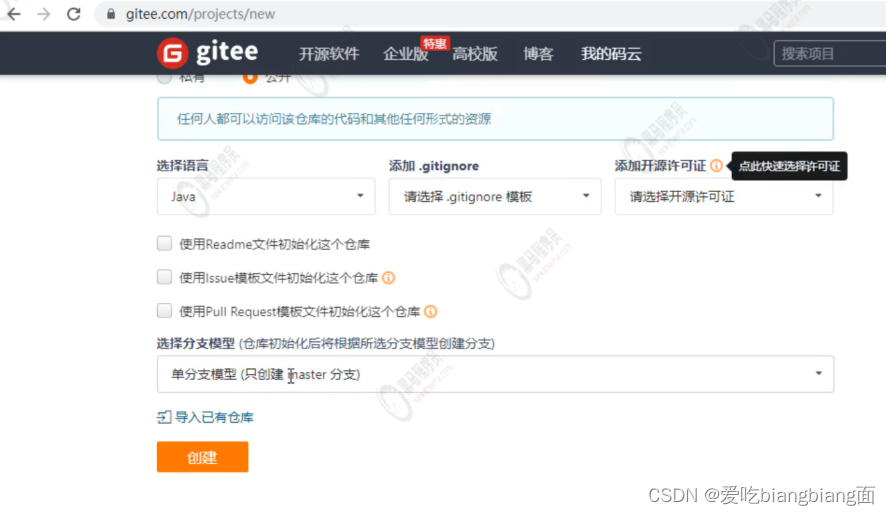
2.语言和模板可以不选,一般使用单分支模型,只创建master分支
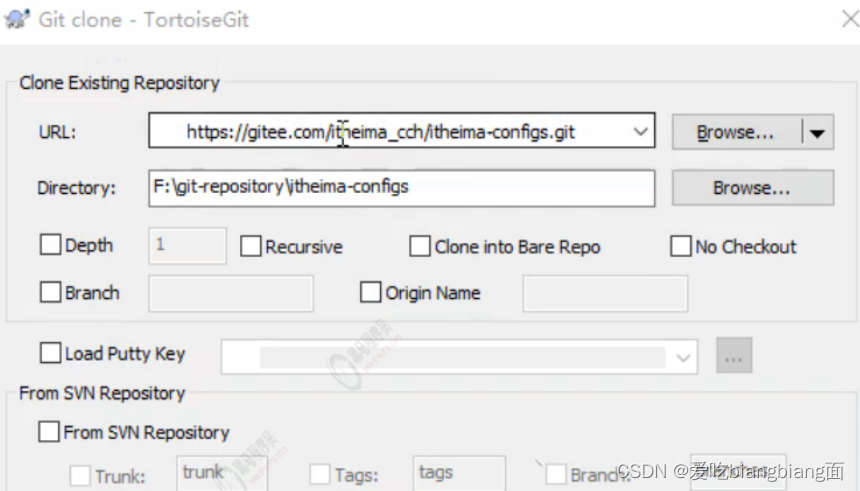
3.使用小乌龟工具,将远程仓库clone到本地
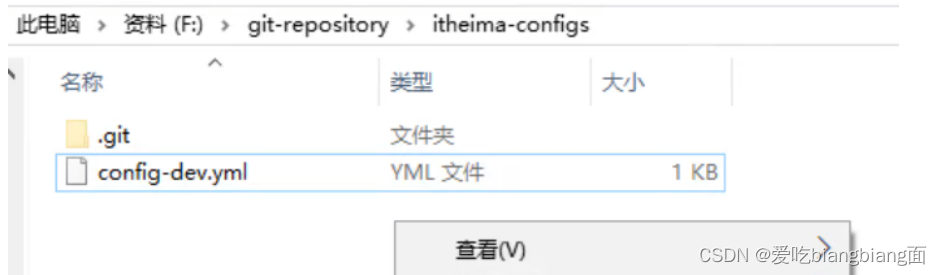
4.使用小乌龟工具将配置文件提交到远程仓库(git commit)
config server搭建
config server
:
1.
使用
gitee
创建远程仓库,上传配置文件
2.
搭建
config server
模块
3.
导入
config-server
依赖
<dependencies>
<!-- config-server -->
  <dependency>
    <groupId>org.springframework.cloud</groupId>
    <artifactId>spring-cloud-config-server</artifactId>
  </dependency>
</dependencies>
4. 编写配置,设置 gitee 远程仓库地址
server:
  port: 9527

spring:
  application:
    name: config-server

  # spring cloud config
  cloud:
    config:
      server:
        git:
          uri: https://gitee.com/itheima_cch/itheima-configs.git
      label: master # 分支配置
5. 启动类添加注解
/**
* @author liqp
* @version 1.0
* @date 2020/8/21
*/
@SpringBootApplication
@EnableConfigServer //启用ConfigServer
public class ConfigServer {
  public static void main(String[] args) {
    SpringApplication.run(ConfigServer.class, args);
  }
}
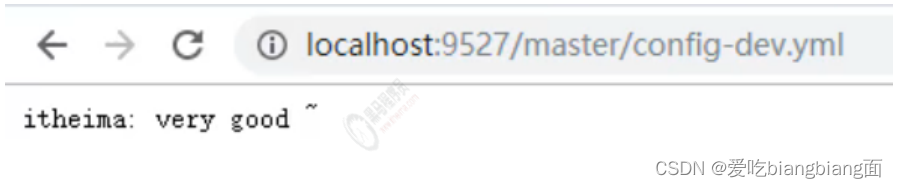
6.
测试访问远程配置文件
config client
搭建
1.
导入
starter-config
依赖
<!--config client -->
<dependency>
  <groupId>org.springframework.cloud</groupId>
  <artifactId>spring-cloud-starter-config</artifactId>
</dependency>
2.
配置
config server
地址,读取配置文件名称等信息
创建配置文件
bootstrap.yml
# 配置config-server地址
# 配置获得配置文件的名称等信息
spring:
  cloud:
    config:
      # 配置config-server地址
      uri: http://localhost:9527
      # 配置获得配置文件的名称等信息
      name: config # 文件名
      profile: dev # profile指定, config-dev.yml
      label: master # 分支
3.
获取配置值
@Value ( "${itheima}" )private String itheima ;
config client
刷新(刷新配置文件的value)
1.
在
config
客户端引入
actuator
依赖
<dependency>
  <groupId>org.springframework.boot</groupId>
  <artifactId>spring-boot-starter-actuator</artifactId>
</dependency>
2.
获取配置信息类上,添加
@RefreshScope
注解
/**
* Goods Controller 服务提供方
*/
@RestController
@RequestMapping("/goods")
@RefreshScope // 开启刷新功能
public class GoodsController {
  @Autowired
  private GoodsService goodsService;
  @Value("${server.port}")
  private int port;
  @Value("${itheima}")
  private String itheima;
  ...
}
3.
添加配置
management.endpoints.web.exposure.include: refresh
# 配置config-server地址
# 配置获得配置文件的名称等信息
spring:
  cloud:
    config:
      # 配置config-server地址
      uri: http://localhost:9527
      # 配置获得配置文件的名称等信息
      name: config # 文件名
      profile: dev # profile指定, config-dev.yml
      label: master # 分支
management:
  endpoints:
    web:
      exposure:
        include: refresh
4.测试
http://localhost:8001/actuator/refresh
config
集成
Eureka

1.config-server pom.xml
中引入
eureka-client
坐标
<!-- eureka-client -->
<dependency>
  <groupId>org.springframework.cloud</groupId>
  <artifactId>spring-cloud-starter-netflix-eureka-client</artifactId>
</dependency>
2.
配置文件中配置
eureka
地址
eureka:
  client:
    service-url:
      defaultZone: http://localhost:8761/eureka/
3.
启动类中添加注解
@SpringBootApplication
@EnableConfigServer // 启用config server功能
@EnableEurekaClient
public class ConfigServerApp {
  public static void main(String[] args) {
    SpringApplication.run(ConfigServerApp.class,args);
  }
}
4.config-provider
工程中
bootstrap.yaml
中注掉写死的地址,改为从
Eureka
中获取
# 配置config-server地址
# 配置获得配置文件的名称等信息
spring:
  cloud:
    config:
      # 配置config-server地址
      # uri: http://localhost:9527
      # 配置获得配置文件的名称等信息
      name: config # 文件名
      profile: dev # profile指定, config-dev.yml
      label: master # 分支
#从注册中心获取config-server地址
      discovery:
        enabled:true
        service-id:CONFIG-SERVER