OpenCV Mat实例详解 一、二介绍了,OpenCV Mat类构造函数及其公共属性。下面继续介绍OpenCV Mat类公有静态成员函数
OpenCV Mat类公有静态成员函数(Static Public Member Functions)
static CV_NODISCARD_STD Mat diag (const Mat &d);
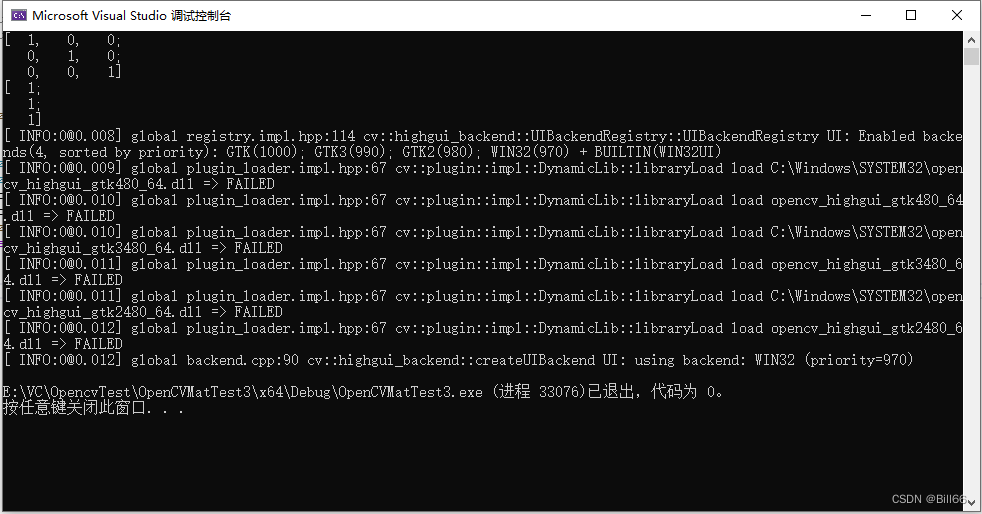
该函数用已有的Mat对象的数据矩阵对角线上的数据填充新创建Mat对象数据矩阵。下面创建一个空的控制台应用程序,来演示其用法·,在程序中加入如下代码:
// OpenCVMatTest3.cpp : 此文件包含 "main" 函数。程序执行将在此处开始并结束。
//

#include <iostream>
#include <opencv2/opencv.hpp>

using namespace cv;
using namespace std;

int main()
{

	Mat src = (Mat_<uchar>(3, 3 ) << 1, 0, 0,  0, 1, 0,  0, 0, 1);
	Mat dst = src.diag();
	cout << src << endl;
	cout << dst << endl;
	waitKey(0);
	return 0;
}
试运行结果如下:
OpenCV Mat类还有一个类似的公有函数,如下:
Mat diag (int d=0) const
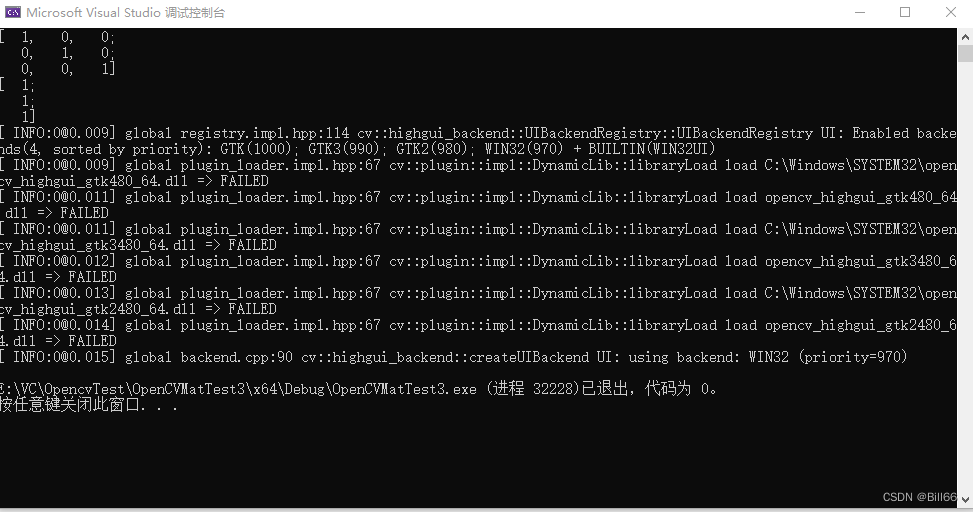
d 左上角的位置,如果d值为 负,则为左边算起第一个方阵的右下角。修改上面的代码,来演示该函数的用法,修改后的代码如下:
// OpenCVMatTest3.cpp : 此文件包含 "main" 函数。程序执行将在此处开始并结束。
//

#include <iostream>
#include <opencv2/opencv.hpp>

using namespace cv;
using namespace std;

int main()
{

	Mat src = (Mat_<uchar>(3, 3 ) << 1, 0, 0,  0, 1, 0,  0, 0, 1);
	//Mat dst = src.diag();
	Mat dst = src.diag(0);
	cout << src << endl;
	cout << dst << endl;
	waitKey(0);
	return 0;
}
试运行,结果如下:
 修改上面示例代码,修改后如下:
// OpenCVMatTest3.cpp : 此文件包含 "main" 函数。程序执行将在此处开始并结束。
//

#include <iostream>
#include <opencv2/opencv.hpp>

using namespace cv;
using namespace std;

int main()
{

	//Mat src = (Mat_<uchar>(3, 3 ) << 1, 0, 0,  0, 1, 0,  0, 0, 1);
	//Mat dst = src.diag();
	//Mat dst = src.diag(0);

	uchar mdata[3][4] = { (1,2,3,4),(5,6,7,8),(9,10,11,12) };
	Mat src = Mat(3, 4, CV_8UC3, mdata);
	Mat dst = src.diag(0);
	cout << src << endl;
	cout << dst << endl;
	waitKey(0);
	return 0;
}
试运行,结果如下:

修改上面示例代码,修改后如下:
// OpenCVMatTest3.cpp : 此文件包含 "main" 函数。程序执行将在此处开始并结束。
//

#include <iostream>
#include <opencv2/opencv.hpp>

using namespace cv;
using namespace std;

int main()
{

	//Mat src = (Mat_<uchar>(3, 3 ) << 1, 0, 0,  0, 1, 0,  0, 0, 1);
	//Mat dst = src.diag();
	//Mat dst = src.diag(0);

	uchar mdata[3][4] = {1,2,3,4,5,6,7,8,9,10,11,12};
	Mat src = Mat(3, 4, CV_8UC1, mdata);
	//Mat dst = src.diag(0);
	Mat dst = src.diag(1);
	cout << src << endl;
	cout << dst << endl;
	waitKey(0);
	return 0;
}
试运行,结果如下:

修改上面示例代码,修改后如下:
// OpenCVMatTest3.cpp : 此文件包含 "main" 函数。程序执行将在此处开始并结束。
//

#include <iostream>
#include <opencv2/opencv.hpp>

using namespace cv;
using namespace std;

int main()
{

	//Mat src = (Mat_<uchar>(3, 3 ) << 1, 0, 0,  0, 1, 0,  0, 0, 1);
	//Mat dst = src.diag();
	//Mat dst = src.diag(0);

	uchar mdata[3][4] = {1,2,3,4,5,6,7,8,9,10,11,12};
	Mat src = Mat(3, 4, CV_8UC1, mdata);
	//Mat dst = src.diag(0);
	//Mat dst = src.diag(1);
	Mat dst = src.diag(2);
	cout << src << endl;
	cout << dst << endl;
	waitKey(0);
	return 0;
}
试运行,结果如下:
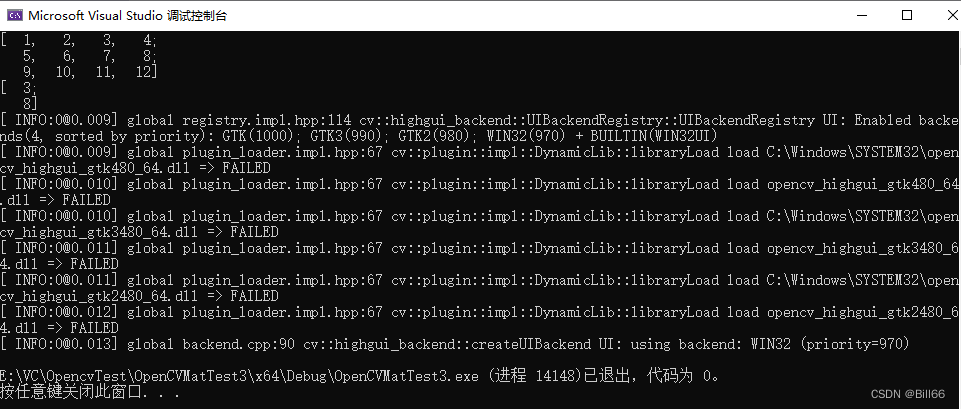
试运行,结果如下:
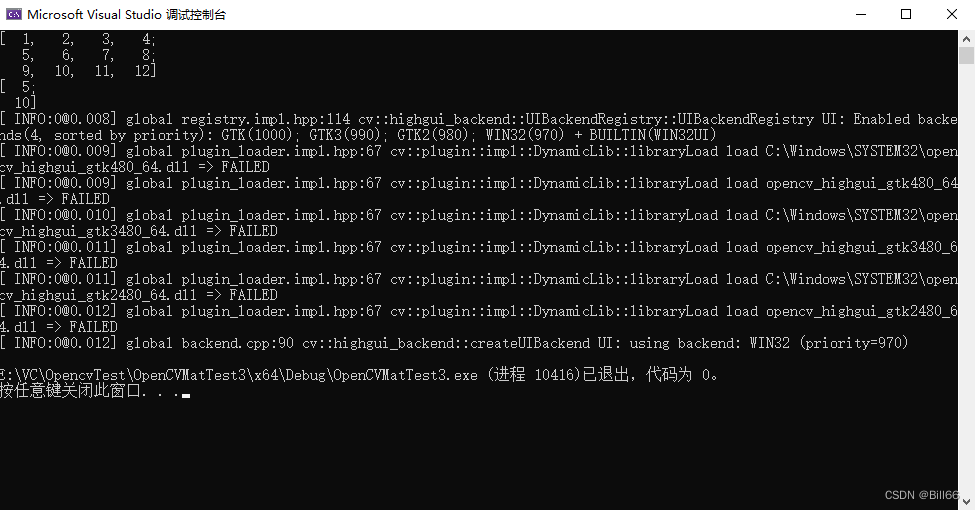 修改上面示例代码,修改后如下:
// OpenCVMatTest3.cpp : 此文件包含 "main" 函数。程序执行将在此处开始并结束。
//

#include <iostream>
#include <opencv2/opencv.hpp>

using namespace cv;
using namespace std;

int main()
{

	//Mat src = (Mat_<uchar>(3, 3 ) << 1, 0, 0,  0, 1, 0,  0, 0, 1);
	//Mat dst = src.diag();
	//Mat dst = src.diag(0);

	uchar mdata[3][4] = {1,2,3,4,5,6,7,8,9,10,11,12};
	Mat src = Mat(3, 4, CV_8UC1, mdata);
	//Mat dst = src.diag(0);
	//Mat dst = src.diag(1);
	//Mat dst = src.diag(2);
	//Mat dst = src.diag(-1);
	Mat dst = src.diag(-2);
	cout << src << endl;
	cout << dst << endl;
	waitKey(0);
	return 0;
}
试运行,结果如下:
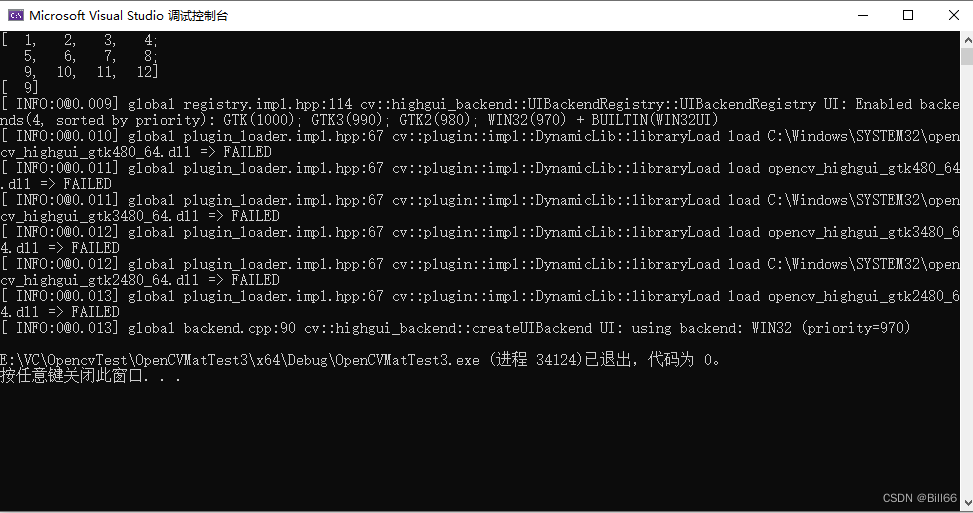
static CV_NODISCARD_STD MatExpr eye (int rows, int cols, int type);
返回一个对角元素为1,其余元素为0的Mat对象
rows 返回Mat对象的rows
cols 返回Mat对象的cols
type 返回Mat对象的type
修改上面示例代码,来演示该函数的用法,修改后的代码如下:
// OpenCVMatTest3.cpp : 此文件包含 "main" 函数。程序执行将在此处开始并结束。
//

#include <iostream>
#include <opencv2/opencv.hpp>

using namespace cv;
using namespace std;

int main()
{

	//Mat src = (Mat_<uchar>(3, 3 ) << 1, 0, 0,  0, 1, 0,  0, 0, 1);
	//Mat dst = src.diag();
	//Mat dst = src.diag(0);

	//uchar mdata[3][4] = {1,2,3,4,5,6,7,8,9,10,11,12};
	//Mat src = Mat(3, 4, CV_8UC1, mdata);
	//Mat dst = src.diag(0);
	//Mat dst = src.diag(1);
	//Mat dst = src.diag(2);
	//Mat dst = src.diag(-1);
	Mat src;
	Mat dst = src.eye(3, 3, CV_8UC1);
	cout << "dst cols: " << dst.cols << endl;
	cout << "dst rows: " << dst.rows << endl;
	cout << "dst tpye: " << dst.type() << endl;
	cout << dst << endl;
	waitKey(0);
	return 0;
}
试运行,结果如下:

修改上面示例代码,修改后如下:
// OpenCVMatTest3.cpp : 此文件包含 "main" 函数。程序执行将在此处开始并结束。
//

#include <iostream>
#include <opencv2/opencv.hpp>

using namespace cv;
using namespace std;

int main()
{

	//Mat src = (Mat_<uchar>(3, 3 ) << 1, 0, 0,  0, 1, 0,  0, 0, 1);
	//Mat dst = src.diag();
	//Mat dst = src.diag(0);

	//uchar mdata[3][4] = {1,2,3,4,5,6,7,8,9,10,11,12};
	//Mat src = Mat(3, 4, CV_8UC1, mdata);
	//Mat dst = src.diag(0);
	//Mat dst = src.diag(1);
	//Mat dst = src.diag(2);
	//Mat dst = src.diag(-1);
	Mat src;
	Mat dst = src.eye(3, 3, CV_8UC1);
	src = src.eye(3, 3, CV_8UC1);
	cout << "dst cols: " << dst.cols << endl;
	cout << "dst rows: " << dst.rows << endl;
	cout << "dst tpye: " << dst.type() << endl;
	cout << "src:" << endl;
	cout << src << endl;
	cout << "dst:" << endl;
	cout << dst << endl;
	waitKey(0);
	return 0;
}
试运行,结果如下:
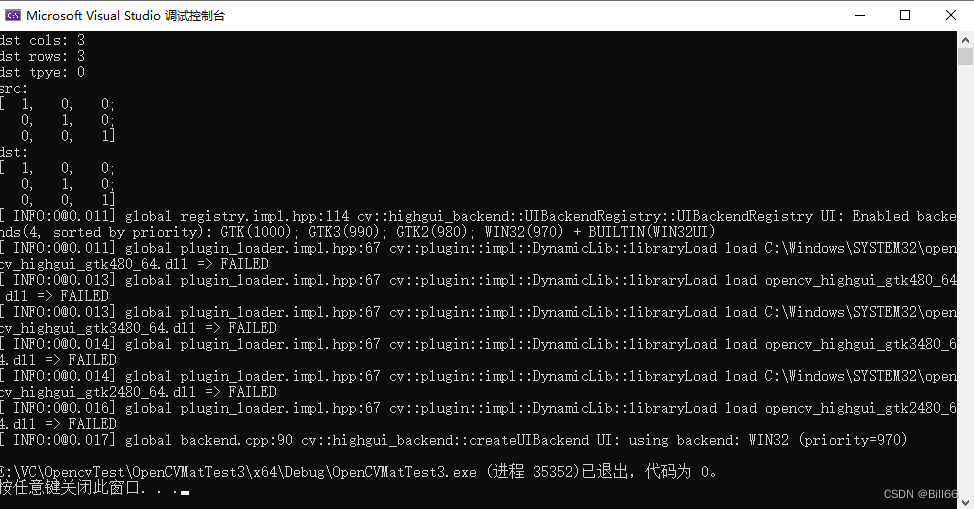
再修改上面示例代码,修改后如下:
// OpenCVMatTest3.cpp : 此文件包含 "main" 函数。程序执行将在此处开始并结束。
//

#include <iostream>
#include <opencv2/opencv.hpp>

using namespace cv;
using namespace std;

int main()
{

	//Mat src = (Mat_<uchar>(3, 3 ) << 1, 0, 0,  0, 1, 0,  0, 0, 1);
	//Mat dst = src.diag();
	//Mat dst = src.diag(0);

	//uchar mdata[3][4] = {1,2,3,4,5,6,7,8,9,10,11,12};
	//Mat src = Mat(3, 4, CV_8UC1, mdata);
	//Mat dst = src.diag(0);
	//Mat dst = src.diag(1);
	//Mat dst = src.diag(2);
	//Mat dst = src.diag(-1);
	Mat src;
	Mat dst = src.eye(3, 3, CV_8UC1);
	//src = src.eye(3, 3, CV_8UC1);
	cout << "dst cols: " << dst.cols << endl;
	cout << "dst rows: " << dst.rows << endl;
	cout << "dst tpye: " << dst.type() << endl;
	cout << "src:" << endl;
	cout << src << endl;
	cout << "dst:" << endl;
	cout << dst << endl;
	waitKey(0);
	return 0;
}
试运行,结果如下:
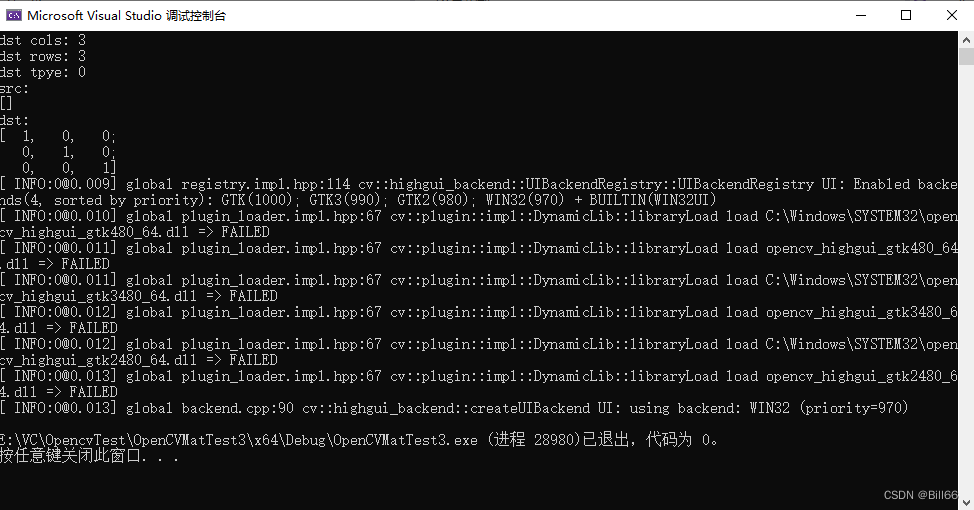
可以看出,该函数不会改变原有Mat对象。
static CV_NODISCARD_STD MatExpr eye (Size size, int type);
该函数与上一个函数作用一样,仅是用Size代替了cols,与rows。
修改上面的示例代码,来演示其用法,修改后的代码如下:
// OpenCVMatTest3.cpp : 此文件包含 "main" 函数。程序执行将在此处开始并结束。
//

#include <iostream>
#include <opencv2/opencv.hpp>

using namespace cv;
using namespace std;

int main()
{

	//Mat src = (Mat_<uchar>(3, 3 ) << 1, 0, 0,  0, 1, 0,  0, 0, 1);
	//Mat dst = src.diag();
	//Mat dst = src.diag(0);

	//uchar mdata[3][4] = {1,2,3,4,5,6,7,8,9,10,11,12};
	//Mat src = Mat(3, 4, CV_8UC1, mdata);
	//Mat dst = src.diag(0);
	//Mat dst = src.diag(1);
	//Mat dst = src.diag(2);
	//Mat dst = src.diag(-1);
	Mat src;
	Mat dst = src.eye(Size(3,4), CV_8UC1);
	cout << "dst cols: " << dst.cols << endl;
	cout << "dst rows: " << dst.rows << endl;
	cout << "dst tpye: " << dst.type() << endl;
	cout << "src:" << endl;
	cout << src << endl;
	cout << "dst:" << endl;
	cout << dst << endl;
	waitKey(0);
	return 0;
}
试运行,结果如下:
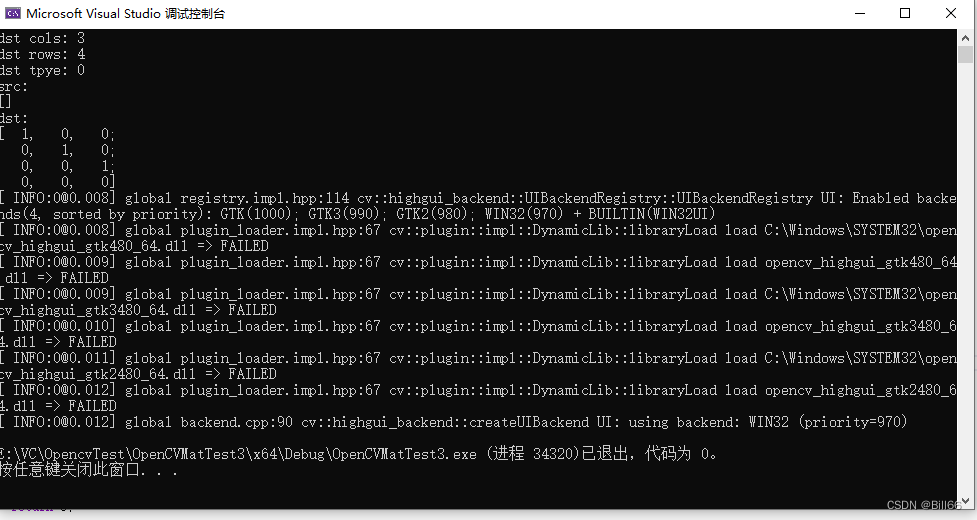
从结果可以看出,返回Mat对象数据矩阵如果不是方矩阵,只有左上角为第一个元素的方矩阵对角线上的元素被填充为1,其余元素为0.
static MatAllocator * getDefaultAllocator ();
修改上面的示例代码,来演示其用法,修改后的代码如下:
	//Mat dst = src.diag();
	//Mat dst = src.diag(0);

	//uchar mdata[3][4] = {1,2,3,4,5,6,7,8,9,10,11,12};
	//Mat src = Mat(3, 4, CV_8UC1, mdata);
	//Mat dst = src.diag(0);
	//Mat dst = src.diag(1);
	//Mat dst = src.diag(2);
	//Mat dst = src.diag(-1);
	/*
	Mat src;
	Mat dst = src.eye(Size(3,4), CV_8UC1);
	//src = src.eye(3, 3, CV_8UC1);
	cout << "dst cols: " << dst.cols << endl;
	cout << "dst rows: " << dst.rows << endl;
	cout << "dst tpye: " << dst.type() << endl;
	cout << "src:" << endl;
	cout << src << endl;
	cout << "dst:" << endl;
	cout << dst << endl;
	*/
	Mat src = imread("1.jpg");
	if (src.empty())
	{
		cout << "Conn't read image!" << endl;
		return -1;
	}
	MatAllocator* pMem = src.getDefaultAllocator();
	if (pMem)
	{
		cout << "Defaultallocator Address:  " << (unsigned int)pMem << endl;
	}
	else
	{
		cout << "pMem is null" << endl;
	}
	imshow("", src);
	waitKey(0);
	return 0;
}
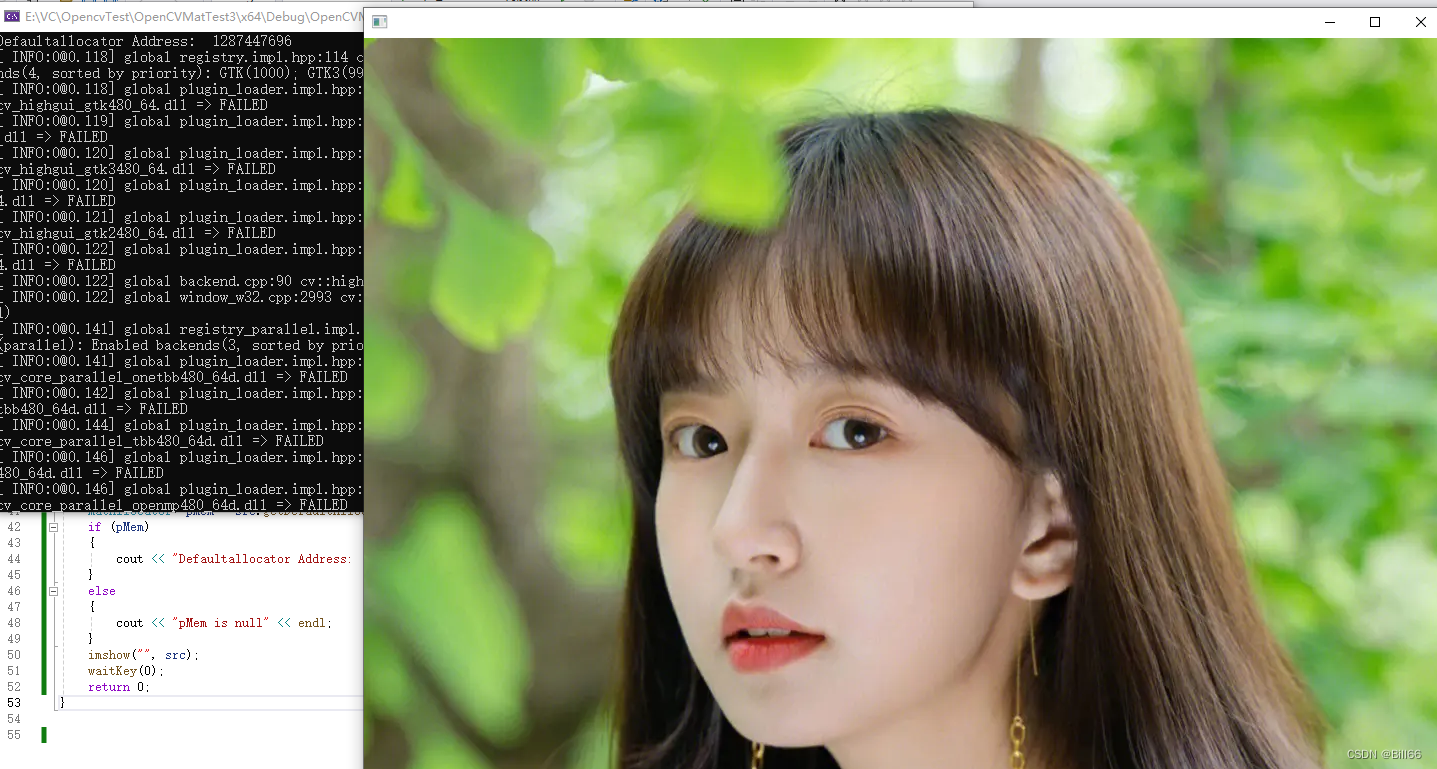
试运行,结果如下:
static MatAllocator * getStdAllocator ();
修改上面的示例代码,来演示其用法,修改后的代码如下:
	//Mat dst = src.diag();
	//Mat dst = src.diag(0);

	//uchar mdata[3][4] = {1,2,3,4,5,6,7,8,9,10,11,12};
	//Mat src = Mat(3, 4, CV_8UC1, mdata);
	//Mat dst = src.diag(0);
	//Mat dst = src.diag(1);
	//Mat dst = src.diag(2);
	//Mat dst = src.diag(-1);
	/*
	Mat src;
	Mat dst = src.eye(Size(3,4), CV_8UC1);
	//src = src.eye(3, 3, CV_8UC1);
	cout << "dst cols: " << dst.cols << endl;
	cout << "dst rows: " << dst.rows << endl;
	cout << "dst tpye: " << dst.type() << endl;
	cout << "src:" << endl;
	cout << src << endl;
	cout << "dst:" << endl;
	cout << dst << endl;
	*/
	Mat src = imread("1.jpg");
	if (src.empty())
	{
		cout << "Conn't read image!" << endl;
		return -1;
	}
	//MatAllocator* pMem = src.getDefaultAllocator();
	MatAllocator* pMem = src.getStdAllocator();
	if (pMem)
	{
		cout << "StdAllocator Address:  " << (unsigned int)pMem << endl;
	}
	else
	{
		cout << "pMem is null" << endl;
	}
	imshow("", src);
	waitKey(0);
	return 0;
}
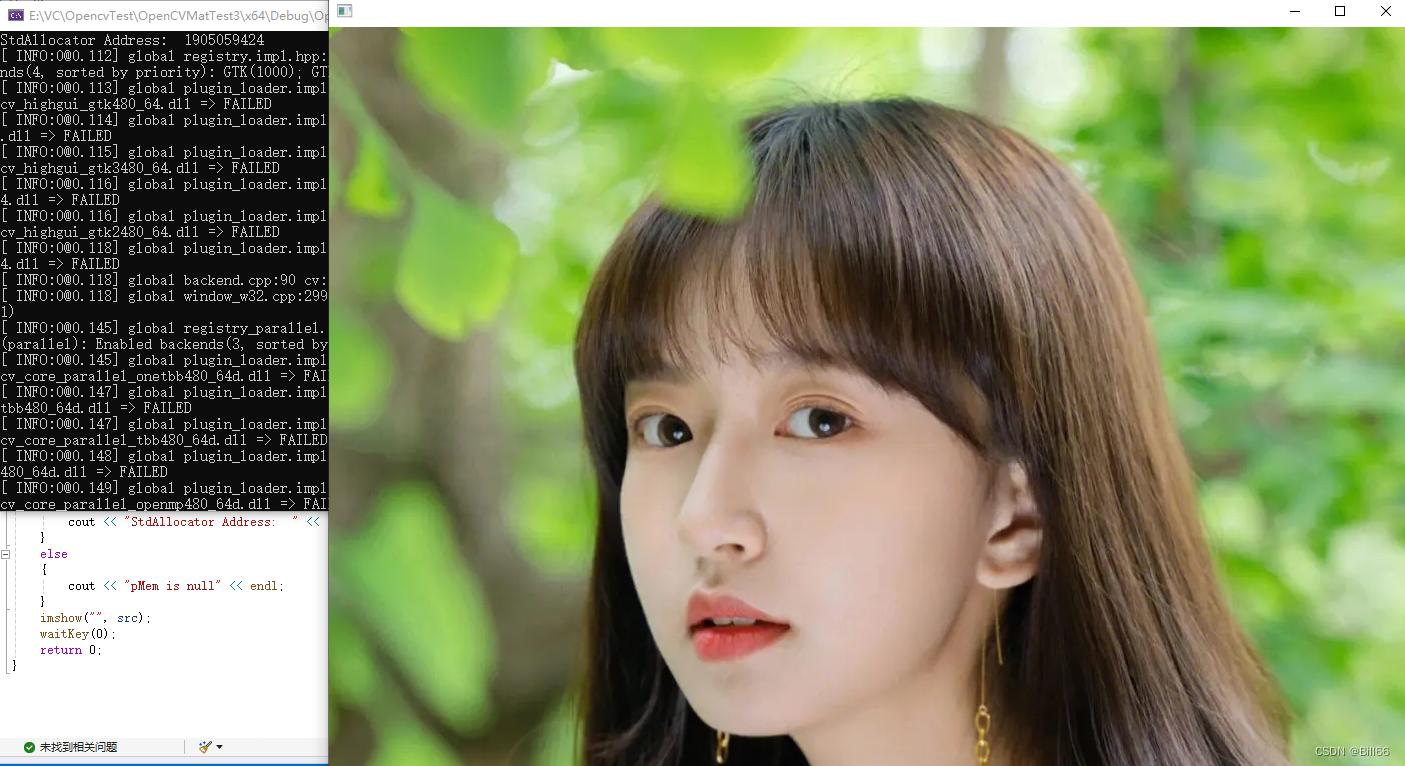
试运行,结果如下:
static CV_NODISCARD_STD MatExpr ones (int rows, int cols, int type);
返回一个数据矩阵被填充为1的Mat对象
rows 返回Mat对象的rows
cols 返回Mat对象的cols
type 返回Mat对象的type
修改上面的示例代码,来演示其用法,修改后的代码如下:
// OpenCVMatTest3.cpp : 此文件包含 "main" 函数。程序执行将在此处开始并结束。
//

#include <iostream>
#include <opencv2/opencv.hpp>

using namespace cv;
using namespace std;

int main()
{

	//Mat src = (Mat_<uchar>(3, 3 ) << 1, 0, 0,  0, 1, 0,  0, 0, 1);
	//Mat dst = src.diag();
	//Mat dst = src.diag(0);

	//uchar mdata[3][4] = {1,2,3,4,5,6,7,8,9,10,11,12};
	//Mat src = Mat(3, 4, CV_8UC1, mdata);
	//Mat dst = src.diag(0);
	//Mat dst = src.diag(1);
	//Mat dst = src.diag(2);
	//Mat dst = src.diag(-1);
	/*
	Mat src;
	Mat dst = src.eye(Size(3,4), CV_8UC1);
	//src = src.eye(3, 3, CV_8UC1);
	cout << "dst cols: " << dst.cols << endl;
	cout << "dst rows: " << dst.rows << endl;
	cout << "dst tpye: " << dst.type() << endl;
	cout << "src:" << endl;
	cout << src << endl;
	cout << "dst:" << endl;
	cout << dst << endl;
	*/

	/*
	Mat src = imread("1.jpg");
	if (src.empty())
	{
		cout << "Conn't read image!" << endl;
		return -1;
	}
	//MatAllocator* pMem = src.getDefaultAllocator();
	MatAllocator* pMem = src.getStdAllocator();
	if (pMem)
	{
		cout << "StdAllocator Address:  " << (unsigned int)pMem << endl;
	}
	else
	{
		cout << "pMem is null" << endl;
	}
	imshow("", src);
	*/
	Mat src;
	src = src.ones(3, 5, CV_8UC1);
	cout << "src cols:  "<< src.cols << endl;
	cout << "src rows:  " << src.rows << endl;
	cout << "src type:  " << src.type() << endl;
	cout << src << endl;

	waitKey(0);
	return 0;
}
试运行,结果如下:
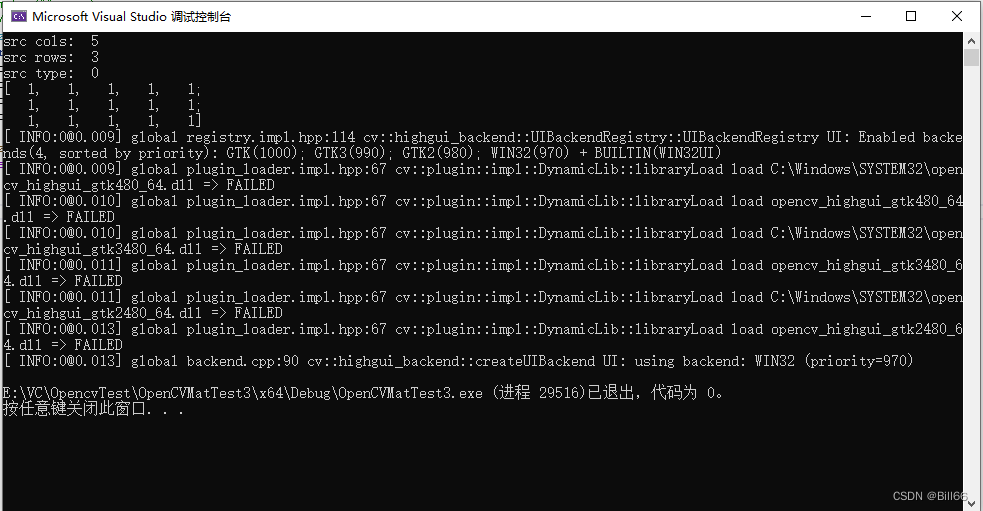
static CV_NODISCARD_STD MatExpr ones (Size size, int type);
这个函数与上一个函数作用相同,Size中包含了rows、cols。
修改上面的示例代码,来演示其用法,修改后的代码如下:
// OpenCVMatTest3.cpp : 此文件包含 "main" 函数。程序执行将在此处开始并结束。
//

#include <iostream>
#include <opencv2/opencv.hpp>

using namespace cv;
using namespace std;

int main()
{

	//Mat src = (Mat_<uchar>(3, 3 ) << 1, 0, 0,  0, 1, 0,  0, 0, 1);
	//Mat dst = src.diag();
	//Mat dst = src.diag(0);

	//uchar mdata[3][4] = {1,2,3,4,5,6,7,8,9,10,11,12};
	//Mat src = Mat(3, 4, CV_8UC1, mdata);
	//Mat dst = src.diag(0);
	//Mat dst = src.diag(1);
	//Mat dst = src.diag(2);
	//Mat dst = src.diag(-1);
	/*
	Mat src;
	Mat dst = src.eye(Size(3,4), CV_8UC1);
	//src = src.eye(3, 3, CV_8UC1);
	cout << "dst cols: " << dst.cols << endl;
	cout << "dst rows: " << dst.rows << endl;
	cout << "dst tpye: " << dst.type() << endl;
	cout << "src:" << endl;
	cout << src << endl;
	cout << "dst:" << endl;
	cout << dst << endl;
	*/

	/*
	Mat src = imread("1.jpg");
	if (src.empty())
	{
		cout << "Conn't read image!" << endl;
		return -1;
	}
	//MatAllocator* pMem = src.getDefaultAllocator();
	MatAllocator* pMem = src.getStdAllocator();
	if (pMem)
	{
		cout << "StdAllocator Address:  " << (unsigned int)pMem << endl;
	}
	else
	{
		cout << "pMem is null" << endl;
	}
	imshow("", src);
	*/
	Mat src;
	//src = src.ones(3, 5, CV_8UC1);
	src = src.ones(Size(3,5), CV_8UC1);
	cout << "src cols:  "<< src.cols << endl;
	cout << "src rows:  " << src.rows << endl;
	cout << "src type:  " << src.type() << endl;
	cout << src << endl;

	waitKey(0);
	return 0;
}
试运行,结果如下:
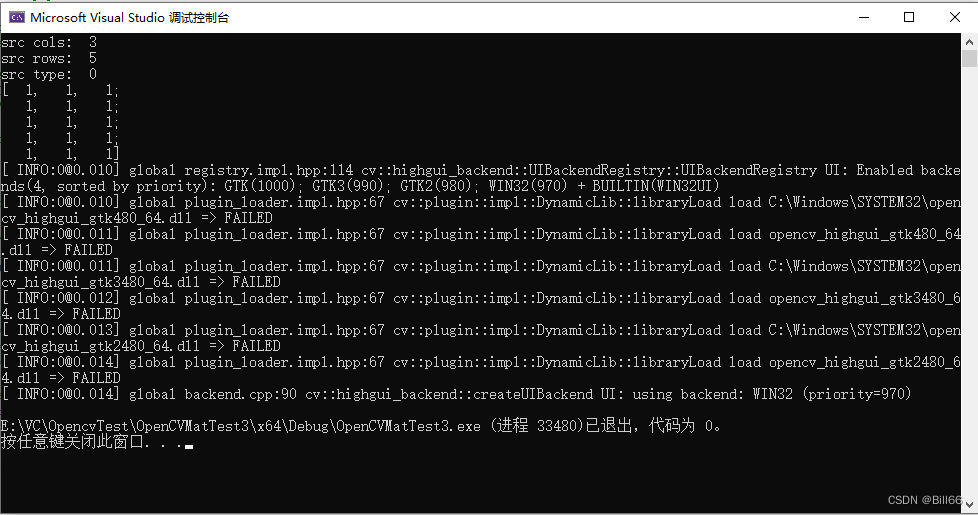
注意Size的两个参数与cols,rows的对应关系。
static CV_NODISCARD_STD MatExpr ones (int ndims, const int *sz, int type);
返回一个数据矩阵被填充为1的Mat对象
ndims 返回Mat对象的维度,1,2有效
*sz 含有返回Mat对象cows,rols数据的int数组
type 返回Mat对象的type
修改上面的示例代码,来演示其用法,修改后的代码如下:
	//Mat dst = src.diag(1);
	//Mat dst = src.diag(2);
	//Mat dst = src.diag(-1);
	/*
	Mat src;
	Mat dst = src.eye(Size(3,4), CV_8UC1);
	//src = src.eye(3, 3, CV_8UC1);
	cout << "dst cols: " << dst.cols << endl;
	cout << "dst rows: " << dst.rows << endl;
	cout << "dst tpye: " << dst.type() << endl;
	cout << "src:" << endl;
	cout << src << endl;
	cout << "dst:" << endl;
	cout << dst << endl;
	*/

	/*
	Mat src = imread("1.jpg");
	if (src.empty())
	{
		cout << "Conn't read image!" << endl;
		return -1;
	}
	//MatAllocator* pMem = src.getDefaultAllocator();
	MatAllocator* pMem = src.getStdAllocator();
	if (pMem)
	{
		cout << "StdAllocator Address:  " << (unsigned int)pMem << endl;
	}
	else
	{
		cout << "pMem is null" << endl;
	}
	imshow("", src);
	*/
	int mdat[] = {3,4};
	Mat src;
	//src = src.ones(3, 5, CV_8UC1);
	src = src.ones(2, mdat,CV_8UC1);
	cout << "src cols:  "<< src.cols << endl;
	cout << "src rows:  " << src.rows << endl;
	cout << "src type:  " << src.type() << endl;
	cout << src << endl;

	waitKey(0);
	return 0;
}
试运行,结果如下:
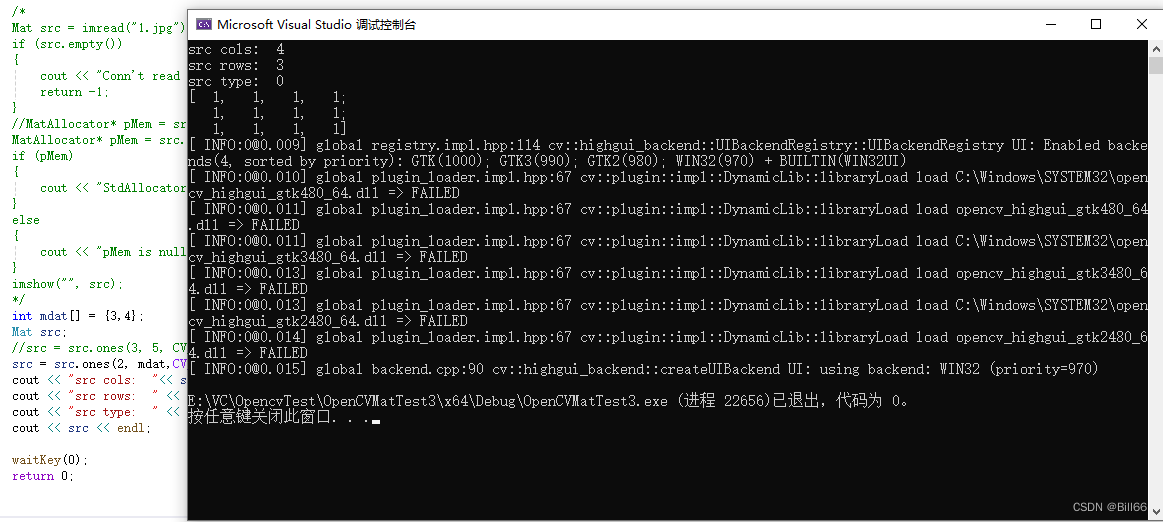
修改上面的示例代码,将ndims的值修改为1,修改后的代码如下:
	//Mat dst = src.diag(0);

	//uchar mdata[3][4] = {1,2,3,4,5,6,7,8,9,10,11,12};
	//Mat src = Mat(3, 4, CV_8UC1, mdata);
	//Mat dst = src.diag(0);
	//Mat dst = src.diag(1);
	//Mat dst = src.diag(2);
	//Mat dst = src.diag(-1);
	/*
	Mat src;
	Mat dst = src.eye(Size(3,4), CV_8UC1);
	//src = src.eye(3, 3, CV_8UC1);
	cout << "dst cols: " << dst.cols << endl;
	cout << "dst rows: " << dst.rows << endl;
	cout << "dst tpye: " << dst.type() << endl;
	cout << "src:" << endl;
	cout << src << endl;
	cout << "dst:" << endl;
	cout << dst << endl;
	*/

	/*
	Mat src = imread("1.jpg");
	if (src.empty())
	{
		cout << "Conn't read image!" << endl;
		return -1;
	}
	//MatAllocator* pMem = src.getDefaultAllocator();
	MatAllocator* pMem = src.getStdAllocator();
	if (pMem)
	{
		cout << "StdAllocator Address:  " << (unsigned int)pMem << endl;
	}
	else
	{
		cout << "pMem is null" << endl;
	}
	imshow("", src);
	*/
	int mdat[] = {3,4};
	Mat src;
	//src = src.ones(3, 5, CV_8UC1);
	src = src.ones(1, mdat,CV_8UC1);
	cout << "src cols:  "<< src.cols << endl;
	cout << "src rows:  " << src.rows << endl;
	cout << "src type:  " << src.type() << endl;
	cout << src << endl;

	waitKey(0);
	return 0;
}
试运行,结果如下:
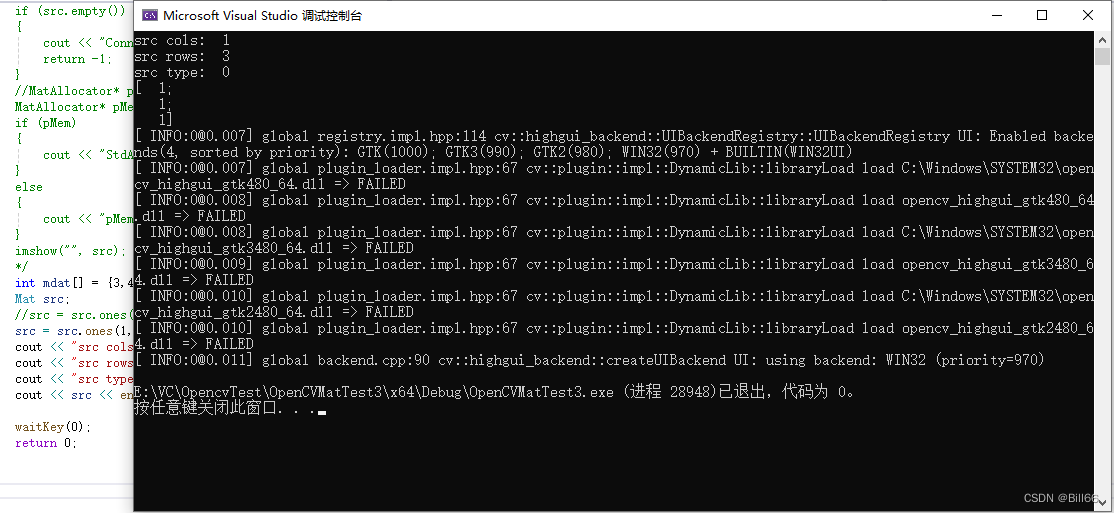
static void setDefaultAllocator (MatAllocator *allocator);
修改上面的示例代码,来演示其用法,修改后的代码如下:
// OpenCVMatTest3.cpp : 此文件包含 "main" 函数。程序执行将在此处开始并结束。
//

#include <iostream>
#include <opencv2/opencv.hpp>

using namespace cv;
using namespace std;

int main()
{

	//Mat src = (Mat_<uchar>(3, 3 ) << 1, 0, 0,  0, 1, 0,  0, 0, 1);
	//Mat dst = src.diag();
	//Mat dst = src.diag(0);

	//uchar mdata[3][4] = {1,2,3,4,5,6,7,8,9,10,11,12};
	//Mat src = Mat(3, 4, CV_8UC1, mdata);
	//Mat dst = src.diag(0);
	//Mat dst = src.diag(1);
	//Mat dst = src.diag(2);
	//Mat dst = src.diag(-1);
	/*
	Mat src;
	Mat dst = src.eye(Size(3,4), CV_8UC1);
	//src = src.eye(3, 3, CV_8UC1);
	cout << "dst cols: " << dst.cols << endl;
	cout << "dst rows: " << dst.rows << endl;
	cout << "dst tpye: " << dst.type() << endl;
	cout << "src:" << endl;
	cout << src << endl;
	cout << "dst:" << endl;
	cout << dst << endl;
	*/

	/*
	Mat src = imread("1.jpg");
	if (src.empty())
	{
		cout << "Conn't read image!" << endl;
		return -1;
	}
	//MatAllocator* pMem = src.getDefaultAllocator();
	MatAllocator* pMem = src.getStdAllocator();
	if (pMem)
	{
		cout << "StdAllocator Address:  " << (unsigned int)pMem << endl;
	}
	else
	{
		cout << "pMem is null" << endl;
	}
	imshow("", src);
	*/

	/*
	int mdat[] = {3,4};
	Mat src;
	//src = src.ones(3, 5, CV_8UC1);
	src = src.ones(1, mdat,CV_8UC1);
	cout << "src cols:  "<< src.cols << endl;
	cout << "src rows:  " << src.rows << endl;
	cout << "src type:  " << src.type() << endl;
	cout << src << endl;
	*/

	Mat src = imread("1.jpg");
	if (src.empty())
	{
		cout << "Conn't read image!" << endl;
		return -1;
	}
	src.resize(src.rows / 2, src.cols / 2);
	MatAllocator* pMem = src.getDefaultAllocator();
	Mat dst = Mat(src.rows, src.cols, src.type());
	dst.setDefaultAllocator(pMem);
	dst.data = src.data;
	imshow("dst", dst);
	waitKey(0);
	return 0;
}
试运行,结果如下:

static CV_NODISCARD_STD MatExpr zeros (int rows, int cols, int type);
static CV_NODISCARD_STD MatExpr zeros (Size size, int type);
static CV_NODISCARD_STD MatExpr zeros (int ndims, const int *sz, int type);
返回数据矩阵被填充为0的Mat对象
row 返回Mat对象的rows
cols 返回Mat对象的cols
type 返回Mat对象的type
ndims 返回Mat对象的维度,1,2有效。
sz 含有返回Mat对象cols,rows数值的int数组
修改上面的示例代码,来演示这几个函数用法,修改后的代码如下:
// OpenCVMatTest3.cpp : 此文件包含 "main" 函数。程序执行将在此处开始并结束。
//

#include <iostream>
#include <opencv2/opencv.hpp>

using namespace cv;
using namespace std;

int main()
{

	//Mat src = (Mat_<uchar>(3, 3 ) << 1, 0, 0,  0, 1, 0,  0, 0, 1);
	//Mat dst = src.diag();
	//Mat dst = src.diag(0);

	//uchar mdata[3][4] = {1,2,3,4,5,6,7,8,9,10,11,12};
	//Mat src = Mat(3, 4, CV_8UC1, mdata);
	//Mat dst = src.diag(0);
	//Mat dst = src.diag(1);
	//Mat dst = src.diag(2);
	//Mat dst = src.diag(-1);
	/*
	Mat src;
	Mat dst = src.eye(Size(3,4), CV_8UC1);
	//src = src.eye(3, 3, CV_8UC1);
	cout << "dst cols: " << dst.cols << endl;
	cout << "dst rows: " << dst.rows << endl;
	cout << "dst tpye: " << dst.type() << endl;
	cout << "src:" << endl;
	cout << src << endl;
	cout << "dst:" << endl;
	cout << dst << endl;
	*/

	/*
	Mat src = imread("1.jpg");
	if (src.empty())
	{
		cout << "Conn't read image!" << endl;
		return -1;
	}
	//MatAllocator* pMem = src.getDefaultAllocator();
	MatAllocator* pMem = src.getStdAllocator();
	if (pMem)
	{
		cout << "StdAllocator Address:  " << (unsigned int)pMem << endl;
	}
	else
	{
		cout << "pMem is null" << endl;
	}
	imshow("", src);
	*/

	/*
	int mdat[] = {3,4};
	Mat src;
	//src = src.ones(3, 5, CV_8UC1);
	src = src.ones(1, mdat,CV_8UC1);
	cout << "src cols:  "<< src.cols << endl;
	cout << "src rows:  " << src.rows << endl;
	cout << "src type:  " << src.type() << endl;
	cout << src << endl;
	*/

	/*
	Mat src = imread("1.jpg");
	if (src.empty())
	{
		cout << "Conn't read image!" << endl;
		return -1;
	}
	src.resize(src.rows / 2, src.cols / 2);
	MatAllocator* pMem = src.getDefaultAllocator();
	Mat dst = Mat(src.rows, src.cols, src.type());
	dst.setDefaultAllocator(pMem);
	dst.data = src.data;
	imshow("dst", dst);
	*/

	Mat src;
	src = src.zeros(3, 4, CV_8UC1);
	cout << "src cols:  " << src.cols << endl;
	cout << "src rows:  " << src.rows << endl;
	cout << "src type:  " << src.type() << endl;
	cout << src << endl;
	waitKey(0);
	return 0;
}
试运行,结果如下:

再修改上面的示例代码,修改后的代码如下:
// OpenCVMatTest3.cpp : 此文件包含 "main" 函数。程序执行将在此处开始并结束。
//

#include <iostream>
#include <opencv2/opencv.hpp>

using namespace cv;
using namespace std;

int main()
{

	//Mat src = (Mat_<uchar>(3, 3 ) << 1, 0, 0,  0, 1, 0,  0, 0, 1);
	//Mat dst = src.diag();
	//Mat dst = src.diag(0);

	//uchar mdata[3][4] = {1,2,3,4,5,6,7,8,9,10,11,12};
	//Mat src = Mat(3, 4, CV_8UC1, mdata);
	//Mat dst = src.diag(0);
	//Mat dst = src.diag(1);
	//Mat dst = src.diag(2);
	//Mat dst = src.diag(-1);
	/*
	Mat src;
	Mat dst = src.eye(Size(3,4), CV_8UC1);
	//src = src.eye(3, 3, CV_8UC1);
	cout << "dst cols: " << dst.cols << endl;
	cout << "dst rows: " << dst.rows << endl;
	cout << "dst tpye: " << dst.type() << endl;
	cout << "src:" << endl;
	cout << src << endl;
	cout << "dst:" << endl;
	cout << dst << endl;
	*/

	/*
	Mat src = imread("1.jpg");
	if (src.empty())
	{
		cout << "Conn't read image!" << endl;
		return -1;
	}
	//MatAllocator* pMem = src.getDefaultAllocator();
	MatAllocator* pMem = src.getStdAllocator();
	if (pMem)
	{
		cout << "StdAllocator Address:  " << (unsigned int)pMem << endl;
	}
	else
	{
		cout << "pMem is null" << endl;
	}
	imshow("", src);
	*/

	/*
	int mdat[] = {3,4};
	Mat src;
	//src = src.ones(3, 5, CV_8UC1);
	src = src.ones(1, mdat,CV_8UC1);
	cout << "src cols:  "<< src.cols << endl;
	cout << "src rows:  " << src.rows << endl;
	cout << "src type:  " << src.type() << endl;
	cout << src << endl;
	*/

	/*
	Mat src = imread("1.jpg");
	if (src.empty())
	{
		cout << "Conn't read image!" << endl;
		return -1;
	}
	src.resize(src.rows / 2, src.cols / 2);
	MatAllocator* pMem = src.getDefaultAllocator();
	Mat dst = Mat(src.rows, src.cols, src.type());
	dst.setDefaultAllocator(pMem);
	dst.data = src.data;
	imshow("dst", dst);
	*/

	Mat src;
	//src = src.zeros(3, 4, CV_8UC1);
	src = src.zeros(Size(4,3), CV_8UC1);
	cout << "src cols:  " << src.cols << endl;
	cout << "src rows:  " << src.rows << endl;
	cout << "src type:  " << src.type() << endl;
	cout << src << endl;
	waitKey(0);
	return 0;
}
试运行,结果如下:
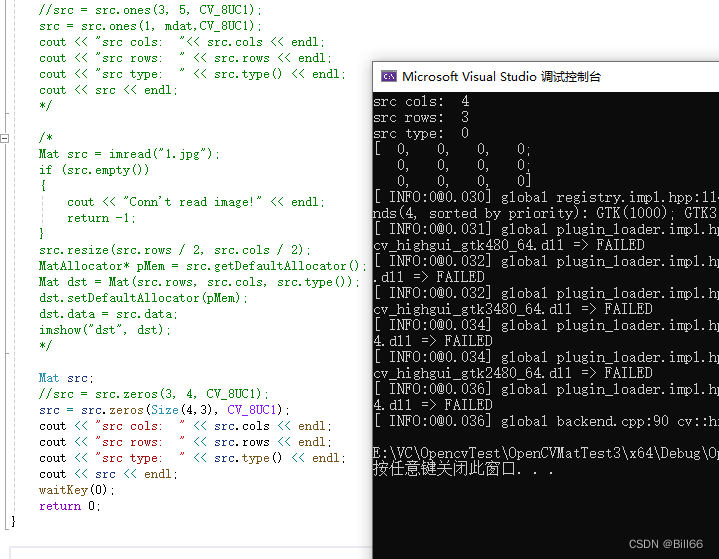
再修改上面的示例代码,修改后的代码如下:
// OpenCVMatTest3.cpp : 此文件包含 "main" 函数。程序执行将在此处开始并结束。
//

#include <iostream>
#include <opencv2/opencv.hpp>

using namespace cv;
using namespace std;

int main()
{

	//Mat src = (Mat_<uchar>(3, 3 ) << 1, 0, 0,  0, 1, 0,  0, 0, 1);
	//Mat dst = src.diag();
	//Mat dst = src.diag(0);

	//uchar mdata[3][4] = {1,2,3,4,5,6,7,8,9,10,11,12};
	//Mat src = Mat(3, 4, CV_8UC1, mdata);
	//Mat dst = src.diag(0);
	//Mat dst = src.diag(1);
	//Mat dst = src.diag(2);
	//Mat dst = src.diag(-1);
	/*
	Mat src;
	Mat dst = src.eye(Size(3,4), CV_8UC1);
	//src = src.eye(3, 3, CV_8UC1);
	cout << "dst cols: " << dst.cols << endl;
	cout << "dst rows: " << dst.rows << endl;
	cout << "dst tpye: " << dst.type() << endl;
	cout << "src:" << endl;
	cout << src << endl;
	cout << "dst:" << endl;
	cout << dst << endl;
	*/

	/*
	Mat src = imread("1.jpg");
	if (src.empty())
	{
		cout << "Conn't read image!" << endl;
		return -1;
	}
	//MatAllocator* pMem = src.getDefaultAllocator();
	MatAllocator* pMem = src.getStdAllocator();
	if (pMem)
	{
		cout << "StdAllocator Address:  " << (unsigned int)pMem << endl;
	}
	else
	{
		cout << "pMem is null" << endl;
	}
	imshow("", src);
	*/

	/*
	int mdat[] = {3,4};
	Mat src;
	//src = src.ones(3, 5, CV_8UC1);
	src = src.ones(1, mdat,CV_8UC1);
	cout << "src cols:  "<< src.cols << endl;
	cout << "src rows:  " << src.rows << endl;
	cout << "src type:  " << src.type() << endl;
	cout << src << endl;
	*/

	/*
	Mat src = imread("1.jpg");
	if (src.empty())
	{
		cout << "Conn't read image!" << endl;
		return -1;
	}
	src.resize(src.rows / 2, src.cols / 2);
	MatAllocator* pMem = src.getDefaultAllocator();
	Mat dst = Mat(src.rows, src.cols, src.type());
	dst.setDefaultAllocator(pMem);
	dst.data = src.data;
	imshow("dst", dst);
	*/
	int  mdat[] = {3,5 };
	Mat src;
	//src = src.zeros(3, 4, CV_8UC1);
	//src = src.zeros(Size(4,3), CV_8UC1);
	src = src.zeros(2, mdat,CV_8UC1);
	cout << "src cols:  " << src.cols << endl;
	cout << "src rows:  " << src.rows << endl;
	cout << "src type:  " << src.type() << endl;
	cout << src << endl;
	waitKey(0);
	return 0;
}
试运行,结果如下:
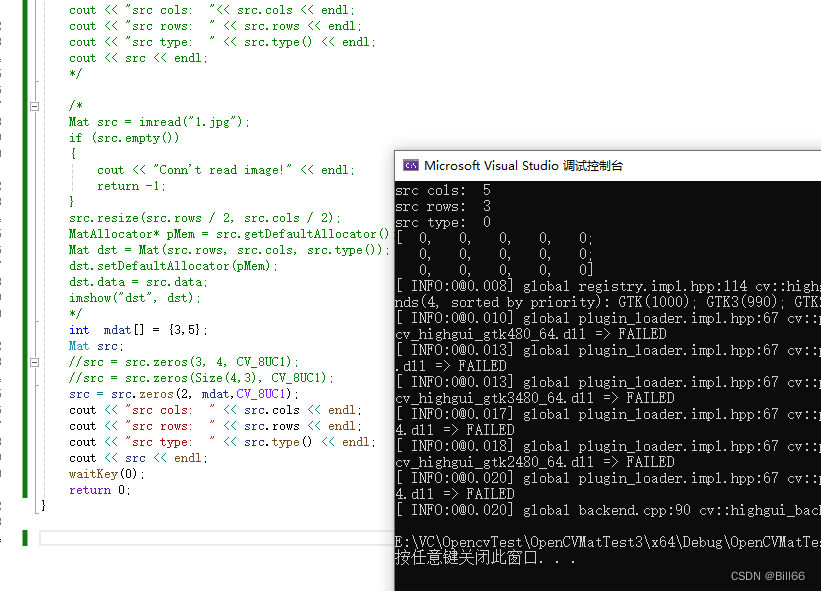
到这里,OpenCV Mat类的静态公有成员函数就介绍完了。
示例是基于OpenCV4.8(opencv目录位于d盘根目录下)及VS2022。示例源代码,已上传到CSDN,链接为:https://download.csdn.net/download/billliu66/88836976

