OpenCV中的Mat是一个类,它用存储图像信息。由两部分数据组成:矩阵头和像素值矩阵。矩阵头包含矩阵尺寸、存储方法、存储地址等信息,而像素值矩阵则存储实际的像素值数据。
Mat类在OpenCV中有十分重要的作用,图像信息的载入、保存、传递都离不开Mat类。OpenCV用来保存图像矩阵类型的数据信息,包括向量、矩阵、灰度或彩色图像等数据。通过使用Mat类,可以对图像进行各种操作和变换,例如裁剪、旋转、缩放、滤波等。 下面详细介绍Mat类中的常用方法(函数)。
Mat 类的常用构造函数
Mat类的构造函数原型有很多,下面介绍几个常用的构造函数及其用法。
Mat (int rows, int cols, int type);
rows图像的像素行数,也可以说是以像素为单位的高度。
cols图像的像素列数,也可以说是以像素为单位的宽度。
type 数据类型,OpenCV的数据类型定义在interface.h中。如下:
#define 	CV_8U   0

#define 	CV_8S   1

#define 	CV_16U   2

#define 	CV_16S   3

#define 	CV_32S   4

#define 	CV_32F   5

#define 	CV_64F   6

#define 	CV_16F   7

#define 	CV_MAKE_TYPE   CV_MAKETYPE

#define 	CV_8UC1   CV_MAKETYPE(CV_8U,1)

#define 	CV_8UC2   CV_MAKETYPE(CV_8U,2)

#define 	CV_8UC3   CV_MAKETYPE(CV_8U,3)

#define 	CV_8UC4   CV_MAKETYPE(CV_8U,4)

#define 	CV_8UC(n)   CV_MAKETYPE(CV_8U,(n))

#define 	CV_8SC1   CV_MAKETYPE(CV_8S,1)

#define 	CV_8SC2   CV_MAKETYPE(CV_8S,2)

#define 	CV_8SC3   CV_MAKETYPE(CV_8S,3)

#define 	CV_8SC4   CV_MAKETYPE(CV_8S,4)

#define 	CV_8SC(n)   CV_MAKETYPE(CV_8S,(n))

#define 	CV_16UC1   CV_MAKETYPE(CV_16U,1)

#define 	CV_16UC2   CV_MAKETYPE(CV_16U,2)

#define 	CV_16UC3   CV_MAKETYPE(CV_16U,3)

#define 	CV_16UC4   CV_MAKETYPE(CV_16U,4)

#define 	CV_16UC(n)   CV_MAKETYPE(CV_16U,(n))

#define 	CV_16SC1   CV_MAKETYPE(CV_16S,1)

#define 	CV_16SC2   CV_MAKETYPE(CV_16S,2)

#define 	CV_16SC3   CV_MAKETYPE(CV_16S,3)

#define 	CV_16SC4   CV_MAKETYPE(CV_16S,4)

#define 	CV_16SC(n)   CV_MAKETYPE(CV_16S,(n))

#define 	CV_32SC1   CV_MAKETYPE(CV_32S,1)

#define 	CV_32SC2   CV_MAKETYPE(CV_32S,2)

#define 	CV_32SC3   CV_MAKETYPE(CV_32S,3)

#define 	CV_32SC4   CV_MAKETYPE(CV_32S,4)

#define 	CV_32SC(n)   CV_MAKETYPE(CV_32S,(n))

#define 	CV_32FC1   CV_MAKETYPE(CV_32F,1)

#define 	CV_32FC2   CV_MAKETYPE(CV_32F,2)

#define 	CV_32FC3   CV_MAKETYPE(CV_32F,3)

#define 	CV_32FC4   CV_MAKETYPE(CV_32F,4)

#define 	CV_32FC(n)   CV_MAKETYPE(CV_32F,(n))

#define 	CV_64FC1   CV_MAKETYPE(CV_64F,1)

#define 	CV_64FC2   CV_MAKETYPE(CV_64F,2)

#define 	CV_64FC3   CV_MAKETYPE(CV_64F,3)

#define 	CV_64FC4   CV_MAKETYPE(CV_64F,4)

#define 	CV_64FC(n)   CV_MAKETYPE(CV_64F,(n))

#define 	CV_16FC1   CV_MAKETYPE(CV_16F,1)

#define 	CV_16FC2   CV_MAKETYPE(CV_16F,2)

#define 	CV_16FC3   CV_MAKETYPE(CV_16F,3)

#define 	CV_16FC4   CV_MAKETYPE(CV_16F,4)

#define 	CV_16FC(n)   CV_MAKETYPE(CV_16F,(n))
下面以实例演示其用法
在VS 中新建一个C++ 控制台程序,完成代码如下:
// OpenCVMatTest.cpp : 此文件包含 "main" 函数。程序执行将在此处开始并结束。


#include <iostream>
#include <opencv2/opencv.hpp>

using namespace cv;
using namespace std;

int main()
{
    Mat tmp(100,200, CV_8U);
    cout <<"构造Mat对象的高度为: " << tmp.rows << endl;
    cout << "构造Mat对象的宽度为: " << tmp.cols << endl;
    cout << "构造Mat对象的数据类型为: " << tmp.type() << endl;
}
试运行结果如下:
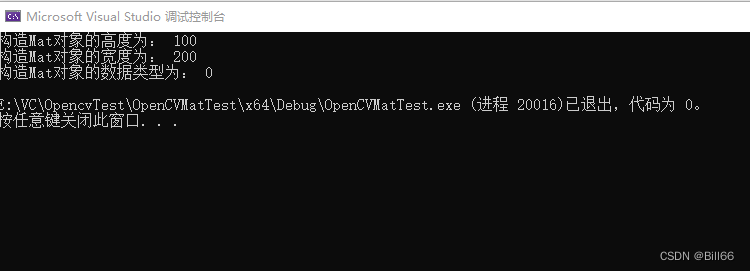
说明已成功构造对象。将构造函数的type直接输入0,也是同样的结果。如下:
Mat tmp(100, 200,0);
如果将type参数用CV_8UC1替代结果又如何,如下:
// OpenCVMatTest.cpp : 此文件包含 "main" 函数。程序执行将在此处开始并结束。


#include <iostream>
#include <opencv2/opencv.hpp>

using namespace cv;
using namespace std;

int main()
{
    //Mat tmp(100,200, CV_8U);
    Mat tmp(100, 200, CV_8UC1);
    cout <<"构造Mat对象的高度为: " << tmp.rows << endl;
    cout << "构造Mat对象的宽度为: " << tmp.cols << endl;
    cout << "构造Mat对象的数据类型为: " << tmp.type() << endl;
}
试运行的结果,如下:
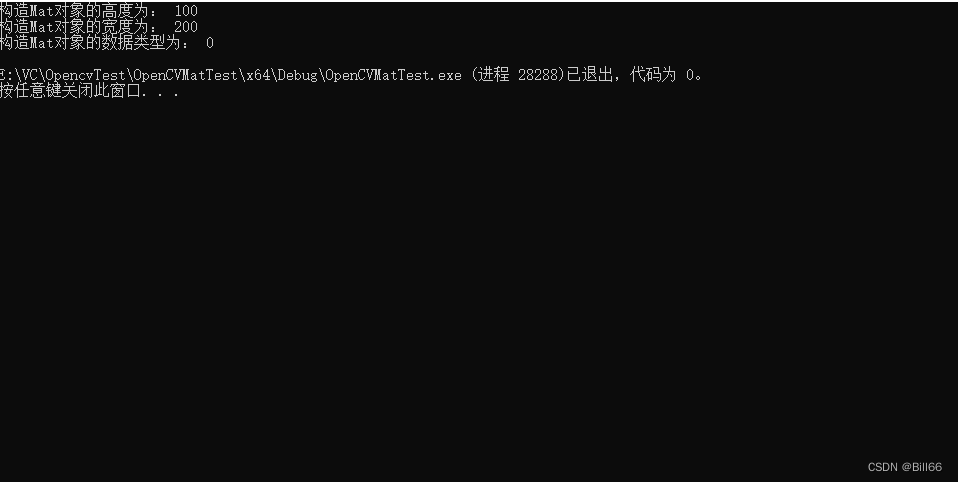
结果并未发生改变。修改代码如下:
// OpenCVMatTest.cpp : 此文件包含 "main" 函数。程序执行将在此处开始并结束。


#include <iostream>
#include <opencv2/opencv.hpp>

using namespace cv;
using namespace std;

int main()
{
    //Mat tmp(100,200, CV_8U);
    Mat tmp(100, 200, CV_8UC1);
    cout <<"构造Mat对象的高度为: " << tmp.rows << endl;
    cout << "构造Mat对象的宽度为: " << tmp.cols << endl;
    cout << "构造Mat对象的通道数为: " << tmp.channels() << endl;
    cout << "构造Mat对象的位深度为: " << tmp.depth() << endl;
    cout << "构造Mat对象的数据类型为: " << tmp.type() << endl;
}
、试运行的结果如下:

再次修改代码如下:
// OpenCVMatTest.cpp : 此文件包含 "main" 函数。程序执行将在此处开始并结束。


#include <iostream>
#include <opencv2/opencv.hpp>

using namespace cv;
using namespace std;

int main()
{
    //Mat tmp(100,200, CV_8U);
    Mat tmp(100, 200, CV_8UC2);
    cout <<"构造Mat对象的高度为: " << tmp.rows << endl;
    cout << "构造Mat对象的宽度为: " << tmp.cols << endl;
    cout << "构造Mat对象的通道数为: " << tmp.channels() << endl;
    cout << "构造Mat对象的位深度为: " << tmp.depth() << endl;
    cout << "构造Mat对象的数据类型为: " << tmp.type() << endl;
}
试运行结果如下:
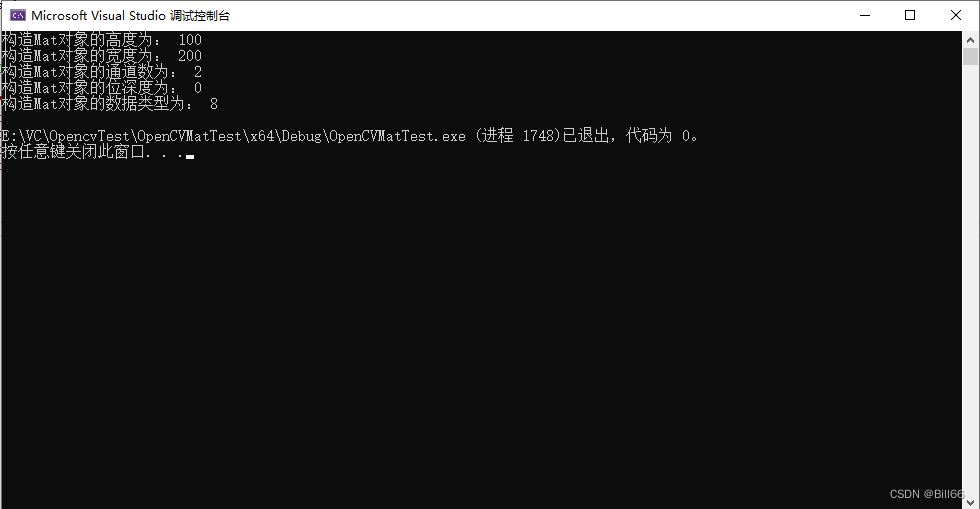
可以看出数据类型与通道数发生了改变,位深度是0,即8位。再修改代码改成如下:
// OpenCVMatTest.cpp : 此文件包含 "main" 函数。程序执行将在此处开始并结束。


#include <iostream>
#include <opencv2/opencv.hpp>

using namespace cv;
using namespace std;

int main()
{
    //Mat tmp(100,200, CV_8U);
    //Mat tmp(100, 200, CV_8UC2);
    Mat tmp(100, 200, CV_8SC3);
    cout <<"构造Mat对象的高度为: " << tmp.rows << endl;
    cout << "构造Mat对象的宽度为: " << tmp.cols << endl;
    cout << "构造Mat对象的通道数为: " << tmp.channels() << endl;
    cout << "构造Mat对象的位深度为: " << tmp.depth() << endl;
    cout << "构造Mat对象的数据类型为: " << tmp.type() << endl;
}
试运行结果如下:
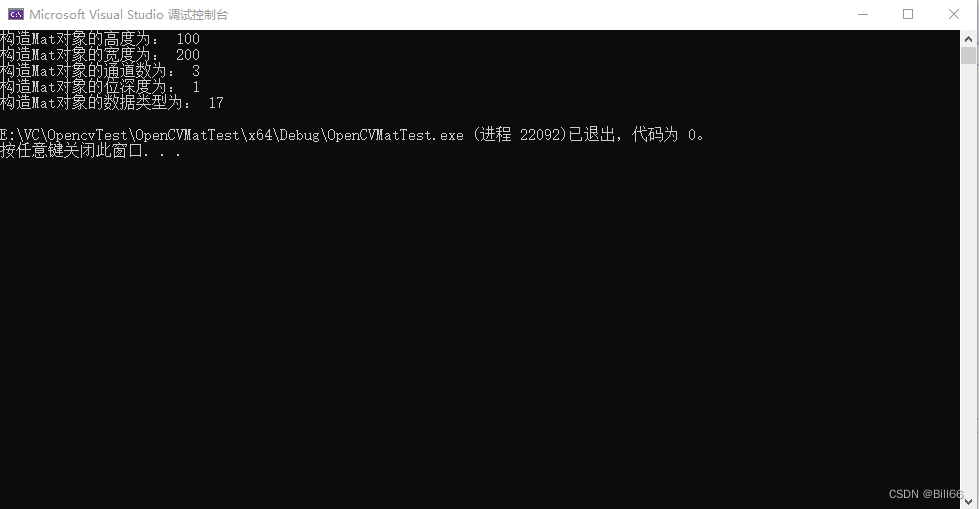 说明type参数与位深度与通道数相关。从数据类型定义即可看出,如CV_8UC1其中的8U表示位深度为0,即8位无符号数据,C1表示通道数为1。
Mat (Size size, int type);
这个构造函数与上面构造函数,只不过用Size参数代替了rows、cols参数。下面演示其使用。将上面的示例代码修改如下:
// OpenCVMatTest.cpp : 此文件包含 "main" 函数。程序执行将在此处开始并结束。


#include <iostream>
#include <opencv2/opencv.hpp>

using namespace cv;
using namespace std;

int main()
{
    //Mat tmp(100,200, CV_8U);
    //Mat tmp(100, 200, CV_8UC2);
    //Mat tmp(100, 200, CV_8SC3);

    Mat tmp(Size(100, 200), CV_16UC3);
    cout <<"构造Mat对象的高度为: " << tmp.rows << endl;
    cout << "构造Mat对象的宽度为: " << tmp.cols << endl;
    cout << "构造Mat对象的通道数为: " << tmp.channels() << endl;
    cout << "构造Mat对象的位深度为: " << tmp.depth() << endl;
    cout << "构造Mat对象的数据类型为: " << tmp.type() << endl;
}
试运行,结果如下:

可以看出Size的第一个参数是cols,第二个参数是rows,这点需要注意。
MatMat (int rows, int cols, int type, const Scalar &s)
修改上面示例程序代码来演示该构造函数的使用,代码修改如下:
// OpenCVMatTest.cpp : 此文件包含 "main" 函数。程序执行将在此处开始并结束。


#include <iostream>
#include <opencv2/opencv.hpp>

using namespace cv;
using namespace std;

int main()
{
    //Mat tmp(100,200, CV_8U);
    //Mat tmp(100, 200, CV_8UC2);
    //Mat tmp(100, 200, CV_8SC3);

    Mat tmp = Mat(Size(400, 200), CV_8UC3, Scalar(255,0,0));
    cout <<"构造Mat对象的高度为: " << tmp.rows << endl;
    cout << "构造Mat对象的宽度为: " << tmp.cols << endl;
    cout << "构造Mat对象的通道数为: " << tmp.channels() << endl;
    cout << "构造Mat对象的位深度为: " << tmp.depth() << endl;
    cout << "构造Mat对象的数据类型为: " << tmp.type() << endl;
    cout << "构造Mat对象的Size为: " << tmp.size() << endl;
    imshow("构造图像", tmp);
    waitKey(0);
试运行,结果如下:
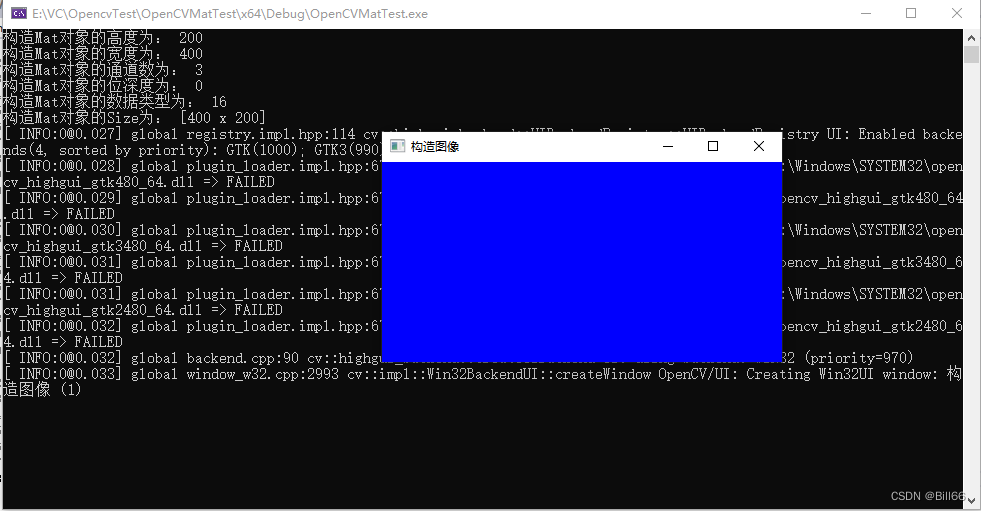
可以看出,已经构造出蓝色图片的Mat对象。
Mat (Size size, int type, const Scalar &s)
这个构造函数与上面的构造函数类似,就不再做详细介绍。
Mat (int ndims, const int *sizes, int type)
ndims 维数,只有1,2有效。
size 包含rows,cols的数组名
修改上面示例代码,来演示该构造函数的用法,修改后的代码如下:
// OpenCVMatTest.cpp : 此文件包含 "main" 函数。程序执行将在此处开始并结束。


#include <iostream>
#include <opencv2/opencv.hpp>

using namespace cv;
using namespace std;

int main()
{
    //Mat tmp(100,200, CV_8U);
    //Mat tmp(100, 200, CV_8UC2);
    //Mat tmp(100, 200, CV_8SC3);
    //Mat tmp = Mat(Size(400, 200), CV_8UC3, Scalar(255,0,0));
    int size[] = {400,200};
    Mat tmp = Mat(2, size, CV_8UC3, Scalar(0,255,0));
    cout <<"构造Mat对象的高度为: " << tmp.rows << endl;
    cout << "构造Mat对象的宽度为: " << tmp.cols << endl;
    cout << "构造Mat对象的通道数为: " << tmp.channels() << endl;
    cout << "构造Mat对象的位深度为: " << tmp.depth() << endl;
    cout << "构造Mat对象的数据类型为: " << tmp.type() << endl;
    cout << "构造Mat对象的Size为: " << tmp.size() << endl;
    imshow("构造图像", tmp);
    waitKey(0);
}
试运行后,结果如下:

可以看出,数组的第一个元素被作为rows,第二个元素作为cols。把ndims参数值设为1,运行结果如下:
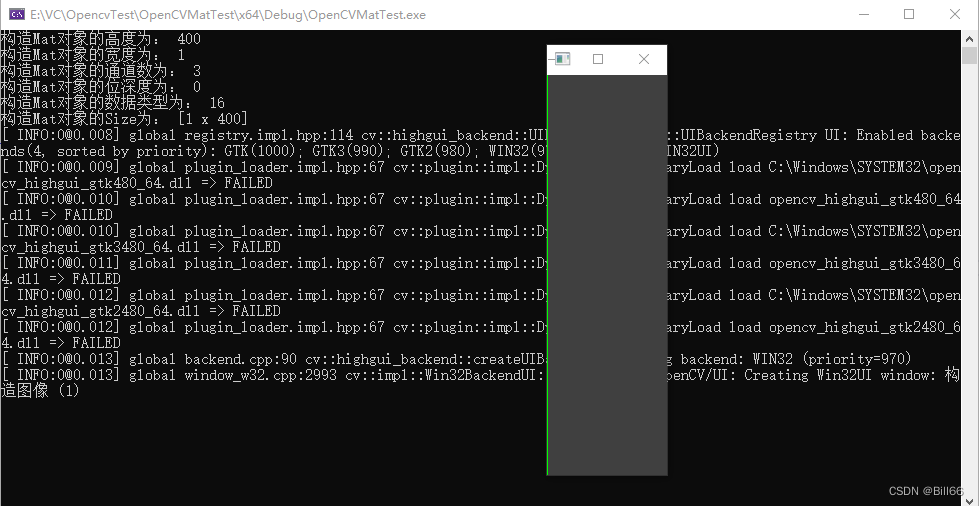
可以看出,构造对象图片的列变成了1,rows依然使用的数组的第一个元素。
Mat (const std::vector< int > &sizes, int type);
Mat (int ndims, const int *sizes, int type, const Scalar &s)
size 装有图像维度数据的vector 对象,
type 数据类型
s 含义颜色信息的Scalar参数
修改上面例程中的代码,来演示该构造函数的用法,修改后的代码如下:
// OpenCVMatTest.cpp : 此文件包含 "main" 函数。程序执行将在此处开始并结束。


#include <iostream>
#include <opencv2/opencv.hpp>

using namespace cv;
using namespace std;

int main()
{
    //Mat tmp(100,200, CV_8U);
    //Mat tmp(100, 200, CV_8UC2);
    //Mat tmp(100, 200, CV_8SC3);
    //Mat tmp = Mat(Size(400, 200), CV_8UC3, Scalar(255,0,0));
    //int size[] = {400,200};
    // Mat tmp = Mat(2, size, CV_8UC3, Scalar(0,255,0));
    //Mat tmp = Mat(1, size, CV_8UC3, Scalar(0, 255, 0));
    vector<int> size(2);
    size[0] = 400;
    size[1] = 200;
    Mat tmp = Mat(size, CV_8UC3, Scalar(0, 255, 0));
    cout <<"构造Mat对象的高度为: " << tmp.rows << endl;
    cout << "构造Mat对象的宽度为: " << tmp.cols << endl;
    cout << "构造Mat对象的通道数为: " << tmp.channels() << endl;
    cout << "构造Mat对象的位深度为: " << tmp.depth() << endl;
    cout << "构造Mat对象的数据类型为: " << tmp.type() << endl;
    cout << "构造Mat对象的Size为: " << tmp.size() << endl;
    imshow("构造图像", tmp);
    waitKey(0);
}
试运行,结果如下:

可以看出已成功构造对象,且vector对象的第一个元素作为rows,第二个元素作为cols。
Mat (const Mat &m)
以已有的Mat对象,构造新的·Mat对象。m: Mat源
修改上面代码,来演示该构造函数的使用方法,修改后的代码如下:
// OpenCVMatTest.cpp : 此文件包含 "main" 函数。程序执行将在此处开始并结束。


#include <iostream>
#include <opencv2/opencv.hpp>

using namespace cv;
using namespace std;

int main()
{
    //Mat tmp(100,200, CV_8U);
    //Mat tmp(100, 200, CV_8UC2);
    //Mat tmp(100, 200, CV_8SC3);
    //Mat tmp = Mat(Size(400, 200), CV_8UC3, Scalar(255,0,0));
    //int size[] = {400,200};
    // Mat tmp = Mat(2, size, CV_8UC3, Scalar(0,255,0));
    //Mat tmp = Mat(1, size, CV_8UC3, Scalar(0, 255, 0));
    //vector<int> size(2);
    //size[0] = 400;
    //size[1] = 200;
    //Mat tmp = Mat(size, CV_8UC3, Scalar(0, 255, 0));
    Mat src = imread("1.jpg");
    src.resize(src.rows / 2, src.cols / 2);
    Mat tmp = Mat(src);
    cout <<"构造Mat对象的高度为: " << tmp.rows << endl;
    cout << "构造Mat对象的宽度为: " << tmp.cols << endl;
    cout << "构造Mat对象的通道数为: " << tmp.channels() << endl;
    cout << "构造Mat对象的位深度为: " << tmp.depth() << endl;
    cout << "构造Mat对象的数据类型为: " << tmp.type() << endl;
    cout << "构造Mat对象的Size为: " << tmp.size() << endl;
    cout << "构造Mat对象的Step为: " << tmp.step << endl;
    imshow("构造图像", tmp);
    waitKey(0);
}
试运行,结果如下:

Mat (int rows, int cols, int type, void *data, size_t step=AUTO_STEP);
Mat (Size size, int type, void *data, size_t step=AUTO_STEP);
Mat (int ndims, const int *sizes, int type, void *data, const size_t *steps=0);
Mat (const std::vector< int > &sizes, int type, void *data, const size_t *steps=0);
rows 构造对象图像rows
cols 构造对象图像 cols
type 构造对象图像数据类型
data 构造对象图像数据指针
ndims 构造对象图像的维度数
size 包含构造对象rows,cols参数的数组名
step 每个行矩阵所占的字节数。
steps 指向step的指针。
修改上面示例代码,来演示以上构造函数的用法,修改后的代码如下:
// OpenCVMatTest.cpp : 此文件包含 "main" 函数。程序执行将在此处开始并结束。


#include <iostream>
#include <opencv2/opencv.hpp>

using namespace cv;
using namespace std;

int main()
{
    //Mat tmp(100,200, CV_8U);
    //Mat tmp(100, 200, CV_8UC2);
    //Mat tmp(100, 200, CV_8SC3);
    //Mat tmp = Mat(Size(400, 200), CV_8UC3, Scalar(255,0,0));
    //int size[] = {400,200};
    // Mat tmp = Mat(2, size, CV_8UC3, Scalar(0,255,0));
    //Mat tmp = Mat(1, size, CV_8UC3, Scalar(0, 255, 0));
    //vector<int> size(2);
    //size[0] = 400;
    //size[1] = 200;
    //Mat tmp = Mat(size, CV_8UC3, Scalar(0, 255, 0));
    Mat src = imread("1.jpg");
    src.resize(src.rows / 2, src.cols / 2);
    //Mat tmp = Mat(src);
    Mat tmp = Mat(src.rows, src.cols, src.type(),src.data);
    cout <<"构造Mat对象的高度为: " << tmp.rows << endl;
    cout << "构造Mat对象的宽度为: " << tmp.cols << endl;
    cout << "构造Mat对象的通道数为: " << tmp.channels() << endl;
    cout << "构造Mat对象的位深度为: " << tmp.depth() << endl;
    cout << "构造Mat对象的数据类型为: " << tmp.type() << endl;
    cout << "构造Mat对象的Size为: " << tmp.size() << endl;
    cout << "构造Mat对象的Step为: " << tmp.step << endl;
    imshow("构造图像", tmp);
    waitKey(0);
}
试运行,结果如下:

修改上面示例代码,来演示另外构造函数的使用,修改后的代码如下:
// OpenCVMatTest.cpp : 此文件包含 "main" 函数。程序执行将在此处开始并结束。


#include <iostream>
#include <opencv2/opencv.hpp>

using namespace cv;
using namespace std;

int main()
{
    //Mat tmp(100,200, CV_8U);
    //Mat tmp(100, 200, CV_8UC2);
    //Mat tmp(100, 200, CV_8SC3);
    //Mat tmp = Mat(Size(400, 200), CV_8UC3, Scalar(255,0,0));
    //int size[] = {400,200};
    // Mat tmp = Mat(2, size, CV_8UC3, Scalar(0,255,0));
    //Mat tmp = Mat(1, size, CV_8UC3, Scalar(0, 255, 0));
    //vector<int> size(2);
    //size[0] = 400;
    //size[1] = 200;
    //Mat tmp = Mat(size, CV_8UC3, Scalar(0, 255, 0));
    Mat src = imread("1.jpg");
    src.resize(src.rows / 2, src.cols / 2);
    //Mat tmp = Mat(src);
    //Mat tmp = Mat(src.rows, src.cols, src.type(),src.data);
    Mat tmp = Mat(src.size(), src.type(), src.data);
    cout <<"构造Mat对象的高度为: " << tmp.rows << endl;
    cout << "构造Mat对象的宽度为: " << tmp.cols << endl;
    cout << "构造Mat对象的通道数为: " << tmp.channels() << endl;
    cout << "构造Mat对象的位深度为: " << tmp.depth() << endl;
    cout << "构造Mat对象的数据类型为: " << tmp.type() << endl;
    cout << "构造Mat对象的Size为: " << tmp.size() << endl;
    cout << "构造Mat对象的Step为: " << tmp.step << endl;
    imshow("构造图像", tmp);
    waitKey(0);
}
试运行,结果如下:

修改上面示例代码,来演示另外构造函数的使用,修改后的代码如下:
// OpenCVMatTest.cpp : 此文件包含 "main" 函数。程序执行将在此处开始并结束。


#include <iostream>
#include <opencv2/opencv.hpp>

using namespace cv;
using namespace std;

int main()
{
    //Mat tmp(100,200, CV_8U);
    //Mat tmp(100, 200, CV_8UC2);
    //Mat tmp(100, 200, CV_8SC3);
    //Mat tmp = Mat(Size(400, 200), CV_8UC3, Scalar(255,0,0));
    //int size[] = {400,200};
    // Mat tmp = Mat(2, size, CV_8UC3, Scalar(0,255,0));
    //Mat tmp = Mat(1, size, CV_8UC3, Scalar(0, 255, 0));
    //vector<int> size(2);
    //size[0] = 400;
    //size[1] = 200;
    //Mat tmp = Mat(size, CV_8UC3, Scalar(0, 255, 0));
    Mat src = imread("1.jpg");
    src.resize(src.rows / 2, src.cols / 2);
    //Mat tmp = Mat(src);
    //Mat tmp = Mat(src.rows, src.cols, src.type(),src.data);
    //Mat tmp = Mat(src.size(), src.type(), src.data);
    Mat tmp = Mat(700,800, CV_8UC3, src.data+800*3);
    cout <<"构造Mat对象的高度为: " << tmp.rows << endl;
    cout << "构造Mat对象的宽度为: " << tmp.cols << endl;
    cout << "构造Mat对象的通道数为: " << tmp.channels() << endl;
    cout << "构造Mat对象的位深度为: " << tmp.depth() << endl;
    cout << "构造Mat对象的数据类型为: " << tmp.type() << endl;
    cout << "构造Mat对象的Size为: " << tmp.size() << endl;
    cout << "构造Mat对象的Step为: " << tmp.step << endl;
    imshow("构造图像", tmp);
    waitKey(0);
}
试运行,结果如下:

Mat (const Mat &m, const Range &rowRange, const Range &colRange=Range::all());
Mat (const Mat &m, const Rect &roi);
Mat (const Mat &m, const Range *ranges);
Mat (const Mat &m, const std::vector< Range > &ranges);
m 分配给构建对象的Mat对象
rowRange 行范围
colRange 列范围
roi 感兴趣的矩形区域
ranges Range数组或Range的vector 容器
用此构造函数构建的Mat对象不会拷贝数据,修改新构建对象的数据反而来修改新构建Mat对象的数据会修改已有Mat对象m的数据,实质上已有图像构建感兴趣区域对象。
修改上面示例代码,来演示构造函数的使用,修改后的代码如下:
// OpenCVMatTest.cpp : 此文件包含 "main" 函数。程序执行将在此处开始并结束。


#include <iostream>
#include <opencv2/opencv.hpp>

using namespace cv;
using namespace std;

int main()
{
    //Mat tmp(100,200, CV_8U);
    //Mat tmp(100, 200, CV_8UC2);
    //Mat tmp(100, 200, CV_8SC3);
    //Mat tmp = Mat(Size(400, 200), CV_8UC3, Scalar(255,0,0));
    //int size[] = {400,200};
    // Mat tmp = Mat(2, size, CV_8UC3, Scalar(0,255,0));
    //Mat tmp = Mat(1, size, CV_8UC3, Scalar(0, 255, 0));
    //vector<int> size(2);
    //size[0] = 400;
    //size[1] = 200;
    //Mat tmp = Mat(size, CV_8UC3, Scalar(0, 255, 0));
    Mat src = imread("1.jpg");
    src.resize(src.rows / 2, src.cols / 2);
    //Mat tmp = Mat(src);
    //Mat tmp = Mat(src.rows, src.cols, src.type(),src.data);
    //Mat tmp = Mat(src.size(), src.type(), src.data);
    //Mat tmp = Mat(700,800, CV_8UC3, src.data+800*3);
    Range rowRange = Range(0, 700);
    Range colRange = Range(0, 700);
    Mat tmp = Mat(src, rowRange, colRange);
    cout <<"构造Mat对象的高度为: " << tmp.rows << endl;
    cout << "构造Mat对象的宽度为: " << tmp.cols << endl;
    cout << "构造Mat对象的通道数为: " << tmp.channels() << endl;
    cout << "构造Mat对象的位深度为: " << tmp.depth() << endl;
    cout << "构造Mat对象的数据类型为: " << tmp.type() << endl;
    cout << "构造Mat对象的Size为: " << tmp.size() << endl;
    cout << "构造Mat对象的Step为: " << tmp.step << endl;
    imshow("构造图像", tmp);
    waitKey(0);
}
试运行,结果如下:

修改上面示例代码,来演示构造函数的使用,修改后的代码如下:
#include <iostream>
#include <opencv2/opencv.hpp>

using namespace cv;
using namespace std;

int main()
{
    //Mat tmp(100,200, CV_8U);
    //Mat tmp(100, 200, CV_8UC2);
    //Mat tmp(100, 200, CV_8SC3);
    //Mat tmp = Mat(Size(400, 200), CV_8UC3, Scalar(255,0,0));
    //int size[] = {400,200};
    // Mat tmp = Mat(2, size, CV_8UC3, Scalar(0,255,0));
    //Mat tmp = Mat(1, size, CV_8UC3, Scalar(0, 255, 0));
    //vector<int> size(2);
    //size[0] = 400;
    //size[1] = 200;
    //Mat tmp = Mat(size, CV_8UC3, Scalar(0, 255, 0));
    Mat src = imread("1.jpg");
    src.resize(src.rows / 2, src.cols / 2);
    //Mat tmp = Mat(src);
    //Mat tmp = Mat(src.rows, src.cols, src.type(),src.data);
    //Mat tmp = Mat(src.size(), src.type(), src.data);
    //Mat tmp = Mat(700,800, CV_8UC3, src.data+800*3);
    //Range rowRange = Range(0, 700);
    //Range colRange = Range(0, 700);
    //Mat tmp = Mat(src, rowRange, colRange);
    Rect rec = Rect(100, 0, 700, 700);
    Mat tmp = Mat(src, rec);
    cout <<"构造Mat对象的高度为: " << tmp.rows << endl;
    cout << "构造Mat对象的宽度为: " << tmp.cols << endl;
    cout << "构造Mat对象的通道数为: " << tmp.channels() << endl;
    cout << "构造Mat对象的位深度为: " << tmp.depth() << endl;
    cout << "构造Mat对象的数据类型为: " << tmp.type() << endl;
    cout << "构造Mat对象的Size为: " << tmp.size() << endl;
    cout << "构造Mat对象的Step为: " << tmp.step << endl;
    imshow("构造图像", tmp);
    waitKey(0);
}
试运行,结果如下:

修改上面代码,来演示另一构造函数的使用,修改后的代码如下:
#include <iostream>
#include <opencv2/opencv.hpp>

using namespace cv;
using namespace std;

int main()
{
    //Mat tmp(100,200, CV_8U);
    //Mat tmp(100, 200, CV_8UC2);
    //Mat tmp(100, 200, CV_8SC3);
    //Mat tmp = Mat(Size(400, 200), CV_8UC3, Scalar(255,0,0));
    //int size[] = {400,200};
    // Mat tmp = Mat(2, size, CV_8UC3, Scalar(0,255,0));
    //Mat tmp = Mat(1, size, CV_8UC3, Scalar(0, 255, 0));
    //vector<int> size(2);
    //size[0] = 400;
    //size[1] = 200;
    //Mat tmp = Mat(size, CV_8UC3, Scalar(0, 255, 0));
    Mat src = imread("1.jpg");
    src.resize(src.rows / 2, src.cols / 2);
    //Mat tmp = Mat(src);
    //Mat tmp = Mat(src.rows, src.cols, src.type(),src.data);
    //Mat tmp = Mat(src.size(), src.type(), src.data);
    //Mat tmp = Mat(700,800, CV_8UC3, src.data+800*3);
    //Range rowRange = Range(0, 700);
    //Range colRange = Range(0, 700);
    //Mat tmp = Mat(src, rowRange, colRange);
    //Rect rec = Rect(100, 0, 700, 700);
    //Mat tmp = Mat(src, rec);
    Range rowRange = Range(0, 700);
    Range colRange = Range(100, 700);
    Range ranges[] = {rowRange, colRange};
    Mat tmp = Mat(src, ranges);
    cout <<"构造Mat对象的高度为: " << tmp.rows << endl;
    cout << "构造Mat对象的宽度为: " << tmp.cols << endl;
    cout << "构造Mat对象的通道数为: " << tmp.channels() << endl;
    cout << "构造Mat对象的位深度为: " << tmp.depth() << endl;
    cout << "构造Mat对象的数据类型为: " << tmp.type() << endl;
    cout << "构造Mat对象的Size为: " << tmp.size() << endl;
    cout << "构造Mat对象的Step为: " << tmp.step << endl;
    imshow("构造图像", tmp);
    waitKey(0);
}
试运行,结果如下:
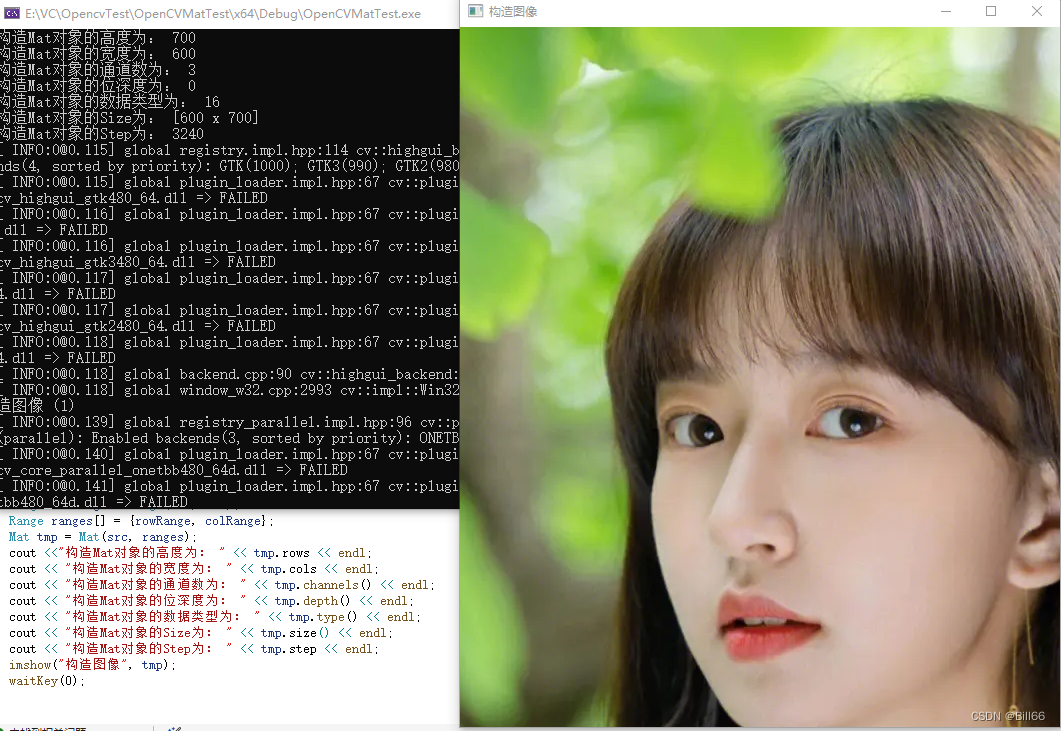 修改上面代码,来演示另一构造函数的使用,修改后的代码如下:
// OpenCVMatTest.cpp : 此文件包含 "main" 函数。程序执行将在此处开始并结束。


#include <iostream>
#include <opencv2/opencv.hpp>

using namespace cv;
using namespace std;

int main()
{
    //Mat tmp(100,200, CV_8U);
    //Mat tmp(100, 200, CV_8UC2);
    //Mat tmp(100, 200, CV_8SC3);
    //Mat tmp = Mat(Size(400, 200), CV_8UC3, Scalar(255,0,0));
    //int size[] = {400,200};
    // Mat tmp = Mat(2, size, CV_8UC3, Scalar(0,255,0));
    //Mat tmp = Mat(1, size, CV_8UC3, Scalar(0, 255, 0));
    //vector<int> size(2);
    //size[0] = 400;
    //size[1] = 200;
    //Mat tmp = Mat(size, CV_8UC3, Scalar(0, 255, 0));
    Mat src = imread("1.jpg");
    src.resize(src.rows / 2, src.cols / 2);
    //Mat tmp = Mat(src);
    //Mat tmp = Mat(src.rows, src.cols, src.type(),src.data);
    //Mat tmp = Mat(src.size(), src.type(), src.data);
    //Mat tmp = Mat(700,800, CV_8UC3, src.data+800*3);
    //Range rowRange = Range(0, 700);
    //Range colRange = Range(0, 700);
    //Mat tmp = Mat(src, rowRange, colRange);
    //Rect rec = Rect(100, 0, 700, 700);
    //Mat tmp = Mat(src, rec);
    Range rowRange = Range(0, 700);
    Range colRange = Range(100, 700);
    //Range ranges[] = {rowRange, colRange};
    //Mat tmp = Mat(src, ranges);
    vector<Range> ranges1(2);
    ranges1[0] = rowRange;
    ranges1[1] = colRange;
    Mat tmp = Mat(src, ranges1);
    cout <<"构造Mat对象的高度为: " << tmp.rows << endl;
    cout << "构造Mat对象的宽度为: " << tmp.cols << endl;
    cout << "构造Mat对象的通道数为: " << tmp.channels() << endl;
    cout << "构造Mat对象的位深度为: " << tmp.depth() << endl;
    cout << "构造Mat对象的数据类型为: " << tmp.type() << endl;
    cout << "构造Mat对象的Size为: " << tmp.size() << endl;
    cout << "构造Mat对象的Step为: " << tmp.step << endl;
    imshow("构造图像", tmp);
    waitKey(0);
}
由于篇幅关系,OpenCV构造函数暂时介绍在这里,将在下篇博文中继续介绍OpenCV Mat类。
本篇 博文示例是基于OpenCV4.8(opencv目录位于d盘根目录下)及VS2022。示例源码已上传到CSDN,其链接为:https://download.csdn.net/download/billliu66/88831683






![[word] word技巧分享_word自动编号的标题 #知识分享#知识分享#其他](https://img-blog.csdnimg.cn/img_convert/157b6d3815e3108636643ed2a05b7e90.jpeg)

