文章目录
- 1.Vue3.3新特性 - defineOptions
- Vue3.3新特性 - defineModel
- 3.Pinia快速入门
- 4.手动添加Pinia到Vue项目
- 5.Vue3 - Pinia的基本语法
- 6.action的异步实现
- 7.Vue3-Pinia-storeToRefs方法
- 8.Pinia持久化插件
- 安装
- 用法
1.Vue3.3新特性 - defineOptions
背景说明
有<script setup>之前,如果要定义 props, emits 可以轻而易举地添加一个与setup平级的属性,但是用了script setup后,就没法这么干了,setup属性已经没有了,自然无法添加与其平级的属性
为了解决这一问题,引入了defineProps 与 defineEmits这两个宏。但这只解决了props与emits这两个属性。如果我们要定义组件的name或其他自定义的属性,还是得回到最原始的用法 – 再添加一个普通的<script>标签。这样就会存在两个<script>标签。让人无法接受。
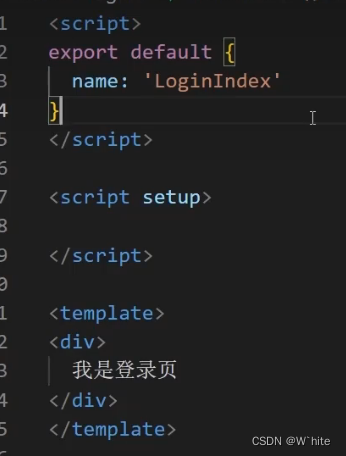
一定要另建一个script给组件起一个名字
所以在Vue3.3中新引入了
defineOptions宏.顾名思义,主要是用来定义Option API的选项. 可以用defineOptions定义任意的选项,props,emits,expose,slots除外(应为这些可以使用defineXXX来做到)
<script setup>
defineOptions({
	name: 'Foo',
	inheritAttrs: false,
	// ...更多自定义属性
})
<script>
Vue3.3新特性 - defineModel
Vue3中的V-model 和 defineModel
在Vue3中,自定义组件上使用v-model,相当于传递一个modelValue属性, 同时触发 updata:modelValue 事件
<Child v-model="isVisible">
// 相当于
<Child :modelValue="isVisible" @updata:modelValue="isVisible=$event">
我们需要先定义 props, 再定义 emits. 其中有许多重复的代码. 如果需要修改此值, 还需要手动调用 emit 函数
ps:页面中有一个小的输入框,想要实现的效果是:封装一个输入框组件,并且v-model跟现在的数据做一个绑定
App.vue
<script setup>
import MyInput from '@/components/my-input.vue'
import { ref } from 'vue'
const txt = ref('123456')
</script>

<template>
<div>
	<MyInput v- model="txt"></MyInput>
	{{ txt }}
</div>
</template>
my-input.vue
<script setup>
defineProps({
	modelValue: String
})
const emit = defineEmits(['updata:modelValue'])
</script>

<template>
<div>
	<input
		type="text"
		:value="modelValue"
		@input="e => emit('updata:modelValue', e.target.value)"
	>
</div>
</template>
新写法
<script setup>
const modelValue = defineModel()
modelValue.value++
</script>
<script setup>
import { defineModel } from 'vue'
const modelValue = defineModel()
</script>

<template>
<div>
	<input
		type="text"
		:value="modelValue"
		@input="e => modelValue = e.target.value
	>
</div>
</template>
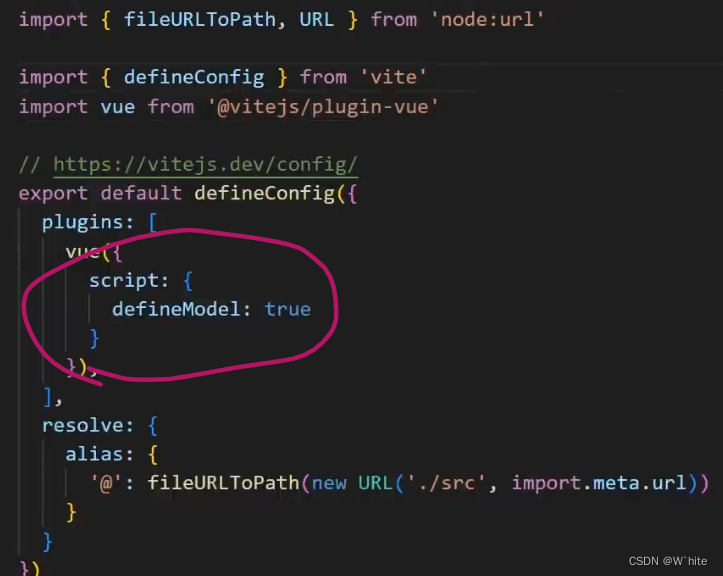
然后往vite.config.js中加配置
3.Pinia快速入门
什么是Pinia
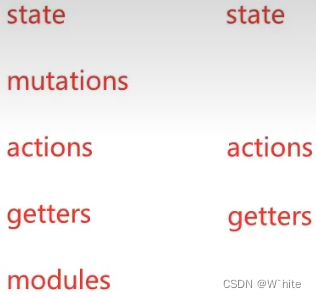
Pinia 是 Vue 的最新状态管理工具, 是Vuex的 替代品
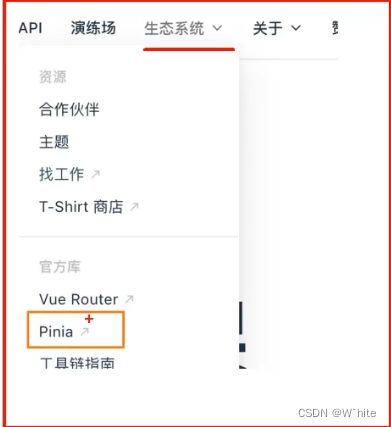
- 提供了更加简单的API(去掉了mutation)
- 提供符合组合式风格的API(和Vue3新语法统一)
- 弃掉了modules的概念, 每一个store都是一个独立的模块
- 配合 TypeScript 更加友好,提供可靠的类型推断
4.手动添加Pinia到Vue项目
在实际开发项目的时候,关于Pinia的配置,可以在创建项目时自动添加
- 使用Vite创建一个空的项目Vue3项目:npm create vue@latest
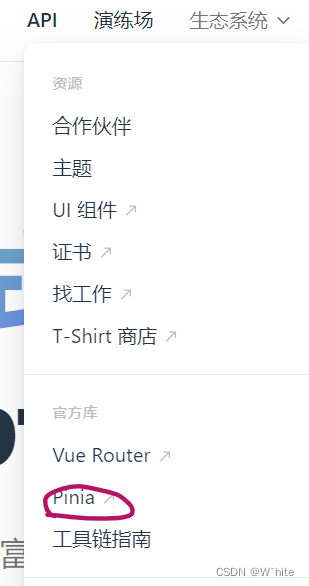
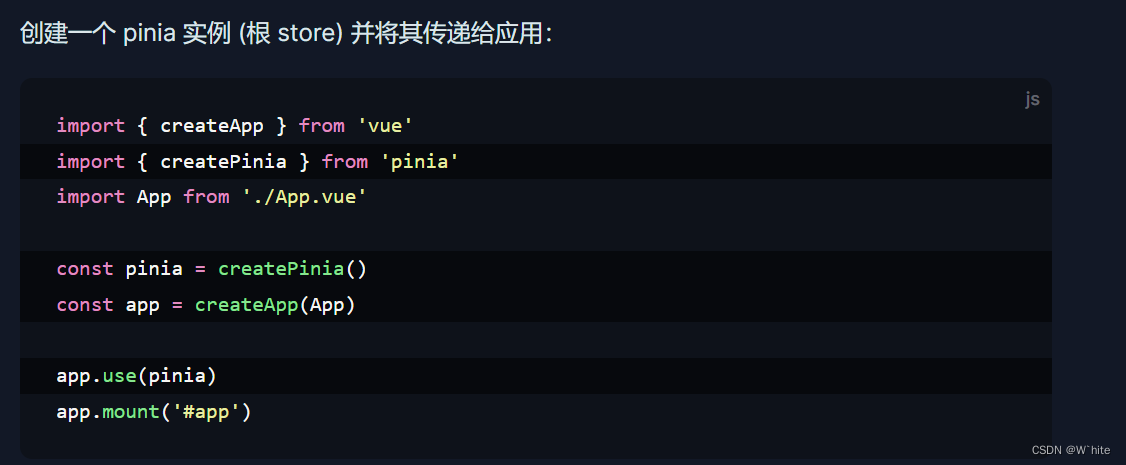
- 按照官方文档 安装 pinia 到项目中(官网:cn.vuejs.org)
- vue3官网中有个生态系统,其中有pinia

main.js
import { createApp } from 'vue'
import { createPinia } from 'pinia'
import App from './App.vue'
const pinia = createPinia() // 创建Pinia实例
const app = createApp(App) // 创建根实例
app.use(pinia).mount('#app') //这个可以拆分成下面的这两个
app.use(pinia)// pinia插件的安装配置
app.mount('#app')// 视图的挂载
5.Vue3 - Pinia的基本语法
定义Store
在深入研究核心概念之前,我们得知道 Store 是用 defineStore() 定义的,它的第一个参数要求是一个独一无二的名字:
import { defineStore } from 'pinia'

// 你可以对 `defineStore()` 的返回值进行任意命名,但最好使用 store 的名字,同时以 `use` 开头且以 `Store` 结尾。(比如 `useUserStore`,`useCartStore`,`useProductStore`)
// 第一个参数是你的应用中 Store 的唯一 ID。
export const useAlertsStore = defineStore('alerts', {
  // 其他配置...
})
这个名字 ,也被用作 id ,是必须传入的, Pinia 将用它来连接 store 和 devtools。为了养成习惯性的用法,将返回的函数命名为 use… 是一个符合组合式函数风格的约定。
defineStore() 的第二个参数可接受两类值:Setup 函数或 Option 对象。
Option Store
与 Vue 的选项式 API 类似,我们也可以传入一个带有 state、actions 与 getters 属性的 Option 对象
export const useCounterStore = defineStore('counter', {
  state: () => ({ count: 0 }),
  getters: {
    double: (state) => state.count * 2,
  },
  actions: {
    increment() {
      this.count++
    },
  },
})
你可以认为 state 是 store 的数据 (data),getters 是 store 的计算属性 (computed),而 actions 则是方法 (methods)。
为方便上手使用,Option Store 应尽可能直观简单。
Setup Store
也存在另一种定义 store 的可用语法。与 Vue 组合式 API 的 setup 函数 相似,我们可以传入一个函数,该函数定义了一些响应式属性和方法,并且返回一个带有我们想暴露出去的属性和方法的对象。
export const useCounterStore = defineStore('counter', () => {
  const count = ref(0)
  const doubleCount = computed(() => count.value * 2)
  function increment() {
    count.value++
  }

  return { count, doubleCount, increment }
})
在 Setup Store 中:
- ref() 就是 state 属性
- computed() 就是 getters
- function() 就是 actions
Setup store 比 Option Store 带来了更多的灵活性,因为你可以在一个 store 内创建侦听器,并自由地使用任何组合式函数。不过,请记住,使用组合式函数会让 SSR 变得更加复杂。
新建store/counter.js
import { defineStore } from 'pinia'
import { ref } from 'vue'

// 定义store
// defineStore(仓库唯一的标识, () => { ... })
export const useCounterStore = defineStore('counter', () => {
    // 声明数据 state - count
    const count = ref(0)
    // 声明操作数据的方法 action
	const addCount = () => count.value++
	const subCount = () => count.value--

    // 声明基于数据派生的计算属性 getters
	const double = computed(() => count.value * 2)

    // 声明数据 state - msg
    const msg = ref('hello pinia')

    return {
        count,
		addCount,
		subCount,

        msg
    }
})
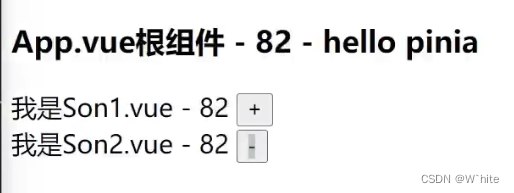
Son1Count.vue
<script setup>
import { useCounterStore } from '@/store/counte
const counterStore = useCounterStore()
</script>

<template>
	<div>
		我是Son1.vue - {{ counterStore.count }} - {{ counterStore.double }}
		<button @click="counterStore.addCount">+</button>
	</div>
</template>

<style scoped>

</style>
Son2Count.vue
<script setup>
import { useCounterStore } from '@/store/counte
const counterStore = useCounterStore()
</script>

<template>
	<div>
		我是Son1.vue - {{ counterStore.count }}
		<button @click="counterStore.subCount">-</button>
	</div>
</template>

<style scoped>

</style>
6.action的异步实现
在action里面不需要考虑同步还是异步,它都可以写,函数里面既可以直接修改数据,也可以先发个请求,拿到数据回来之后再去修改上面的数据
编写方式: 异步action函数的写法和组件中获取异步数据的写法完全一致
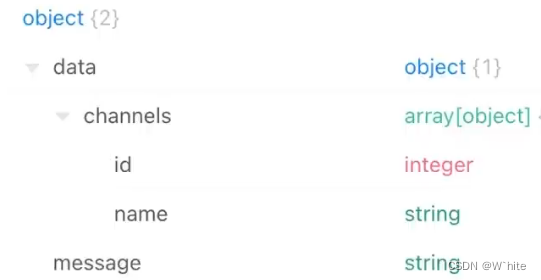
接口地址: http://geek.itheima.net/v1_0/channels
需求: 在Pinia中获取频道列表数据并把数据渲染App组件的模板中
channel.js
import { defineStore } from 'pinia'
import { ref } from 'vue'
import axios from 'axios'

export const useChannelStore = defineStore('channel', () => {
    // 声明数据
    const channelList = ref([])
    //声明操作数据的方法
    const getList = async () => {
    //支持异步
    const { data: { data }} = await axios.get('http://geek.itheima.net/v1_0/channels')
    channelList.value = data.channels
    console.log(data.channels)

    }

    // 声明getters相关
    return {
    channelList,
    getList
    }
})
<script setup>
import Son1Com from '@/components/Son1Com.vue'
import Son2Com from '@/components/Son2Com.vue'
import { useCounterStore } from '@/store/counter'
import { useChannelStore } from './store/channel'👈
const counterStore = useCounterStore ()
const channelStore = useChannelStore ()👈
console.log(counterStore)
</script>

<template>
    <div>
      <h3>
        App.vue根组件
        - {{ counterStore.count }}
        - {{ counterStore.msg }}
      </h3>
      <Son1Com></Son1Com>
      <Son2Com></Son2Com>
      <hr>
      <button @click="channelStore.getList">获取频道数据</button>👈
      <ul>
        <li v-for="item in channelStore.channelList" :key="item.id">{{ item.name }}</li>👈
      </ul>
    </div>
</template>

<style scoped>

</style>
7.Vue3-Pinia-storeToRefs方法
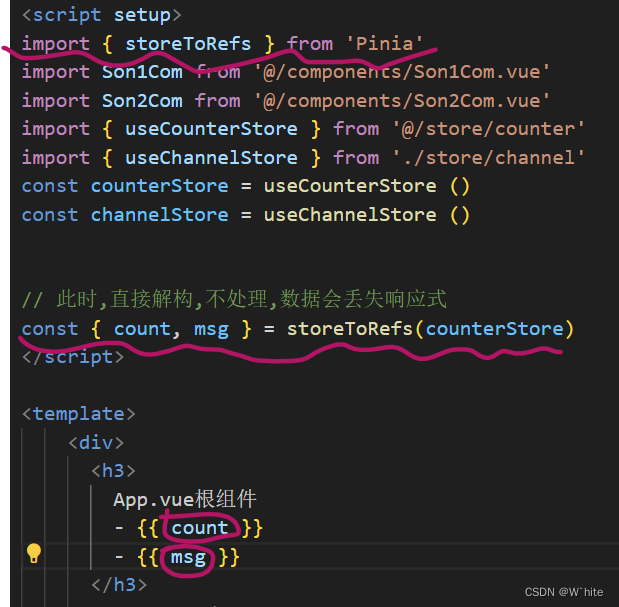
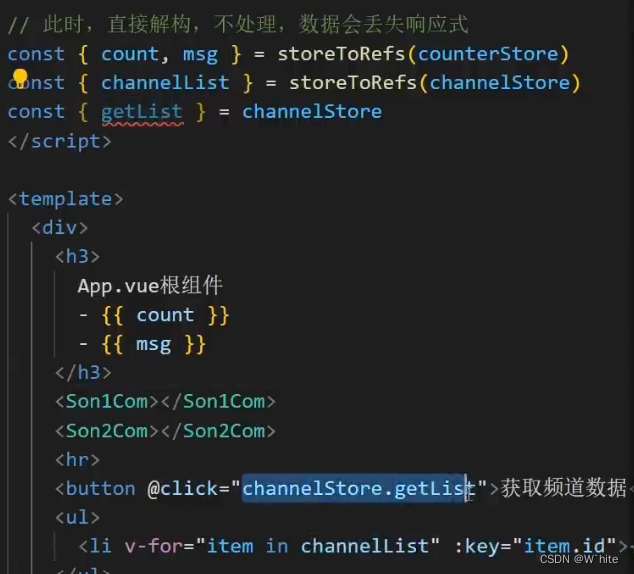
第六点中,如果直接进行解构,不进行处理,数据会丢失响应式,所以可以用到storeToRefs
8.Pinia持久化插件
官方文档:https://prazdevs.github.io/pinia-plugin-persistedstate/zh/
1.安装插件 pinia-plugin-persistedstate
npm i pinia-plugin-persistedstate
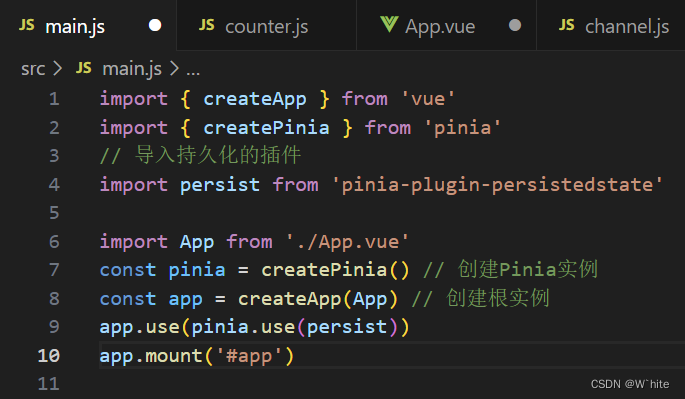
2.main.js 使用
import persist from 'pinia-plugin-persistedstate'

app.use(createPinia().use(persist))
3.store仓库中,persist:true开启
安装
npm
npm i pinia-plugin-persistedstate
将插件添加到 pinia 实例上
import { createPinia } from 'pinia'
import piniaPluginPersistedstate from 'pinia-plugin-persistedstate'

const pinia = createPinia()
pinia.use(piniaPluginPersistedstate)
用法
创建 Store 时,将 persist 选项设置为 true。
- 选项式语法
import { defineStore } from 'pinia'

export const useStore = defineStore('main', {
  state: () => {
    return {
      someState: '你好 pinia',
    }
  },
  persist: true,
})
- 组合式语法
import { defineStore } from 'pinia'

export const useStore = defineStore(
  'main',
  () => {
    const someState = ref('你好 pinia')
    return { someState }
  },
  {
    persist: true,
  },
)
