文章末尾附上仓库地址!!!!
清单
- 模板基于 electron-vite-vue vue3 + ts + vite
- 组件库 element-plus
- hooks库 vueuse 、useElementPlusTheme
初始化工程
使用 electron-vite 作为模板,方便大家尽快吧项目跑起来
# 创建模板
npm create electron-vite
# 进入目录
cd electron-vite-vue

# 下载依赖,如果有异常的话可以尝试 cnpm
cnpm i

# 目前这个模板缺少了 esbuild 依赖,所以需要补上
cnpm i esbuild -D

# 启动项目
npm run dev
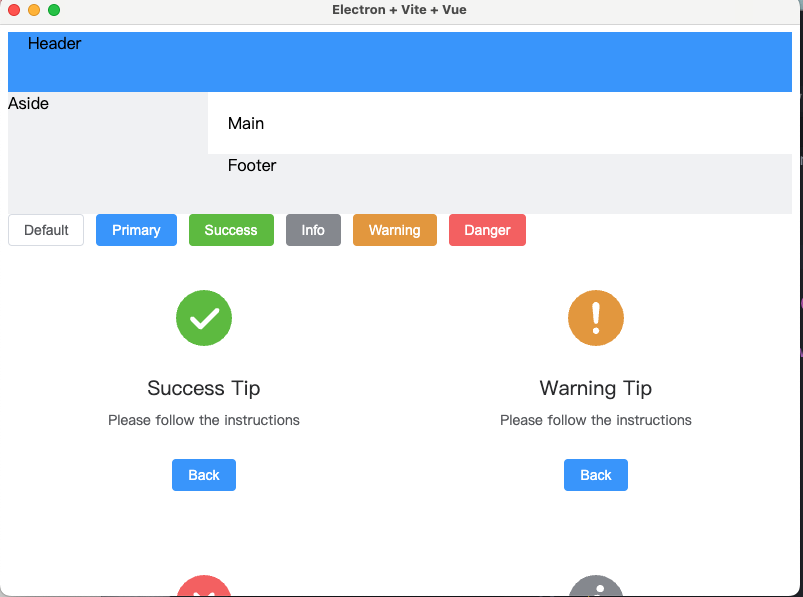
出现这个页面,初始化工程部分就结束了

ElementPlus 引入
cnpm i element-plus
main.ts 全局引入 ElementPlus
修改 src/main.ts
import { createApp } from "vue";
import "./style.css";
import App from "./App.vue";
// ElementPlus 引入
import ElementPlus from "element-plus";
import "element-plus/dist/index.css";

const app = createApp(App);
// ElementPlus 注册
app.use(ElementPlus);
app.mount("#app").$nextTick(() => {
  postMessage({ payload: "removeLoading" }, "*");
});
启动项目如果报以上错误的话,将缺的两个包下载就好了

cnpm i @vue/shared @vue/reactivity
测试组件引用
修改 src/App.vue 测试一下组件引用, 务必清空src/style.css哈
<template>
  <el-container>
    <el-header class="header">Header</el-header>
    <el-container>
      <el-aside width="200px" class="aside">Aside</el-aside>
      <el-container>
        <el-main class="main">Main</el-main>
        <el-footer class="footer">Footer</el-footer>
      </el-container>
    </el-container>
  </el-container>
  <el-row class="mb-4">
    <el-button>Default</el-button>
    <el-button type="primary">Primary</el-button>
    <el-button type="success">Success</el-button>
    <el-button type="info">Info</el-button>
    <el-button type="warning">Warning</el-button>
    <el-button type="danger">Danger</el-button>
  </el-row>
  <el-row>
    <el-col :sm="12" :lg="6">
      <el-result
        icon="success"
        title="Success Tip"
        sub-title="Please follow the instructions"
        >
        <template #extra>
          <el-button type="primary">Back</el-button>
        </template>
        </el-result>
          </el-col>
          <el-col :sm="12" :lg="6">
          <el-result
          icon="warning"
          title="Warning Tip"
          sub-title="Please follow the instructions"
            >
            <template #extra>
            <el-button type="primary">Back</el-button>
            </template>
            </el-result>
            </el-col>
            <el-col :sm="12" :lg="6">
            <el-result
          icon="error"
          title="Error Tip"
          sub-title="Please follow the instructions"
            >
            <template #extra>
            <el-button type="primary">Back</el-button>
            </template>
            </el-result>
            </el-col>
            <el-col :sm="12" :lg="6">
            <el-result icon="info" title="Info Tip">
            <template #sub-title>
            <p>Using slot as subtitle</p>
            </template>
            <template #extra>
            <el-button type="primary">Back</el-button>
            </template>
            </el-result>
            </el-col>
            </el-row>
            </template>

            <script setup lang="ts"></script>

<style>
  .header {
    background: var(--el-color-primary);
  }
  .aside {
    background: var(--el-bg-color-page);
  }
  .main {
    background: var(--el-bg-color);
  }
  .footer {
    background: var(--el-bg-color-page);
  }
</style>
ElementPlus暗黑模式
官方文档传送门
- ElementPlus的暗黑模式 切换方式是在 html元素属性上 增删 class=“dark”
- 暗黑模式需要在man.ts 文件引入
- 可以通过 useDark | VueUse 切换暗黑模式
引用element-plus暗黑主题样式
修改 src/main.ts
//.......
// 增加暗黑模式样式文件
import 'element-plus/theme-chalk/dark/css-vars.css'
//.......
使用useColorMode
官方文档传送门
具有自动数据持久化的主题模式hooks(深色/浅色/自定义)。
- 将颜色模式存在本地存储中持久化
- 颜色模式为相应式属性
cnpm i @vueuse/core
修改 src/App.vue 改造增加模式切换部分
<template>
  <div style="margin-top: 20px">
    <el-radio-group v-model="mode" size="small">
      <el-radio-button label="light">浅色</el-radio-button>
      <el-radio-button label="dark">暗黑</el-radio-button>
      <el-radio-button label="auto">跟随系统</el-radio-button>
    </el-radio-group>
  </div>
<!--   ......... -->
</template>
<script setup lang="ts">
import { useColorMode } from "@vueuse/core";
import { onBeforeMount } from "vue";
const mode = useColorMode({
  // 如果模式为auto也需要回显回auto
  emitAuto: true,
  // 默认模式先默认auto,后续通过Electorn拿到当前App主题
  initialValue: "auto",
});
</script>
Electron暗黑主题同步
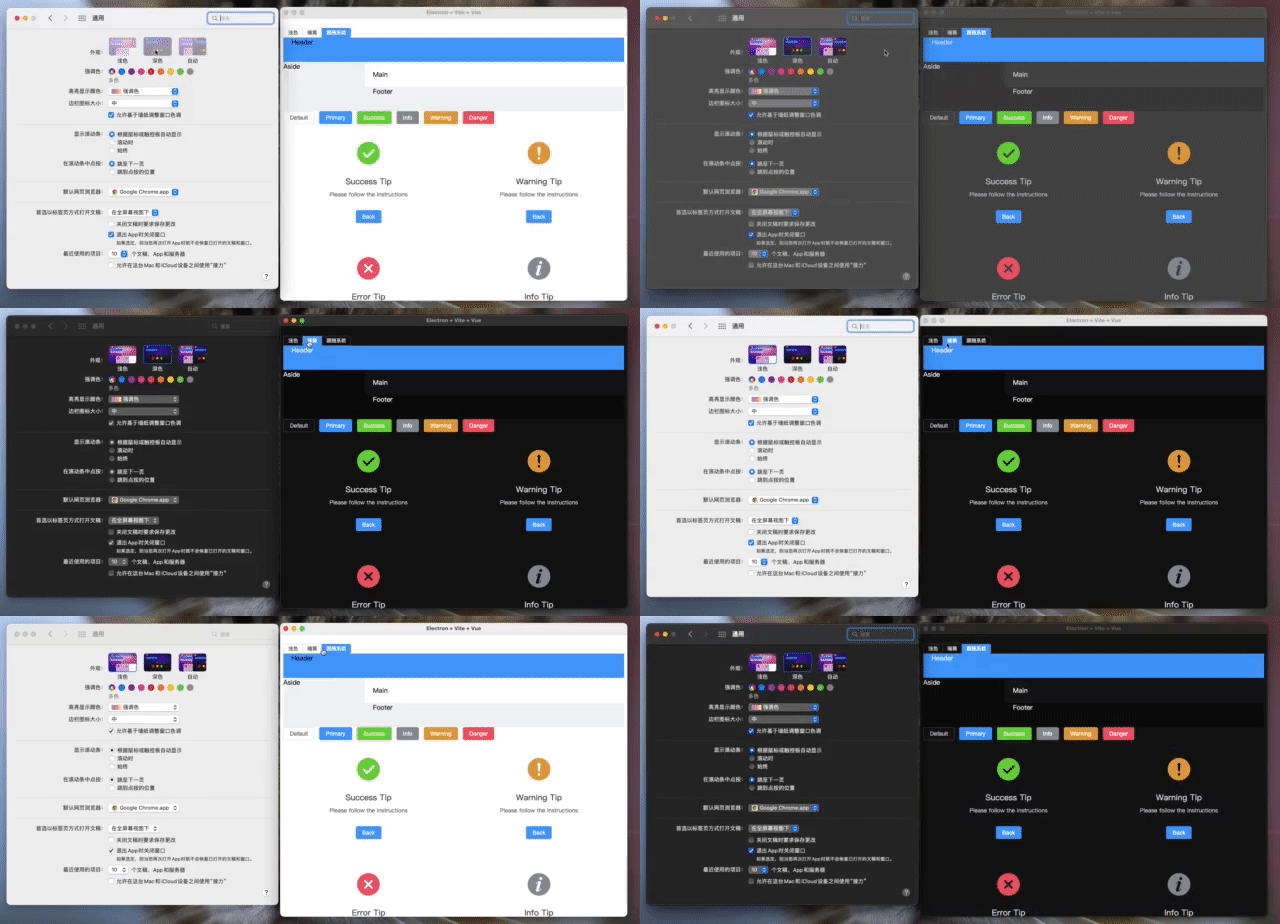
细心的小伙伴可能发现了,在改变暗黑模式时,顶部的窗口颜色并没有同步,只有在auto模式下才同步。这是因为顶部的窗口是原生窗口,我们只是改变了webpage 也就是我们特指“html” 部分的主题颜色,下面我们就像两部分联动起来。
IPC(进程间通信)
- ipcMain模块用于从主进程(main process)异步通信到renderer进程。
- ipcRenderer模块用于从一个renderer进程异步传送到主进程。
这里本章不做过多介绍,可以先简单理解为发布订阅,后续会更新此系列文章。
改造主线程
修改 electron/main/index.ts 增加两个主线程监听,放在文件末尾即可
// 获取APP当前主题模式
ipcMain.handle("dark-mode", () => {
  return nativeTheme.themeSource;
});
// 设置APP主题模式
ipcMain.handle("dark-mode:change", (_, type: "system" | "light" | "dark") => {
  nativeTheme.themeSource = type;
  return nativeTheme.themeSource;
});
改造
修改 src/App.vue 页面挂载时获取APP 的主题,同步到主题中
<script setup lang="ts">
  import { useColorMode } from "@vueuse/core";
  import { ipcRenderer } from "electron";
  import { onBeforeMount } from "vue";
  const mode = useColorMode({
    emitAuto: true,
    initialValue: "auto",
  });
  // 监听 Mode 改变
  const changeModel = (mode: "light" | "dark" | "auto") => {
    // Electorn的主题模式 auto 为 system 所以需要转换
    ipcRenderer.invoke("dark-mode:change", mode === "auto" ? "system" : mode);
  };
  onBeforeMount(() => {
    // 通过 ipcRenderer 与主线程通信
    // 获取到App主题 同步到 useColorMode 中
    ipcRenderer.invoke("dark-mode").then((type: "light" | "dark" | "system") => {
      mode.value = type == "system" ? "auto" : type;
    });
  });
</script>
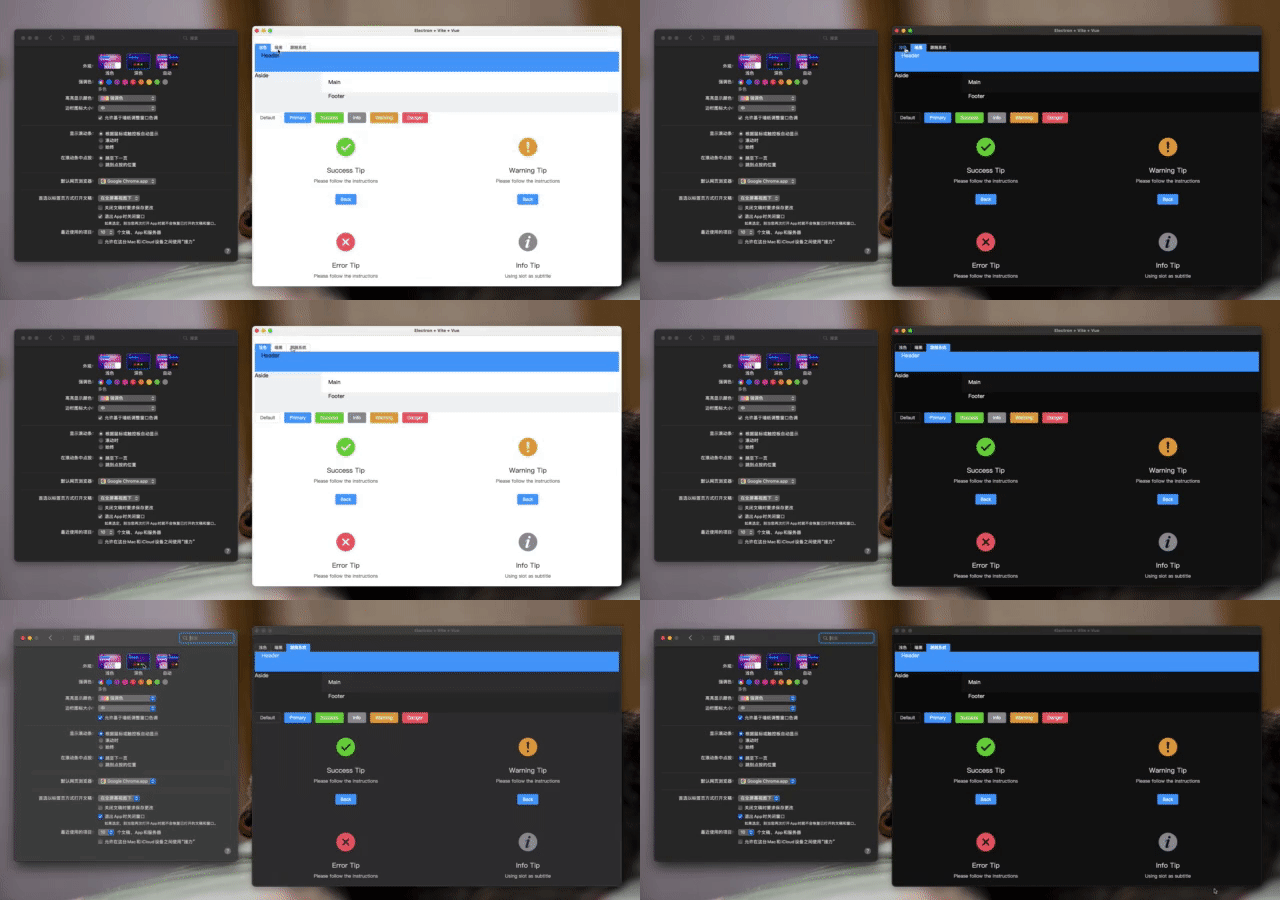
主题切换
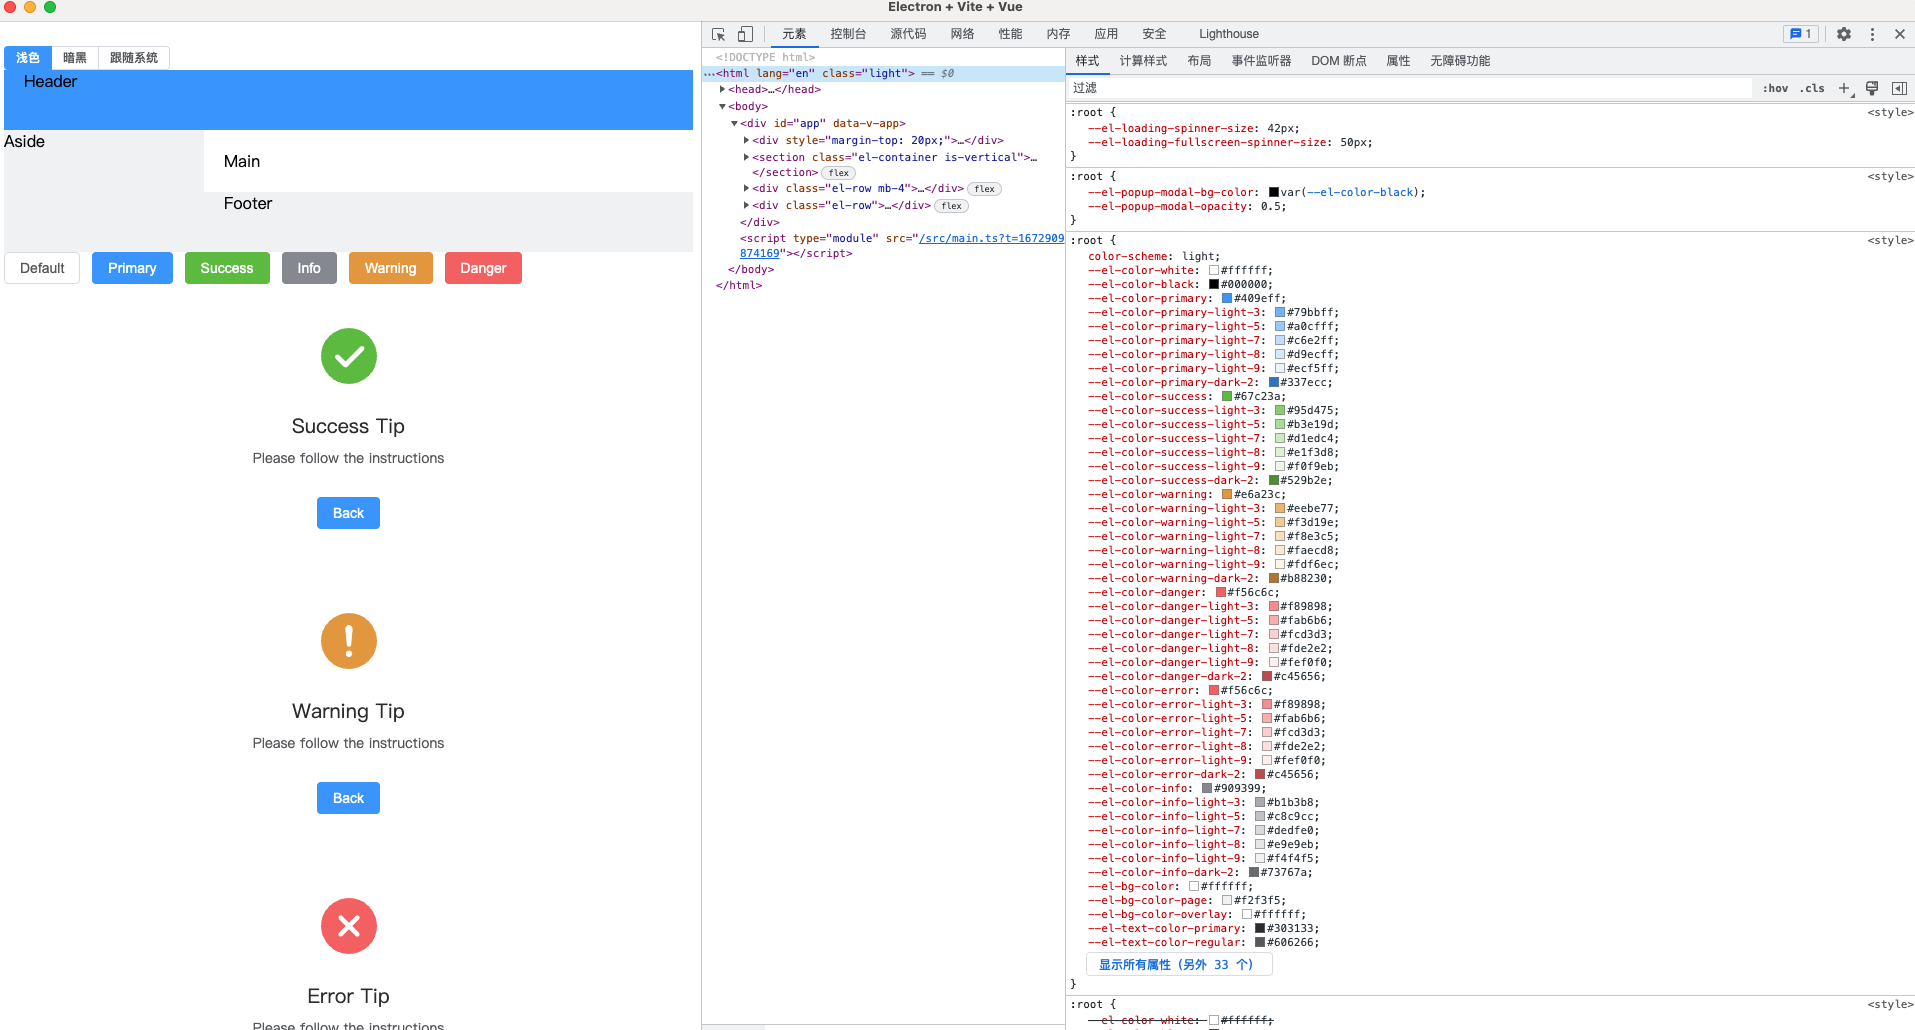
因为 ElementPlus 的主题可以通过css变量控制,如下面这个图一样。
useElementPlusTheme
useElementPlusTheme仓库地址
这个hooks没有找到原作者的博客地址以及文档,但是找到了仓库地址。为了代码可控性以及维护性,直接在文件中创建useElementPlusTheme 而不是下载。
增加文件 src/hooks/useElementPlusTheme.ts
import { onBeforeMount } from "vue";

/** 变量前缀 */
const PRE = "--el-color-primary";
const PRE_LIGHT = `${PRE}-light`;
const PRE_DARK = `${PRE}-dark`;
/** 白色 */
const WHITE = "#ffffff";
/** 黑色 */
const BLACK = "#000000";

const html = document.documentElement;

/**
 * 混合颜色
 */
const mix = (color1: string, color2: string, weight: number) => {
  weight = Math.max(Math.min(Number(weight), 1), 0);
  const r1 = parseInt(color1.substring(1, 3), 16);
  const g1 = parseInt(color1.substring(3, 5), 16);
  const b1 = parseInt(color1.substring(5, 7), 16);
  const r2 = parseInt(color2.substring(1, 3), 16);
  const g2 = parseInt(color2.substring(3, 5), 16);
  const b2 = parseInt(color2.substring(5, 7), 16);
  const r = Math.round(r1 * (1 - weight) + r2 * weight);
  const g = Math.round(g1 * (1 - weight) + g2 * weight);
  const b = Math.round(b1 * (1 - weight) + b2 * weight);
  const _r = ("0" + (r || 0).toString(16)).slice(-2);
  const _g = ("0" + (g || 0).toString(16)).slice(-2);
  const _b = ("0" + (b || 0).toString(16)).slice(-2);
  return "#" + _r + _g + _b;
};

/**
 * 更换颜色的方法
 * @param color 颜色
 */
const changeTheme = (color?: string) => {
  if (!color) return;
  // 设置主要颜色
  html.style.setProperty(PRE, color);
  // 循环设置次级颜色
  for (let i = 1; i < 10; i += 1) {
    html.style.setProperty(`${PRE_LIGHT}-${i}`, mix(color, WHITE, i * 0.1));
  }
  // 设置主要暗色
  const dark = mix(color, BLACK, 0.2);
  html.style.setProperty(`${PRE_DARK}-2`, dark);
};

export function useElementPlusTheme(color?: string) {
  onBeforeMount(() => changeTheme(color));
  return {
    changeTheme,
  };
}
使用 useElementPlusTheme
修改 src/App.vue
<template>
<!--  ......  -->
  <div>主题颜色: <el-color-picker v-model="themeColor" @change="changeTheme"/></div>
<!--  ......  -->
</template>
<script setup lang="ts">
import { useElementPlusTheme } from "./hooks/useElementPlusTheme";
// ......
const themeColor = ref("#cc312c");
const { changeTheme } = useElementPlusTheme(themeColor.value);
</script>
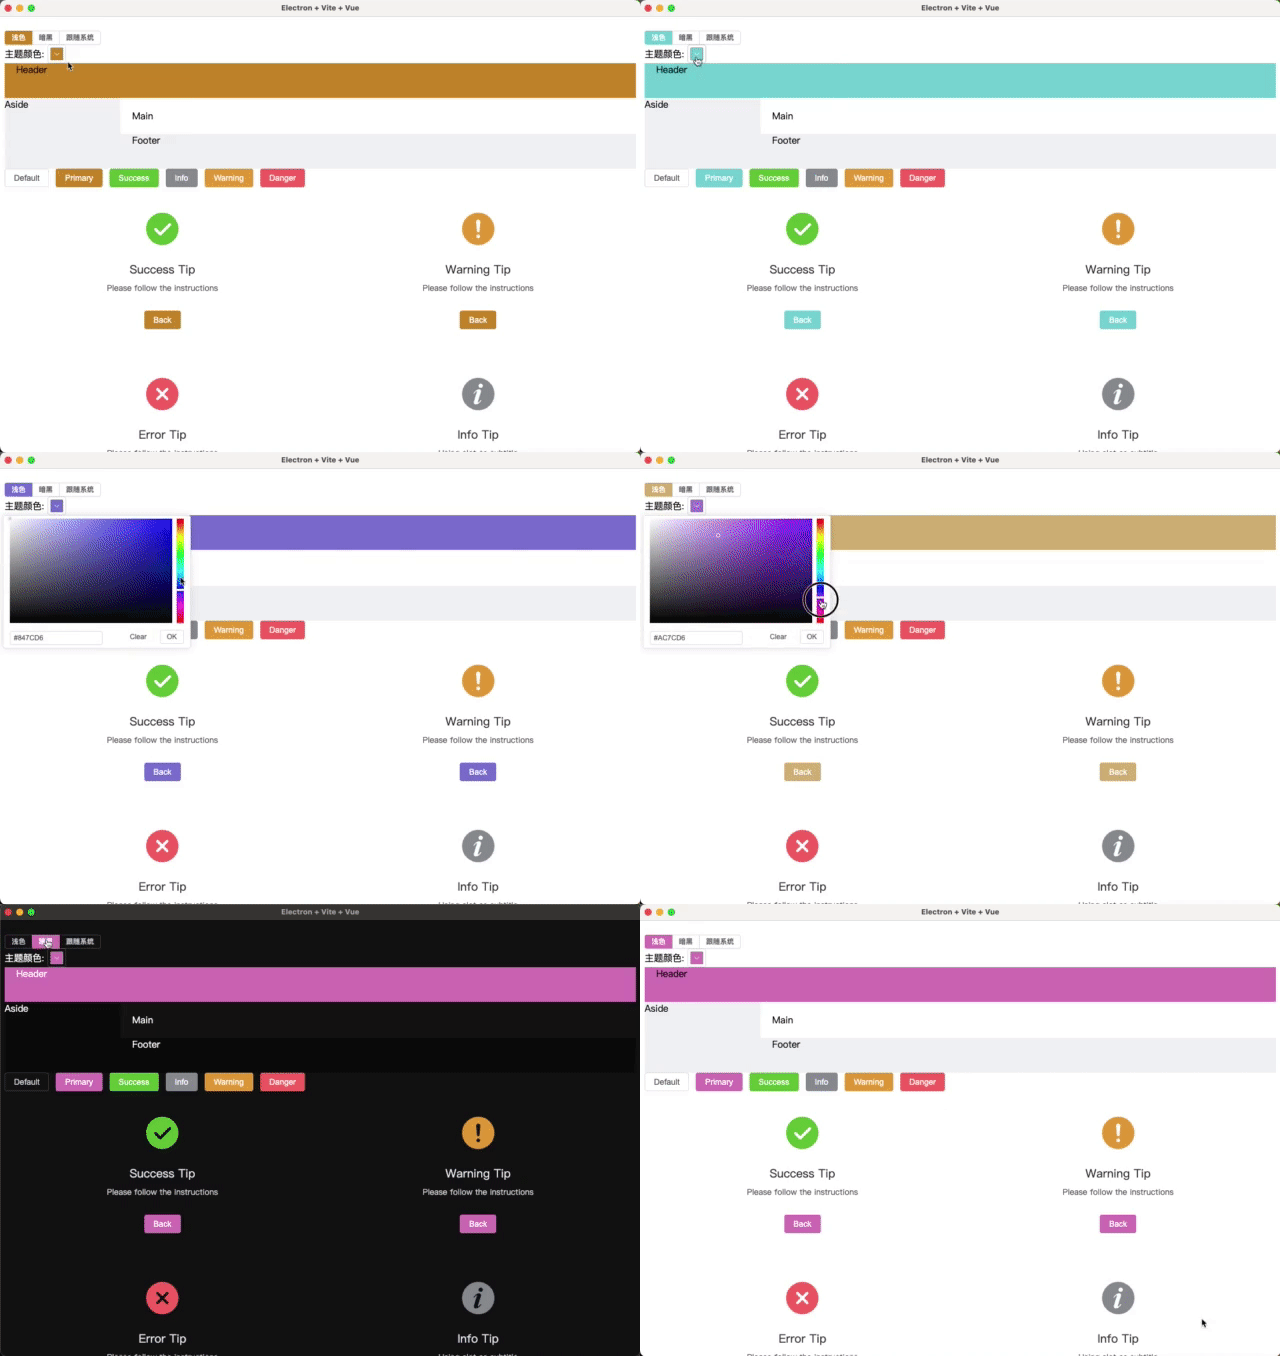
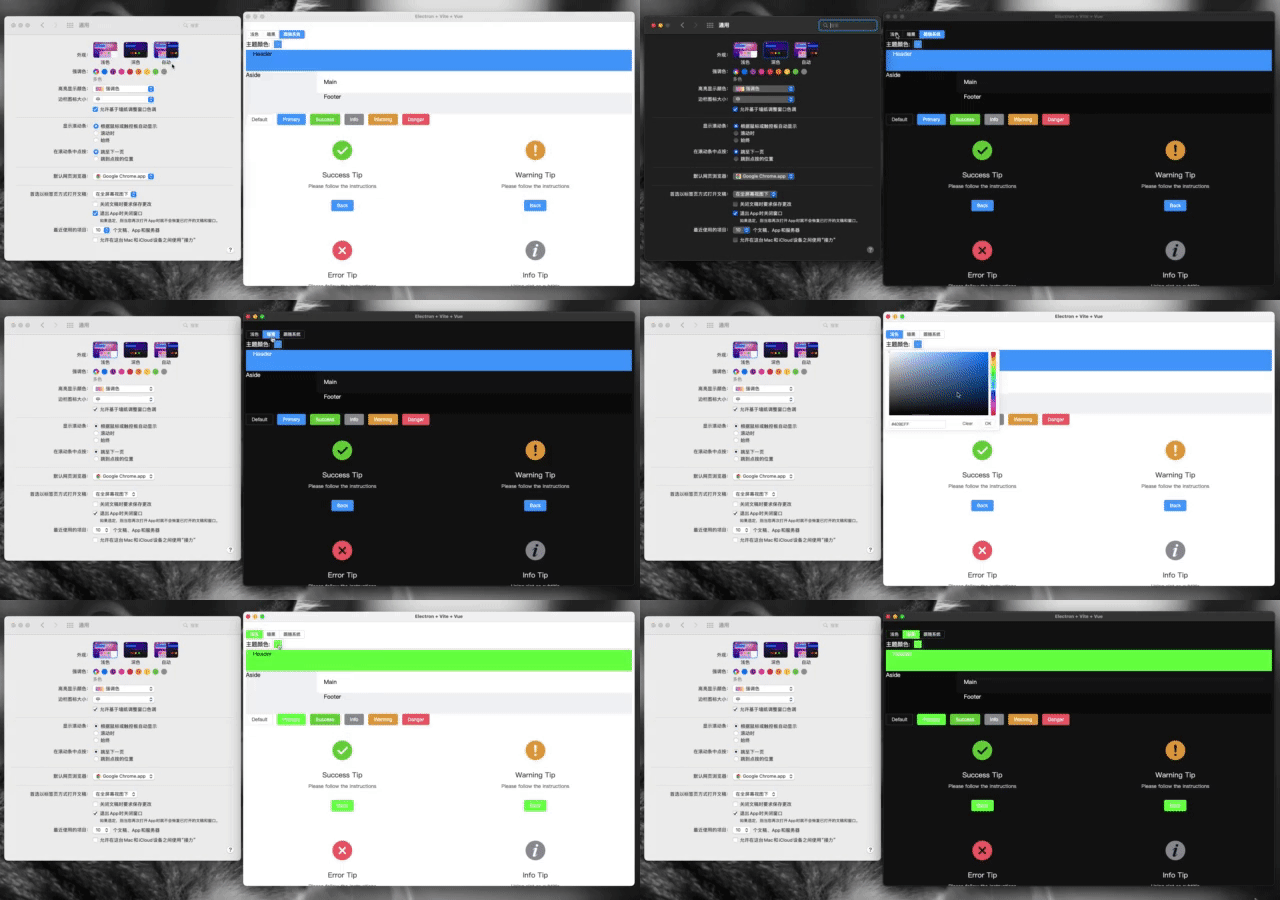



![[Leetcode] 二叉树的遍历](https://img-blog.csdnimg.cn/img_convert/f793105ca0ebd6224c6f50d2dc3f981c.png)
