Windows11 用 HyperV 安装 Ubuntu-16.04 虚拟机
- 1. 确保已经开启HyperV
- 2. 准备Ubuntu16.04镜像(推荐64位的)
- 3. HyperV ->快速创建 -> 更改安装源 选刚刚下载的镜像(.iso)文件就好 -> 创建虚拟机[^1]
前提:VMware需要付费,Hyper-V是windows11装机自带,但其操作系统最“久远”是Ubuntu18.04版本,因此我们需要自己想办法从本地安装。
1. 确保已经开启HyperV
可以参考如下教程 Win11 家庭版/专业版开启Hyper-V
- 创建 hyper-v.cmd 文件 并 运行 (注意:显示文件扩展名)
pushd "%~dp0"
dir /b %SystemRoot%\servicing\Packages\*Hyper-V*.mum >hyper-v.txt
for /f %%i in ('findstr /i . hyper-v.txt 2^>nul') do dism /online /norestart /add-package:"%SystemRoot%\servicing\Packages\%%i"
del hyper-v.txt
Dism /online /enable-feature /featurename:Microsoft-Hyper-V-All /LimitAccess /ALL
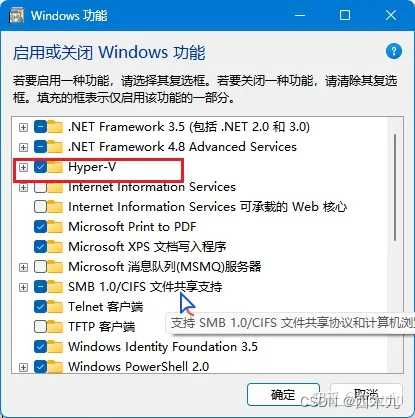
- 启用 Hyper-V:控制面板 -》程序和功能 -》启用或关闭windows功能-》勾选Hyper-V -》 打开 Windows虚拟机监控程序平台 & 虚拟机平台 -》 确定(不需要重新启动)
|

|
2. 准备Ubuntu16.04镜像(推荐64位的)
- 阿里云开源镜像:链接;【推荐】
- Ubuntu官网: 链接;
3. HyperV ->快速创建 -> 更改安装源 选刚刚下载的镜像(.iso)文件就好 -> 创建虚拟机1
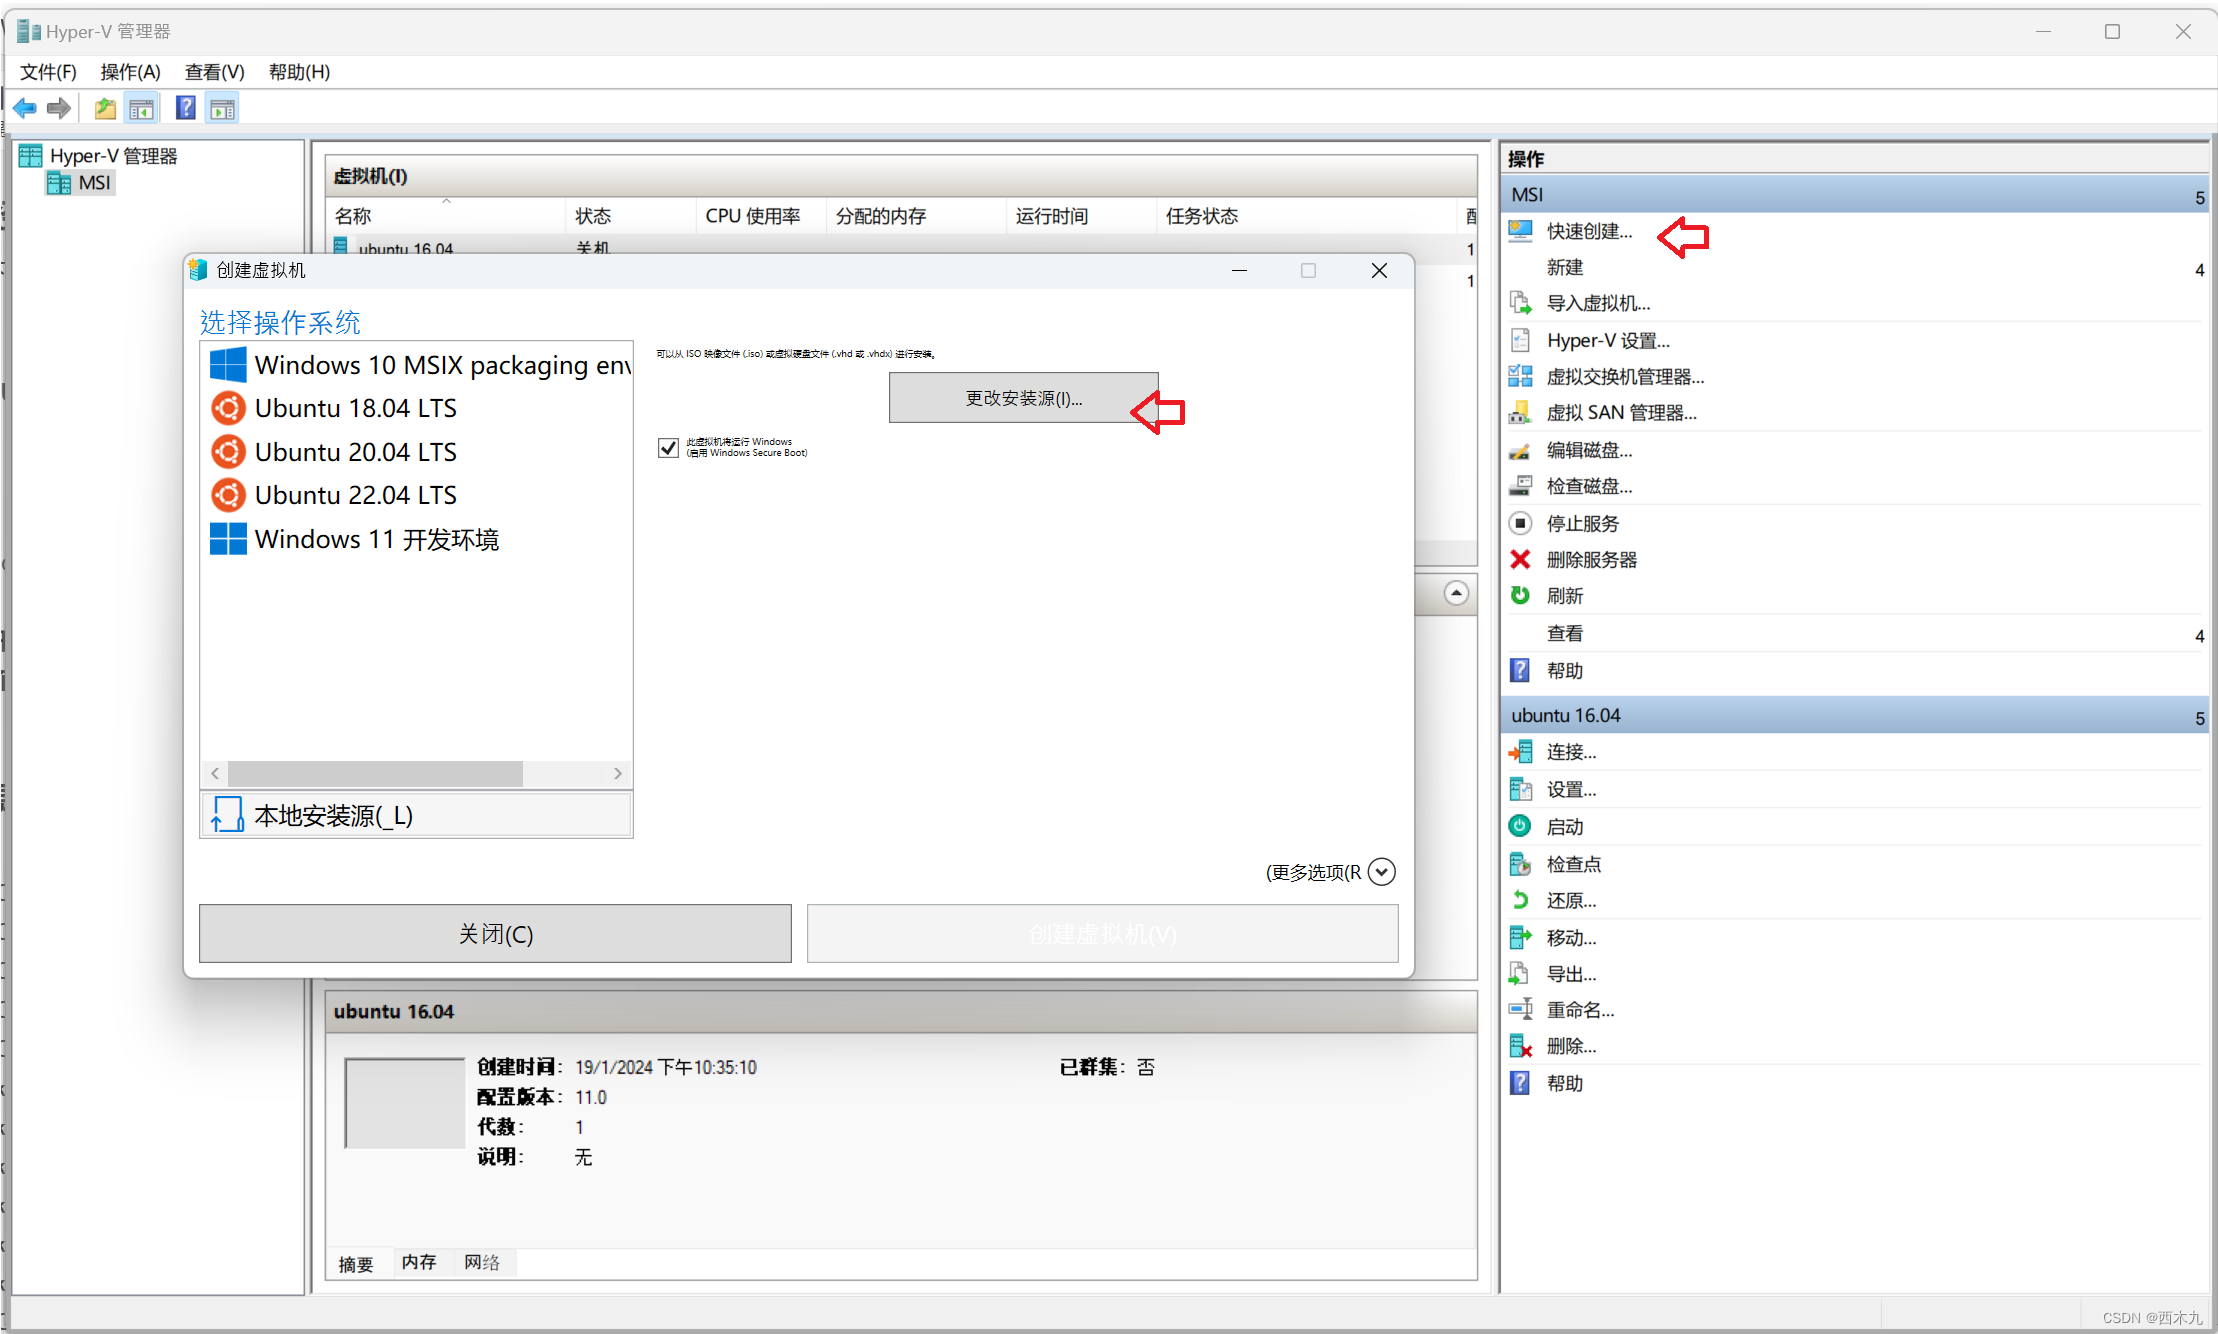
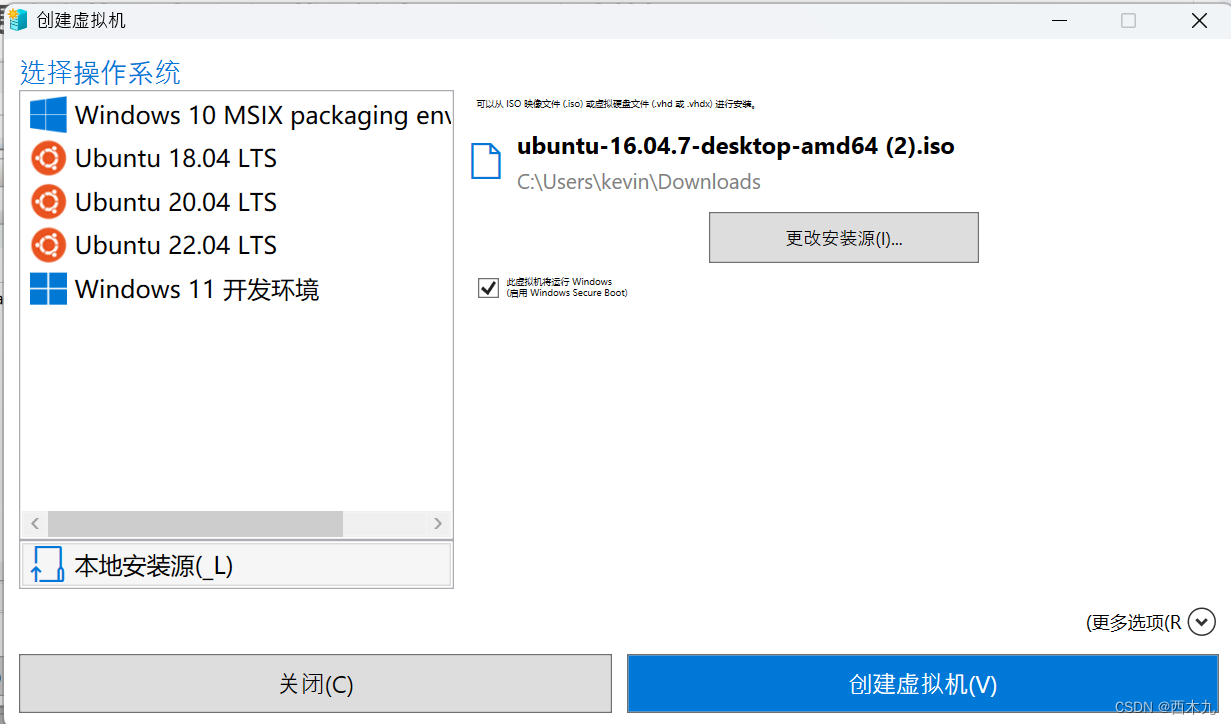
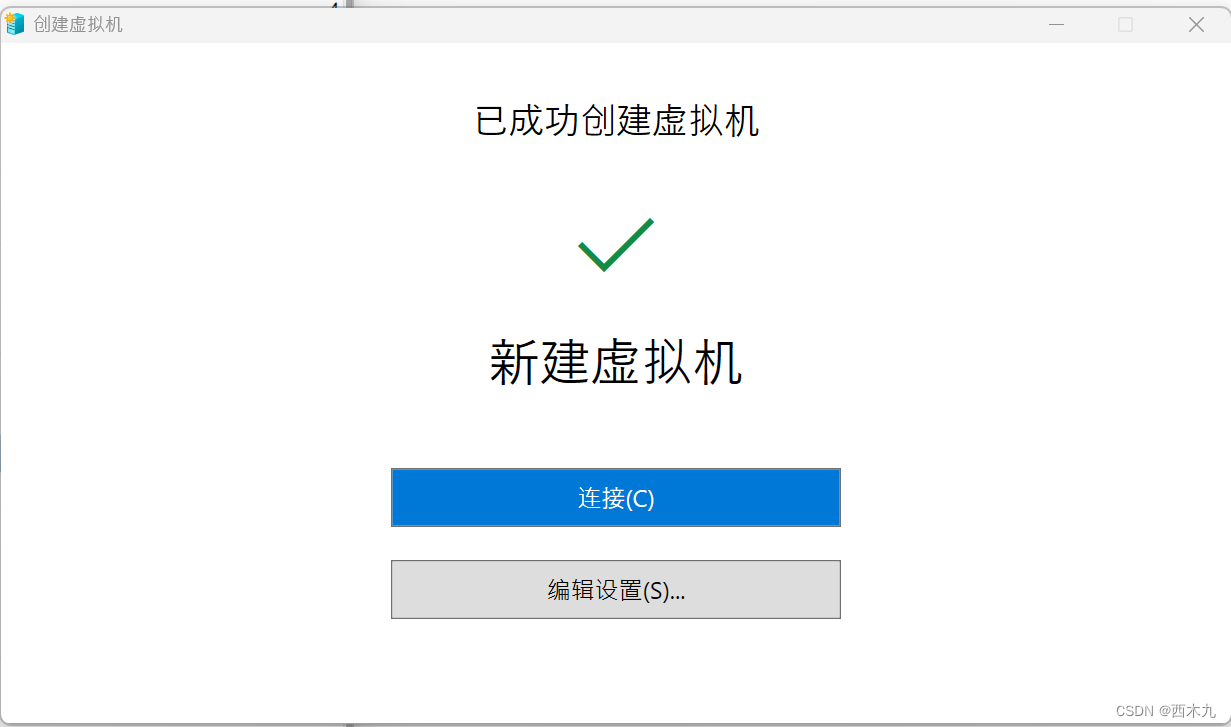
| 1. 按提示往下按,如下图的位置选 "Install third party" | 2. 这个地方选 “Erase disk and install Ubuntu” |

|

|
【注】如果按不成功,换个源重新再试试。
参考视频
[1]: https://youtu.be/B_tnnDlUuzw?si=MO85fcPdLL1eGcYe ↩︎






![[C#][opencvsharp]winform实现自定义卷积核锐化和USM锐化](https://img-blog.csdnimg.cn/direct/a7dff0c0bf88402c914b51a8509963b6.jpeg)

