真实的工作中 Node.js 版本不是随意可升级的,此处记录一次折中升级实战~
本章基于 Vite4 开发!
Vite5、 Vitepress, 都需要
Node.js版本18+,20+
node/npm Vite4 Vite5 Vitepress 14.21.3 / 8.13.2 💯 20.11.0 / 10.2.4 💯 💯
第一步:初始化框架
- 全局安装
Vite4
npm i vite@4 -g
如果你想尝试最新版也可,但注意需要 Node.js 版本 18+,20+
npm i vite@latest -g
查看版本号
vite -v
- 基于 Vite 命令 搭建项目
npm create vite@4 my-vue-app --template vue
- 根据提示步骤
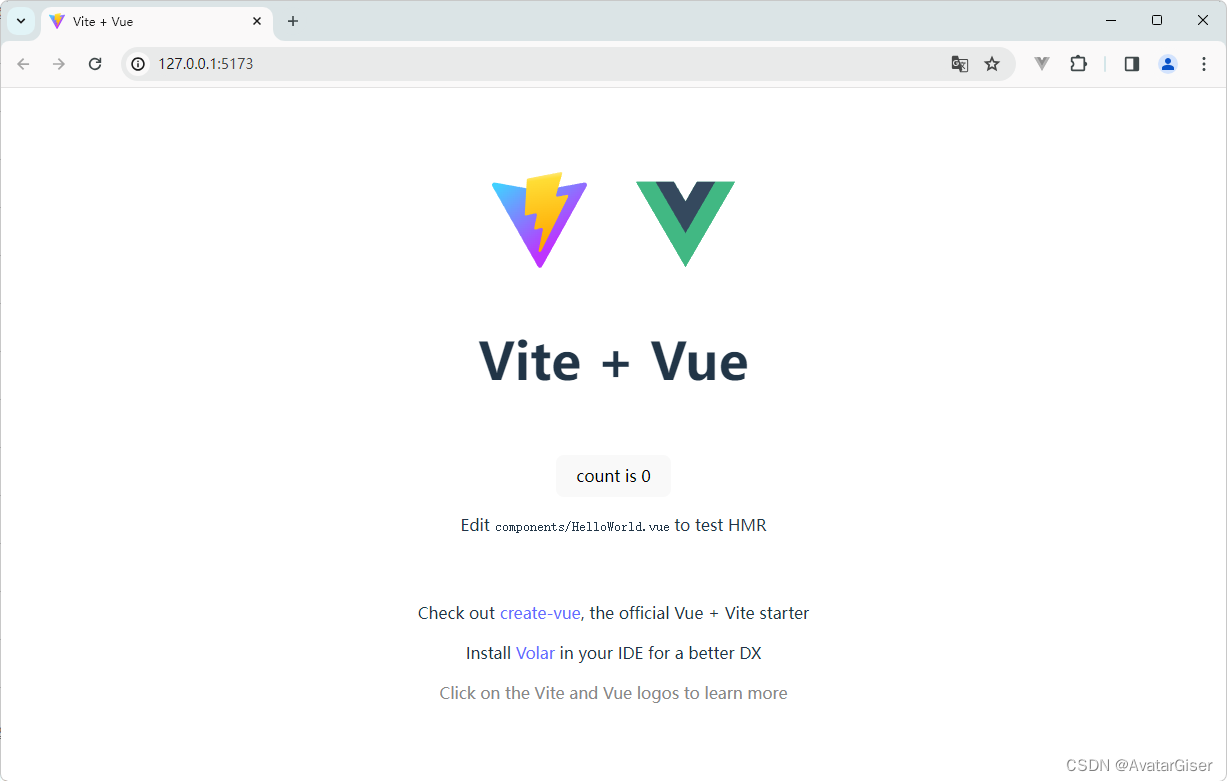
创建项目、进入目录、安装依赖、最后启动
> npm create vite@4 my-vue-app --template vue// [!code ++]
√ Select a framework: » Vue// [!code ++]
√ Select a variant: » JavaScript// [!code ++]

Scaffolding project in D:\project\my-vue-app...

Done. Now run:
  cd my-vue-app # 进入项目目录
  npm install   # 安装依赖
  npm run dev   # 启动
第二步:自定义配置
vite.config.js
- 代码第
6行,base 设为相对路径,打包后可放任意路径; - 代码第
3,8行,必须设置 Vue 插件,用以支持Vue3单文件组件。否则编译报错[vite:build-import-analysis]; - 代码第
15行,限制为工作区 root 路径以外的文件的访问。设为false可连开发版组件库; - 代码
3,19-23行,设置文件系统路径别名 resolve.alias; - 代码
25行,resolve.extensions 导入文件时免后缀;
import { defineConfig } from 'vite'
import vue from '@vitejs/plugin-vue'
import { resolve } from 'path'

export default defineConfig({
    base: './', // 相对路径,打包后可放任意路径
    plugins: [ // 必有插件
        vue()
    ],
    server: {
        host: true,
        port: 8001, // 设置服务启动端口号
        open: true, // 设置服务启动时是否自动打开浏览器
        fs: { // 限制为工作区 root 路径以外的文件的访问
            strict: false
        }
    },
    resolve: {
        alias: { // 路径别名
            "@": resolve(__dirname, 'src'),
            "@images": resolve(__dirname, 'src/assets/images'),
            "@public": resolve(__dirname, 'public'),
        },
        // 导入文件时免后缀
        extensions: ['.vue', '.js', '.ts', '.jsx', '.tsx', '.json']
    }
})
packages.json
- 插件都是固定版本,避免意想不到的错误;
- 把接下来要安装的插件都已列出,直接拷贝即可;
{
    "name": "webapp",
    "version": "0.0.0",
    "type": "module",
    "scripts": {
        "dev": "vite",
        "build": "vite build",
        "preview": "vite preview"
    },
    "dependencies": {
        "@element-plus/icons-vue": "2.3.1",
        "axios": "1.6.5",
        "element-plus": "2.5.1",
        "js-cookie": "3.0.5",
        "js-md5": "0.8.3",
        "viewerjs": "1.11.6",
        "vue": "3.4.8",
        "vue-router": "4.2.5",
        "vuex": "4.1.0"
    },
    "devDependencies": {
        "@vitejs/plugin-vue": "4.6.2",
        "postcss-pxtorem": "6.0.0",
        "sass": "1.70.0",
        "vite": "4.5.1"
    }
}
main.js
import { createApp } from 'vue'
import App from './App.vue'

import ElementPlus from 'element-plus'
import zhCn from 'element-plus/dist/locale/zh-cn.mjs' // 配置中文
import 'element-plus/dist/index.css'
import { registerElIcon } from './utils/elements'

import router from './router/index.js' // 路由
import '@/permission' // 路由守卫:权限控制及跳转
import '@/utils/rem.js' // 自适应分辨率监听
import { ParamsStore } from './params' // 前置信息获取
import axios from 'axios'
import store from './store/index'

// 创建 Vue 实例
const app = createApp(App);

window.$vueApp = app;

// 链式安装插件
app.use(ElementPlus, { locale: zhCn }) // 使用中文
    .use(router)
    .use(store)
    .mount('#app')

// 全局注册 el-icon
registerElIcon(app);
App.vue
main.js中删除默认样式import './style.css',还有文件;- 代码第
2行,配置路由。注意Vue2和Vue3非兼容之一,被挂载的应用不会替换元素。也就是说id='app'不会被替换,而是放在id='app'节点之下; - 代码第
6,7行,直接全局导入字体库和样式;
<template>
  <router-view></router-view>
</template>

<style>
@import './assets/fonts/fonts.css';
@import './assets//scss/base.scss';

svg {
  width: 1em;
  height: 1em;
}

#app {
  position: absolute;
  left: 0;
  right: 0;
  top: 0;
  bottom: 0;
  overflow: hidden;
}

html ::-webkit-scrollbar { /*滚动条整体样式*/
  width: 8px; /*高宽分别对应横竖滚动条的尺寸*/
  height: 8px;
}

html ::-webkit-scrollbar-thumb { /*滚动条里面小方块*/
  border-radius: 4px;
  background: #cdcdcd;
}

html ::-webkit-scrollbar-track { /*滚动条里面轨道*/
  border-radius: 4px;
  background: white;
  margin: 0;
}
</style>
第三步:CSS自适应分辨率
参考《CSS自适应分辨率 postcss-pxtorem(适用于 Vite)》
第四步:配置 Element Plus
Element Plus 支持
Vue3,Element UI 支持Vue2!
- 安装 element plus 和 Icon 图标(需要单独安装)
npm i element-plus

npm i @element-plus/icons-vue
- 新建文件
src/utils/elements.js
import * as ElementPlusIconsVue from '@element-plus/icons-vue'

export const registerElIcon = (app) => {
    // 全局注册图标 会牺牲一点性能 ElIconXxxx
    for (let i in ElementPlusIconsVue) {
        let name = `ElIcon${i}`;
        app.component(name, ElementPlusIconsVue[i])
        console.log(name, ElementPlusIconsVue[i]);
    }
}
App.vue中设置svg高宽
<style>
svg {
  width: 1em;
  height: 1em;
}
</style>
-
main.js引入,仅全局引入,- 代码第
6-7行,引入所有图标和转行方法; - 代码第
11-16行,全局注册图标组件,且使用方式有改变; - 代码 5 和 20 行,可配置成中文;
- 代码第
import ElementPlus from 'element-plus'
import zhCn from 'element-plus/dist/locale/zh-cn.mjs' // 配置中文
import 'element-plus/dist/index.css'
import { registerElIcon } from './utils/elements'

// 全局注册 el-icon
registerElIcon(app);

app.use(ElementPlus, { locale: zhCn }) // 使用中文
同样,有两种使用方式:
- 结合
el-icon使用,提供了额外的属性,如:is-loading等; - 直接使用
SVG图标,当做一般的svg使用;
<!-- 使用 el-icon 为 SVG 图标提供属性 -->
<el-icon :size="size" :color="color">
    <ElIconEdit  />
</el-icon>
<!-- 或者独立使用它,不从父级获取属性 -->
<ElIconEdit />
第五步:配置 Sass
Scss是从Sass3引入进来的,scss语法有"{}“,”;"而sass没有,所以sass-loader对他们的解析是不一样的;Sass从第三代开始,放弃了缩进式风格,并且完全向下兼容普通的CSS代码,这一代的Sass也被称为Scss;- 如果使用 vscode 开发,建议安装插件
Live Sass Compiler;- 详细语法,参考此篇
安装 SASS 插件即可, Vite 提供了内置支持。无需安装 sass-loader, 这是 Webpack 插件;
npm i sass@1.70.0 -D
第六步:配置 Router
Router4 支持
Vue3,Router3 支持Vue2!
-
安装
npm i vue-router@4 -
简单示例
-
新建
src/router/index.js文件; -
新建 views 文件夹,新建 login.vue 和 index.vue 来;
-
import { createRouter, createWebHashHistory } from 'vue-router'
import index from '../views/index.vue'
import login from '../views/login.vue'

// 定义路由
const routes = [{
        path: '/',
        component: login
    },
    {
        path: '/index',
        component: index
    }
];

// 创建路由实例并传递 `routes` 配置
const router = createRouter({
    history: createWebHashHistory(),
    routes
});

export default router
- 设置 全局前置守卫,新建文件
src/permission.js
import router from "./router";

router.beforeEach((to, from, next) => {
    debugger
    // 获取 token
    let token = MyCookie.getAuthToken();
    // "/" 是登录页,"/index" 是主页
    if (token) {
        if (to.path == "/") {
            next("/index");
        } else {
            next();
        }
    } else {
        if (to.path !== "/") {
            next("/");
        } else {
            next();
        }
    }
});
- main.js 设置
import router from './router/index.js'
import '@/permission' // 路由守卫:权限控制及跳转

app.use(router)
- 基于
Vue2的Router3和基于Vue3的Router4主要差异如下:- 导入不同;
- 创建接口不同;
/* Vue2 / Router3 */
import Router from 'vue-router'
const store = new new Router({})

/* Vue3 / Router4 */
import { createRouter, createWebHashHistory } from 'vue-router'
const router = createRouter({})
第七步:配置 Vuex4
Vuex4 支持
Vue3,但官方更推荐新 状态管理库 Pinia!本次不做更换,依然用
Vuex4,但Pinia也排在升级计划里。如果想现在就了解,可移步 Pinia 从 Vuex ≤4 迁移。
- 安装
npm i vuex@4.1.0
-
将原项目中的
src/store文件夹和文件拷贝来; -
main.js 配置
import store from './store/index'

app.use(store)
- 优化
src\store\index.js- 代码第
1,14行,Vue4导入和初始化接口有变; - 代码第
4行,动态导入.js文件,使用 Vite Glob 导入接口;
- 代码第
import * as Vuex from 'vuex'
import getters from './getters'

const modulesFiles = import.meta.glob('./modules/**/*.js', { eager: true });

let modules = {};
for (const path in modulesFiles) {
    const moduleName = path.replace(/(.*\/)*([^.]+).*/ig, "$2");
    modules[moduleName] = modulesFiles[path].default;
}

const store = Vuex.createStore({
    modules,
    getters,
})

export default store
- 基于
Vue2的Vuex3和基于Vue3的Vuex4主要差异如下:- 导入不同;
- 创建接口不同;
/* Vue2 / Vuex3 */
import Vuex from 'vuex'
const store = new Vuex.Store({})

/* Vue3 / Vuex4 */
import * as Vuex from 'vuex'
const store = Vuex.createStore({})

![[NOIP2011 提高组] 聪明的质监员](https://img-blog.csdnimg.cn/direct/d674fd8805504449be7207dd707f96ee.png)
