你好,我是田哥
最近,我在对充电桩项目进行微服务升级中,既然是项目升级,难免会遇到各种各样的问题。比如:分布式事务问题、多数据源问题、分布式锁问题等。

项目技术栈:
Spring
Spring Boot
Spring Cloud Alibaba(Nacos、Gateway、openfeigin、Sentinel)
MongoDB+Redis
EMQX
XXL-JOB
RabbitMQ
MySQL
Atomikos(分布式事务)
OSS
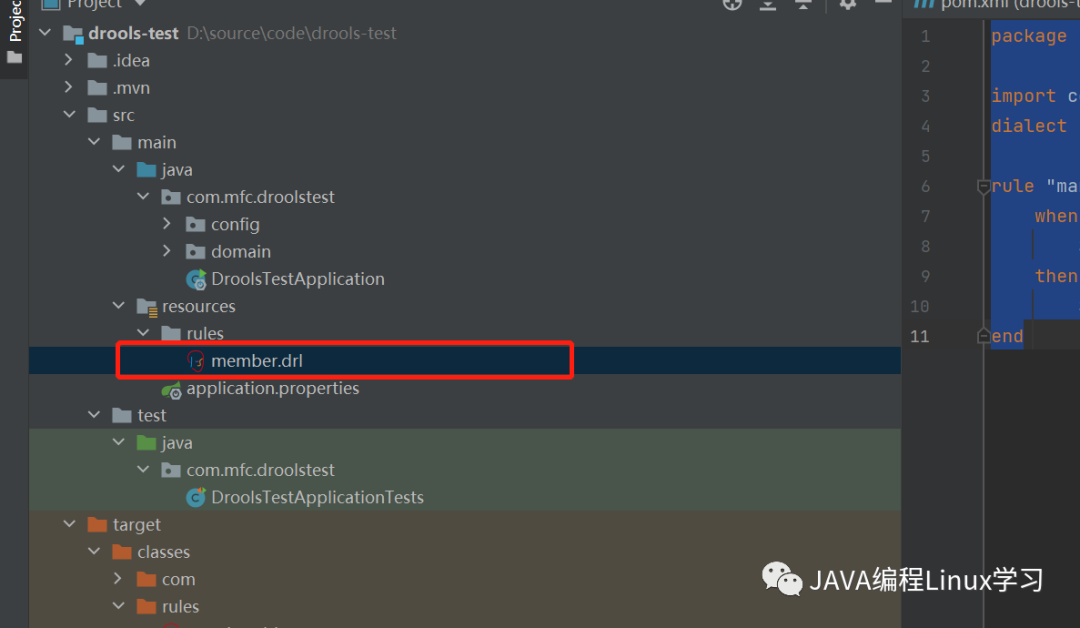
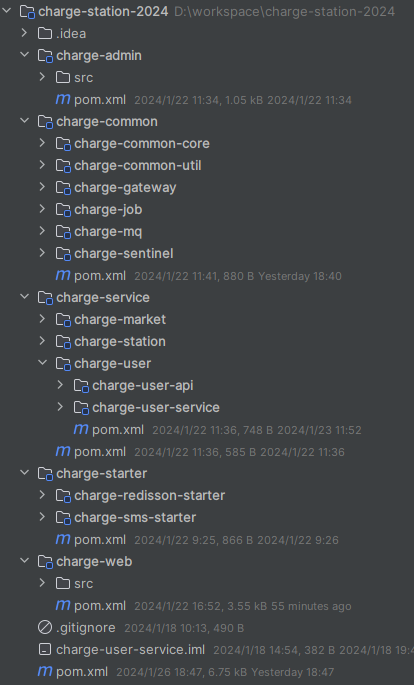
项目结构:
题外话:如果想年后找到更好的工作,推荐看这篇文章:
Java后端面试复习规划表,5万字
因为对数据库进行拆分成了多个库,所以,肯定会涉及到比如分布式事务、多数据源等问题,关于分布式事务这采用Atomikos解决的,可以参考之前的文章:
Spring Boot+MyBatis+Atomikos+MySQL(附源码)
分布式事务这里就不聊了,咱们来聊聊多数据源的问题。
多数据源
多数据源的场景通常有:
1:主和从数据库数据源
2:A项目中的数据库和B项目中的数据库
3:A公司数据库和B公司数据库
主和从数据库数据源
主要是用于数据库架构变成了主从结构,通常会使用到注解:@Primary。
在Spring框架中,@Primary注解用于指定一个Bean作为主要的候选者,当有多个相同类型的Bean可供选择时,标记为@Primary的Bean将优先被考虑。这在处理多个相同类型Bean的情况时非常有用,特别是在自动装配(Autowiring)时。
例如,假设您有一个接口MyService和两个实现类FirstService和SecondService,并且都使用@Service注解进行了声明。如果没有使用@Primary注解,在进行自动装配时,Spring会抛出异常,因为无法确定应该选择哪个实现类。但是,如果其中一个实现类使用了@Primary注解,那么Spring就会选择这个Bean进行装配。
以下是一个示例:
@Service
public class FirstService implements MyService {
    // ...
}

@Service
@Primary
public class SecondService implements MyService {
    // ...
}在上面的代码中,由于SecondService使用了@Primary注解,因此Spring会自动装配SecondService作为MyService的实现类。
A项目中的数据库和B项目中的数据库
我的充电桩项目中就是这类场景,主要是对充电桩项目拆分了。
下面来看看实现过程。
实现
实现通常分为下面几步:
pom配置依赖
配置数据源信息
读取配置信息
使用
pom配置依赖
<dependency>
    <groupId>org.mybatis.spring.boot</groupId>
    <artifactId>mybatis-spring-boot-starter</artifactId>
    <version>2.2.2</version>
</dependency>
<dependency>
    <groupId>mysql</groupId>
    <artifactId>mysql-connector-java</artifactId>
    <version>8.0.16</version>
</dependency>
跟普通Spring Boot项目集成MyBatis没什么区别。
properties配置
spring.datasource.chargeuser.driverClassName = com.mysql.jdbc.Driver
spring.datasource.chargeuser.jdbc-url = jdbc:mysql://localhost:3306/charge-user?characterEncoding=utf8&useSSL=false&serverTimezone=GMT%2B8&allowPublicKeyRetrieval=true
spring.datasource.chargeuser.username = root
spring.datasource.chargeuser.password = 123456

spring.datasource.chargemarket.driverClassName = com.mysql.jdbc.Driver
spring.datasource.chargemarket.jdbc-url = jdbc:mysql://localhost:3306/charge-market?characterEncoding=utf8&useSSL=false&serverTimezone=GMT%2B8&allowPublicKeyRetrieval=true
spring.datasource.chargemarket.username = root
spring.datasource.chargemarket.password = 123456
我们这里配置了两个数据源,如果有需要我们可以照着这样配置即可。
数据源信息的装配
@Configuration
@MapperScan(basePackages = "com.tian.mapper.market", sqlSessionTemplateRef  = "marketSqlSessionTemplate")
public class DataSourceMarketConfig {

    @Bean(name = "marketDataSource")
    @ConfigurationProperties(prefix = "spring.datasource.chargemarket")
    public DataSource marketDataSource() {
        return DataSourceBuilder.create().build();
    }

    @Bean(name = "marketSqlSessionFactory")
    public SqlSessionFactory marketSqlSessionFactory(@Qualifier("marketDataSource") DataSource dataSource) throws Exception {
        SqlSessionFactoryBean bean = new SqlSessionFactoryBean();
        bean.setDataSource(dataSource);
        bean.setMapperLocations(new PathMatchingResourcePatternResolver().getResources(
                "classpath:mapper/market/*.xml"));
        return bean.getObject();
    }

    @Bean(name = "marketTransactionManager")

    public DataSourceTransactionManager marketTransactionManager(@Qualifier("marketDataSource") DataSource dataSource) {
        return new DataSourceTransactionManager(dataSource);
    }

    @Bean(name = "marketSqlSessionTemplate")
    public SqlSessionTemplate marketSqlSessionTemplate(@Qualifier("marketSqlSessionFactory") SqlSessionFactory sqlSessionFactory) throws Exception {
        return new SqlSessionTemplate(sqlSessionFactory);
    }

}
注意:
1:
spring.datasource.chargemarket就是我们在properties文件配置数据源信息。2:
com.tian.mapper.market就是我们需要扫描的mapper3:
classpath:mapper/market/*.xml扫描的XxxxMapper.xml文件
然后,关于数据源spring.datasource.chargemarket 就这样搞定了,其他mapper的使用和普通mybatis没什么区别。
再来看看spring.datasource.chargeuser数据源的处理,和上面完全一毛一样。
@Configuration
@MapperScan(basePackages = "com.tian.mapper.user", sqlSessionTemplateRef = "userSqlSessionTemplate")
public class DataSourceUserConfig {

    @Bean(name = "userDataSource")
    @ConfigurationProperties(prefix = "spring.datasource.chargeuser")
    public DataSource userDataSource() {
        return DataSourceBuilder.create().build();
    }

    @Bean(name = "userSqlSessionFactory")
    public SqlSessionFactory userSqlSessionFactory(@Qualifier("userDataSource") DataSource dataSource) throws Exception {
        SqlSessionFactoryBean bean = new SqlSessionFactoryBean();
        bean.setDataSource(dataSource);
        bean.setMapperLocations(new PathMatchingResourcePatternResolver().getResources(
                "classpath:mapper/user/*.xml"));
        return bean.getObject();
    }

    @Bean(name = "userTransactionManager")
    public DataSourceTransactionManager userTransactionManager(@Qualifier("userDataSource") DataSource dataSource) {
        return new DataSourceTransactionManager(dataSource);
    }

    @Bean(name = "userSqlSessionTemplate")
    public SqlSessionTemplate userSqlSessionTemplate(@Qualifier("userSqlSessionFactory") SqlSessionFactory sqlSessionFactory) throws Exception {
        return new SqlSessionTemplate(sqlSessionFactory);
    }
}
强调一下:项目中使用UserMapper方式并没有什么区别,还是以前
Spring Boot+MyBatis方式,所以这里就没有必要在展示相关无用的代码了。
多数据源配置就这么搞定了,学会(废)了吗?
总结
对上面多数据源的配置多一个简单的总结:
1:数据库连接信息不一样(多数据源)
2:扫描的
mapper不一样和mapper.xml3:然后把对应的
dataSource和SqlSessionFactory、TransactionManager以及SqlSessionTemplate关联起来。
最后在使用我们的XxxMapper时候就会自动给我们关联起来了相关的SqlSessionFactory、TransactionManager以及SqlSessionTemplat。
回复77,免费获取《面试小抄》
推荐
MySQL 开发规范,非常详细,建议收藏!
16k面试中的10个问题
从0开始搭建公司技术栈,yyds
全程面试辅导,保驾护航!

