目录
一、实现思路
二、实现步骤
①view部分展示
②JavaScript 内容
③css中样式展示
三、效果展示
四、小结 + 注意事项
总结模板:
一、实现思路
1.在 data 中定义一个数组,用于存储表单项的数据
2.在模板中使用 v-for 指令渲染表单项
3.在 methods 中定义添加和删除表单项的方法
每点击一次 “添加表单项” 按钮,就会新增一个表单项
并且你可以通过输入框的 v-model 来动态修改表单项的值。点击对应的 “删除” 按钮可以移除对应的表单项。
二、实现步骤
①view部分展示
<view style="background-color: #e5e5e5;padding: 32rpx;">
			<view class="publish-top-two" style="margin: 32rpx; ">
				<template v-for="(item,index) in exigencyList">
					<view class="publish-top" style="position: relative; padding: 32rpx;" :key="index">
						<view class="upload-title">紧急联系人{{ item.num }}</view>
						<view class="person-item">
							<view class="flex">
								<view class="asterisk">*</view>
								<view class="item-left">姓名</view>
							</view>
							<u-input v-model="item.name" border="none" placeholder="请输入姓名"
								placeholderStyle="color: #999"></u-input>
						</view>
						<view class="person-item">
							<view class="flex">
								<view class="asterisk">*</view>
								<view class="item-left">手机号</view>
							</view>
							<u-input v-model="item.telephone" border="none" placeholder="请输入手机号"
								placeholderStyle="color: #999"></u-input>
						</view>
						<view class="person-item">
							<view class="flex">
								<view class="asterisk">*</view>
								<view class="item-left">关系</view>
							</view>
							<u-input v-model="item.relation" border="none" placeholder="请输入关系"
								placeholderStyle="color: #999"></u-input>
						</view>
						<view style="position: absolute;top: -5px;left: -5px;width: 40rpx;height: 40rpx;"
							v-if="index != 0" @click.stop="reduceGoods(index)">
							<!-- 								<u-icon name="minus-circle" color="Error" size="22"></u-icon> -->
							<image style="width: 100%;height: 100%;"
								src="../../pagesLeave/static/information/reduce.png" mode="aspectFill"></image>
						</view>
					</view>
				</template>
			</view>
			<view class="addexigencybth" @click="getadd">添加联系人</view>
		</view>
②JavaScript 内容
<script>
	export default {
		data() {
			return {
				exigencyList: [{
						num: '1',
						name: '',
						telephone: '',
						relation: '',
					},
					{
						num: '2',
						name: '',
						telephone: '',
						relation: '',
					}
				],
			}
		},
		methods: {
			// 添加紧急联系人
			getadd() {
				this.exigencyList.push({
					num: '1',
					name: '',
					telephone: '',
					relation: '',
				})
				//新增默认加 0.1
				// this.form.salary += 0.1
			},
			//减少紧急联系人
			reduceGoods(index) {
				this.exigencyList.splice(index, 1)
				// 需要去除减少物品的价格
				let count = 0
				for (let i = 0; i < this.tabList; i++) {
					count += this.tabList[i].fetchMoney
				}
				// this.form.salary = count
			},


		}
	}
</script>
③css中样式展示
<style lang="scss" scoped>
	.publish-top {
		margin: 12px 16px 0px 16px;
		background-color: #fff;
		border-radius: 16rpx;

		.person-item {
			display: flex;
			align-items: center;
			padding: 32rpx;
			border-bottom: 1px solid #E6E6E8;
		}

		//紧急联系人
		.publish-top-two {
			position: absolute;
			left: auto;
			top: 104px;

			.publish-top {
				position: relative;
				background-color: #fff;
				border-radius: 16rpx;

				.reduce-btn {
					position: absolute;
					top: 0px;
					left: 0px;
					width: 40rpx;
					height: 40rpx;

					image {
						width: 100%;
						height: 100%;
					}
				}
			}
		}
	}

	.asterisk {
		color: rgba(255, 128, 128, 1);
		margin-right: 10rpx;
		margin-top: 12rpx;
	}

	.item-left {
		color: #1A1A1A;
		font-family: MiSans-Medium, MiSans;
		font-weight: 500;
		font-size: 32rpx;
		margin-right: 32rpx;
	}

	.item-right {
		text-align: right;
		font-size: 32rpx;
		color: #333
	}

	.addexigencybth {
		height: 88rpx;
		margin: 12px 16px 0px 16px;
		background-color: #fff;
		border-radius: 16rpx;
		display: flex;
		align-items: center;
		justify-content: center;
		color: #1A1A1A;
		font-size: 32rpx;
		font-weight: 500;
	}
</style>
三、效果展示
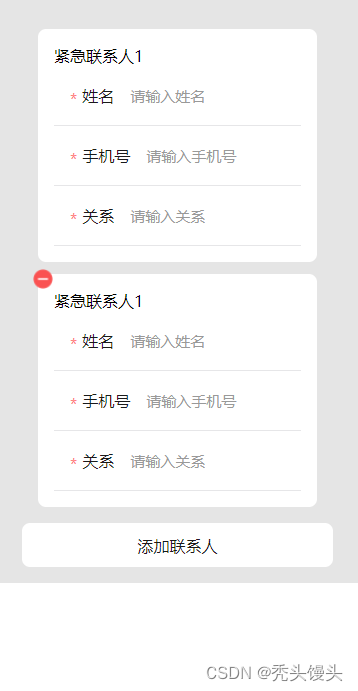
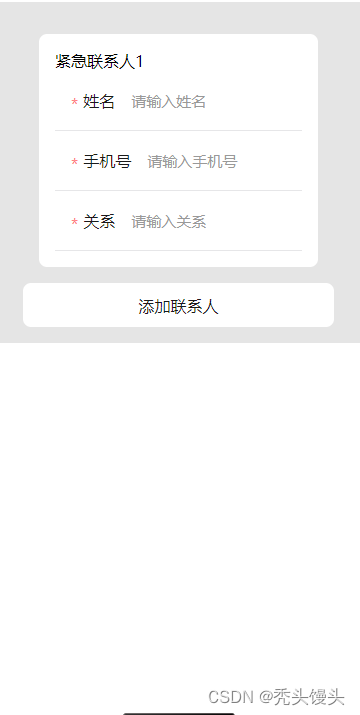
点击添加按钮就会添加一个输入框
点击减少,就会减少输入框
四、小结 + 注意事项
总结模板:
| 在模板中使用 v-for 指令渲染表单项 <div> |
| 在 data 中定义一个数组,用于存储表单项的数据 data() { return { formItems: [] } } |
| 在 methods 中定义添加和删除表单项的方法 methods: { |
这样就完成了在uni-app中添加多个表单数组的功能。每次点击“新增”按钮时,会自动添加一个新的表单项;而点击已存在的表单项右侧的“删除”按钮时,则会从列表中移除该表单项。
表单中至少保留一条表单项,必须要有添加按钮,和移除按钮
