目录
一、实战项目一:Acwing名片
二、实战项目二:Bilibili名片
三、样式定义方式
四、选择器
五、颜色
六、文本
七、字体
八、背景
九、边框
十、元素展示格式
十一、内边距与外边距
十二、盒子模型
十三、位置
十四、浮动
十五、flex布局
十六、响应式布局
一、实战项目一:Acwing名片
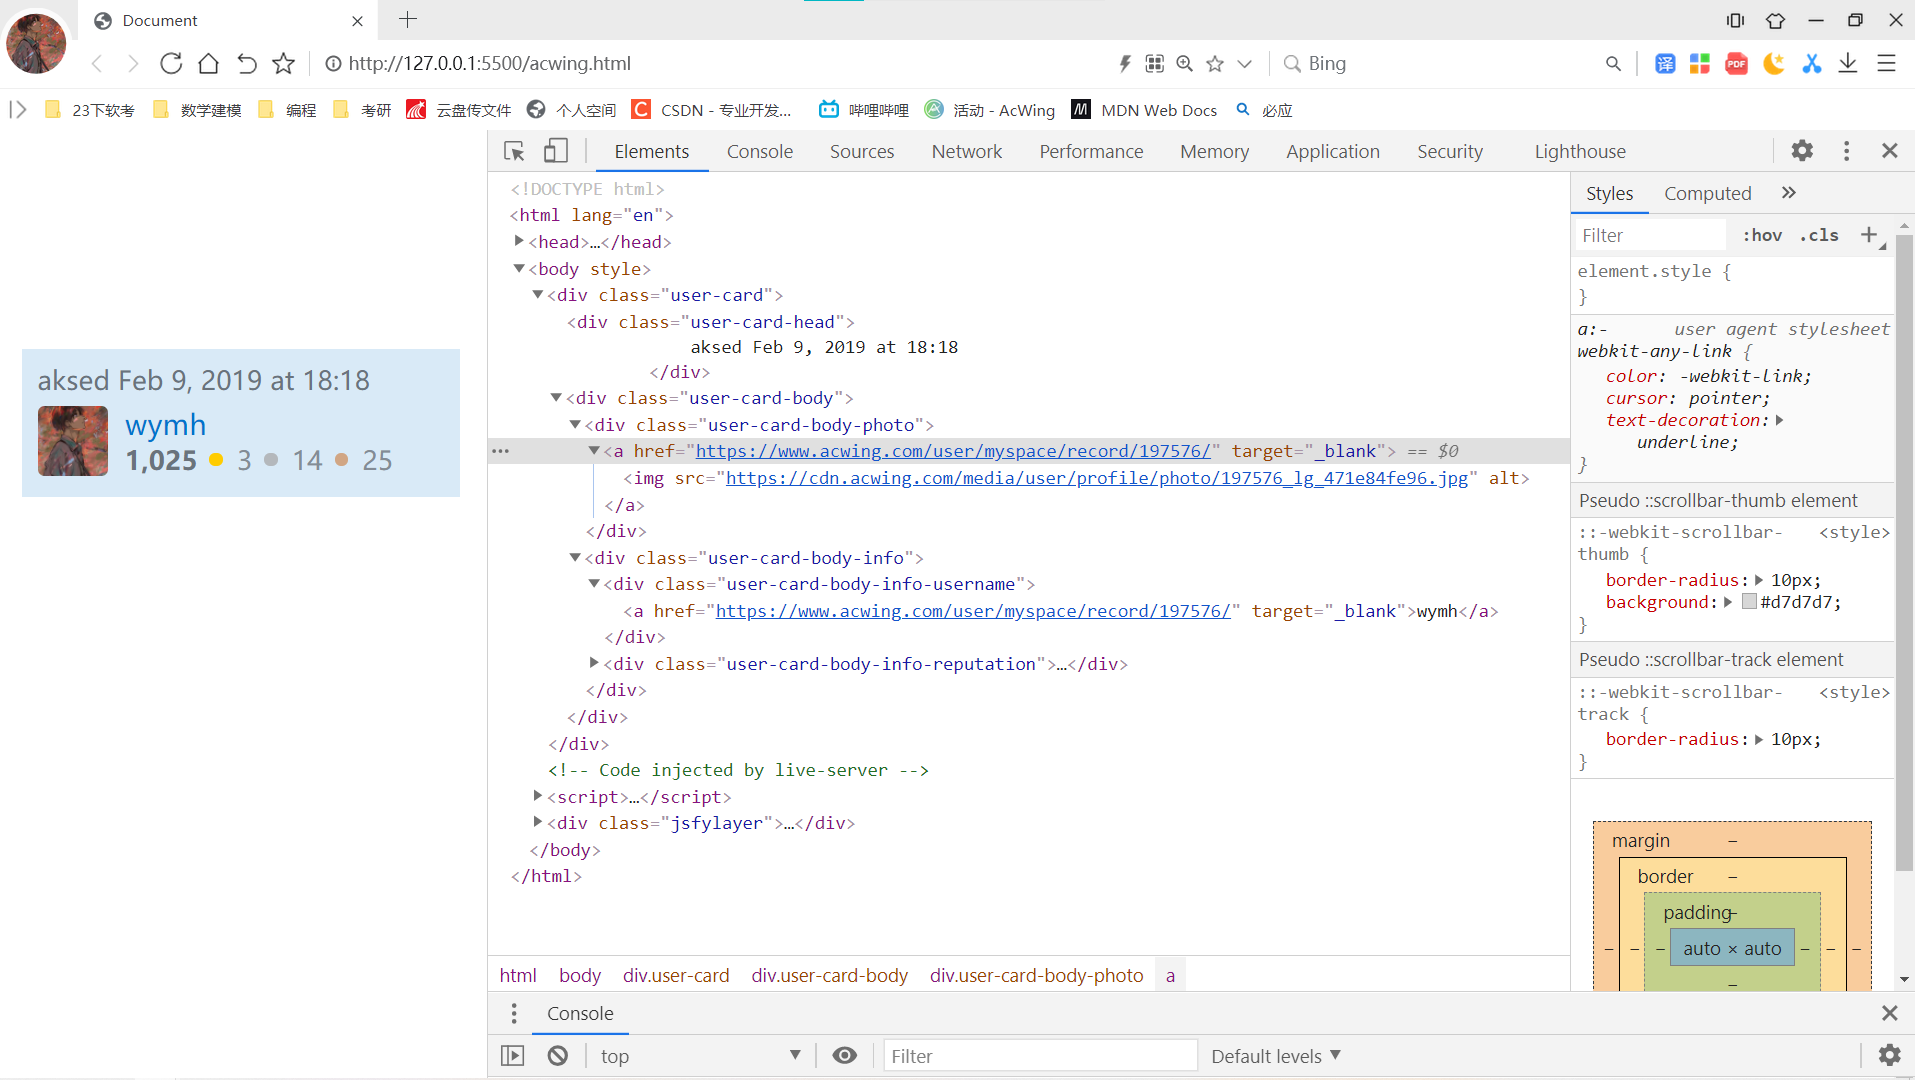
1.acwing.html源码如下
<!DOCTYPE html>
<html lang="en">

<head>
    <meta charset="UTF-8">
    <meta name="viewport" content="width=device-width, initial-scale=1.0">
    <title>Document</title>
    <link rel="stylesheet" href="/static/css/acwing.css">

</head>

<body>
    <div class="user-card">
        <div class="user-card-head">
            aksed Feb 9, 2019 at 18:18
        </div>
        <div class="user-card-body">
            <div class="user-card-body-photo">
                <a href="https://www.acwing.com/user/myspace/record/197576/" target="_blank">
                    <img src="https://cdn.acwing.com/media/user/profile/photo/197576_lg_471e84fe96.jpg" alt="">
                </a>
            </div>
            <div class="user-card-body-info">
                <div class="user-card-body-info-username">
                    <a href="https://www.acwing.com/user/myspace/record/197576/" target="_blank">wymh</a>
                </div>
                <div class="user-card-body-info-reputation">
                    <span style="color:#6A737C ; font-weight:bold ;">1,025</span>
                    <div class="user-card-body-info-reputation-item" style="background-color:#FFCC01 ;"></div>
                    3
                    <div class="user-card-body-info-reputation-item" style="background-color: #B4B8BC;"></div>
                    14
                    <div class="user-card-body-info-reputation-item" style="background-color: #D1A684;"></div>
                    25
                </div>
            </div>

        </div>

    </div>
</body>

</html>
2.acwing.css源码如下
img {
    width: 32px;
    height: 32px;
}

.user-card {
    width: 200px;
    height: 67.69px;
    background-color: #D9EAF7;
    margin: 100px auto;
    padding: 5px 6px 7px 7px;
    box-sizing: border-box;

}

.user-card-head {
    font-size: 12px;
    color: #6A737C;
    margin: 1px 0 4px 0;
}

.user-card-body-photo img {
    float: left;
    border-radius: 3px;

}

.user-card-body-info {
    float: left;
    margin-left: 8px;
}

.user-card-body-info-username {
    height: 14px;
    line-height: 14px;
    margin-bottom: 4px;
}

.user-card-body-info-username>a {
    font-size: 13px;
    color: #0074CC;
    text-decoration: none;

}

.user-card-body-info-reputation {
    font-size: 12px;
    color: #838C95;
    height: 14px;
    line-height: 14px;
}

.user-card-body-info-reputation-item {
    width: 6px;
    height: 6px;
    /* float: left; */
    display: inline-block;
    border-radius: 50%;
    margin: 0 3px 0 2px;
    position: relative;
    top: -2px;
}
二、实战项目二:Bilibili名片
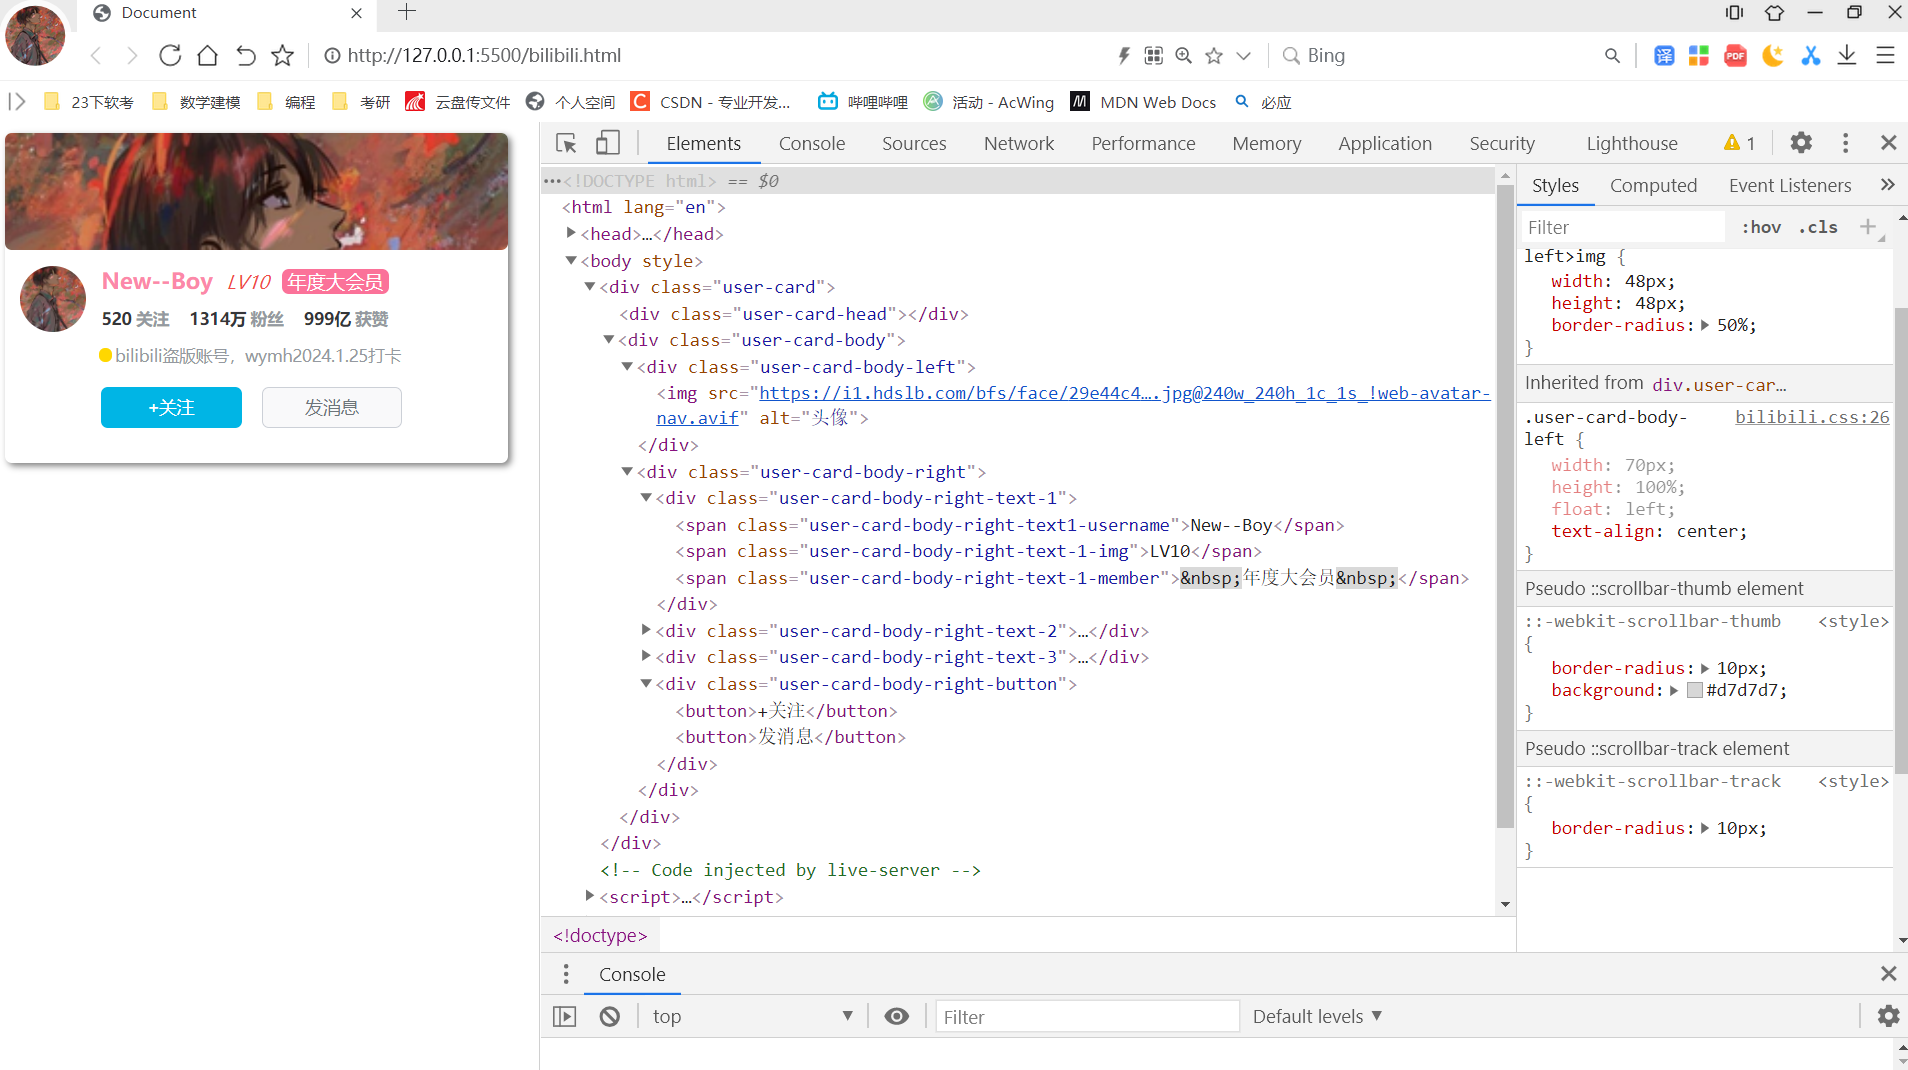
1.bilibili.html源码如下:
<!DOCTYPE html>
<html lang ="en">
<head>
<meta charset="UTF-8">
<meta http-equiv="X-UA-Compatible" content="IE=edge">
<meta name="viewport" content="width=, initial-scale=1.0">
<title>Document</title>
<link rel="stylesheet" href="static/css/bilibili.css">
</head>
<body>
<div class="user-card">
<div class="user-card-head"></div>
<div class="user-card-body">
<div class="user-card-body-left">
<img src="https://i1.hdslb.com/bfs/face/29e44c42eacf52b82af802976f7637580458f23a.jpg@240w_240h_1c_1s_!web-avatar-nav.avif"
alt="头像">
</div>
<div class="user-card-body-right">
<div class="user-card-body-right-text-1">
<span class="user-card-body-right-text1-username">New--Boy</span>
<span class="user-card-body-right-text-1-img">LV10</span>
<span class="user-card-body-right-text-1-member"> 年度大会员 </span>
</div>
<div class="user-card-body-right-text-2">
<div class=" user-card-body-right-text2-reputation">
<span>520<span>关注</span></span>
<span>1314万<span>粉丝</span></span>
<span>999亿<span>获赞</span></span>
</div>
</div>
<div class="user-card-body-right-text-3">
<span class="user-card-body-right-text-3-logo"></span>
<span class="user-card-body-right-text-3-detail">bilibili盗版账号,wymh2024.1.25打卡</span>
</div>
<div class="user-card-body-right-button">
<button>+关注</button>
<button>发消息</button>
</div>
</div>
</div>
</div>
</body>
</html>2.bilibili.css源码如下:
.user-card {
    width: 366px;
    height: 240px;
    box-shadow: 2px 2px 5px gray;
    border-radius: 5px;
    background-color: white;
    box-sizing: border-box;
}


.user-card-body {
    width: 366px;
    height: calc(100% - 85px);
    box-sizing: border-box;
    padding-top: 12px;
}

.user-card-head {
    background-image: url('https://cdn.acwing.com/media/user/profile/photo/197576_lg_471e84fe96.jpg');
    background-size: cover;
    width: 100%;
    height: 85px;
    border-radius: 5px;
}

.user-card-body-left {
    width: 70px;
    height: 100%;
    float: left;
    text-align: center;
}

.user-card-body-left>img {
    width: 48px;
    height: 48px;
    border-radius: 50%;
}

.user-card-body-right {
    width: calc(100% - 70px);
    float: left;
    height: 100%;
}

.user-card-body-right-text1 {
    width: 100%;
    height: calc(100% - 85px) / 4;
}

.user-card-body-right-text2 {
    width: 100%;
    height: calc(100% - 85px) / 4;
}

.user-card-body-right-text-3 {
    position: relative;
    top: 10px;
    width: 100%;
    height: calc(100% - 85px) / 4;
}

.user-card-body-right-button {
    position: relative;
    top: 25px;
    width: 100%;
    height: calc(100% - 85px) / 4;
}

.user-card-body-right-text1-username {
    color: #FC88A9;
    font-size: 16px;
    font-weight: bold;
    margin-right: 5px;
}

.user-card-body-right-text-1-img {
    color: #F04C49;
    font-size: 13px;
    margin-right: 5px;
    font-style: italic;
}

.user-card-body-right-text-1-member {
    background-color: #FB7299;
    color: white;
    font-size: 14px;
    margin-right: 10px;
    border-radius: 5px;
}

.user-card-body-right-text2-reputation {
    padding-top: 5px;
}


.user-card-body-right-text2-reputation>span {
    font-size: 12px;
    color: #353639;
    font-weight: bold;
}

.user-card-body-right-text2-reputation>span>span {
    font-size: 12px;
    color: #9499A0;
    margin-right: 10px;
    margin-left: 3px;
}

.user-card-body-right-text-3-logo {
    width: 10px;
    height: 10px;
    background-color: gold;
    border-radius: 50px;
    position: relative;
    top: 2px;
    right: 2px;
    float: left;
}

.user-card-body-right-text-3-detail {
    font-size: 12px;
    color: #9499A0;
    float: left;
}

.user-card-body-right-button>button {
    width: 102px;
    height: 30px;
    border: none;
    font-size: 13px;
    border-radius: 5px;
    margin-right: 10px;
    cursor: pointer;
}

.user-card-body-right-button>button:nth-child(1) {
    color: white;
    background-color: #00B5E5;
    font-weight: 500;
}

.user-card-body-right-button>button:nth-child(1):hover {
    background-color: #2a849d;
    color: #2a849d;
    transition: 700ms;
}

.user-card-body-right-button>button:nth-child(2) {
    border: #CCD0D7 solid 1px;
    color: #6D757A;
    font-weight: 500;
    background-color: #f9f9fa;
}

.user-card-body-right-button>button:nth-child(2):hover {
    border-color: #00B5E5;
    color: #00B5E5;
    transition: 700ms;
}
三、样式定义方式
- 行内样式表:直接定义在标签的style属性中。(仅对当前标签产生影响)
例如:
<img src="/images/mountain.jpg" alt="" style="width: 300px; height: 200px;">
- 内部样式表:定义在style标签中,通过选择器影响对应的标签。(作用范围:可以对同一个页面中的多个元素产生影响)
- 外部样式表:定义在css样式文件中,通过选择器影响对应的标签。可以用link标签引入某些页面。(作用范围:可以对多个页面产生影响。)
<!DOCTYPE html>
<html lang="en">

<head>
    <meta charset="UTF-8">
    <meta http-equiv="X-UA-Compatible" content="IE=edge">
    <meta name="viewport" content="width=device-width, initial-scale=1.0">
    <title>Document</title>
    <style>
        div {
            color: white;
            width: 300px;
            height: 300px;
        }

        div:nth-child(odd) {
            background-color: #0000FF;
        }

        div:nth-child(even) {
            background-color: rgba(255, 0, 0, 0.7);
        }

        .small-div {
            width: 200px;
            height: 200px;
        }

        #big-div {
            width: 400px;
            height: 400px;
        }

        .hover-div:hover {
            background-color: orange;
        }
    </style>
</head>

<body>
    <div class="small-div">1</div>
    <div id="big-div">2</div>
    <div>3</div>
    <div class="small-div">4</div>
    <div class="small-div hover-div">5</div>
    <div>6</div>
    <div>7</div>
    <div class="hover-div">8</div>
    <div>9</div>
    <div>10</div>
</body>

</html>
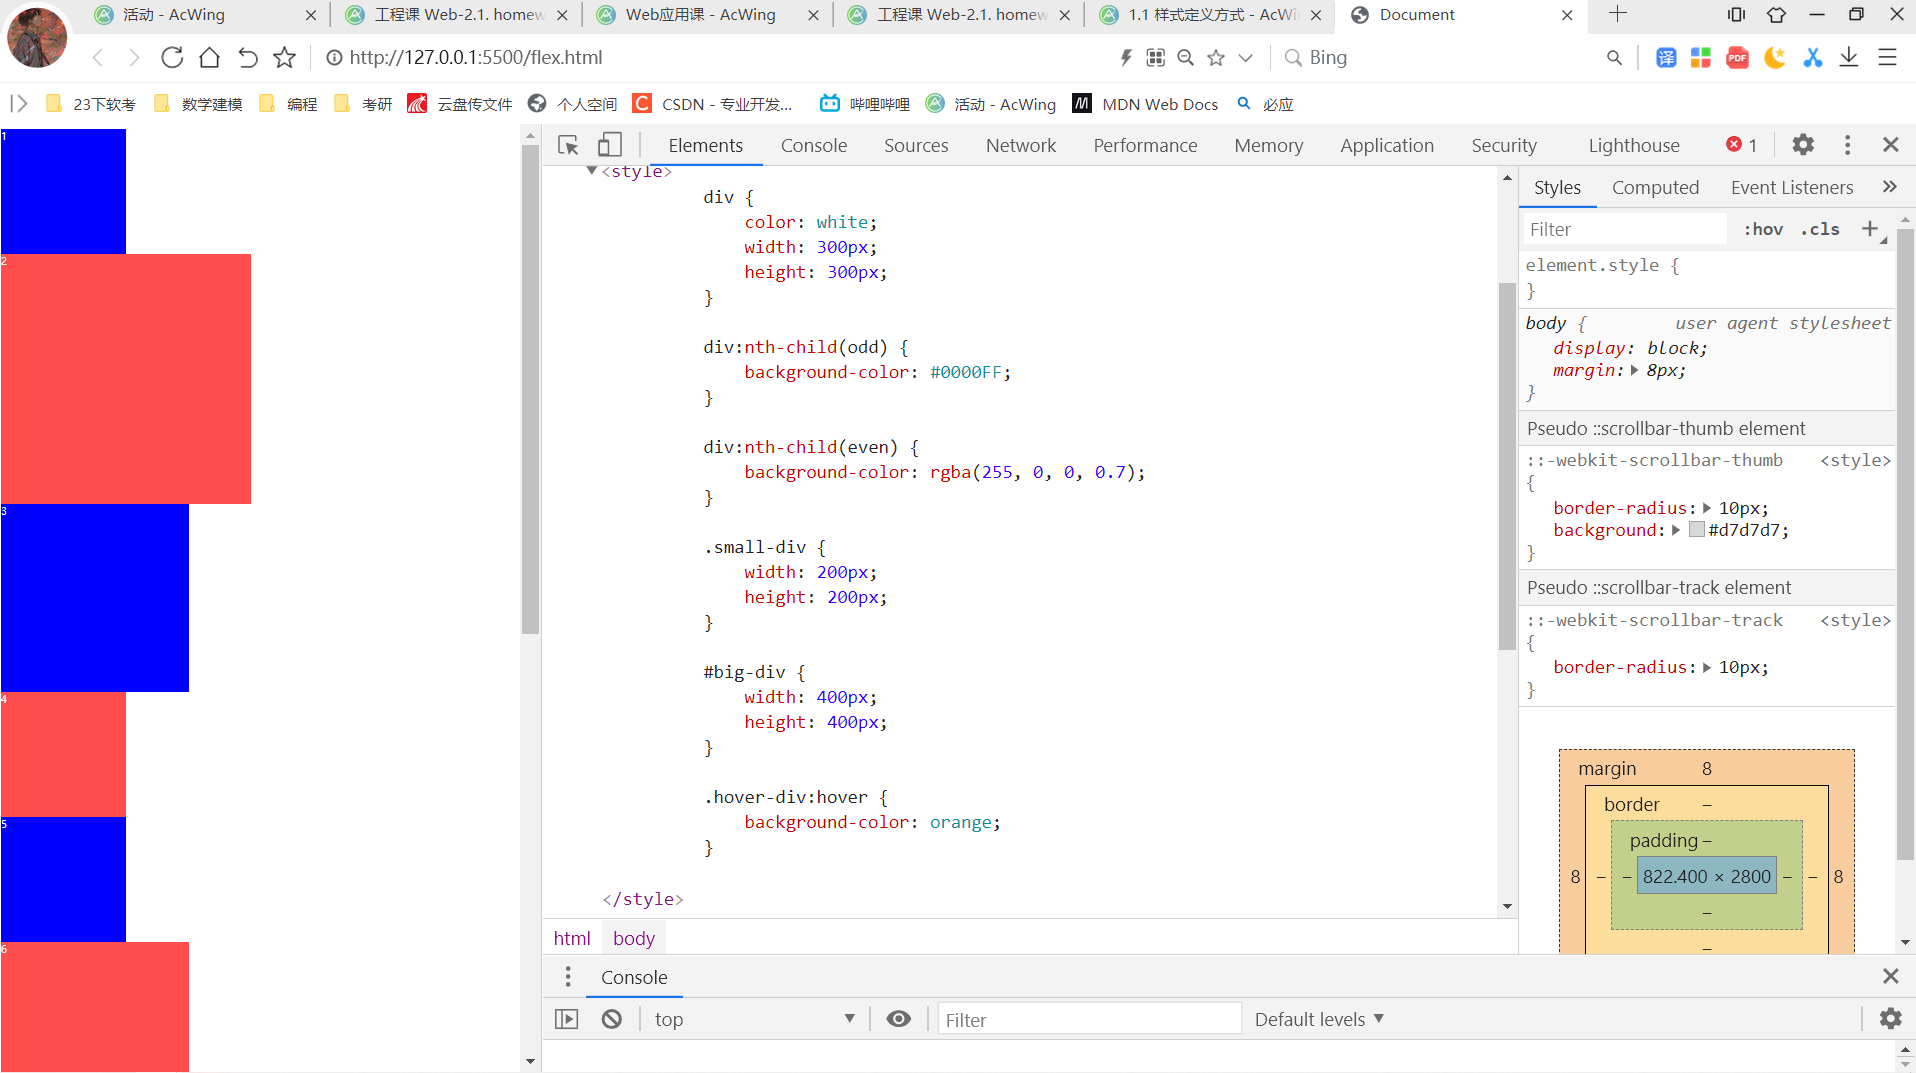
运行结果如下 :
四、选择器
- 标签选择器:选择所有div标签:
div {
    width: 200px;
    height: 200px;
    background-color: gray;
}
- ID选择器:选择ID为rect-1的标签:
#rect-1 {
    width: 200px;
    height: 200px;
    background-color: gray;
}
- 类选择器:选择所有rectangle类的标签:
.rectangle {
    width: 200px;
    height: 200px;
    background-color: gray;
}
- 伪类选择器:伪类用于定义元素的特殊状态。链接伪类选择器:
:link:链接访问前的样式
:visited:链接访问后的样式
:hover:鼠标悬停时的样式
:active:鼠标点击后长按时的样式
:focus:聚焦后的样式
- 位置伪类选择器:(nth-child(n):选择是其父标签第n个子元素的所有元素)
- 目标伪类选择器:(target:当url指向该元素时生效)
<!DOCTYPE html>
<html lang="en">

<head>
    <meta charset="UTF-8">
    <meta http-equiv="X-UA-Compatible" content="IE=edge">
    <meta name="viewport" content="width=device-width, initial-scale=1.0">
    <title>Document</title>
    <style>
        h2 {
            text-align: center;
        }

        p {
            line-height: 1.5em;
            letter-spacing: 1px;
            text-indent: 2em;
        }

        .beautiful-p {
            text-decoration: underline wavy green;
        }

        .shadow-p {
            text-shadow: 5px 5px 5px grey;
        }

        p::first-letter {
            font-size: 1.2em;
            color: red;
        }

        .bold-p {
            font-weight: 800;
        }

        .italic-p {
            font-style: italic;
        }

        .fantasy-p {
            font-family: monospace;
        }
    </style>
</head>

<body>
    <h2>春</h2>
    <p>盼望着,盼望着,东风来了,春天的脚步近了。</p>
    <p class="shadow-p">一切都像刚睡醒的样子,欣欣然张开了眼。山朗润起来了,水涨起来了,太阳的脸红起来了。</p>
    <p class="fantasy-p">小草偷偷地从土里钻出来,嫩嫩的,绿绿的。园子里,田野里,瞧去,一大片一大片满是的。坐着,躺着,打两个滚,踢几脚球,赛几趟跑,捉几回迷藏。风轻悄悄的,草软绵绵的。</p>
    <p>桃树、杏树、梨树,你不让我,我不让你,都开满了花赶趟儿。红的像火,粉的像霞,白的像雪。花里带着甜味儿;闭了眼,树上仿佛已经满是桃儿、杏儿、梨儿。花下成千成百的蜜蜂嗡嗡地闹着,大小的蝴蝶飞来飞去。野花遍地是:杂样儿,有名字的,没名字的,散在草丛里,像眼睛,像星星,还眨呀眨的。
    </p>
    <p class="beautiful-p">
        “吹面不寒杨柳风”,不错的,像母亲的手抚摸着你。风里带来些新翻的泥土的气息,混着青草味儿,还有各种花的香,都在微微润湿的空气里酝酿。鸟儿将窠巢安在繁花嫩叶当中,高兴起来了,呼朋引伴地卖弄清脆的喉咙,唱出宛转的曲子,与轻风流水应和着。牛背上牧童的短笛,这时候也成天在嘹亮地响。
    </p>
    <p class="bold-p italic-p">
        雨是最寻常的,一下就是三两天。可别恼。看,像牛毛,像花针,像细丝,密密地斜织着,人家屋顶上全笼着一层薄烟。树叶子却绿得发亮,小草也青得逼你的眼。傍晚时候,上灯了,一点点黄晕的光,烘托出一片安静而和平的夜。乡下去,小路上,石桥边,有撑起伞慢慢走着的人;还有地里工作的农夫,披着蓑,戴着笠的。他们的草屋,稀稀疏疏的,在雨里静默着。
    </p>
    <p>天上风筝渐渐多了,地上孩子也多了。城里乡下,家家户户,老老小小,他们也赶趟儿似的,一个个都出来了。舒活舒活筋骨,抖擞抖擞精神,各做各的一份事去。“一年之计在于春”,刚起头儿,有的是工夫,有的是希望。</p>
    <p class="beautiful-p">春天像刚落地的娃娃,从头到脚都是新的,他生长着。</p>
    <p>春天像小姑娘,花枝招展的,笑着,走着。</p>
    <p class="shadow-p">春天像健壮的青年,有铁一般的胳膊和腰脚,他领着我们上前去。</p>
</body>

</html>
代码运行结果如下:

五、颜色
- 16进制表示法
使用6位16进制数表示颜色,例如:#ADD8E6。
其中第1-2位表示红色,第3-4位表示绿色,第5-6位表示蓝色。

简写方式:#ABC,等价于#AABBCC。
- RGB表示法
rgb(173, 216, 230)。

其中第一个数表示红色,第二个数表示绿色,第三个数表示蓝色。
- RGBA表示法
rgba(173, 216, 230, 0.5)。

前三个数同上,第四个数表示透明度。
- 取色方式
网页里的颜色,可以在chrome的调试模式下获取
其他颜色可以使用QQ的截图软件:
直接按c键,可以复制rgb颜色值
按住shift再按c键,可以复制16进制颜色值
<!DOCTYPE html>
<html lang="en">

<head>
    <meta charset="UTF-8">
    <meta http-equiv="X-UA-Compatible" content="IE=edge">
    <meta name="viewport" content="width=device-width, initial-scale=1.0">
    <title>Document</title>
    <style>
        div {
            width: 300px;
            height: 300px;
            margin: 10px;
        }

        div:nth-child(1) {
            background-color: lightblue;
        }

        div:nth-child(2) {
            background-image: url('/static/images/mountain.png');
            background-size: 100% 100%;
            background-repeat: no-repeat;
        }

        div:nth-child(3) {
            background-image: url('/static/images/mountain.png'), url('/static/images/icon.png');
            background-size: 50% 100%, 50% 100%;
            background-repeat: no-repeat, no-repeat;
            background-position: top left, 150px 0;
        }

        div:nth-child(4) {
            background-image: url('/static/images/mountain.png');
            background-size: 100% 100%;
            background-repeat: no-repeat;
            background-attachment: fixed;
        }
    </style>
</head>

<body>
    <div></div>
    <div></div>
    <div></div>
    <div></div>
</body>

</html>
代码运行结果如下:
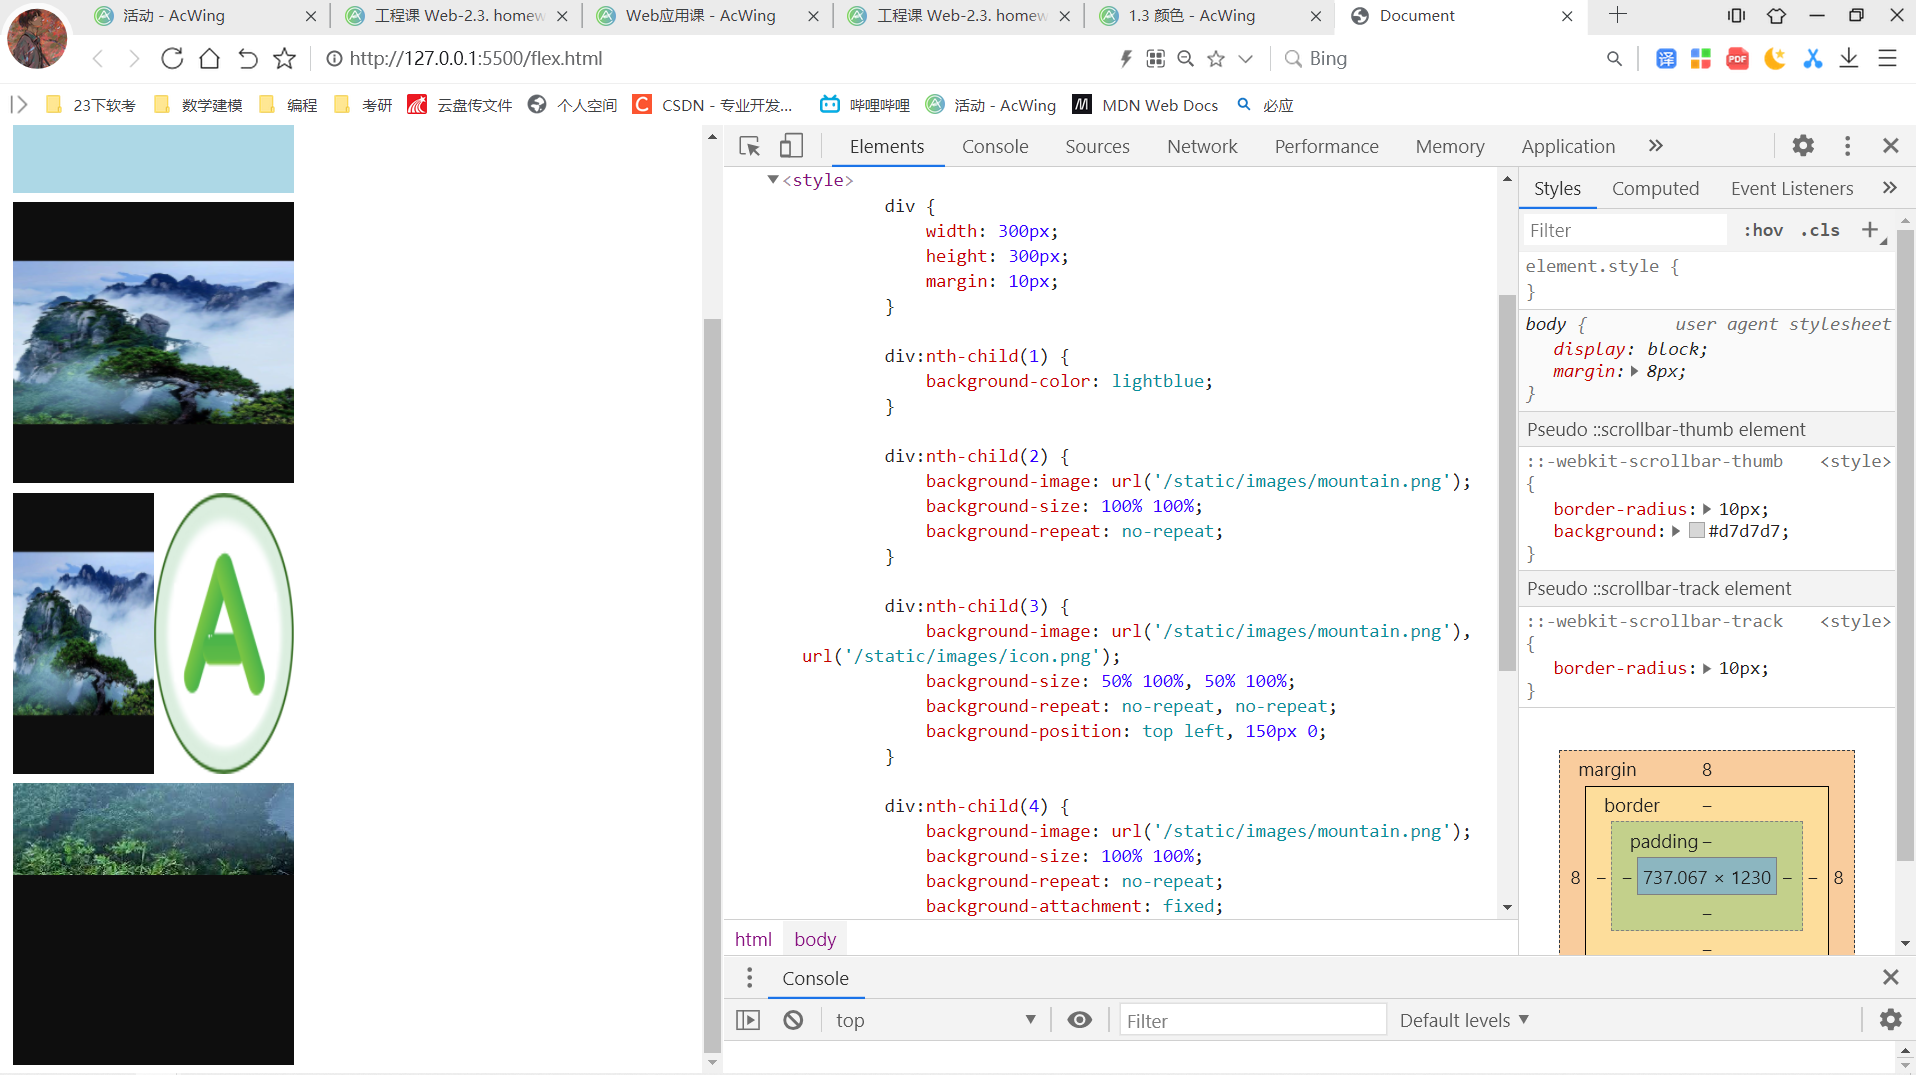
六、文本
- text-align:定义行内内容(例如文字)如何相对它的块父元素对齐。text-align 并不控制块元素自己的对齐,只控制它的行内内容的对齐。
- line-height:设置多行元素的空间量,如多行文本的间距。对于块级元素,它指定元素行盒的最小高度。对于非替代的 inline 元素,它用于计算行盒的高度。
- 补充知识点:长度单位
px    设备上的像素点
%    相对于父元素的百分比
em    相对于当前元素的字体大小
rem    相对于根元素的字体大小
vw    相对于视窗宽度的百分比
vh    相对于视窗高度的百分比
- letter-spacing:用于设置文本字符的间距。
- text-indent:定义一个块元素首行文本内容之前的缩进量。
- text-decoration:用于设置文本的修饰线外观的(下划线、上划线、贯穿线/删除线 或 闪烁)它是 text-decoration-line, text-decoration-color, text-decoration-style, 和新出现的 text-decoration-thickness 属性的缩写。
- text-shadow:为文字添加阴影。可以为文字与 text-decorations 添加多个阴影,阴影值之间用逗号隔开。每个阴影值由元素在X和Y方向的偏移量、模糊半径和颜色值组成。
<!DOCTYPE html>
<html lang="en">

<head>
    <meta charset="UTF-8">
    <meta http-equiv="X-UA-Compatible" content="IE=edge">
    <meta name="viewport" content="width=device-width, initial-scale=1.0">
    <title>Document</title>
    <style>
        div {
            width: 300px;
            height: 300px;
        }

        div:nth-child(1) {
            border-width: 10px;
            border-style: solid dotted inset dashed;
            border-color: blue red;
            border-radius: 50%;
        }

        div:nth-child(2) {
            border: solid 3px black;
            border-radius: 10px;
        }
    </style>
</head>

<body>
    <div></div>
    <div></div>
</body>

</html>
代码运行结果如下:
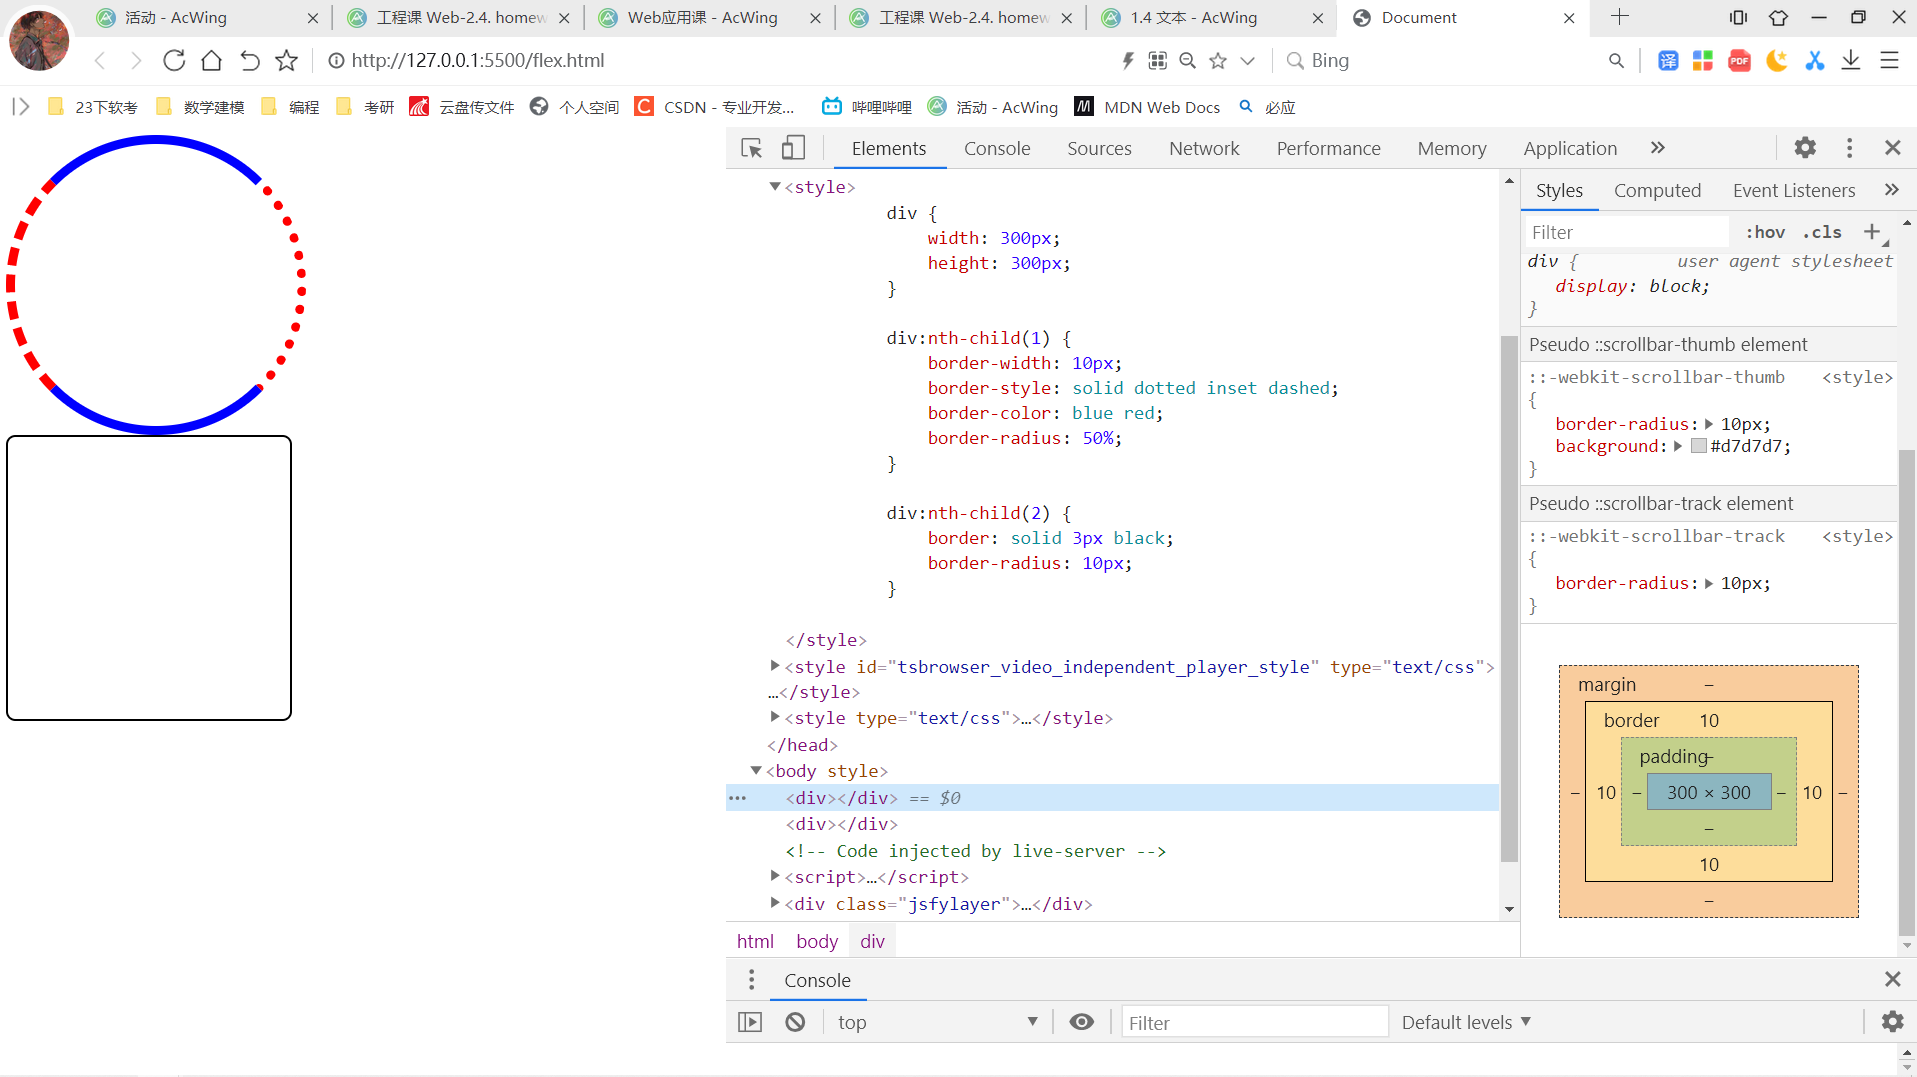
七、字体
- font-size:指定字体的大小。因为该属性的值会被用于计算em和ex长度单位,定义该值可能改变其他元素的大小。
- font-style:允许你选择 font-family 字体下的 italic 或 oblique 样式。
- font-weight:指定了字体的粗细程度。 一些字体只提供 normal 和 bold 两种值。
- font-family:表示的是字体,例如英文里面的带衬线字体,中文里面的草书这些。
<!DOCTYPE html>
<html lang="en">

<head>
    <meta charset="UTF-8">
    <meta http-equiv="X-UA-Compatible" content="IE=edge">
    <meta name="viewport" content="width=device-width, initial-scale=1.0">
    <title>Document</title>

    <style>
        .container {
            display: block;
            width: 500px;
            height: 500px;
            padding: 10px;
            margin: 20px;
            background-color: lightblue;
        }

        .inline-block-div {
            display: inline-block;
            width: 100px;
            height: 100px;
            padding: 10px;
            margin: 10px;
            background-color: blue;
            color: white;
        }

        span {
            display: inline;
            padding-left: 10px;
            padding-right: 10px;
            margin-left: 20px;
            margin-right: 20px;
            background-color: bisque;
            color: green;
        }

        .block-div {
            display: block;
            width: 100px;
            height: 100px;
            padding: 10px;
            margin: 10px;
            background-color: blue;
            color: white;
            overflow: hidden;
            text-overflow: ellipsis;
        }
    </style>
</head>

<body>
    <div class="container">
        <div class="inline-block-div">div-1</div>
        <div class="inline-block-div">div-2</div>
        <div class="inline-block-div">div-3</div>
        <br>
        <span>span-1</span>
        <span>span-2</span>
        <span>span-3</span>
        <br>
        <div class="block-div">
            123456789101112
        </div>
    </div>
</body>

</html>
代码运行结果如下: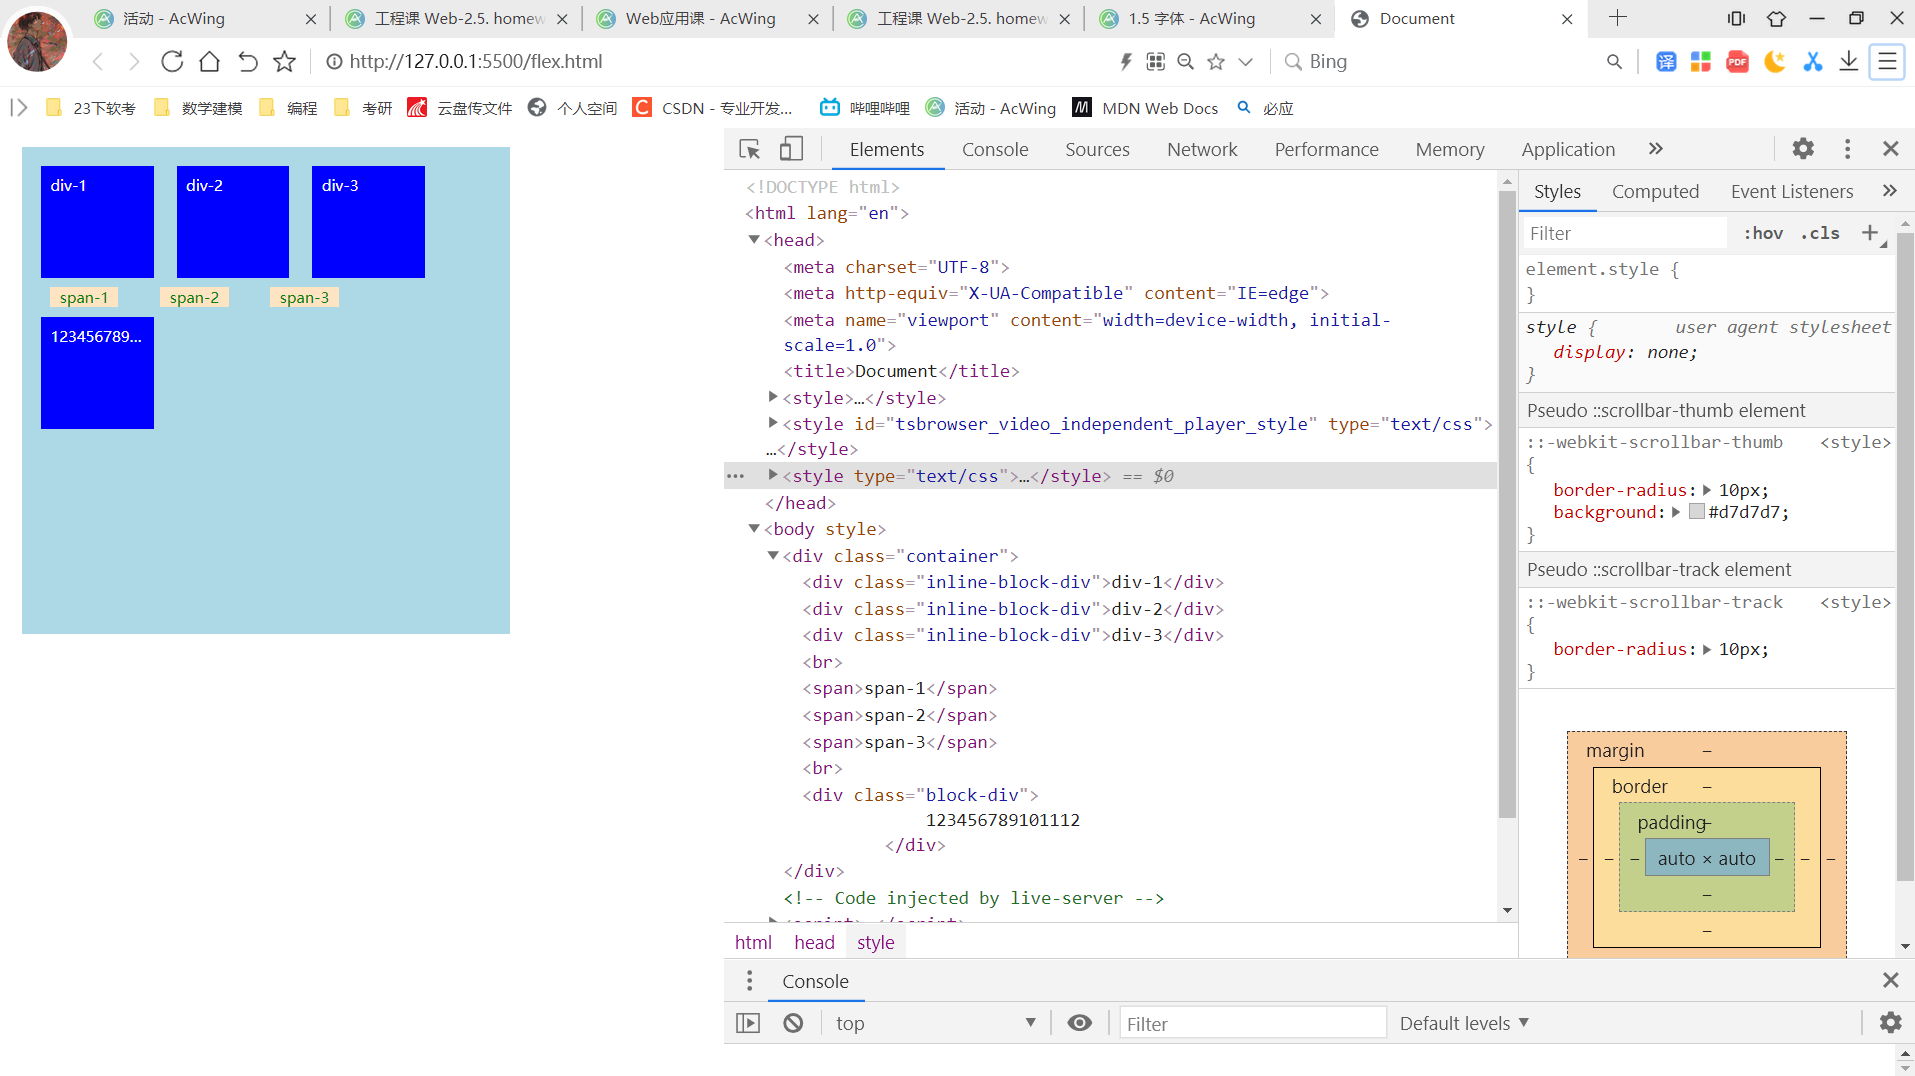
八、背景
- background-color:设置元素的背景色。
- background-image:用于为一个元素设置一个或者多个背景图像。
渐变色:linear-gradient(rgba(0, 0, 255, 0.5), rgba(255, 255, 0, 0.5))
- background-size:设置背景图片大小。图片可以保有其原有的尺寸,或者拉伸到新的尺寸,或者在保持其原有比例的同时缩放到元素的可用空间的尺寸。
- background-repeat:定义背景图像的重复方式。背景图像可以沿着水平轴,垂直轴,两个轴重复,或者根本不重复。
- background-position:为背景图片设置初始位置。
- background-attachment:决定背景图像的位置是在视口内固定,或者随着包含它的区块滚动。
<!DOCTYPE html>
<html lang="en">

<head>
    <meta charset="UTF-8">
    <meta http-equiv="X-UA-Compatible" content="IE=edge">
    <meta name="viewport" content="width=device-width, initial-scale=1.0">
    <title>Document</title>
    <style>
        div {
            width: 100px;
            height: 100px;
            background-color: lightsalmon;
        }

        div:nth-child(1) {
            margin: 10px 20px 30px 40px;
            padding: 10px 20px 30px 40px;
        }

        div:nth-child(2) {
            margin: 0 auto;
        }
    </style>
</head>

<body>
    <div>文本1</div>
    <div>文本2</div>
</body>

</html>
代码运行结果如下: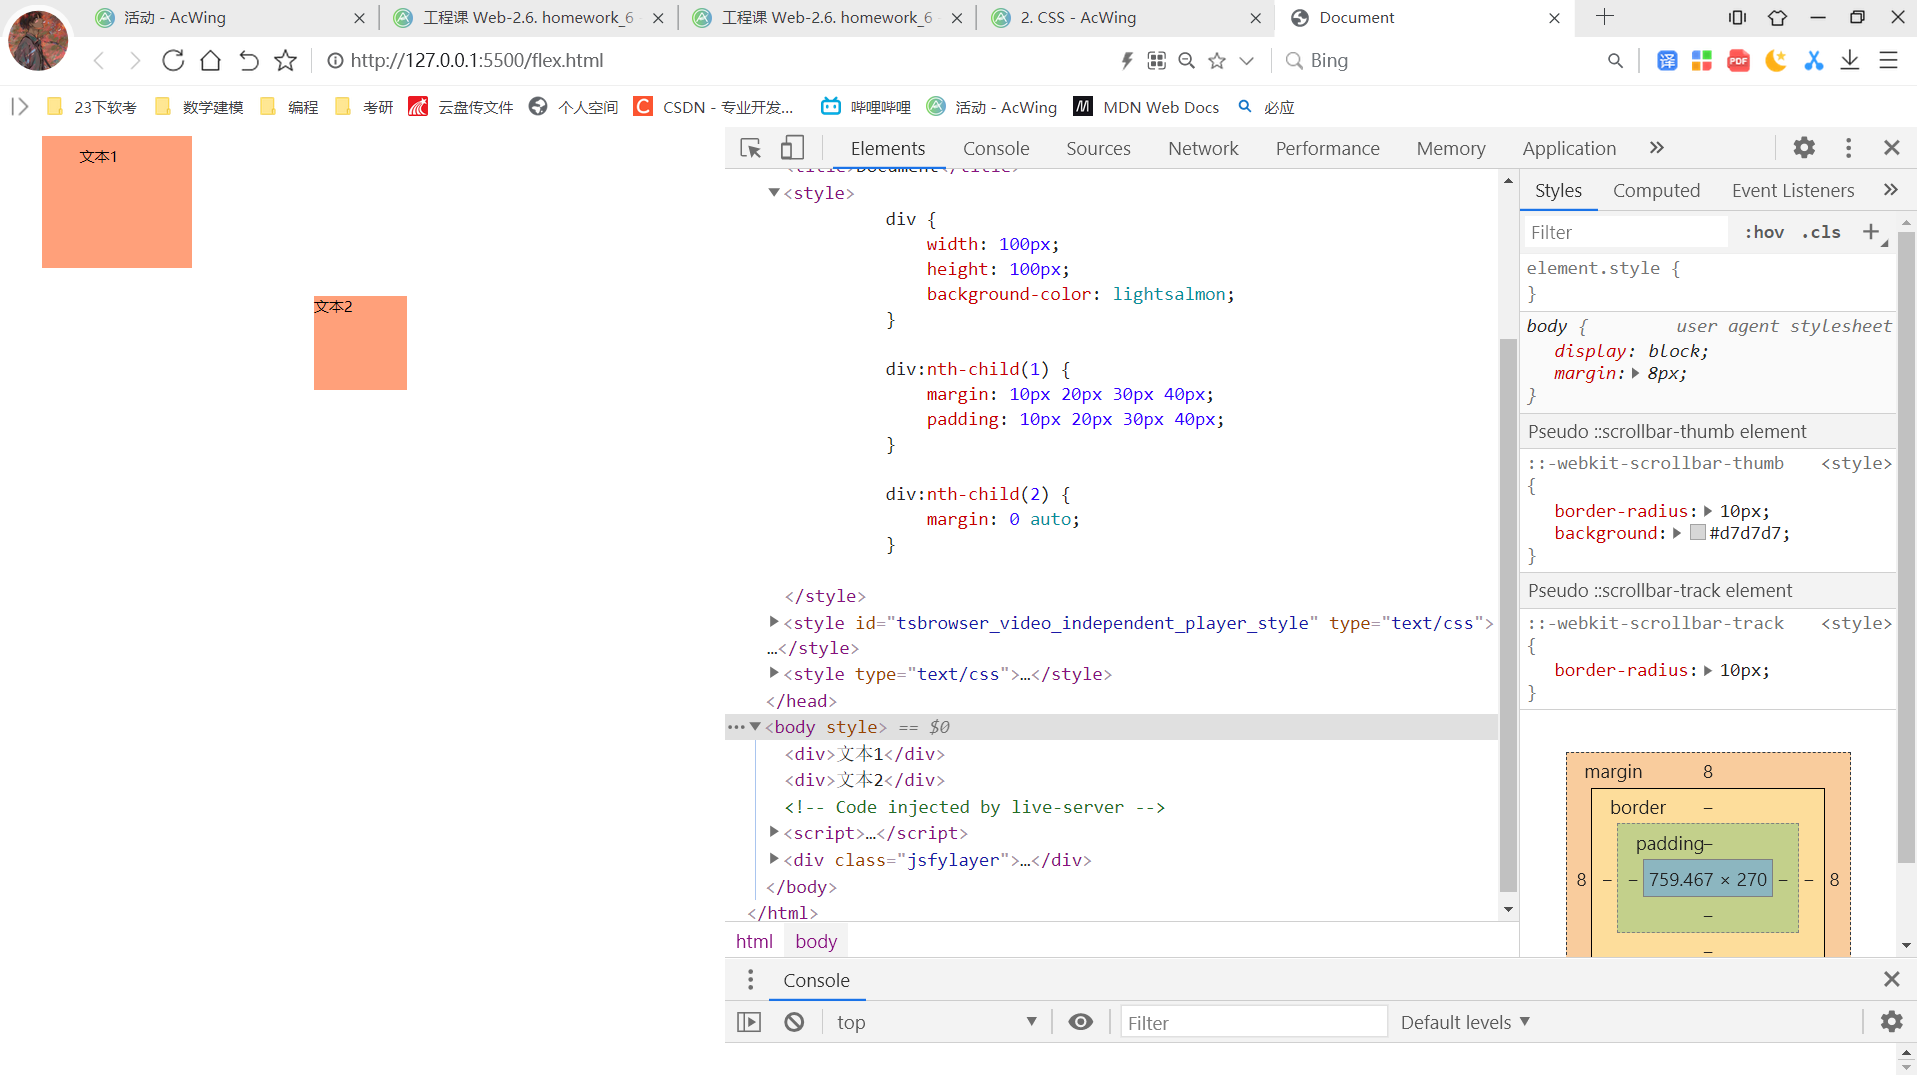
九、边框
- border-style:是一个 CSS 简写属性,用来设定元素所有边框的样式。
- border-width:可以设置盒子模型的边框宽度。
- border-color:用于设置元素四个边框颜色的快捷属性: border-top-color, border-right-color, border-bottom-color, border-left-color
- border-radius:允许你设置元素的外边框圆角。当使用一个半径时确定一个圆形,当使用两个半径时确定一个椭圆。这个(椭)圆与边框的交集形成圆角效果。
- border-collapse:用来决定表格的边框是分开的还是合并的。在分隔模式下,相邻的单元格都拥有独立的边框。在合并模式下,相邻单元格共享边框。
<!DOCTYPE html>
<html lang="en">

<head>
    <meta charset="UTF-8">
    <meta http-equiv="X-UA-Compatible" content="IE=edge">
    <meta name="viewport" content="width=device-width, initial-scale=1.0">
    <title>Document</title>
    <style>
        div {
            width: 300px;
            height: 300px;
            padding: 10px;
            margin: 10px;
            background-color: lightblue;
            border: solid 10px gray;
        }

        div:nth-child(1) {
            box-sizing: content-box;
        }

        div:nth-child(2) {
            box-sizing: border-box;
        }
    </style>
</head>

<body>
    <div>1</div>
    <div>2</div>
</body>

</html>
代码运行结果如下:

十、元素展示格式
- display:
block:
独占一行
width、height、margin、padding均可控制
width默认100%。
inline: 可以共占一行 width与height无效,水平方向的margin与padding有效,竖直方向的margin与padding无效 width默认为本身内容宽度inline-block 可以共占一行 width、height、margin、padding均可控制 width默认为本身内容宽度
- white-space:用来设置如何处理元素中的 空白 (en-US)。
- text-overflow:确定如何向用户发出未显示的溢出内容信号。它可以被剪切,显示一个省略号或显示一个自定义字符串。
- overflow:定义当一个元素的内容太大而无法适应 块级格式化上下文 时候该做什么。它是 overflow-x 和overflow-y的 简写属性 。
<!DOCTYPE html>
<html lang="en">

<head>
    <meta charset="UTF-8">
    <meta http-equiv="X-UA-Compatible" content="IE=edge">
    <meta name="viewport" content="width=device-width, initial-scale=1.0">
    <title>Document</title>
    <style>
        body {
            height: 2000px;
            margin: 0;
        }

        div {
            width: 200px;
            height: 200px;
            background-color: lightblue;
            margin: 20px;
        }

        div:nth-child(1) {
            position: static;
        }

        div:nth-child(2) {
            position: relative;
            left: 50px;
            top: 15px;
        }

        div:nth-child(3) {
            position: absolute;
            background-color: rgba(0, 0, 255, 0.5);
            left: 30px;
            top: 30px;
        }

        div:nth-child(4) {
            position: fixed;
            background-color: rgba(0, 255, 0, 0.5);
            left: 100px;
            top: 250px;
        }

        div:nth-child(10) {
            position: sticky;
            background-color: rgba(255, 0, 0, 0.5);
            bottom: 10px;
        }
    </style>
</head>

<body>
    <div>1</div>
    <div>2</div>
    <div>3</div>
    <div>4</div>
    <div>5</div>
    <div>6</div>
    <div>7</div>
    <div>8</div>
    <div>9</div>
    <div>10</div>
</body>

</html>
代码运行结果如下: 
十一、内边距与外边距
- margin:为给定元素设置所有四个(上下左右)方向的外边距属性。
可以接受1~4个值(上、右、下、左的顺序)
可以分别指明四个方向:
margin-top、margin-right、
margin-bottom、margin-left

可取值:
(length:固定值)
(percentage:相对于包含块的宽度,以百分比值为外边距。)
(auto:让浏览器自己选择一个合适的外边距。有时,在一些特殊情况下,该值可以使元素居中)
- 外边距重叠
- 块的上外边距(margin-top)和下外边距(margin-bottom)有时合并(折叠)为单个边距,其大小为单个边距的最大值(或如果它们相等,则仅为其中一个),这种行为称为边距折叠。
- 父元素与后代元素:父元素没有上边框和padding时,后代元素的margin-top会溢出,溢出后父元素的margin-top会与后代元素取最大值。
- padding:简写属性控制元素所有四条边的内边距区域。
可以接受1~4个值(上、右、下、左的顺序)
可以分别指明四个方向:
padding-top、padding-right、
padding-bottom、padding-left

可取值
(length:固定值)
(percentage:相对于包含块的宽度,以百分比值为内边距。)
<!DOCTYPE html>
<html lang="en">

<head>
    <meta charset="UTF-8">
    <meta http-equiv="X-UA-Compatible" content="IE=edge">
    <meta name="viewport" content="width=device-width, initial-scale=1.0">
    <title>Document</title>
    <style>
        .container {
            width: 500px;
            height: 500px;
            background-color: lightblue;
        }

        .item {
            width: 100px;
            height: 100px;
            margin: 10px;
            background-color: lightcoral;
            float: left;
        }

        .next-line {
            width: 150px;
            height: 150px;
            background-color: rgba(0, 0, 255, 0.5);
            clear: left;
        }
    </style>
</head>

<body>
    <div class="container">
        <div class="item"></div>
        <div class="item"></div>
        <div class="item"></div>
        <div class="item"></div>
        <div class="item"></div>
        <div class="next-line"></div>
    </div>
</body>

</html>
代码运行结果如下:
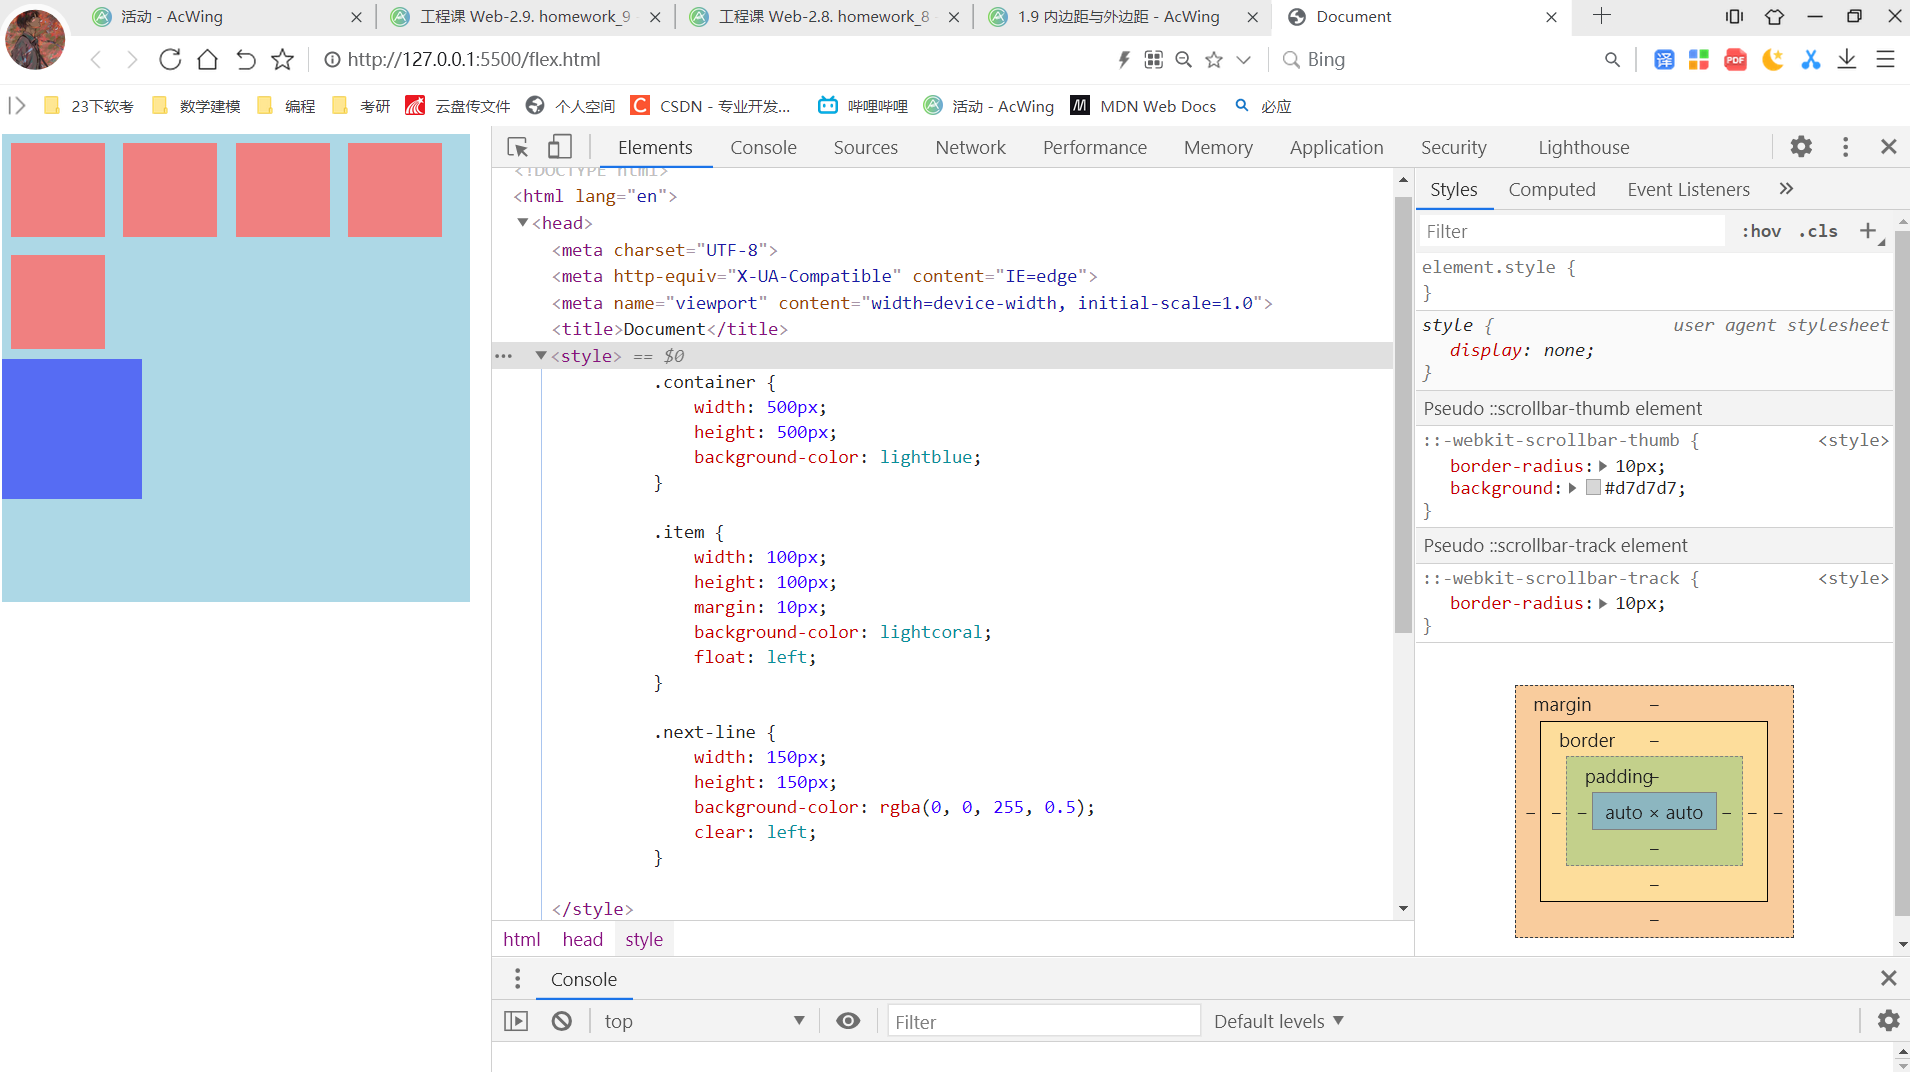
十二、盒子模型
- box-sizing:定义了 user agent 应该如何计算一个元素的总宽度和总高度。
- content-box:是默认值,设置border和padding均会增加元素的宽高。
- border-box:设置border和padding不会改变元素的宽高,而是挤占内容区域。
<!DOCTYPE html>
<html lang="en">

<head>
    <meta charset="UTF-8">
    <meta http-equiv="X-UA-Compatible" content="IE=edge">
    <meta name="viewport" content="width=device-width, initial-scale=1.0">
    <title>Document</title>
    <style>
        .container {
            display: flex;
            width: 50%;
            height: 500px;
            background-color: lightblue;
            margin: 10px;
        }

        .container>div {
            width: 120px;
            height: 120px;
        }

        .container>div:nth-child(odd) {
            background-color: lightsalmon;
        }

        .container>div:nth-child(even) {
            background-color: lightgreen;
        }

        .container:nth-child(1) {
            flex-wrap: wrap;
            justify-content: space-between;
            align-content: flex-start;
        }

        .container:nth-child(2) {
            flex-direction: row-reverse;
            flex-wrap: nowrap;
        }

        .container:nth-child(2)>div:nth-child(odd) {
            flex-grow: 3;
            flex-shrink: 3;
        }

        .container:nth-child(2)>div:nth-child(even) {
            flex-grow: 1;
            flex-shrink: 1;
        }
    </style>
</head>

<body>
    <div class="container">
        <div>1</div>
        <div>2</div>
        <div>3</div>
        <div>4</div>
        <div>5</div>
        <div>6</div>
    </div>

    <div class="container">
        <div>1</div>
        <div>2</div>
        <div>3</div>
        <div>4</div>
        <div>5</div>
        <div>6</div>
    </div>
</body>

</html>
代码运行结果如下:
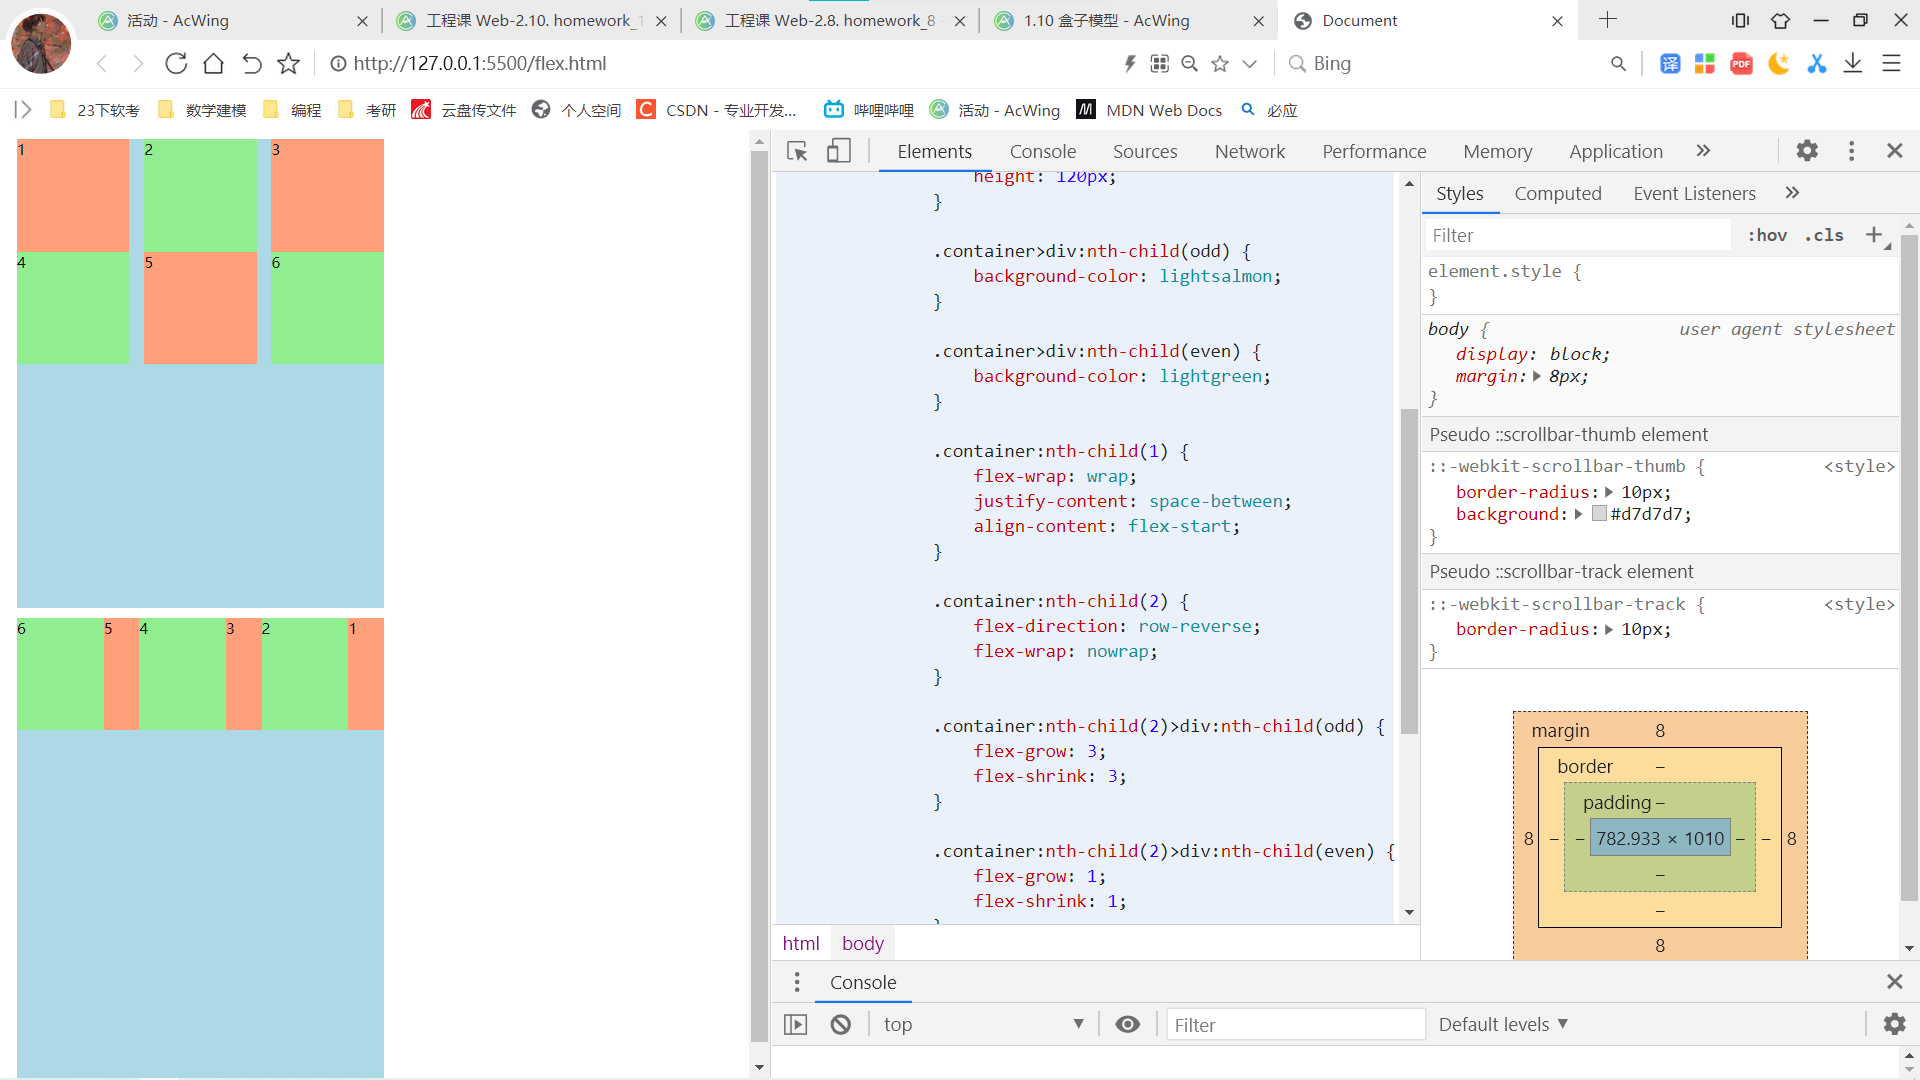
十三、位置
CSS position属性用于指定一个元素在文档中的定位方式。
定位类型:
1、定位元素(positioned element):是其计算后位置属性为
relative, absolute, fixed 或 sticky 的一个元素(换句话说,除static以外的任何东西)。

2、相对定位元素(relatively positioned element):
是计算后位置属性为 relative 的元素。

3、绝对定位元素(absolutely positioned element):
是计算后位置属性为 absolute 或 fixed 的元素。

4、粘性定位元素(stickily positioned element):
是计算后位置属性为 sticky 的元素。

取值:
1、static:该关键字指定元素使用正常的布局行为,即元素在文档常规流中当前的布局位置。
此时 top, right, bottom, left 和 z-index 属性无效。

2、relative:该关键字下,元素先放置在未添加定位时的位置,
再在不改变页面布局的前提下调整元素位置(因此会在此元素未添加定位时所在位置留下空白)。
top, right, bottom, left等调整元素相对于初始位置的偏移量。

3、absolute:元素会被移出正常文档流,并不为元素预留空间,
通过指定元素相对于最近的非 static 定位祖先元素的偏移,来确定元素位置。
绝对定位的元素可以设置外边距(margins),且不会与其他边距合并。

4、fixed:元素会被移出正常文档流,并不为元素预留空间,
而是通过指定元素相对于屏幕视口(viewport)的位置来指定元素位置。
元素的位置在屏幕滚动时不会改变。

5、sticky:元素根据正常文档流进行定位,然后相对它的最近滚动祖先(nearest scrolling ancestor)
和 containing block (最近块级祖先 nearest block-level ancestor),
包括table-related元素,基于top, right, bottom, 和 left的值进行偏移。
偏移值不会影响任何其他元素的位置。
十四、浮动
- float:指定一个元素应沿其容器的左侧或右侧放置,允许文本和内联元素环绕它。该元素从网页的正常流动(文档流)中移除,尽管仍然保持部分的流动性(与绝对定位相反)。
display为inline或inline-block时,使用float后会统一变成block。
- left:表明元素必须浮动在其所在的块容器左侧的关键字。
- right:表明元素必须浮动在其所在的块容器右侧的关键字。
- clear:有时,你可能想要强制元素移至任何浮动元素下方。比如说,你可能希望某个段落与浮动元素保持相邻的位置,但又希望这个段落从头开始强制独占一行。此时可以使用clear。
- left:清除左侧浮动。
- right:清除右侧浮动。
- both:清除左右两侧浮动
十五、flex布局
flex-direction:指定了内部元素是如何在 flex 容器中布局的,定义了主轴的方向。
取值:
row:flex容器的主轴被定义为与文本方向相同。 主轴起点和主轴终点与内容方向相同。
row-reverse:表现和row相同,但是置换了主轴起点和主轴终点。
column:flex容器的主轴和块轴相同。主轴起点与主轴终点和书写模式的前后点相同
column-reverse:表现和column相同,但是置换了主轴起点和主轴终点
flex-wrap:指定 flex 元素单行显示还是多行显示。如果允许换行,这个属性允许你控制行的堆叠方向。
取值:
nowrap:默认值。不换行。
wrap:换行,第一行在上方。
wrap-reverse:换行,第一行在下方。
flex-flow:是 flex-direction 和 flex-wrap 的简写。默认值为:row nowrap。
justify-content:定义了浏览器之间,如何分配顺着弹性容器主轴(或者网格行轴) 的元素之间及其周围的空间。
取值:
flex-start:默认值。左对齐。
flex-end:右对齐。
space-between:左右两段对齐。
space-around:在每行上均匀分配弹性元素。相邻元素间距离相同。每行第一个元素到行首的距离和每行最后一个元素到行尾的距离将会是相邻元素之间距离的一半。
space-evenly:flex项都沿着主轴均匀分布在指定的对齐容器中。相邻flex项之间的间距,主轴起始位置到第一个flex项的间距,主轴结束位置到最后一个flex项的间距,都完全一样。
align-items:将所有直接子节点上的align-self值设置为一个组。 align-self属性设置项目在其包含块中在交叉轴方向上的对齐方式。
取值:
flex-start:元素向主轴起点对齐。
flex-end:元素向主轴终点对齐。
center:元素在侧轴居中。
stretch:弹性元素被在侧轴方向被拉伸到与容器相同的高度或宽度。
align-content:设置了浏览器如何沿着弹性盒子布局的纵轴和网格布局的主轴在内容项之间和周围分配空间。
取值:
flex-start:所有行从垂直轴起点开始填充。第一行的垂直轴起点边和容器的垂直轴起点边对齐。接下来的每一行紧跟前一行。
flex-end:所有行从垂直轴末尾开始填充。最后一行的垂直轴终点和容器的垂直轴终点对齐。同时所有后续行与前一个对齐。
center:所有行朝向容器的中心填充。每行互相紧挨,相对于容器居中对齐。容器的垂直轴起点边和第一行的距离相等于容器的垂直轴终点边和最后一行的距离。
stretch:拉伸所有行来填满剩余空间。剩余空间平均地分配给每一行。
order:定义flex项目的顺序,值越小越靠前。
flex-grow:设置 flex 项主尺寸 的 flex 增长系数。(负值无效,默认为 0。)
flex-shrink:指定了 flex 元素的收缩规则。flex 元素仅在默认宽度之和大于容器的时候才会发生收缩,其收缩的大小是依据 flex-shrink 的值。(负值无效,默认为 0。)
flex-basis:指定了 flex 元素在主轴方向上的初始大小。
取值:
width 值可以是 <length>; 该值也可以是一个相对于其父弹性盒容器主轴尺寸的百分数 。负值是不被允许的。默认为 auto。

flex
flex-grow、flex-shrink、flex-basis的缩写。
常用取值: auto:flex: 1 1 auto none:flex: 0 0 auto
十六、响应式布局
media查询:当屏幕宽度满足特定条件时应用css。
例如:

@media(min-width: 768px) {
    .container {
        width: 960px;
        background-color: lightblue;
    }
}
