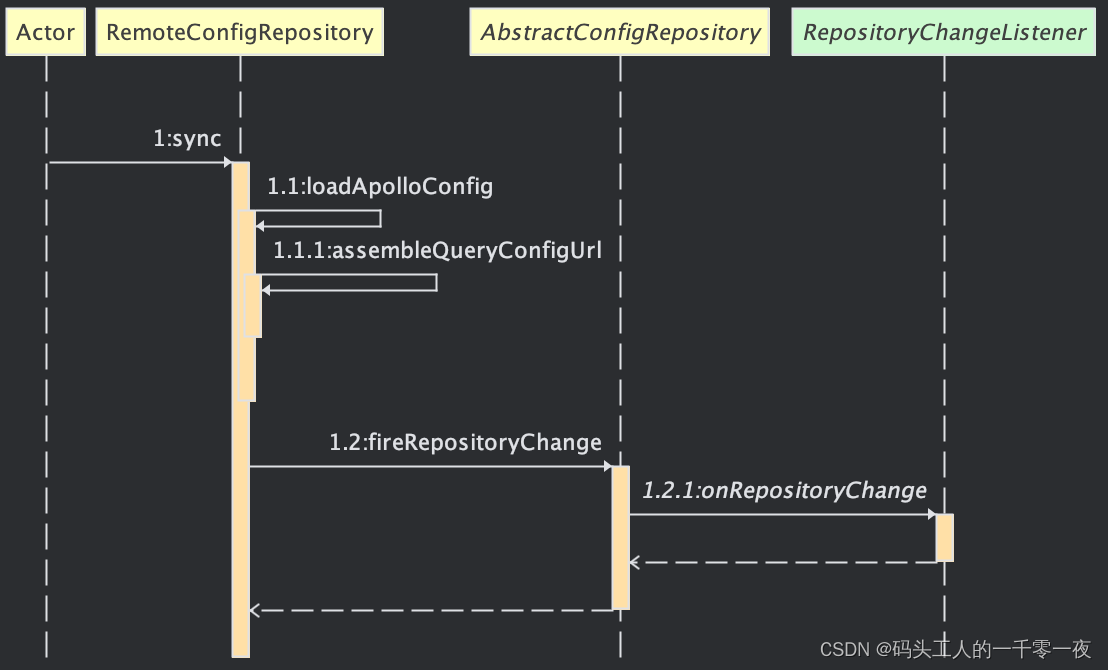
在自定义注解与拦截器实现不规范sql拦截(拦截器实现篇)中提到过,写了一个idea插件来辅助对Mapper接口中的方法添加自定义注解,这边记录一下插件的实现。
需求简介
在上一篇中,定义了一个自定义注解对需要经过where判断的Mapper sql方法进行修饰。那么,现在想使用一个idea插件来辅助进行自定义注解的增加,需要做到以下几点:
- 支持在接口名带Mapper的编辑页面中,右键菜单,显示增加注解信息的选项
- 鼠标移动到该选项,支持显示可选的需要新增的注解名称
- 点击增加,对当前Mapper中的所有方法增加对应注解;同时,没有import的文件中需要增加对应的包导入。
具体实现
插件开发所需前置
第一点就是需要gradle进行打包,所以需要配置gradle项目和对应的配置文件;第二点就是在Project Structure中,将SDK设置为IDEA的sdk,从而导入支持对idea界面和编辑内容进行处理的api。idea大多数版本本身就会提供plugin开发专用的project,对应的配置文件会在project模板中初始化,直接用就行。
插件配置文件
plugin.xml,放在reources的META-INF元数据文件夹下,自动进行插件基本信息的读取:
<!-- Plugin Configuration File. Read more: https://plugins.jetbrains.com/docs/intellij/plugin-configuration-file.html -->
<idea-plugin>
    <!-- Unique identifier of the plugin. It should be FQN. It cannot be changed between the plugin versions. -->
    <id>com.huiluczp.checkAnnocationPlugin</id>

    <!-- Public plugin name should be written in Title Case.
         Guidelines: https://plugins.jetbrains.com/docs/marketplace/plugin-overview-page.html#plugin-name -->
    <name>CheckAnnocationPlugin</name>

    <!-- A displayed Vendor name or Organization ID displayed on the Plugins Page. -->
    <vendor email="970921331@qq.com" url="https://www.huiluczp.com">huiluczP</vendor>

    <!-- Description of the plugin displayed on the Plugin Page and IDE Plugin Manager.
         Simple HTML elements (text formatting, paragraphs, and lists) can be added inside of <![CDATA[ ]]> tag.
         Guidelines: https://plugins.jetbrains.com/docs/marketplace/plugin-overview-page.html#plugin-description -->
    <description>Simple annotation complete plugin used for mybatis mapping interface.</description>

    <!-- Product and plugin compatibility requirements.
         Read more: https://plugins.jetbrains.com/docs/intellij/plugin-compatibility.html -->
    <depends>com.intellij.modules.platform</depends>
    <depends>com.intellij.modules.lang</depends>
    <depends>com.intellij.modules.java</depends>

    <!-- Extension points defined by the plugin.
         Read more: https://plugins.jetbrains.com/docs/intellij/plugin-extension-points.html -->
    <extensions defaultExtensionNs="com.intellij">

    </extensions>
    <actions>
        <group id="add_annotation_group" text="Add Self Annotation" popup="true">
            <!-- EditorPopupMenu是文件中右键会显示的菜单 -->
            <add-to-group group-id="EditorPopupMenu" anchor="last"/>
            <action id="plugin.demoAction" class="com.huiluczp.checkannotationplugin.AnnotationAdditionAction" text="@WhereConditionCheck"
                    description="com.huiluczP.annotation.WhereConditionCheck">
            </action>
        </group>
    </actions>
</idea-plugin>
对插件功能实现来说,主要需要关注的是actions部分,其中,设置了一个名为add_annotation_group的菜单组,在这个标签中,使用add-to-group标签将其插入EditorPopupMenu中,也就是右键展开菜单。最后,在我们定义的菜单组中,增加一个action,也就是点击后会进行对应功能处理的单元,在class中设置具体的实现类,并用text设置需要显示的信息。
功能类实现
将所有功能都塞到了AnnotationAdditionAction类中。
public class AnnotationAdditionAction extends AnAction {

    private Project project;
    private Editor editor;
    private String annotationStr;
    private AnActionEvent event;
    private String fullAnnotationStr;

    @Override
    // 主方法,增加对应的注解信息
    public void actionPerformed(AnActionEvent event) {
        project = event.getData(PlatformDataKeys.PROJECT);
        editor = event.getRequiredData(CommonDataKeys.EDITOR);

        // 获取注解名称
        annotationStr = event.getPresentation().getText();
        fullAnnotationStr = event.getPresentation().getDescription();
        // 获取
        // 获取所有类
        PsiClass[] psiClasses = getAllClasses(event);

        // 对类中所有满足条件的类增加Annotation
        for(PsiClass psiClass:psiClasses){
            // 满足条件
            List<String> methodNames = new ArrayList<>();
            if(checkMapperInterface(psiClass)) {
                PsiMethod[] psiMethods = psiClass.getMethods();
                for (PsiMethod psiMethod : psiMethods) {
                    PsiAnnotation[] psiAnnotations = psiMethod.getAnnotations();
                    boolean isExist = false;
                    System.out.println(psiMethod.getName());
                    for (PsiAnnotation psiAnnotation : psiAnnotations) {
                        // 注解已存在
                        if (psiAnnotation.getText().equals(annotationStr)){
                            isExist = true;
                            break;
                        }
                    }
                    // 不存在,增加信息
                    if(!isExist){
                        System.out.println("add annotation "+annotationStr + ", method:" + psiMethod.getName());
                        methodNames.add(psiMethod.getName());
                    }
                }
            }
            // 创建线程进行编辑器内容的修改
            // todo 考虑同名,还需要考虑对方法的参数判断,有空再说吧
            WriteCommandAction.runWriteCommandAction(project, new TextChangeRunnable(methodNames, event));
        }
    }
实现类需要继承AnAction抽象类,并通过actionPerformed方法来执行具体的操作逻辑。通过event对象,可以获取idea定义的project项目信息和editor当前编辑窗口的信息。通过获取当前窗口的类信息,并编辑对应文本,最终实现对所有满足条件的方法增加自定义注解的功能。
    // 获取对应的method 并插入字符串
    class TextChangeRunnable implements Runnable{

        private final List<String> methodNames;
        private final AnActionEvent event;

        public TextChangeRunnable(List<String> methodNames, AnActionEvent event) {
            this.methodNames = methodNames;
            this.event = event;
        }

        @Override
        public void run() {
            String textNow = editor.getDocument().getText();
            StringBuilder result = new StringBuilder();
            // 考虑import,不存在则增加import信息
            PsiImportList psiImportList = getImportList(event);
            if(!psiImportList.getText().contains(fullAnnotationStr)){
                result.append("import ").append(fullAnnotationStr).append(";\n");
            }

            // 对所有的方法进行定位,增加注解
            // 粗暴一点,直接找到public的位置,前面增加注解+\n
            String[] strList = textNow.split("\n");
            for(String s:strList){
                boolean has = false;
                for(String methodName:methodNames) {
                    if (s.contains(methodName)){
                        has = true;
                        break;
                    }
                }
                if(has){
                    // 获取当前行的缩进
                    int offSet = calculateBlank(s);
                    result.append(" ".repeat(Math.max(0, offSet)));
                    result.append(annotationStr).append("\n");
                }
                result.append(s).append("\n");
            }
            editor.getDocument().setText(result);
        }

        // 找到字符串第一个非空字符前空格数量
        private int calculateBlank(String str){
            int length = str.length();
            int index = 0;
            while(index < length && str.charAt(index) == ' '){
                index ++;
            }
            if(index >= length)
                return -1;
            return index;
        }
    }
需要注意的是,在插件中对文本进行编辑,需要新建线程进行处理。TextChangeRunnable线程类对当前编辑的每一行进行分析,保留对应的缩进信息并增加public方法的自定义注解修饰。同时,判断import包信息,增加对应注解的import。
    @Override
    // 当文件为接口,且名称中包含Mapper信息时,才显示对应的右键菜单
    public void update(@NotNull AnActionEvent event) {
        super.update(event);
        Presentation presentation = event.getPresentation();
        PsiFile psiFile = event.getData(PlatformDataKeys.PSI_FILE);
        presentation.setEnabledAndVisible(false); // 默认不可用
        if(psiFile != null){
            VirtualFile virtualFile = psiFile.getVirtualFile();
            FileType fileType = virtualFile.getFileType();
            // 首先满足为JAVA文件
            if(fileType.getName().equals("JAVA")){
                // 获取当前文件中的所有类信息
                PsiClass[] psiClasses = getAllClasses(event);
                // 只允许存在一个接口类
                if(psiClasses.length!=1)
                    return;
                for(PsiClass psiClass:psiClasses){
                    // 其中包含Mapper接口即可
                    boolean isOk = checkMapperInterface(psiClass);
                    if(isOk){
                        presentation.setEnabledAndVisible(true);
                        break;
                    }
                }
            }
        }
    }
重写update方法,当前右键菜单显示时,判断是否为接口名带Mapper的情况,若不是则进行自定义注解增加功能的隐藏。
    // 获取当前文件中所有类
    private PsiClass[] getAllClasses(AnActionEvent event){
        PsiFile psiFile = event.getData(PlatformDataKeys.PSI_FILE);
        assert psiFile != null;
        FileASTNode node = psiFile.getNode();
        PsiElement psi = node.getPsi();
        PsiJavaFile pp = (PsiJavaFile) psi;
        return pp.getClasses();
    }

    // 获取所有import信息
    private PsiImportList getImportList(AnActionEvent event){
        PsiFile psiFile = event.getData(PlatformDataKeys.PSI_FILE);
        assert psiFile != null;
        FileASTNode node = psiFile.getNode();
        PsiElement psi = node.getPsi();
        PsiJavaFile pp = (PsiJavaFile) psi;
        return pp.getImportList();
    }

    // 判断是否为名称Mapper结尾的接口
    private boolean checkMapperInterface(PsiClass psiClass){
        if(psiClass == null)
            return false;
        if(!psiClass.isInterface())
            return false;
        String name = psiClass.getName();
        if(name == null)
            return false;
        return name.endsWith("Mapper");
    }
最后是几个工具方法,通过psiFile来获取对应的psiJavaFile,从而得到对应的类信息。
插件打包
因为使用了gradle,直接使用gradle命令进行打包。
gradlew build
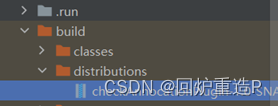
之后会自动执行完整的编译和打包流程,最终会在/build/distributions文件夹下生成对应的jar文件。

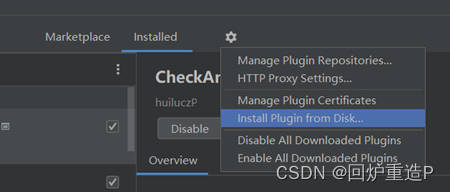
之后,在idea的settings中搜索plugins,点击配置中的本地install选项,即可选择并加载对应的插件jar。
效果展示
创建一个简单的UserMapper类。
public interface UserMapper {

    public String queryG();

    public String queryKKP();
}
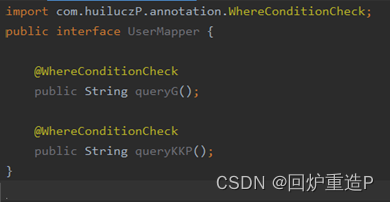
在编辑页面上右键显示菜单,点击我们之前设置的新按钮增加自定义注解信息,增加成功。

总结
这次主要是记录了下简单的idea插件开发过程,idea的sdk以编辑页面为基础提供了PSI api来对当前页面与整体项目的展示进行修改,还是挺方便的。配置文件对action展示的位置进行编辑,感觉和传统的gui开发差不多。
对现在这个插件,感觉还可以拓展一下编辑界面,输进其他想增加的注解类型和展示逻辑,有空再拓展吧。
