zookeeper是一个为分布式应用提供一致性服务的软件,它是开源的Hadoop项目的一个子项目,并根据google发表的一篇论文来实现的。zookeeper为分布式系统提供了高效且易于使用的协同服务,它可以为分布式应用提供相当多的服务,诸如统一命名服务,配置管理,状态同步和组服务等。
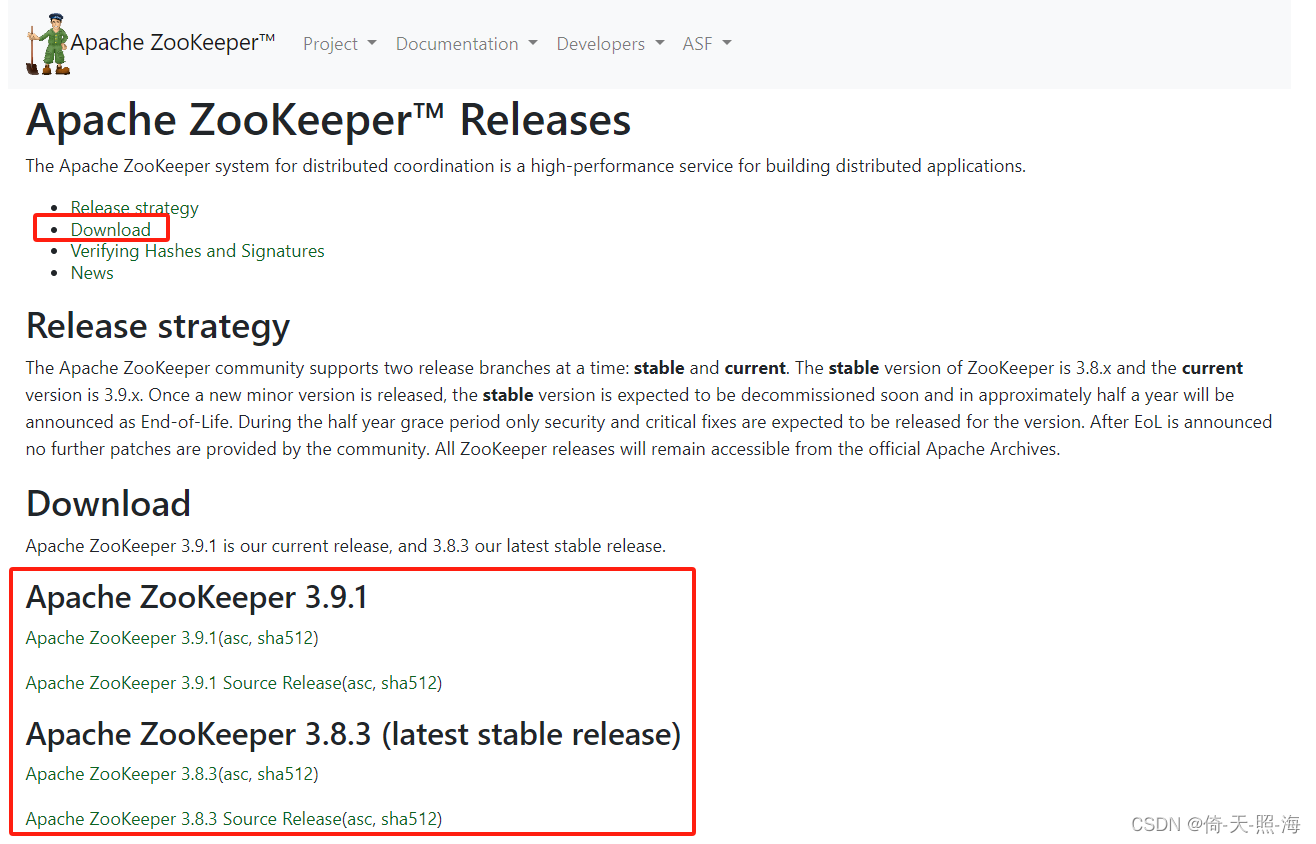
1、下载zookeeper
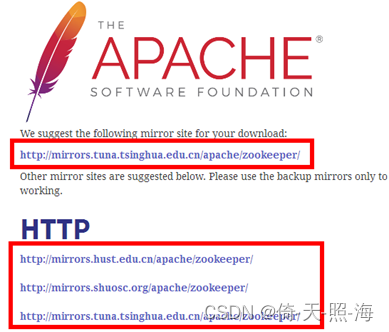
下载地址:Apache ZooKeeper
先在Windows系统下载,下载完之后可以通过Xftp软件上传到Linux系统中。也可以直接在Linux系统中通过以下命令下载:
wget http://mirrors.tuna.tsinghua.edu.cn/apache/zookeeper/zookeeper-3.4.11/zookeeper-3.4.11.tar.gz

2、单机部署zookeeper
将下载好的zookeeper通过Xftp软件上传到Linux系统中,上传完成之后解压缩。
tar -zxvf zookeeper-3.4.11.tar.gz将解压后的文件移动到 /usr/local 目录下。
mv zookeeper-3.4.11 /usr/local/2.1、修改配置文件zoo.cfg
进入到 /usr/local/zookeeper-3.4.11目录下,创建temp/zk/data和temp/zk/log两个子目录,并进入到conf目录下修改配置文件。
执行如下命令:mv zoo_sample.cfg zoo.cfg 将zoo_sample.cfg重命名为zoo.cfg,或者执行 cp zoo_sample.cfg zoo.cfg 生成zoo.cfg文件,然后修改zoo.cfg文件。
# The number of milliseconds of each tick
tickTime=2000
# The number of ticks that the initial
# synchronization phase can take
initLimit=10
# The number of ticks that can pass between
# sending a request and getting an acknowledgement
syncLimit=5
# the directory where the snapshot is stored.
# do not use /tmp for storage, /tmp here is just
# example sakes.
#dataDir=D:/MySoftware/Install/tools/zookeeper/data
#dataLogDir=D:/MySoftware/Install/tools/zookeeper/log
dataDir=/usr/local/zookeeper-3.4.11/temp/zk/data
dataLogDir=/usr/local/zookeeper-3.4.11/temp/zk/log

# the port at which the clients will connect
clientPort=2181
# the maximum number of client connections.
# increase this if you need to handle more clients
#maxClientCnxns=60
#
# Be sure to read the maintenance section of the
# administrator guide before turning on autopurge.
#
# http://zookeeper.apache.org/doc/current/zookeeperAdmin.html#sc_maintenance
#
# The number of snapshots to retain in dataDir
#autopurge.snapRetainCount=3
# Purge task interval in hours
# Set to "0" to disable auto purge feature
#autopurge.purgeInterval=1

## Metrics Providers
#
# https://prometheus.io Metrics Exporter
#metricsProvider.className=org.apache.zookeeper.metrics.prometheus.PrometheusMetricsProvider
#metricsProvider.httpPort=7000
#metricsProvider.exportJvmInfo=true
参数说明:
tickTime: zookeeper中使用的基本时间单位, 时长单位是毫秒。1 * tickTime是客户端与zk服务端的心跳时间,2 * tickTime是客户端会话的超时时间。
tickTime的默认值为2000毫秒,更低的tickTime值可以更快地发现超时问题,但也会导致更高的网络流量(心跳消息)和更高的CPU使用率(会话的跟踪处理)。
initLimit:此配置表示,允许follower(相对于Leaderer言的“客户端”)连接并同步到Leader的初始化连接时间,以tickTime为单位。当初始化连接时间超过该值,则表示连接失败。此处该参数设置为10, 说明时间限制为10倍tickTime, 即10*2000=20000ms=20s。
syncLimit:此配置项表示Leader与Follower之间发送消息时,请求和应答时间长度。如果follower在设置时间内不能与leader通信,那么此follower将会被丢弃。此处该参数设置为5, 说明时间限制为5倍tickTime, 即5*2000=10000ms=10s。
dataDir: 数据目录,可以是任意目录。用于配置存储快照文件的目录。
dataLogDir: log目录, 同样可以是任意目录。 如果没有设置该参数, 将使用和dataDir相同的设置.
clientPort: 监听client连接的端口号。zk服务进程监听的TCP端口,默认情况下,服务端会监听2181端口。
maxClientCnxns:这个操作将限制连接到Zookeeper的客户端数量,并限制并发连接的数量,通过IP来区分不同的客户端。此配置选项可以阻止某些类别的Dos攻击。将他设置为零或忽略不进行设置将会取消对并发连接的限制。
例如,此时我们将maxClientCnxns的值设为1,如下所示:
# set maxClientCnxns
maxClientCnxns=1
启动Zookeeper之后,首先用一个客户端连接到Zookeeper服务器上。之后如果有第二个客户端尝试对Zookeeper进行连接,或者有某些隐式的对客户端的连接操作,将会触发Zookeeper的上述配置。
2.2、配置环境变量
修改/etc/profile文件,在文件最后加上如下配置:
#set zookeeper
export ZOOKEEPER_HOME=/usr/local/zookeeper-3.4.11
export PATH=$JAVA_HOME/bin:$JRE_HOME/bin:$HADOOP_HOME/bin:$ZOOKEEPER_HOME/bin:$PATH:$HOME/bin
然后执行 source /etc/profile 命令使修改立即生效。
2.3、启动zookeeper服务端和客户端
进入到zookeeper-3.4.11目录下的bin目录中,执行如下命令启动zookeeper服务端。
./zkServer.sh start启动zookeeper客户端:如果是连接同一台主机上的zookeeper进程,那么直接运行bin/目录下的zkCli.cmd(Windows环境下)或者zkCli.sh(Linux环境下),即可连接上zookeeper。
直接执行zkCli.cmd或者zkCli.sh命令默认以主机号 127.0.0.1,端口号 2181 来连接zk,如果要连接不同机器上的zk,可以使用 -server 参数。
在bin目录下输入命令:./zkCli.sh 或 bash zkCli.sh (默认以主机号127.0.0.1,端口号2181连接)
./zkCli.sh
或 bash zkCli.sh


./zkCli.sh -server 192.168.10.188:2181
或 bash zkCli.sh -server 192.168.10.188:2181
命令 ./zkCli.sh -server 192.168.10.188:2181 表示以主机号192.168.10.188,端口号2181连接。
断开连接zookeeper:

关闭zookeeper:
./zkServer.sh stop3、伪集群部署zookeeper
所谓伪集群, 是指在单台机器中启动多个zookeeper进程, 并组成一个集群。集群是指在多台机器中分别启动一个zookeeper进程。
下面这种伪集群部署方式只有一个zookeeper-3.4.11目录(即下载zk后解压缩的那个目录),在zookeeper-3.4.11目录下创建temp/zk目录,在该目录下分别创建了data1、data2、data3和log1、log2、log3目录。另外在data1、data2、data3中均创建myid文件。
另外一种伪集群部署方式是在/usr/local目录下创建多个zookeeper目录,这里仍然以三个zookeeper服务器为例,创建三个zookeeper目录,分别命名为zookeeper1、zookeeper2和zookeeper3,然后在这三个目录下都要将下载的zookeeper-3.4.11.tar.gz压缩包解压成zookeeper-3.4.11目录,同时在zookeeper1、zookeeper2、zookeeper3目录下都只需要创建一个data和log目录即可。
3.1、修改配置文件
首先在 /usr/local/zookeeper-3.4.11 目录下创建 temp/zk子目录,在该子目录下分别创建data1、data2、data3和log1、log2、log3目录。另外在data1、data2、data3中均创建myid文件。
mkdir -p /usr/local/zookeeper-3.4.11/temp/zk
cd /usr/local/zookeeper-3.4.11/temp/zk
mkdir data1
mkdir data2
mkdir data3
mkdir log1
mkdir log2
mkdir log3

# 分别在data1、data2、data3目录下创建myid文件,并分别写入1、2、3,代表zookeeper服务的id
echo 1 > data1/myid
echo 2 > data2/myid
echo 3 > data3/myid
复制三个配置文件:
cp zoo_sample.cfg zoo1.cfg
cp zoo_sample.cfg zoo2.cfg
cp zoo_sample.cfg zoo3.cfg
分别修改zoo1.cfg、zoo2.cfg和zoo3.cfg三个配置文件,这三个配置文件的区别就在于dataDir、dataLogDir 和 clientPort 的不同。
zoo1.cfg文件内容如下所示:
# The number of milliseconds of each tick
tickTime=2000
# The number of ticks that the initial
# synchronization phase can take
initLimit=10
# The number of ticks that can pass between
# sending a request and getting an acknowledgement
syncLimit=5
# the directory where the snapshot is stored.
# do not use /tmp for storage, /tmp here is just
# example sakes.
#dataDir=D:/MySoftware/Install/tools/zookeeper/data
#dataLogDir=D:/MySoftware/Install/tools/zookeeper/log
dataDir=/usr/local/zookeeper-3.4.11/temp/zk/data1
dataLogDir=/usr/local/zookeeper-3.4.11/temp/zk/log1

# the port at which the clients will connect
clientPort=2181

server.1=192.168.1.128:2888:3888
server.2=192.168.1.128:2889:3889
server.3=192.168.1.128:2890:3890


# the maximum number of client connections.
# increase this if you need to handle more clients
#maxClientCnxns=60
#
# Be sure to read the maintenance section of the
# administrator guide before turning on autopurge.
#
# http://zookeeper.apache.org/doc/current/zookeeperAdmin.html#sc_maintenance
#
# The number of snapshots to retain in dataDir
#autopurge.snapRetainCount=3
# Purge task interval in hours
# Set to "0" to disable auto purge feature
#autopurge.purgeInterval=1

## Metrics Providers
#
# https://prometheus.io Metrics Exporter
#metricsProvider.className=org.apache.zookeeper.metrics.prometheus.PrometheusMetricsProvider
#metricsProvider.httpPort=7000
#metricsProvider.exportJvmInfo=true
zoo2.cfg文件内容如下所示:
# The number of milliseconds of each tick
tickTime=2000
# The number of ticks that the initial
# synchronization phase can take
initLimit=10
# The number of ticks that can pass between
# sending a request and getting an acknowledgement
syncLimit=5
# the directory where the snapshot is stored.
# do not use /tmp for storage, /tmp here is just
# example sakes.
#dataDir=D:/MySoftware/Install/tools/zookeeper/data
#dataLogDir=D:/MySoftware/Install/tools/zookeeper/log
dataDir=/usr/local/zookeeper-3.4.11/temp/zk/data2
dataLogDir=/usr/local/zookeeper-3.4.11/temp/zk/log2

# the port at which the clients will connect
clientPort=2182

server.1=192.168.1.128:2888:3888
server.2=192.168.1.128:2889:3889
server.3=192.168.1.128:2890:3890


# the maximum number of client connections.
# increase this if you need to handle more clients
#maxClientCnxns=60
#
# Be sure to read the maintenance section of the
# administrator guide before turning on autopurge.
#
# http://zookeeper.apache.org/doc/current/zookeeperAdmin.html#sc_maintenance
#
# The number of snapshots to retain in dataDir
#autopurge.snapRetainCount=3
# Purge task interval in hours
# Set to "0" to disable auto purge feature
#autopurge.purgeInterval=1

## Metrics Providers
#
# https://prometheus.io Metrics Exporter
#metricsProvider.className=org.apache.zookeeper.metrics.prometheus.PrometheusMetricsProvider
#metricsProvider.httpPort=7000
#metricsProvider.exportJvmInfo=true
zoo3.cfg文件内容如下所示:
# The number of milliseconds of each tick
tickTime=2000
# The number of ticks that the initial
# synchronization phase can take
initLimit=10
# The number of ticks that can pass between
# sending a request and getting an acknowledgement
syncLimit=5
# the directory where the snapshot is stored.
# do not use /tmp for storage, /tmp here is just
# example sakes.
#dataDir=D:/MySoftware/Install/tools/zookeeper/data
#dataLogDir=D:/MySoftware/Install/tools/zookeeper/log
dataDir=/usr/local/zookeeper-3.4.11/temp/zk/data3
dataLogDir=/usr/local/zookeeper-3.4.11/temp/zk/log3

# the port at which the clients will connect
clientPort=2183

server.1=192.168.1.128:2888:3888
server.2=192.168.1.128:2889:3889
server.3=192.168.1.128:2890:3890


# the maximum number of client connections.
# increase this if you need to handle more clients
#maxClientCnxns=60
#
# Be sure to read the maintenance section of the
# administrator guide before turning on autopurge.
#
# http://zookeeper.apache.org/doc/current/zookeeperAdmin.html#sc_maintenance
#
# The number of snapshots to retain in dataDir
#autopurge.snapRetainCount=3
# Purge task interval in hours
# Set to "0" to disable auto purge feature
#autopurge.purgeInterval=1

## Metrics Providers
#
# https://prometheus.io Metrics Exporter
#metricsProvider.className=org.apache.zookeeper.metrics.prometheus.PrometheusMetricsProvider
#metricsProvider.httpPort=7000
#metricsProvider.exportJvmInfo=true
3.2、配置环境变量
修改/etc/profile文件,在文件最后加上如下配置:
#set zookeeper
export ZOOKEEPER_HOME=/usr/local/zookeeper-3.4.11
export PATH=$JAVA_HOME/bin:$JRE_HOME/bin:$HADOOP_HOME/bin:$ZOOKEEPER_HOME/bin:$PATH:$HOME/bin
然后执行 source /etc/profile 命令使修改立即生效。
3.3、启动zookeeper
进入到zookeeper的bin目录下,分别执行下面三个命令,启动zookeeper。
./zkServer.sh start zoo1.cfg
./zkServer.sh start zoo2.cfg
./zkServer.sh start zoo3.cfg
查看zookeeper的状态:
通过下面的命令可以查看三个server哪个是 leader,哪个是follower:
./zkServer.sh status zoo1.cfg
./zkServer.sh status zoo2.cfg
./zkServer.sh status zoo3.cfg
通过客户端连接zookeeper,可以查看zookeeper的节点。
./zkCli.sh -server 192.168.1.128:21814、集群部署zookeeper
这里以三台计算机为例,在三台计算机上实现zookeeper的集群部署。在三台计算机上都下载zookeeper-3.4.11.tar.gz压缩包,然后解压成zookeeper-3.4.11目录。下面演示先在一台计算机上操作,剩下两台计算机的操作与这一台完全相同。
4.1、修改配置文件
类似于伪集群部署,先在 /usr/local/zookeeper-3.4.11 目录下创建 temp/zk子目录,并在temp/zk目录下创建data和logs目录。另外在data目录下创建myid文件,并在myid文件中写入一个1~255之间的任意一个数字,比如为1。这三台计算机中的myid文件的内容都不能相同。假设另两台的myid的数字分别是2和3。
mkdir -p /usr/local/zookeeper-3.4.11/temp/zk
cd /usr/local/zookeeper-3.4.11/temp/zk
mkdir data
mkdir log

# 在data目录下创建myid文件,并写入1,代表zookeeper服务的id
echo 1 > data1/myid执行如下命令:mv zoo_sample.cfg zoo.cfg 将zoo_sample.cfg重命名为zoo.cfg,或者执行 cp zoo_sample.cfg zoo.cfg 生成zoo.cfg文件,然后修改zoo.cfg文件。
在三台计算机的zoo.cfg中都加入下面三行(三台计算机的zoo.cfg内容可以完全相同):
server.1=192.168.1.128:2888:3888
server.2=192.168.1.129:2888:3888
server.3=192.168.1.130:2888:3888
server.X=A:B:C,如果配置的是伪集群模式,三个server的ip地址都相同,所以各个server的B, C参数必须不同。这里是集群模式,三个server的ip地址不同,故B、C可以相同。
# The number of milliseconds of each tick
tickTime=2000
# The number of ticks that the initial
# synchronization phase can take
initLimit=10
# The number of ticks that can pass between
# sending a request and getting an acknowledgement
syncLimit=5
# the directory where the snapshot is stored.
# do not use /tmp for storage, /tmp here is just
# example sakes.
#dataDir=D:/MySoftware/Install/tools/zookeeper/data
#dataLogDir=D:/MySoftware/Install/tools/zookeeper/log
dataDir=/usr/local/zookeeper-3.4.11/temp/zk/data
dataLogDir=/usr/local/zookeeper-3.4.11/temp/zk/log

# the port at which the clients will connect
clientPort=2181


server.1=192.168.1.128:2888:3888
server.2=192.168.1.129:2888:3888
server.3=192.168.1.130:2888:3888


# the maximum number of client connections.
# increase this if you need to handle more clients
#maxClientCnxns=60
#
# Be sure to read the maintenance section of the
# administrator guide before turning on autopurge.
#
# http://zookeeper.apache.org/doc/current/zookeeperAdmin.html#sc_maintenance
#
# The number of snapshots to retain in dataDir
#autopurge.snapRetainCount=3
# Purge task interval in hours
# Set to "0" to disable auto purge feature
#autopurge.purgeInterval=1

## Metrics Providers
#
# https://prometheus.io Metrics Exporter
#metricsProvider.className=org.apache.zookeeper.metrics.prometheus.PrometheusMetricsProvider
#metricsProvider.httpPort=7000
#metricsProvider.exportJvmInfo=true
clientPort是客户端连接zookeeper服务器的端口,由于这里是集群部署,每台zookeeper服务器的ip地址都不相同(如上面所示),所以三台服务器的clientPort可以相同。客户端通过下面的命令与其中一个zookeeper服务器建立连接(这里以ip为192.168.1.128的主机为例):
命令:bash zkCli.sh -server 192.168.1.128:2181 以主机号192.168.1.128,端口号2181连接。
3.2、配置环境变量
修改/etc/profile文件,在文件最后加上如下配置:
#set zookeeper
export ZOOKEEPER_HOME=/usr/local/zookeeper-3.4.11
export PATH=$JAVA_HOME/bin:$JRE_HOME/bin:$HADOOP_HOME/bin:$ZOOKEEPER_HOME/bin:$PATH:$HOME/bin
然后执行 source /etc/profile 命令使修改立即生效。
3.3、启动zookeeper
在三台计算机上都要进入到zookeeper的bin目录下,执行下面的命令:
./zkServer.sh start zoo.cfg
./zkServer.sh start zoo.cfg在三台计算机上都要进入到zookeeper的bin目录下,执行下面的命令查看zookeeper的状态:
./zkServer.sh status zoo.cfg
./zkServer.sh status zoo.cfg客户端通过下面的命令连接zookeeper服务器,可以查看zookeeper的节点。
./zkCli.sh -server 192.168.1.128:2181      (连接ip为192.168.1.128的zookeeper服务器)

./zkCli.sh -server 192.168.1.129:2181      (连接ip为192.168.1.129的zookeeper服务器)

./zkCli.sh -server 192.168.1.130:2181      (连接ip为192.168.1.130的zookeeper服务器)
./zkCli.sh -server 192.168.1.128:2181 (连接ip为192.168.1.128的zookeeper服务器)
./zkCli.sh -server 192.168.1.129:2181 (连接ip为192.168.1.129的zookeeper服务器)
./zkCli.sh -server 192.168.1.130:2181 (连接ip为192.168.1.130的zookeeper服务器)
