先用MLPClassifier应用到two_moons数据集上:
from sklearn.neural_network import MLPClassifier
from sklearn.datasets import make_moons
from sklearn.model_selection import train_test_split
import mglearn
import matplotlib.pyplot as plt

plt.rcParams['font.sans-serif'] = ['SimHei']
plt.rcParams['axes.unicode_minus'] = False
X,y=make_moons(n_samples=100,noise=0.25,random_state=3)
X_train,X_test,y_train,y_test=train_test_split(X,y,stratify=y,random_state=42)

mlp=MLPClassifier(solver='lbfgs'
                  ,random_state=0
                  )
mlp.fit(X_train,y_train)
mglearn.plots.plot_2d_separator(mlp,X_train,fill=True,alpha=.3)
mglearn.discrete_scatter(X_train[:,0],X_train[:,1],y_train)
plt.xlabel('特征0')
plt.ylabel('特征1')
plt.show()
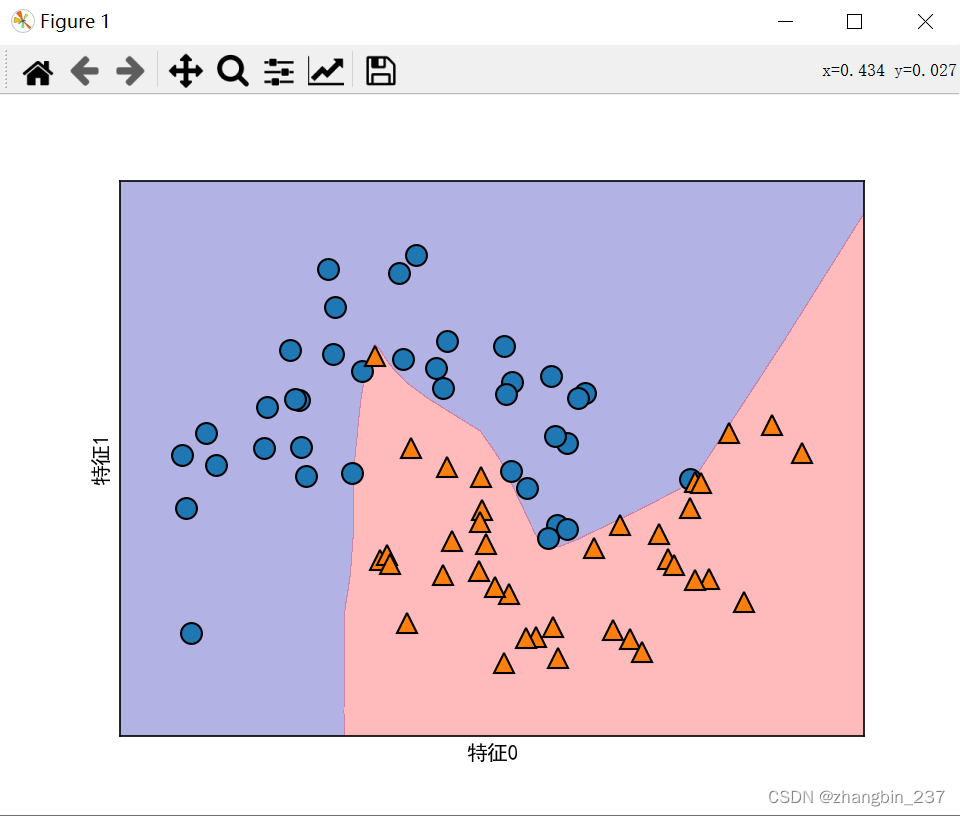
可以看到,神经网络学到的决策边界完全是非线性的,但相对平滑, 默认情况下,MLP使用100个隐结点,可以减少数量,降低模型复杂度,对于小型数据集来说,仍然可以得到很好的结果。
from sklearn.neural_network import MLPClassifier
from sklearn.datasets import make_moons
from sklearn.model_selection import train_test_split
import mglearn
import matplotlib.pyplot as plt

plt.rcParams['font.sans-serif'] = ['SimHei']
plt.rcParams['axes.unicode_minus'] = False
X,y=make_moons(n_samples=100,noise=0.25,random_state=3)
X_train,X_test,y_train,y_test=train_test_split(X,y,stratify=y,random_state=42)

mlp=MLPClassifier(solver='lbfgs'
                  ,random_state=0
                  ,hidden_layer_sizes=[10]
                  ,max_iter=10000
                  )
mlp.fit(X_train,y_train)
mglearn.plots.plot_2d_separator(mlp,X_train,fill=True,alpha=.3)
mglearn.discrete_scatter(X_train[:,0],X_train[:,1],y_train)
plt.xlabel('特征0')
plt.ylabel('特征1')
plt.show()
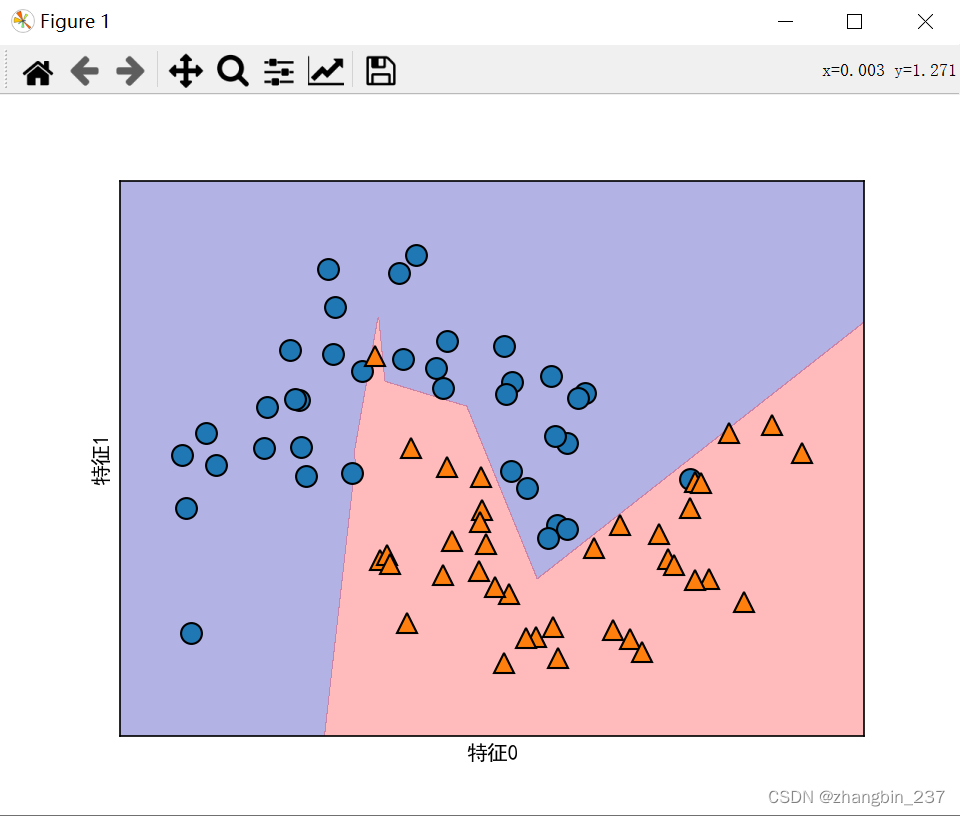
可以看到,决策边界更加参差不齐。默认的非线性是relu,如果想要得到更平滑的决策边界,可以添加更多隐单元,或者使用tanh非线性。
from sklearn.neural_network import MLPClassifier
from sklearn.datasets import make_moons
from sklearn.model_selection import train_test_split
import mglearn
import matplotlib.pyplot as plt

plt.rcParams['font.sans-serif'] = ['SimHei']
plt.rcParams['axes.unicode_minus'] = False
X,y=make_moons(n_samples=100,noise=0.25,random_state=3)
X_train,X_test,y_train,y_test=train_test_split(X,y,stratify=y,random_state=42)

mlp=MLPClassifier(solver='lbfgs'
                  ,activation='tanh'
                  ,random_state=0
                  ,hidden_layer_sizes=[10,10]
                  ,max_iter=10000
                  )
mlp.fit(X_train,y_train)
mglearn.plots.plot_2d_separator(mlp,X_train,fill=True,alpha=.3)
mglearn.discrete_scatter(X_train[:,0],X_train[:,1],y_train)
plt.xlabel('特征0')
plt.ylabel('特征1')
plt.show()

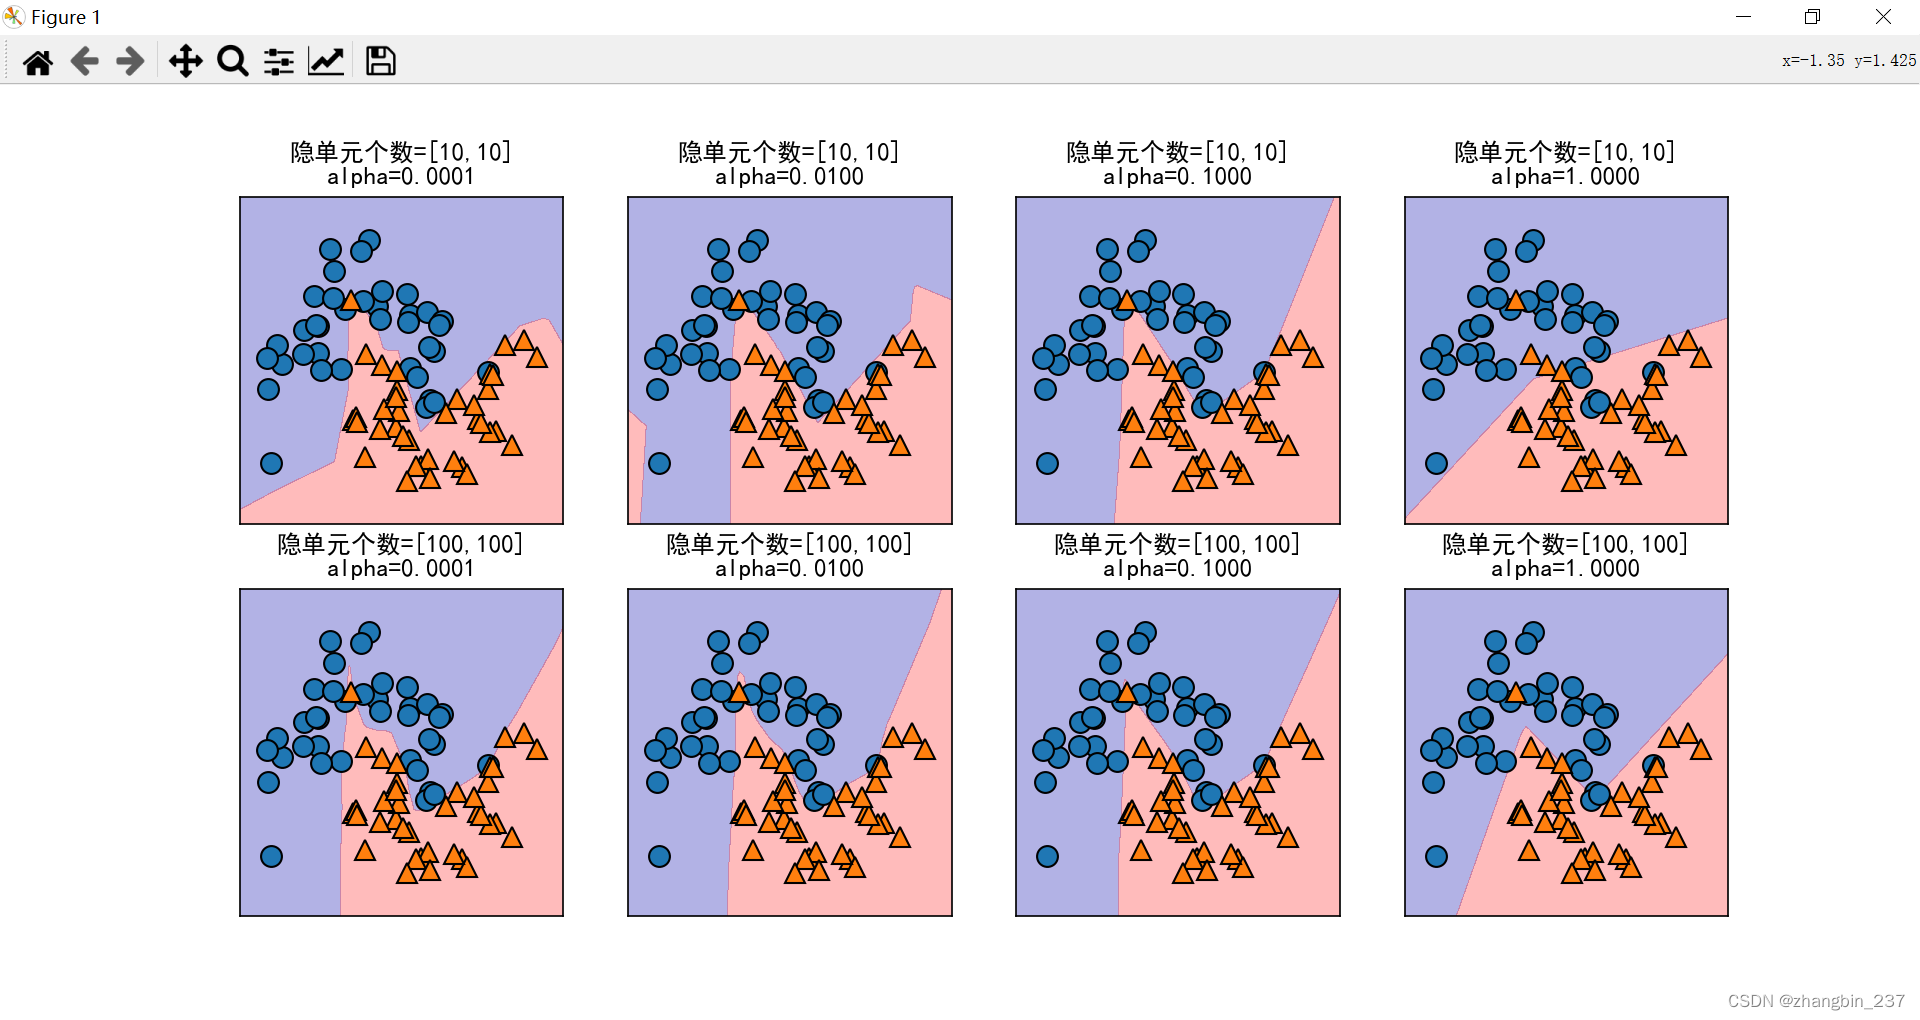
除此以外,还可以利用L2惩罚使权重趋向于0,从而控制神经网络的复杂度,alpha的默认值很小,下面对不同参数下,神经网络结果的可视化:
from sklearn.neural_network import MLPClassifier
from sklearn.datasets import make_moons
from sklearn.model_selection import train_test_split
import mglearn
import matplotlib.pyplot as plt

plt.rcParams['font.sans-serif'] = ['SimHei']
plt.rcParams['axes.unicode_minus'] = False
X,y=make_moons(n_samples=100,noise=0.25,random_state=3)
X_train,X_test,y_train,y_test=train_test_split(X,y,stratify=y,random_state=42)

fig,axes=plt.subplots(2,4,figsize=(20,8))
for axx,n_hidden_nodes in zip(axes,[10,100]):
    for ax,alpha in zip(axx,[0.0001,0.01,0.1,1]):
        mlp = MLPClassifier(solver='lbfgs'
                            #, activation='tanh'
                            , random_state=0
                            , hidden_layer_sizes=[n_hidden_nodes, n_hidden_nodes]
                            ,alpha=alpha
                            ,max_iter=10000
                            )
        mlp.fit(X_train,y_train)
        mglearn.plots.plot_2d_separator(mlp,X_train,fill=True,alpha=.3,ax=ax)
        mglearn.discrete_scatter(X_train[:, 0], X_train[:, 1], y_train,ax=ax)
        ax.set_title('隐单元个数=[{},{}]\nalpha={:.4f}'.format(n_hidden_nodes,n_hidden_nodes,alpha))
plt.show()
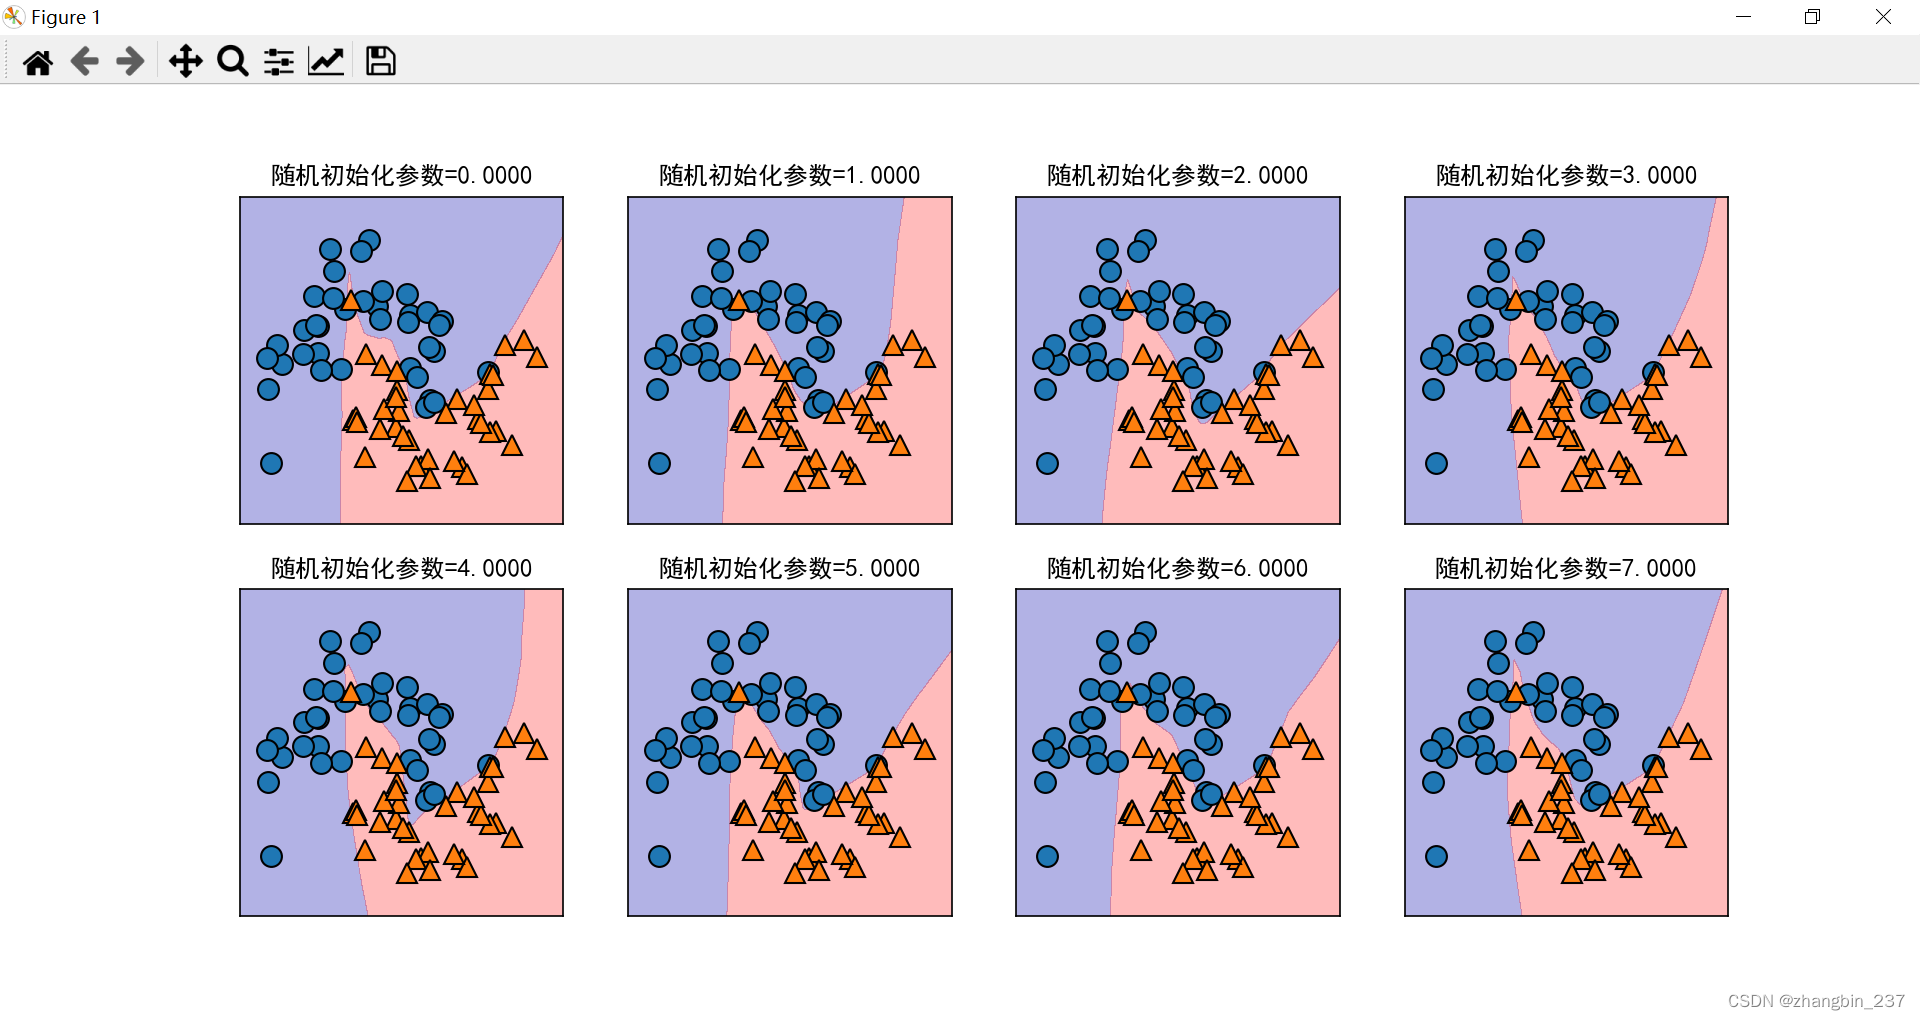
神经网络的一个重要性质是:在开始学习之前,权重是随机设置的,这种随机化会影响学到的模型,也就是即使使用完全相同的参数,用的随机种子不同,也可能得到非常不一样的模型:
from sklearn.neural_network import MLPClassifier
from sklearn.datasets import make_moons
from sklearn.model_selection import train_test_split
import mglearn
import matplotlib.pyplot as plt

plt.rcParams['font.sans-serif'] = ['SimHei']
plt.rcParams['axes.unicode_minus'] = False
X,y=make_moons(n_samples=100,noise=0.25,random_state=3)
X_train,X_test,y_train,y_test=train_test_split(X,y,stratify=y,random_state=42)

fig,axes=plt.subplots(2,4,figsize=(20,8))
for i,ax in enumerate(axes.ravel()):
    mlp = MLPClassifier(solver='lbfgs'
                        #,activation='tanh'
                        ,random_state=i
                        ,hidden_layer_sizes=[100,100]
                        ,max_iter=10000
                        )
    mlp.fit(X_train,y_train)
    mglearn.plots.plot_2d_separator(mlp,X_train,fill=True,alpha=.3,ax=ax)
    mglearn.discrete_scatter(X_train[:, 0], X_train[:, 1], y_train,ax=ax)
    ax.set_title('随机初始化参数={:.4f}'.format(i))
plt.show()
用另一个例子,使用默认参数查看模型的特征数据和精度:
from sklearn.datasets import load_breast_cancer
from sklearn.model_selection import train_test_split
from sklearn.linear_model import Ridge,LinearRegression,Lasso,LogisticRegression
import matplotlib.pyplot as plt
from sklearn.neural_network import MLPClassifier

plt.rcParams['font.sans-serif']=['SimHei']
cancer=load_breast_cancer()

print('癌症数据集每个特征的最大值:{}'.format(cancer.data.max(axis=0)))
X_train,X_test,y_train,y_test=train_test_split(
    cancer.data,cancer.target,random_state=0
)
mlp=MLPClassifier(random_state=0)
mlp.fit(X_train,y_train)

print('训练集精度:{:.4f}'.format(mlp.score(X_train,y_train)))
print('测试集精度:{:.4f}'.format(mlp.score(X_test,y_test)))
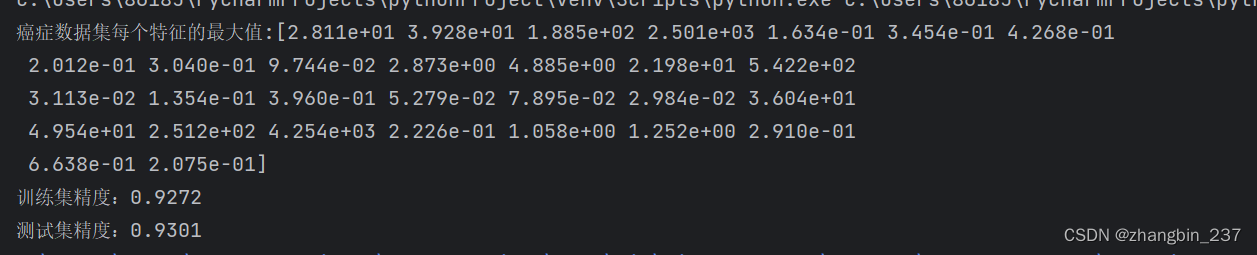
MLP模型的精度很好,但是没有其他模型好,原因可能在于数据的缩放。神经网络也要求所有数据特征的变化范围相近,最理想的情况是均值为0,方差为1,人工处理:
#计算每个特征的平均值
mean_on_train=X_train.mean(axis=0)
#计算每个特征的标准差
std_on_train=X_train.std(axis=0)

#减去平均值,然后乘标准差的倒数
#计算完成后mean=0,std=1
X_train_scaled=(X_train-mean_on_train)/std_on_train
X_test_scaled=(X_test-mean_on_train)/std_on_train

mlp_std=MLPClassifier(random_state=0)
mlp_std.fit(X_train_scaled,y_train)

print('训练集精度:{:.4f}'.format(mlp_std.score(X_train_scaled,y_train)))
print('测试集精度:{:.4f}'.format(mlp_std.score(X_test_scaled,y_test)))

可以看到缩放之后的结果要好很多,另外,增大迭代次数可以提高训练集性能,但不提高泛化性能。
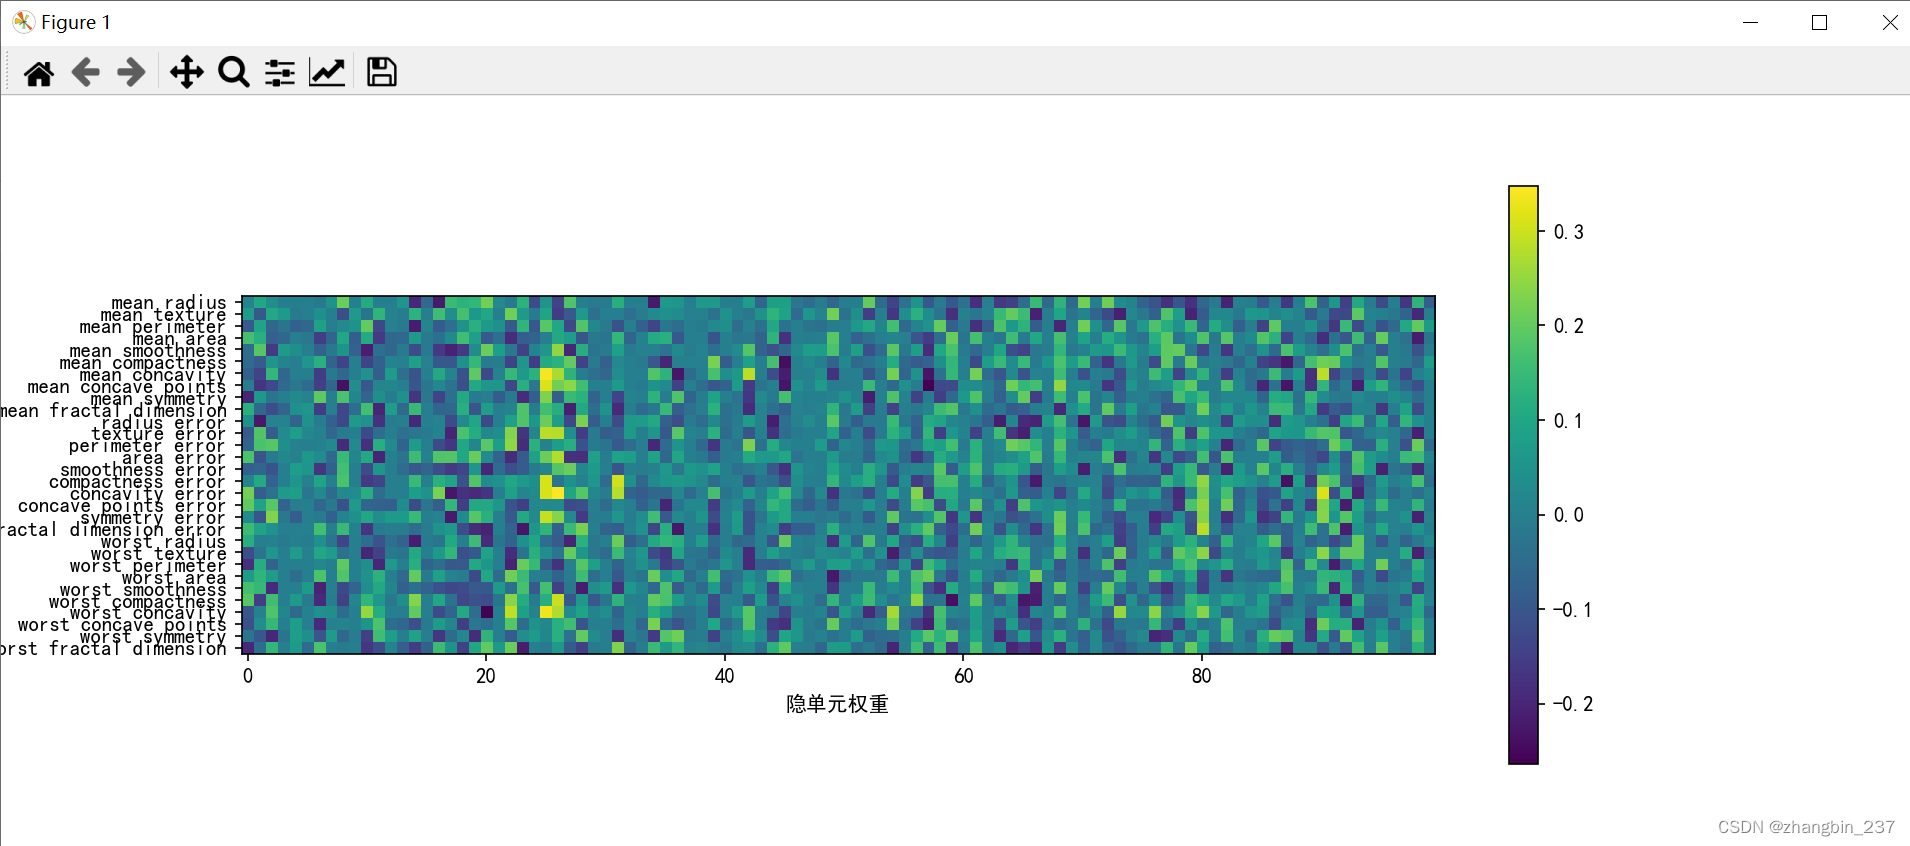
对特征重要性的可视化:
from sklearn.datasets import load_breast_cancer
from sklearn.model_selection import train_test_split
from sklearn.linear_model import Ridge,LinearRegression,Lasso,LogisticRegression
import matplotlib.pyplot as plt
from sklearn.neural_network import MLPClassifier

plt.rcParams['font.sans-serif']=['SimHei']
plt.rcParams['axes.unicode_minus'] = False
cancer=load_breast_cancer()

print('癌症数据集每个特征的最大值:{}'.format(cancer.data.max(axis=0)))
X_train,X_test,y_train,y_test=train_test_split(
    cancer.data,cancer.target,random_state=0
)
mlp=MLPClassifier(random_state=0)
mlp.fit(X_train,y_train)

plt.figure(figsize=(20,5))
plt.imshow(mlp.coefs_[0],interpolation='none',cmap='viridis')
plt.yticks(range(30),cancer.feature_names)
plt.xlabel('隐单元权重')
plt.ylabel('输入特征')
plt.colorbar()
plt.show()