鸿蒙HarmonyOS兼容JS的类Web开发-开发指导
文章目录
- 鸿蒙HarmonyOS兼容JS的类Web开发-开发指导
- 常用组件开发指导
- list开发指导
- 创建list组件
- 添加滚动条
- 添加侧边索引栏
- 实现列表折叠和展开
- 场景示例
- dialog开发指导
- 创建dialog组件
- 设置弹窗响应
- 场景示例
- form开发指导
- 创建form组件
- 实现表单缩放
- 设置form样式
- 添加响应事件
- 场景示例
- stepper开发指导
- 创建stepper组件
- 设置index属性
- 设置样式
- 添加事件
- 场景示例
- tabs开发指导
- 创建tabs
- 设置样式
- 显示页签索引
- 场景示例
- swiper开发指导
- 创建swiper组件
- 添加属性
- 设置样式
- 绑定事件
- 场景示例
- Canvas开发指南
- Canvas对象
- 创建Canvas组件
- 添加样式
- 添加事件
- 2D对象
- 画线段
- 画边框
- 填充渐变色
- 填充文字
- 添加图片
- 添加方法
- 画线段
- 画图形
- 判断位置
- Svg开发指导
- 基础知识
- 创建Svg组件
- 设置属性
- 绘制图形
- 绘制路径
- 绘制文本
- 文本
- 沿路径绘制文本
- 动效开发指导
- 属性样式动画
- transform样式动画
- 设置静态动画
- 设置平移动画
- 设置旋转动画
- 设置缩放动画
- 设置matrix属性
- 整合transform属性
- background-position样式动画
- svg动画
- 属性样式动画
- 路径动画
- animateTransform动画
- JS动画
- 组件动画
- 获取动画对象
- 设置动画参数
- 插值器动画
- 创建动画对象
- 添加动画事件和调用接口
- 动画帧
- 请求动画帧
- 取消动画帧
常用组件开发指导
list开发指导
list是用来显示列表的组件,包含一系列相同宽度的列表项,适合连续、多行地呈现同类数据。具体用法请参考list API。
创建list组件
在pages/index目录下的hml文件中创建一个list组件。
<!-- xxx.hml -->
<div class="container">
 <list>
   <list-item class="listItem"></list-item>
   <list-item class="listItem"></list-item>
   <list-item class="listItem"></list-item>
   <list-item class="listItem"></list-item>
 </list>
</div>
/* xxx.css */
.container {
  width:100%;
  height:100%;
  flex-direction: column;
  align-items: center;
  background-color: #F1F3F5;
}
.listItem{
  height: 20%;
  background-color:#d2e0e0;
  margin-top: 20px;
}
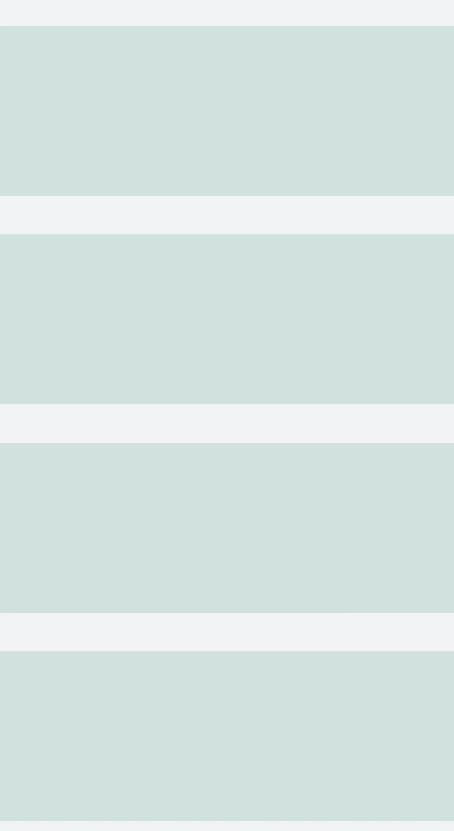
说明
- 是的子组件,实现列表分组功能,不能再嵌套,可以嵌套。
- 是的子组件,展示列表的具体项。
添加滚动条
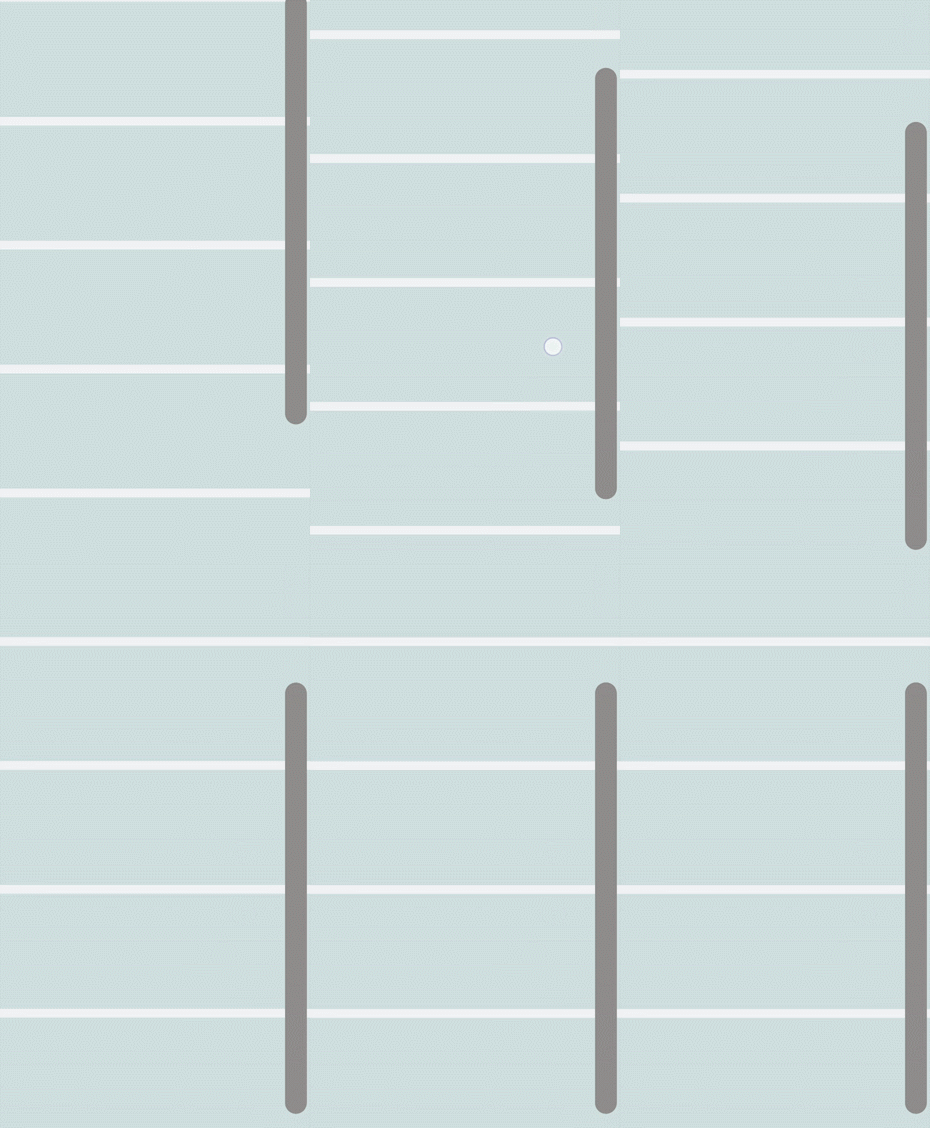
设置scrollbar属性为on即可在屏幕右侧生成滚动条,实现长列表或者屏幕滚动等效果。
<!-- xxx.hml -->
<div class="container">
  <list class="listCss" scrollbar="on" >
    <list-item class="listItem"></list-item>
    <list-item class="listItem"></list-item>
    <list-item class="listItem"></list-item>
    <list-item class="listItem"></list-item>
    <list-item class="listItem"></list-item>
    <list-item class="listItem"></list-item>
 </list>
</div>
/* xxx.css */
.container {
  flex-direction: column;
  background-color: #F1F3F5;
}
.listItem{
  height: 20%;
  background-color:#d2e0e0;
  margin-top: 20px;
}
.listCss{
  height: 100%;
  scrollbar-color: #8e8b8b;
  scrollbar-width: 50px;
}
添加侧边索引栏
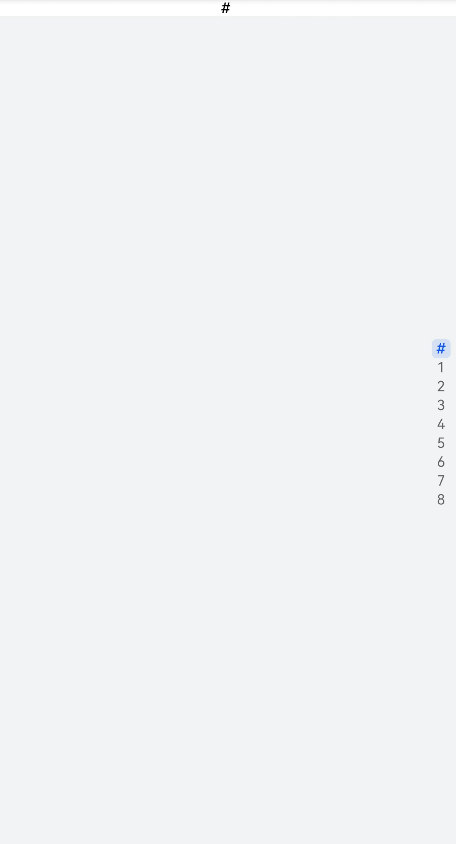
设置indexer属性为自定义索引时,索引栏会显示在列表右边界处,indexer属性设置为true,默认为字母索引表。
<!-- xxx.hml -->
<div class="container">
  <list class="listCss"  indexer="{{['#','1','2','3','4','5','6','7','8']}}" >
    <list-item class="listItem"  section="#" ></list-item>
  </list>
</div>
/* xxx.css */
.container{
  flex-direction: column;
  background-color: #F1F3F5;
 }
.listCss{
  height: 100%;
  flex-direction: column;
  columns: 1
}
说明
- indexer属性生效需要flex-direction属性配合设置为column,且columns属性设置为1。
- indexer可以自定义索引表,自定义时"#"必须要存在。
实现列表折叠和展开
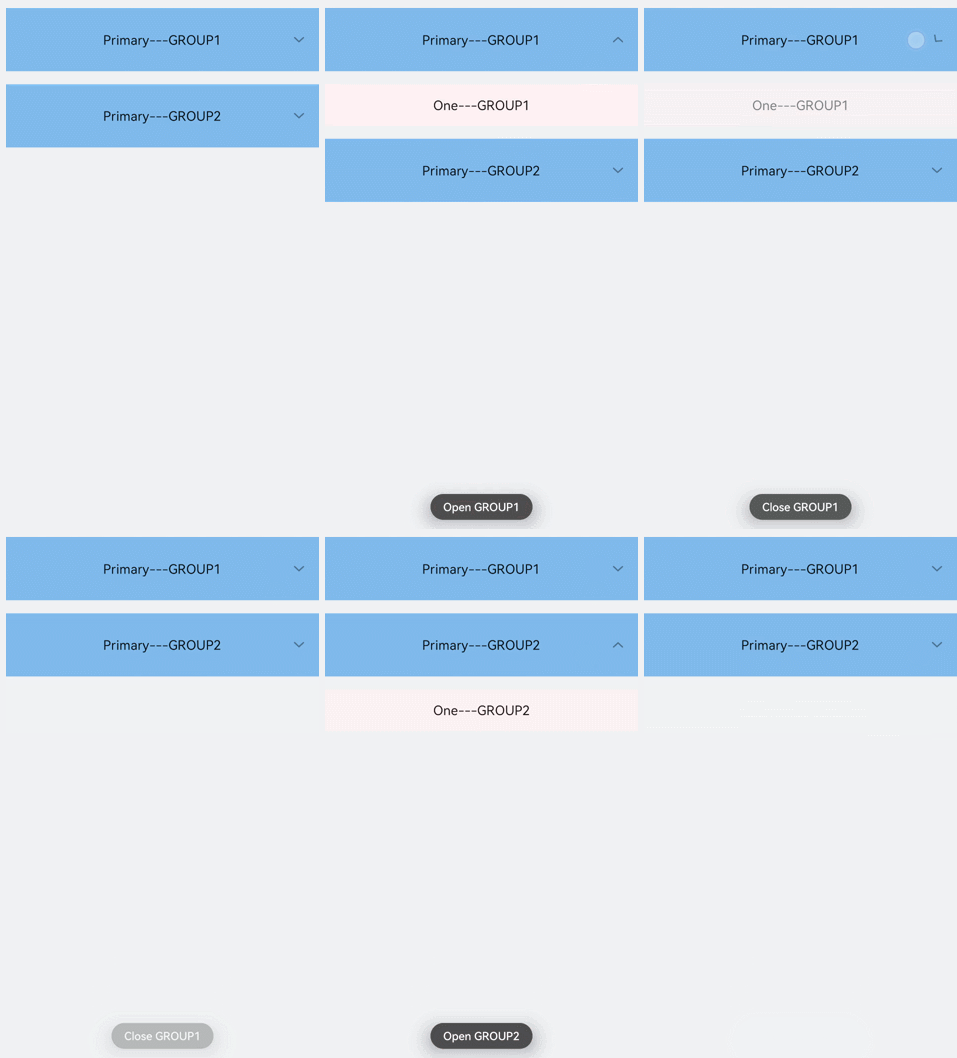
为list组件添加groupcollapse和groupexpand事件实现列表的折叠和展开。
<!-- xxx.hml -->
<div class="doc-page">
  <list style="width: 100%;" id="mylist">
    <list-item-group for="listgroup in list" id="{{listgroup.value}}" ongroupcollapse="collapse" ongroupexpand="expand">
      <list-item type="item" style="background-color:#FFF0F5;height:95px;">
        <div class="item-group-child">
          <text>One---{{listgroup.value}}</text>
        </div>
      </list-item>
      <list-item type="item" style="background-color: #87CEFA;height:145px;" primary="true">
        <div class="item-group-child">
          <text>Primary---{{listgroup.value}}</text>
        </div>
      </list-item>
    </list-item-group>
  </list>
</div>
/* xxx.css */
.doc-page {
  flex-direction: column;
  background-color: #F1F3F5;
}
list-item{
margin-top:30px;
}
.top-list-item {
  width:100%;
  background-color:#D4F2E7;
}
.item-group-child {
  justify-content: center;
  align-items: center;
  width:100%;
}
// xxx.js
import promptAction from '@ohos.promptAction';
export default {
  data: {
    direction: 'column',
    list: []
  },
  onInit() {
    this.list = []
    this.listAdd = []
    for (var i = 1; i <= 2; i++) {
      var dataItem = {
        value: 'GROUP' + i,
      };
        this.list.push(dataItem);
    }
  },
  collapse(e) {
    promptAction.showToast({
      message: 'Close ' + e.groupid
    })
  },
  expand(e) {
    promptAction.showToast({
    message: 'Open ' + e.groupid
    })
  }
}
说明
- groupcollapse和groupexpand事件仅支持list-item-group组件使用。
场景示例
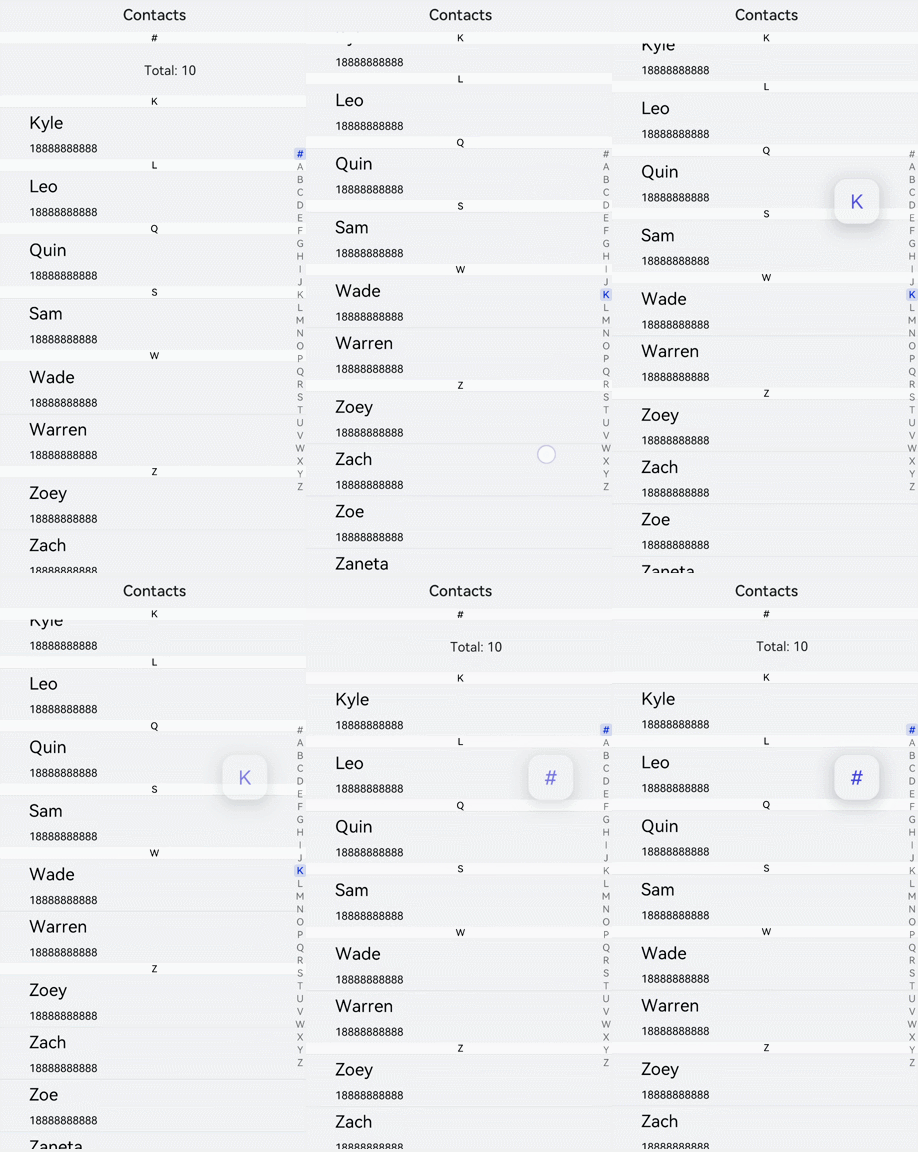
在本场景中,开发者可以根据字母索引表查找对应联系人。
<!-- xxx.hml -->
<div class="doc-page">
  <text style="font-size: 35px; font-weight: 500; text-align: center; margin-top: 20px; margin-bottom: 20px;">
      <span>Contacts</span>
  </text>
  <list class="list" indexer="true">
    <list-item class="item" for="{{namelist}}" type="{{$item.section}}" section="{{$item.section}}">
      <div class="container">
        <div class="in-container">
          <text class="name">{{$item.name}}</text>
          <text class="number">18888888888</text>
        </div>
      </div>
    </list-item>
    <list-item type="end" class="item">
      <div style="align-items:center;justify-content:center;width:750px;">
        <text style="text-align: center;">Total: 10</text>
      </div>
    </list-item>
  </list>
</div>
/* xxx.css */
.doc-page {
  width: 100%;
  height: 100%;
  flex-direction: column;
  background-color: #F1F3F5;
}
.list {
  width: 100%;
  height: 90%;
  flex-grow: 1;
}
.item {
  height: 120px;
  padding-left: 10%;
  border-top: 1px solid #dcdcdc;
}
.name {
  color: #000000;
  font-size: 39px;
}
.number {
  color: black;
  font-size: 25px;
}
.container {
  flex-direction: row;
  align-items: center;
}
.in-container {
  flex-direction: column;
  justify-content: space-around;
}
// xxx.js
export default {
   data: {
     namelist:[{
       name: 'Zoey',
       section:'Z'
     },{
       name: 'Quin',
       section:'Q'
     },{
       name:'Sam',
       section:'S'
     },{
       name:'Leo',
       section:'L'
     },{
       name:'Zach',
       section:'Z'
     },{
       name:'Wade',
       section:'W'
     },{
       name:'Zoe',
       section:'Z'
     },{
        name:'Warren',
        section:'W'
     },{
        name:'Kyle',
        section:'K'
     },{
       name:'Zaneta',
       section:'Z'
     }]
   },
   onInit() {
   }
 }
dialog开发指导
dialog组件用于创建自定义弹窗,通常用来展示用户当前需要或用户必须关注的信息或操作。具体用法请参考dialog API。
创建dialog组件
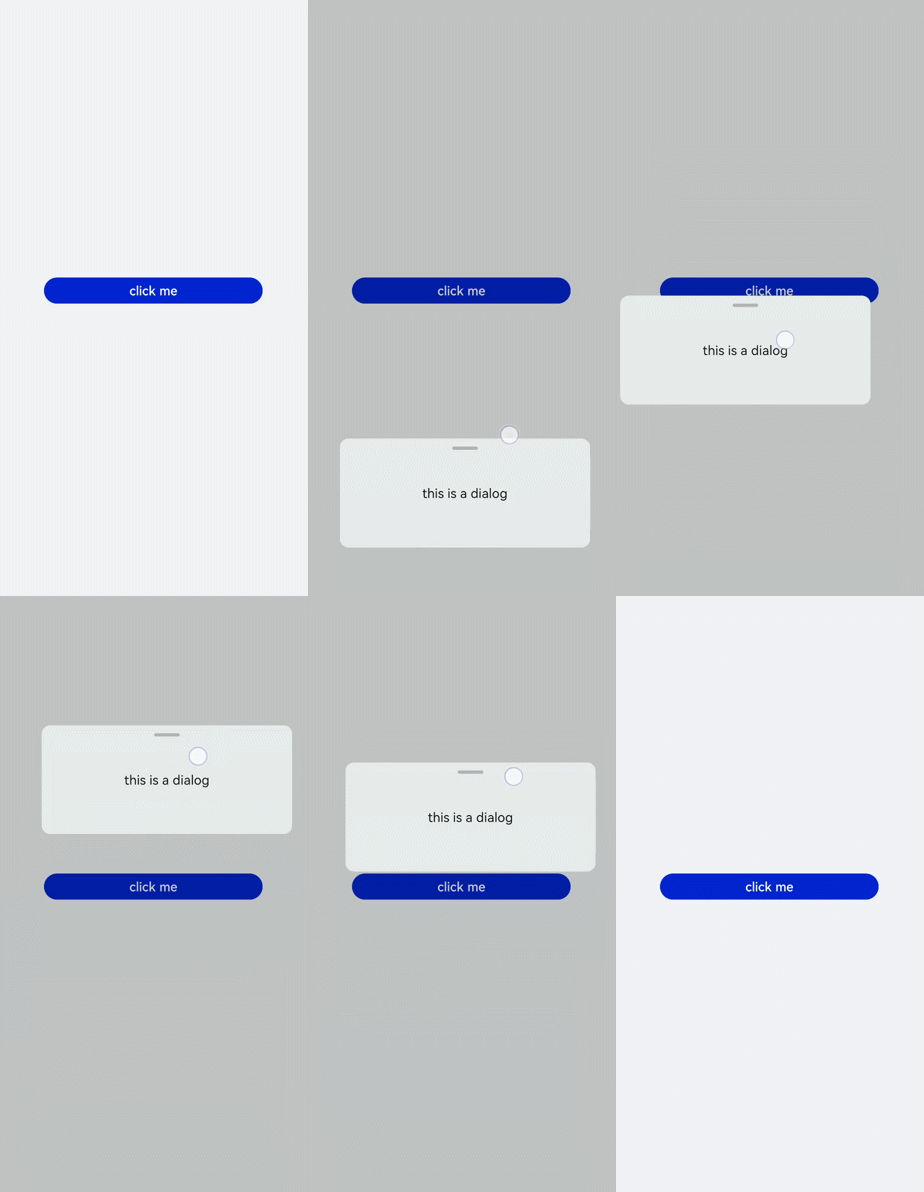
在pages/index目录下的hml文件中创建一个dialog组件,并添加Button组件来触发dialog。dialog组件仅支持width、height、margin、margin-[left|top|right|bottom]、margin-[start|end]样式。
<!-- xxx.hml -->
<div class="doc-page">
  <dialog class="dialogClass" id="dialogId" dragable="true">
    <div class="content">
      <text>this is a dialog</text>
    </div>
  </dialog>
  <button value="click me" onclick="opendialog"></button>
</div>
/* xxx.css */
.doc-page {
  width:100%;
  height:100%;
  flex-direction: column;
  align-items: center;
  justify-content: center;
  background-color: #F1F3F5;
}
.dialogClass{
  width: 80%;
  height: 250px;
  margin-start: 1%;
}
.content{
  width: 100%;
  height: 250px;
  justify-content: center;
  background-color: #e8ebec;
  border-radius: 20px;
}
text{
  width: 100%;
  height: 100%;
  text-align: center;
}
button{
  width: 70%;
  height: 60px;
}
// xxx.js
export default {
  //Touch to open the dialog box.
  opendialog(){
    this.$element('dialogId').show()
  },
}
设置弹窗响应
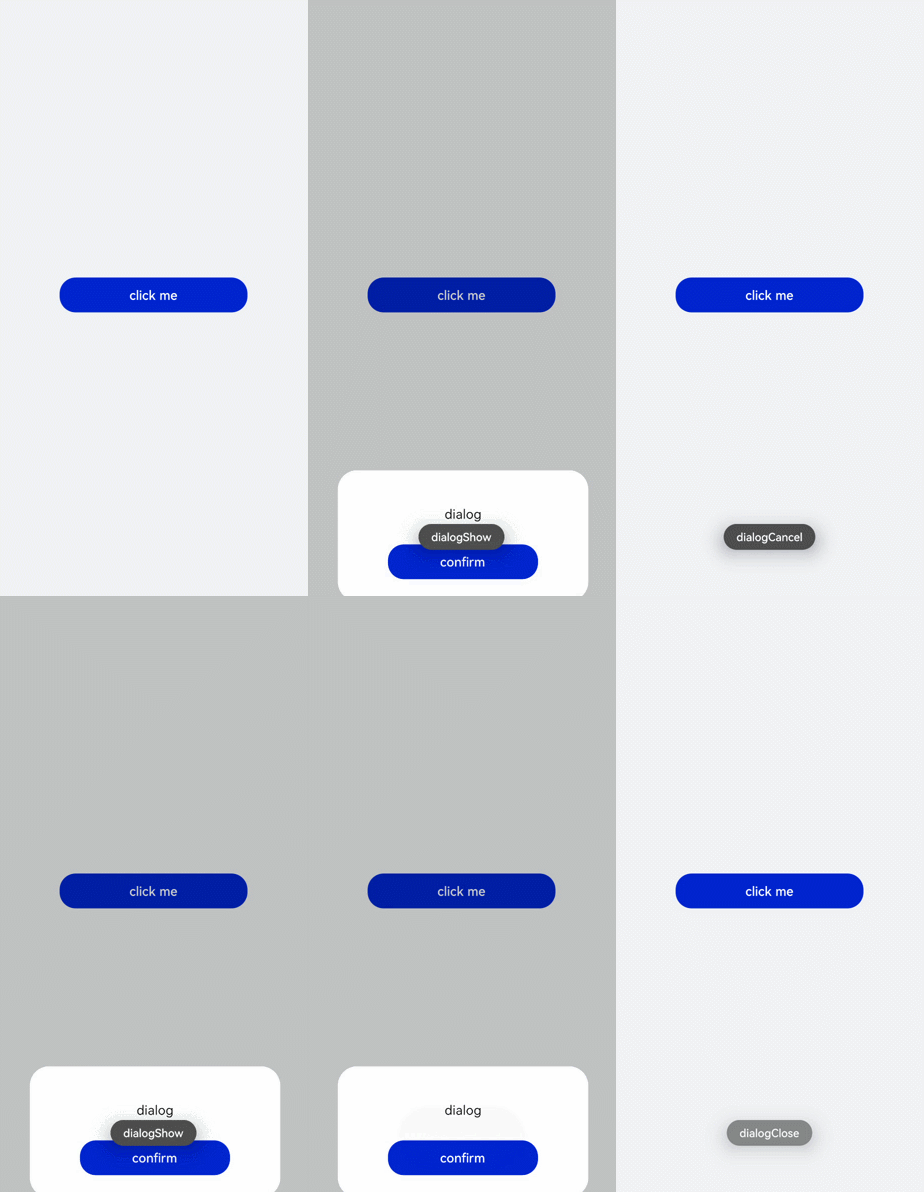
开发者点击页面上非dialog的区域时,将触发cancel事件而关闭弹窗。同时也可以通过对dialog添加show和close方法来显示和关闭弹窗。
<!-- xxx.hml -->
<div class="doc-page">
  <dialog class="dialogClass" id="dialogId" oncancel="canceldialog">
    <div class="dialogDiv">
      <text>dialog</text>
      <button value="confirm" onclick="confirmClick"></button>
    </div>
  </dialog>
  <button value="click me" onclick="opendialog"></button>
</div>
/* xxx.css */
.doc-page {
  width:100%;
  height:100%;
  flex-direction: column;
  align-items: center;
  justify-content: center;
  background-color: #F1F3F5;
}
.dialogClass{
  width: 80%;
  height: 300px;
  margin-start: 1%;
}
.dialogDiv{
  width: 100%;
  flex-direction: column;
  justify-content: center;
  align-self: center;
}
text{
  height: 100px;
  align-self: center;
}
button{
  align-self: center;
  margin-top: 20px;
  width: 60%;
  height: 80px;
}
// xxx.js
import promptAction from '@ohos.promptAction';
export default {
  canceldialog(e){
    promptAction.showToast({
      message: 'dialogCancel'
    })
  },
  opendialog(){
    this.$element('dialogId').show()
     promptAction.showToast({
      message: 'dialogShow'
    })
  },
  confirmClick(e) {
    this.$element('dialogId').close()
    promptAction.showToast({
      message: 'dialogClose'
    })
  },
}
说明
- 仅支持单个子组件。
- dialog属性、样式均不支持动态更新。
- dialog组件不支持focusable、click-effect属性。
场景示例
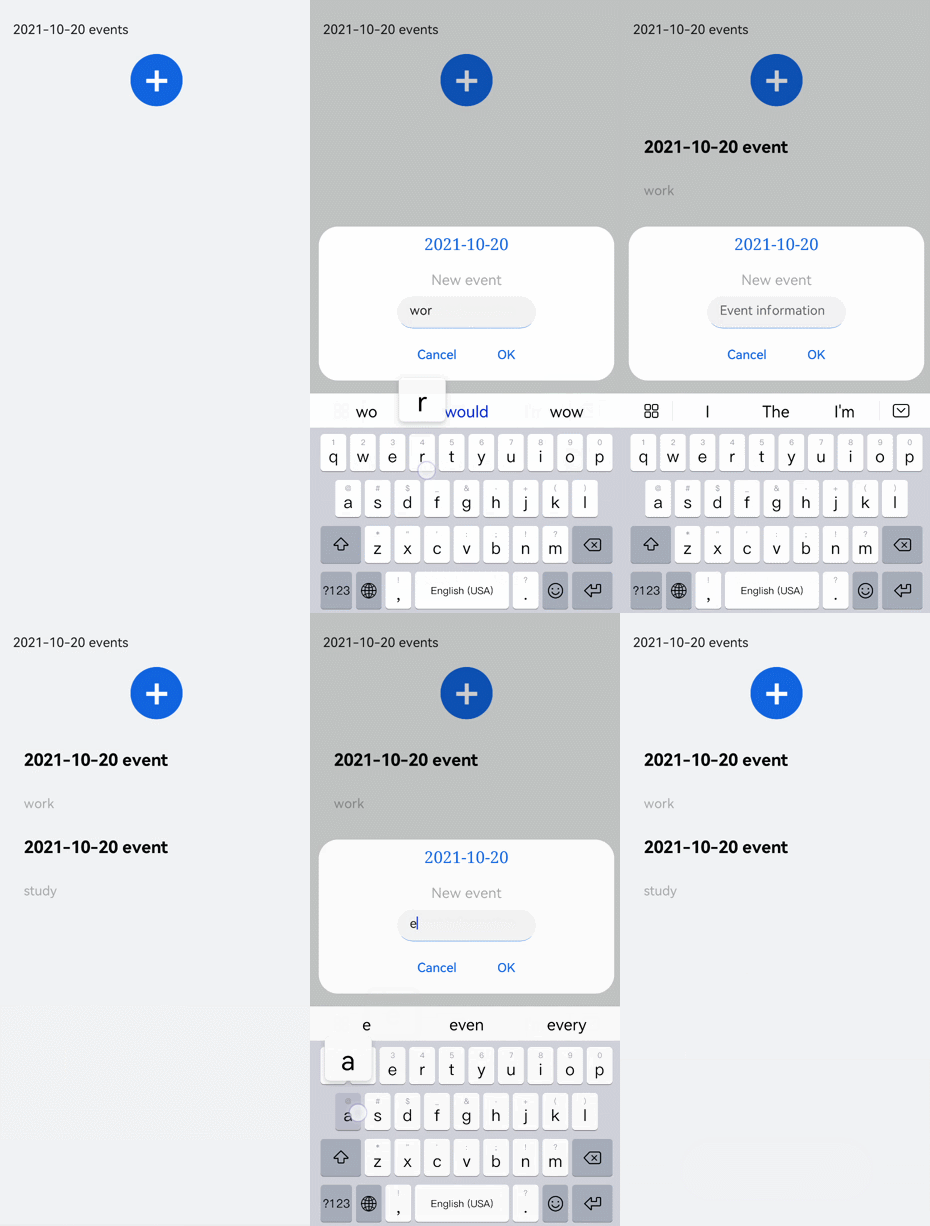
在本场景中,开发者可以通过dialog组件实现一个日程表。弹窗在打开状态下,利用Textarea组件输入当前日程,点击确认按钮后获取当前时间并保存输入文本。最后以列表形式将各日程进行展示。
<!-- xxx.hml -->
<div class="doc-page">
  <text style="margin-top: 60px;margin-left: 30px;">
    <span>{{date}} events</span>
  </text>
  <div class="btndiv">
    <button type="circle" class="btn" onclick="addschedule">+</button>
  </div>
<!--  for Render events data  -->
  <list style="width: 100%;">
    <list-item type="item" for="schedulelist" style="width:100%;height: 200px;">
      <div class="schedulediv">
        <text class="text1">{{date}}  event</text>
        <text class="text2">{{$item.schedule}}</text>
      </div>
    </list-item>
  </list>
  <dialog id="datedialog" oncancel="canceldialog" >
    <div class="dialogdiv">
      <div class="innertxt">
        <text class="text3">{{date}}</text>
        <text class="text4">New event</text>
      </div>
      <textarea placeholder="Event information" onchange="getschedule" class="area" extend="true"></textarea>
      <div class="innerbtn">
        <button type="text" value="Cancel" onclick="cancelschedule" class="btntxt"></button>
        <button type="text" value="OK" onclick="setschedule" class="btntxt"></button>
      </div>
    </div>
  </dialog>
</div>
/* xxx.css */
.doc-page {
  flex-direction: column;
  background-color: #F1F3F5;
}
.btndiv {
  width: 100%;
  height: 200px;
  flex-direction: column;
  align-items: center;
  justify-content: center;
}
.btn {
  radius:60px;
  font-size: 100px;
  background-color: #1E90FF;
}
.schedulediv {
  width: 100%;
  height: 200px;
  flex-direction: column;
  justify-content: space-around;
  padding-left: 55px;
}
.text1 {
  color: #000000;
  font-weight: bold;
  font-size: 39px;
}
.text2 {
  color: #a9a9a9;
  font-size: 30px;
}
.dialogdiv {
  flex-direction: column;
  align-items: center;
}
.innertxt {
  width: 320px;
  height: 160px;
  flex-direction: column;
  align-items: center;
  justify-content: space-around;
}
.text3 {
  font-family: serif;
  color: #1E90FF;
  font-size: 38px;
}
.text4 {
  color: #a9a9a9;
  font-size: 33px;
}
.area {
  width: 320px;
  border-bottom: 1px solid #1E90FF;
}
.innerbtn {
  width: 320px;
  height: 120px;
  justify-content: space-around;
}
.btntxt {
  text-color: #1E90FF;
}
// xxx.js
var info = null;
import promptAction from '@ohos.promptAction';

export default {
  data: {
    curYear:'',
    curMonth:'',
    curDay:'',
    date:'',
    schedule:'',
    schedulelist:[]
  },
  onInit() {
    // Obtain the current date.
    var date = new Date();
    this.curYear = date.getFullYear();
    this.curMonth = date.getMonth() + 1;
    this.curDay = date.getDate();
    this.date = this.curYear + '-' + this.curMonth + '-' + this.curDay;
    this.schedulelist = []
  },
  addschedule(e) {
    this.$element('datedialog').show()
  },
  canceldialog(e) {
    promptAction.showToast({
      message: 'Event setting canceled.'
    })
  },
  getschedule(e) {
    info = e.value
  },
  cancelschedule(e) {
    this.$element('datedialog').close()
    promptAction.showToast({
      message: 'Event setting canceled.'
    })
  },
//    Touch OK to save the data.
  setschedule(e) {
    if (e.text === '') {
      this.schedule = info
    } else {
      this.schedule = info
      var addItem =  {schedule: this.schedule,}
      this.schedulelist.push(addItem)
    }
    this.$element('datedialog').close()
  }
}
form开发指导
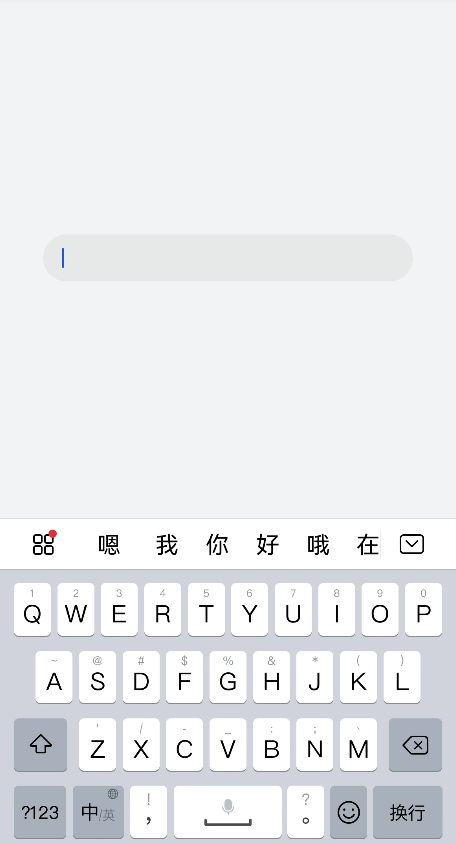
form是一个表单容器,支持容器内Input组件内容的提交和重置。具体用法请参考form API。
说明
从 API Version 6 开始支持。
创建form组件
在pages/index目录下的hml文件中创建一个form组件。
<!-- xxx.hml -->
<div class="container">
  <form style="width: 100%; height: 20%">
    <input type="text" style="width:80%"></input>
  </form>
</div>
/* xxx.css */
.container {
  width:100%;
  height:100%;
  flex-direction: column;
  justify-content: center;
  align-items: center;
  background-color: #F1F3F5;
}
实现表单缩放
为form组件添加click-effect属性,实现点击表单后的缩放效果,click-effect枚举值请参考通用属性。
<!-- xxx.hml -->
<div class="container">
  <form  id="formId" class="formClass" click-effect="spring-large">
    <input type="text"></input>
  </form>
</div>
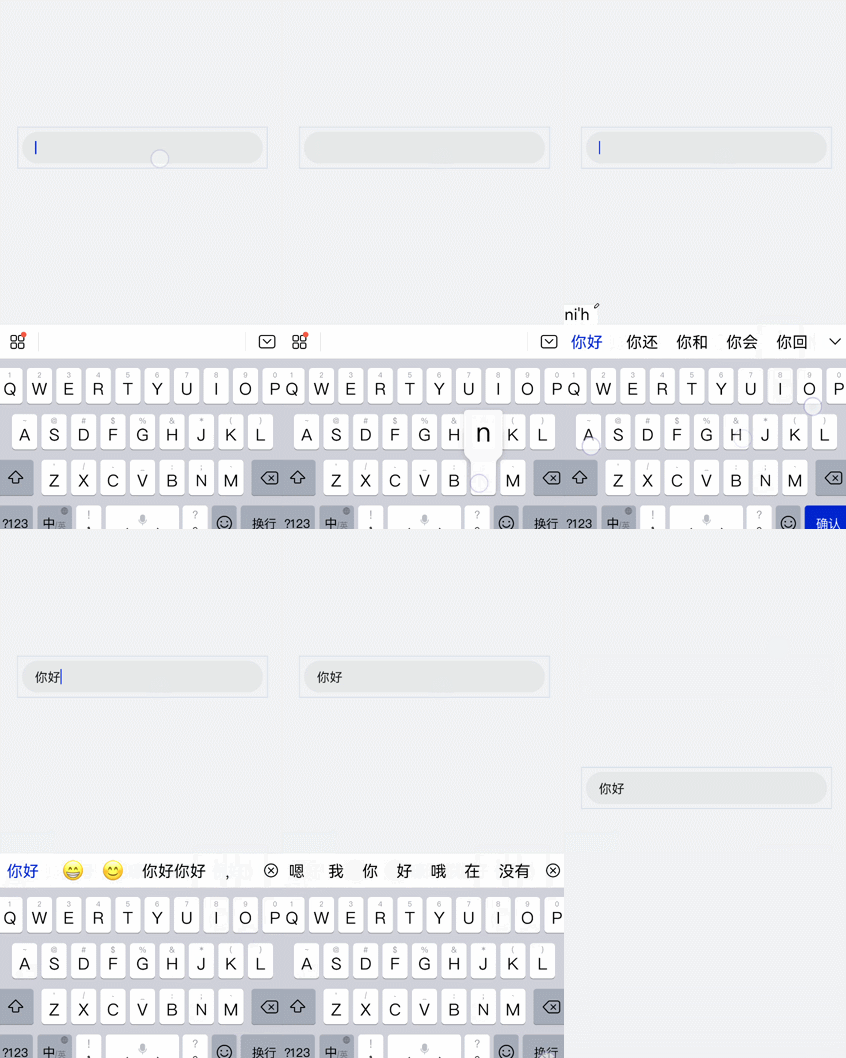
设置form样式
通过为form添加background-color和border属性,来设置表单的背景颜色和边框。
/* xxx.css */
.container {
  width: 100%;
  height: 100%;
  flex-direction: column;
  align-items: center;
  justify-content: center;
  background-color: #F1F3F5;
}
.formClass{
  width: 80%;
  height: 100px;
  padding: 10px;
  border: 1px solid #cccccc;
}
添加响应事件
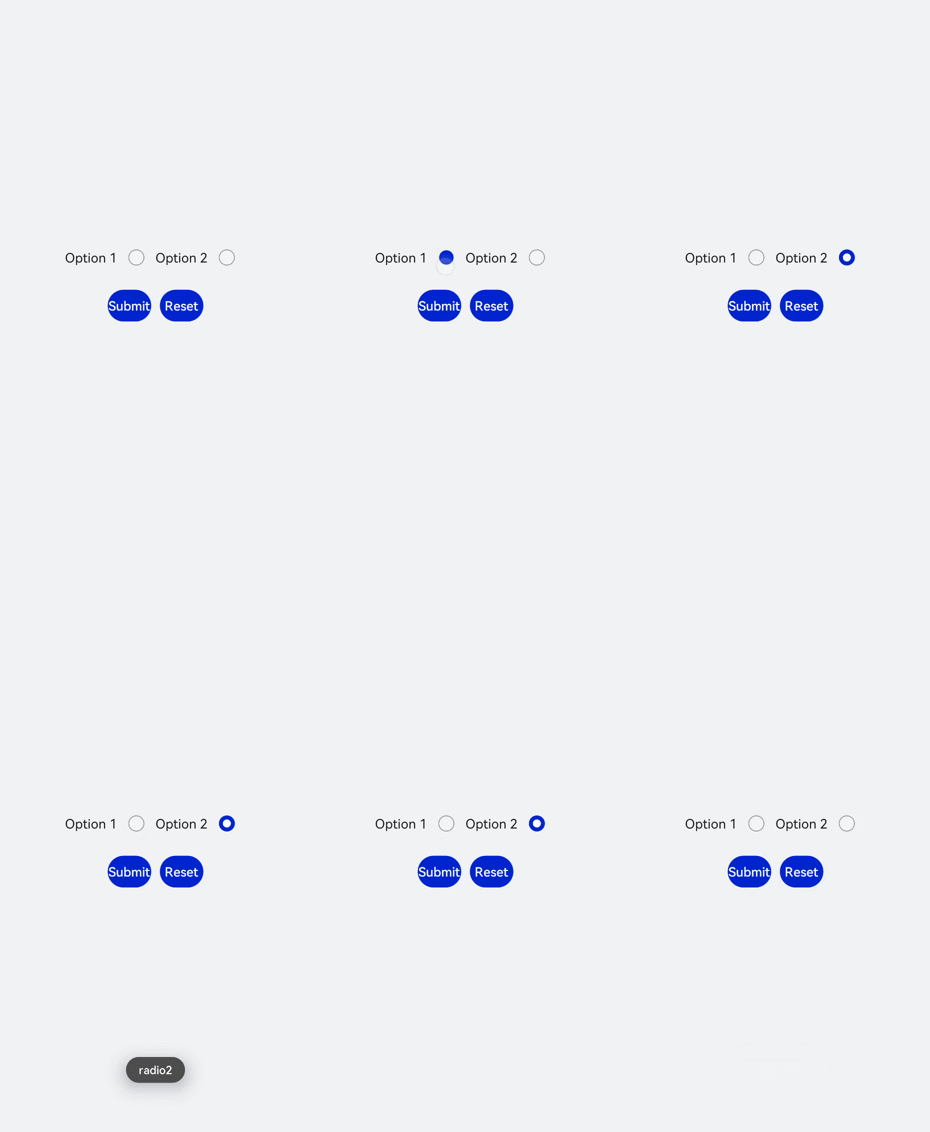
为form组件添加submit和reset事件,来提交表单内容或重置表单选项。
<!-- xxx.hml -->
<div class="container">
  <form onsubmit='onSubmit' onreset='onReset' class="form">
    <div style="width: 100%;justify-content: center;">
      <label>Option 1</label>
      <input type='radio' name='radioGroup' value='radio1'></input>
      <label>Option 2</label>
      <input type='radio' name='radioGroup' value='radio2'></input>
    </div>
    <div style="width: 100%;justify-content: center; margin-top: 20px">
      <input type="submit" value="Submit" style="width:120px; margin-right:20px;" >
      </input>
      <input type="reset" value="Reset" style="width:120px;"></input>
    </div>
  </form>
</div>
/* index.css */
.container{
  width: 100%;
  height: 100%;
  flex-direction: column;
  justify-items: center;
  align-items: center;
  background-color: #F1F3F5;
}
.form{
  width: 100%;
  height: 30%;
  margin-top: 40%;
  flex-direction: column;
  justify-items: center;
  align-items: center;
}
// xxx.js
import promptAction from '@ohos.promptAction';
export default{
  onSubmit(result) {
    promptAction.showToast({
      message: result.value.radioGroup
    })
  },
  onReset() {
    promptAction.showToast({
      message: 'Reset All'
    })
  }
}
场景示例
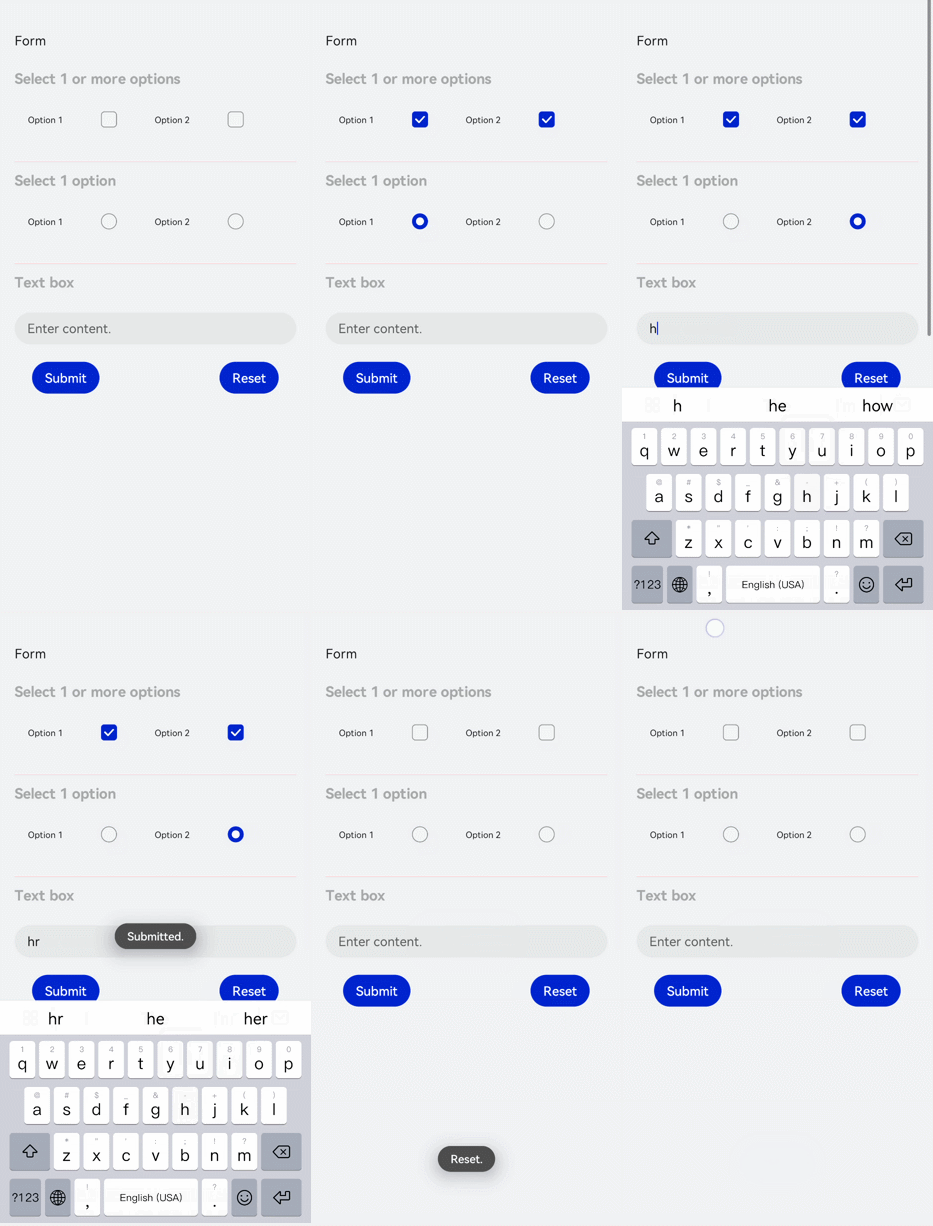
在本场景中,开发者可以选择相应选项并提交或重置数据。
创建Input组件,分别设置type属性为checkbox(多选框)和radio(单选框),再使用form组件的onsubmit和onreset事件实现表单数据的提交与重置。
<!-- xxx.hml -->
<div class="container">
   <form onsubmit="formSubmit" onreset="formReset">
 <text style="font-size: 30px; margin-bottom: 20px; margin-top: 100px;">
      <span > Form </span>
  </text>
    <div style="flex-direction: column;width: 90%;padding: 30px 0px;">
     <text class="txt">Select 1 or more options</text>
      <div style="width: 90%;height: 150px;align-items: center;justify-content: space-around;">
        <label target="checkbox1">Option 1</label>
        <input id="checkbox1" type="checkbox" name="checkbox1"></input>
        <label target="checkbox2">Option 2</label>
        <input id="checkbox2" type="checkbox" name="checkbox2"></input>
       </div>
       <divider style="margin: 20px 0px;color: pink;height: 5px;"></divider>
       <text class="txt">Select 1 option</text>
       <div style="width: 90%;height: 150px;align-items: center;justify-content: space-around;">
         <label target="radio1">Option 1</label>
         <input id="radio1" type="radio" name="myradio"></input>
         <label target="radio2">Option 2</label>
         <input id="radio2" type="radio" name="myradio"></input>
       </div>
       <divider style="margin: 20px 0px;color: pink;height: 5px;"></divider>
       <text class="txt">Text box</text>
       <input type="text" placeholder="Enter content." style="margin-top: 50px;"></input>
       <div style="width: 90%;align-items: center;justify-content: space-between;margin: 40px;">
         <input type="submit">Submit</input>
         <input type="reset">Reset</input>
       </div>
    </div>
  </form>
</div>
/* index.css */
.container {
  width: 100%;
  height: 100%;
  flex-direction:column;
  align-items:center;
  background-color:#F1F3F5;
}
.txt {
  font-size:33px;
  font-weight:bold;
  color:darkgray;
}
label{
  font-size: 20px;
}
// xxx.js
import promptAction from '@ohos.promptAction';
export default {
  formSubmit() {
    promptAction.showToast({
      message: 'Submitted.'
    })
  },
  formReset() {
    promptAction.showToast({
      message: 'Reset.'
    })
  }
}
stepper开发指导
当一个任务需要多个步骤时,可以使用stepper组件展示当前进展。具体用法请参考stepper API。
说明
从API Version 5 开始支持。
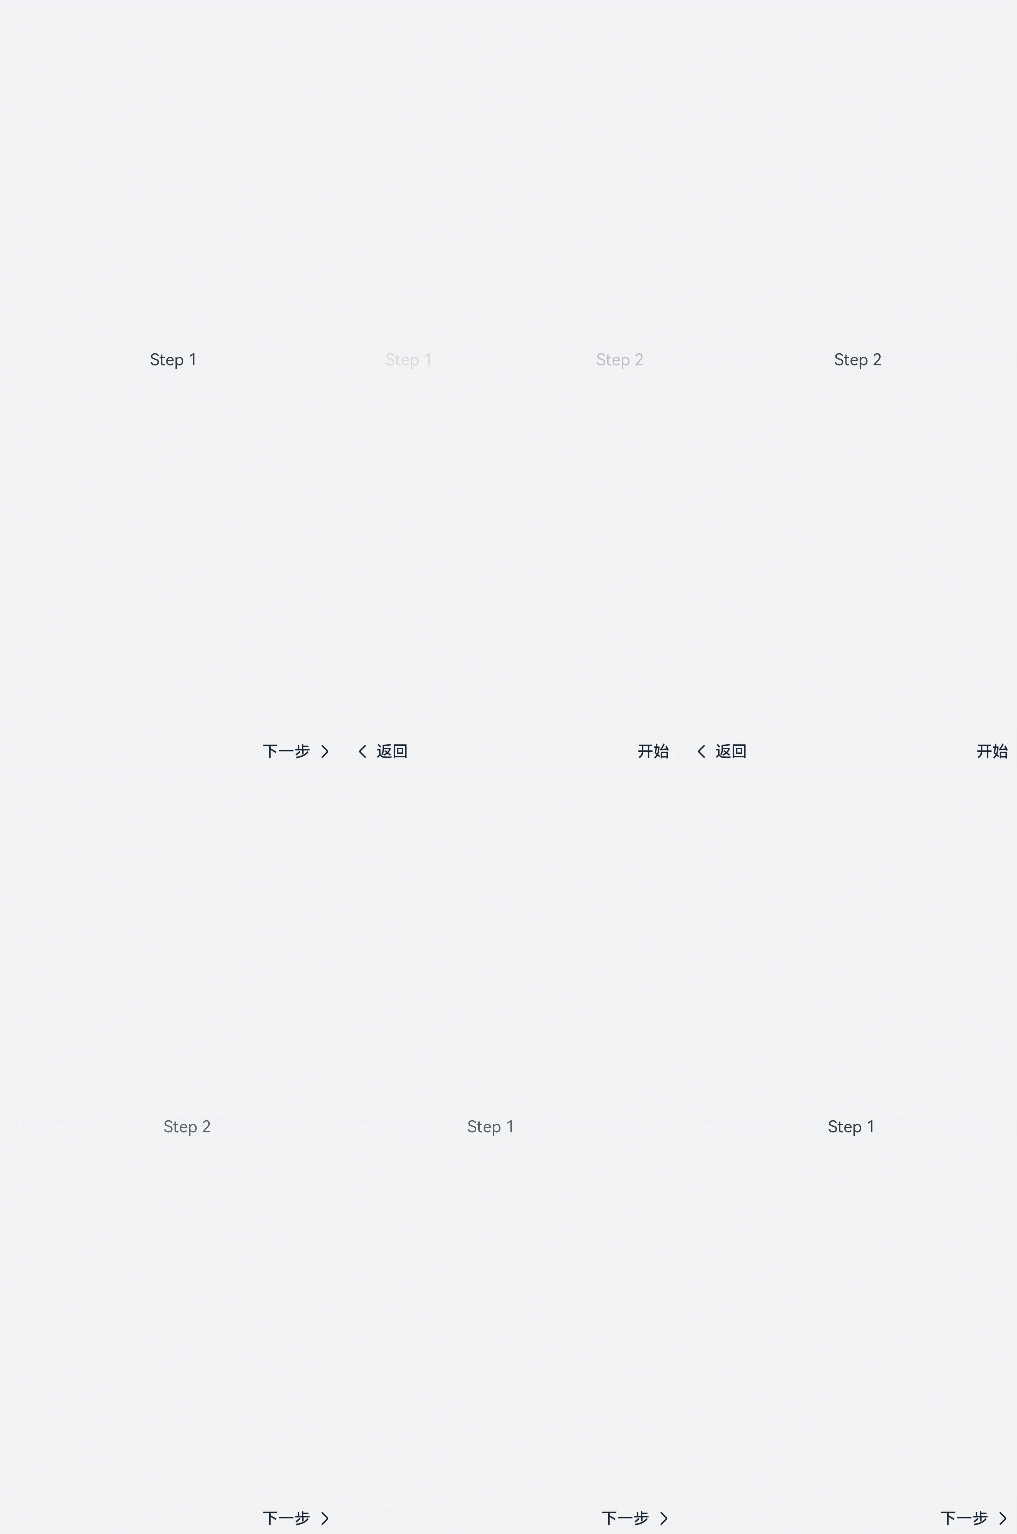
创建stepper组件
在pages/index目录下的hml文件中创建一个stepper组件。
<!-- xxx.hml -->
<div class="container">
 <stepper>
   <stepper-item>
     <text>Step 1</text>
   </stepper-item>
   <stepper-item>
     <text>Step 2</text>
   </stepper-item>
 </stepper>
</div>
/* xxx.css */
.container {
  width:100%;
  height:100%;
  flex-direction: column;
  justify-content: center;
  align-items: center;
  background-color: #F1F3F5;
}
text{
  width: 100%;
  height: 100%;
  text-align: center;
}
设置index属性
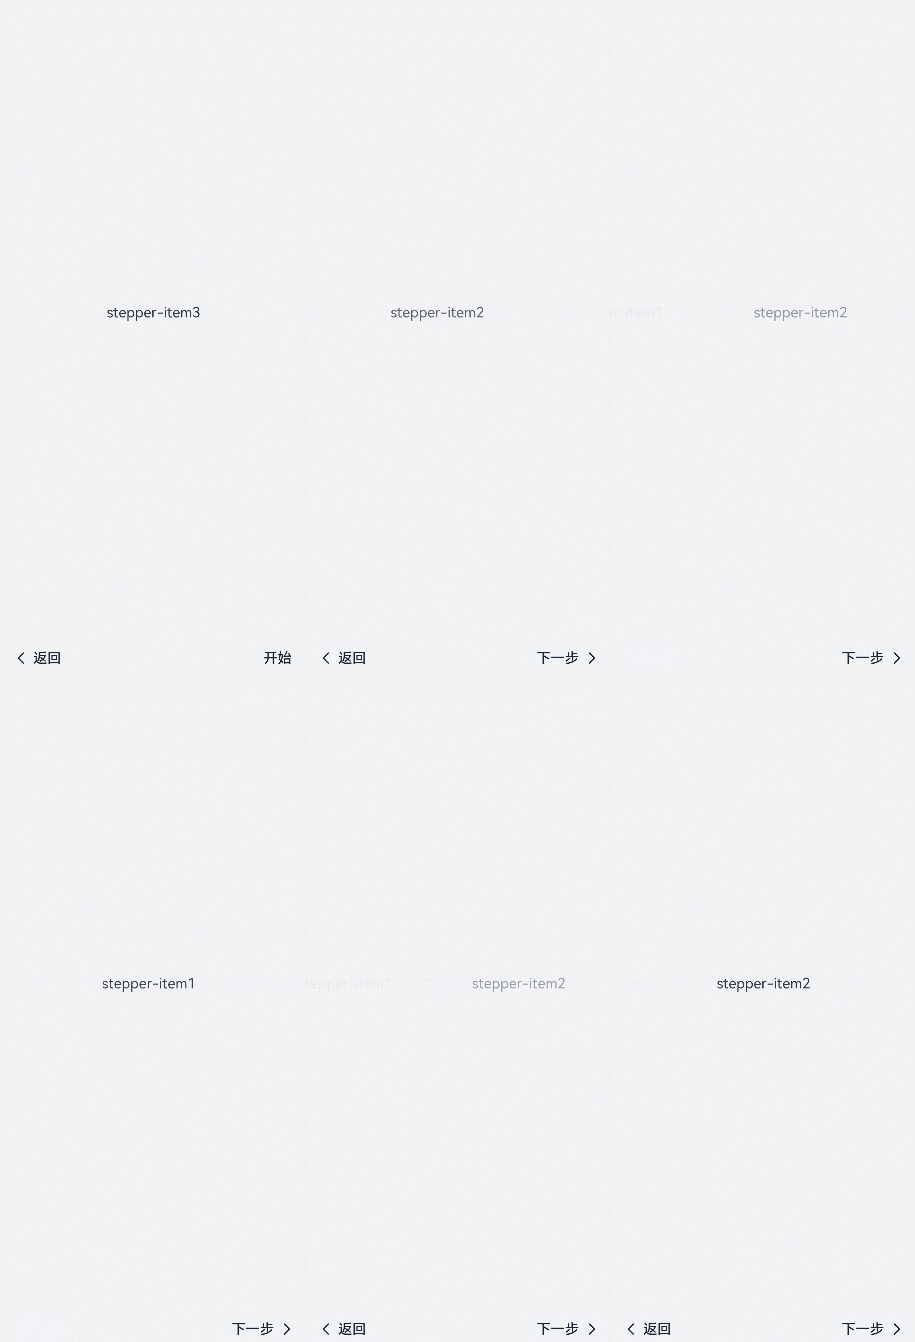
页面默认显示索引值为index的步骤。
<!-- xxx.hml -->
<div class="container">
 <stepper index="2">
   <stepper-item>
     <text>stepper-item1</text>
   </stepper-item>
   <stepper-item>
     <text>stepper-item2</text>
   </stepper-item>
   <stepper-item>
     <text>stepper-item3</text>
   </stepper-item>
  </stepper>
</div>
/* xxx.css */
.container {
  width:100%;
  height:100%;
  flex-direction: column;
  background-color: #F1F3F5;
}
text{
  width: 100%;
  height: 100%;
  text-align: center;
}
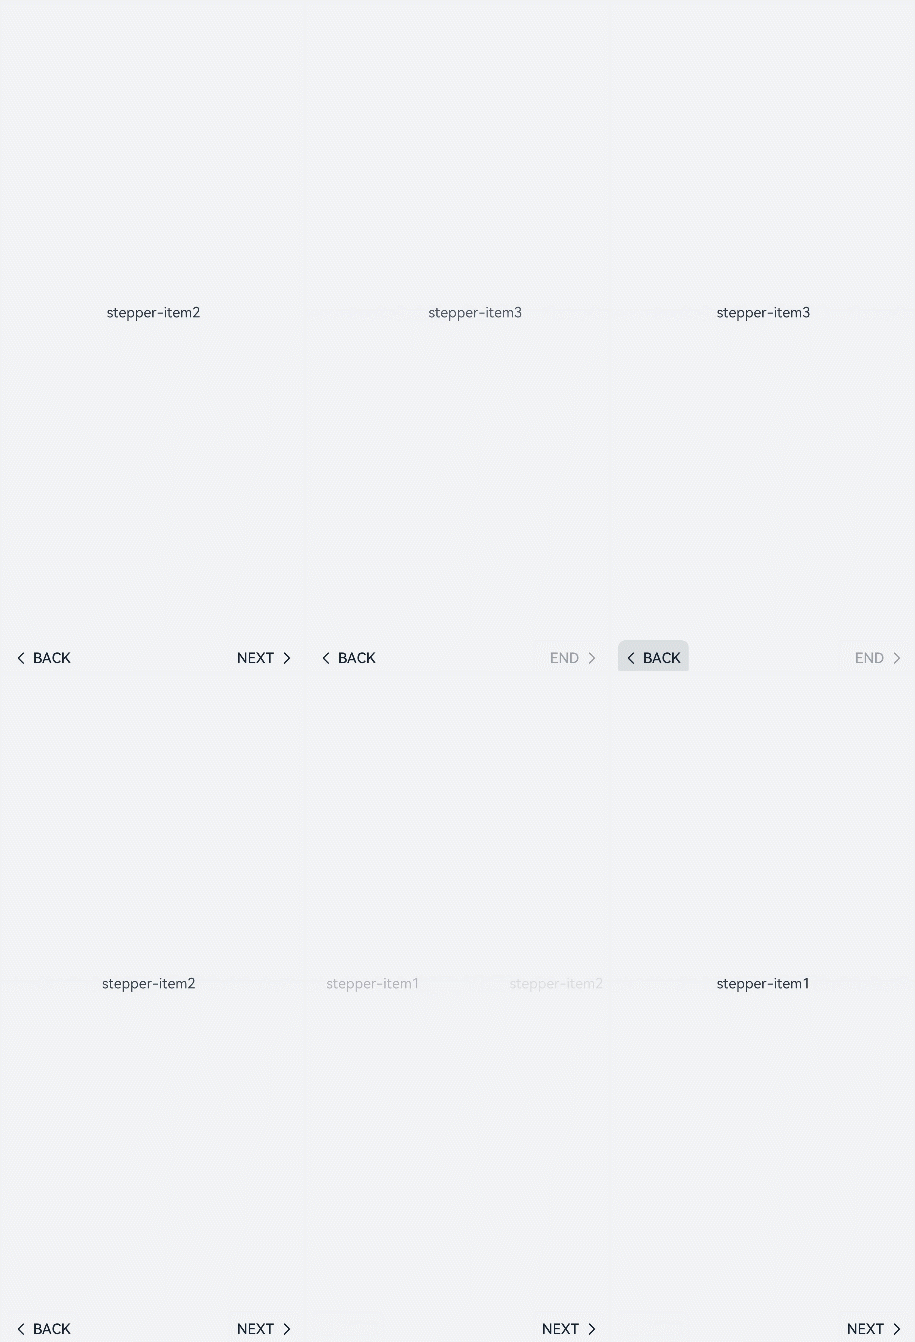
通过设置label属性,自定义stepper-item的提示按钮。
<!-- xxx.hml -->
<div class="container">
 <stepper index="1">
   <stepper-item label="{{label_1}}">
     <text>stepper-item1</text>
   </stepper-item>
   <stepper-item label="{{label_2}}">
     <text>stepper-item2</text>
   </stepper-item>
   <stepper-item label="{{label_3}}">
     <text>stepper-item3</text>
   </stepper-item>
   <stepper-item>
     <text>stepper-item4</text>
   </stepper-item>
 </stepper>
</div>
/* xxx.css */
.container {
  width:100%;
  height:100%;
  flex-direction: column;
  background-color: #F1F3F5;
}
text{
  width: 100%;
  height: 100%;
  text-align: center;
}
// xxx.js
export default {
  data: {
    label_1:{
      nextLabel: 'NEXT',
      status: 'normal'
    },
    label_2:{
      prevLabel: 'BACK',
      nextLabel: 'NEXT',
      status: 'normal'
    },
    label_3:{
      prevLabel: 'BACK',
      nextLabel: 'END',
      status: 'disabled'
    },
  },
}
设置样式
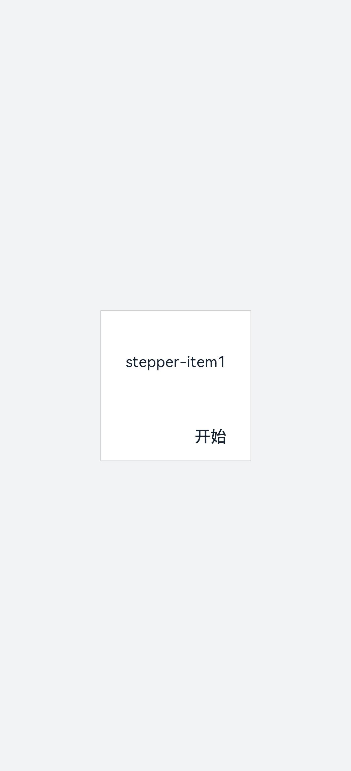
stepper组件默认填充父容器,通过border和background-color设置边框、背景色。
<!-- xxx.hml -->
<div class="container" >
  <div class="stepperContent">
    <stepper class="stepperClass">
      <stepper-item>
        <text>stepper-item1</text>
      </stepper-item>
    </stepper>
  </div>
</div>
/* xxx.css */
.container {
  width:100%;
  height:100%;
  flex-direction: column;
  align-items: center;
  justify-content: center;
  background-color:#F1F3F5;
}
.stepperContent{
  width: 300px;
  height: 300px;
}
.stepperClass{
  border:1px solid silver ;
  background-color: white;
}
text{
  width: 100%;
  height: 100%;
  text-align: center;
}
添加事件
stepper分别添加finish,change,next,back,skip事件。
- 当change与next或back同时存在时,会先执行next或back事件再去执行change事件。
- 重新设置index属性值时要先清除index的值再重新设置,否则检测不到值的改变。
<!-- xxx.hml -->
<div class="container"  style="background-color:#F1F3F5;">
  <div >
    <stepper onfinish="stepperFinish" onchange="stepperChange" onnext="stepperNext" onback="stepperBack" onskip="stepperSkip" id="stepperId" index="{{index}}">
      <stepper-item>
        <text>stepper-item1</text>
        <button value="skip" onclick="skipClick"></button>
      </stepper-item>
      <stepper-item>
         <text>stepper-item2</text>
         <button value="skip" onclick="skipClick"></button>
      </stepper-item>
      <stepper-item>
        <text>stepper-item3</text>
      </stepper-item>
    </stepper>
  </div>
</div>
/* xxx.css */
.doc-page {
  width:100%;
  height:100%;
  flex-direction: column;
  align-items: center;
  justify-content: center;
}
stepper-item{
  width: 100%;
  flex-direction: column;
  align-self: center;
  justify-content: center;
}
text{
  margin-top: 45%;
  justify-content: center;
  align-self: center;
  margin-bottom: 50px;
}
button{
  width: 80%;
  height: 60px;
  margin-top: 20px;
}
// xxx.js
import promptAction from '@ohos.promptAction';
export default {
  data: {
    index:0,
  },
   stepperSkip(){
    this.index = null;
    this.index=2;
  },
   skipClick(){
    this.$element('stepperId').setNextButtonStatus({status: 'skip', label: 'SKIP'});
  },
  stepperFinish(){
    promptAction.showToast({
      message: 'All Finished'
    })
  },
  stepperChange(e){
    console.log("stepperChange"+e.index)
    promptAction.showToast({
      // index表示当前步骤的序号
      message: 'Previous step: '+e.prevIndex+"-------Current step:"+e.index
    })
  },
  stepperNext(e){
    console.log("stepperNext"+e.index)
    promptAction.showToast({
      // pendingIndex表示将要跳转的序号
      message: 'Current step:'+e.index+"-------Next step:"+e.pendingIndex
    })
    var index = {pendingIndex:e.pendingIndex }
    return index;
  },
  stepperBack(e){
    console.log("stepperBack"+e.index)
    var index = {pendingIndex: e.pendingIndex }
    return index;
  }
}
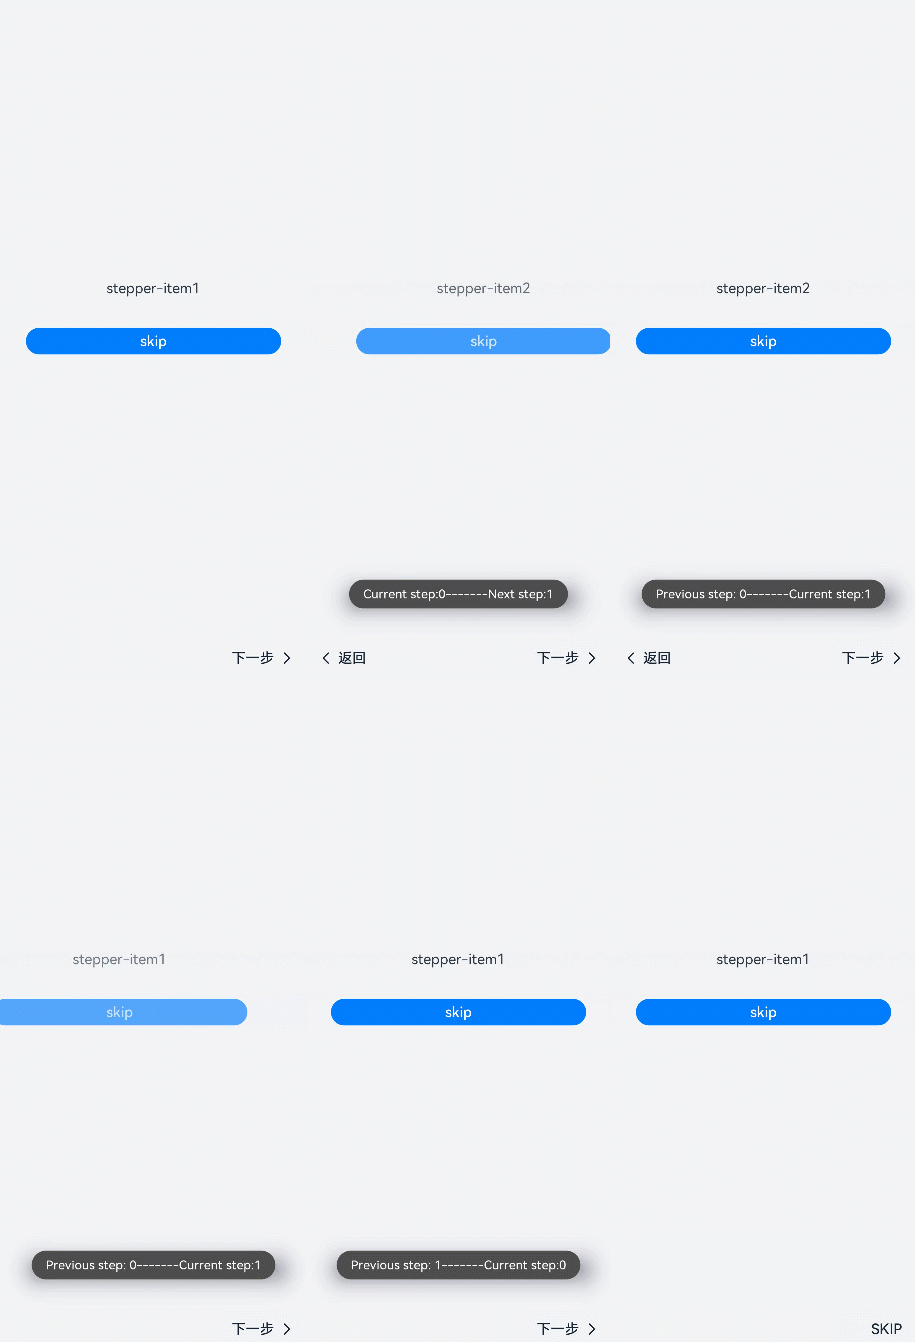
场景示例
在本场景中,开发者可以在界面上点击选择并实时显示选择结果,点击下一步按钮后可动态修改页面的字体颜色和字体大小。
用stepper组件实现分步,再创建Toggle组件实现选择显示功能,再使用Select组件实现改变选中值动态修改字体颜色或大小。
<!-- xxx.hml -->
<div class="container">
  <stepper id="mystep" index="0" onfinish="back" style="text-color: indigo;">
    <stepper-item label="{{label1}}">
      <div style="flex-direction: column;padding: 0px 10px;">
        <text class="text" style="margin-top: 10%;text-align: center;width: 100%;">Select error types:</text>
        <text style="margin-top: 20px;padding: 10px">
          <span>{{error}}</span>
        </text>
        <div style="justify-content: space-around;flex-wrap: wrap;">
          <toggle for="{{togglelist1}}" value="{{$item}}" class="tog" onchange="multiTog({{$item}})"></toggle>
        </div>
      </div>
    </stepper-item>
    <stepper-item label="{{label2}}">
      <div style="flex-direction: column;align-items: center;">
        <text class="txt" style="margin-top: 10%;">Toggle</text>
        <div style="justify-content: space-around;flex-wrap: wrap;;margin-top:10%">
          <toggle class="tog" for="{{togglelist1}}" value="{{$item}}" style="text-color: {{tcolor}};font-size: {{tsize}}; font-style: {{tstyle}};font-weight: {{tweight}};font-family: {{tfamily}};">
          </toggle>
        </div>
        <div style="flex-wrap: wrap;width: 700px;margin-top:10%">
          <div style="flex-direction: column;width: 350px;height: 185px;align-items: center;">
            <text class="txt">text-color</text>
            <select onchange="settcolor">
              <option for="{{color_list}}" value="{{$item}}">{{$item}}</option>
            </select>
          </div>
          <div style="flex-direction: column;width: 350px;height: 185px;align-items: center;">
            <text class="txt">font-size</text>
            <select onchange="settsize">
              <option for="{{size_list}}" value="{{$item}}">{{$item}}</option>
            </select>
          </div>
        </div>
      </div>
    </stepper-item>
  </stepper>
</div>
/* xxx.css */
.container {
  width:100%;
  height:100%;
  flex-direction: column;
  align-items: center;
  justify-content: center;
  background-color:#F1F3F5;
}
.dvd {
  stroke-width: 8px;
  color: orangered;
  margin: 65px;
}
.tog{
  margin-right: 20px;
  margin-top: 30px;
}
// xxx.js
let myset = new Set();
export default {
  data: {
    error: '',
    tcolor:'#FF4500',
    color_list:['#FF4500','#5F9EA0','#0000FF'],
    tsize: '12px',
    size_list: ['12px', '30px', '8px', '50px'],
    label1: {
      prevLabel: 'The text on the left of the starting step is invalid.',
      nextLabel: 'Toggle'
    },
    label2: {
      prevLabel: 'toggle',
      nextLabel: 'END'
    },
    togglelist1:['Program error', 'Software', 'System', 'Application'],
  },
  multiTog(arg, e) {
    this.error = ' '
    if (e.checked) {
      myset.add(arg)
    } else {
      myset.delete(arg)
    }
    for (let item of myset) {
      this.error += item + ' '
    }
  },
  settcolor(e) {
    this.tcolor = e.newValue
  },
  settsize(e) {
    this.tsize = e.newValue
  }
}
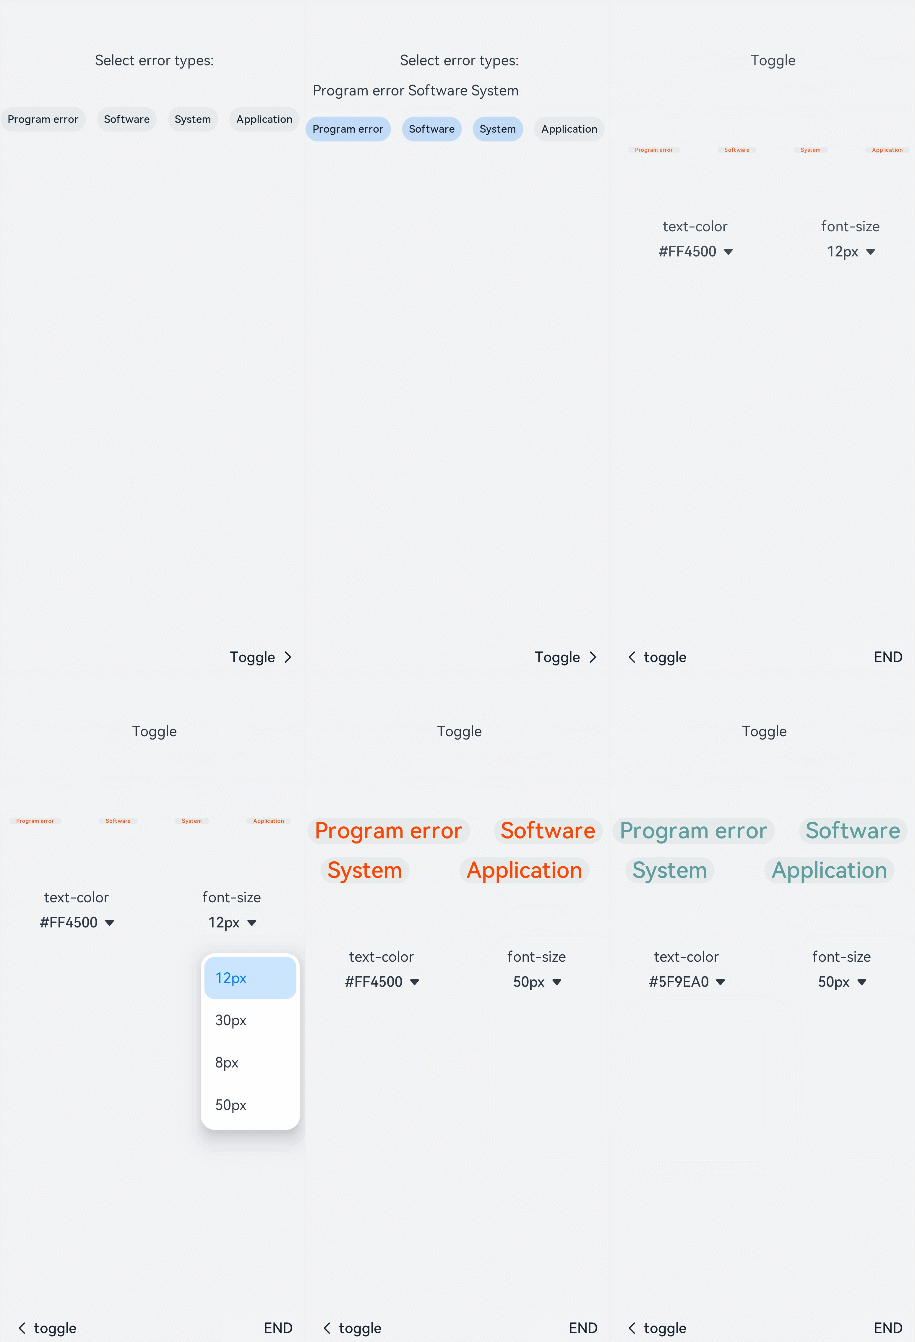
tabs开发指导
tabs是一种常见的界面导航结构。通过页签容器,用户可以快捷地访问应用的不同模块。具体用法请参考tabs API。
创建tabs
在pages/index目录下的hml文件中创建一个tabs组件。
<!-- xxx.hml -->
<div class="container">
    <tabs>
        <tab-bar>
            <text>item1</text>
            <text>item2</text>
        </tab-bar>
        <tab-content class="tabContent">
            <div class="text">
                <text>content1</text>
            </div>
            <div class="text">
                <text>content2</text>
            </div>
        </tab-content>
    </tabs>
</div>
/* xxx.css */
.container {
  flex-direction: column;
  justify-content: center;
  align-items: center;
  background-color: #F1F3F5;
}
.tabContent{
  width: 100%;
  height: 100%;
}
.text{
  width: 100%;
  height: 100%;
  justify-content: center;
  align-items: center;
}
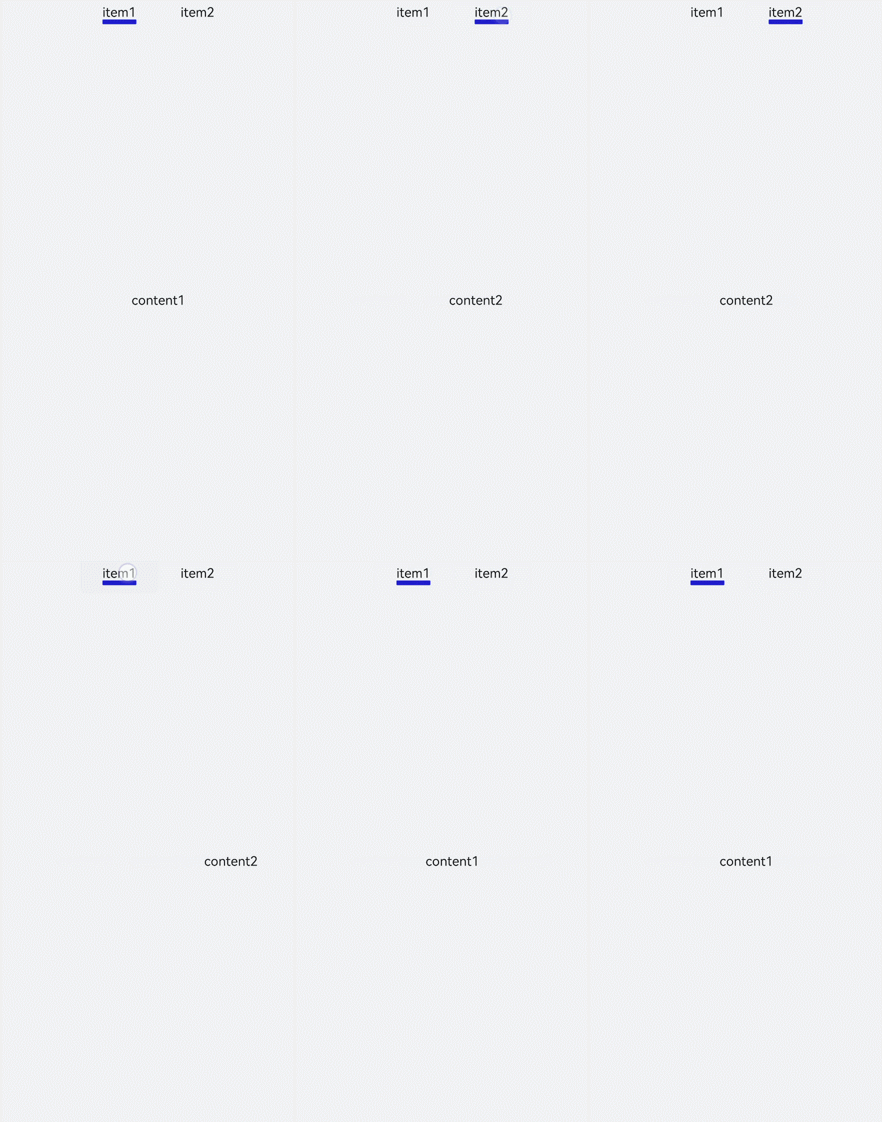
设置样式
设置tabs背景色及边框和tab-content布局。
<!-- xxx.hml -->
<div class="container">
  <tabs class="tabs">
    <tab-bar class="tabBar">
      <text class="tabBarItem">item1</text>
      <text class="tabBarItem">item2</text>
    </tab-bar>
    <tab-content class="tabContent">
      <div class="tabContent">
        <text>content1</text>
      </div>
      <div class="tabContent" >
        <text>content2</text>
      </div>
    </tab-content>
  </tabs>
</div>
/* xxx.css */
.container {
  flex-direction: column;
  justify-content: flex-start;
  align-items: center;
 background-color:#F1F3F5;
}
.tabs{
  margin-top: 20px;
 border: 1px solid #2262ef;
  width: 99%;
  padding: 10px;
}
.tabBar{
  width: 100%;
  border: 1px solid #78abec;
}
.tabContent{
  width: 100%;
  margin-top: 10px;
  height: 300px;
  color: blue;
  justify-content: center;
  align-items: center;
}
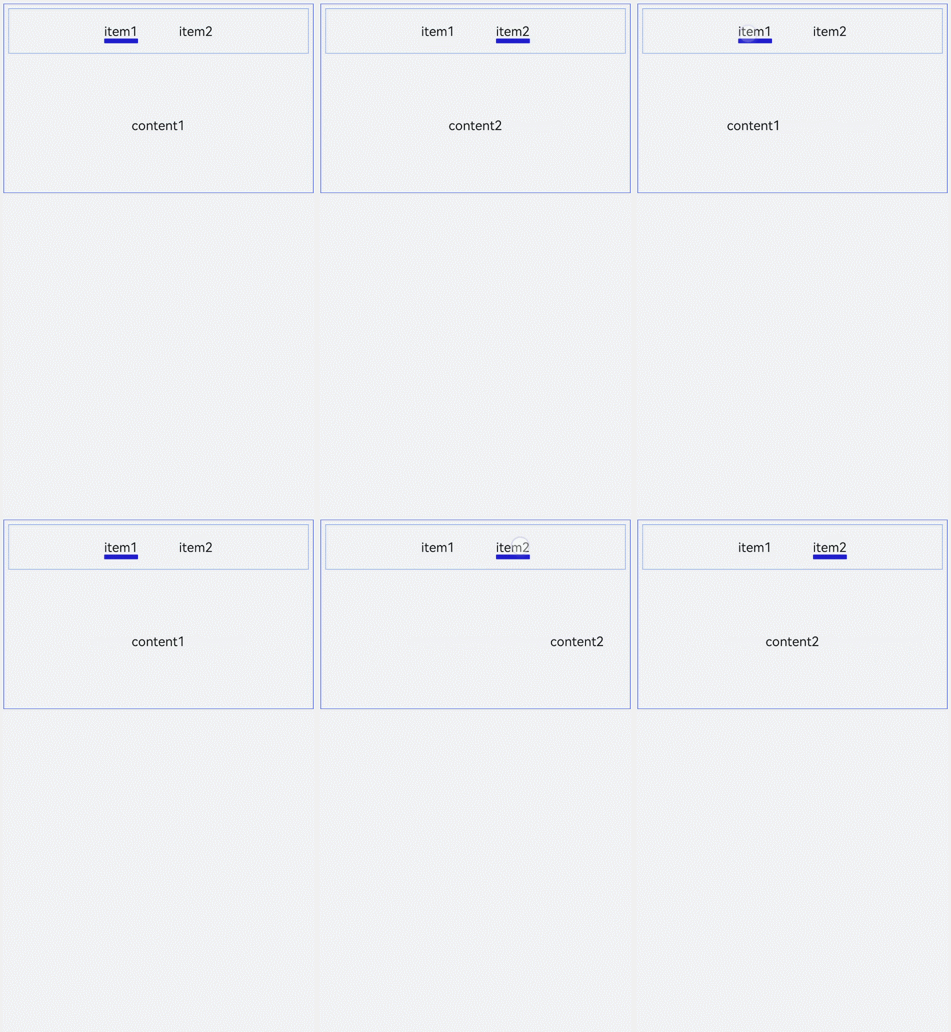
显示页签索引
开发者可以为tabs添加change事件,实现页签切换后显示当前页签索引的功能。
<!-- xxx.hml -->
<div class="container" style="background-color:#F1F3F5;">
  <tabs class="tabs" onchange="tabChange">
    <tab-bar class="tabBar">
      <text class="tabBarItem">item1</text>
      <text class="tabBarItem">item2</text>
    </tab-bar>
    <tab-content class="tabContent">
      <div>
        <image src="common/images/bg-tv.jpg" style="object-fit: contain;"> </image>
      </div>
      <div>
        <image src="common/images/img1.jpg" style="object-fit: contain;"> </image>
      </div>
    </tab-content>
  </tabs>
</div>
// xxx.js
import promptAction from '@ohos.promptAction';
export default {
  tabChange(e){
    promptAction.showToast({
      message: "Tab index: " + e.index
    })
  }
}
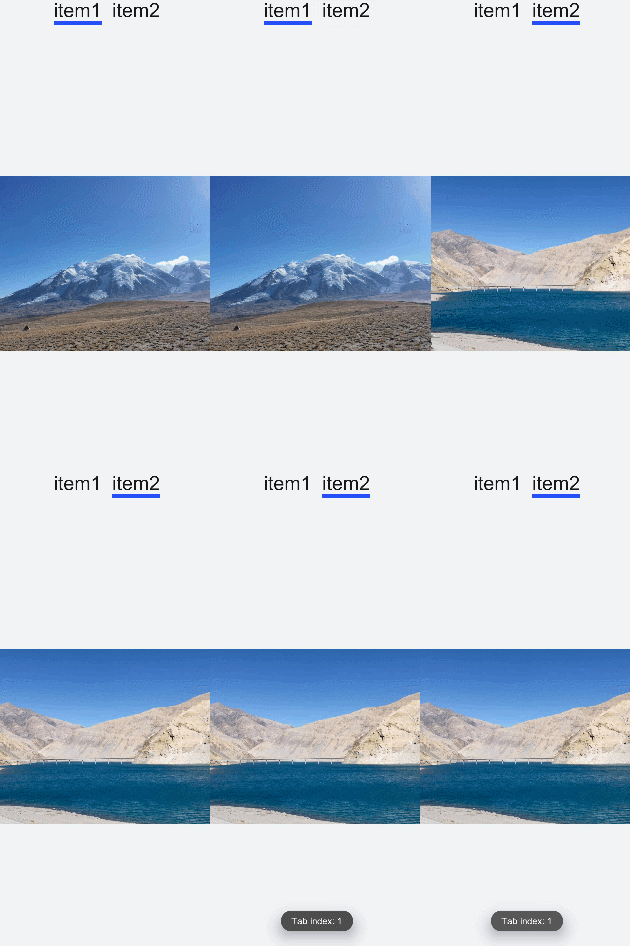
场景示例
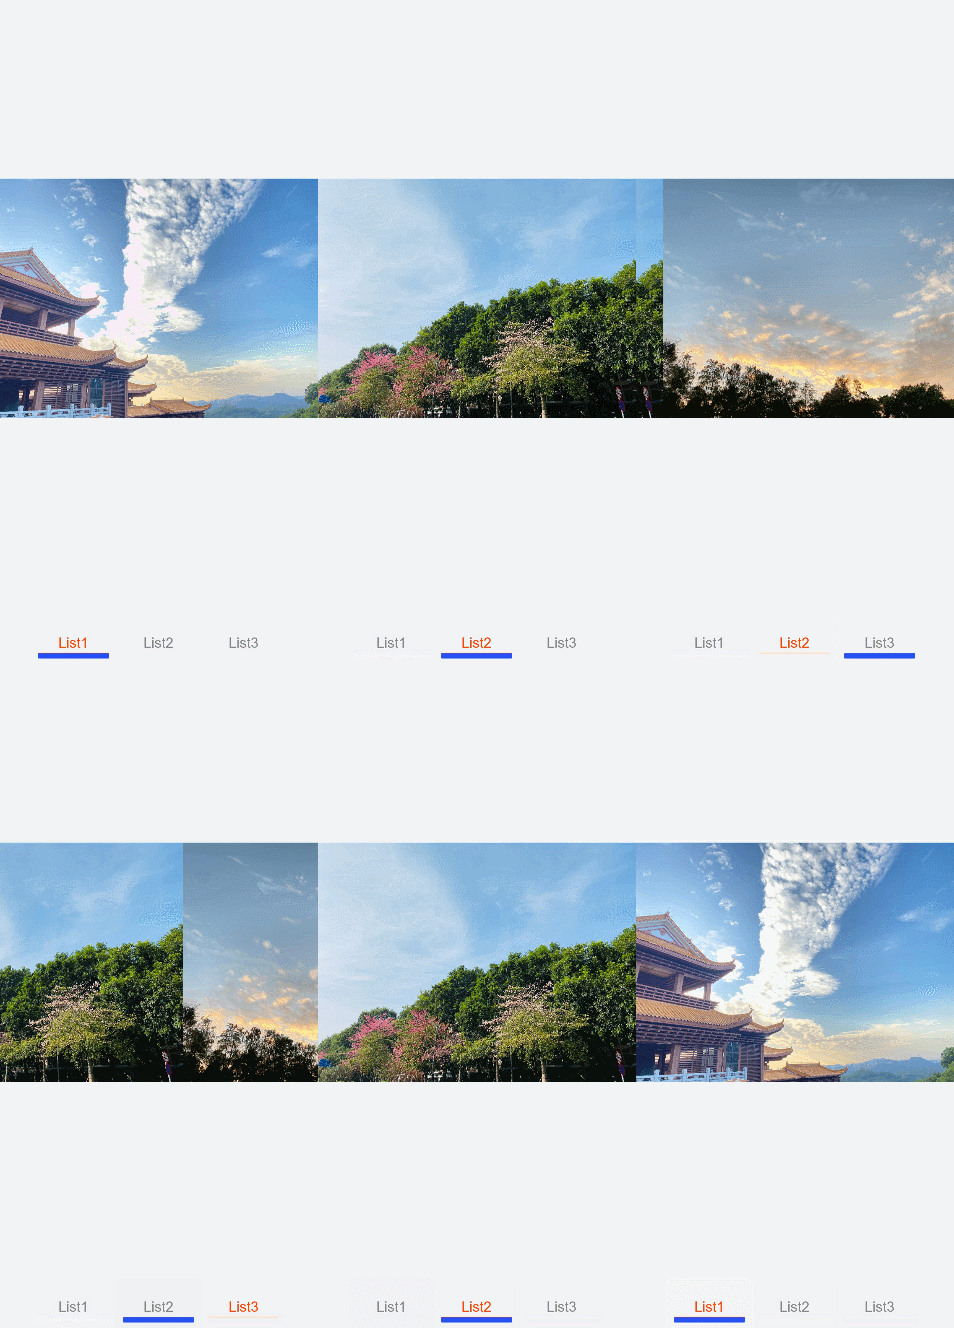
在本场景中,开发者可以点击标签切换内容,选中后标签文字颜色变红,并显示下划线。
用tabs、tab-bar和tab-content实现点击切换功能,再定义数组,设置属性。使用change事件改变数组内的属性值实现变色及下划线的显示。
<!-- xxx.hml -->
<div class="container">
  <tabs onchange="changeTabactive">
    <tab-content>
      <div class="item-container" for="datas.list">
        <div if="{{$item.title=='List1'?true:false}}">
          <image src="common/images/bg-tv.jpg" style="object-fit: contain;"> </image>
        </div>
        <div if="{{$item.title=='List2'?true:false}}">
          <image src="common/images/img1.jpg" style="object-fit: none;"> </image>
        </div>
        <div if="{{$item.title=='List3'?true:false}}">
          <image src="common/images/img2.jpg" style="object-fit: contain;"> </image>
        </div>
      </div>
    </tab-content>
    <tab-bar class="tab_bar mytabs" mode="scrollable">
      <div class="tab_item" for="datas.list">
        <text style="color: {{$item.color}};">{{$item.title}}</text>
        <div class="underline-show" if="{{$item.show}}"></div>
        <div class="underline-hide" if="{{!$item.show}}"></div>
      </div>
    </tab-bar>
  </tabs>
</div>
/* xxx.css */
.container{
width: 100%;
height: 100%;
background-color:#F1F3F5;
}
.tab_bar {
  width: 100%;
  height: 150px;
}
.tab_item {
  height: 30%;
  flex-direction: column;
  align-items: center;
}
.tab_item text {
  font-size: 32px;
}
.item-container {
  justify-content: center;
  flex-direction: column;
}
.underline-show {
  height: 2px;
  width: 160px;
  background-color: #FF4500;
  margin-top: 7.5px;
}
.underline-hide {
  height: 2px;
  margin-top: 7.5px;
  width: 160px;
}
// xxx.js
export default {
  data() {
    return {
      datas: {
        color_normal: '#878787',
        color_active: '#ff4500',
        show: true,
        list: [{
          i: 0,
          color: '#ff4500',
          show: true,
          title: 'List1'
        }, {
          i: 1,
          color: '#878787',
          show: false,
          title: 'List2'
        }, {
           i: 2,
           color: '#878787',
           show: false,
           title: 'List3'
        }]
      }
    }
  },
  changeTabactive (e) {
    for (let i = 0; i < this.datas.list.length; i++) {
      let element = this.datas.list[i];
      element.show = false;
      element.color = this.datas.color_normal;
      if (i === e.index) {
        element.show = true;
        element.color = this.datas.color_active;
      }
    }
  }
}
swiper开发指导
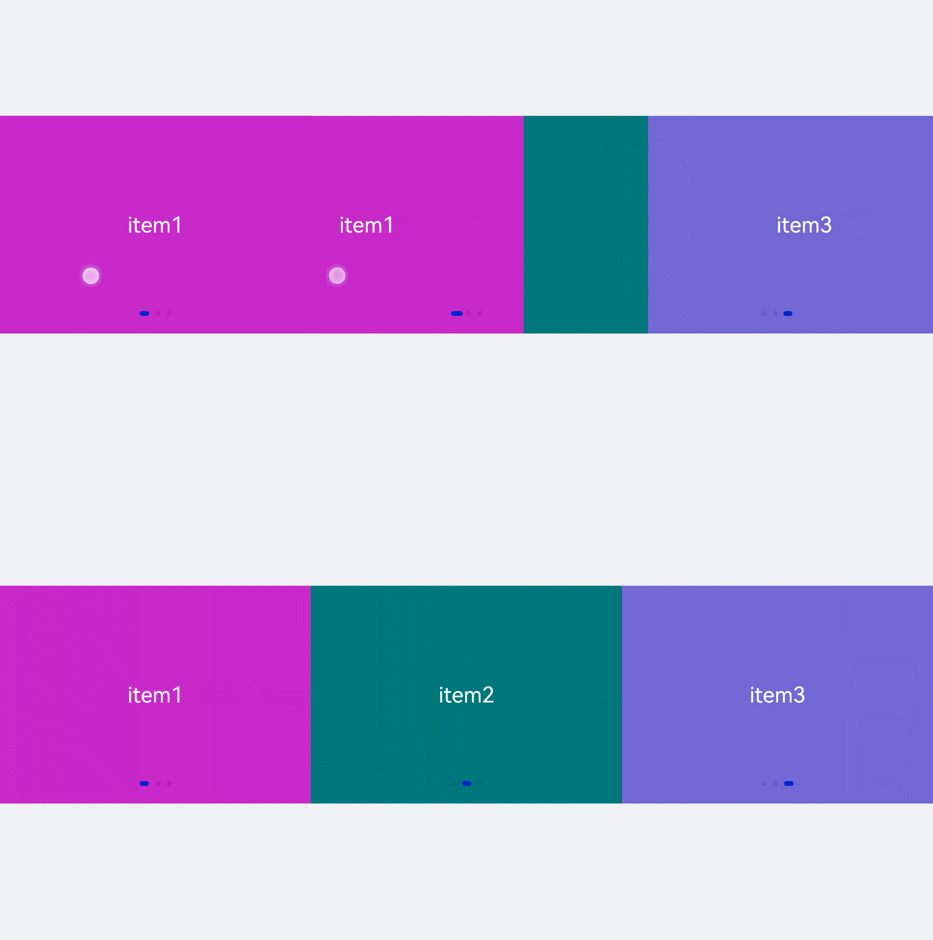
创建swiper组件
在pages/index目录下的hml文件中创建一个swiper组件。
<!-- xxx.hml-->
<div class="container">
  <swiper>
    <div class="item" style="background-color: #bf45ea;">
      <text>item1</text>
    </div>
    <div class="item" style="background-color: #088684;">
      <text>item2</text>
    </div>
    <div class="item" style="background-color: #7786ee;">
      <text>item3</text>
    </div>
  </swiper>
</div>
/* xxx.css */
.container{
  width: 100%;
  height: 100%;
  flex-direction: column;
  background-color: #F1F3F5;
  align-items: center;
  justify-content: center;
  width: 100%;
}
swiper{
  height: 30%;
}
.item{
  width: 100%;
  height: 500px;
}
text{
  width: 100%;
  height: 100%;
  text-align: center;
  font-size: 50px;
  color: white;
}
说明
swiper组件支持除之外的子组件。
添加属性
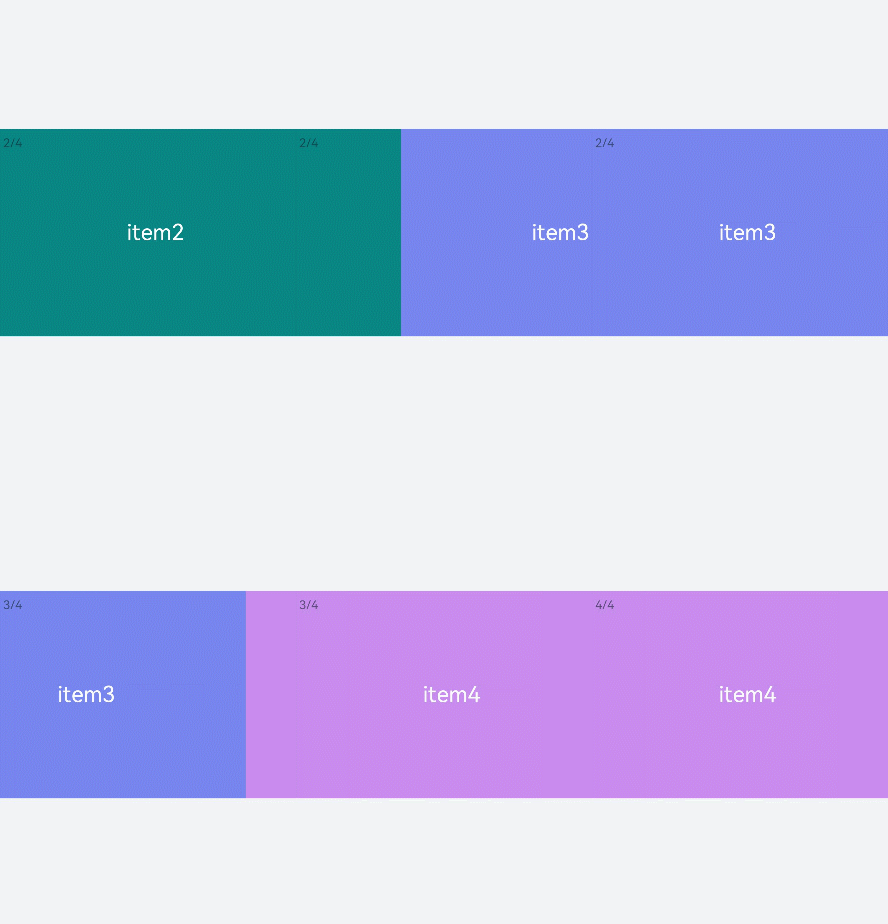
swiper组件当不开启循环播放(loop=“false”)时添加自动播放属性(autoplay),设置自动播放时播放时间间隔(interval),页面会自动切换并停留在最后一个子组件页面。添加digital属性启用数字导航点,设置切换时为渐隐滑动效果(scrolleffect=“fade”))。
<!-- xxx.hml-->
<div class="container">
  <swiper index="1"  autoplay="true" interval="2000" indicator="true" digital="true" duration="500"
  scrolleffect="fade" loop="false">
    <div class="item" style="background-color: #bf45ea;">
      <text>item1</text>
    </div>
    <div class="item" style="background-color: #088684;">
      <text>item2</text>
    </div>
    <div class="item" style="background-color: #7786ee;">
      <text>item3</text>
    </div>
    <div class="item" style="background-color: #c88cee;">
      <text>item4</text>
    </div>
  </swiper>
</div>
/* xxx.css */
.container{
  width: 100%;
  height: 100%;
  flex-direction: column;
  background-color: #F1F3F5;
  align-items: center;
  justify-content: center;
}
swiper{
  height: 30%;
}
.item{
  width: 100%;
  height: 500px;
}
text{
  width: 100%;
  height: 100%;
  text-align: center;
  font-size: 50px;
  color: white;
}
说明
- 设置indicator(是否启用导航点指示器)属性为true时digital(是否启用数字导航点)属性才会生效。
- swiper子组件的个数大于等于2时设置的loop属性才会生效。
- scrolleffect属性仅在loop属性值为false时生效。
设置样式
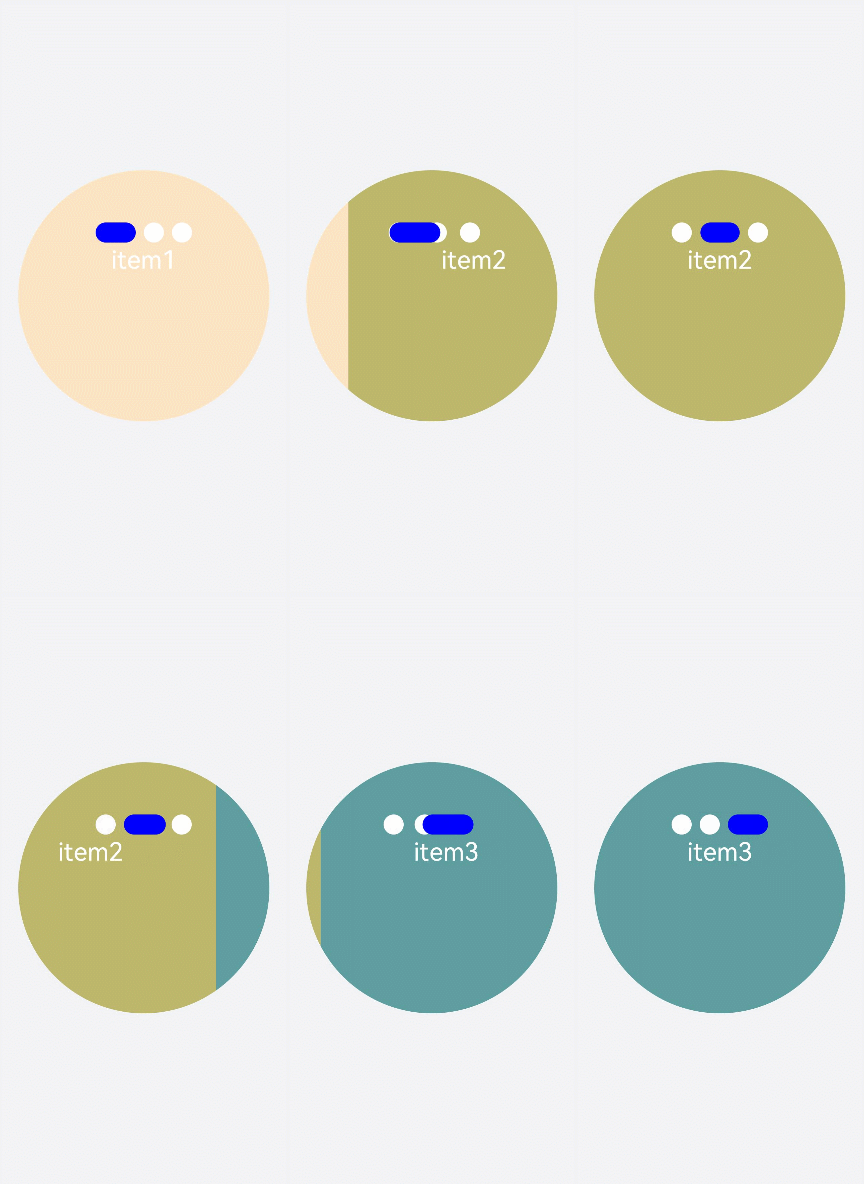
设置swiper组件的宽高,导航点指示器的直径大小(indicator-size)、颜色(indicator-color)、相对位置(ndicator-top)及选中时的颜色(indicator-selected-color)。
<!-- xxx.hml-->
<div class="container">
    <swiper index="1" autoplay="true" interval="2000"  duration="500" >
        <div class="item" style="background-color: bisque;">
            <text>item1</text>
        </div>
        <div class="item" style="background-color: darkkhaki;">
            <text>item2</text>
        </div>
        <div class="item" style="background-color: cadetblue;">
            <text>item3</text>
        </div>
    </swiper>
</div>
/* xxx.css */
.container{
  width: 100%;
  height: 100%;
  flex-direction: column;
  background-color: #F1F3F5;
  align-items: center;
  justify-content: center;
}
swiper{
  width:  500px;
  height: 500px;
  border-radius: 250px;
  indicator-color: white;
  indicator-selected-color: blue;
  indicator-size: 40px;
  indicator-top: 100px;
  overflow: hidden ;
}
.item{
  width: 100%;
  height: 500px;
}
text{
  width: 100%;
  text-align: center;
  margin-top: 150px;
  font-size: 50px;
  color: white;
}
绑定事件
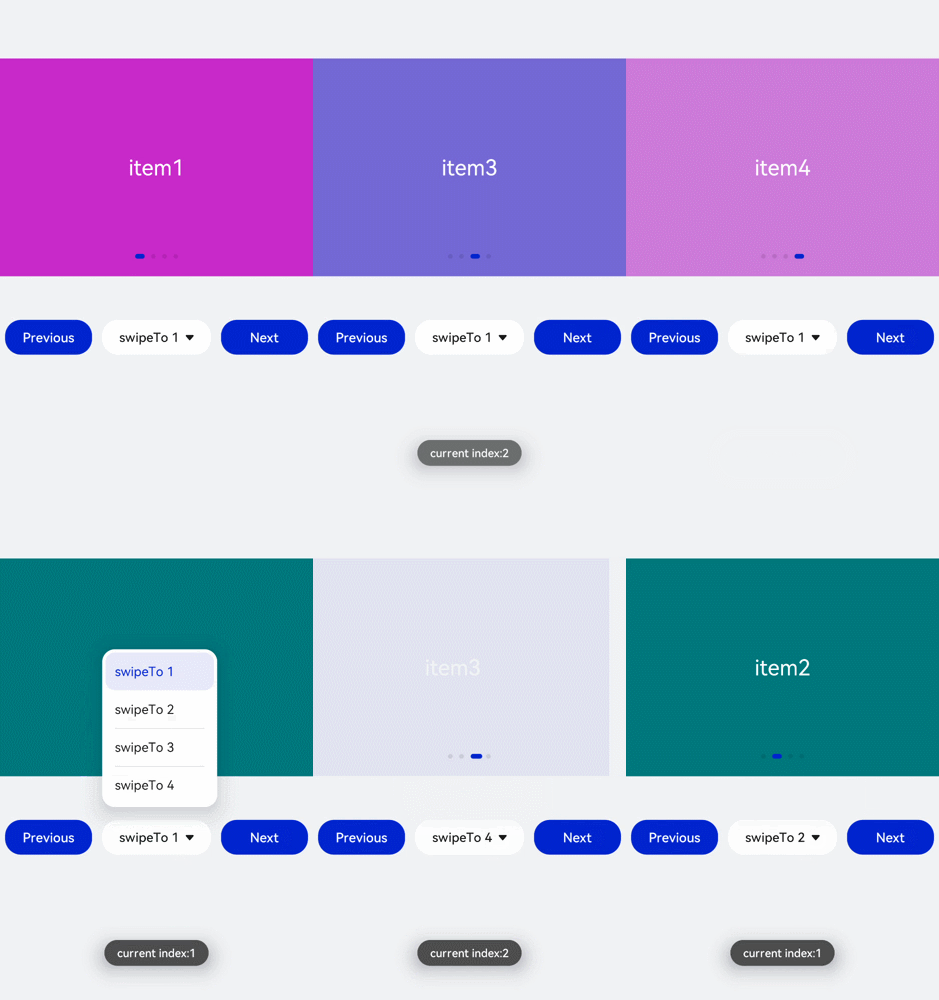
创建两个text组件添加点击事件,当点击后就调用showPrevious(显示上一个子组件)或showNext(显示下一个子组件)方法。添加select组件下拉选择时触发change事件后调用swiperTo方法跳转到指定轮播页面。swiper组件绑定change(当前显示的组件索引变化时触发)和finish(切换动画结束时触发)事件。
<!-- xxx.hml-->
<div class="container">
  <swiper interval="2000" onchange="change" loop="false" onanimationfinish="finish" id="swiper">
    <div class="item" style="background-color: #bf45ea">
      <text>item1</text>
    </div>
    <div class="item" style="background-color: #088684;">
      <text>item2</text>
    </div>
    <div class="item" style="background-color: #7786ee;">
      <text>item3</text>
    </div>
    <div class="item" style="background-color: #c88cee;">
      <text>item4</text>
    </div>
  </swiper>
  <div class="content">
      <button class="pnbtn" onclick="previous">Previous</button>
      <select onchange="selectChange">
          <option value="0">swipeTo 1</option>
          <option value="1">swipeTo 2</option>
          <option value="2">swipeTo 3</option>
          <option value="3">swipeTo 4</option>
      </select>
    <button class="pnbtn" onclick="next">Next</button>
  </div>
</div>
/* xxx.css */
.container{
  width: 100%;
  height: 100%;
  flex-direction: column;
  background-color: #F1F3F5;
  align-items: center;
  justify-content: center;
}
swiper{
  height: 30%;
}
.item{
  width: 100%;
  height: 500px;
}
text{
  width: 100%;
  height: 100%;
  text-align: center;
  font-size: 50px;
  color: white;
}
select{
  background-color: white;
  width: 250px;
  height: 80px;
}
.content{
  margin-top: 100px;
  justify-content: space-around;
}
.pnbtn{
  width: 200px;
  height: 80px;
  font-size: 30px;
}
// xxx.js
import promptAction from '@ohos.promptAction';
export default{
  change(e){
    promptAction.showToast({duration:2000,message:"current index:"+e.index});
  },
  finish(){
    promptAction.showToast({duration:2000,message:"切换动作结束"});
  },
  selectChange(e){
    this.$element('swiper').swipeTo({index: Number(e.newValue)});
  },
  previous(){
    this.$element('swiper').showPrevious();
  },
  next(){
    this.$element('swiper').showNext();
  }
}
场景示例
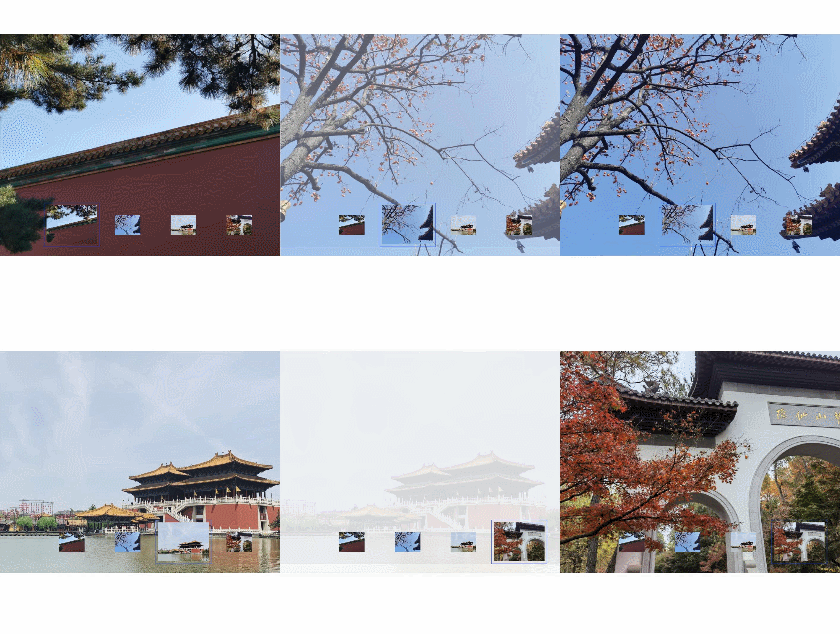
本场景中使用swiper创建一个轮播图,在轮播图底部制作一个缩略图,点击缩略图后调用swipeTo方法切换到对应的轮播图。
<!-- xxx.hml-->
<div class="container">
  <swiper duration="500" indicator="false" id="swiper" onchange="change">
    <div class="item" for="item in list">
      <image src="{{item.src}}"></image>
    </div>
  </swiper>
  <div class="content">
    <div class="content_item {{index == $idx?'actived':''}}" for="item in list" onclick="imageTo({{$idx}})">
      <image src="{{item.src}}"></image>
    </div>
  </div>
</div>
/* xxx.css */
.container{
  flex-direction: column;
  background-color: #F1F3F5;
  align-items: center;
  justify-content: center;
  width: 100%;
}
swiper{
  width: 100%;
  height: 500px;
}
.item{
  width: 100%;
  height: 500px;
}
.content{
  margin-top: -120px;
  width: 70%;
  display: flex;
  justify-content: space-around;
  height: 100px;
}
.content_item{
  padding: 5px;
  transform: scale(0.5);
}
.actived{
  transform: scale(1);
  border: 1px solid #b20937ea;
}
// xxx.js
export default {
  data:{
    index: 0,
    list:[
      {src: 'common/images/1.png'},
      {src: 'common/images/2.png'},
      {src: 'common/images/3.png'},
      {src: 'common/images/4.png'},]
    },
  imageTo(index){
    this.index = index;
    this.$element('swiper').swipeTo({index: index});
  },
  change(e){
    this.index = e.index;
  }
}
Canvas开发指南
Canvas对象
创建Canvas组件
在pages/index目录下的hml文件中创建一个Canvas组件。
<!-- xxx.hml -->
<div class="container">
  <canvas></canvas>
</div>
/* xxx.css */
.container{
  width: 100%;
  height: 100%;
  flex-direction: column;
  justify-content: center;
  align-items: center;
  background-color: #F1F3F5;
}
canvas{
  background-color: #00ff73;
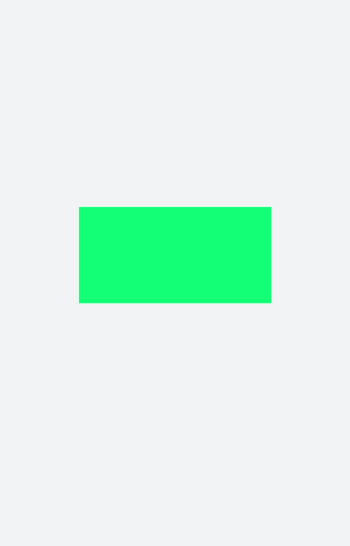
}
说明
- Canvas组件默认背景色与父组件的背景色一致。
- Canvas默认宽高为width: 300px,height: 150px。
添加样式
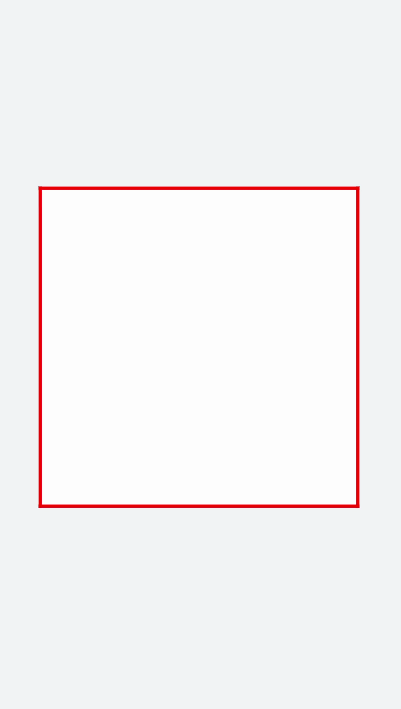
Canvas组件设置宽(width)、高(height)、背景色(background-color)及边框样式(border)。
<!-- xxx.hml -->
<div class="container">
  <canvas></canvas>
</div>
/* xxx.css */
.container{
  flex-direction: column;
  justify-content: center;
  align-items: center;
  background-color: #F1F3F5;
}
canvas{
  width: 500px;
  height: 500px;
  background-color: #fdfdfd;
  border: 5px solid red;
}
添加事件
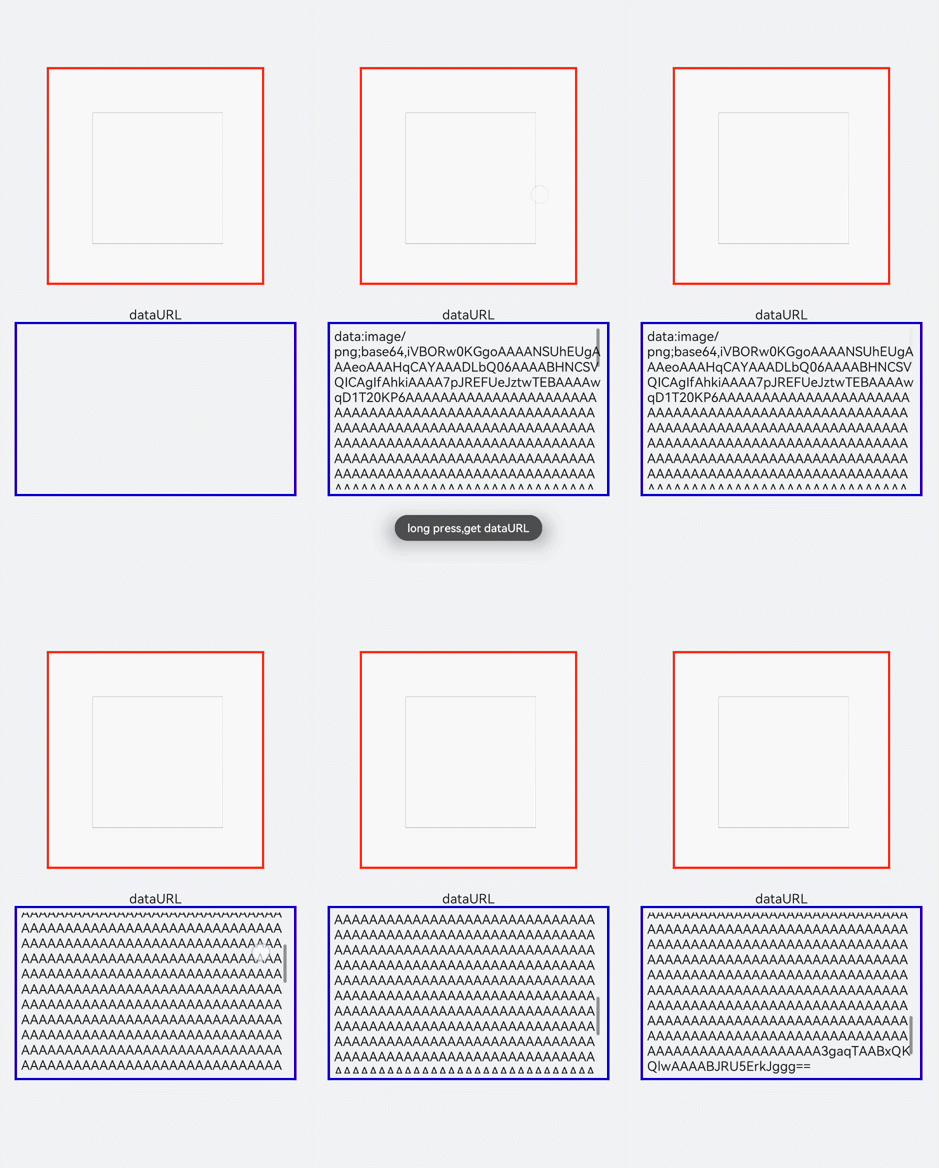
Canvas添加长按事件,长按后可获取Canvas组件的dataUrl值(toDataURL方法返回的图片信息),打印在下方文本区域内。
<!-- xxx.hml -->
<div class="container">
  <canvas ref="canvas1" onlongpress="getUrl"></canvas>
  <text>dataURL</text>
  <text class="content">{{dataURL}}</text>
</div>
/* xxx.css */
.container{
  width:100%;
  height:100%;
  flex-direction: column;
  justify-content: center;
  align-items: center;
  background-color: #F1F3F5;
  }
  canvas{
    width: 500px;
    height: 500px;
    background-color: #fdfdfd;
    border: 5px solid red;
    margin-bottom: 50px;
}
.content{
  border: 5px solid blue;
  padding: 10px;
  width: 90%;
  height: 400px;
  overflow: scroll;
}
// xxx.js
import promptAction from '@ohos.promptAction';
export default {
  data:{
    dataURL:null,
  },
  onShow(){
    let el = this.$refs.canvas1;
    let ctx = el.getContext("2d");
    ctx.strokeRect(100,100,300,300);
  },
  getUrl(){
    let el = this.$refs.canvas1
    let dataUrl = el.toDataURL()
    this.dataURL = dataUrl;
    promptAction.showToast({duration:2000,message:"long press,get dataURL"})
  }
}
说明
画布不支持在onInit和onReady中进行创建。
2D对象
使用CanvasRenderingContext2D在Canvas画布组件上进行绘制,绘制对象可以是图形、文本、线段、图片等。具体请参考CanvasRenderingContext2D对象。
画线段
使用moveTo和lineTo画出一条线段,当使用closePath方法时会结束当前路径形成一个封闭图形 。设置quadraticCurveTo(二次贝赛尔曲线)或bezierCurveTo(三次贝赛尔曲线)的值组成图形。
<!-- xxx.hml -->
<div class="container">
  <canvas ref="canvas1"></canvas>
  <select @change="change">
    <option value="value1"> line </option>
    <option value="value2"> quadratic </option>
    <option value="value3"> bezier </option>
    <option value="value4"> arc/ellipse </option>
    <option value="value5"> lineJoin/miterLimit </option>
  </select>
</div>
/* xxx.css */
.container{
  width: 100%;
  height: 100%;
  flex-direction: column;
  justify-content: center;
  align-items: center;
  background-color: #F1F3F5;
}
canvas{
  width: 600px;
  height: 500px;
  background-color: #fdfdfd;
  border: 5px solid red;
}
select{
  margin-top: 50px;
  width: 250px;
  height: 100px;
  background-color: white;
}
// xxx.js
export default {
  data:{
    el: null,
    ctx: null,
  },
  onShow(){
    this.el = this.$refs.canvas1;
    this.ctx = this.el.getContext("2d",{antialias: true});
    // 清除画布上的内容
    this.ctx.clearRect(0, 0, 600, 500);
    // 创建一个新的绘制路径
    this.ctx.beginPath();
    // 线端点以方形结束
    this.ctx.lineCap = 'butt';
    // 描边的宽度
    this.ctx.lineWidth = 15;
    // 创建一个新的绘制路径
    this.ctx.beginPath();
    // 路径从当前点移动到指定点
    this.ctx.moveTo(200, 100);
    // 从当前点到指定点进行路径连接
    this.ctx.lineTo(400, 100);
    // 边框绘制
    this.ctx.stroke();
    this.ctx.beginPath();
    // 线端点以圆形结束
    this.ctx.lineCap = 'round';
    this.ctx.moveTo(200, 200);
    this.ctx.lineTo(400, 200);
    this.ctx.stroke();
    // 线端点以方形结束
    this.ctx.beginPath();
    this.ctx.lineCap = 'square';
    this.ctx.moveTo(200, 300);
    this.ctx.lineTo(400, 300);
    this.ctx.stroke();
  },
  change(e){
    if(e.newValue == 'value1'){
      this.el = this.$refs.canvas1;
      this.ctx = this.el.getContext("2d",{antialias: true});
      this.ctx.clearRect(0, 0, 600, 500);
      // 上
      this.ctx.beginPath();
      this.ctx.lineCap = 'butt';
      this.ctx.moveTo(200, 100);
      this.ctx.lineTo(400, 100);
      this.ctx.stroke();
      // 中
      this.ctx.beginPath();
      this.ctx.lineCap = 'round';
      this.ctx.moveTo(200, 200);
      this.ctx.lineTo(400, 200);
      this.ctx.stroke();
      // 下
      this.ctx.beginPath();
      this.ctx.lineCap = 'square';
      this.ctx.moveTo(200, 300);
      this.ctx.lineTo(400, 300);
      this.ctx.stroke();
    }else if(e.newValue == 'value2'){
      this.ctx.clearRect(0, 0, 600, 500);
      // 上
      this.ctx.beginPath();
      this.ctx.moveTo(100, 150);
      // 二次贝赛尔曲线的路径
      this.ctx.quadraticCurveTo(300, 50, 500, 150);
      this.ctx.stroke();
      // 左
      this.ctx.beginPath();
      this.ctx.moveTo(200, 150);
      this.ctx.quadraticCurveTo(250, 250, 250, 400);
      this.ctx.stroke();
      // 右
      this.ctx.beginPath();
      this.ctx.moveTo(400, 150);
      this.ctx.quadraticCurveTo(350, 250, 350, 400);
      this.ctx.stroke();
    }else if(e.newValue == 'value3'){
      this.ctx.clearRect(0, 0, 600, 500);
      // 下
      this.ctx.beginPath();
      this.ctx.moveTo(100, 200);
      // 三次贝赛尔曲线的路径
      this.ctx.bezierCurveTo(150, 100, 200, 100,250, 200);
      this.ctx.stroke();
      // 左
      this.ctx.beginPath();
      this.ctx.moveTo(350, 200);
      this.ctx.bezierCurveTo(400, 100, 450, 100,500, 200);
      this.ctx.stroke();
      // 右
      this.ctx.beginPath();
      this.ctx.moveTo(200, 350);
      this.ctx.bezierCurveTo(250, 500, 350, 500, 400, 350);
      this.ctx.stroke();
    }else if(e.newValue == 'value4'){
      this.ctx.clearRect(0, 0, 600, 500);
      this.ctx.beginPath();
      this.ctx.moveTo(100, 200);
      // 弧线
      this.ctx.arcTo(150, 300, 350, 300, 150);
      this.ctx.stroke();
      this.ctx.beginPath();
      // 椭圆
      this.ctx.ellipse(400, 250, 50, 100, Math.PI * 0.25, Math.PI * 0.5 , Math.PI , 1);
      this.ctx.stroke();
    }else if(e.newValue == 'value5'){
      this.ctx.clearRect(0, 0, 600, 500);
      // 左上
      this.ctx.beginPath();
      // 在线段相连处绘制一个扇形
      this.ctx.lineJoin = 'round';
      this.ctx.moveTo(100, 100);
      this.ctx.lineTo(200, 200);
      this.ctx.lineTo(100, 250);
      this.ctx.stroke();
      // 左下
      this.ctx.beginPath();
      // 在线段相连处使用三角形为底填充
      this.ctx.lineJoin = 'bevel';
      this.ctx.moveTo(100, 300);
      this.ctx.lineTo(200, 400);
      this.ctx.lineTo(100, 450);
      this.ctx.stroke();
      // 右上
      this.ctx.beginPath();
      //线条相交处内角和外角的距离
      this.ctx.lineJoin = 'miter';
      this.ctx.miterLimit = 3;
      this.ctx.moveTo(400, 100);
      this.ctx.lineTo(450, 200);
      this.ctx.lineTo(400, 250);
      // 结束当前路径形成一个封闭路径
      this.ctx.closePath();
      this.ctx.stroke();
      // 右下
      this.ctx.beginPath();
      this.ctx.lineJoin = 'miter';
      this.ctx.miterLimit = 10;
      this.ctx.moveTo(400, 300);
      this.ctx.lineTo(450, 400);
      this.ctx.lineTo(400, 450);
      this.ctx.closePath();
      this.ctx.stroke();
    }
  },
}
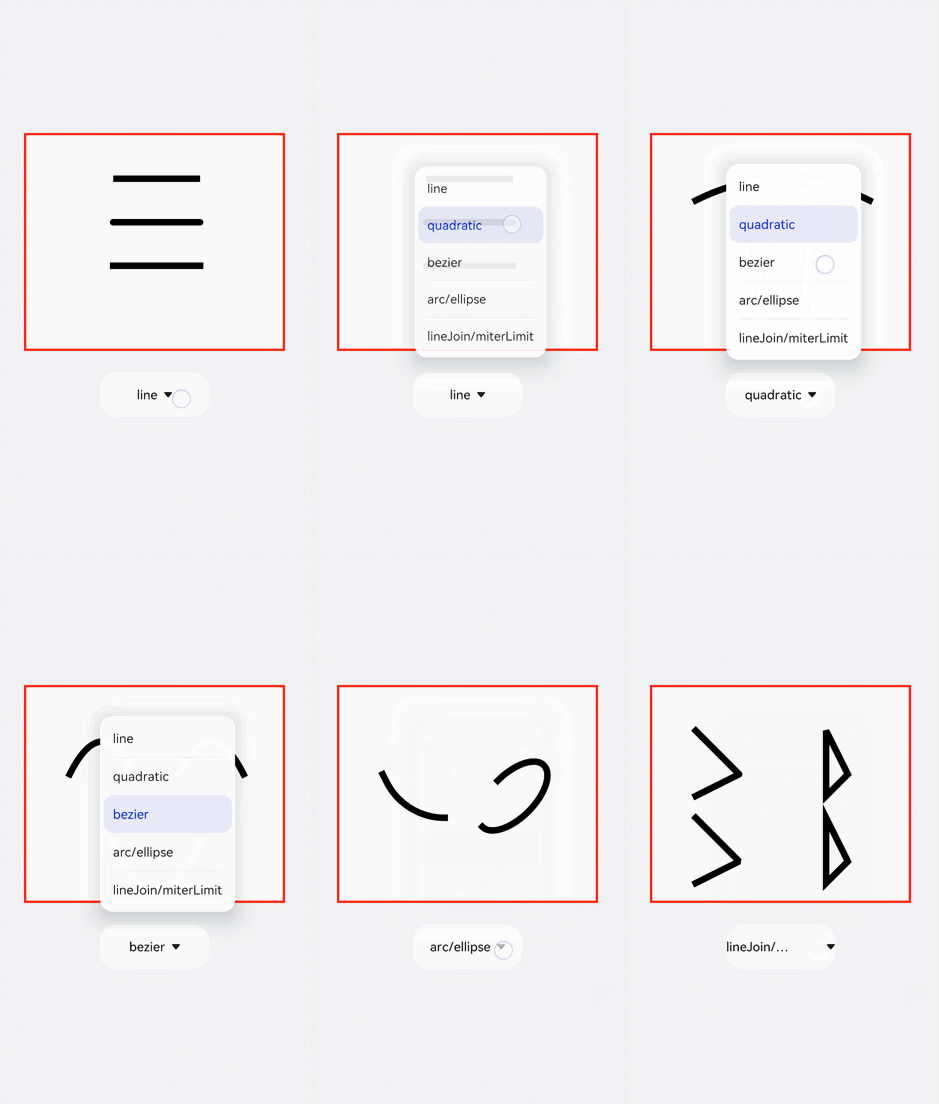
画边框
全局定义画布(el)及画笔(ctx),初始化创建一个边框宽度为5的长方形。对边框的宽度(lineWidth)、颜色(strokeStyle)、虚化程度(setLineDash)进行改变,选用select组件添加change事件,下拉选择时触发change事件后画出改变后的图形。
<!-- xxx.hml -->
<div class="container">
  <canvas ref="canvas1"></canvas>
  <select @change="change">
    <option value="value1">strokeRect</option>
    <option value="value2">arc</option>
    <option value="value3">lineDashRect</option>
    <option value="value4">fillRect</option>
  </select>
</div>
/* xxx.css */
.container{
  width: 100%;
  height: 100%;
  flex-direction: column;
  justify-content: center;
  align-items: center;
  background-color: #F1F3F5;
}
canvas{
  width: 600px;
  height: 500px;
  background-color: #fdfdfd;
  border: 5px solid red;
}
select{
  margin-top: 50px;
  width: 250px;
  height: 100px;
  background-color: white;
}
// xxx.js
export default {
  data:{
    el: null,
    ctx: null,
  },
  onShow(){
    this.el = this.$refs.canvas1;
    this.ctx = this.el.getContext("2d",{antialias: true});
    this.ctx.lineWidth = 5;
    this.ctx.strokeRect(200, 150, 200, 200);
  },
  change(e){
    if(e.newValue == 'value1'){
      // 清除画布上的内容
      this.ctx.clearRect(0,0,600,500);
      // 边框宽度
      this.ctx.lineWidth = 5;
      // 边框颜色
      this.ctx.strokeStyle = '#110000';
      // 边框的虚化程度
      this.ctx.setLineDash([0,0]);
      // 画具有边框的矩形
      this.ctx.strokeRect(200, 150, 200, 200);
    }else if (e.newValue == 'value2'){
      this.ctx.clearRect(0,0,600,500);
      this.ctx.lineWidth = 30;
      this.ctx.strokeStyle = '#0000ff';
      this.ctx.setLineDash([0,0]);
      // 画圆
      this.ctx.arc(300, 250, 150,0,6.28);
      //进行边框绘制
      this.ctx.stroke();
    }else if (e.newValue == 'value3'){
      this.ctx.clearRect(0,0,600,500);
      this.ctx.lineWidth = 5;
      this.ctx.setLineDash([5,5]);
      this.ctx.strokeRect(200, 150, 200, 200);
    }else if (e.newValue == 'value4'){
      this.ctx.clearRect(0,0,600,500);
      // 画一个有填充颜色的矩形
      this.ctx.fillStyle = '#0000ff';
      this.ctx.fillRect(200, 150, 200, 200);
    }
  },
}
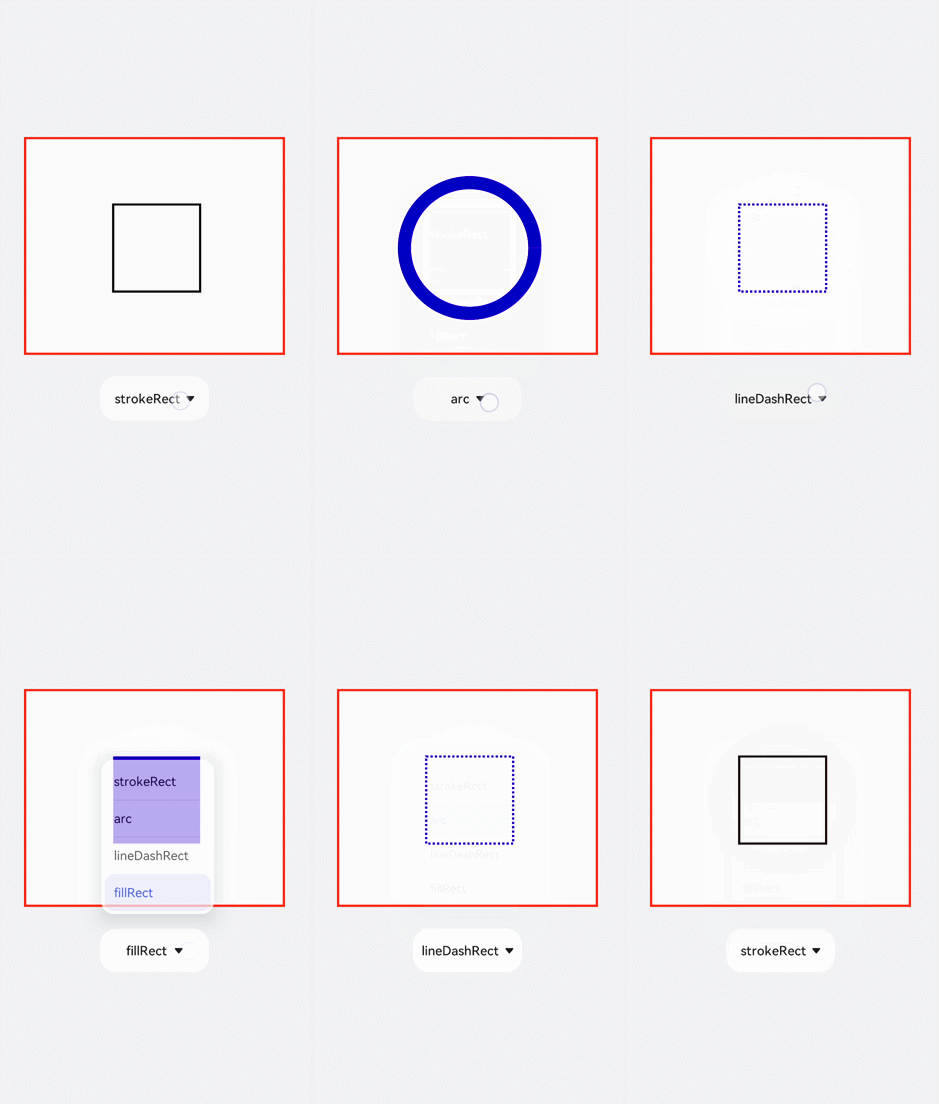
填充渐变色
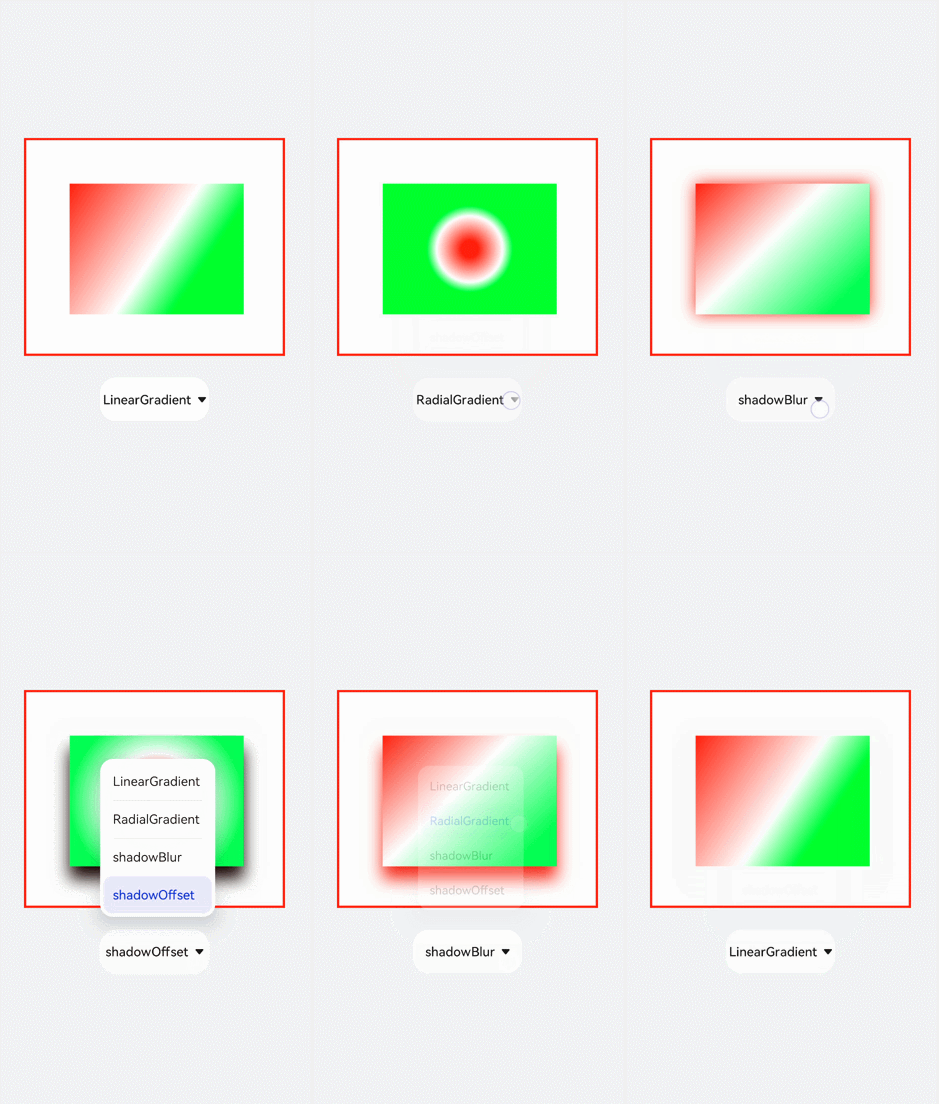
添加createLinearGradient和createRadialGradient属性创建渐变容器,接着用addColorStop方法添加多个色块组成渐变色,再设置fillStyle为gradient将渐变色填充到矩形中,最后设置阴影的模糊级别(shadowBlur)、阴影颜色(shadowColor)及阴影偏移量(shadowOffset)。
<!-- xxx.hml -->
<div class="container">
  <canvas ref="canvas1"></canvas>
  <select @change="change">
    <option value="value1">LinearGradient</option>
    <option value="value2">RadialGradient</option>
    <option value="value3">shadowBlur</option>
    <option value="value4">shadowOffset</option>
  </select>
</div>
/* xxx.css */
.container{
  width: 100%;
  height: 100%;
  flex-direction: column;
  justify-content: center;
  align-items: center;
  background-color: #F1F3F5;
}
canvas{
  width: 600px;
  height: 500px;
  background-color: #fdfdfd;
  border: 5px solid red;
}
select{
  margin-top: 50px;
  width: 250px;
  height: 100px;
  background-color: white;
}
// xxx.js
export default {
  data:{
    el: null,
    ctx: null,
  },
  onShow(){
    this.el = this.$refs.canvas1;
    this.ctx = this.el.getContext("2d",{antialias: true});
    // 创建一个线性渐变色
    let gradient = this.ctx.createLinearGradient(100,100, 400,300);
    // 添加渐变颜色
    gradient.addColorStop(0.0, 'red');
    gradient.addColorStop(0.7, 'white');
    gradient.addColorStop(1.0, 'green');
    // 填充颜色为渐变色
    this.ctx.fillStyle = gradient;
    this.ctx.fillRect(100, 100, 400, 300);
  },
  change(e){
    if(e.newValue == 'value1'){
      // 清除画布上的内容
      this.ctx.clearRect(0,0,600,500);
      let gradient = this.ctx.createLinearGradient(100,100, 400,300);
      gradient.addColorStop(0.0, 'red');
      gradient.addColorStop(0.7, 'white');
      gradient.addColorStop(1.0, 'green');
      this.ctx.fillStyle = gradient;
      // 设置绘制阴影时的模糊级别
      this.ctx.shadowBlur = 0;
      // 绘制阴影时和原有对象的垂直偏移值
      this.ctx.shadowOffsetY = 0;
      // 绘制阴影时和原有对象的水平偏移值
      this.ctx.shadowOffsetX = 0;
      this.ctx.fillRect(100, 100, 400, 300);
    }else if(e.newValue == 'value2'){
      this.ctx.clearRect(0,0,600,500);
      // 创建一个径向渐变色
      let gradient = this.ctx.createRadialGradient(300,250,20,300,250,100);
      gradient.addColorStop(0.0, 'red');
      gradient.addColorStop(0.7, 'white');
      gradient.addColorStop(1.0, 'green');
      this.ctx.shadowBlur = 0;
      this.ctx.shadowOffsetY = 0;
      this.ctx.shadowOffsetX = 0;
      this.ctx.fillStyle = gradient;
      this.ctx.fillRect(100, 100, 400, 300);
    }else if(e.newValue == 'value3'){
      this.ctx.clearRect(0,0,600,500);
      let gradient = this.ctx.createLinearGradient(100,100, 400,400);
      gradient.addColorStop(0.0, 'red');
      gradient.addColorStop(0.5, 'white');
      gradient.addColorStop(1, '#17ea35');
      // 设置绘制阴影时的模糊级别
      this.ctx.shadowBlur = 30;
      // 绘制阴影时的阴影颜色
      this.ctx.shadowColor = 'rgb(229, 16, 16)';
      this.ctx.fillStyle = gradient;
      this.ctx.fillRect(100, 100, 400, 300);
    }else if(e.newValue == 'value4'){
      this.ctx.clearRect(0,0,600,500);
      this.ctx.clearRect(0,0,600,500);
      let gradient = this.ctx.createRadialGradient(300,250,20,300,250,200);
      gradient.addColorStop(0.0, 'red');
      gradient.addColorStop(0.5, 'white');
      gradient.addColorStop(1, '#17ea35');
      // 设置绘制阴影时的模糊级别
      this.ctx.shadowBlur = 30;
      this.ctx.shadowOffsetY = 30;
      // 绘制阴影时的阴影颜色
      this.ctx.shadowColor = 'rgb(23, 1, 1)';
      this.ctx.fillStyle = gradient;
      this.ctx.fillRect(100, 100, 400, 300);
    }
  },
}
填充文字
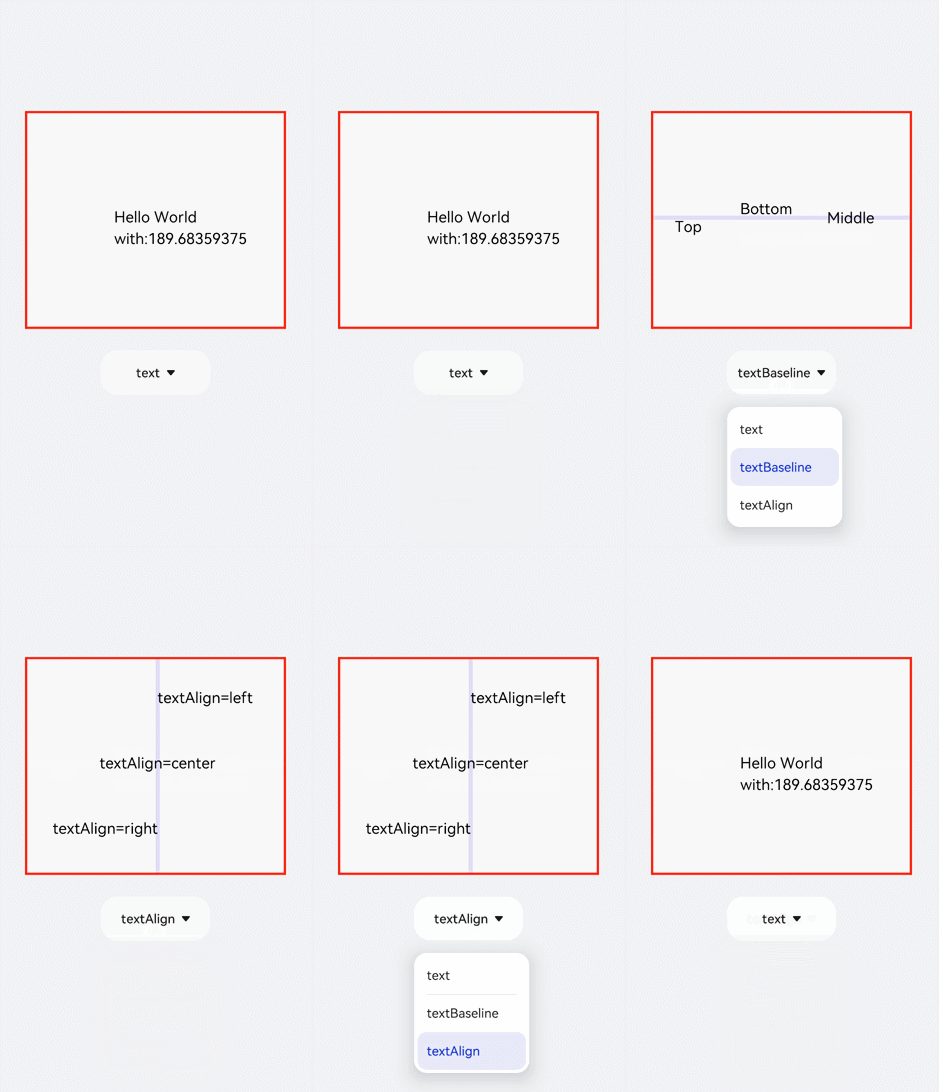
先创建文本,再用fillText方法把文字写在画布上。通过globalAlpha属性改变基线透明度,使基线不会挡住文字,再设置textAlign和textBaseline属性确定文字基于基线的位置。
<!-- xxx.hml -->
<div class="container">
  <canvas ref="canvas1"></canvas>
  <select @change="change">
    <option value="value1">text</option>
    <option value="value2">textBaseline</option>
    <option value="value3">textAlign</option>
  </select>
</div>
/* xxx.css */
.container{
  width: 100%;
  height: 100%;
  flex-direction: column;
  justify-content: center;
  align-items: center;
  background-color: #F1F3F5;
}
canvas{
  width: 600px;
  height: 500px;
  background-color: #fdfdfd;
  border: 5px solid red;
}
select{
  margin-top: 50px;
  width: 250px;
  height: 100px;
  background-color: white;
}
// xxx.js
export default {
  data:{
    el: null,
    ctx: null,
  },
  onShow(){
    this.el = this.$refs.canvas1;
    this.ctx = this.el.getContext("2d",{antialias: true});
    // 创建文本
    let text = "Hello World";
    // 设置字体
    this.ctx.font = '30px';
    this.ctx.fillText("with:"+this.ctx.measureText(text).width, 200, 300);
    // 填充字体文本
    this.ctx.fillText(text, 200, 250);
  },
  change(e){
    if(e.newValue == 'value1'){
      // 清除画布上的内容
      this.ctx.clearRect(0,0,600,500);
      // 开始新的路径
      this.ctx.beginPath();
      // 初始化textAlign值
      this.ctx.textAlign = 'left';
      // 初始化textBaseline
      this.ctx.textBaseline = 'alphabetic';
      // 设置字体
      this.ctx.font = '30px';
      let text = "Hello World";
      // 获取字体width
      this.ctx.fillText("with:"+this.ctx.measureText(text).width, 200, 300);
      // 填充字体文本
      this.ctx.fillText(text, 200, 250);
    }else if(e.newValue == 'value2'){
      this.ctx.clearRect(0,0,600,500);
      this.ctx.beginPath();
      // 设置透明度
      this.ctx.globalAlpha = 0.1;
      // 设置线宽度
      this.ctx.lineWidth = 10;
      // 设置线段颜色
      this.ctx.strokeStyle = '#0000ff';
      // 从当前点移动到指定点
      this.ctx.moveTo(0, 240);
      // 当前点到指定点进行路径连接
      this.ctx.lineTo(600, 240);
      this.ctx.stroke();
      this.ctx.font = '35px';
      this.ctx.globalAlpha = 1;
      // 初始化textAlign值
      this.ctx.textAlign = 'left';
      // 设置textBaseline
      this.ctx.textBaseline = 'top';
      this.ctx.fillText('Top', 50, 240);
      this.ctx.textBaseline = 'bottom';
      this.ctx.fillText('Bottom', 200, 240);
      this.ctx.textBaseline = 'middle';
      this.ctx.fillText('Middle', 400, 240);
    }else if(e.newValue == 'value3'){
      // 清除画布上的内容
      this.ctx.clearRect(0,0,600,500);
      this.ctx.beginPath();
      this.ctx.globalAlpha = 0.1;
      this.ctx.lineWidth = 10;
      this.ctx.strokeStyle = '#0000ff';
      this.ctx.moveTo(300, 0);
      this.ctx.lineTo(300, 500);
      this.ctx.stroke();
      this.ctx.font = '35px';
      this.ctx.globalAlpha = 1;
      // 初始化 textBaseline
      this.ctx.textBaseline = 'alphabetic';
      // 设置textAlign
      this.ctx.textAlign = 'left';
      this.ctx.fillText('textAlign=left',300, 100);
      this.ctx.textAlign = 'center';
      this.ctx.fillText('textAlign=center',300, 250);
      this.ctx.textAlign = 'right';
      this.ctx.fillText('textAlign=right',300, 400);
    }
  }
}
说明
ltr布局模式下start和left一致,rtl布局模式下start和right一致·。
添加图片
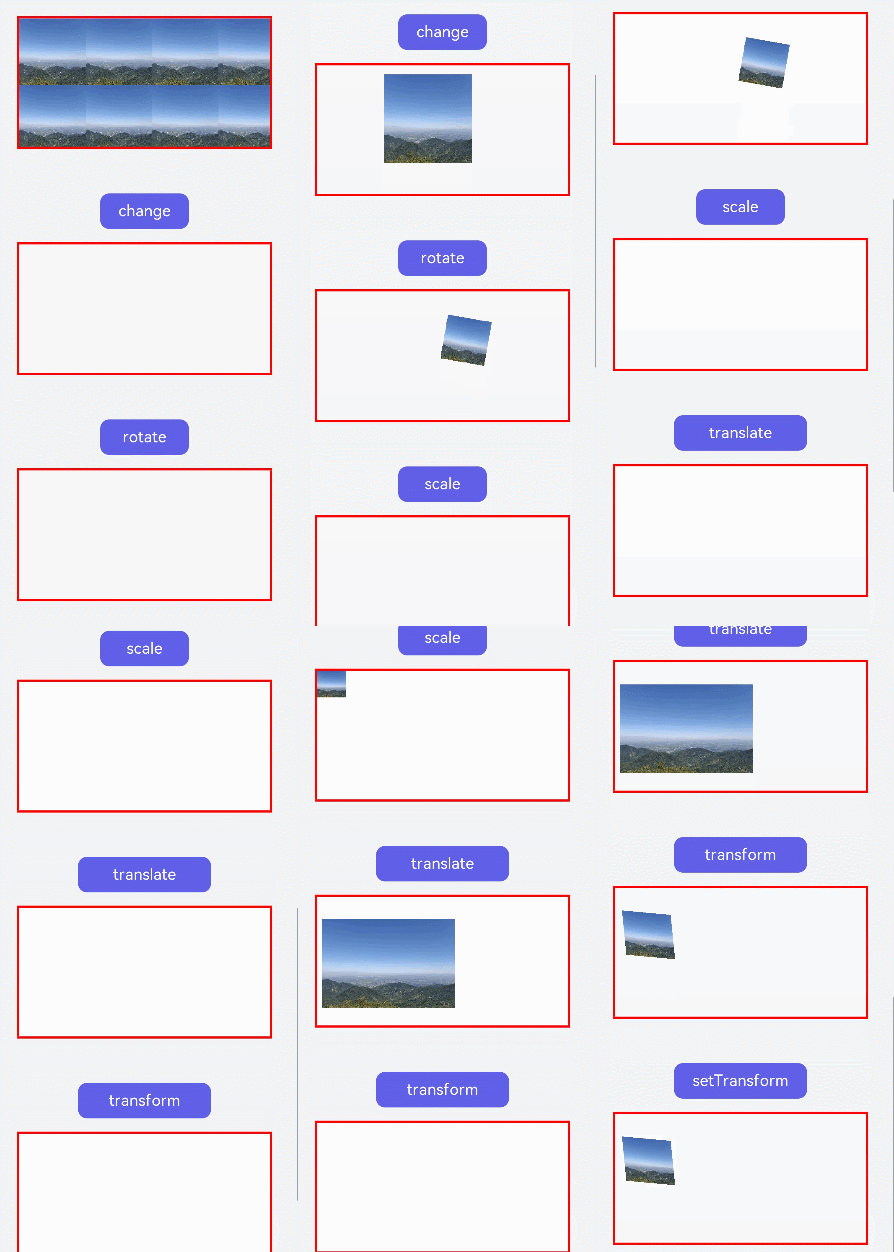
创建图片对象后使用drawImage属性画出图片,给图片设置一些动画样式如scale(缩放)、translate(平移)或rotate(旋转)。
<!-- xxx.hml -->
<div class="container">
  <div class="content">
    <canvas ref="canvas0"></canvas>
    <text onclick="change">change</text>
    <canvas ref="canvas1"></canvas>
    <text onclick="rotate">rotate</text>
    <canvas ref="canvas2"></canvas>
    <text onclick="scale">scale</text>
    <canvas ref="canvas3"></canvas>
    <text onclick="translate" style="width: 300px;">translate</text>
    <canvas ref="canvas4"></canvas>
    <text onclick="transform" style="width: 300px;">transform</text>
    <canvas ref="canvas5"></canvas>
    <text onclick="setTransform" style="width: 300px;">setTransform</text>
    <canvas ref="canvas6"></canvas>
  </div>
</div>
/* xxx.css */
.container{
  width: 100%;
  flex-direction: column;
  background-color: #F1F3F5;
  align-items: center;
}
canvas{
  width: 600px;
  height: 300px;
  margin-bottom: 100px;
  background-color: #fdfdfd;
  border: 5px solid red;
}
.content{
  width: 80%;
  margin-top: 50px;
  margin-bottom: 50px;
  display: flex;
  flex-wrap: wrap;
  justify-content: space-around;
}
text{
  font-size: 35px;
  width: 200px;
  height: 80px;
  color: white;
  border-radius: 20px;
  text-align: center;
  background-color: #6060e7;
  margin-bottom: 30px;
}
// xxx.js
import promptAction from '@ohos.promptAction';
export default {
  data:{
    compositeOperation: 'source-over'
  },
  onShow(){
    let ctx = this.$refs.canvas0.getContext("2d");
    // 创建图片对象
    let img = new Image();
    // 设置图片路径
    img.src = 'common/images/2.png';
    // 设置图片宽度
    img.width= 150;
    // 设置图片高度
    img.height=150;
    // 图片平铺容器
    var pat = ctx.createPattern(img, 'repeat');ctx.fillStyle = pat;
    ctx.fillRect(0, 0, 600, 300);
  },
  change(){
    // 创建画布后得到画笔
    let ctx = this.$refs.canvas1.getContext("2d");
    ctx.clearRect(0,0,600,1000);
    if(this.compositeOperation == "source-over"){
      this.compositeOperation = "destination-over";
    }else{
      this.compositeOperation = "source-over";
    }
    ctx.globalCompositeOperation = this.compositeOperation;
    let img = new Image();
    img.src = 'common/images/2.png';
    // 图片成功获取触发方法
    img.onload = function() {
      ctx.drawImage(img, 150, 20, 200, 200);
    };
    let img1 = new Image();
    img1.src = 'common/images/3.png';
    img1.onload = function() {
      // 画上图片
      ctx.drawImage(img1, 250, 80, 200, 200);
    };
    // 图片获取失败触发方法
    img1.onerror = function() {
      promptAction.showToast({message:"error",duration:2000})
    };
  },
  rotate(){
    let ctx = this.$refs.canvas2.getContext("2d");
    ctx.clearRect(0,0,600,300);
    // 旋转
    ctx.rotate(10 * Math.PI / 180);
    let img = new Image();
    img.src = 'common/images/2.png';
    img.onload = function() {
      ctx.drawImage(img, 300, 0, 100, 100);
    };
  },
  scale(){
    let ctx = this.$refs.canvas3.getContext("2d");
    ctx.clearRect(0,0,600,200);
    // 缩放
    ctx.scale(1.3,1.2);
    let img = new Image();
    img.src = 'common/images/2.png';
    img.onload = function() {
      ctx.drawImage(img, 0, 0, 50, 50);
    };
  },
  translate(){
    let ctx = this.$refs.canvas4.getContext("2d");
    ctx.clearRect(0,0,600,300);
    ctx.translate(10,0);
    let img = new Image();
    img.src = 'common/images/2.png';
    img.onload = function() {
      ctx.drawImage(img, 0, 50, 300, 200);
    };
  },
  transform(){
    let ctx = this.$refs.canvas5.getContext("2d");
    ctx.clearRect(0,0,600,300);
    ctx.transform(1.1, 0.1, 0.1, 1, 10, 0);
    let img = new Image();
    img.src = 'common/images/2.png';
    img.onload = function() {
      ctx.drawImage(img, 0, 50, 100, 100);
     };
  },
  setTransform(){
    let ctx = this.$refs.canvas6.getContext("2d");
    ctx.clearRect(0,0,600,300);
    ctx.setTransform(1.1, 0.1, 0.1, 1, 10, 0);
    let img = new Image();
    img.src = 'common/images/2.png';
    img.onload = function() {
      ctx.drawImage(img, 0, 50, 100, 100);
    };
  },
}
说明
-
setTransfrom方法使用的参数和transform()方法相同,但setTransform()方法会重置现有的变换矩阵并创建新的变换矩阵。
-
变换后的坐标计算方式(x和y为变换前坐标,x’和y’为变换后坐标):
x’ = scaleX * x + skewY * y + translateX
y’ = skewX * x + scaleY * y + translateY
添加方法
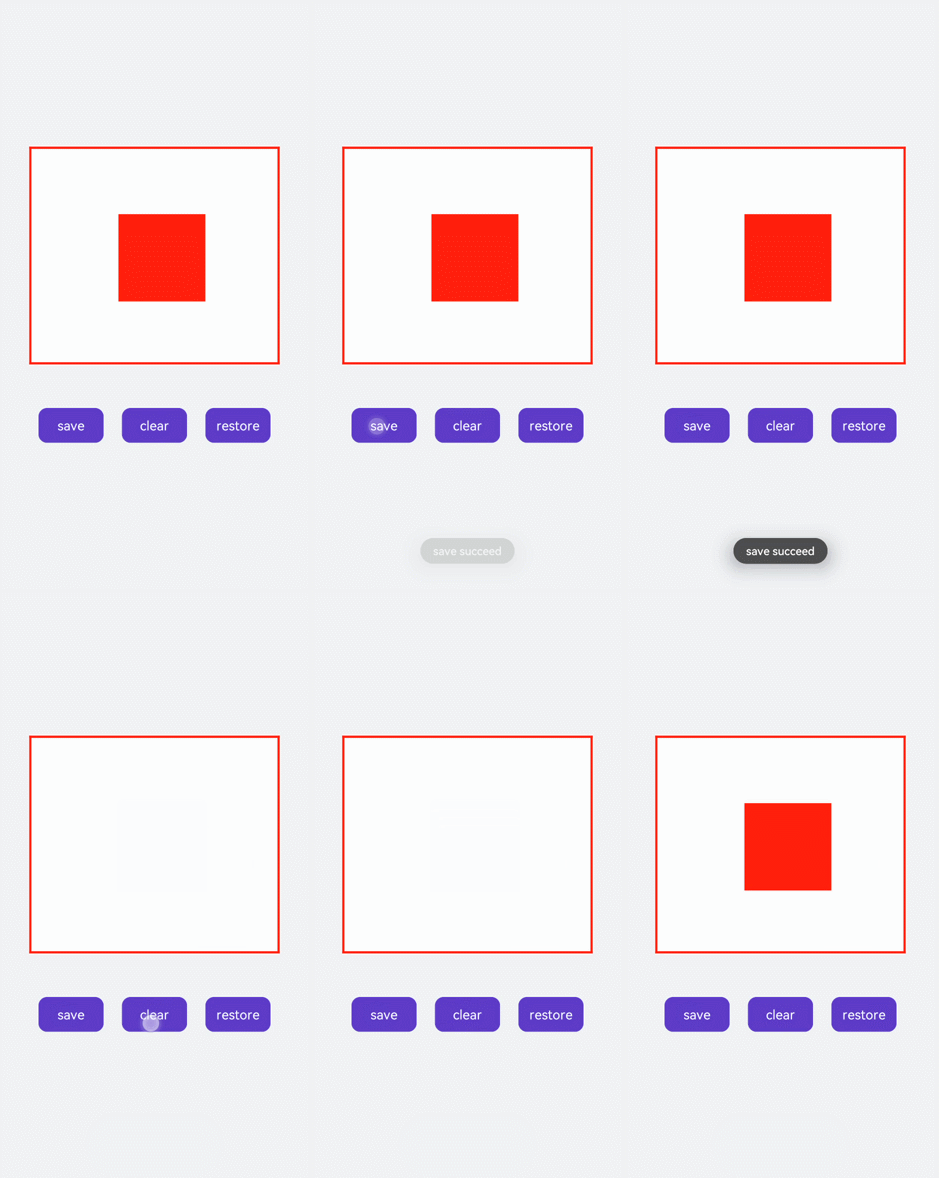
save方法可对画笔样式进行存储,restore可对存储的画笔进行恢复。如下面的示例,先设置画笔为红色,在保存画笔后对画布进行清除并改变画笔为蓝色,当我们直接使用画笔时会画出一个蓝色矩形,对存储的画笔进行恢复后就可画出红色矩形。
<!-- xxx.hml -->
<div class="container">
  <div class="content">
    <canvas ref="canvas"></canvas>
  </div>
  <div class="content">
    <text onclick="save">save</text>
    <text onclick="clear">clear</text>
    <text onclick="restore">restore</text>
  </div>
</div>
/* xxx.css */
.container{
  width: 100%;
  height: 100%;
  flex-direction: column;
  background-color: #F1F3F5;
  align-items: center;
}
canvas{
  margin-top: 300px;
  width: 600px;
  height: 500px;
  background-color: #fdfdfd;
  border: 5px solid red;
}
.content{
  width: 80%;
  margin-top: 50px;
  margin-bottom: 50px;
  display: flex;
  flex-wrap: wrap;
  justify-content: space-around;
}
text{
  width: 150px;
  height: 80px;
  color: white;
  border-radius: 20px;
  text-align: center;
  background-color: #6060e7;
  margin-bottom: 30px;
}
// xxx.js
import promptAction from '@ohos.promptAction';
export default {
  data:{
    ctx: '',
  },
  onShow(){
    this.ctx = this.$refs.canvas.getContext("2d");
    this.ctx.fillStyle = "red"
    this.ctx.fillRect(200, 150, 200, 200);
  },
  save(){
    // 画笔储存
    this.ctx.save();
    promptAction.showToast({message:"save succeed"});
  },
  clear(){
    this.ctx.clearRect(0,0,600,500);
    // 该变画笔颜色
    this.ctx.fillStyle = "#2133d2";
  },
  restore(){
    this.ctx.beginPath();
    // 画笔恢复
    this.ctx.restore();
    this.ctx.fillRect(200, 150, 200, 200);
  },
}
画线段
创建Path2D,使用多条线段组合图形。
<!-- xxx.hml -->
<div class="container">
  <canvas ref="canvas"></canvas>
</div>
/* xxx.css */
.container {
    flex-direction: column;
    background-color: #F1F3F5;
    align-items: center;
    justify-content: center;
    width: 100%;
    height: 100%;
}

canvas {
    width: 600px;
    height: 600px;
    background-color: #fdfdfd;
    border: 5px solid red;
}
// xxx.js
export default {
    onShow() {
        let ctx = this.$refs.canvas.getContext('2d', {
            antialias: true
        });
        let path = ctx.createPath2D();
        // 房顶
        path.moveTo(10, 300);
        path.lineTo(210, 100);
        path.lineTo(410, 300);
        // 屋子
        path.moveTo(10, 300);
        path.lineTo(410, 300);
        path.lineTo(410, 600);
        path.lineTo(10, 600);
        path.closePath();
        // 窗子
        path.moveTo(50, 450);
        path.bezierCurveTo(70, 350, 130, 350, 150, 450);
        path.closePath();
        // 门
        path.moveTo(250, 450);
        path.rect(250, 450, 100, 600);
        path.closePath();
        // 烟囱
        path.moveTo(365, 250);
        path.ellipse(310, 215, 30, 130, 0, Math.PI * 0.04, Math.PI * 1.1, 1);
        // 树
        path.moveTo(485, 450);
        path.quadraticCurveTo(510, 500, 485, 600);
        path.moveTo(550, 450);
        path.quadraticCurveTo(525, 500, 550, 600);
        path.moveTo(600, 535);
        path.arc(520, 450, 85, 0, 6);
        ctx.stroke(path);
    }
}
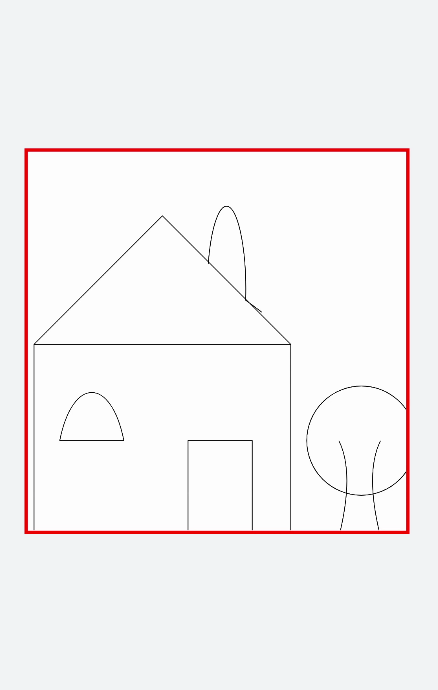
画图形
先使用createPath2D创建出路径对象,只对path1路径进行描边,所以画布上就只会出现path1的路径图形。点击text组件触发addPath方法会把path2路径对象当参数传入path1中,再对path1对象进行描边(stroke)操作后画布出现path1和path2两个图形。点击change文本改变setTransform属性值为setTransform(2, 0.1, 0.1, 2, 0,0),图形变大并向左倾斜。
<!-- xxx.hml -->
<div class="container">
    <canvas ref="canvas"></canvas>
    <div class="content">
        <text onclick="addPath">{{ isAdd }}</text>
        <text onclick="setTransform">{{ textName }}</text>
    </div>
</div>
/* xxx.css */
.container {
    flex-direction: column;
    background-color: #F1F3F5;
    align-items: center;
    justify-content: center;
    width: 100%;
    height: 100%;
}

canvas {
    width: 600px;
    height: 600px;
    background-color: #fdfdfd;
    border: 5px solid red;
}

.content {
    width: 80%;
    margin-top: 50px;
    margin-bottom: 50px;
    display: flex;
    flex-wrap: wrap;
    justify-content: space-around;
}

text {
    width: 150px;
    height: 80px;
    color: white;
    border-radius: 20px;
    text-align: center;
    background-color: #6060e7;
    margin-bottom: 30px;
}
// xxx.js
export default {
    data: {
        ctx: null,
        path1: null,
        path2: null,
        path3: null,
        isAdd: "addPath2",
        isChange: true,
        textName: 'change'
    },
    onShow() {
        this.ctx = this.$refs.canvas.getContext('2d', {
            antialias: true
        });
        this.path1 = this.ctx.createPath2D();
        // 正方形
        this.path1.moveTo(200, 200);
        this.path1.lineTo(400, 200);
        this.path1.lineTo(400, 400);
        this.path1.lineTo(200, 400);
        this.path1.closePath();
        this.path2 = this.ctx.createPath2D();
        // 圆形
        this.path2.arc(300, 300, 75, 0, 6.28);
        this.ctx.stroke(this.path1);
    },
    addPath() {
        if (this.isAdd == "addPath2") {
            // 删除指定指定区域的绘制内容
            this.ctx.clearRect(0, 0, 600, 600);
            this.ctx.beginPath();
            // 将另一个的路径添加到当前路径对象中
            this.path2.addPath(this.path1);
            this.ctx.stroke(this.path2);
            this.isAdd = "clearPath2";
        } else {
            this.ctx.clearRect(0, 0, 600, 600);
            this.ctx.stroke(this.path1);
            this.isAdd = "addPath2";
        }
    },
    setTransform() {
        if (this.isChange) {
            this.ctx.clearRect(0, 0, 600, 600);
            this.path3 = this.ctx.createPath2D();
            this.path3.arc(150, 150, 100, 0, 6.28);
            // 重置现有的变换矩阵并创建新的变换矩阵
            this.path3.setTransform(2, 0.1, 0.1, 2, 0, 0);
            this.ctx.stroke(this.path3);
            this.isChange = !this.isChange;
            this.textName = "back"
        } else {
            this.ctx.clearRect(0, 0, 600, 600);
            this.path3.setTransform(0.5, -0.1, -0.1, 0.5, 0, 0);
            this.ctx.stroke(this.path3);
            this.isChange = !this.isChange;
            this.textName = "change";
        }
    }
}
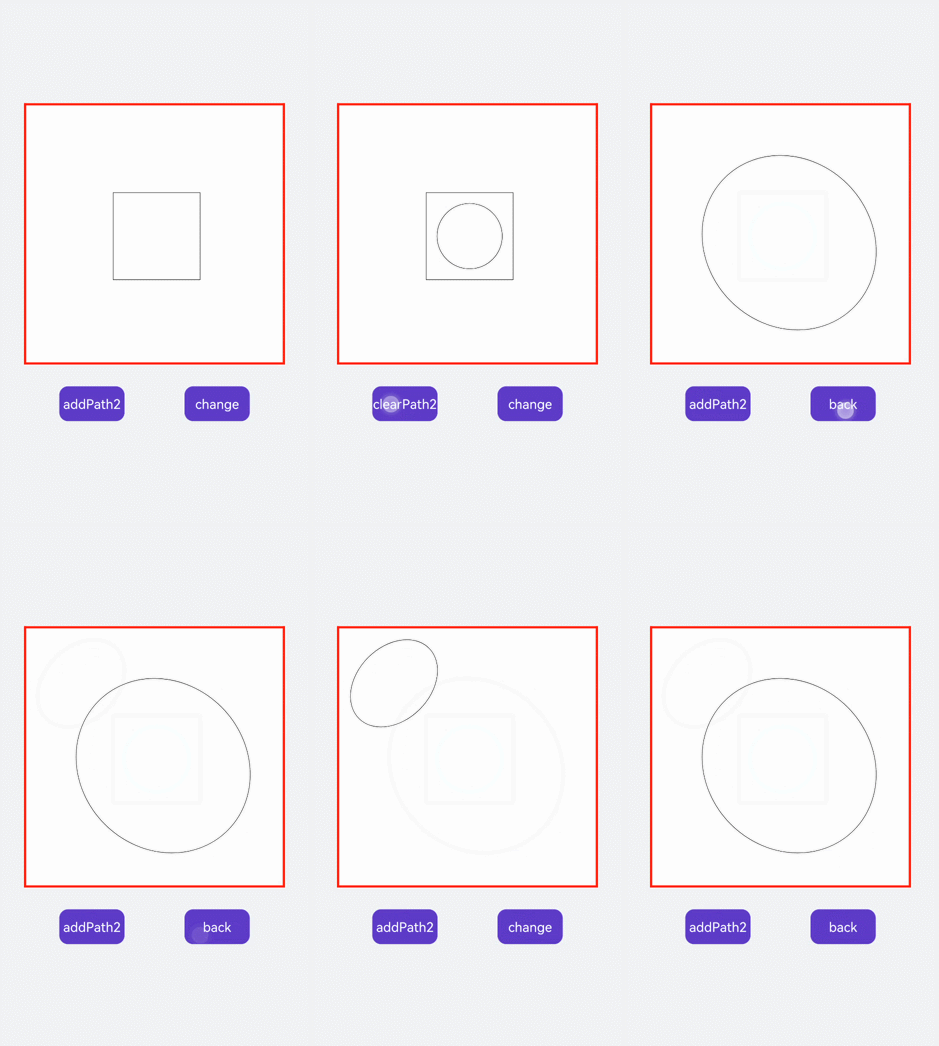
判断位置
使用isPointInPath判断坐标点是否在路径的区域内,使用isPointInStroke判断坐标点是否在路径的边缘线上,并在页面上显示返回结果。
<!-- xxx.hml -->
<div class="container">
  <div class="content">
    <text>坐标:{{X}}, {{Y}}</text>
    <text>In path:{{textValue}}</text>
    <text>In stroke:{{textValue1}}</text>
  </div>
  <canvas ref="canvas"></canvas>
  <button onclick="change">Add(50)</button>
</div>
/* xxx.css */
.container{
  width: 100%;
  height: 100%;
  flex-direction: column;
  justify-content: center;
  align-items: center;
  background-color: #F1F3F5;
}
canvas{
  width: 600px;
  height: 500px;
  background-color: #fdfdfd;
  border: 5px solid red;
}
.content{
  flex-direction: column;
  justify-content: center;
  align-items: center;
}
text{
  font-size: 30px;
  width: 300px;
  height: 80px;
  text-align: center;
}
button{
  width: 180px;
  height: 75px;
  margin-top: 50px;
}
// xxx.js
export default {
  data: {
    textValue: 0,
    textValue1: 0,
    X:0,
    Y:250,
  },
  onShow(){
    let canvas = this.$refs.canvas.getContext('2d');
    let offscreen = new OffscreenCanvas(500,500);
    let offscreenCanvasCtx = offscreen.getContext("2d");
    let offscreenCanvasCtx1 = offscreen.getContext("2d");
    offscreenCanvasCtx1.arc(this.X, this.Y, 2, 0, 6.28);
    offscreenCanvasCtx.lineWidth=20;
    offscreenCanvasCtx.rect(200,150, 200, 200);
    offscreenCanvasCtx.stroke();
    this.textValue1 = offscreenCanvasCtx.isPointInStroke(this.X, this.Y)?'true':'false';
    this.textValue = offscreenCanvasCtx.isPointInPath(this.X, this.Y)?'true':'false';
    let bitmap = offscreen.transferToImageBitmap();
    canvas.transferFromImageBitmap(bitmap);
  },
  change(){
    if(this.X < 500){
      this.X = this.X+50;
    }else{
      this.X = 0;
    }
    let canvas = this.$refs.canvas.getContext('2d');
    let offscreen = new OffscreenCanvas(500,500);
    let offscreenCanvasCtx = offscreen.getContext("2d");
    let offscreenCanvasCtx1 = offscreen.getContext("2d");
    offscreenCanvasCtx1.arc(this.X, this.Y, 1, 0, 6.28)
    offscreenCanvasCtx.lineWidth=20
    offscreenCanvasCtx.rect(200,150, 200, 200);
    offscreenCanvasCtx.stroke();
    this.textValue1 = offscreenCanvasCtx.isPointInStroke(this.X, this.Y)?'true':'false';
    this.textValue = offscreenCanvasCtx.isPointInPath(this.X, this.Y)?'true':'false';
    let bitmap = offscreen.transferToImageBitmap();
    canvas.transferFromImageBitmap(bitmap);
  }
}
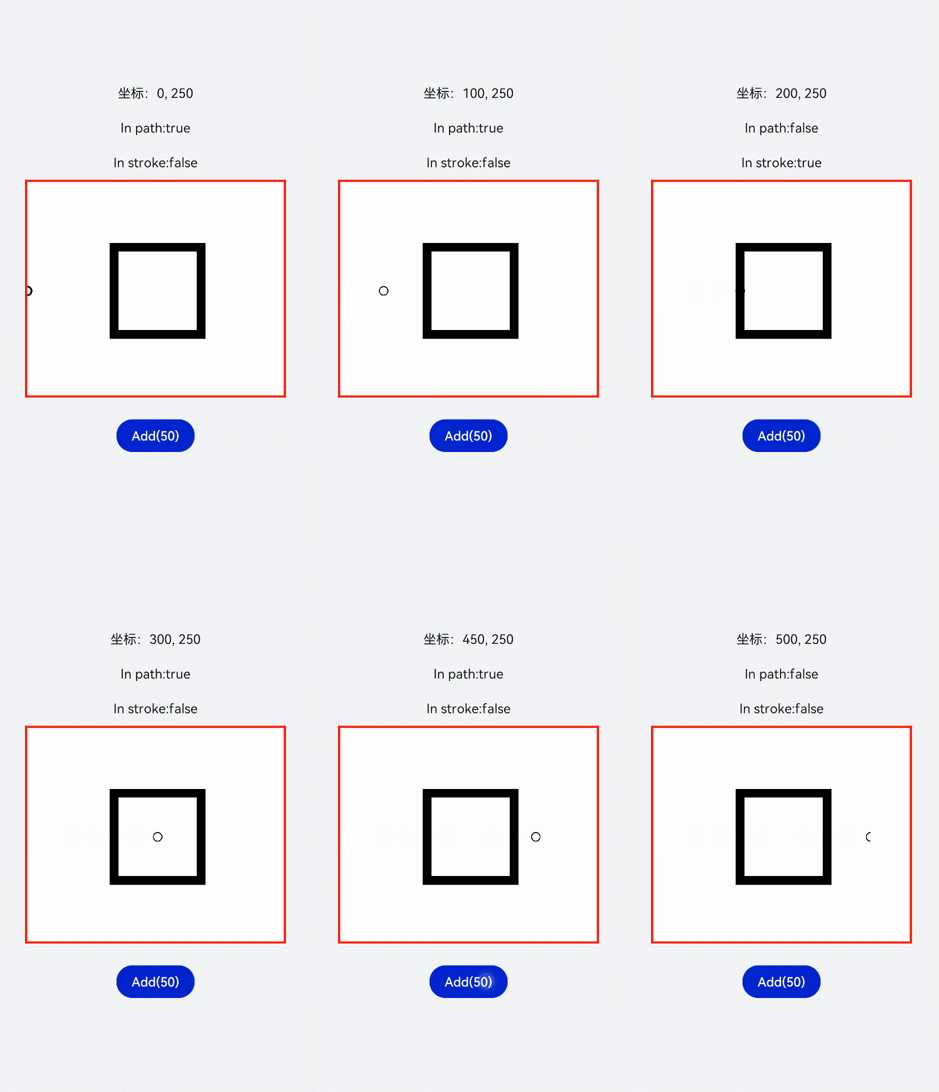
Svg开发指导
基础知识
Svg组件主要作为svg画布的根节点使用,也可以在svg中嵌套使用。具体用法请参考Svg。
说明
- 从API version 7开始支持。
- svg父组件或者svg组件需要定义宽高值,否则不进行绘制。
创建Svg组件
在pages/index目录下的hml文件中创建一个Svg组件。
<!-- xxx.hml -->
<div class="container">
  <svg width="400" height="400">  </svg>
</div>
/* xxx.css */
.container{
  width: 100%;
  height: 100%;
  flex-direction: column;
  align-items: center;
  justify-content: center;
  background-color: #F1F3F5;
}
svg{
  background-color: blue;
}
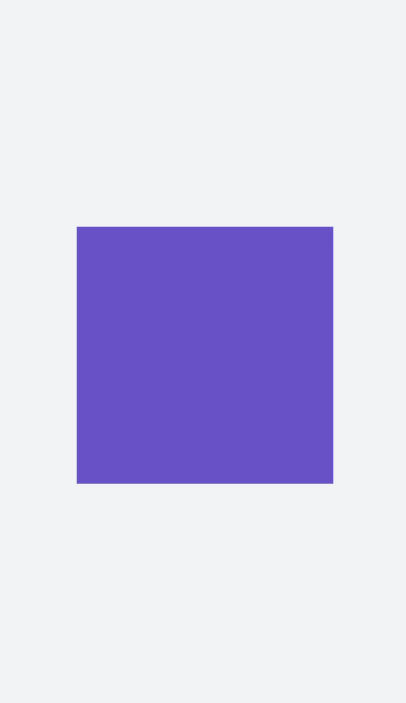
设置属性
通过设置width、height、x、y和viewBox属性为Svg设置宽度、高度、x轴坐标、y轴坐标和Svg视口。
<!-- xxx.hml -->
<div class="container">
  <svg width="200" height="200" viewBox="0 0 100 100">
    <svg class="rect" width="200" height="200" x="20" y="10">
    </svg>
  </svg>
</div>
/* xxx.css */
.container{
  width: 100%;
  height: 100%;
  flex-direction: column;
  align-items: center;
  justify-content: center;
  background-color: #F1F3F5;
}
svg{
  background-color: yellow;
}
.rect{
  background-color: red;
}
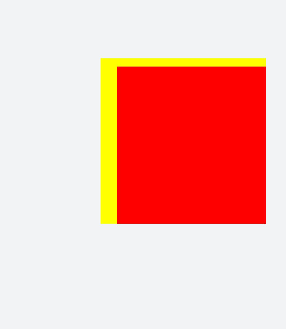
说明
- x和y设置的是当前Svg的x轴和y轴坐标,如果当前Svg为根节点,x轴和y轴属性无效。
- viewBox的宽高和svg的宽高不一致,会以中心对齐进行缩放
绘制图形
Svg组件可以用来绘制常见图形和线段,如矩形(
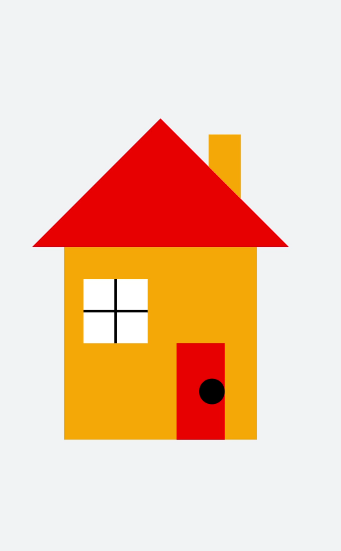
在本场景中,绘制各种图形拼接组成一个小房子。
<!-- xxx.hml -->
<div class="container">
  <svg width="1000" height="1000">
    <polygon points="100,400 300,200 500,400" fill="red"></polygon>     //屋顶
    <polygon points="375,275 375,225 425,225 425,325" fill="orange"></polygon>   //烟囱
    <rect width="300" height="300" x="150" y="400" fill="orange">      //房子
    </rect>
    <rect width="100" height="100" x="180" y="450" fill="white">    //窗户
    </rect>
    <line x1="180" x2="280" y1="500" y2="500" stroke-width="4" fill="white" stroke="black"></line>     //窗框
    <line x1="230" x2="230" y1="450" y2="550" stroke-width="4" fill="white" stroke="black"></line>     //窗框
    <polygon points="325,700 325,550 400,550 400,700" fill="red"></polygon>     //门
    <circle cx="380" cy="625" r="20" fill="black"></circle>      //门把手
  </svg>
</div>
/* xxx.css */
.container {
  width: 100%;
  height: 100%;
  flex-direction: column;
  justify-content: center;
  align-items: center;
  background-color: #F1F3F5;
}
绘制路径
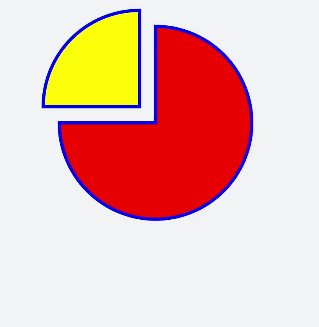
Svg组件绘制路径时,通过Path中的M(起点)、H(水平线)、a(绘制弧形到指定位置)路径控制指令,并填充颜色实现 饼状图效果。
<!-- xxx.hml -->
<div class="container">
  <svg fill="#00FF00" x="100" y="400">
    <path d="M300,200 h-150 a150 150 0 1 0 150 -150 z" fill="red" stroke="blue" stroke-width="5" >
    </path>
    <path d="M275,175 v-150 a150 150 0 0 0 -150 150 z" fill="yellow" stroke="blue" stroke-width="5">
    </path>
  </svg>
</div>
/* xxx.css */
.container {
  flex-direction: row;
  justify-content: flex-start;
  align-items: flex-start;
  height: 1200px;
  width: 600px;
  background-color: #F1F3F5;
}
说明
- M/m = moveto 参数x和y表示需要移动到点的x轴和y轴的坐标。在使用M命令移动画笔后,只会移动画笔,但不会在两点之间画线。所以M命令经常出现在路径的开始处,用来指明从何处开始画。
- L/l = lineto 参数x和y表示一个点的x轴和y轴坐标,L命令将会在当前位置和新位置(L前面画笔所在的点)之间画一条线段。
- H/h = horizontal lineto 绘制平行线。
- V/v = vertical lineto 绘制垂直线。
- C/c = curveto 三次贝塞尔曲线 设置三组坐标参数: x1 y1, x2 y2, x y。
- S/s = smooth curveto 三次贝塞尔曲线命令 设置两组坐标参数: x2 y2, x y。
- Q/q = quadratic Belzier curve 二次贝塞尔曲线 设置两组坐标参数: x1 y1, x y。
- T/t = smooth quadratic Belzier curveto 二次贝塞尔曲线命令 设置参数: x y。
- A/a = elliptical Arc 弧形命令 设置参数: rx ry x-axis-rotation(旋转角度)large-arc-flag(角度大小) sweep-flag(弧线方向) x y。large-arc-flag决定弧线是大于还是小于180度,0表示小角度弧,1表示大角度弧。sweep-flag表示弧线的方向,0表示从起点到终点沿逆时针画弧,1表示从起点到终点沿顺时针画弧。
- Z/z = closepath 从当前点画一条直线到路径的起点。
绘制文本
Svg组件还可以绘制文本。
文本
说明
- 文本的展示内容需要写在元素标签text内,可嵌套tspan子元素标签分段。
- 只支持被父元素标签svg嵌套。
- 只支持默认字体sans-serif。
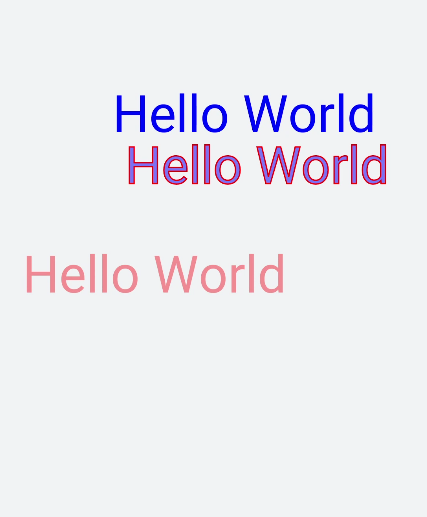
通过设置x(x轴坐标)、y(y轴坐标)、dx(文本x轴偏移)、dy(文本y轴偏移)、fill(字体填充颜色)、stroke(文本边框颜色)、stroke-width(文本边框宽度)等属性实现文本的不同展示样式。
<!-- xxx.hml -->
<div class="container">
  <svg>
    <text x="200" y="300" font-size="80px" fill="blue" >Hello World</text>    <text x="200" y="300" dx="20" dy="80" font-size="80px" fill="blue" fill-opacity="0.5" stroke="red" stroke-width="2">Hello World</text>
    <text x="20" y="550" fill="#D2691E">
      <tspan dx="40" fill="red" font-size="80" fill-opacity="0.4">Hello World </tspan>
    </text>
  </svg>
</div>
沿路径绘制文本
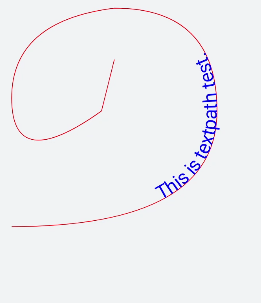
textpath文本内容沿着属性path中的路径绘制文本。
<!-- xxx.hml -->
<div class="container">
  <svg fill="#00FF00" x="100" y="400">
    <path d="M40,360 Q360,360 360,180 Q360,20 200,20 Q40,40 40,160 Q40,280 180,180 Q180,180 200,100" stroke="red" fill="none"></path>
      <text>
        <textpath fill="blue" startOffset="20%" path="M40,360 Q360,360 360,180 Q360,20 200,20 Q40,40 40,160 Q40,280 180,180 Q180,180 200,100" font-size="30px">
          This is textpath test.
        </textpath>
      </text>
  </svg>
</div>
动效开发指导
属性样式动画
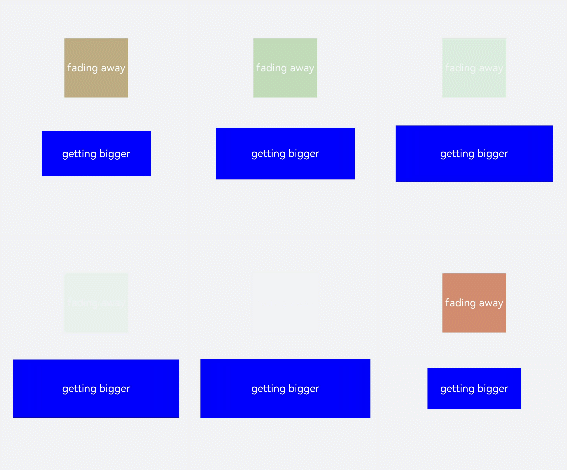
在关键帧(Keyframes)中动态设置父组件的width和height,实现组件变大缩小。子组件设置scale属性使父子组件同时缩放,再设置opacity实现父子组件的显示与隐藏。
<!-- xxx.hml -->
<div class="container">
  <div class="fade">
    <text>fading away</text>
  </div>
  <div class="bigger">
    <text>getting bigger</text>
  </div>
</div>
/* xxx.css */
.container {
  background-color:#F1F3F5;
  display: flex;
  justify-content: center;
  align-items: center;
  flex-direction: column;
  width: 100%;
  height: 100%;
}
.fade {
  width: 30%;
  height: 200px;
  left: 35%;
  top: 25%;
  position: absolute;
  animation: 2s change infinite friction;
}
.bigger {
  width: 20%;
  height: 100px;
  background-color: blue;
  animation: 2s change1 infinite linear-out-slow-in;
}
text {
  width: 100%;
  height: 100%;
  text-align: center;
  color: white;
  font-size: 35px;
  animation: 2s change2 infinite linear-out-slow-in;
}
/* 颜色变化 */
@keyframes change{
  from {
    background-color: #f76160;
    opacity: 1;
  }
  to {
    background-color: #09ba07;
    opacity: 0;
  }
}
/* 父组件大小变化 */
@keyframes change1 {
  0% {
    width: 20%;
    height: 100px;
  }
  100% {
    width: 80%;
    height: 200px;
  }
}
/* 子组件文字缩放 */
@keyframes change2 {
  0% {
    transform: scale(0);
  }
  100% {
    transform: scale(1.5);
  }
}
说明
- animation取值不区分先后,duration (动画执行时间)/ delay (动画延迟执行时间)按照出现的先后顺序解析。
- 必须设置animation-duration样式,否则时长为0则不会有动画效果。当设置animation-fill-mode属性为forwards时,组件直接展示最后一帧的样式。
transform样式动画
设置transform属性对组件进行旋转、缩放、移动和倾斜。
设置静态动画
创建一个正方形并旋转90°变成菱形,并用下方的长方形把菱形下半部分遮盖形成屋顶,设置长方形translate属性值为(150px,-150px)确定坐标位置形成门,再使用position属性使横纵线跟随父组件(正方形)移动到指定坐标位置,接着设置scale属性使父子组件一起变大形成窗户大小,最后使用skewX属性使组件倾斜后设置坐标translate(200px,-710px)得到烟囱。
<!-- xxx.hml -->
<div class="container">
  <div class="top"></div>
  <div class="content"></div>
  <div class="door"></div>
  <!-- 窗户 -->
  <div class="window">
    <div class="horizontal"></div>
    <div class="vertical"></div>
  </div>
  <div class="chimney"></div>
</div>
/* xxx.css */
.container {
  width:100%;
  height:100%;
  background-color:#F1F3F5;
  align-items: center;
  flex-direction: column;
}
.top{
  z-index: -1;
  position: absolute;
  width: 428px;
  height: 428px;
  background-color: #860303;
  transform: rotate(45deg);
  margin-top: 284px;
  margin-left: 148px;
}
.content{
  margin-top: 500px;
  width: 600px;
  height: 400px;
  background-color: white;
  border:  1px solid black;
}
.door{
  width: 100px;
  height: 135px;
  background-color: #1033d9;
  transform: translate(150px,-137px);
}
.window{
  z-index: 1;
  position: relative;
  width: 100px;
  height: 100px;
  background-color: white;
  border: 1px solid black;
  transform: translate(-150px,-400px) scale(1.5);
}
/* 窗户的横轴 */
.horizontal{
  position: absolute;
  top: 50%;
  width: 100px;
  height: 5px;
  background-color: black;
}
/* 窗户的纵轴 */
.vertical{
  position: absolute;
  left: 50%;
  width: 5px;
  height: 100px;
  background-color: black;
}
.chimney{
  z-index: -2;
  width: 40px;
  height: 100px;
  border-radius: 15px;
  background-color: #9a7404;
  transform: translate(200px,-710px) skewX(-5deg);
}
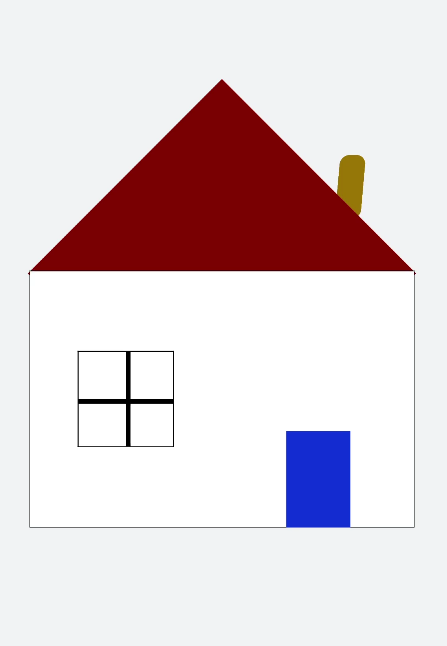
设置平移动画
小球下降动画,改变小球的Y轴坐标实现小球下落,在下一段是时间内减小Y轴坐标实现小球回弹,让每次回弹的高度逐次减小直至回弹高度为0,就模拟出了小球下降的动画。
<!-- xxx.hml -->
<div class="container">
  <div class="circle"></div>
  <div class="flower"></div>
</div>
/* xxx.css */
.container {
  width:100%;
  height:100%;
  background-color:#F1F3F5;
  display: flex;
  justify-content: center;
}
.circle{
  width: 100px;
  height: 100px;
  border-radius: 50px;
  background-color: red;
  /* forwards停在动画的最后一帧 */
  animation: down 3s fast-out-linear-in forwards;
}
.flower{
  position: fixed;
  width: 80%;
  margin-left: 10%;
  height: 5px;
  background-color: black;
  top: 1000px;
}
@keyframes down {
  0%{
    transform: translate(0px,0px);
  }
  /* 下落 */
  15%{
    transform: translate(10px,900px);
  }
  /* 开始回弹 */
  25%{
    transform: translate(20px,500px);
  }
  /* 下落 */
  35%{
    transform: translate(30px,900px);
  }
  /* 回弹 */
  45%{
    transform: translate(40px,700px);
  }
  55%{
    transform: translate(50px,900px);
  }
  65%{
    transform: translate(60px,800px);
  }
  80%{
    transform: translate(70px,900px);
  }
  90%{
    transform: translate(80px,850px);
  }
  /* 停止 */
  100%{
    transform: translate(90px,900px);
  }
}
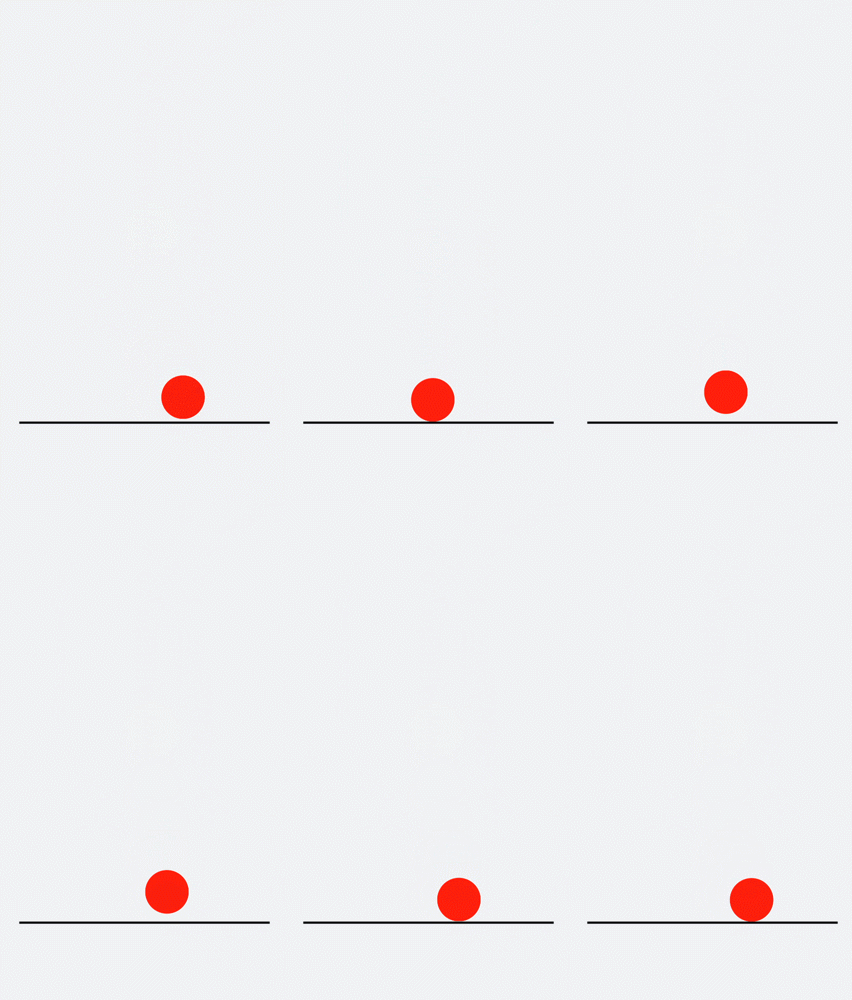
设置旋转动画
设置不同的原点位置(transform-origin)改变元素所围绕的旋转中心。rotate3d属性前三个参数值分别为X轴、Y轴、Z轴的旋转向量,第四个值为旋转角度,旋转向角度可为负值,负值则代表旋转方向为逆时针方向。
<!-- xxx.hml -->
<div class="container">
  <div class="rotate">
    <div class="rect rect1"></div>
    <div class="rect rect2"></div>
    <div class="rect rect3"></div>
  </div>
  <!-- 3d属性 -->
  <div class="rotate3d">
    <div class="content">
        <div class="rect4"></div>
        <div class="rect5"> </div>
    </div>
    <div class="mouse"></div>
  </div>
</div>
/* xxx.css */
.container {
    flex-direction: column;
    background-color:#F1F3F5;
    display: flex;
    align-items: center;
    justify-content: center;
    width: 100%;
    height: 100%;
}
.rect {
    width: 100px;
    height: 100px;
    animation: rotate 3s infinite;
    margin-left: 30px;
}
.rect1 {
    background-color: #f76160;
}
.rect2 {
    background-color: #60f76f;
/* 改变原点位置*/
    transform-origin: 10% 10px;
}
.rect3 {
    background-color: #6081f7;
/*  改变原点位置*/
    transform-origin: right bottom;
}
@keyframes rotate {
    from {
        transform: rotate(0deg)
    }
    to {
        transform: rotate(360deg);
    }
}
/* 3d示例样式 */
.rotate3d {
    margin-top: 150px;
    flex-direction: column;
    background-color:#F1F3F5;
    display: flex;
    align-items: center;
    width: 80%;
    height: 600px;
    border-radius: 300px;
    border: 1px solid #ec0808;
}
.content {
    padding-top: 150px;
    display: flex;
    align-items: center;
    justify-content: center;
}
/* react4 react5 翻转形成眼睛 */
.rect4 {
    width: 100px;
    height: 100px;
    animation: rotate3d1 1000ms infinite;
    background-color: darkmagenta;
}
.rect5 {
    width: 100px;
    height: 100px;
    animation: rotate3d1 1000ms infinite;
    margin-left: 100px;
    background-color: darkmagenta;
}
.mouse {
    margin-top: 150px;
    width: 200px;
    height: 100px;
    border-radius: 50px;
    border: 1px solid #e70303;
    animation: rotate3d2 1000ms infinite;
}
/* 眼睛的动效 */
@keyframes rotate3d1 {
    0% {
        transform:rotate3d(0,0,0,0deg)
    }
    50% {
        transform:rotate3d(20,20,20,360deg);
    }
    100% {
        transform:rotate3d(0,0,0,0deg);
    }
}
/* 嘴的动效 */
@keyframes rotate3d2 {
    0% {
        transform:rotate3d(0,0,0,0deg)
    }
    33% {
        transform:rotate3d(0,0,10,30deg);
    }
    66% {
        transform:rotate3d(0,0,10,-30deg);
    }
    100% {
        transform:rotate3d(0,0,0,0deg);
    }
}
说明
transform-origin变换对象的原点位置,如果仅设置一个值,另一个值为50%,若设置两个值第一个值表示X轴的位置,第二个值表示Y轴的位置。
设置缩放动画
设置scale样式属性实现涟漪动画,先使用定位确定元素的位置,确定坐标后创建多个组件实现重合效果,再设置opacity属性改变组件不透明度实现组件隐藏与显示,同时设置scale值使组件可以一边放大一边隐藏,最后设置两个组件不同的动画执行时间,实现扩散的效果。
设置sacle3d中X轴、Y轴、Z轴的缩放参数实现动画。
<!-- xxx.hml -->
<div class="container">
  <div class="circle">
    <text>ripple</text>
  </div>
  <div class="ripple"></div>
  <div class="ripple ripple2"></div>
  <!-- 3d -->
  <div class="content">
    <text>spring</text>
  </div>
</div>
/* xxx.css */
.container {
    flex-direction: column;
    background-color:#F1F3F5;
    width: 100%;
    position: relative;
}
.circle{
    margin-top: 400px;
    margin-left: 40%;
    width: 100px;
    height: 100px;
    border-radius: 50px;
    background-color: mediumpurple;
    z-index: 1;  position: absolute;
}
.ripple{
    margin-top: 400px;
    margin-left: 40%;
    position: absolute;  z-index: 0;
    width: 100px;
    height: 100px;
    border-radius: 50px;
    background-color: blueviolet;
    animation: ripple 5s infinite;
}
/* 设置不同的动画时间 */
.ripple2{
    animation-duration: 2.5s;
}
@keyframes ripple{
    0%{
        transform: scale(1);
        opacity: 0.5;
    }
    50%{
        transform: scale(3);
        opacity: 0;
    }
    100%{
        transform: scale(1);
        opacity: 0.5;
    }
}
text{
    color: white;
    text-align: center;
    height: 100%;
    width: 100%;
}
.content {
    margin-top: 700px;
    margin-left: 33%;
    width: 200px;
    height: 100px;
    animation:rubberBand 1s infinite;
    background-color: darkmagenta;
    position: absolute;
}
@keyframes rubberBand {
    0% {
        transform: scale3d(1, 1, 1);
    }
    30% {
        transform: scale3d(1.25, 0.75, 1.1);
    }
    40% {
        transform: scale3d(0.75, 1.25, 1.2);
    }
    50% {
        transform: scale3d(1.15, 0.85, 1.3);
    }
    65% {
        transform: scale3d(.95, 1.05, 1.2);
    }
    75% {
        transform: scale3d(1.05, .95, 1.1);
    }
    100%{
        transform: scale3d(1, 1, 1);
    }
}
说明
设置transform属性值后,子元素会跟着父元素一起改变,若只改变父元素其他属性值时(如:height,width),子元素不会改变。
设置matrix属性
matrix是一个入参为六个值的矩阵,6个值分别代表:scaleX, skewY, skewX, scaleY, translateX, translateY。下面示例中设置 了matrix属性为matrix(1,0,0,1,0,200)使组件移动和倾斜。
<!-- xxx.hml -->
<div class="container">
  <div class="rect"> </div>
</div>
/* xxx.css */
.container{
  background-color:#F1F3F5;
  display: flex;
  justify-content: center;
  width: 100%;
  height: 100%;
}
.rect{
  width: 100px;
  height: 100px;
  background-color: red;
  animation: down 3s infinite forwards;
}
@keyframes down{
  0%{
    transform: matrix(1,0,0,1,0,0);
  }
  10%{
    transform: matrix(1,0,0,1,0,200);
  }
  60%{
    transform: matrix(2,1.5,1.5,2,0,700);
  }
  100%{
    transform: matrix(1,0,0,1,0,0);
  }
}
整合transform属性
transform可以设置多个值并且多个值可同时设置,下面案例中展示同时设置缩放(scale),平移(translate),旋转(rotate)属性时的动画效果。
<!-- xxx.hml -->
<div class="container">
  <div class="rect1"></div>
  <div class="rect2"></div>
  <div class="rect3"></div>
  <div class="rect4"></div>
  <div class="rect5"></div>
</div>
/* xxx.css */
.container{
    width: 100%;
    height: 100%;
    flex-direction:column;
    background-color:#F1F3F5;
    padding:50px;
}
.rect1{
    width: 100px;
    height: 100px;
    background-color: red;
    animation: change1 3s infinite forwards;
}
.rect2{
    margin-top: 50px;
    width: 100px;
    height: 100px;
    background-color: darkblue;
    animation: change2 3s infinite forwards;
}
.rect3{
    margin-top: 50px;
    width: 100px;
    height: 100px;
    background-color: darkblue;
    animation: change3 3s infinite;
}
.rect4{
    align-self: center;
    margin-left: 50px;
    margin-top: 200px;
    width: 100px;
    height: 100px;
    background-color: darkmagenta;
    animation: change4 3s infinite;
}
.rect5{
    margin-top: 300px;
    width: 100px;
    height: 100px;
   background-color: cadetblue;
    animation: change5 3s infinite;
}
/* change1 change2 对比 */
@keyframes change1{
    0%{
        transform: translate(0,0);    transform: rotate(0deg)
    }
    100%{
        transform: translate(0,500px);
        transform: rotate(360deg)
    }
}
/* change2 change3 对比属性顺序不同的动画效果 */
@keyframes change2{
    0%{
        transform:translate(0,0) rotate(0deg) ;
    }
    100%{
        transform: translate(300px,0) rotate(360deg);
    }
}
@keyframes change3{
    0%{
        transform:rotate(0deg) translate(0,0);
    }
    100%{
        transform:rotate(360deg)  translate(300px,0);
    }
}
/* 属性值不对应的情况 */
@keyframes change4{
    0%{
        transform: scale(0.5);
    }
    100%{
        transform:scale(2) rotate(45deg);
    }
}
/* 多属性的写法 */
@keyframes change5{
    0%{
        transform:scale(0) translate(0,0) rotate(0);
    }
    100%{
        transform: scale(1.5) rotate(360deg) translate(200px,0);
    }
}
说明
- 当设置多个transform时,后续的transform值会把前面的覆盖掉。若想同时使用多个动画样式可用复合写法,例:transform: scale(1) rotate(0) translate(0,0)。
- transform进行复合写法时,变化样式内多个样式值顺序的不同会呈现不一样的动画效果。
- transform属性设置的样式值要一一对应,若前后不对应,则该动画不生效。若设置多个样式值则只会呈现出已对应值的动画效果。
background-position样式动画
通过改变background-position属性(第一个值为X轴的位置,第二个值为Y轴的位置)移动背景图片位置,若背景图位置超出组件则超出部分的背景图不显示。
<!-- xxx.hml -->
<div class="container">
  <div class="content"></div>
  <div class="content1"></div>
</div>
/* xxx.css */
.container {
  height: 100%;
  background-color:#F1F3F5;
  display: flex;
  flex-direction: column;
  justify-content: center;
  align-items: center;
  width: 100%;
}
.content{
  width: 400px;
  height: 400px;
  /* 不建议图片长宽比为1:1 */
  background-image: url('common/images/bg-tv.jpg');
  background-size: 100%;
  background-repeat: no-repeat;
  animation: change 3s infinite;
  border: 1px solid black;
}
.content1{
  margin-top:50px;
  width: 400px;
  height: 400px;
  background-image: url('common/images/bg-tv.jpg');
  background-size: 50%;
  background-repeat: no-repeat;
  animation: change1 5s infinite;
  border: 1px solid black;
}
/* 背景图片移动出组件 */
@keyframes change{
  0%{
    background-position:0px top;
  }
  25%{
    background-position:400px top;
  }
  50%{
    background-position:0px top;
  }
  75%{
    background-position:0px bottom;
  }
  100%{
    background-position:0px top;
  }
}
/* 背景图片在组件内移动 */
@keyframes change1{
  0%{
    background-position:left top;
  }
  25%{
    background-position:50% 50%;
  }
  50%{
    background-position:right bottom;
  }
  100%{
    background-position:left top;;
  }
}
说明
background-position仅支持背景图片的移动,不支持背景颜色(background-color)。
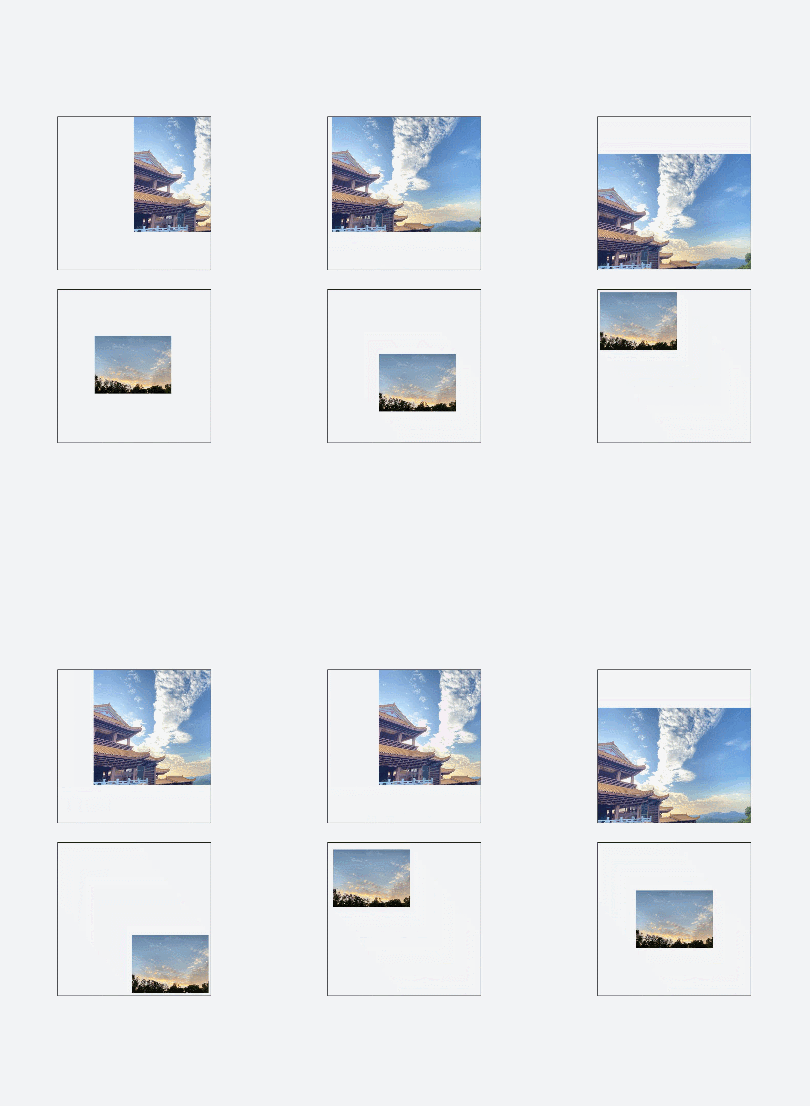
svg动画
属性样式动画
在Svg的子组件animate中,通过attributeName设置需要进行动效的属性,from设置开始值,to设置结束值。
<!-- xxx.hml -->
<div class="container">
  <svg>
    <text x="300" y="300" fill="blue">
      Hello
      <animate attributeName="font-size" from="30" to="60" dur="3s" repeatCount="indefinite">
      </animate>
      <animate attributeName="fill" from="red" to="blue" dur="3s" repeatCount="indefinite">
      </animate>
      <animate attributeName="opacity" from="1" to="0.3" dur="3s" repeatCount="indefinite">
      </animate>
    </text>
    <text x="300" y="600" fill="blue">
      World
      <animate attributeName="font-size" from="30" to="60" values="30;80" dur="3s" repeatCount="indefinite">
      </animate>
      <animate attributeName="fill" from="red" to="blue"  dur="3s" repeatCount="indefinite">
      </animate>
      <animate attributeName="opacity" from="0.3" to="1" dur="3s" repeatCount="indefinite">
      </animate>
    </text>
  </svg>
</div>
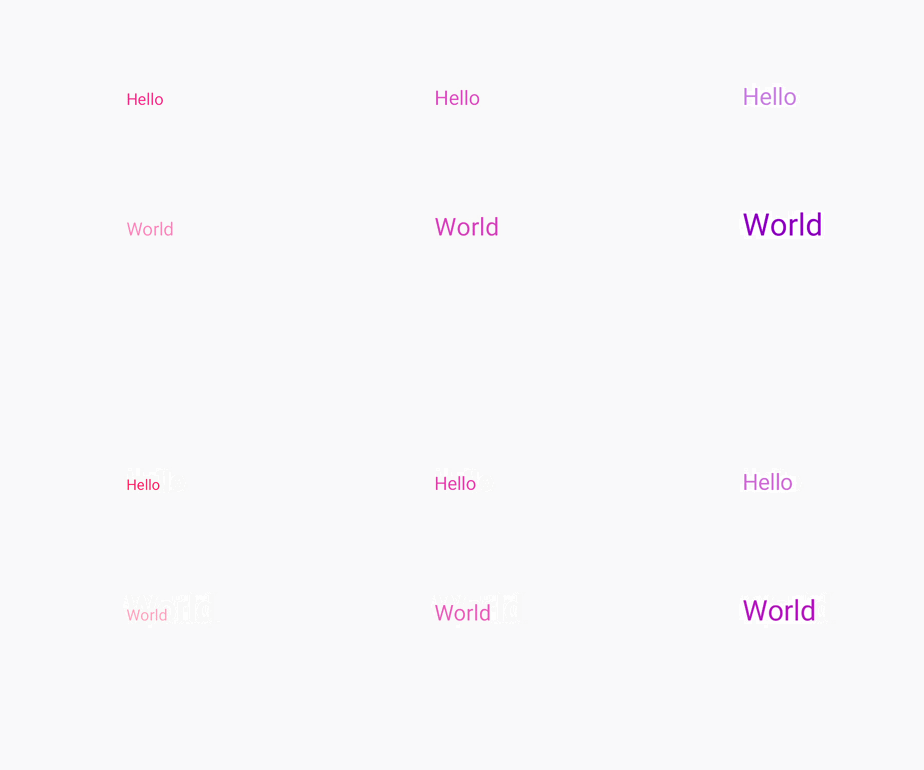
说明
在设置动画变化值时,如果已经设置了values属性,则from和to都失效。
路径动画
在Svg的子组件animateMotion中,通过path设置动画变化的路径。
<!-- xxx.hml -->
<div class="container">
  <svg fill="white" width="800" height="900">
    <path d="M300,200 h-150 a150 150 0 1 0 150 -150 z" fill="white" stroke="blue" stroke-width="5" >
    </path>
    <path fill="red" d="M-5,-5 L10,0 L-5,5 L0,0 Z"  >
      <animateMotion dur="2000" repeatCount="indefinite" rotate="auto-reverse"path="M300,200 h-150 a150 150 0 1 0 150 -150 z">
      </animateMotion>
    </path>
  </svg>
</div>
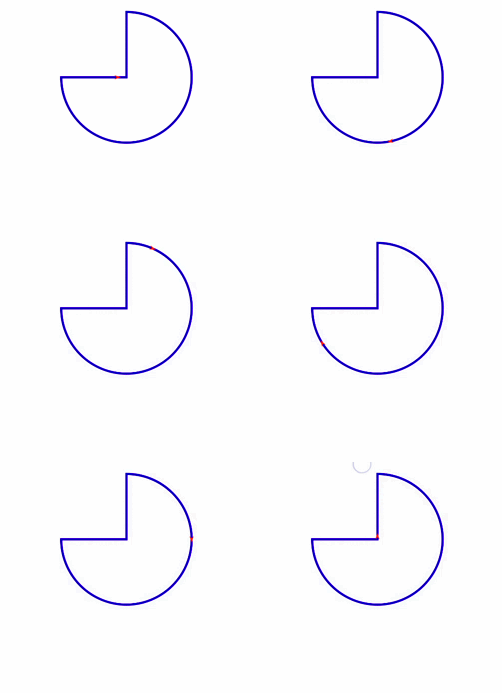
animateTransform动画
在Svg的子组件animateTransform中,通过attributeName绑定transform属性,type设置动画类型,from设置开始值,to设置结束值。
<!-- xxx.hml -->
<div class="container" style="">
    <svg>
        <line x1="90" y1="300" x2="90" y2="730" stroke-width="10" stroke="black" stroke-linecap="round">
            <animateTransform attributeName="transform" attributeType="XML" type="translate"  dur="3s" values="0;30;10;30;20;30;25;30" keyTimes="0;0.3;0.5;0.7;0.8;0.9;1.0;1.1"
                              fill="freeze">
            </animateTransform>
        </line>
        <circle cx="500" cy="500" r="50" stroke-width="15" fill="red" stroke="#e70d0d">
            <animateTransform attributeName="transform" attributeType="XML" type="rotate"  dur="3s" values="0;30;10;30;20;30;25;30" keyTimes="0;0.3;0.5;0.7;0.8;0.9;1.0;1.1" fill="freeze">
            </animateTransform>
            <animateTransform attributeName="transform" attributeType="XML" type="scale"  dur="6s" values="1;1;1.3" keyTimes="0;0.5;1" fill="freeze"></animateTransform>
            <animateTransform attributeName="transform" attributeType="XML" type="translate"  dur="9s" values="0;0;300 7" keyTimes="0;0.6;0.9" fill="freeze"></animateTransform>
        </circle>
        <line x1="650" y1="300" x2="650" y2="600" stroke-width="20" stroke="blue" stroke-linecap="round">
            <animateTransform attributeName="transform" attributeType="XML" type="translate"  dur="9s" values="0;0;0 800" keyTimes="0;0.6;1" fill="freeze"></animateTransform>
        </line>
    </svg>
</div>
/* xxx.css */
.container {
  flex-direction: column;
  align-items: center;
  width: 100%;
  height: 100%;
  background-color: #F1F3F5;
}
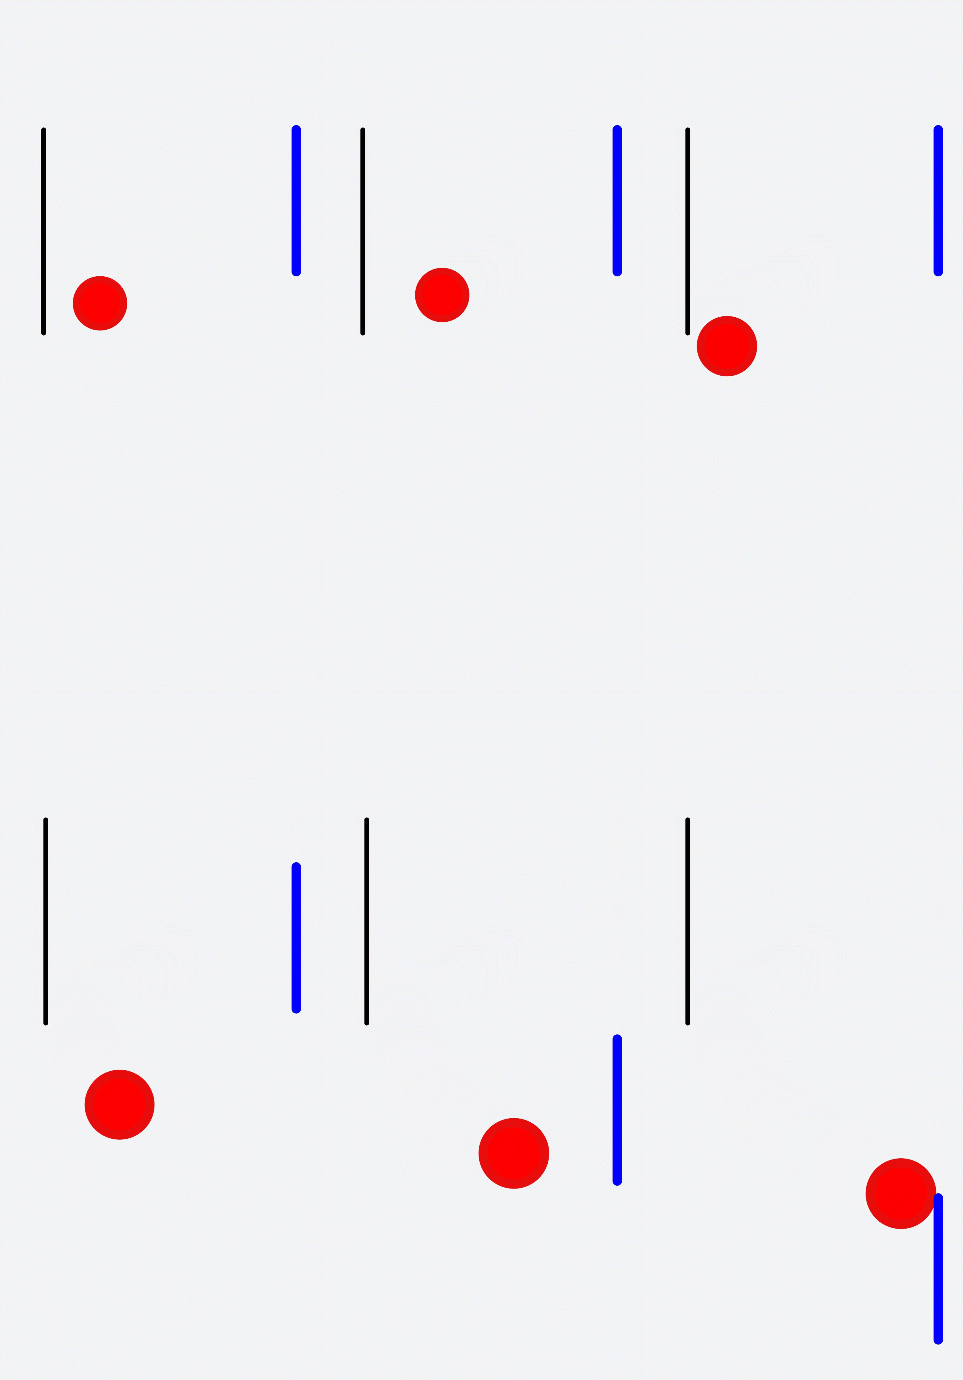
JS动画
组件动画
获取动画对象
通过调用animate方法获得animation对象,animation对象支持动画属性、动画方法和动画事件。
<!-- xxx.hml -->
<div class="container">
  <div id="content" class="box" onclick="Show"></div>
</div>
/* xxx.css */
.container {
  flex-direction: column;
  justify-content: center;
  align-items: center;
  width: 100%;
}
.box{
  width: 200px;
  height: 200px;
  background-color: #ff0000;
  margin-top: 30px;
}
/* xxx.js */
export default {
  data: {
    animation: '',
  },
  onInit() {
  },
  onShow() {
    var options = {
      duration: 1500,
    };
    var frames = [
      {
        width:200,height:200,
      },
      {
        width:300,height:300,
      }
    ];
    this.animation = this.$element('content').animate(frames, options);  //获取动画对象
  },
  Show() {
    this.animation.play();
  }
}
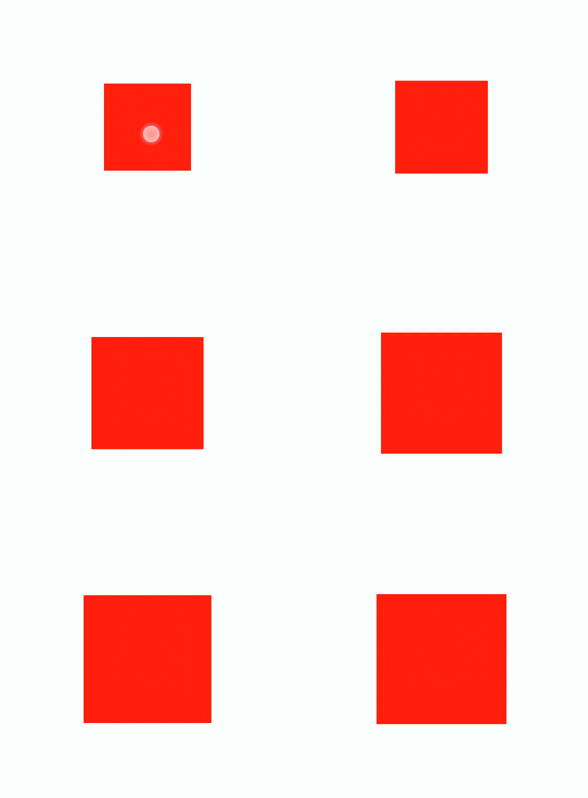
说明
- 使用animate方法时必须传入Keyframes和Options参数。
- 多次调用animate方法时,采用replace策略,即最后一次调用时传入的参数生效。
设置动画参数
在获取动画对象后,通过设置参数Keyframes设置动画在组件上的样式。
<!-- xxx.hml -->
<div class="container">
   <div id="content" class="box" onclick="Show"></div>
</div>
/* xxx.css */
.container {
  flex-direction: column;
  justify-content: center;
  align-items: center;
  width: 100%;
  height: 100%;
}
.box{
  width: 200px;
  height: 200px;
  background-color: #ff0000;
  margin-top: 30px;
}
/* xxx.js */
export default {
  data: {
    animation: '',
    keyframes:{},
    options:{}
  },
  onInit() {
    this.options = {
      duration: 4000,
    }
    this.keyframes = [
    {
      transform: {
        translate: '-120px -0px',
        scale: 1,
        rotate: 0
        },
        transformOrigin: '100px 100px',
        offset: 0.0,
        width: 200,
        height: 200
      },
      {
        transform: {
          translate: '120px 0px',
          scale: 1.5,
          rotate: 90
          },
          transformOrigin: '100px 100px',
          offset: 1.0,
          width: 300,
          height: 300
      }
    ]
  },
  Show() {
    this.animation = this.$element('content').animate(this.keyframes, this.options)
    this.animation.play()
  }
}
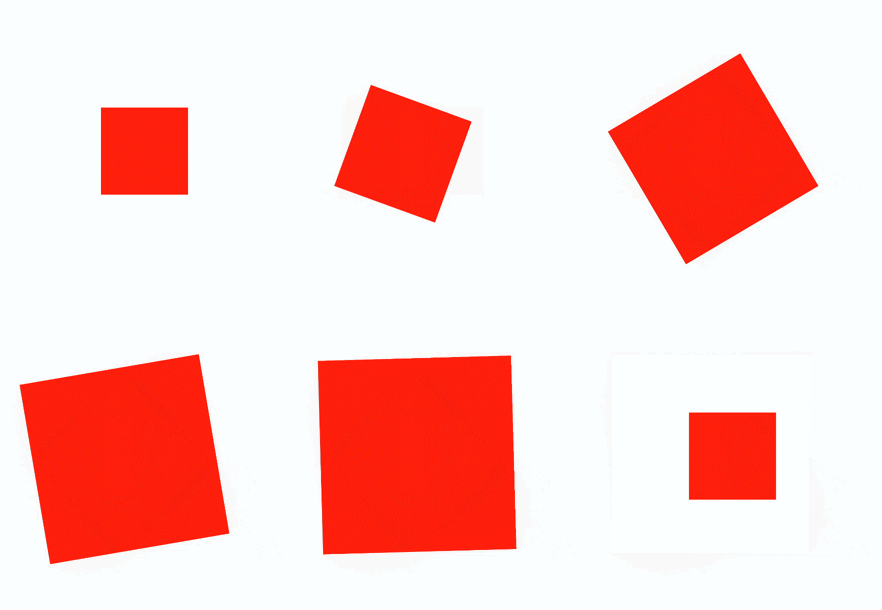
说明
- translate、scale和rtotate的先后顺序会影响动画效果。
- transformOrigin只对scale和rtotate起作用。
在获取动画对象后,通过设置参数Options来设置动画的属性。
<!-- xxx.hml -->
<div class="container">
   <div id="content" class="box" onclick="Show"></div>
</div>
/* xxx.css */
.container {
  flex-direction: column;
  justify-content: center;
  align-items: center;
  width: 100%;
}
.box{
  width: 200px;
  height: 200px;
  background-color: #ff0000;
  margin-top: 30px;
}
/* xxx.js */
export default {
  data: {
    animation: '',
  },
  onInit() {
  },
  onShow() {
    var options = {
        duration: 1500,
        easing: 'ease-in',
        delay: 5,
        iterations: 2,
        direction: 'normal',
    };
    var frames = [
      {
        transform: {
          translate: '-150px -0px'
        }
      },
      {
        transform: {
          translate: '150px 0px'
        }
      }
    ];
    this.animation = this.$element('content').animate(frames, options);
  },
  Show() {
    this.animation.play();
  }
}
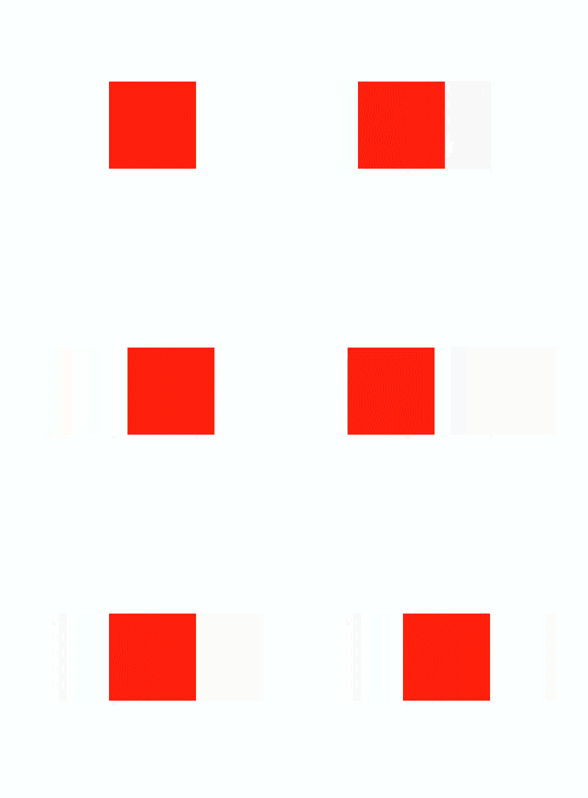
说明
direction:指定动画的播放模式。
normal: 动画正向循环播放。
reverse: 动画反向循环播放。
alternate:动画交替循环播放,奇数次正向播放,偶数次反向播放。
alternate-reverse:动画反向交替循环播放,奇数次反向播放,偶数次正向播放。
插值器动画
创建动画对象
通过createAnimator创建一个动画对象,通过设置参数options来设置动画的属性。
<!-- xxx.hml -->
<div class="container">
  <div style="width: 300px;height: 300px;margin-top: 100px;background: linear-gradient(pink, purple);transform: translate({{translateVal}});">
  </div>
  <div class="row">
    <button type="capsule" value="play" onclick="playAnimation"></button>
  </div>
</div>
/* xxx.css */
.container {
  width:100%;
  height:100%;
  flex-direction: column;
  align-items: center;
  justify-content: center;
}
button{
  width: 200px;
}
.row{
  width: 65%;
  height: 100px;
  align-items: center;
  justify-content: space-between;
  margin-top: 50px;
  margin-left: 260px;
}
// xxx.js
import animator from '@ohos.animator';
export default {
  data: {
    translateVal: 0,
    animation: null
  },
  onInit() {},
  onShow(){
    var options = {
      duration: 3000,
      easing:"friction",
      delay:"1000",
      fill: 'forwards',
      direction:'alternate',
      iterations: 2,
      begin: 0,
      end: 180
    };//设置参数
    this.animation = animator.createAnimator(options)//创建动画
  },
  playAnimation() {
    var _this = this;
    this.animation.onframe = function(value) {
      _this.translateVal= value
    };
    this.animation.play();
  }
}
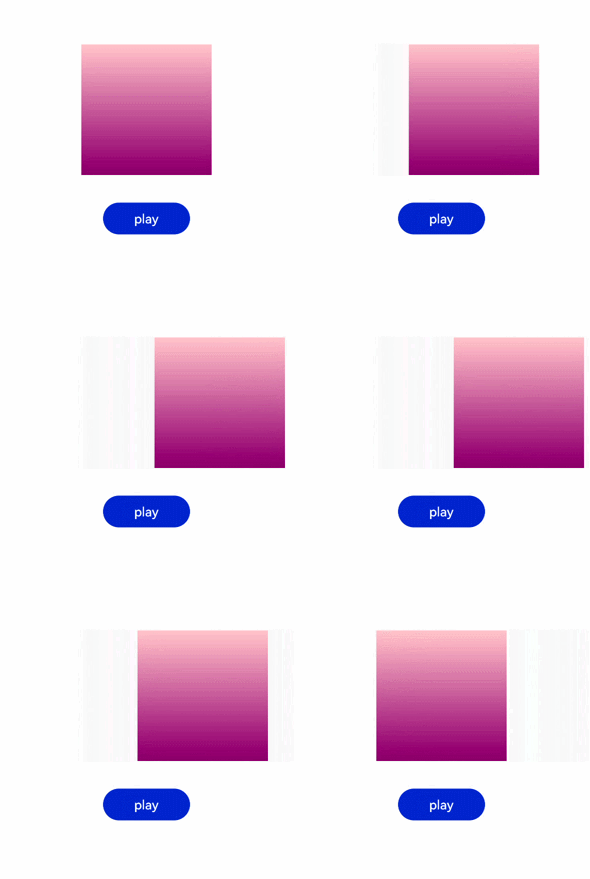
说明
- 使用createAnimator创建动画对象时必须传入options参数。
- begin插值起点,不设置时默认为0。
- end插值终点,不设置时默认为1。
添加动画事件和调用接口
animator支持事件和接口,可以通过添加frame、cancel、repeat、finish事件和调用update、play、pause、cancel、reverse、finish接口自定义动画效果。animator支持的事件和接口具体见动画中的createAnimator。
<!-- xxx.hml -->
<div style="flex-direction: column;align-items: center;width: 100%;height: 100%;">
  <div style="width:200px;height: 200px;margin-top: 100px;background: linear-gradient(#b30d29, #dcac1b);
  transform: scale({{scaleVal}});"></div>
  <div style="width: {{DivWidth}};height: {{DivHeight}};margin-top: 200px;
  background: linear-gradient(pink, purple);margin-top: 200px;transform:translateY({{translateVal}});">
  </div>
  <div class="row">
    <button type="capsule" value="play" onclick="playAnimation"></button>
    <button type="capsule" value="update" onclick="updateAnimation"></button>
  </div>
  <div class="row1">
    <button type="capsule" value="pause" onclick="pauseAnimation"></button>
    <button type="capsule" value="finish" onclick="finishAnimation"></button>
  </div>
  <div class="row2">
    <button type="capsule" value="cancel" onclick="cancelAnimation"></button>
    <button type="capsule" value="reverse" onclick="reverseAnimation"></button>
  </div>
</div>
/* xxx.css */
button{
  width: 200px;
}
.row{
  width: 65%;
  height: 100px;
  align-items: center;
  justify-content: space-between;
  margin-top: 150px;
  position: fixed;
  top: 52%;
  left: 120px;
}
.row1{
  width: 65%;
  height: 100px;
  align-items: center;
  justify-content: space-between;
  margin-top: 120px;
  position: fixed;
  top: 65%;
  left: 120px;
}
.row2{
  width: 65%;
  height: 100px;
  align-items: center;
  justify-content: space-between;
  margin-top: 100px;
  position: fixed;
  top: 75%;
  left: 120px;
}
// xxx.js
import animator from '@ohos.animator';
import promptAction from '@ohos.promptAction';
export default {
  data: {
    scaleVal:1,
    DivWidth:200,
    DivHeight:200,
    translateVal:0,
    animation: null
  },
  onInit() {
    var options = {
      duration: 3000,
      fill: 'forwards',
      begin: 200,
      end: 270
    };
    this.animation = animator.createAnimator(options);
  },
  onShow() {
    var _this= this;
    //添加动画重放事件
    this.animation.onrepeat = function() {
      promptAction.showToast({
        message: 'repeat'
      });
      var repeatoptions = {
        duration: 2000,
        iterations: 1,
         direction: 'alternate',
         begin: 180,
         end: 240
       };
        _this.animation.update(repeatoptions);
        _this.animation.play();
      };
  },
  playAnimation() {
    var _this= this;
    //添加动画逐帧插值回调事件
    this.animation.onframe = function(value) {
      _this. scaleVal= value/150,
      _this.DivWidth = value,
      _this.DivHeight = value,
      _this.translateVal = value-180
    };
    this.animation.play();
  },
  updateAnimation() {
    var newoptions = {
      duration: 5000,
      iterations: 2,
      begin: 120,
      end: 180
    };
    this.animation.update(newoptions);
    this.animation.play();//调用动画播放接口
  },
  pauseAnimation() {
    this.animation.pause();//调用动画暂停接口
  },
  finishAnimation() {
    var _this= this;
   //添加动画完成事件
    this.animation.onfinish = function() {
      promptAction.showToast({
        message: 'finish'
      })
    };
    this.animation.finish(); //调用动画完成接口
  },
  cancelAnimation() {
    this.animation.cancel(); //调用动画取消接口
  },
  reverseAnimation() {
    this.animation.reverse(); //调用动画倒放接口
  }
}
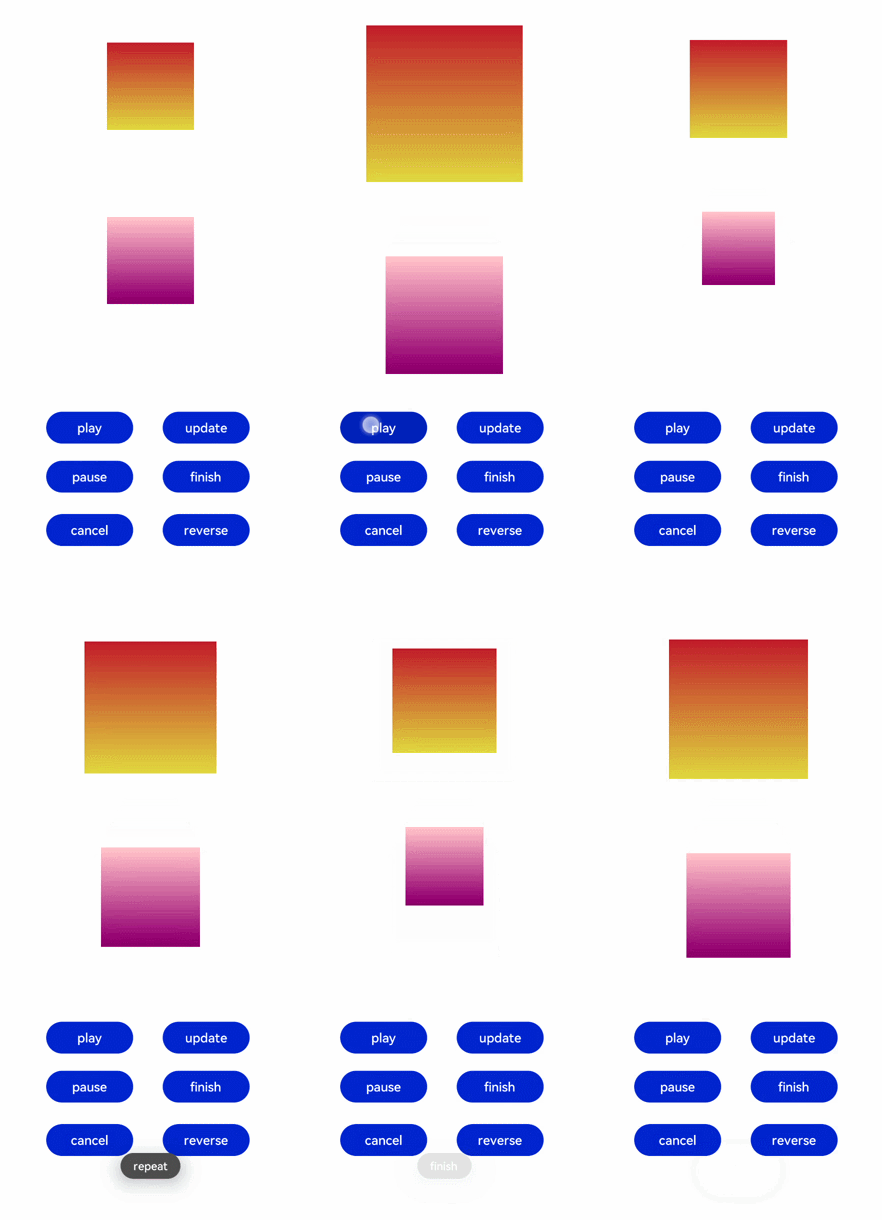
说明
在调用update接口的过程中可以使用这个接口更新动画参数,入参与createAnimator一致。
动画帧
请求动画帧
请求动画帧时通过requestAnimationFrame函数逐帧回调,在调用该函数时传入一个回调函数。
runframe在调用requestAnimationFrame时传入带有timestamp参数的回调函数step,将step中的timestamp赋予起始的startTime。当timestamp与startTime的差值小于规定的时间时将再次调用requestAnimationFrame,最终动画将会停止。
<!-- xxx.hml -->
<div class="container">
  <tabs onchange="changecontent">
    <tab-content>
      <div class="container">
        <stack style="width: 300px;height: 300px;margin-top: 100px;margin-bottom: 100px;">
          <canvas id="mycanvas" style="width: 100%;height: 100%;background-color: coral;">
          </canvas>
          <div style="width: 50px;height: 50px;border-radius: 25px;background-color: indigo;position: absolute;left: {{left}};top: {{top}};">
          </div>
        </stack>
        <button type="capsule" value="play" onclick="runframe"></button>
      </div>
    </tab-content>
  </tabs>
</div>
/* xxx.css */
.container {
  flex-direction: column;
  justify-content: center;
  align-items: center;
  width: 100%;
  height: 100%;
}
button{
  width: 300px;
}
// xxx.js
export default {
  data: {
    timer: null,
    left: 0,
    top: 0,
    flag: true,
    animation: null,
    startTime: 0,
  },
  onShow() {
    var test = this.$element("mycanvas");
    var ctx = test.getContext("2d");
    ctx.beginPath();
    ctx.moveTo(0, 0);
    ctx.lineTo(300, 300);
    ctx.lineWidth = 5;
    ctx.strokeStyle = "red";
    ctx.stroke();
  },
  runframe() {
    this.left = 0;
    this.top = 0;
    this.flag = true;
    this.animation = requestAnimationFrame(this.step);
  },
  step(timestamp) {
    if (this.flag) {
      this.left += 5;
      this.top += 5;
      if (this.startTime == 0) {
        this.startTime = timestamp;
      }
      var elapsed = timestamp - this.startTime;
        if (elapsed < 500) {
          console.log('callback step timestamp: ' + timestamp);
          this.animation = requestAnimationFrame(this.step);
        }
      } else {
        this.left -= 5;
        this.top -= 5;
        this.animation = requestAnimationFrame(this.step);
      }
      if (this.left == 250 || this.left == 0) {
        this.flag = !this.flag
     }
    },
    onDestroy() {
      cancelAnimationFrame(this.animation);
    }
}
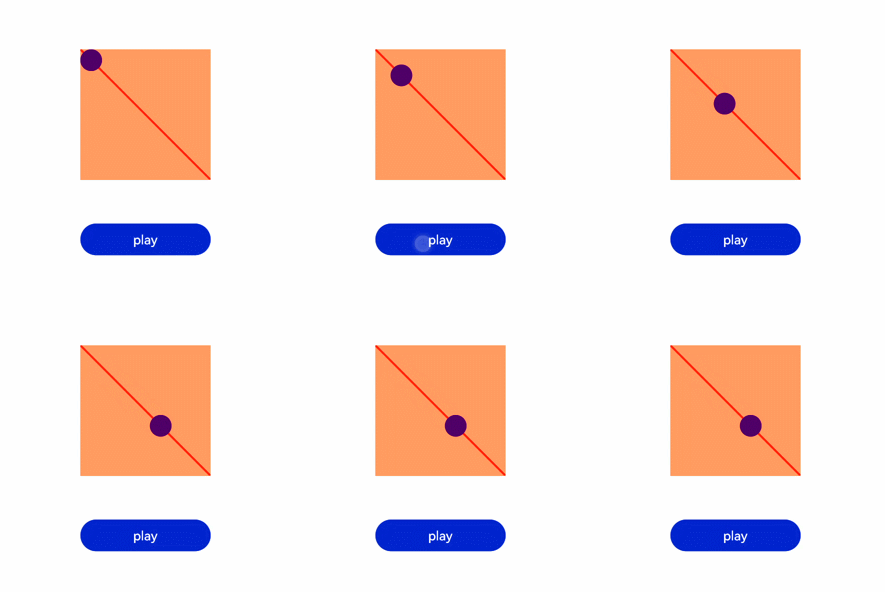
说明
requestAnimationFrame函数在调用回调函数时在第一个参数位置传入timestamp时间戳,表示requestAnimationFrame开始去执行回调函数的时刻。
取消动画帧
通过cancelAnimationFrame函数取消逐帧回调,在调用cancelAnimationFrame函数时取消requestAnimationFrame函数的请求。
<!-- xxx.hml -->
<div class="container">
  <tabs onchange="changecontent">
    <tab-content>
      <div class="container">
        <stack style="width: 300px;height: 300px;margin-top: 100px;margin-bottom: 100px;">
          <canvas id="mycanvas" style="width: 100%;height: 100%;background-color: coral;">
          </canvas>
          <div style="width: 50px;height: 50px;border-radius: 25px;background-color: indigo;position: absolute;left: {{left}};top: {{top}};">
          </div>
        </stack>
        <button type="capsule" value="play" onclick="runframe"></button>
      </div>
    </tab-content>
  </tabs>
</div>
/* xxx.css */
.container {
  flex-direction: column;
  justify-content: center;
  align-items: center;
  width: 100%;
  height: 100%;
}
button{
  width: 300px;
}
// xxx.js
export default {
  data: {
    timer: null,
    left: 0,
    top: 0,
    flag: true,
    animation: null
  },
  onShow() {
    var test = this.$element("mycanvas");
    var ctx = test.getContext("2d");
    ctx.beginPath();
    ctx.moveTo(0, 0);
    ctx.lineTo(300, 300);
    ctx.lineWidth = 5;
    ctx.strokeStyle = "red";
    ctx.stroke();
  },
  runframe() {
    this.left = 0;
    this.top = 0;
    this.flag = true;
    this.animation = requestAnimationFrame(this.step);
  },
  step(timestamp) {
    if (this.flag) {
      this.left += 5;
      this.top += 5;
      this.animation = requestAnimationFrame(this.step);
    } else {
      this.left -= 5;
      this.top -= 5;
      this.animation = requestAnimationFrame(this.step);
    }
    if (this.left == 250 || this.left == 0) {
      this.flag = !this.flag
    }
  },
  onDestroy() {
    cancelAnimationFrame(this.animation);
  }
}
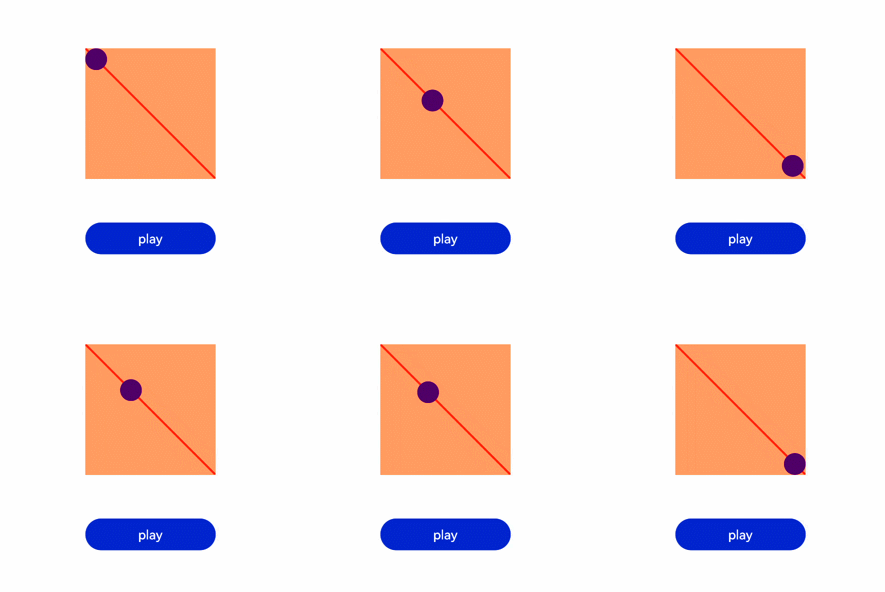
说明
在调用该函数时需传入一个具有标识id的参数。


