目录
一、实验
1.环境
2.iostat
3.sar
4.pidstat
5.perf
6. biolatency
7. biosnoop
8.iotop、biotop
9.blktrace
10.bpftrace
11.smartctl
二、问题
1.如何查看PSI数据
2.iotop如何安装
3.smartctl如何使用
一、实验
1.环境
(1)主机
表1-1 主机
| 主机 | 架构 | 组件 | IP | 备注 |
| prometheus | 监测 系统 | prometheus、node_exporter | 192.168.204.18 | |
| grafana | 监测GUI | grafana | 192.168.204.19 | |
| agent | 监测 主机 | node_exporter | 192.168.204.20 |
(2)磁盘I/O观测工具
表1-2 磁盘I/O观测工具
| 序号 | 工具 | 描述 |
| 1 | iostat | 单个磁盘的各种统计信息 |
| 2 | sar | 磁盘历史统计信息 |
| 3 | pidstat | 按进程列出磁盘I/O使用情况 |
| 4 | perf | 记录块I/O跟踪点 |
| 5 | biolatency | 把磁盘I/O延时汇总成直方图 |
| 6 | biosnoop | 带PID和延时来跟踪磁盘I/O |
| 7 | iotop、biotop | 磁盘的top程序:按进程汇总磁盘I/O |
| 8 | blktrace | 磁盘I/O事件跟踪 |
| 9 | bpftrace | 自定义磁盘跟踪 |
| 10 | smartctl | 磁盘控制器统计信息 |
2.iostat
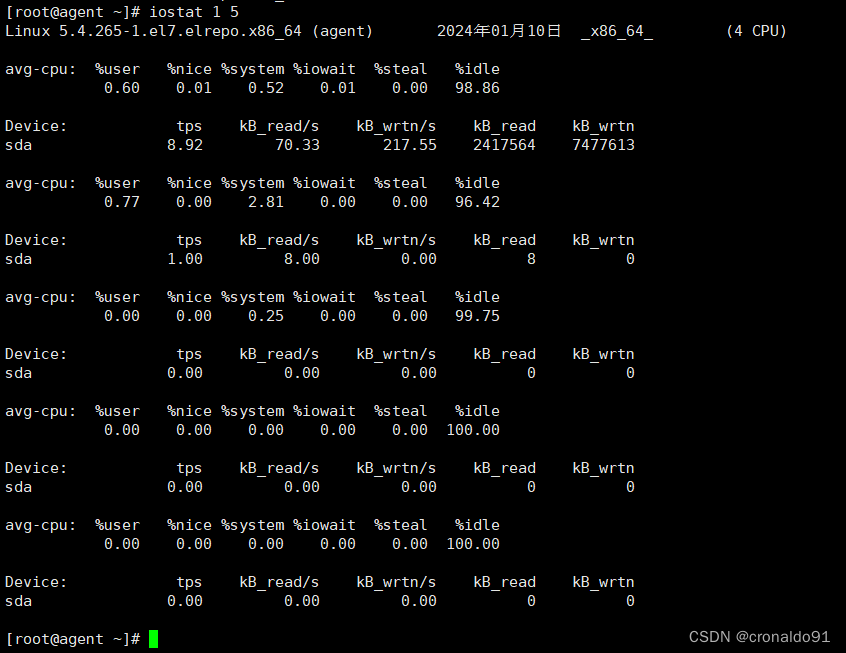
(1) 打印CPU和磁盘自启动以来的统计信息
每秒1次,共计5次
[root@agent ~]# iostat 1 5
(2)-x扩展统计、-z 跳过零活设备
每秒1次,共计5次
[root@agent ~]# iostat -xz 1 5
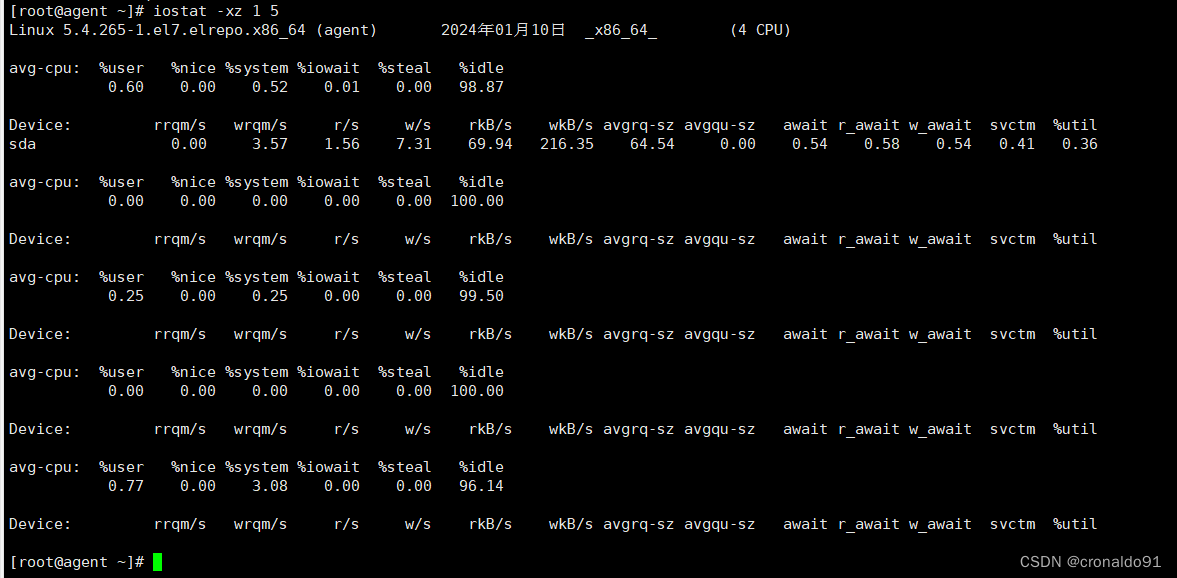
(3) -d 只关注磁盘统计信息(没有CPU)、-m 代表MB、-t代表时间戳、-p ALL 表示包括每个分区统计
每秒1次,共计1次
[root@agent ~]# iostat -dmtxz -p ALL 1 1

3.sar
(1) -d 报告磁盘汇总信息
每秒1次,共计5次
[root@agent ~]# sar -d 1 5

4.pidstat
(1)-d 输出磁盘I/O 的统计信息
每秒1次,共计5次
[root@agent ~]# pidstat -d 1 5

5.perf
(1) 查询块tracepoint
[root@agent ~]# perf list "block:*"

(2) 用栈踪迹来记录块设备问题
sleep 10 跟踪的持续时间为10秒
[root@agent ~]# perf record -e block:block_rq_issue -a -g sleep 10

[root@agent ~]# perf script --header
(3)使用过滤器与块tracepoint
①跟踪所有大小不小于100KB的块I/O 完成事件,CTRL+C结束
[root@agent ~]# perf record -e block:block_rq_complete --filter 'nr_sector > 200'
②跟踪所有的块I/O 同步写完成事件,CTRL+C结束
[root@agent ~]# perf record -e block:block_rq_complete --filter 'rwbs == "ws"'

③ 跟踪所有的块I/O 写完成事件,CTRL+C结束
[root@agent ~]# perf record -e block:block_rq_complete --filter 'rwbs ~ "*W*"'

(4)磁盘I/O延时
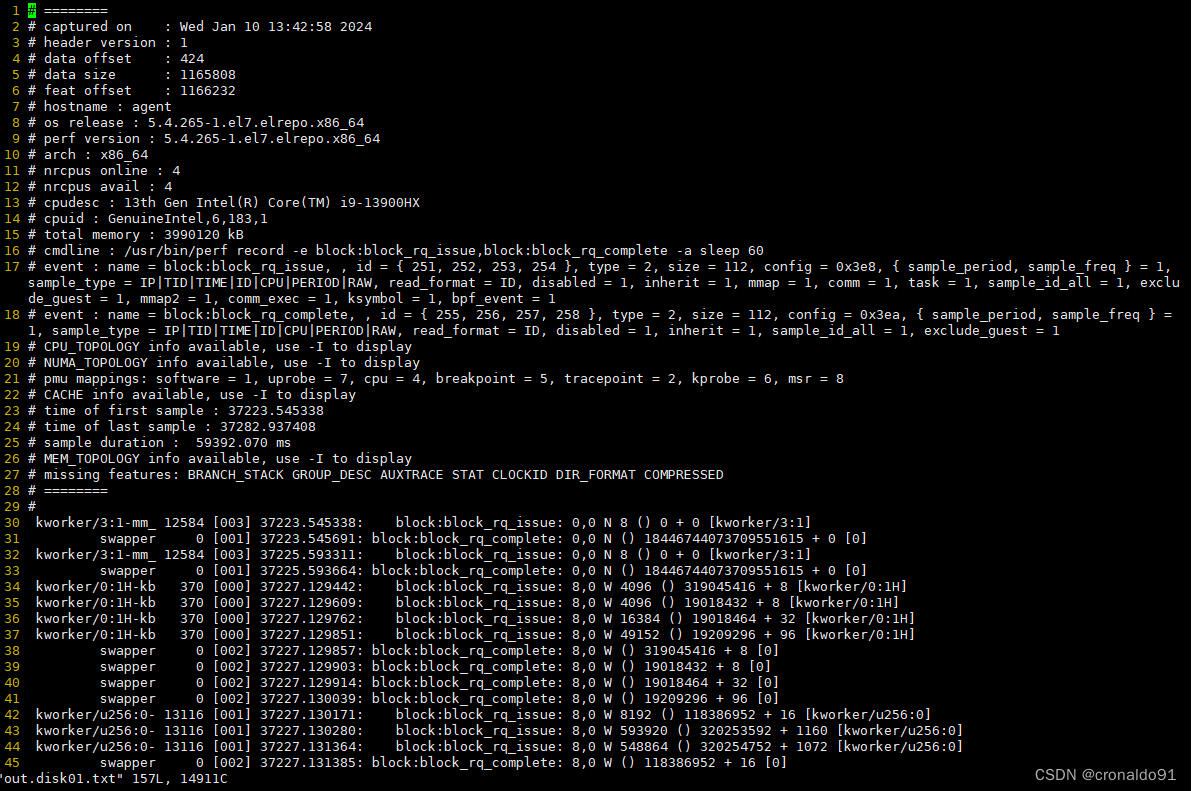
① 记录磁盘发出和完成事件,睡眠60秒
[root@agent ~]# perf record -e block:block_rq_issue,block:block_rq_complete -a sleep 60

② 写入指定文件
[root@agent ~]# perf script --header > out.disk01.txt
![]()
③ 查看文件
[root@agent ~]# vim out.disk01.txt
6. biolatency
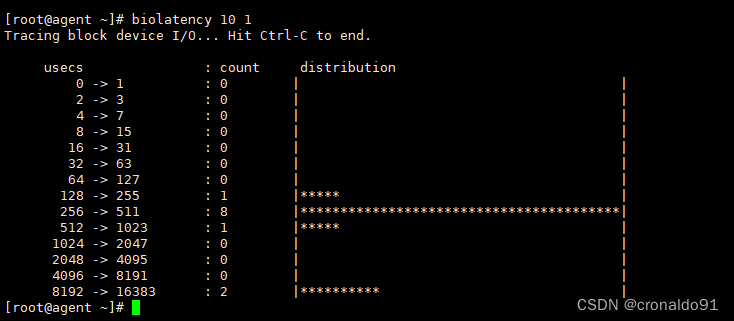
(1)以直方图的形式显示磁盘I/O延时
①BCC跟踪块I/O 10秒
[root@agent ~]# biolatency 10 1
(2)-F 显示每个I/O标志位组的直方图,-m以毫秒为单位输出
[root@agent ~]# biolatency -Fm 10 1

7. biosnoop
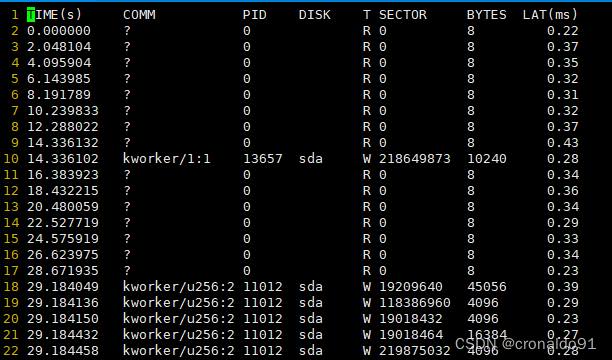
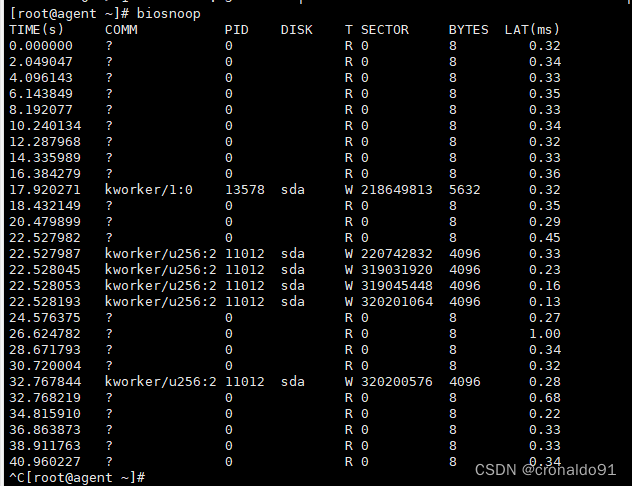
(1) 输出每个磁盘I/O的单行摘要
[root@agent ~]# biosnoop
(2)离群点分析
①写入一个文件
[root@agent ~]# biosnoop > out.biosnoop01.txt
![]()
② 安装延时列将输出排序,并打印最后5个条目(高延时项目)
[root@agent ~]# sort -n -k 8,8 out.biosnoop01.txt | tail -5

③文本编辑器打开输出
[root@agent ~]# vim out.biosnoop01.txt
![]()
④ 从最快到最慢遍历离群值,寻找第一列的时间
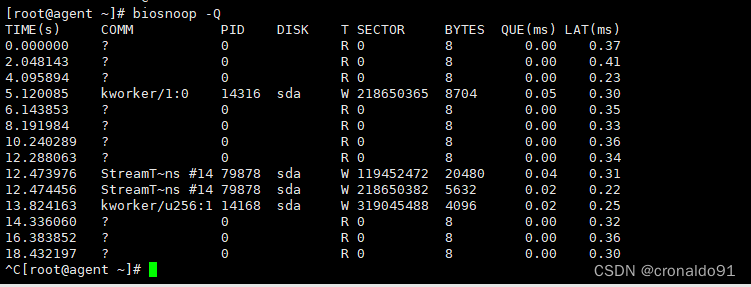
(3)排队时间
-Q 显示从创建I/O 到向设备发出的时间
[root@agent ~]# biosnoop -Q
8.iotop、biotop
(1) iotop
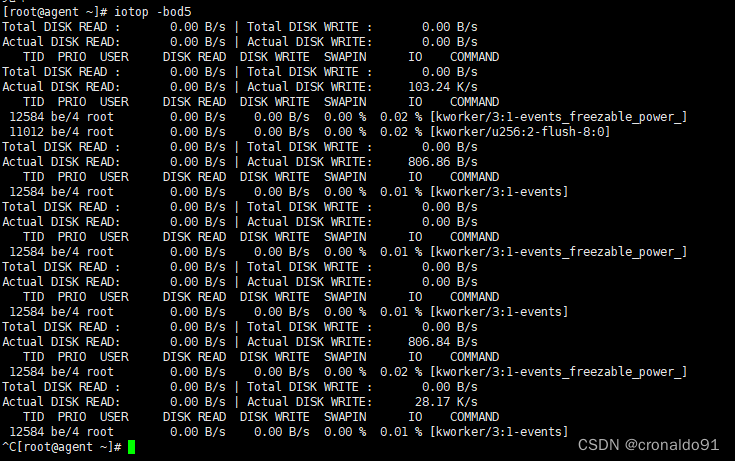
① -b 批量模式来提供滚动输出(不清楚屏幕)、-d5 间隔时间为5秒、-o 显示I/O 进程
[root@agent ~]# iotop -bod5
(2)biotop
① 磁盘的top工具
[root@agent ~]# biotop
![]()

9.blktrace
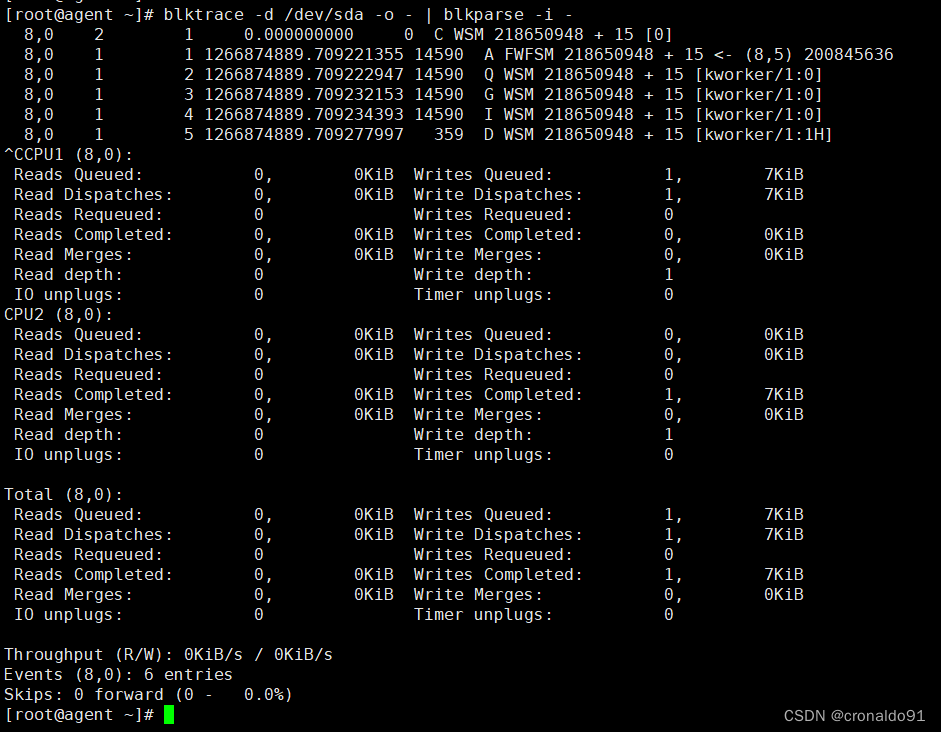
(1)块设备I/O 事件的自定义跟踪工具
[root@agent ~]# blktrace -d /dev/sda -o - | blkparse -i -
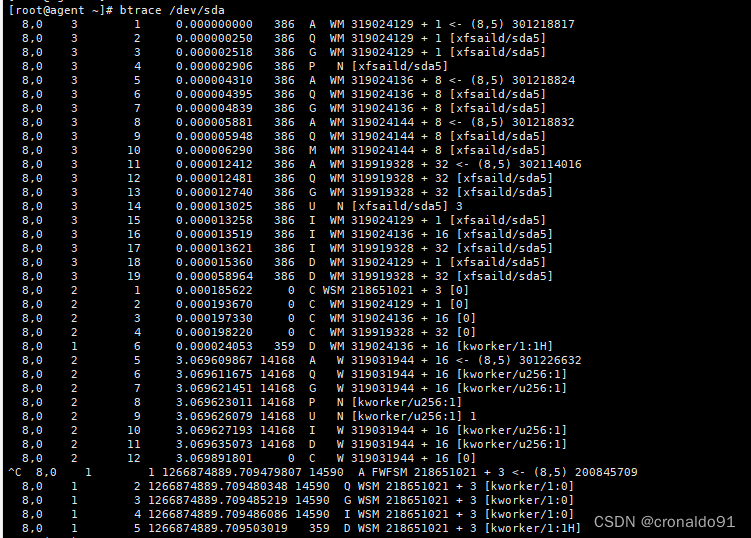
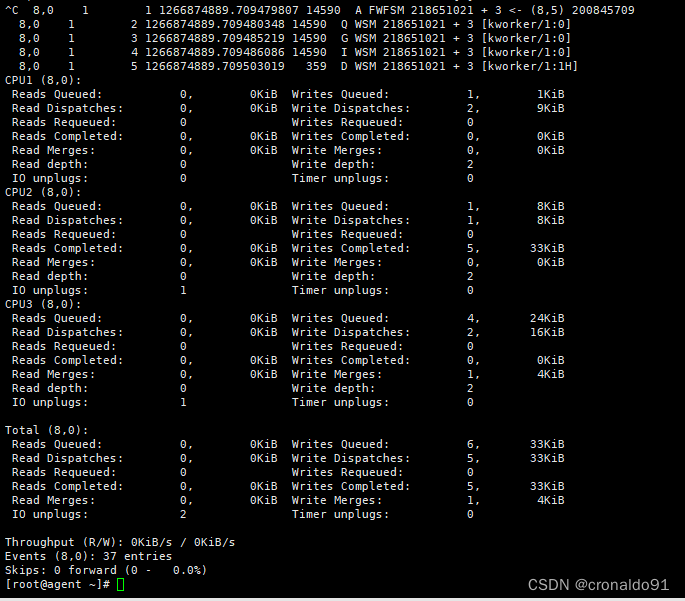
(2)等价命令
[root@agent ~]# btrace /dev/sda
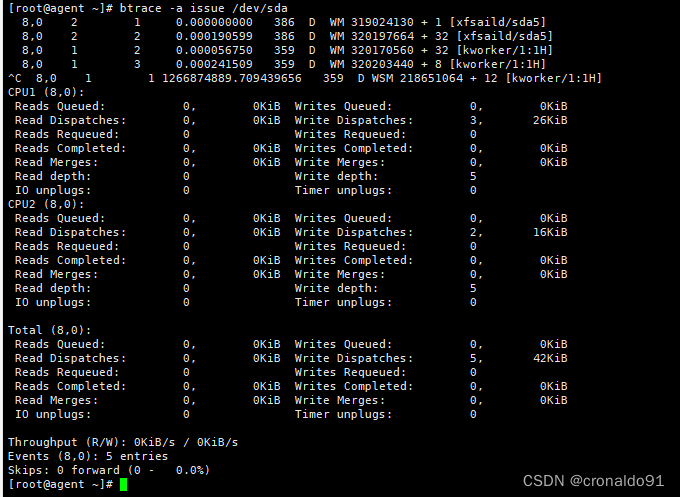
(3)活动功率
① -a issue 跟踪D活动(发出I/O)
[root@agent ~]# btrace -a issue /dev/sda
(4) 分析
① 查看磁盘
[root@agent tracefiles]# lsblk

② dev/sda 上使用blktrace来分析
[root@agent tracefiles]# blktrace -d /dev/sda -o out -w 10

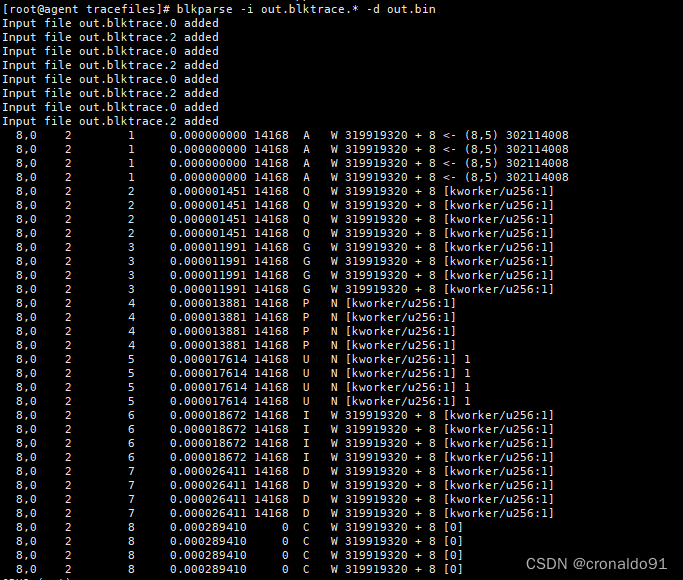
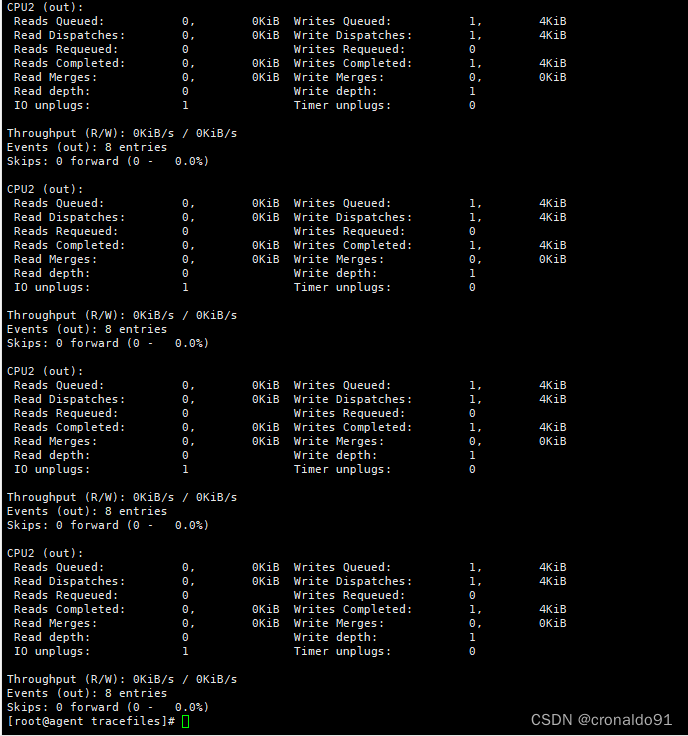
③ 写入跟踪文件
[root@agent tracefiles]# blkparse -i out.blktrace.* -d out.bin
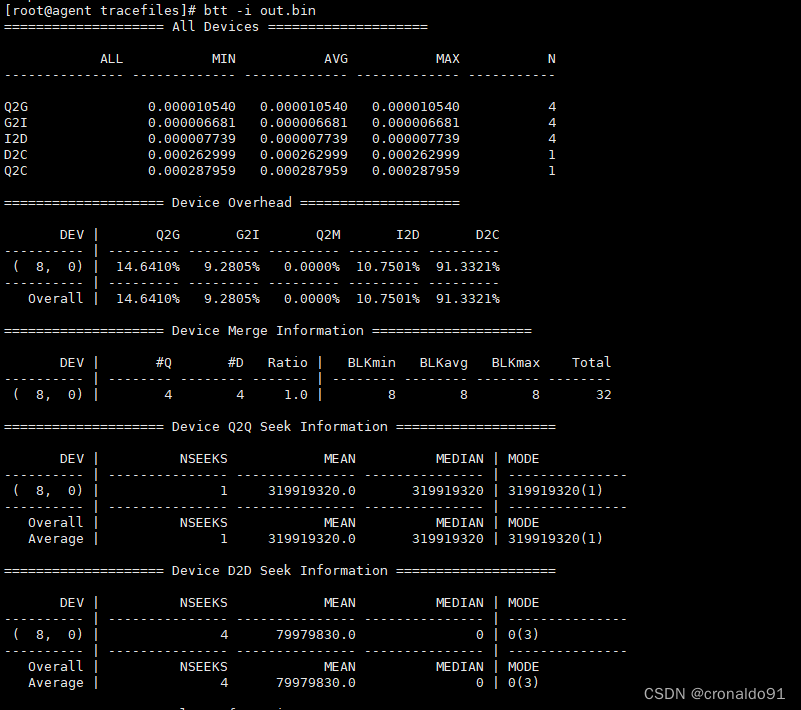
④ 分析I/O轨迹的btt
[root@agent tracefiles]# btt -i out.bin

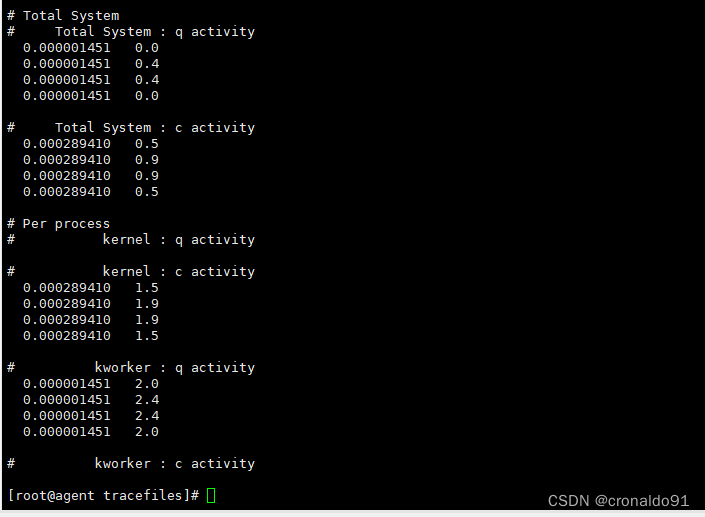
⑤ 查看当前目录
[root@agent tracefiles]# ls

10.bpftrace
(1) 计数块I/O tracepoint事件
[root@agent tracefiles]# bpftrace -e 'tracepoint:block:* { @[probe] = count(); }'
(2) 把块I/O 大小汇总成一张直方图
[root@agent ~]# bpftrace -e 't:block:block_rq_issue { @bytes = hist(args->bytes); }'
(3)计数块I/O 请求的用户栈踪迹
[root@agent ~]# bpftrace -e 't:block:block_rq_issue { @[ustack] = count(); }'
[root@agent ~]# bpftrace -e 't:block:block_rq_insert { @[ustack] = count(); }'
(4)计数块I/O 类型的标识位
[root@agent ~]# bpftrace -e 't:block:block_rq_issue { @[args->rwbs] = count(); }'
(5)跟踪块I/O 错误,包括设备和I/O类型
[root@agent ~]# bpftrace -e 't:block:block_rq_complete /args->error/ { printf("dev %d type %s error %d/n", args->dev, args->rwbs, args->error); }'
![]()
(6)计数SCSI操作码
[root@agent ~]# bpftrace -e 't:scsi:scsi_dispatch_cmd_start { @opcode[args->opcode] = count(); }'

(7)计数SCSI结果码
[root@agent ~]# bpftrace -e 't:scsi:scsi_dispatch_cmd_done { @result[args->result] = count(); }'

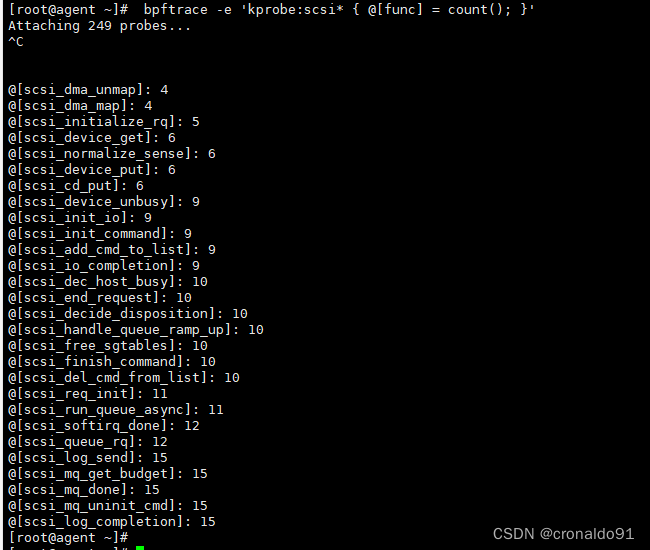
(8)计数SCSI驱动程序函数
[root@agent ~]# bpftrace -e 'kprobe:scsi* { @[func] = count(); }'
(9)磁盘I/O大小
① 按请求进程名称细分的磁盘I/O大小分布
[root@agent ~]# bpftrace -e 't:block:block_rq_issue /args->bytes/ { @[comm] = hist(args->bytes); }'
② 添加args->rwbs作为直方图键,输出将按I/O类型进一步细分
[root@agent ~]# bpftrace -e 't:block:block_rq_insert /args->bytes/ { @[comm, args->rwbs] = hist(args->bytes); }'

11.smartctl
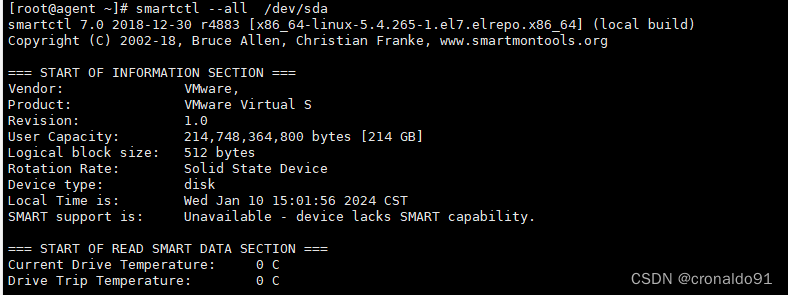
(1)输出 SMART(自监测、分析和报告技术)数据
[root@agent ~]# smartctl --all /dev/sda
二、问题
1.如何查看PSI数据
(1)命令
[root@agent ~]# cat /proc/pressure/io
![]()
some开头的一行显示了一些任务(线程)受到影响的时间,full开头的一行显示了所有可运行任务受到影响的时间
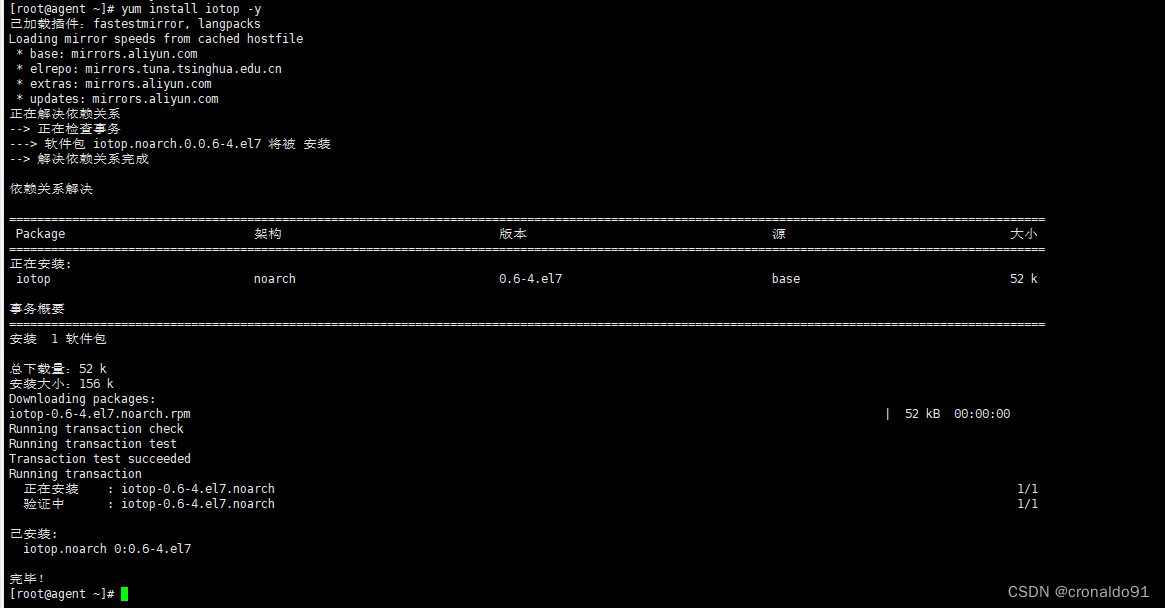
2.iotop如何安装
(1)搜索
[root@agent ~]# yum search iotop

(2)安装
[root@agent ~]# yum install iotop -y
3.smartctl如何使用
(1)命令
[root@agent ~]# smartctl -h

(2)参数
Usage: smartctl [options] device

============================================ SHOW INFORMATION OPTIONS =====

  -h, --help, --usage
         Display this help and exit

  -V, --version, --copyright, --license
         Print license, copyright, and version information and exit

  -i, --info
         Show identity information for device

  --identify[=[w][nvb]]
         Show words and bits from IDENTIFY DEVICE data                (ATA)

  -g NAME, --get=NAME
        Get device setting: all, aam, apm, dsn, lookahead, security,
        wcache, rcache, wcreorder, wcache-sct

  -a, --all
         Show all SMART information for device

  -x, --xall
         Show all information for device

  --scan
         Scan for devices

  --scan-open
         Scan for devices and try to open each device

================================== SMARTCTL RUN-TIME BEHAVIOR OPTIONS =====

  -j, --json[=[cgiosuv]]
         Print output in JSON format

  -q TYPE, --quietmode=TYPE                                           (ATA)
         Set smartctl quiet mode to one of: errorsonly, silent, noserial

  -d TYPE, --device=TYPE
         Specify device type to one of:
         ata, scsi[+TYPE], nvme[,NSID], sat[,auto][,N][+TYPE], usbcypress[,X], usbjmicron[,p][,x][,N], usbprolific, usbsunplus, sntjmicron[,NSID], intelliprop,N[+TYPE], marvell, areca,N/E, 3ware,N, hpt,L/M/N, megaraid,N, aacraid,H,L,ID, cciss,N, auto, test

  -T TYPE, --tolerance=TYPE                                           (ATA)
         Tolerance: normal, conservative, permissive, verypermissive

  -b TYPE, --badsum=TYPE                                              (ATA)
         Set action on bad checksum to one of: warn, exit, ignore

  -r TYPE, --report=TYPE
         Report transactions (see man page)

  -n MODE[,STATUS], --nocheck=MODE[,STATUS]                           (ATA)
         No check if: never, sleep, standby, idle (see man page)

============================== DEVICE FEATURE ENABLE/DISABLE COMMANDS =====

  -s VALUE, --smart=VALUE
        Enable/disable SMART on device (on/off)

  -o VALUE, --offlineauto=VALUE                                       (ATA)
        Enable/disable automatic offline testing on device (on/off)

  -S VALUE, --saveauto=VALUE                                          (ATA)
        Enable/disable Attribute autosave on device (on/off)

  -s NAME[,VALUE], --set=NAME[,VALUE]
        Enable/disable/change device setting: aam,[N|off], apm,[N|off],
        dsn,[on|off], lookahead,[on|off], security-freeze,
        standby,[N|off|now], wcache,[on|off], rcache,[on|off],
        wcreorder,[on|off[,p]], wcache-sct,[ata|on|off[,p]]

======================================= READ AND DISPLAY DATA OPTIONS =====

  -H, --health
        Show device SMART health status

  -c, --capabilities                                            (ATA, NVMe)
        Show device SMART capabilities

  -A, --attributes
        Show device SMART vendor-specific Attributes and values

  -f FORMAT, --format=FORMAT                                          (ATA)
        Set output format for attributes: old, brief, hex[,id|val]

  -l TYPE, --log=TYPE
        Show device log. TYPE: error, selftest, selective, directory[,g|s],
        xerror[,N][,error], xselftest[,N][,selftest], background,
        sasphy[,reset], sataphy[,reset], scttemp[sts,hist],
        scttempint,N[,p], scterc[,N,M], devstat[,N], defects[,N], ssd,
        gplog,N[,RANGE], smartlog,N[,RANGE], nvmelog,N,SIZE

  -v N,OPTION , --vendorattribute=N,OPTION                            (ATA)
        Set display OPTION for vendor Attribute N (see man page)

  -F TYPE, --firmwarebug=TYPE                                         (ATA)
        Use firmware bug workaround:
        none, nologdir, samsung, samsung2, samsung3, xerrorlba, swapid

  -P TYPE, --presets=TYPE                                             (ATA)
        Drive-specific presets: use, ignore, show, showall

  -B [+]FILE, --drivedb=[+]FILE                                       (ATA)
        Read and replace [add] drive database from FILE
        [default is +/etc/smartmontools/smart_drivedb.h
         and then    /usr/share/smartmontools/drivedb.h]

============================================ DEVICE SELF-TEST OPTIONS =====

  -t TEST, --test=TEST
        Run test. TEST: offline, short, long, conveyance, force, vendor,N,
                        select,M-N, pending,N, afterselect,[on|off]

  -C, --captive
        Do test in captive mode (along with -t)

  -X, --abort
        Abort any non-captive test on device

=================================================== SMARTCTL EXAMPLES =====

  smartctl --all /dev/sda                    (Prints all SMART information)

  smartctl --smart=on --offlineauto=on --saveauto=on /dev/sda
                                              (Enables SMART on first disk)

  smartctl --test=long /dev/sda          (Executes extended disk self-test)

  smartctl --attributes --log=selftest --quietmode=errorsonly /dev/sda
                                      (Prints Self-Test & Attribute errors)
  smartctl --all --device=3ware,2 /dev/sda
  smartctl --all --device=3ware,2 /dev/twe0
  smartctl --all --device=3ware,2 /dev/twa0
  smartctl --all --device=3ware,2 /dev/twl0
          (Prints all SMART info for 3rd ATA disk on 3ware RAID controller)
  smartctl --all --device=hpt,1/1/3 /dev/sda
          (Prints all SMART info for the SATA disk attached to the 3rd PMPort
           of the 1st channel on the 1st HighPoint RAID controller)
  smartctl --all --device=areca,3/1 /dev/sg2
          (Prints all SMART info for 3rd ATA disk of the 1st enclosure
           on Areca RAID controller)


