1、准备工作
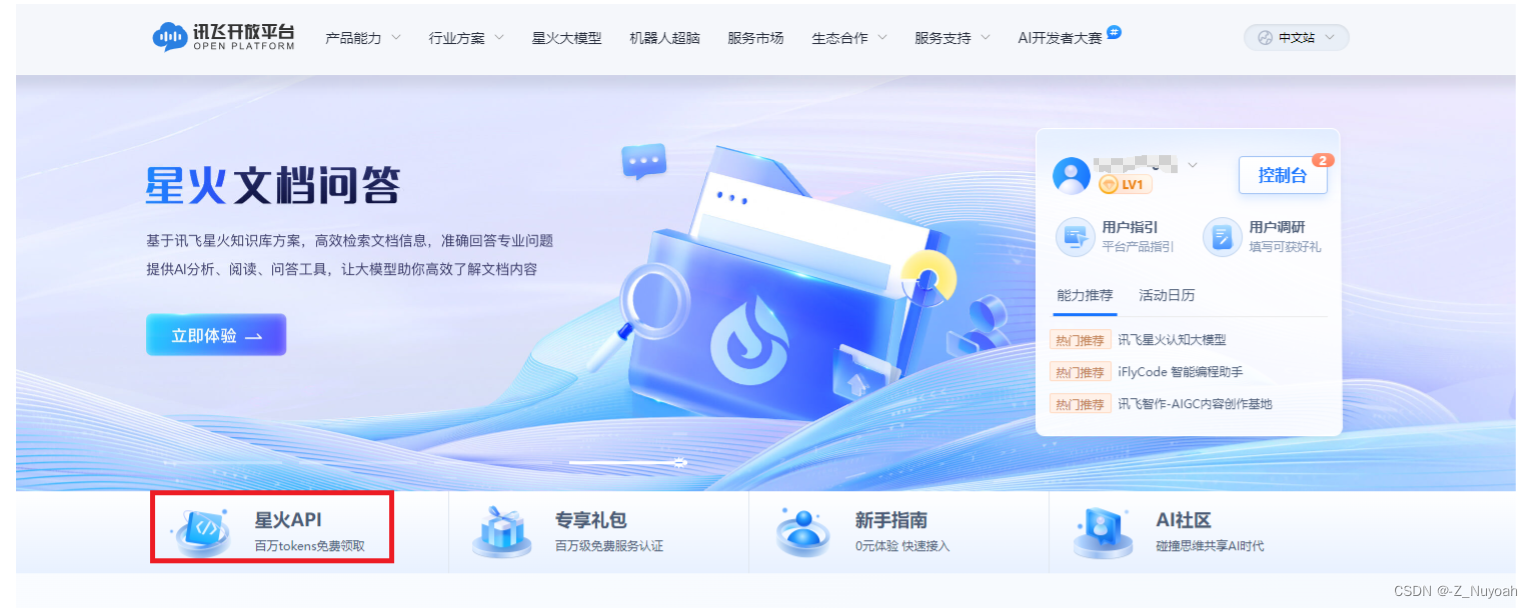
1)、进入以下平台进行注册,登录后,点击红框处
2)、点击个人免费包(会弹出实名认证,先进行实名认证)

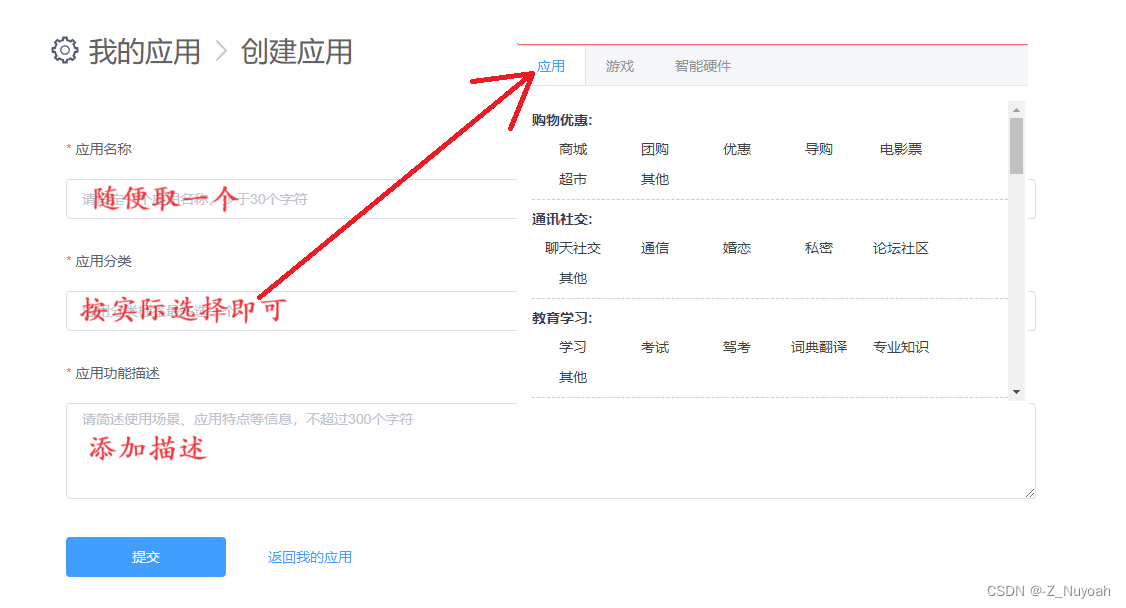
3)、认证后,会进入以下界面,先添加应用

4)、添加应用
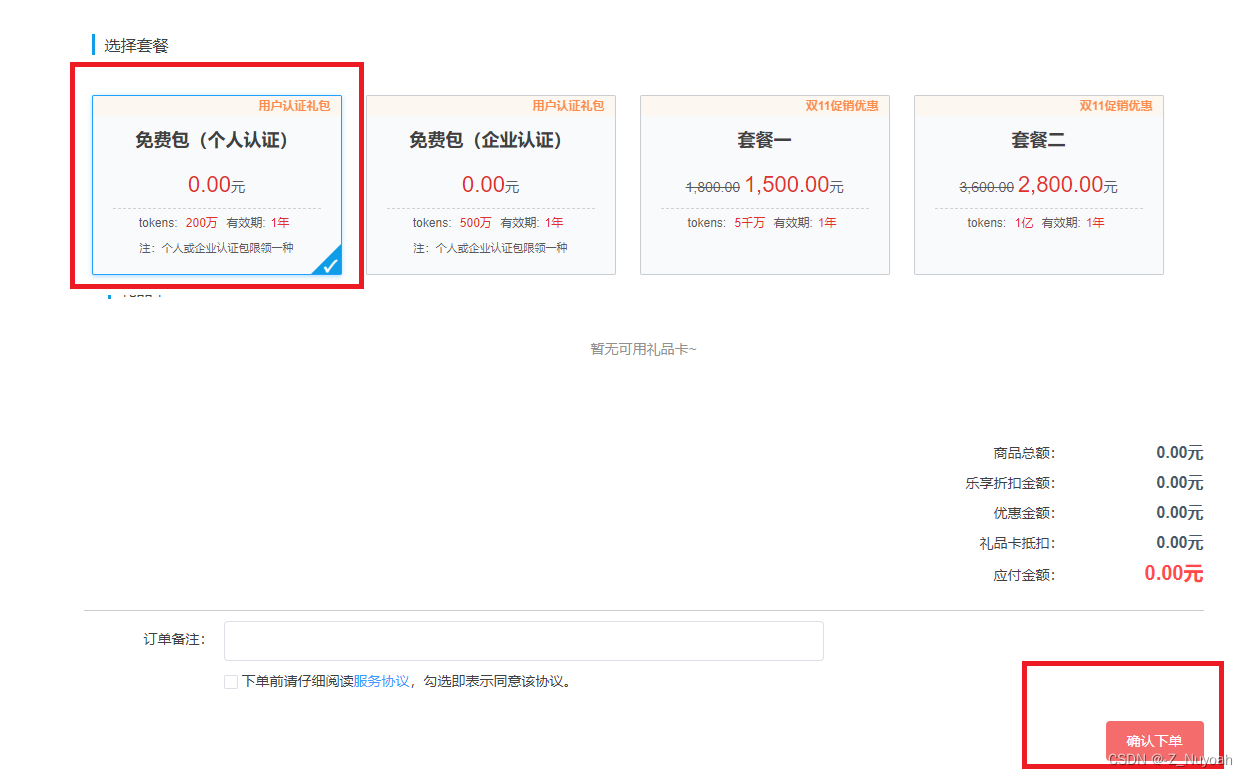
5)、选择套餐,提交订单
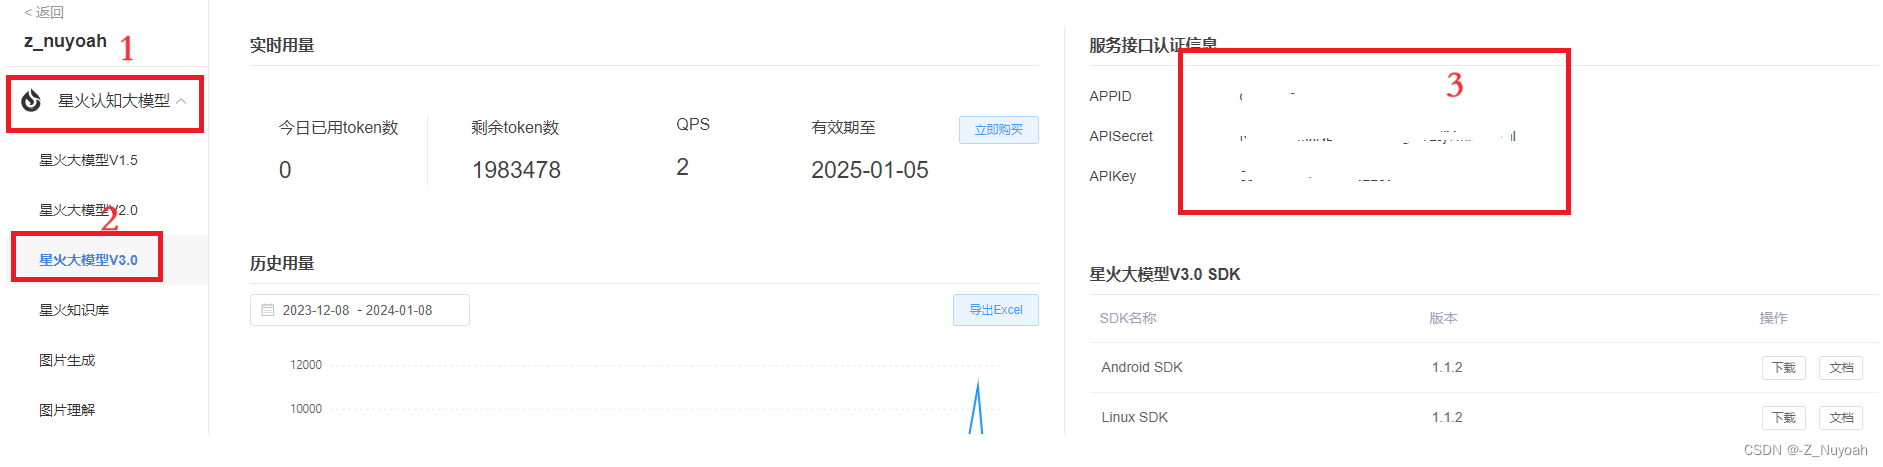
6)、返回主页,点击控制台,找到自己的应用,点击进入应用
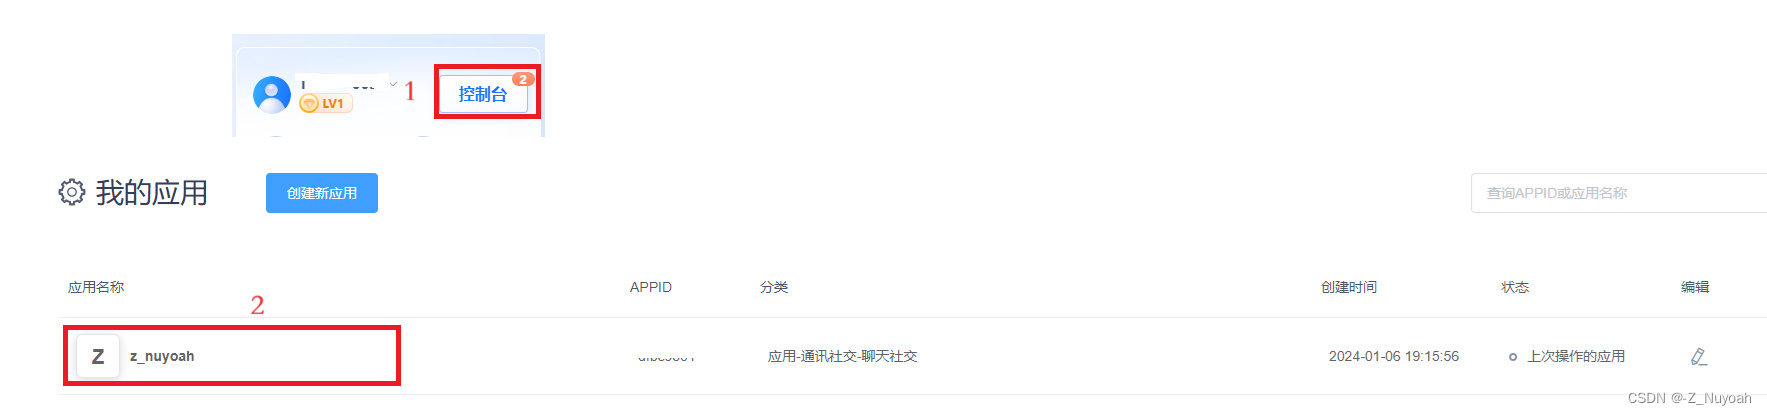
7)、进入应用后找到自己的APPID、APISecret、APIKey。
2、先看效果

3、前端完整代码
★★★注意★★★:个人只是写了前端代码,聊天记录刷新后就没有了。
<template>
  <a-layout style="max-width: 800px; margin: auto">
    <a-layout-content
      :style="{
        border: '3px solid #4fc3f7',
        borderRadius: '8px',
        boxShadow: '0 8px 16px rgba(0, 0, 0, 0.3)',
        overflow: 'hidden',
      }"
    >
      <h2 style="margin-bottom: 20px; text-align: center; color: #4fc3f7">
        Chat Record
      </h2>
      <div class="divider"></div>
      <div class="chat-messages" ref="chatMessages">
        <!-- 聊天记录显示区域Q -->
        <div v-if="dialogueHistory.length === 0" class="no-data-message">
          暂无数据
        </div>
        <div
          v-for="message in dialogueHistory"
          :key="message.id"
          class="message-container"
        >
          <!-- 修改部分 -->
          <div
            :class="[
              message.type === 'question'
                ? 'user-name-aline'
                : 'robot-name-aline',
            ]"
          >
            <div>{{ message.name }}:</div>
          </div>
          <div class="divider"></div>
          <div
            :class="[
              message.type === 'question' ? 'user-message' : 'bot-message',
              message.isCode ? 'code-message' : '',
            ]"
            style="position: relative"
          >
            <template v-if="message.isCode">
              <!-- 使用 extractCodeAndLanguage 函数 -->
              <pre
                v-html="
                  highlightCode(extractCodeAndLanguage(message.text).code)
                "
                style="
                  background-color: #f0f0f0;
                  padding: 15px;
                  box-shadow: #999999;
                  border-radius: 5px;
                  margin: 0;
                "
              ></pre>
            </template>
            <template v-else>
              {{ message.text }}
            </template>
            <!-- 添加复制按钮 -->
            <button
              v-if="message.isCode"
              @click="copyCode(message.text)"
              class="copy-button"
              style="
                position: absolute;
                top: 7px;
                right: 7px;
                cursor: pointer;
                border: none;
                background: transparent;
                color: #3498db;
              "
            >
              Copy
            </button>
          </div>
          <!-- 结束修改部分 -->
        </div>
      </div>
      <div class="user-input-container">
        <!-- 用户输入框 -->
        <a-input
          v-model="inputVal"
          @pressEnter="sendMsg"
          placeholder="请输入消息..."
          style="
            flex-grow: 1;
            padding: 8px;
            border: 1px solid #3498db;
            border-radius: 5px;
            margin-right: 10px;
          "
        />
        <!-- 发送按钮 -->
        <a-button type="primary" @click="sendMsg" style="cursor: pointer">
          发送
        </a-button>
      </div>
    </a-layout-content>
  </a-layout>
</template>
<script setup>
import { ref } from "vue";
import * as base64 from "base-64";
import CryptoJs from "crypto-js";
import hljs from "highlight.js/lib/core";
import "highlight.js/styles/default.css"; // 选择适合你项目的样式

// 导入你需要的语言支持
import javascript from "highlight.js/lib/languages/javascript";
import css from "highlight.js/lib/languages/css";
import html from "highlight.js/lib/languages/xml";
import ClipboardJS from "clipboard";

// 注册语言支持
hljs.registerLanguage("javascript", javascript);
hljs.registerLanguage("css", css);
hljs.registerLanguage("html", html);
const requestObj = {
  APPID: "填你自己的",
  APISecret: "填你自己的",
  APIKey: "填你自己的",
  Uid: "0",
  sparkResult: "",
};

const inputVal = ref("");
const result = ref("");
const dialogueHistory = ref([]);

const isCopyButtonClicked = ref(false);

// 检测回复是否为代码
const isCode = (text) => {
  // 简单的检测逻辑,您可以根据需要进行调整
  return text.startsWith("```") && text.endsWith("```");
};

// 获取鉴权 URL
const getWebsocketUrl = async () => {
  return new Promise((resolve, reject) => {
    const url = "wss://spark-api.xf-yun.com/v3.1/chat";
    const host = "spark-api.xf-yun.com";
    const apiKeyName = "api_key";
    const date = new Date().toGMTString();
    const algorithm = "hmac-sha256";
    const headers = "host date request-line";
    const signatureOrigin = `host: ${host}\ndate: ${date}\nGET /v3.1/chat HTTP/1.1`;
    const signatureSha = CryptoJs.HmacSHA256(
      signatureOrigin,
      requestObj.APISecret
    );
    const signature = CryptoJs.enc.Base64.stringify(signatureSha);

    const authorizationOrigin = `${apiKeyName}="${requestObj.APIKey}", algorithm="${algorithm}", headers="${headers}", signature="${signature}"`;

    const authorization = base64.encode(authorizationOrigin);

    // 将空格编码
    resolve(
      `${url}?authorization=${authorization}&date=${encodeURI(
        date
      )}&host=${host}`
    );
  });
};

// 发送消息
const sendMsg = async () => {
  const myUrl = await getWebsocketUrl();
  const socket = new WebSocket(myUrl);

  socket.onopen = (event) => {
    // 发送消息的逻辑
    // 发送消息
    const params = {
      header: {
        app_id: requestObj.APPID,
        uid: "redrun",
      },
      parameter: {
        chat: {
          domain: "generalv3",
          temperature: 0.5,
          max_tokens: 1024,
        },
      },
      payload: {
        message: {
          text: [{ role: "user", content: inputVal.value }],
        },
      },
    };
    dialogueHistory.value.push({
      type: "question",
      name: "我",
      text: inputVal.value,
      // timestamp: getTimestamp(),
    });
    socket.send(JSON.stringify(params));
  };

  socket.onmessage = (event) => {
    const data = JSON.parse(event.data);

    if (data.header.code !== 0) {
      console.error("Error:", data.header.code, data.header.message);
      socket.close();
      return;
    }

    // 累积所有接收到的消息
    if (data.payload.choices.text) {
      // 连接新接收到的消息片段
      const newMessage = data.payload.choices.text[0].content;

      if (
        dialogueHistory.value.length > 0 &&
        dialogueHistory.value[dialogueHistory.value.length - 1].type ===
          "answer"
      ) {
        // 连接新接收到的消息片段到最后一个回答
        dialogueHistory.value[dialogueHistory.value.length - 1].text +=
          newMessage;
      } else {
        // 添加新的回答
        dialogueHistory.value.push({
          type: "answer",
          name: "智能助手",
          text: newMessage,
          // timestamp: getTimestamp(),
        });
      }
      // 如果回复是代码,添加相应的标记和样式
      if (isCode(newMessage)) {
        dialogueHistory.value[dialogueHistory.value.length - 1].isCode = true;
      }
    }
    // 如果对话完成或者发生错误,则关闭 socket
    if (data.header.status === 2 || data.header.code !== 0) {
      setTimeout(() => {
        socket.close();
      }, 1000);
    }
  };

  socket.onclose = (event) => {
    inputVal.value = "";
  };

  socket.onerror = (event) => {
    console.error("WebSocket error:", event);
  };
};
// 移除代码块的标记和语言标识符
const extractCodeAndLanguage = (text) => {
  if (isCode(text)) {
    const lines = text.split("\n");
    const language = lines[0].substring(3).trim();
    const code = lines.slice(1, -1).join("\n");
    return { language, code };
  }
  return { language: null, code: text };
};
// 高亮代码的方法
const highlightCode = (code) => {
  // 判断是否包含代码标识符
  if (code.startsWith("```") && code.endsWith("```")) {
    // 去掉头尾的```标识符
    code = code.slice(3, -3);
  }
  const highlighted = hljs.highlightAuto(code);
  return highlighted.value;
};
//
// // 获取当前时间戳
// const getTimestamp = () => {
//   return Math.floor(new Date().getTime() / 1000);
// };
//
// // 格式化时间戳为可读的时间格式
// const formatTimestamp = (timestamp) => {
//   const date = new Date(timestamp * 1000);
//   const hours = date.getHours();
//   const minutes = "0" + date.getMinutes();
//   return `${hours}:${minutes.substr(-2)}`;
// };
const copyCode = (code) => {
  // 使用 clipboard.js 复制文本到剪贴板
  const parentButton = document.querySelector(".message-container button");

  // 获取处理后的代码,如果是代码块,提取其中的代码
  const processedCode =
    code.startsWith("```") && code.endsWith("```")
      ? extractCodeAndLanguage(code).code
      : code;
  // 获取按钮元素
  const copyButton = document.querySelector(".copy-button");

  // 按钮初始文本
  const initialButtonText = copyButton.innerText;

  // 修改按钮文本为勾
  copyButton.innerText = "✔ Copied";

  // 3秒后将按钮文本还原
  setTimeout(() => {
    copyButton.innerText = initialButtonText;
  }, 3000);

  if (parentButton && parentButton.parentNode) {
    const clipboard = new ClipboardJS(parentButton, {
      text: function () {
        return processedCode;
      },
    });

    clipboard.on("success", function (e) {
      console.log("Text copied to clipboard:", e.text);
      clipboard.destroy(); // 销毁 clipboard 实例,防止重复绑定
    });

    clipboard.on("error", function (e) {
      console.error("Unable to copy text to clipboard:", e.action);
      clipboard.destroy(); // 销毁 clipboard 实例,防止重复绑定
    });
  } else {
    console.error("Parent button or its parent node is null or undefined.");
  }
};
</script>

<style scoped>
#ChatRobotView {
  max-width: 800px;
  margin: auto;
}

.chat-container {
  border: 1px solid #ccc;
  border-radius: 8px;
  overflow: hidden;
}

.chat-messages {
  padding: 10px;
  max-height: 400px;
  overflow-y: auto;
}

.message {
  margin-bottom: 10px;
}

.user-message {
  background-color: #3498db;
  color: #ffffff;
  padding: 10px;
  border-radius: 5px;
  align-self: flex-end;
}

.bot-message {
  background-color: #e0e0e0;
  color: #000000;
  padding: 10px;
  border-radius: 5px;
  align-self: flex-start;
}

.user-input-container {
  display: flex;
  justify-content: space-between;
  align-items: center;
  padding: 10px;
  border-top: 1px solid #ddd;
}

.user-input-container input {
  flex-grow: 1;
  padding: 8px;
  border: 1px solid #ddd;
  border-radius: 5px;
  margin-right: 10px;
}

.user-input-container button {
  background-color: #4caf50;
  color: #fff;
  border: none;
  padding: 8px 16px;
  border-radius: 5px;
  cursor: pointer;
}

.message-container {
  display: flex;
  flex-direction: column;
  margin-bottom: 10px;
}

.message-info {
  font-size: 12px;
  color: #888;
  margin-bottom: 5px;
}

.user-name-aline {
  align-self: flex-end;
  margin-bottom: 5px;
}

.robot-name-aline {
  align-self: flex-start;
  margin-bottom: 5px;
}

.no-data-message {
  font-size: large;
  color: #8c8c8c;
  height: 200px;

  display: flex;
  align-items: center;
  justify-content: center;
}

.message-container button.copy-button:active {
  background-color: #4caf50; /* 按下时的背景色 */
  color: #fff;
}

.divider {
  width: 100%;
  height: 1px;
  background-color: #4fc3f7;
  margin: 5px 0;
}
</style>