一、单用户模式修改root密码
1.重启服务器系统后,将光标移动到第二项,按【e】键进入用户登录页面。
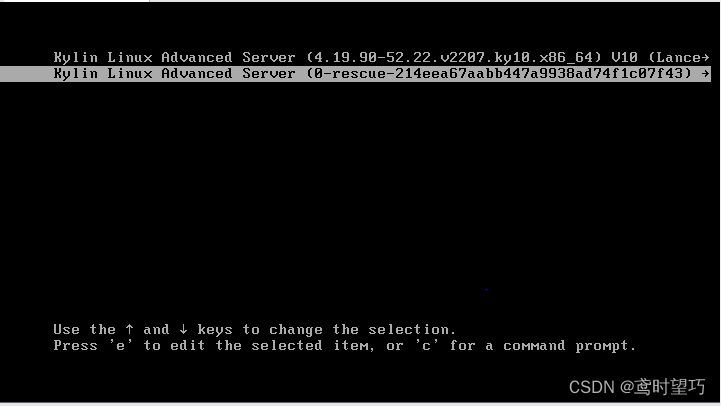
2.在【username】下方所在行输入root名称,【password】下方所在行输入密码Kylin123123后,进入编辑模式。代码如下:
Enter username:

Root

Enter password:

Kylin123123      //输入密码时不显示
3.在linux开头所在行的结尾加上“rd.break console=tty0”,按【Ctrl +X】进入单用户模式。代码如下:
    insmod xfs

    set root='hd0,msdos1'

    if [ x$feature_platform_search_hint = xy ]; then

        search --no-floppy --fs-uuid --set=root --hint-bios=hd0,msdos1 --hin\

t-efi=hd0,msdos1 --hint-baremetal=ahci0,msdos1 --hint='hd0,msdos1'  5fa324b9-b\

c33-48b6-9852-bb42182eb115

    else

        search --no-floppy --fs-uuid --set=root 5fa324b9-bc33-40b6-9852-bb42\

182eb115

    fi

    linux   /vmlinuz-0-rescue-214eea67aabb447a9938ad74f1c07f43 root=/\

dev/mapper/klas-root ro resume=/dev/mapper/klas-swap rd.lvm.lv=klas/root rd.lv\

m.lv=klas/swap rhgb quiet crashkernel=1024M,high audit=0 rd.break console=tty0

    initrd  /initramfs-0-rescue-214eea67aabb447a9938ad74f1c07f43.img


    Press Ctrl-x to start,Ctrl-c for a command prompt or Escape to

    discard edits and return to the menu.Pressing Tab lists

    possible completions.
4.进入到单用户模式后,先按【回车】键继续操作,在该模式下依次输入以下命令,代码如下:
[      3.2354271[0]sd6:0:0:0:[sda]Assuming drive cache:write through


Generating"/runinitramfs/rdsosreport.txt"


Entering emergency mode. Exit the shell to continue.

Type "journalcti" to view systeml ogs.

You might want to save "/run/initramfs/rdsosreport.txt" to a USB stick or /boot

after mounting them and attach it to a bug report.


Press Enter for maintenance

(or press Control-D to continue):

sh-5.0# mount –o remount,rw /sysroot   \\重新挂载/sysroot为可读写模式

sh-5.0# chroot /sysroot    \\进入/sysroot子系统重置

sh-5.0# export LANG=en_US.UTF-8    \\设置系统编码为UTF-8

sh-5.0# passwd root    \\更新root用户密码

Changing password for user root.

New password:Jan16@123  \\设置root用户密码,输入时密码不显示

Retype new password:Jan16@123  \\重新输入root用户密码,输入时密码不显示

passwd: all authentication tokens updated successfully.

sh-5.0# touch /.autorelabel    \\更新selinux上下文

sh-5.0# exit  \\输入exit两次退出重启

exit

sh-5.0# reboot
二、 Live CD修改root密码
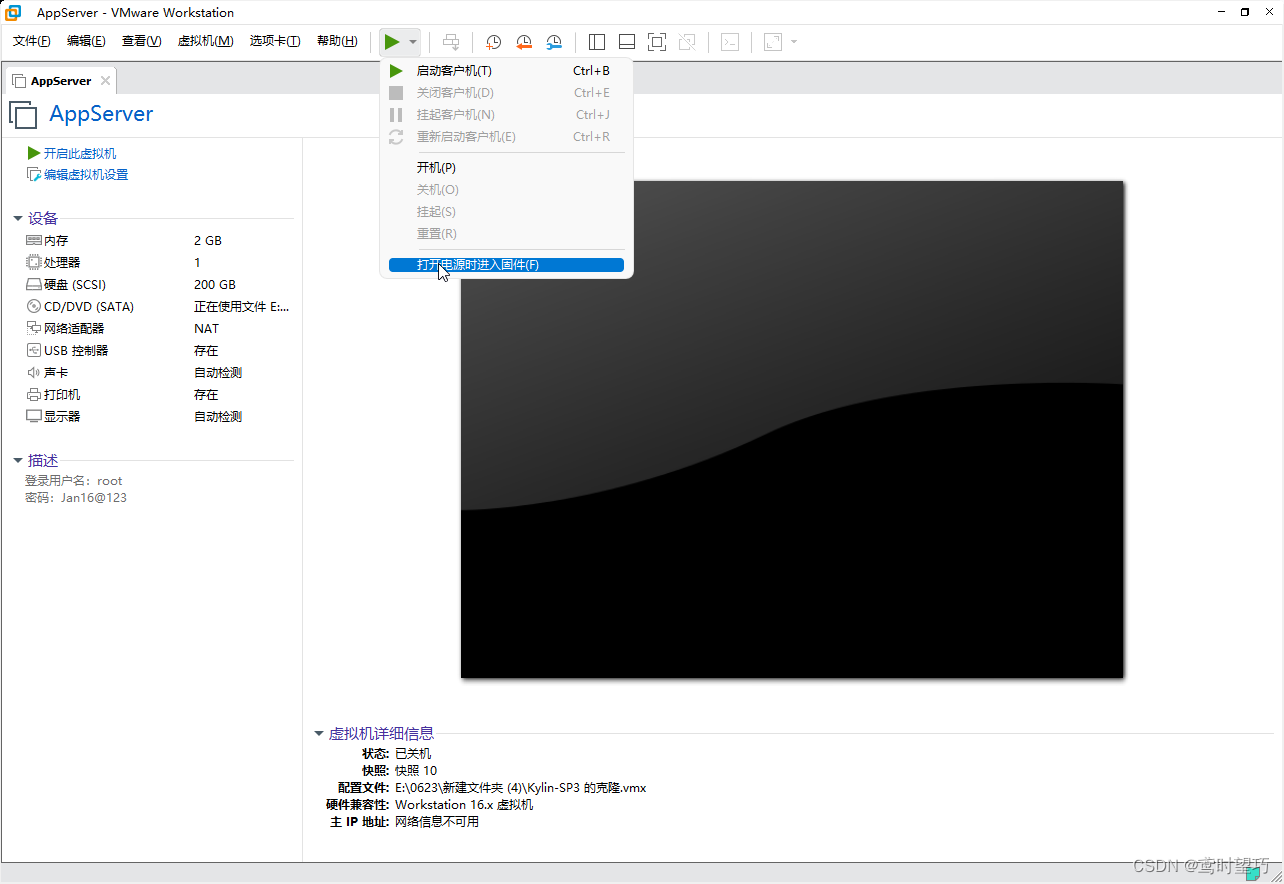
1.在VMWare Workstation中选择虚机AppServer,点击导航栏中的播放按钮,在弹出的下拉列表中单击【打开电源时进入固件(F)】。
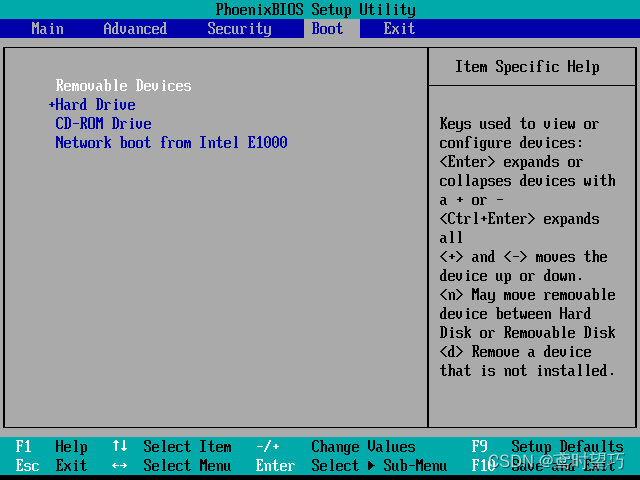
2.单击后服务器进入BIOS模式,使用【→】键将修改界面切换从【Main】切换至【Boot】页面。

3.在【Boot】页面上使用【↓】键将光标移动到【CD-ROM Drive】该行。
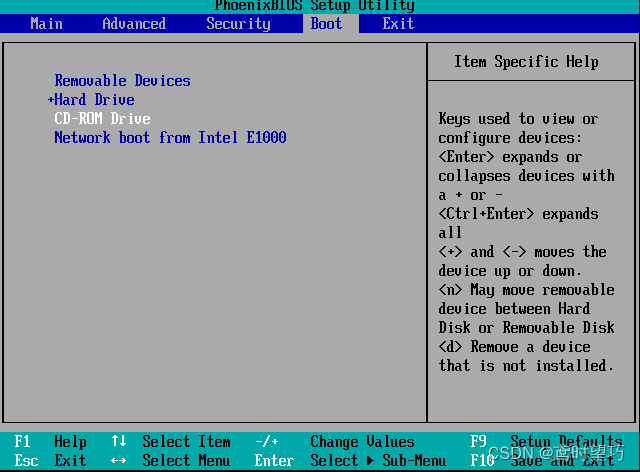
4.在【Boot】页面上使用【+】键将【CD-ROM Drive】行移动到最上方。
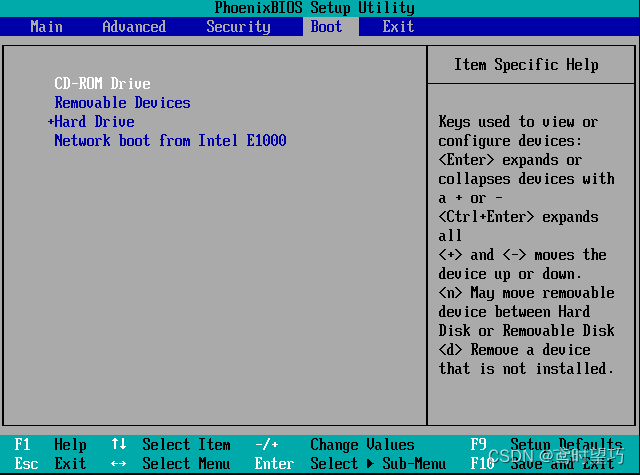
5.使用【F10】键保存修改的操作,单击【Yes】键完成保存操作,以【CD-ROM Drive】方式启动服务器。

6.使用方向键将光标移动到【Troubleshooting】该行。
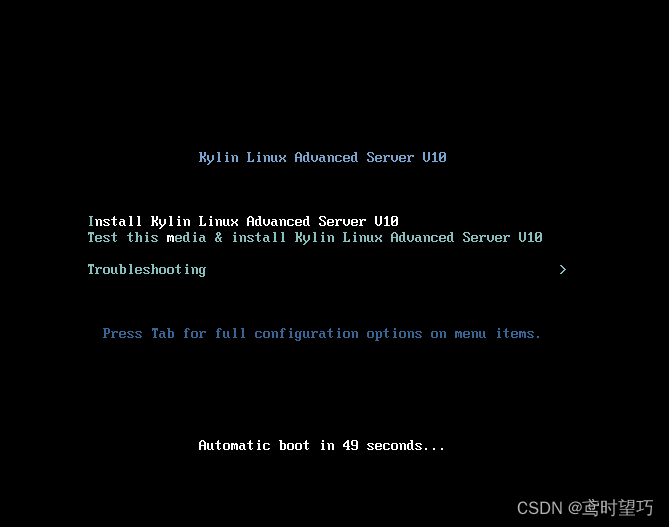
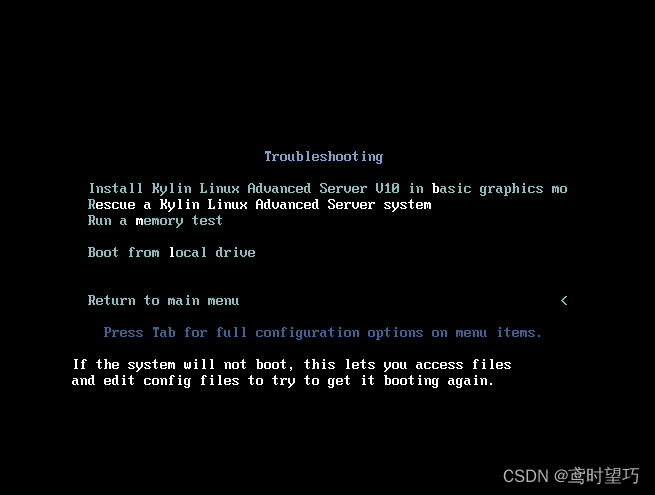
7.单击【Enter】键进入【Troubleshooting】页面,使用方向键切换至【Rescue a Kylin Linux Advanced Server system】,单击【Enter】键进入救援模式。
8.进入救援模式后,使用【Control-D】键继续配置操作。
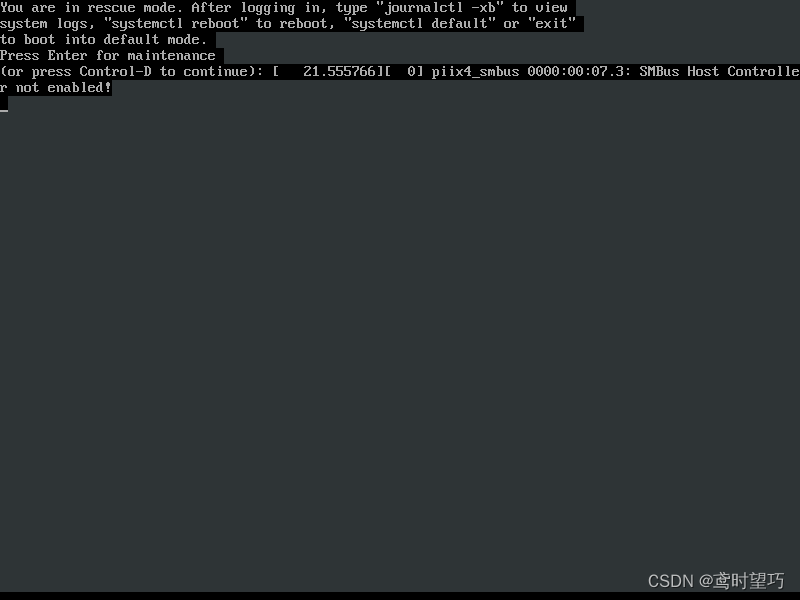
9.救援模式下,输入“1”后继续,开始对系统进行更改操作。

10.在Shell中使用chroot命令将系统根目录设置为当前活动系统的根目录。代码如下:
sh-5.0# chroot /mnt/sysroot

bash-5.0#
11.在bash中使用passwd命令修改root用户密码。代码如下:
bash-5.0# passwd root

更改用户root的密码 。

新的密码:    \\设置新密码

重新输入新 的密码:     \\重复输入

passwd:所有的身份验证令牌已经成功更新。
12.在bash中使用exit命令退出bash环境。在shell中使用exit命令退出shell环境。代码如下:
bash-5.0# exit

sh-5.0# exit
12.完成后关闭虚拟机,重新在BIOS内将【Removable Devices】移动到【Boot】界面顶部。【Hard Drive】移动到第二行。
