目录
一、回顾以及本篇博客内容概述
二、代码解析
2.1 ROIHeads类(承接上篇博客的2.5节)
2.1.1 初始化函数 __init__回顾
2.1.2 正向传播forward回顾
2.1.3 select_training_samples
2.1.4 add_gt_proposals
2.1.5 assign_targets_to_proposals
2.1.6 subsample
2.1.7 fastrcnn_loss
一、回顾以及本篇博客内容概述
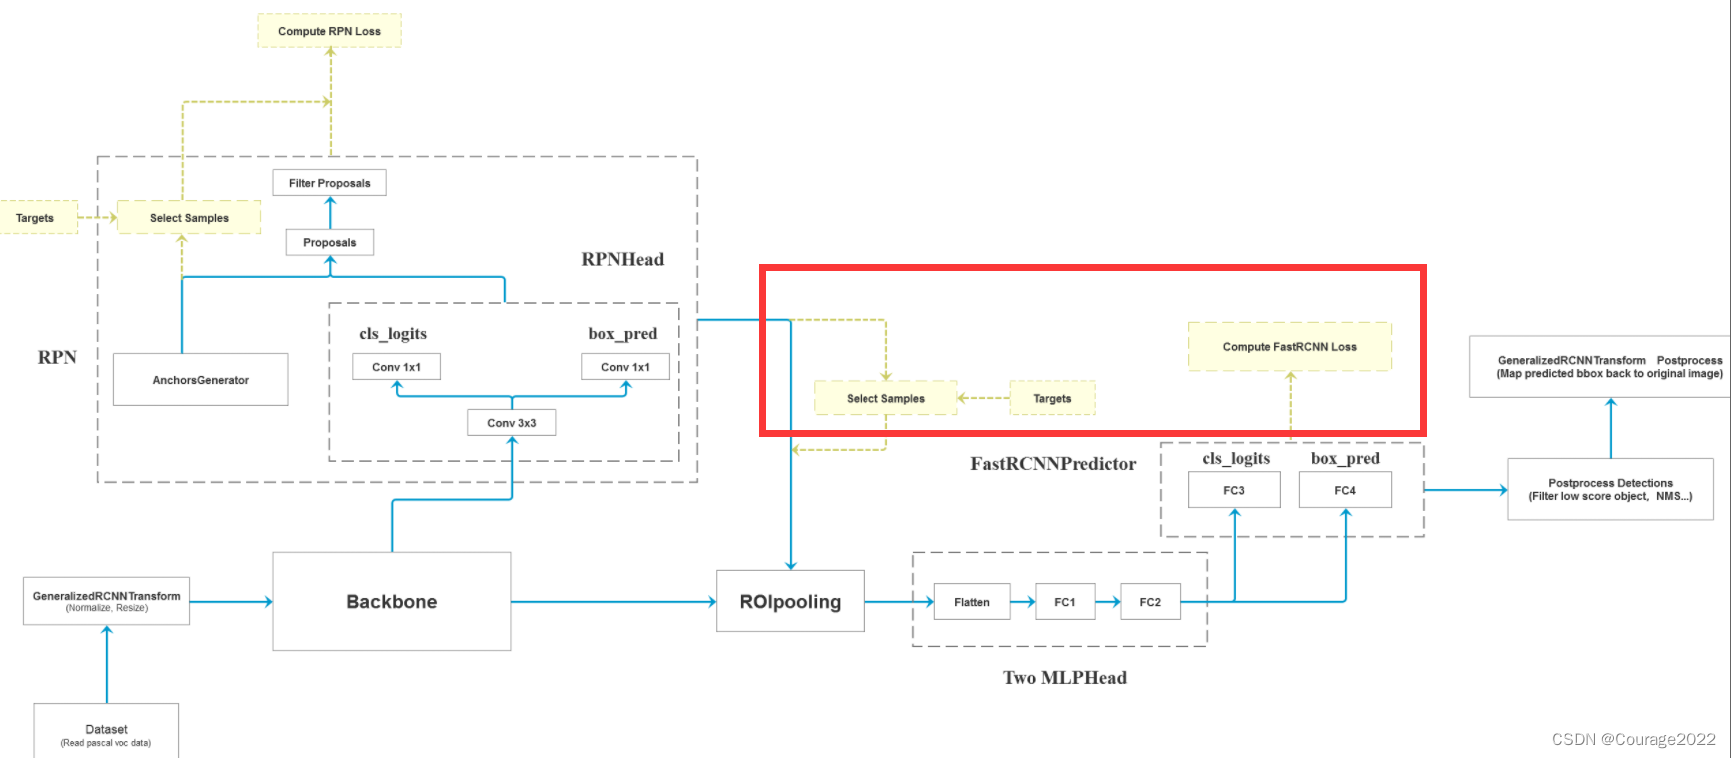
上篇博客我们讲述完了ROIPooling(ROIAlign)、Two MLPHead及FastRCNNPredictor部分。
本篇博客我们将讲述在我们的训练过程中并不是选择RPN提供的所有proposal,而是其中选取一部分proposal作为我们的FastRCNN损失计算。对应下图的内容:
二、代码解析
2.1 ROIHeads类(承接上篇博客的2.5节)
2.1.1 初始化函数 __init__回顾
    def __init__(self,
                 box_roi_pool,   # Multi-scale RoIAlign pooling
                 box_head,       # TwoMLPHead
                 box_predictor,  # FastRCNNPredictor
                 # Faster R-CNN training
                 fg_iou_thresh, bg_iou_thresh,  # default: 0.5, 0.5
                 batch_size_per_image, positive_fraction,  # default: 512, 0.25
                 bbox_reg_weights,  # None
                 # Faster R-CNN inference
                 score_thresh,        # default: 0.05
                 nms_thresh,          # default: 0.5
                 detection_per_img):  # default: 100
        super(RoIHeads, self).__init__()

		#计算IoU的方法
        self.box_similarity = box_ops.box_iou
        # assign ground-truth boxes for each proposal
		#将proposal划分为正负样本中
        self.proposal_matcher = det_utils.Matcher(
            fg_iou_thresh,  # default: 0.5
            bg_iou_thresh,  # default: 0.5
            allow_low_quality_matches=False)

		#对于划分的正负样本进行采样
        self.fg_bg_sampler = det_utils.BalancedPositiveNegativeSampler(
            batch_size_per_image,  # default: 512
            positive_fraction)     # default: 0.25

        if bbox_reg_weights is None:
            bbox_reg_weights = (10., 10., 5., 5.)
        self.box_coder = det_utils.BoxCoder(bbox_reg_weights)

        self.box_roi_pool = box_roi_pool    # Multi-scale RoIAlign pooling
        self.box_head = box_head            # TwoMLPHead
        self.box_predictor = box_predictor  # FastRCNNPredictor

        self.score_thresh = score_thresh  # default: 0.05
        self.nms_thresh = nms_thresh      # default: 0.5
        self.detection_per_img = detection_per_img  # default: 100
简单的对我们2.2.1节的参数进行了类内初始化。
        self.proposal_matcher = det_utils.Matcher(
            fg_iou_thresh,  # default: 0.5
            bg_iou_thresh,  # default: 0.5
            allow_low_quality_matches=False)
这个是将proposal划分到正负样本中。
self.fg_bg_sampler = det_utils.BalancedPositiveNegativeSampler(
            batch_size_per_image,  # default: 512
            positive_fraction)     # default: 0.25
这个是将正负样本进行采样。
2.1.2 正向传播forward回顾
	#参数:features特征图,proposals框体的坐标,image_shapes图片经过预处理后的大小,targets真实目标的标注信息
    def forward(self,
                features,       # type: Dict[str, Tensor]
                proposals,      # type: List[Tensor]
                image_shapes,   # type: List[Tuple[int, int]]
                targets=None    # type: Optional[List[Dict[str, Tensor]]]
                ):
        # type: (...) -> Tuple[List[Dict[str, Tensor]], Dict[str, Tensor]]
        """
        Arguments:
            features (List[Tensor])
            proposals (List[Tensor[N, 4]])
            image_shapes (List[Tuple[H, W]])
            targets (List[Dict])
        """

        # 检查targets的数据类型是否正确
        if targets is not None:
            for t in targets:
                floating_point_types = (torch.float, torch.double, torch.half)
                assert t["boxes"].dtype in floating_point_types, "target boxes must of float type"
                assert t["labels"].dtype == torch.int64, "target labels must of int64 type"

        if self.training:
            # 划分正负样本,统计对应gt的标签以及边界框回归信息
			#在我们的rpn输出时会提供2000个proposal,但在我们的训练过程中我们只需要从中采样512个就够了
            proposals, labels, regression_targets = self.select_training_samples(proposals, targets)
		#不是训练模式生成1000个proposal rpn_post_nms_top_n_test=1000
	    else:
            labels = None
            regression_targets = None

        # 将采集样本通过Multi-scale RoIAlign pooling层
        # box_features_shape: [num_proposals, channel, height, width]
		#这里的box_roi_pool就是我们所说的ros_alain 通过它就能将我们的proposal处理到我们所指定的大小当中
		#features由于我们在多个特征层上预测,因此features有五个预测特征层
		#box_features 1024 256 7 7   两张图片,一张照片512个proposal,每一个proposal经过ros_alain后得到一个256 7 7大小的特征矩阵
        box_features = self.box_roi_pool(features, proposals, image_shapes)

        # 通过roi_pooling后的两层全连接层 TwoMLPHead
        # box_features_shape: [num_proposals, representation_size] 1024 1024
        box_features = self.box_head(box_features)

        # 接着分别预测目标类别和边界框回归参数 1024 21   1024 84
        class_logits, box_regression = self.box_predictor(box_features)

		#空列表空字典
        result = torch.jit.annotate(List[Dict[str, torch.Tensor]], [])
        losses = {}
		#训练模式记录,计算fastrcnn部分的损失
        if self.training:
            assert labels is not None and regression_targets is not None
            loss_classifier, loss_box_reg = fastrcnn_loss(
                class_logits, box_regression, labels, regression_targets)
            losses = {
                "loss_classifier": loss_classifier,
                "loss_box_reg": loss_box_reg
            }
		#验证模式对预测结果进行后处理
		#验证模式不会进行正负样本划分及采样过程,预测过程中直接使用rpn所有的proposal进行预测,预测的时候rpn只会提供1000个proposal
        else:
            boxes, scores, labels = self.postprocess_detections(class_logits, box_regression, proposals, image_shapes)
            num_images = len(boxes)
            for i in range(num_images):
                result.append(
                    {
                        "boxes": boxes[i],
                        "labels": labels[i],
                        "scores": scores[i],
                    }
                )

        return result, losses
这里的参数:
@features:特征图,经过backbone模块后得到的部分
@proposals:RPN生成的proposals
@image_shapes:在预处理之后图像所得到的shape,即经过等比例缩放后的图片的高度宽度大小。不是打包成batch的大小!
@targets:真实目标的标注信息
if self.training: # 划分正负样本,统计对应gt的标签以及边界框回归信息 #在我们的rpn输出时会提供2000个proposal,但在我们的训练过程中我们只需要从中采样512个就够了 proposals, labels, regression_targets = self.select_training_samples(proposals, targets) #不是训练模式生成1000个proposal rpn_post_nms_top_n_test=1000 else: labels = None regression_targets = None如果是训练模式,我们用select_training_samples方法选取我们使用的样本,我们回忆一下,在RPN输出时会提供2000个proposal,但我们在训练过程中只需要采样512个样本就够了,因此在训练过程中我们会进一步采样;如果不是训练模式(验证模式),RPN只会生成1000个proposal。
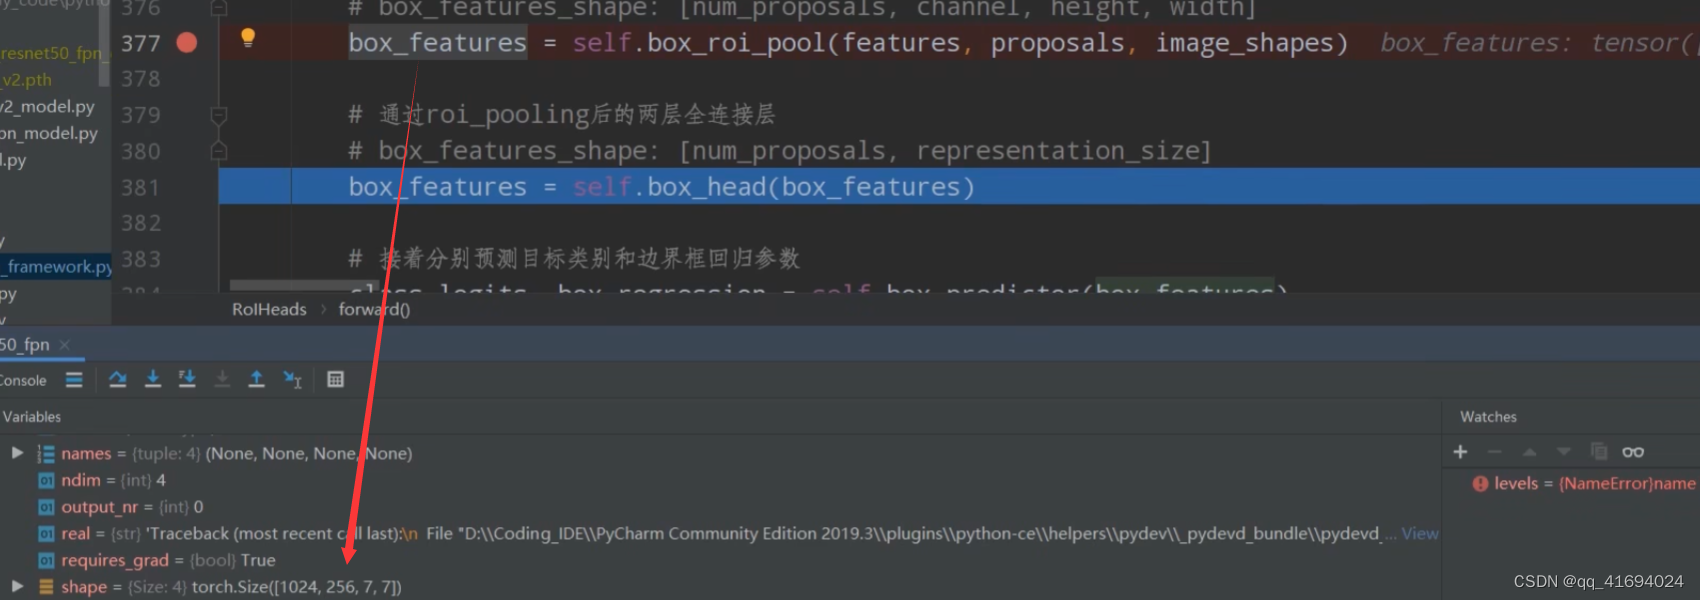
# 将采集样本通过Multi-scale RoIAlign pooling层 # box_features_shape: [num_proposals, channel, height, width] #这里的box_roi_pool就是我们所说的ros_alain 通过它就能将我们的proposal处理到我们所指定的大小当中 #features由于我们在多个特征层上预测,因此features有五个预测特征层 #box_features 1024 256 7 7 两张图片,一张照片512个proposal,每一个proposal经过ros_alain后得到一个256 7 7大小的特征矩阵 box_features = self.box_roi_pool(features, proposals, image_shapes)将我们的features, proposals, image_shapes传给box_roi_pool,这里的box_roi_pool就是我们说的ROIAlign,通过这个函数可以将我们的proposal处理到指定的大小当中。
这里的features是通过backbone所得到的特征矩阵features。(FPN结构5个特征层)
这里的proposals是经过筛选之后对于每张图片只保留了512个proposal。
这里的image_shapes是每张图片缩放之后对应的尺寸。
我们得到的box_features如下:
1024对应着两张图片,一张图片中含有512个proposal。每个proposal经过RoIAlign后变成256*7*7大小的特征矩阵了。
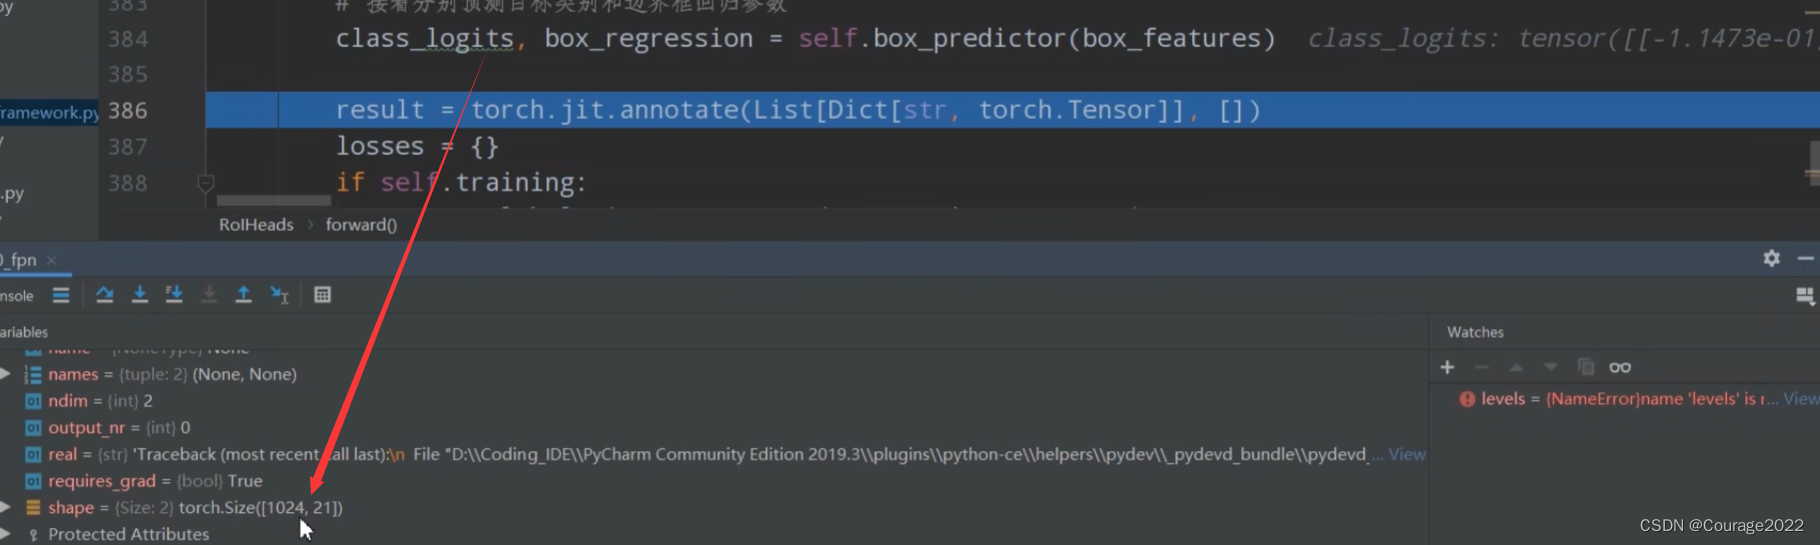
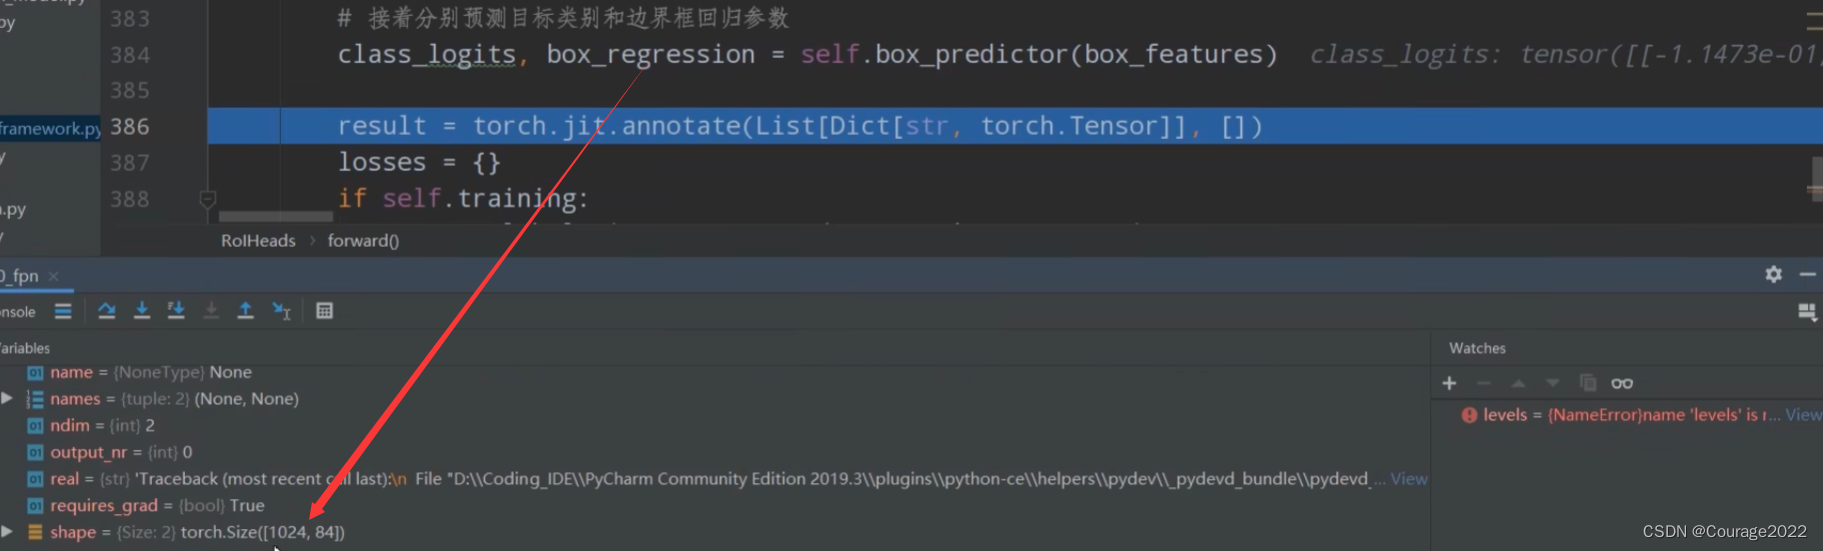
        # 通过roi_pooling后的两层全连接层 TwoMLPHead
        # box_features_shape: [num_proposals, representation_size] 1024 1024
        box_features = self.box_head(box_features)
这里的BoxHead对应的图中Two MLPHead部分。
现在我们的box_features是1024*1024的。
我们再将我们所得的box_features传给box_predictor。对应图中的FastRCNNPreDictor部分。
        # 接着分别预测目标类别和边界框回归参数 1024 21   1024 84
        class_logits, box_regression = self.box_predictor(box_features)
对于每个proposal,都会预测21种类别的概率。
对于每个proposal,都会预测21种类别每个类别的四个坐标参数。
我们定义了空列表和空字典:
		#空列表空字典
        result = torch.jit.annotate(List[Dict[str, torch.Tensor]], [])
        losses = {}
对于训练模式下计算fastrcnn部分的损失。
        if self.training:
            assert labels is not None and regression_targets is not None
            loss_classifier, loss_box_reg = fastrcnn_loss(
                class_logits, box_regression, labels, regression_targets)
            losses = {
                "loss_classifier": loss_classifier,
                "loss_box_reg": loss_box_reg
对于验证模式下,对于预测的结果进行后处理:
		#验证模式对预测结果进行后处理
		#验证模式不会进行正负样本划分及采样过程,预测过程中直接使用rpn所有的proposal进行预测,预测的时候rpn只会提供1000个proposal
        else:
            boxes, scores, labels = self.postprocess_detections(class_logits, box_regression, proposals, image_shapes)
            num_images = len(boxes)
            for i in range(num_images):
                result.append(
                    {
                        "boxes": boxes[i],
                        "labels": labels[i],
                        "scores": scores[i],
                    }
                )
--------------------------------------------------------------------------------------------------------------------------
接着上篇博客,我们来介绍select_training_samples这个方法。(2.1.3节)
            # 划分正负样本,统计对应gt的标签以及边界框回归信息
			#在我们的rpn输出时会提供2000个proposal,但在我们的训练过程中我们只需要从中采样512个就够了
            proposals, labels, regression_targets = self.select_training_samples(proposals, targets)
这里传入的参数:
@proposals:经过RPN模块处理后的proposal。
@targets:人工标注的真实的groungtruth信息。
我们得到了如下信息:
proposals:经过抽取后的正负样本的集合(512 * 2)
labels:获取对应正负样本的真实类别信息(512 * 2)
regression_targets:对应着真实的框体信息
我们进行了RPN生成的样本进行了正负样本的划分以及采样,对采样的样本计算相对于gtbox的回归参数。
--------------------------------------------------------------------------------------------------------------------------
#训练模式记录,计算fastrcnn部分的损失 if self.training: assert labels is not None and regression_targets is not None loss_classifier, loss_box_reg = fastrcnn_loss( class_logits, box_regression, labels, regression_targets) losses = { "loss_classifier": loss_classifier, "loss_box_reg": loss_box_reg }计算Fastrcnn损失部分:(2.1.7节)
这里我们传入的参数:
@class_logits:预测目标类别信息(
)
@box_regression:预测目标边界框信息(
)
@labels:筛选出来的proposal对应的类别信息
@regression_targets:真实的目标边界框(

2.1.3 select_training_samples
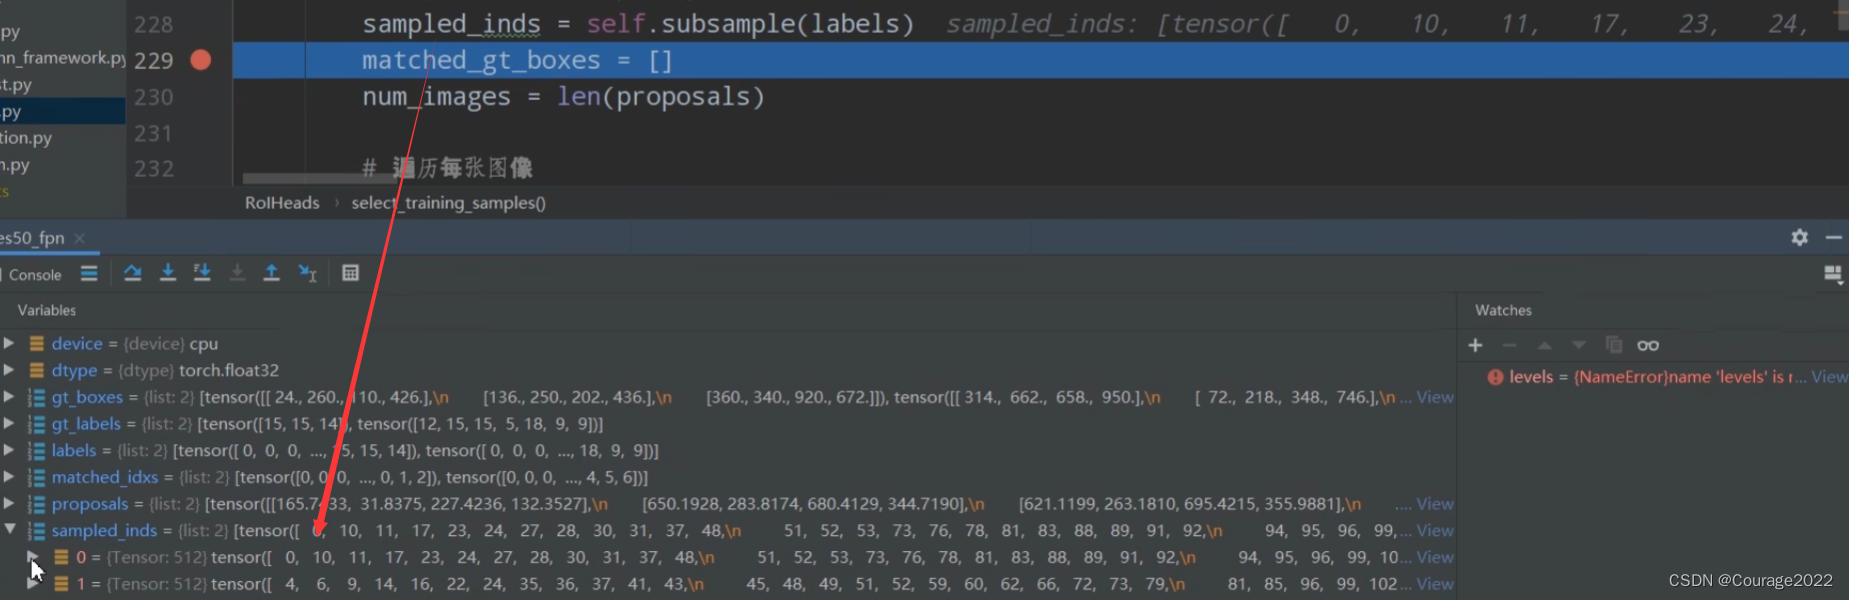
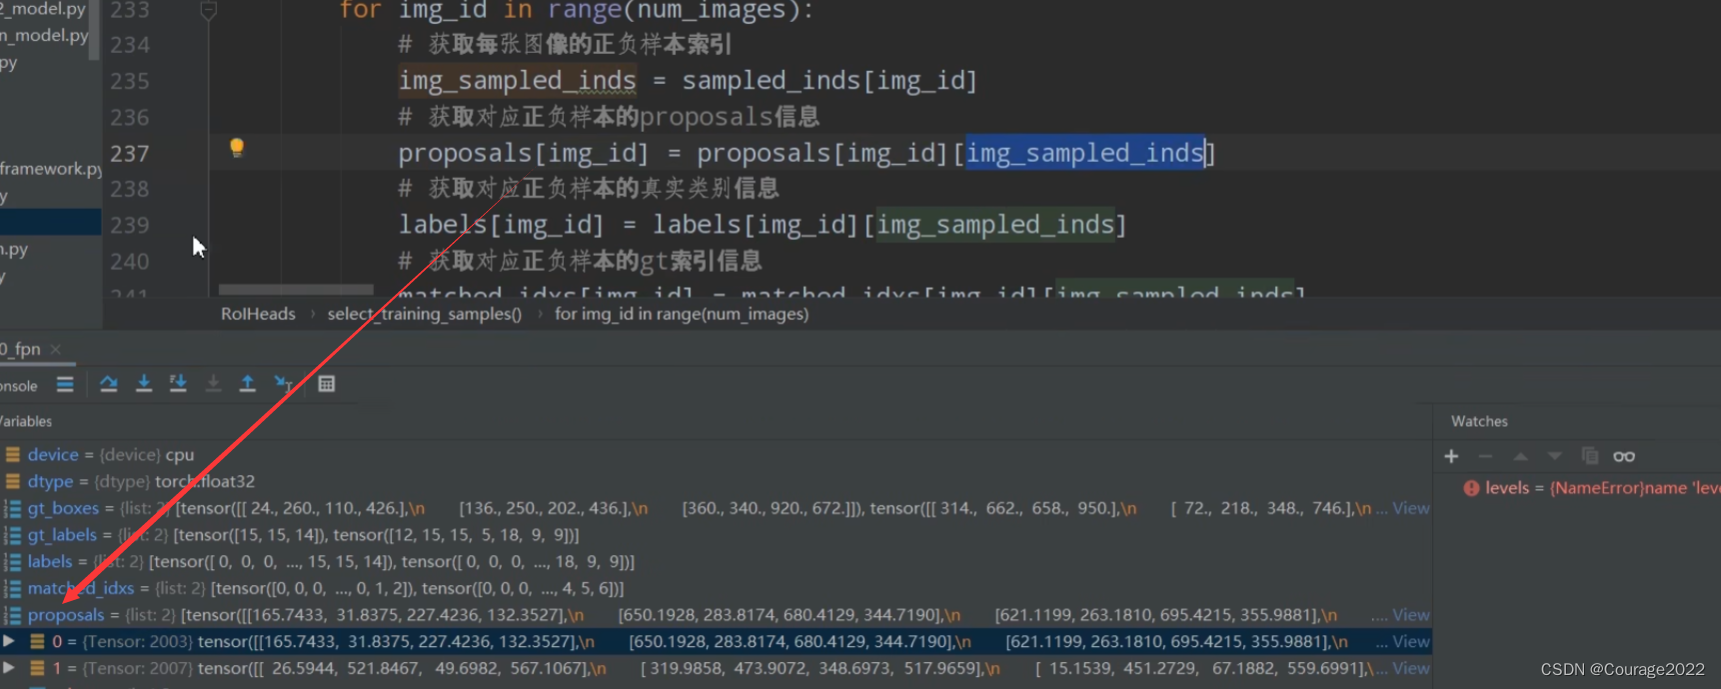
#proposals是rpn预测的目标边界框 #targets 是人工标定的图片中的gtbox以及所对应的标签 def select_training_samples(self, proposals, # type: List[Tensor] targets # type: Optional[List[Dict[str, Tensor]]] ): # type: (...) -> Tuple[List[Tensor], List[Tensor], List[Tensor]] """ 划分正负样本,统计对应gt的标签以及边界框回归信息 list元素个数为batch_size Args: proposals: rpn预测的boxes targets: Returns: """ # 检查target数据是否为空 self.check_targets(targets) # 如果不加这句,jit.script会不通过(看不懂) assert targets is not None dtype = proposals[0].dtype device = proposals[0].device # 获取标注好的boxes以及labels信息 gt_boxes = [t["boxes"].to(dtype) for t in targets] gt_labels = [t["labels"] for t in targets] # append ground-truth bboxes to proposal # 将gt_boxes拼接到proposal后面 # 这里是防止正样本出现的太少 将rpn预测的目标边界框和人工标注的框都算在了proposals里面 proposals = self.add_gt_proposals(proposals, gt_boxes) # get matching gt indices for each proposal # 为每个proposal匹配对应的gt_box,并划分到正负样本中 # matched_idxs是 [2,1,0,0,0,3] 记录iou最高值的框体索引 # label是 每个框体匹配的最高的iou值,0代表背景。比如labels_in_image为{12 10 0}代表第一个框体是第12类物体 第三类物体是背景 matched_idxs, labels = self.assign_targets_to_proposals(proposals, gt_boxes, gt_labels) # sample a fixed proportion of positive-negative proposals # 按给定数量和比例采样正负样本 # sampled_inds存储着所有采样样本的索引 # 是一个列表,每个元素对应的是一张图片 shape都等于512 sampled_inds = self.subsample(labels) matched_gt_boxes = [] num_images = len(proposals) # 遍历每张图像 for img_id in range(num_images): # 获取每张图像的正负样本索引 img_sampled_inds = sampled_inds[img_id] # 获取对应正负样本的proposals信息本身是2003 现在是502个了 proposals[img_id] = proposals[img_id][img_sampled_inds] # 获取对应正负样本的真实类别信息 labels[img_id] = labels[img_id][img_sampled_inds] # 获取对应正负样本的gt索引信息 matched_idxs[img_id] = matched_idxs[img_id][img_sampled_inds] #shape 3*4 gt_boxes_in_image = gt_boxes[img_id] if gt_boxes_in_image.numel() == 0: gt_boxes_in_image = torch.zeros((1, 4), dtype=dtype, device=device) # 获取对应正负样本的gt box信息 # 首先获取matched_idxs[img_id] 对应正负样本的gt索引信息 # 再将gtbox中对应的索引提取出来 # 512 * 4 matched_gt_boxes.append(gt_boxes_in_image[matched_idxs[img_id]]) # 根据gt和proposal计算边框回归参数(针对gt的) regression_targets = self.box_coder.encode(matched_gt_boxes, proposals) #regression_targets return proposals, labels, regression_targets@proposals:经过RPN模块处理后的proposal。
@targets:人工标注的真实的groungtruth信息。
获取每张图片中标注好的boxes以及labels信息:
# 获取标注好的boxes以及labels信息 gt_boxes = [t["boxes"].to(dtype) for t in targets] gt_labels = [t["labels"] for t in targets]通过add_gt_proposals方法将gt_boxes拼接到proposal后面(2.1.4节)
# append ground-truth bboxes to proposal # 将gt_boxes拼接到proposal后面 # 这里是防止正样本出现的太少 将rpn预测的目标边界框和人工标注的框都算在了proposals里面 proposals = self.add_gt_proposals(proposals, gt_boxes)再通过assign_targets_to_proposals方法将proposal划分到正样本或负样本中。(2.1.5节)
# get matching gt indices for each proposal # 为每个proposal匹配对应的gt_box,并划分到正负样本中 matched_idxs, labels = self.assign_targets_to_proposals(proposals, gt_boxes, gt_labels)matched_idxs变量,其中存储的内容是大于0,0数字,对应着每张图片proposal的标记(正样本、负样本及丢弃样本)
labels变量,其中存储的内容是每个proposal对应的gt的背景标签。(-1,-2,1-21的值)
我们可以看到 matched_idxs有两张图片,第一张图片对应的proposal数量是2003,第二张图片对应的proposal数量是2007,0对应着负样本和丢弃样本,大于0代表匹配到的gtbox索引值。
我们可以看到 labels对应两张图片的信息,第一张图片对应的proposal数量是2003,第二张图片对应的proposal数量是2007,0对应着负样本和丢弃样本没有label标签,大于0代表匹配到的gtbox的类别信息(1-21)。
# sample a fixed proportion of positive-negative proposals # 按给定数量和比例采样正负样本 # sampled_inds存储着所有采样样本的索引 # 是一个列表,每个元素对应的是一张图片 shape都等于512 sampled_inds = self.subsample(labels)通过subsample方法对labels进行正负样本的采样。sampled_inds 的内容就是一个512的tensor,为采样数据的索引。
遍历每张图片:
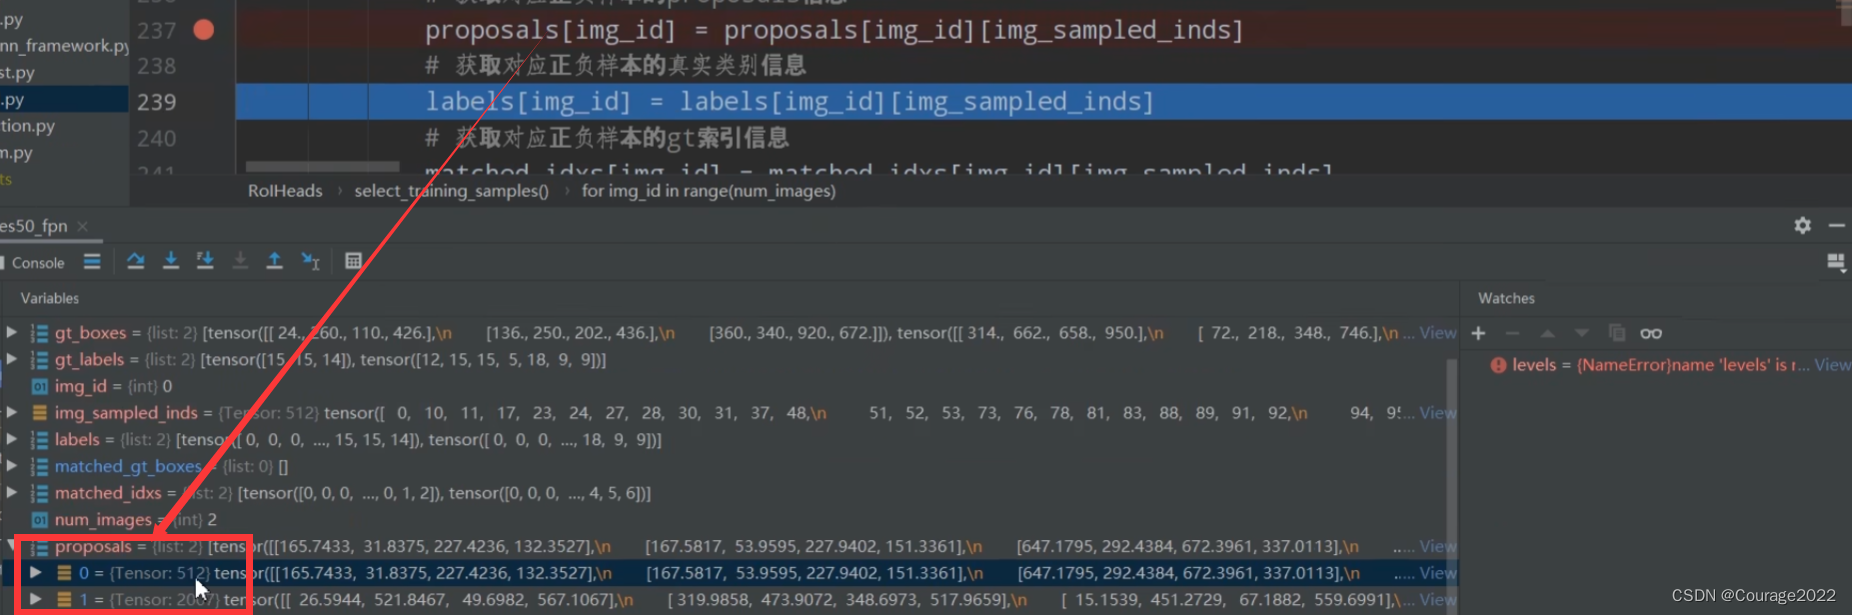
matched_gt_boxes = [] num_images = len(proposals) # 遍历每张图像 for img_id in range(num_images): # 获取每张图像的正负样本索引 img_sampled_inds = sampled_inds[img_id] # 获取对应正负样本的proposals信息本身是2003 现在是502个了 proposals[img_id] = proposals[img_id][img_sampled_inds] # 获取对应正负样本的真实类别信息 labels[img_id] = labels[img_id][img_sampled_inds] # 获取对应正负样本的gt索引信息 matched_idxs[img_id] = matched_idxs[img_id][img_sampled_inds] #shape 3*4 gt_boxes_in_image = gt_boxes[img_id] if gt_boxes_in_image.numel() == 0: gt_boxes_in_image = torch.zeros((1, 4), dtype=dtype, device=device) # 获取对应正负样本的gt box信息 # 首先获取matched_idxs[img_id] 对应正负样本的gt索引信息 # 再将gtbox中对应的索引提取出来 # 512 * 4 matched_gt_boxes.append(gt_boxes_in_image[matched_idxs[img_id]]) # 根据gt和proposal计算边框回归参数(针对gt的) regression_targets = self.box_coder.encode(matched_gt_boxes, proposals) #regression_targets return proposals, labels, regression_targets用img_sampled_inds变量存储每张图片正负样本的索引。
取出对应正负样本的proposalproposals[img_id]、真实标签(1-21)类别信息labels[img_id]、每个proposal所匹配的gtbox信息matched_idxs[img_id]。
原来proposal是2003,现在只需要512个采样样本即可。
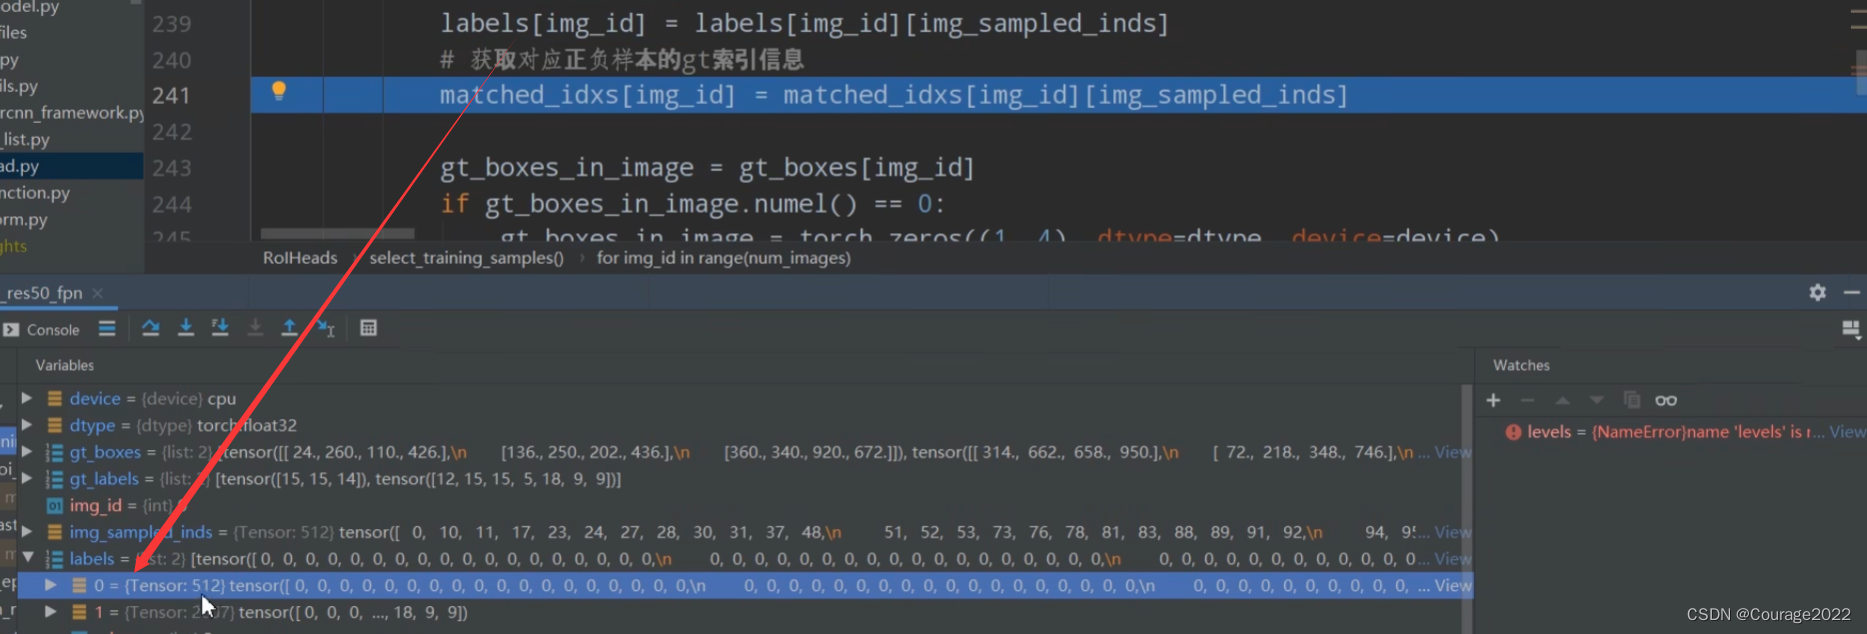
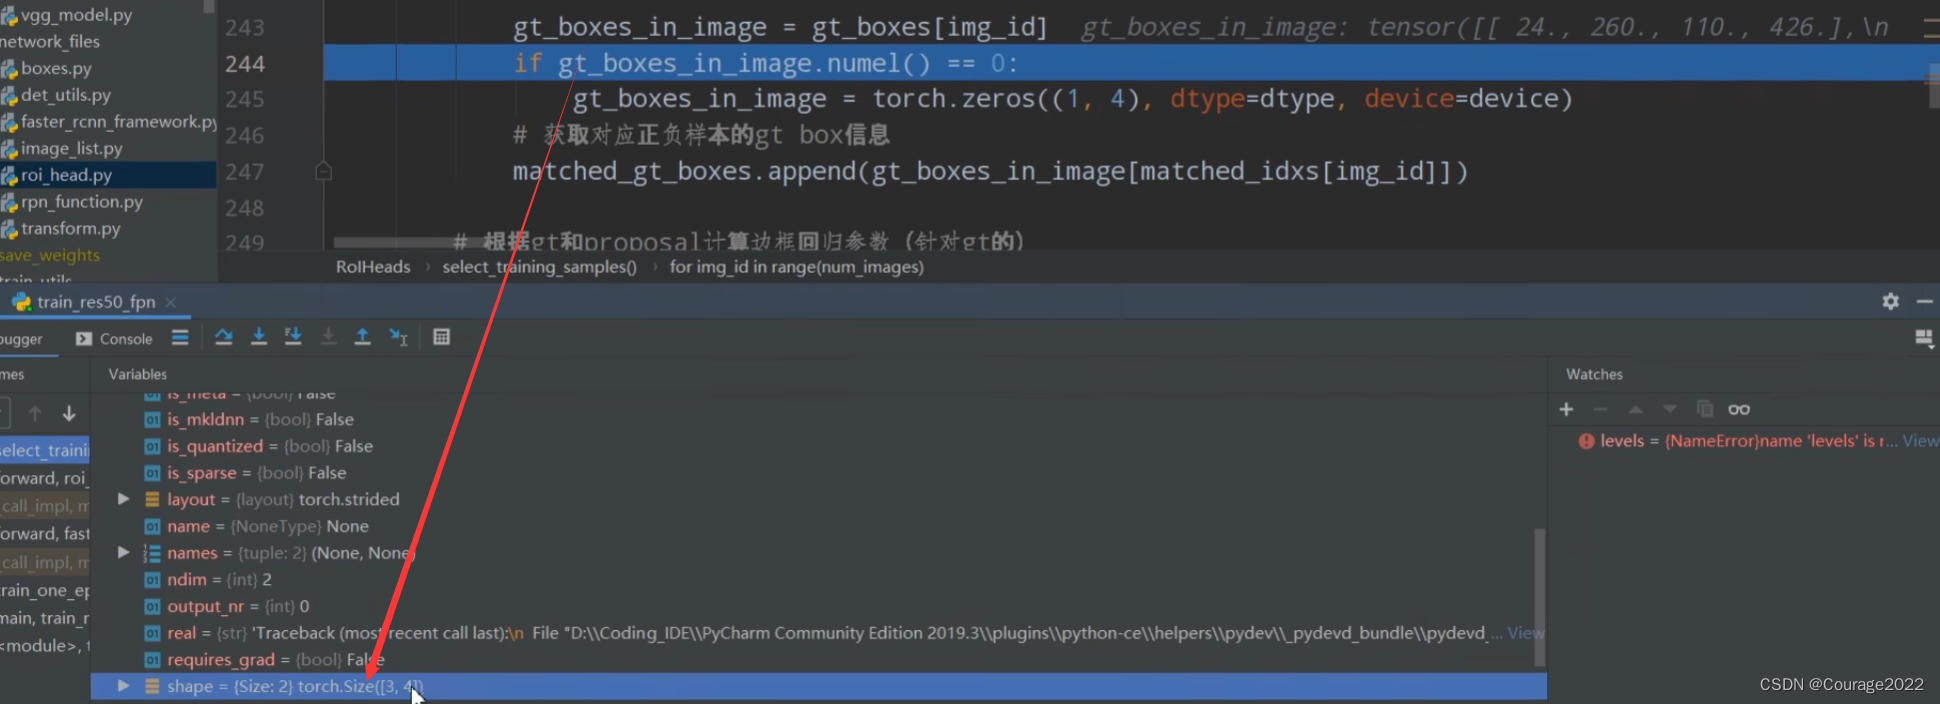
提取每张图片的gtbox信息:3个gtbox,每个gtbox四个坐标。
gt_boxes_in_image = gt_boxes[img_id]
matched_gt_boxes.append(gt_boxes_in_image[matched_idxs[img_id]])matched_idxs[img_id]是当前图像img_id中所有proposal对应gtbox的索引信息,gt_boxes_in_image[matched_idxs[img_id]]即在gtbox在对应索引处的gtbox取出来,我们就得到了每个proposal的(512个proposal)的gtbox的坐标。
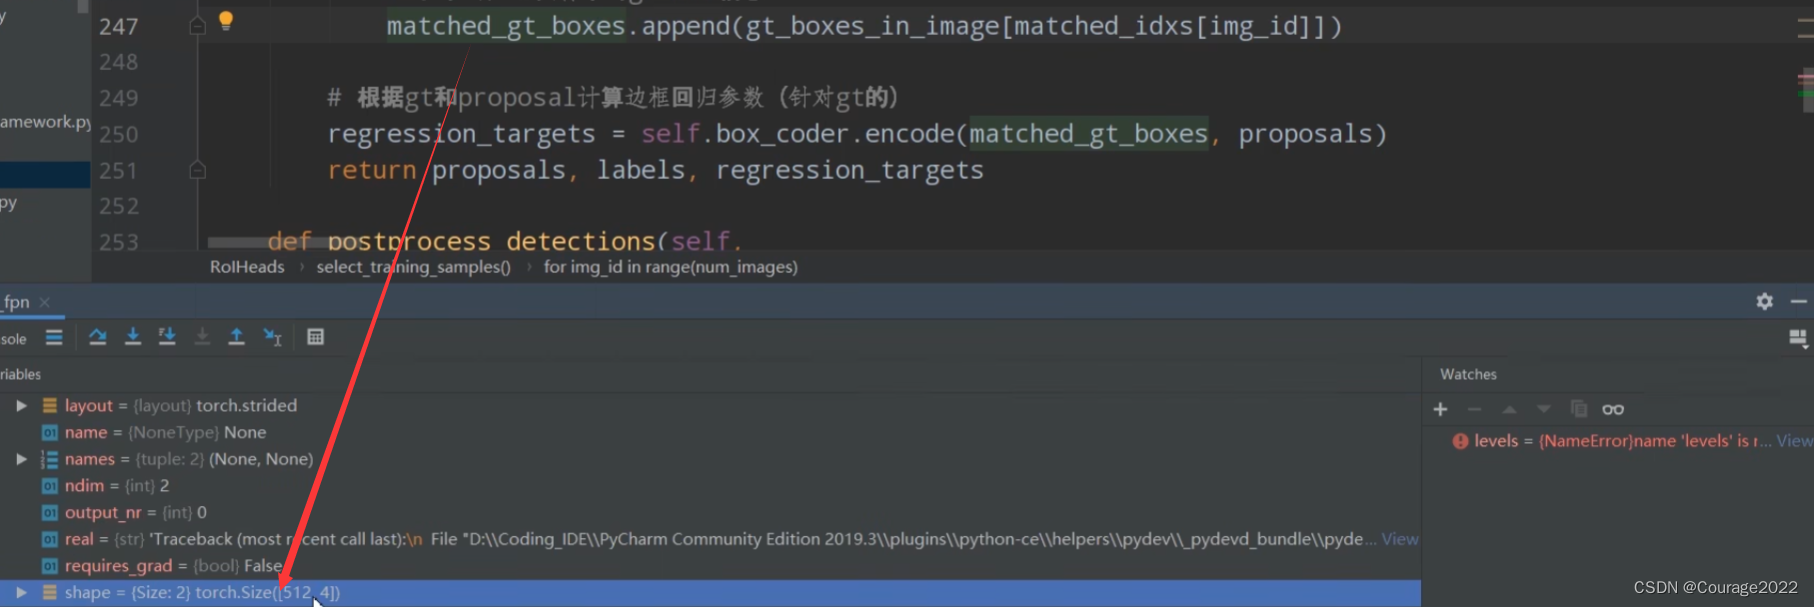
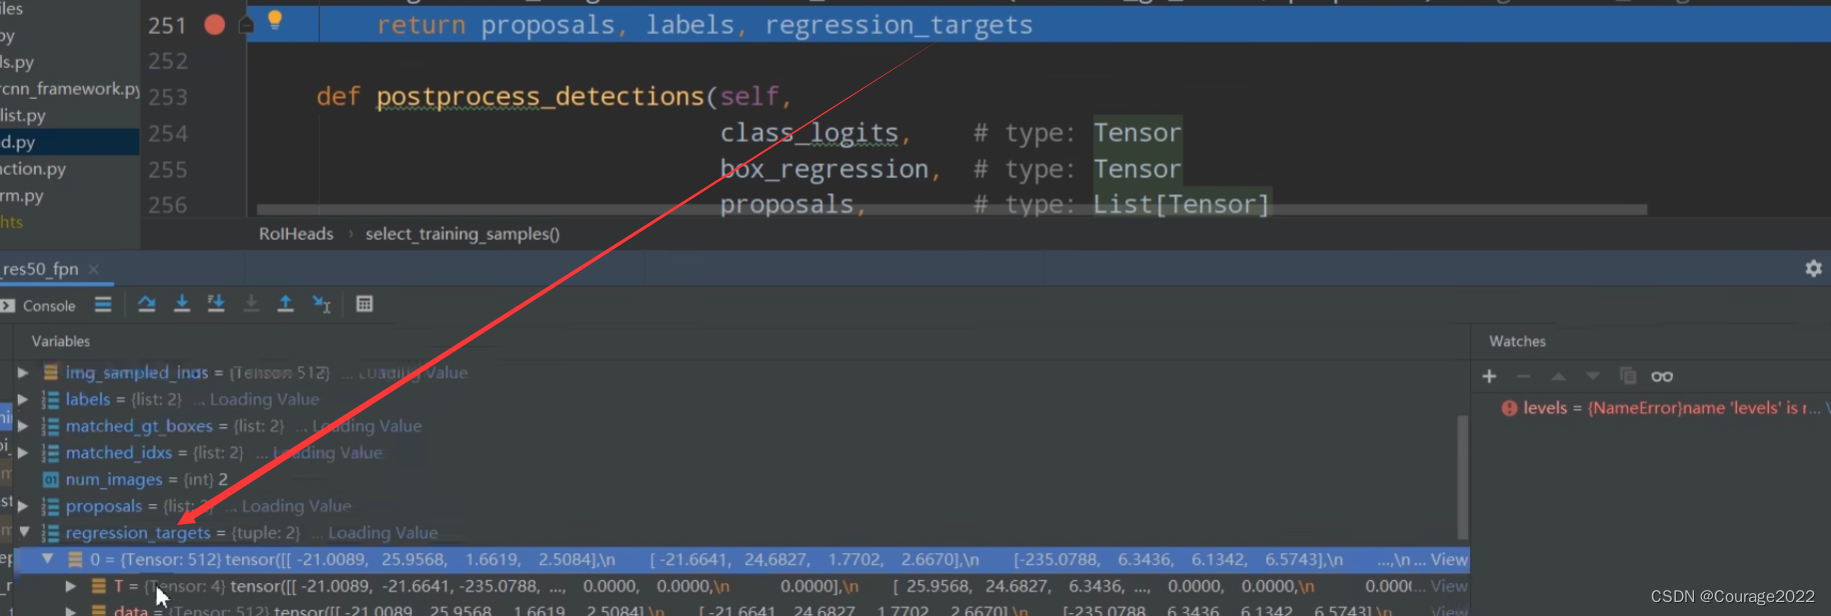
        # 根据gt和proposal计算边框回归参数(针对gt的)
        regression_targets = self.box_coder.encode(matched_gt_boxes, proposals)
计算真实的边界框回归参数。后续需要把预测的边界框回归参数和这个边界框回归参数进行对比得到fastrcnn部分的误差。这部分的代码之前讲过不再赘述。
Faster RCNN网络源码解读(Ⅷ) --- RPN网络代码解析(下)RegionProposalNetwork类解析
https://blog.csdn.net/qq_41694024/article/details/128510426 最后我们调试一下得到的regression_targets变量:对应着真实的框体信息
最后,我们将 proposals, labels, regression_targets返回给调用函数。
proposals:经过抽取后的正负样本的集合(512 * 2)
labels:获取对应正负样本的真实类别信息(512 * 2)
regression_targets:对应着真实的框体信息
返回给上层调用。


2.1.4 add_gt_proposals
	#将gt_boxes拼接到proposal后面
    def add_gt_proposals(self, proposals, gt_boxes):
        # type: (List[Tensor], List[Tensor]) -> List[Tensor]
        """
        将gt_boxes拼接到proposal后面
        Args:
            proposals: 一个batch中每张图像rpn预测的boxes
            gt_boxes:  一个batch中每张图像对应的真实目标边界框

        Returns:

        """
        proposals = [
            torch.cat((proposal, gt_box))
            for proposal, gt_box in zip(proposals, gt_boxes)
        ]
        return proposals
由于在训练过程中我们的正样本是很少的,为了增加正样本的数量,将gtbox也添加到proposal中。
2.1.5 assign_targets_to_proposals
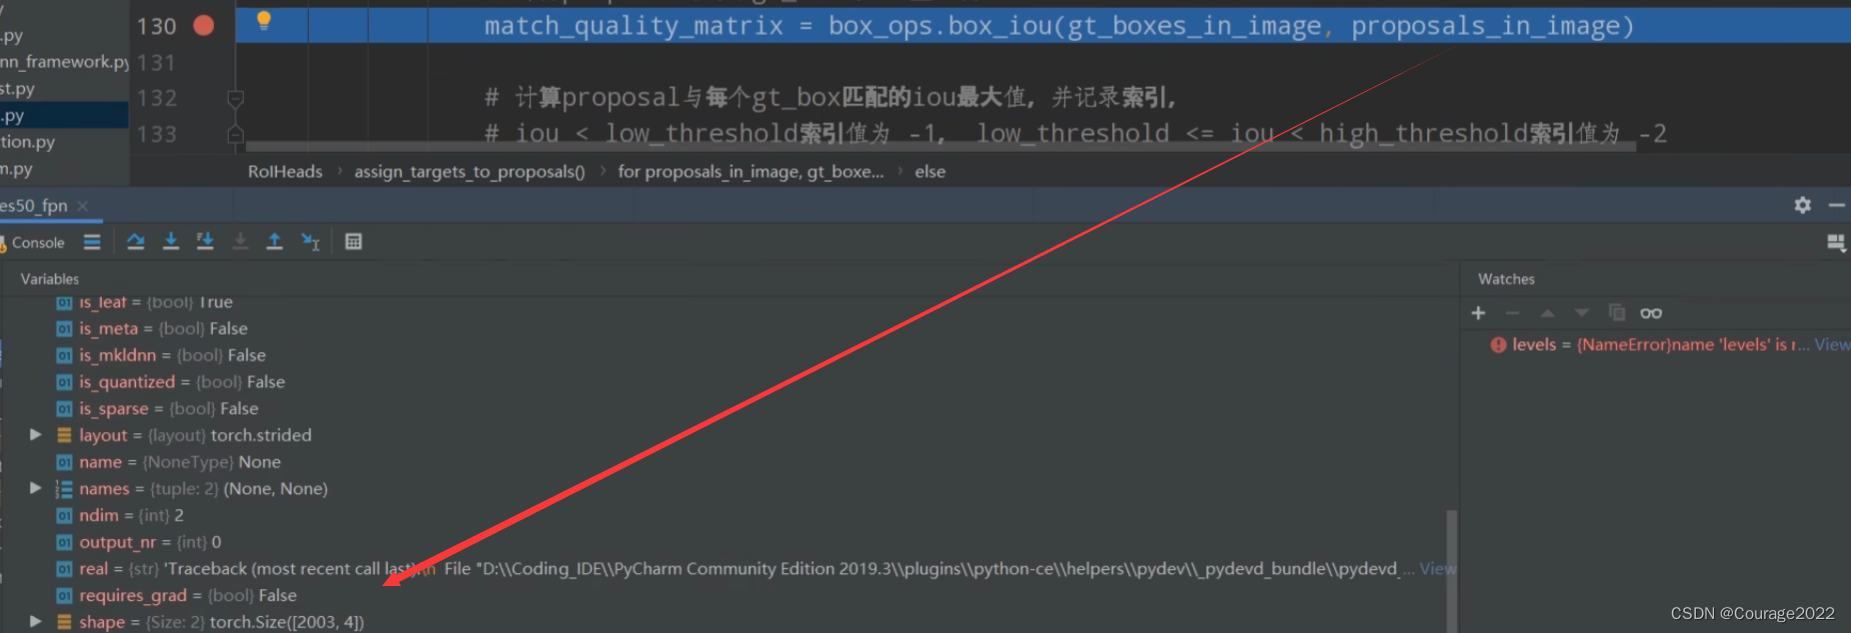
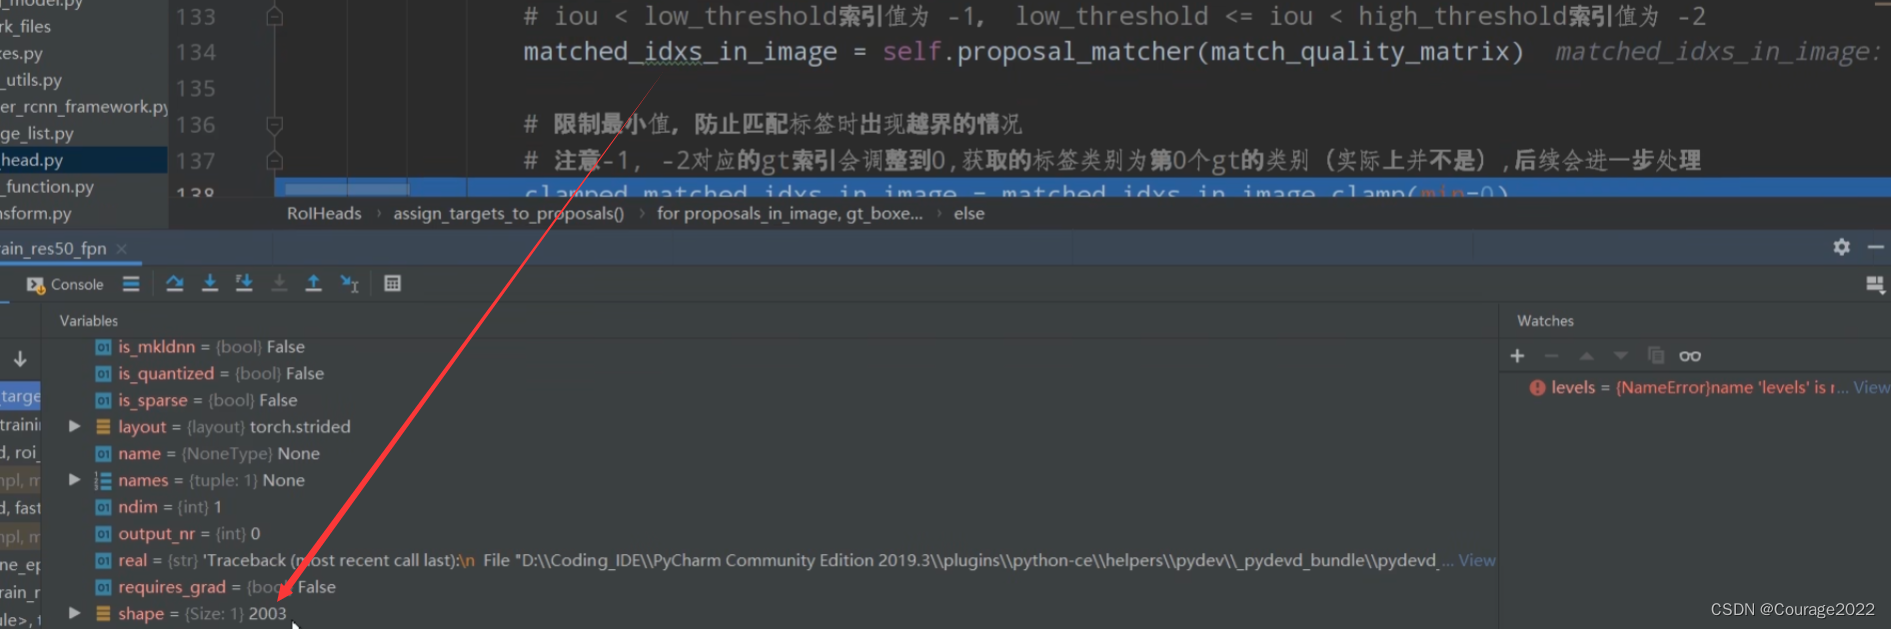
	#为每个proposal匹配对应的gt_box,并划分到正负样本中
    def assign_targets_to_proposals(self, proposals, gt_boxes, gt_labels):
        # type: (List[Tensor], List[Tensor], List[Tensor]) -> Tuple[List[Tensor], List[Tensor]]
        """
        为每个proposal匹配对应的gt_box,并划分到正负样本中
        Args:
            proposals:
            gt_boxes:
            gt_labels:

        Returns:

        """
        matched_idxs = []
        labels = []
        # 遍历每张图像的proposals, gt_boxes, gt_labels信息
        for proposals_in_image, gt_boxes_in_image, gt_labels_in_image in zip(proposals, gt_boxes, gt_labels):
            if gt_boxes_in_image.numel() == 0:  # 该张图像中没有gt框,为背景
                # background image
                device = proposals_in_image.device
                clamped_matched_idxs_in_image = torch.zeros(
                    (proposals_in_image.shape[0],), dtype=torch.int64, device=device
                )
                labels_in_image = torch.zeros(
                    (proposals_in_image.shape[0],), dtype=torch.int64, device=device
                )
            else:
                #  set to self.box_similarity when https://github.com/pytorch/pytorch/issues/27495 lands
                # 计算proposal与每个gt_box的iou重合度
				#gt_boxes_in_image shape为3*4 也就是说在当前遍历的图像当中她有3个gtbox
				#proposals_in_image为2003*4 rpn网络提供了2000个proposal,又将gt添加到了这里面,因此是2003
				#match_quality_matrix为 3 * 2003 计算了每一个gt与每一个proposal的iOu值
                match_quality_matrix = box_ops.box_iou(gt_boxes_in_image, proposals_in_image)

                # 计算proposal与每个gt_box匹配的iou最大值,并记录索引
                # iou < low_threshold索引值为 -1, low_threshold <= iou < high_threshold索引值为 -2
				#matched_idxs_in_image是一个2003的shape,内容为最大值索引以及-1值(最大的iou值低于0.5)
                matched_idxs_in_image = self.proposal_matcher(match_quality_matrix)

                # 限制最小值,防止匹配标签时出现越界的情况,即将之前的-1改为0
                # 注意-1, -2对应的gt索引会调整到0,获取的标签类别为第0个gt的类别(实际上并不是),后续会进一步处理
                clamped_matched_idxs_in_image = matched_idxs_in_image.clamp(min=0)

				# 获取proposal匹配到的gt对应标签
                labels_in_image = gt_labels_in_image[clamped_matched_idxs_in_image]
                labels_in_image = labels_in_image.to(dtype=torch.int64)

                # label background (below the low threshold)
                # 将gt索引为-1的类别设置为0,即背景,负样本
                bg_inds = matched_idxs_in_image == self.proposal_matcher.BELOW_LOW_THRESHOLD  # -1
                labels_in_image[bg_inds] = 0

                # label ignore proposals (between low and high threshold)
                # 将gt索引为-2的类别设置为-1, 即废弃样本
                ignore_inds = matched_idxs_in_image == self.proposal_matcher.BETWEEN_THRESHOLDS  # -2
                labels_in_image[ignore_inds] = -1  # -1 is ignored by sampler

            matched_idxs.append(clamped_matched_idxs_in_image)
            labels.append(labels_in_image)
		#matched_idxs是 [2,1,0,0,0,3] 记录iou最高值的框体索引
		#labels_in_image是 每个框体匹配的最高的iou值,0代表背景。比如labels_in_image为{12 10 0}代表第一个框体是第12类物体 第三类物体是背景
        return matched_idxs, labels
这个之前说过....这里就说返回的是什么东西:
我们设置断点,gt_boxes_in_image调试一下:
也就是说在我们当前遍历的图像中有3个gtbox。
我们设置断点,proposals_in_image调试一下:
也就是说在我们当前遍历的图像中有2003(2000(RPN网络提供)+3(gtbox提供))个proposal。
计算一下IoU矩阵match_quality_matrix:大小为
,存储着每一个gt与每个proposal的IoU的值。
matched_idxs_in_image记录着proposal与每个gt_box匹配的iou最大值,并记录索引。iou < low_threshold索引值为 -1, low_threshold <= iou < high_threshold索引值为 -2。
clamped_matched_idxs_in_image将matched_idxs_in_image小于0的位置置0,没有置0的位置即正样本的位置。
gt_labels_in_image存储着每一个gtbox对应的标签索引,比如我们有四个gtbox,8号索引对应着gtbox框住的东西是猫,10号索引对应着gtbox框住的东西是狗.....。
clamped_matched_idxs_in_image存储着matched_idxs_in_image索引低于0置为0的部分。
labels_in_image = gt_labels_in_image[clamped_matched_idxs_in_image]存储着每个proposal对应的图片的标签。
bg_inds、ignore_inds分别对应着负样本、废弃样本的蒙版。
通过这两个蒙版,我们修改labels_in_image 变量 ,将背景设为0,废弃样本设置为-1。
我们将clamped_matched_idxs_in_image存储进matched_idxs变量,其中存储的内容是大于0、0数字,对应着每张图片proposal的标记(正样本、负样本及丢弃样本)
我们将labels_in_image存储进labels变量,其中存储的内容是每个proposal对应的gt的背景标签。(-1,-2,1-21的值)


2.1.6 subsample
    def subsample(self, labels):
        # type: (List[Tensor]) -> List[Tensor]
        # BalancedPositiveNegativeSampler
		#正样本负样本对应索引
        sampled_pos_inds, sampled_neg_inds = self.fg_bg_sampler(labels)
        sampled_inds = []
        # 遍历每张图片的正负样本索引
        for img_idx, (pos_inds_img, neg_inds_img) in enumerate(zip(sampled_pos_inds, sampled_neg_inds)):
            # 记录所有采集样本索引(包括正样本和负样本)
            # img_sampled_inds = torch.nonzero(pos_inds_img | neg_inds_img).squeeze(1)
            img_sampled_inds = torch.where(pos_inds_img | neg_inds_img)[0]
            sampled_inds.append(img_sampled_inds)
        return sampled_inds
我们再讲RPN的时候说过,这里只做调试:
		#对于划分的正负样本进行采样
        self.fg_bg_sampler = det_utils.BalancedPositiveNegativeSampler(
            batch_size_per_image,  # default: 512
            positive_fraction)     # default: 0.25
class BalancedPositiveNegativeSampler(object): """ This class samples batches, ensuring that they contain a fixed proportion of positives """ def __init__(self, batch_size_per_image, positive_fraction): # type: (int, float) -> None """ Arguments: batch_size_per_image (int): number of elements to be selected per image positive_fraction (float): percentage of positive elements per batch """ self.batch_size_per_image = batch_size_per_image self.positive_fraction = positive_fraction def __call__(self, matched_idxs): # type: (List[Tensor]) -> Tuple[List[Tensor], List[Tensor]] """ Arguments: matched idxs: list of tensors containing -1, 0 or positive values. Each tensor corresponds to a specific image. -1 values are ignored, 0 are considered as negatives and > 0 as positives. Returns: pos_idx (list[tensor]) neg_idx (list[tensor]) Returns two lists of binary masks for each image. The first list contains the positive elements that were selected, and the second list the negative example. """ pos_idx = [] neg_idx = [] # 遍历每张图像的matched_idxs for matched_idxs_per_image in matched_idxs: # >= 1的为正样本, nonzero返回非零元素索引 # positive = torch.nonzero(matched_idxs_per_image >= 1).squeeze(1) positive = torch.where(torch.ge(matched_idxs_per_image, 1))[0] # = 0的为负样本 # negative = torch.nonzero(matched_idxs_per_image == 0).squeeze(1) negative = torch.where(torch.eq(matched_idxs_per_image, 0))[0] # 指定正样本的数量 num_pos = int(self.batch_size_per_image * self.positive_fraction) # protect against not enough positive examples # 如果正样本数量不够就直接采用所有正样本 num_pos = min(positive.numel(), num_pos) # 指定负样本数量 num_neg = self.batch_size_per_image - num_pos # protect against not enough negative examples # 如果负样本数量不够就直接采用所有负样本 num_neg = min(negative.numel(), num_neg) # randomly select positive and negative examples # Returns a random permutation of integers from 0 to n - 1. # 随机选择指定数量的正负样本 perm1 = torch.randperm(positive.numel(), device=positive.device)[:num_pos] perm2 = torch.randperm(negative.numel(), device=negative.device)[:num_neg] pos_idx_per_image = positive[perm1] neg_idx_per_image = negative[perm2] # create binary mask from indices pos_idx_per_image_mask = torch.zeros_like( matched_idxs_per_image, dtype=torch.uint8 ) neg_idx_per_image_mask = torch.zeros_like( matched_idxs_per_image, dtype=torch.uint8 ) pos_idx_per_image_mask[pos_idx_per_image] = 1 neg_idx_per_image_mask[neg_idx_per_image] = 1 pos_idx.append(pos_idx_per_image_mask) neg_idx.append(neg_idx_per_image_mask) return pos_idx, neg_idxsampled_pos_inds, sampled_neg_inds对应着正负样本的蒙版,在正负样本的地方的tensor索引值为1,其他地方为0。
遍历每张图片的正负索引sampled_pos_inds, sampled_neg_inds:
img_sampled_inds = torch.where(pos_inds_img | neg_inds_img)[0]这里做了一个或的逻辑判断,我们就可以得到采样的数据的蒙版(正+负样本)。
将这个索引信息sampled_inds返回给上层调用。
2.1.7 fastrcnn_loss
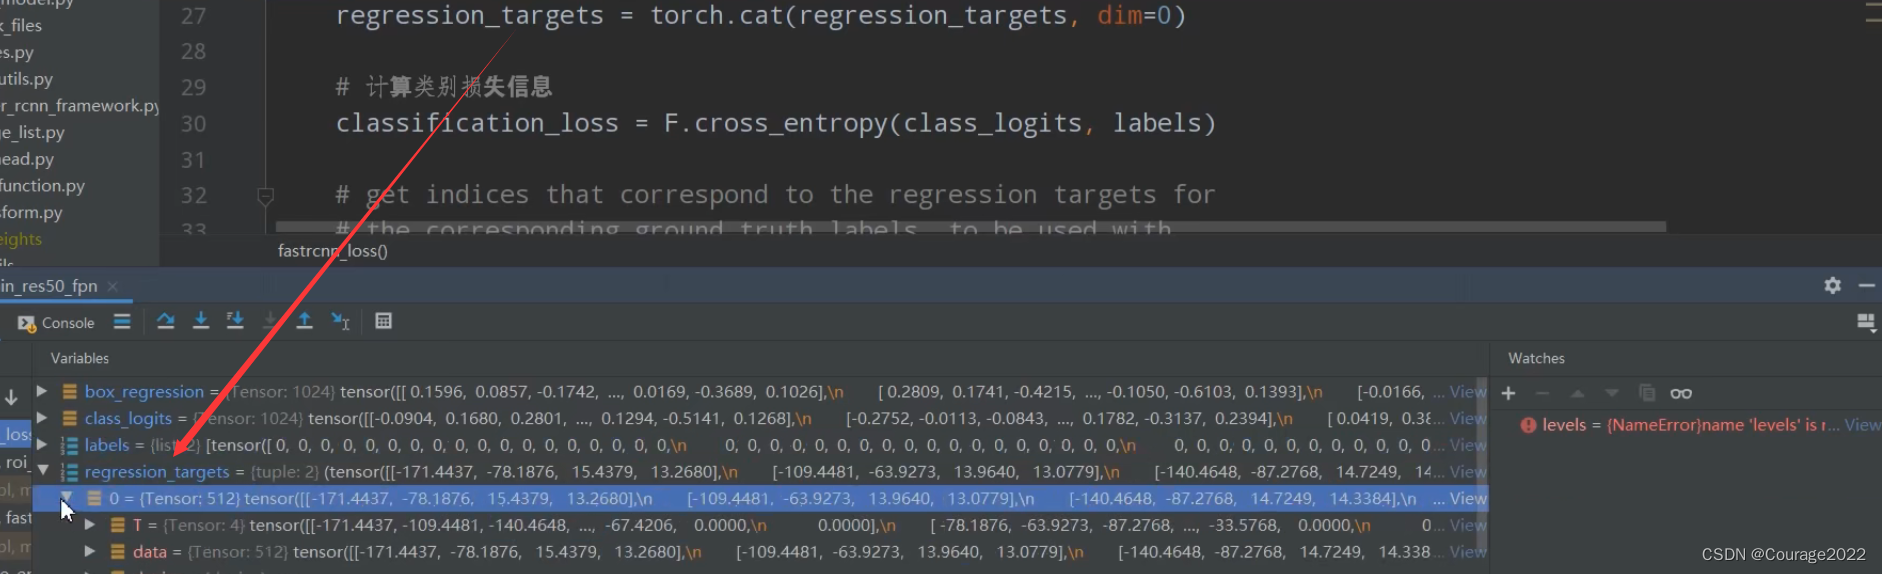
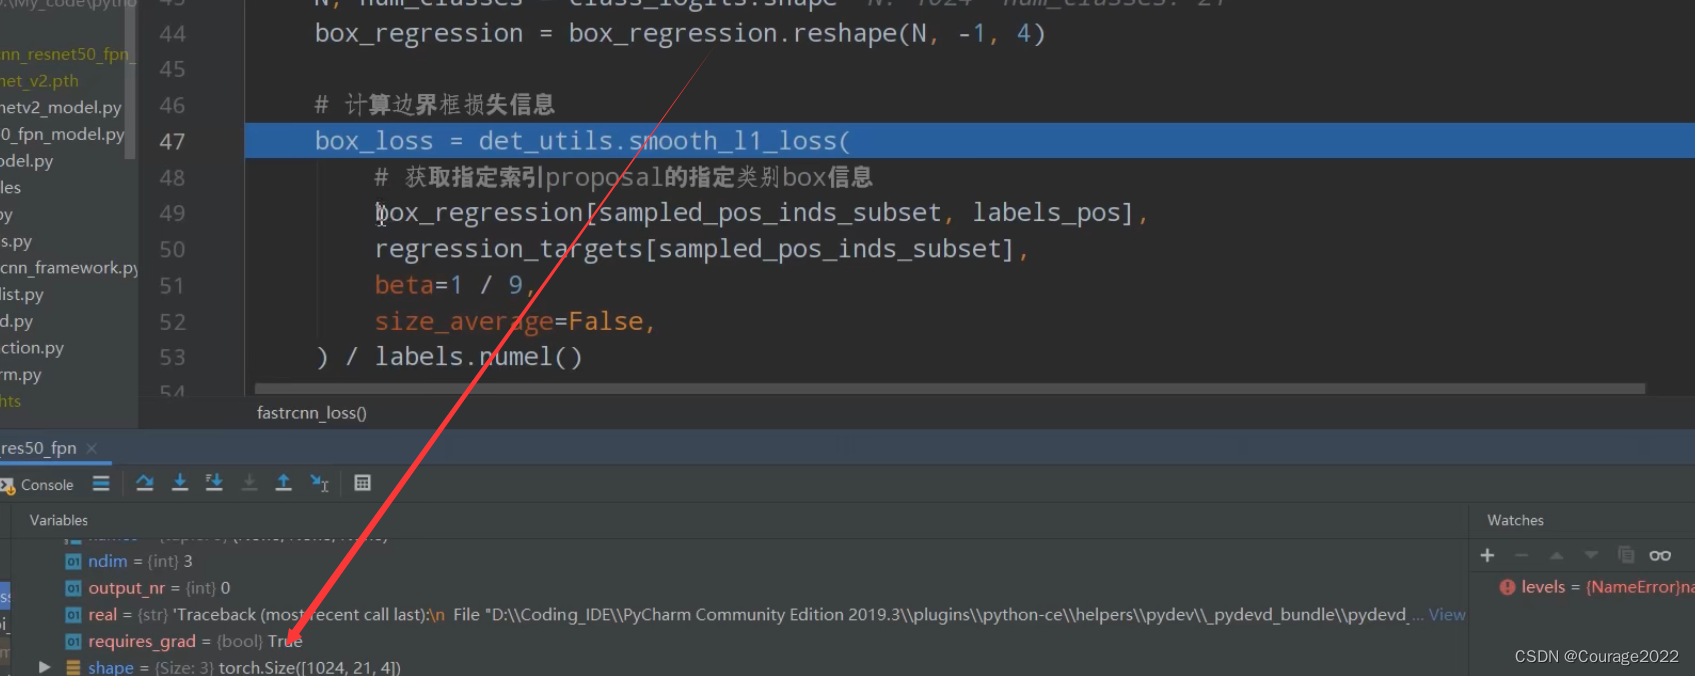
def fastrcnn_loss(class_logits, box_regression, labels, regression_targets):
    # type: (Tensor, Tensor, List[Tensor], List[Tensor]) -> Tuple[Tensor, Tensor]
    """
    Computes the loss for Faster R-CNN.

    Arguments:
        class_logits : 预测类别概率信息,shape=[num_anchors, num_classes]
        box_regression : 预测边目标界框回归信息
        labels : 真实类别信息
        regression_targets : 真实目标边界框信息

    Returns:
        classification_loss (Tensor)
        box_loss (Tensor)
    """

	#对labels和regression_targets进行一个拼接,传进来的时候labels和regression_targets是一个列表的形式,列表的每一个元素对应的是batch中的每一个图片的对应信息
	#labels是一个包含两个元素的list,list的每个元素是一个tensor,shape都是512,也就是采样的512个样本对应的gt的标签
	#regression_targets对应的每张图片采样的512个proposal所对应的gt的目标边界框的回归参数 shape是512*4

	#拼接之后labels就变成1024了 regression_targets变成了1024*4
    labels = torch.cat(labels, dim=0)
    regression_targets = torch.cat(regression_targets, dim=0)

    # 计算类别损失信息 class_logits(1024*21)存放着预测对应每个proposal对应的每一个类别分数
    classification_loss = F.cross_entropy(class_logits, labels)

	#计算目标边界框损失

    # get indices that correspond to the regression targets for
    # the corresponding ground truth labels, to be used with
    # advanced indexing
    # 返回标签类别大于0的索引
    # sampled_pos_inds_subset = torch.nonzero(torch.gt(labels, 0)).squeeze(1)
	#获取正样本对应的位置
    sampled_pos_inds_subset = torch.where(torch.gt(labels, 0))[0]

    # 返回标签类别大于0位置的类别信息
    labels_pos = labels[sampled_pos_inds_subset]

    # shape=[num_proposal, num_classes] 1024*84(21*4) --> 1024 21 4
    N, num_classes = class_logits.shape
    box_regression = box_regression.reshape(N, -1, 4)

    # 计算边界框损失信息
    box_loss = det_utils.smooth_l1_loss(
        # 获取指定索引proposal的指定类别box信息
        box_regression[sampled_pos_inds_subset, labels_pos],
        regression_targets[sampled_pos_inds_subset],
        beta=1 / 9,
        size_average=False,
    ) / labels.numel()

    return classification_loss, box_loss
@class_logits:预测目标类别信息(
@box_regression:预测目标边界框信息(
@labels:筛选出来的proposal对应的类别信息
@regression_targets:真实的目标边界框(
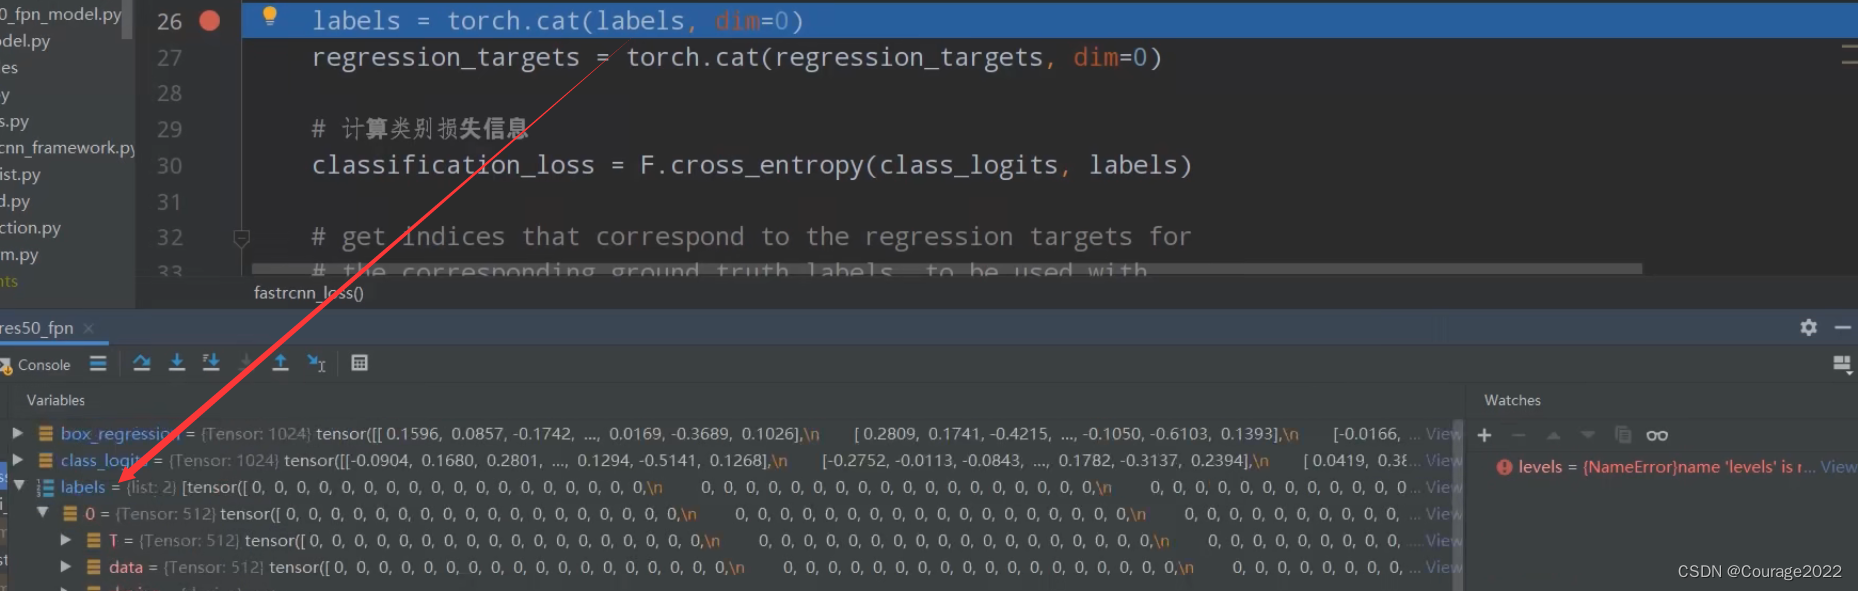
这里传入的labels的信息我们调试一下:
是一个列表,有两个元素,每个列表是512的一个tensor,对应着筛选出来的proposal对应的类别信息。
我们拼接之后,都成了1024的tensor了。1024*1与1024*4。
用cross_entropy方法计算类别损失,传入参数为class_logits,为每个proposal对应的预测类别信息。shape为
。labels对应着每个proposal对应的gtbox的类别信息。如何计算参阅我的博客:
Faster RCNN网络源码解读(Ⅰ) --- Fast RCNN、Faster RCNN论文解读
	#获取正样本对应的位置
    sampled_pos_inds_subset = torch.where(torch.gt(labels, 0))[0]
我们获取
的部分,即对应的正样本的部分,接着获取正样本的类别标签:
labels_pos = labels[sampled_pos_inds_subset]对网络真实的边界框进行reshape处理:
对正样本进行计算边界框的损失信息。
    # 计算边界框损失信息
    box_loss = det_utils.smooth_l1_loss(
        # 获取指定索引proposal的指定类别box信息
        box_regression[sampled_pos_inds_subset, labels_pos],
        regression_targets[sampled_pos_inds_subset],
        beta=1 / 9,
        size_average=False,
    ) / labels.numel()
返回损失信息。