文章目录
- 一、Room简介
- 二、用Room+ViewModel+LiveData增删改查数据
- 三、下载源码
一、Room简介
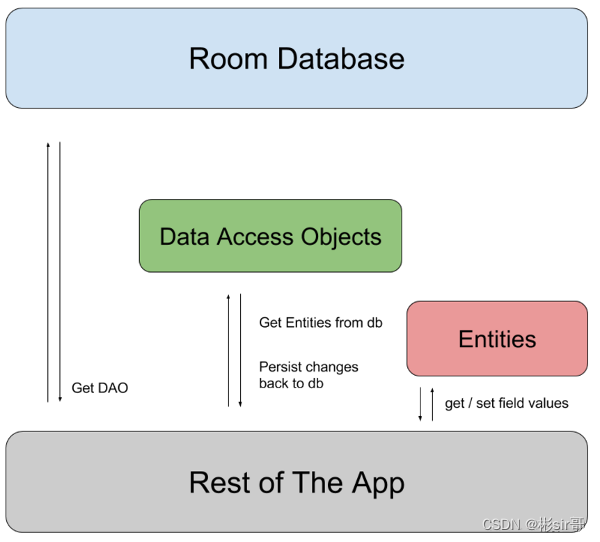
Room是Google推出的数据库框架,是一个 ORM (Object Relational Mapping)对象关系映射数据库、其底层还是对SQLite的封装。
Room包含三个主要组件:
- 数据库类(
DataBase),用于保存数据库并作为应用持久性数据底层连接的主要访问点。 - 数据实体(
Entity),用于表示应用的数据库中的表。 - 数据访问对象 (
DAO),提供您的应用可用于查询、更新、插入和删除数据库中的数据的方法。
@Entity表结构实体@PrimaryKey主键@ColumnInfo列/字段信息
二、用Room+ViewModel+LiveData增删改查数据
用 Entity、Dao、Database 操作数据库
数据库的每个表,都对应一个Entity,一个Dao(Dao负责增删改查操作)
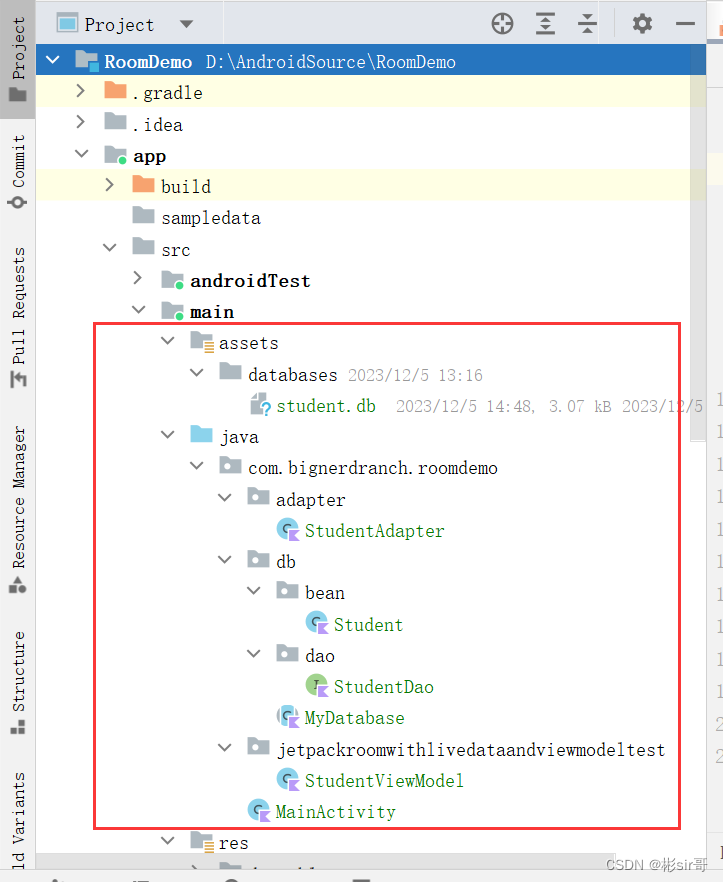
项目RoomDemo,如下图:
在build.gradle添加如下依赖:
plugins {
    id 'com.android.application'
    id 'kotlin-android'
    id 'kotlin-android-extensions'
    id 'kotlin-kapt'
}

dependencies {
    def room_version = "2.3.0"
    implementation "androidx.room:room-runtime:$room_version"
    annotationProcessor "androidx.room:room-compiler:$room_version"
    kapt "androidx.room:room-compiler:$room_version"
}
首先,创建一个数据表Student。先创建包名,在com.bignerdranch.roomdemo下创建一个db包,db下创建bean包,bean包下创建Student类。
package com.bignerdranch.roomdemo.db.bean

import androidx.room.ColumnInfo
import androidx.room.Entity
import androidx.room.Ignore
import androidx.room.PrimaryKey
import org.jetbrains.annotations.NotNull

@Entity(tableName = "student")
class Student {
    @NotNull
    @PrimaryKey(autoGenerate = true)
    @ColumnInfo(name = "id", typeAffinity = ColumnInfo.INTEGER)
    var id = 0

    @NotNull
    @ColumnInfo(name = "name", typeAffinity = ColumnInfo.TEXT)
    var name: String

    @NotNull
    @ColumnInfo(name = "age", typeAffinity = ColumnInfo.TEXT)
    var age: String

    /**
     * Room会使用这个构造器来存储数据,也就是当你从表中得到Student对象时候,Room会使用这个构造器
     */
    constructor(id: Int, name: String, age: String) {
        this.id = id
        this.name = name
        this.age = age
    }

    /**
     * 由于Room只能识别和使用一个构造器,如果希望定义多个构造器,你可以使用Ignore标签,让Room忽略这个构造器
     * 同样,@Ignore标签还可用于字段,使用@Ignore标签标记过的字段,Room不会持久化该字段的数据
     */
    @Ignore
    constructor(name: String, age: String) {
        this.name = name
        this.age = age
    }
}
这个@Entity就是表示数据库中的表,Student类对应就是Student表,@PrimaryKey表示主键,这里是id,autoGenerate = true 是自增,@NonNull表示不为空。 @ColumnInfo表示表中的列名,name = "name"表示列名的值。
下面在db包下新建一个dao包,创建StudentDao,里面的代码如下:
package com.bignerdranch.roomdemo.db.dao

import androidx.lifecycle.LiveData
import androidx.room.*
import com.bignerdranch.roomdemo.db.bean.Student

@Dao
interface StudentDao {
    @Insert
    fun insertStudent(student: Student?)

    @Delete
    fun deleteStudent(student: Student?)

    @Update
    fun updateStudent(student: Student?)

    @Query("SELECT * FROM student")
    fun getStudentList(): LiveData<List<Student?>?>? //希望监听学生表的变化,为其加上LiveData

    @Query("SELECT * FROM student WHERE id = :id")
    fun getStudentById(id: Int): Student?
}
StudentDao是一个接口,主要是定义了一些方法,通过注解在编译的时候会生成实现类。
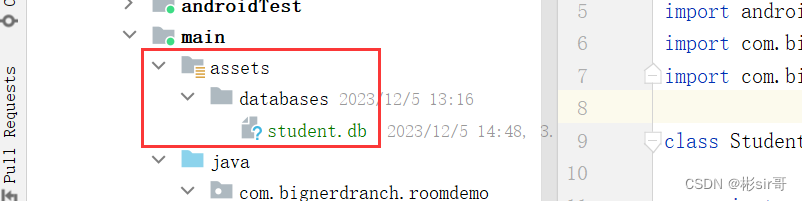
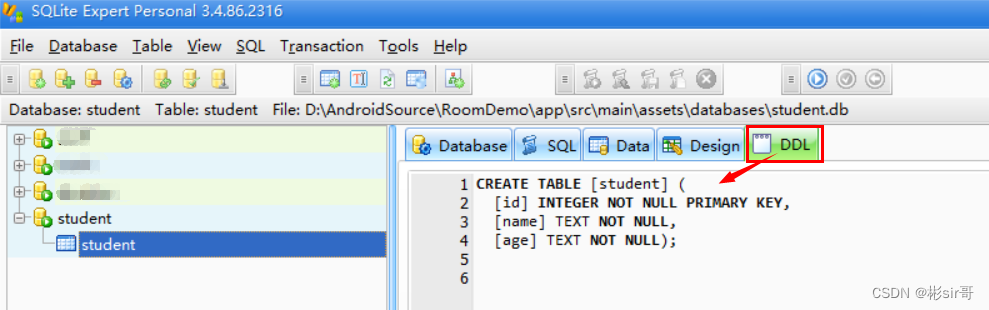
然后,新建main/assets/databases,并在其中放置student.db文件,其位置如下:
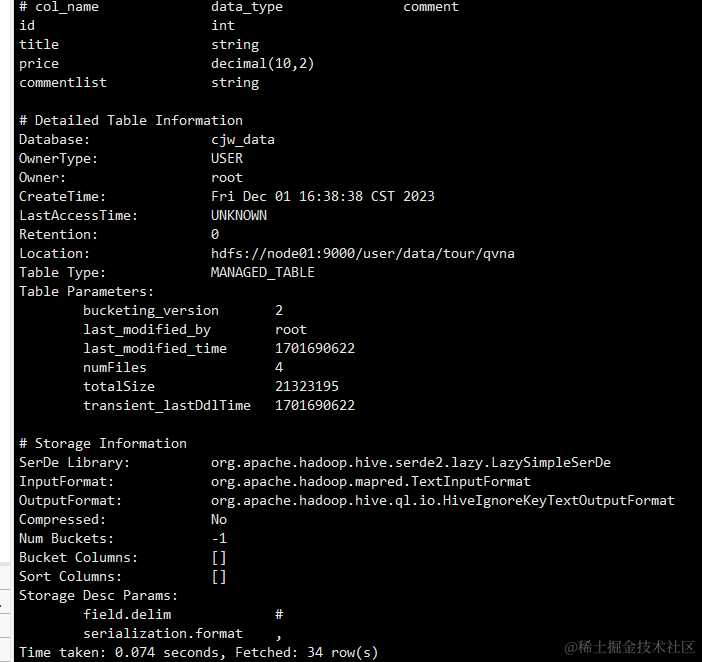
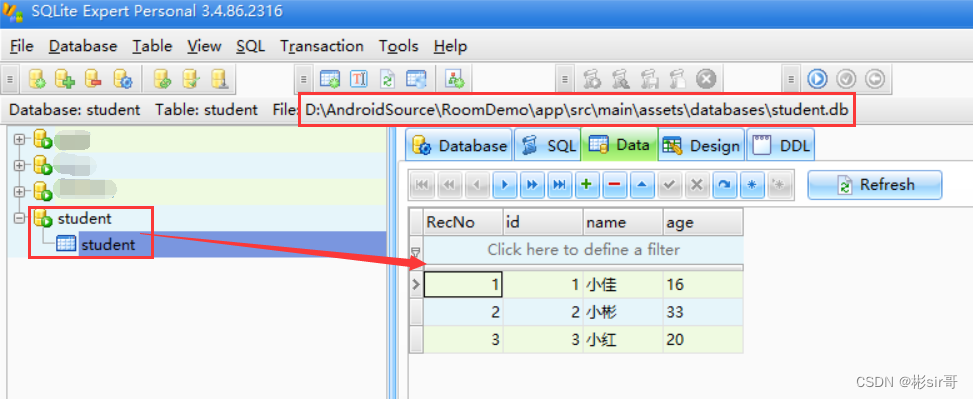
用SQLite软件导入students.db文件,如下图:
然后,在MyDatabase.kt中,用createFromAsset()方法从assets/database/students.db创建Room数据库,下面是数据库的创建,在db包下新建一个MyDatabase类,继承RoomDatabase,代码如下:
package com.bignerdranch.roomdemo.db

import android.content.Context
import android.util.Log
import androidx.room.Database
import androidx.room.Room
import androidx.room.RoomDatabase
import androidx.room.migration.Migration
import androidx.sqlite.db.SupportSQLiteDatabase
import com.bignerdranch.roomdemo.db.bean.Student
import com.bignerdranch.roomdemo.db.dao.StudentDao

@Database(entities = [Student::class], exportSchema = false, version = 1)
abstract class MyDatabase() : RoomDatabase() {
    abstract fun studentDao(): StudentDao?

    companion object {
        private val DATABASE_NAME = "my_db"
        private var databaseInstance: MyDatabase? = null

        @Synchronized //已同步
        fun getInstance(context: Context): MyDatabase? {
            if (databaseInstance == null) {
                databaseInstance = Room
                    .databaseBuilder(
                        context.applicationContext,
                        MyDatabase::class.java,
                        DATABASE_NAME
                    )
                    .createFromAsset("databases/student.db")
                    .fallbackToDestructiveMigration()
//                    .addMigrations(MIGRATION_1_2, MIGRATION_2_3, MIGRATION_1_3, MIGRATION_3_4)
                    .build()
            }
            return databaseInstance
        }

        val MIGRATION_1_2: Migration = object : Migration(1, 2) {
            override fun migrate(database: SupportSQLiteDatabase) {
                //do something
                Log.d("MyDatabase", "MIGRATION_1_2")
            }
        }
        private val MIGRATION_2_3: Migration = object : Migration(2, 3) {
            override fun migrate(database: SupportSQLiteDatabase) {
                //do something
                Log.d("MyDatabase", "MIGRATION_2_3")
            }
        }
        private val MIGRATION_1_3: Migration = object : Migration(1, 3) {
            override fun migrate(database: SupportSQLiteDatabase) {
                //do something
                Log.d("MyDatabase", "MIGRATION_1_3")
            }
        }
        val MIGRATION_3_4: Migration = object : Migration(3, 4) {
            override fun migrate(database: SupportSQLiteDatabase) {
                Log.d("MyDatabase", "MIGRATION_3_4")
                database.execSQL(
                    "CREATE TABLE temp_Student (" +
                            "id INTEGER PRIMARY KEY NOT NULL," +
                            "name TEXT," +
                            "age TEXT)"
                )
                database.execSQL(
                    "INSERT INTO temp_Student (id, name, age) " +
                            "SELECT id, name, age FROM Student"
                )
                database.execSQL("DROP TABLE Student")
                database.execSQL("ALTER TABLE temp_Student RENAME TO Student")
            }
        }
    }
}
这里的@Database注解表示这个类是用来操作数据库的,entities = [Student::class]表示当前数据库中的表,只有一个Student表,多的表用应用逗号隔开。version = 1表示数据库的版本,可以做数据库的升级操作。createFromAsset()是Room库中提供的。
注意这是一个抽象类,在编译时Room会帮助构建实现类。
现在运行一下,手机或者模拟器都可以。然后什么都不用去做。
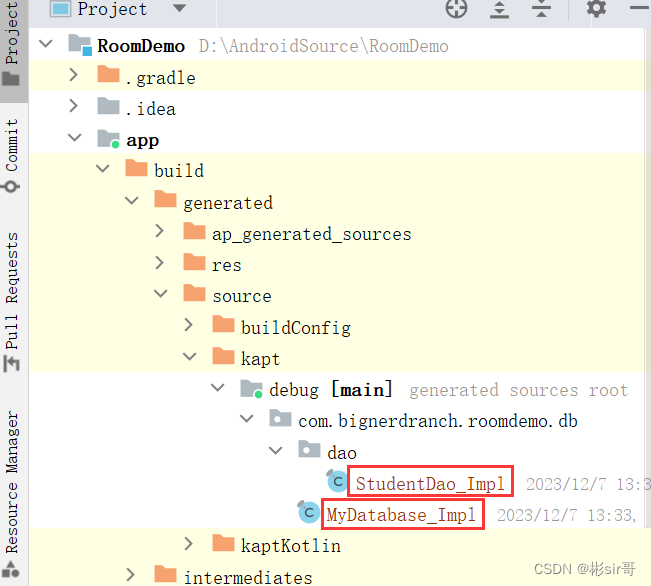
可以查看到,MyDatabase和StudentDao的实现类都自动生成了。
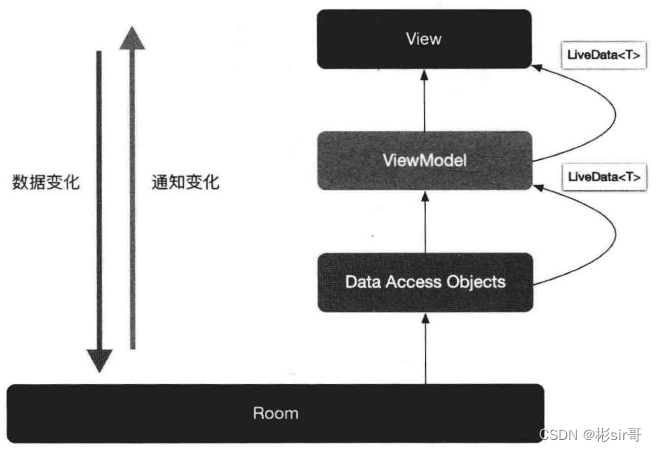
ViewModel内:通过 Room.Database查到LiveData数据,在外部监听LiveData
当 Room变化时,通过ViewModel内的LiveData通知页面数据的变化,架构如下:
新建StudentViewModel类,该类继承自AndroidViewModel,其中有Database和LiveData,代码如下:
package com.bignerdranch.roomdemo.jetpackroomwithlivedataandviewmodeltest

import android.app.Application
import androidx.lifecycle.AndroidViewModel
import androidx.lifecycle.LiveData
import com.bignerdranch.roomdemo.db.MyDatabase
import com.bignerdranch.roomdemo.db.bean.Student

class StudentViewModel(application: Application) : AndroidViewModel(application) {

    private val myDatabase: MyDatabase?
    val liveDataStudent: LiveData<List<Student?>?>?

    init {
        myDatabase = MyDatabase.getInstance(application)
        liveDataStudent = myDatabase!!.studentDao()!!.getStudentList()
    }

}
表操作无非就是那么几个,增删改查,但是为了更直观的显示结果,需要对UI做一些改动。
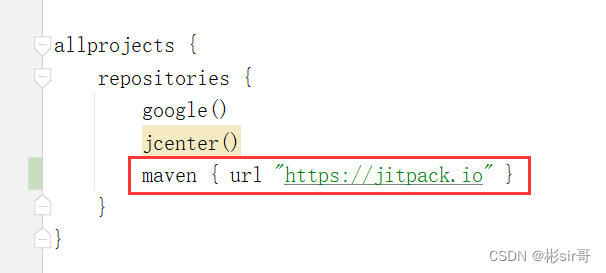
在工程的build.gradle中增加repositories闭包中增加jitpack库。
然后在app的build.gradle中的dependencies{}比包中增加
implementation 'com.github.CymChad:BaseRecyclerViewAdapterHelper:3.0.6'
1. 修改布局
Sync一下,下面修改一下页面的布局文件activity_main.xml
<?xml version="1.0" encoding="utf-8"?>
<LinearLayout xmlns:android="http://schemas.android.com/apk/res/android"
    android:layout_width="match_parent"
    android:layout_height="match_parent"
    android:orientation="vertical">

    <Button
        android:id="@+id/btnInsertStudent"
        android:layout_width="wrap_content"
        android:layout_height="wrap_content"
        android:layout_gravity="center_horizontal"
        android:layout_margin="12dp"
        android:text="Add a Student"
        android:textAllCaps="false" />

    <androidx.recyclerview.widget.RecyclerView
        android:id="@+id/recyclerView"
        android:layout_width="match_parent"
        android:layout_height="wrap_content" />
</LinearLayout>
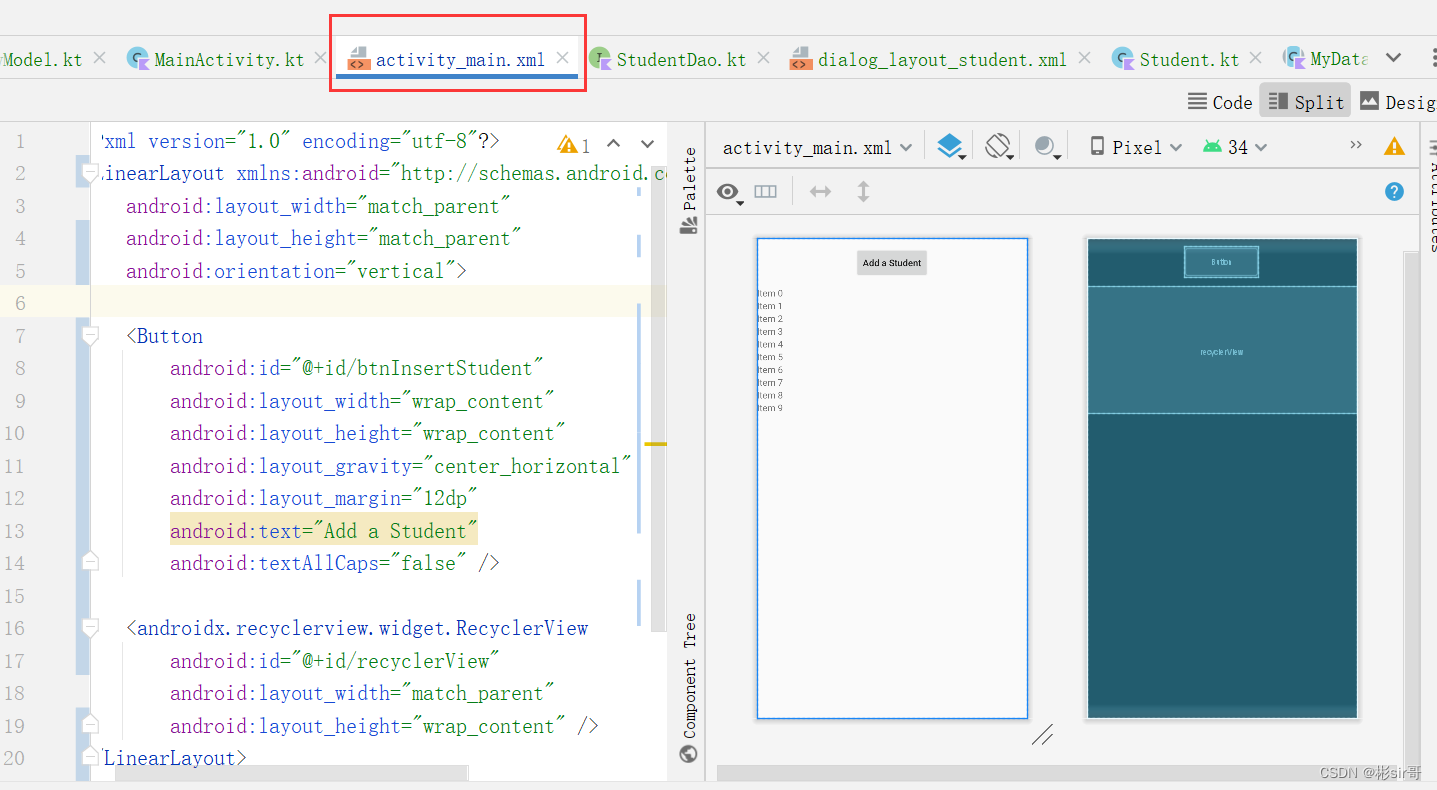
这里就是一个按钮和一个列表,下面创建列表的item布局
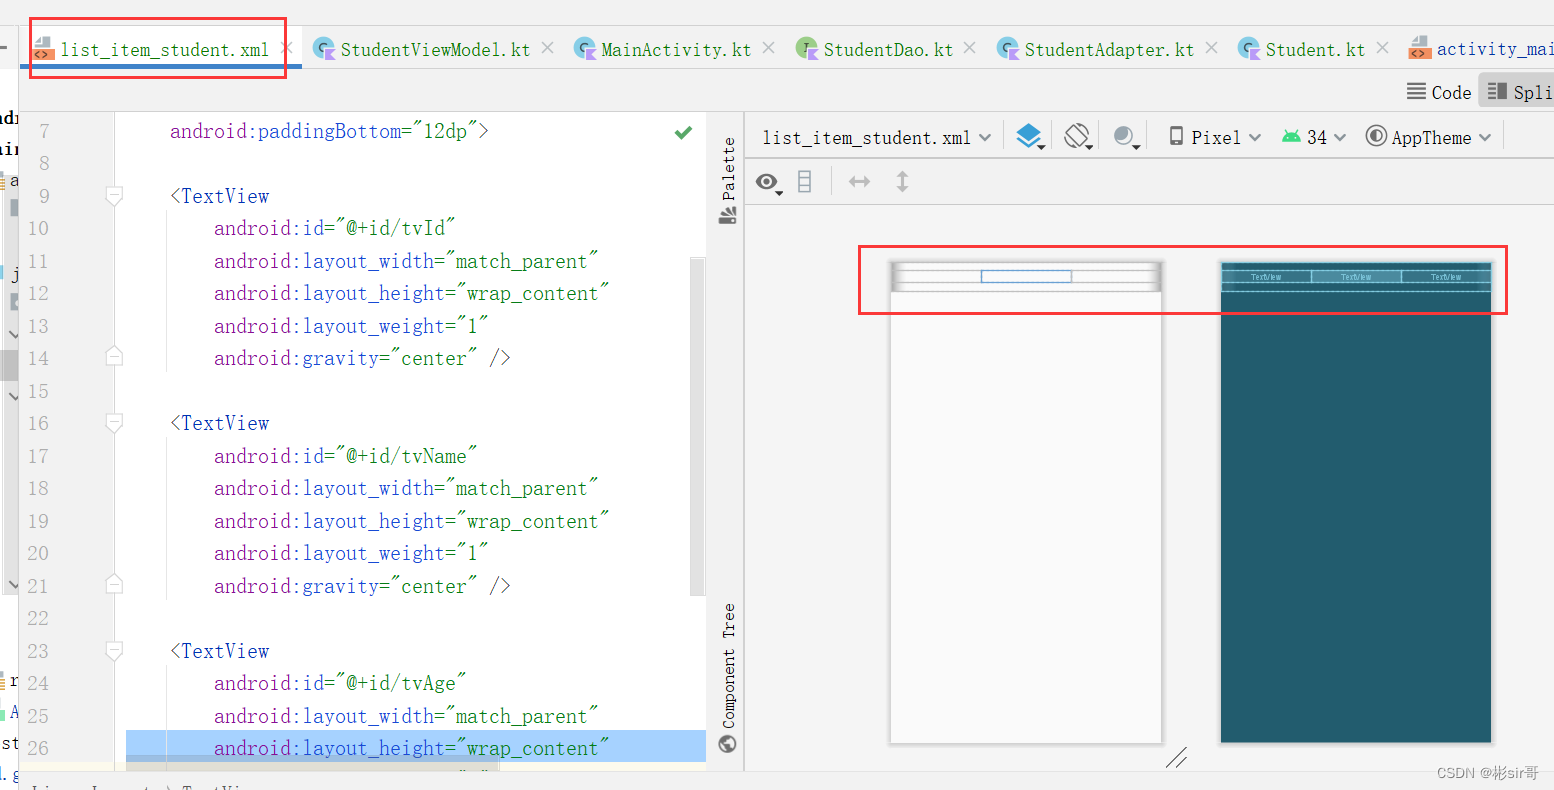
在layout下新建一个list_item_student.xml布局,代码如下:
<?xml version="1.0" encoding="utf-8"?>
<LinearLayout xmlns:android="http://schemas.android.com/apk/res/android"
    android:layout_width="match_parent"
    android:layout_height="wrap_content"
    android:orientation="horizontal"
    android:paddingTop="12dp"
    android:paddingBottom="12dp">

    <TextView
        android:id="@+id/tvId"
        android:layout_width="match_parent"
        android:layout_height="wrap_content"
        android:layout_weight="1"
        android:gravity="center" />

    <TextView
        android:id="@+id/tvName"
        android:layout_width="match_parent"
        android:layout_height="wrap_content"
        android:layout_weight="1"
        android:gravity="center" />

    <TextView
        android:id="@+id/tvAge"
        android:layout_width="match_parent"
        android:layout_height="wrap_content"
        android:layout_weight="1"
        android:gravity="center" />

</LinearLayout>
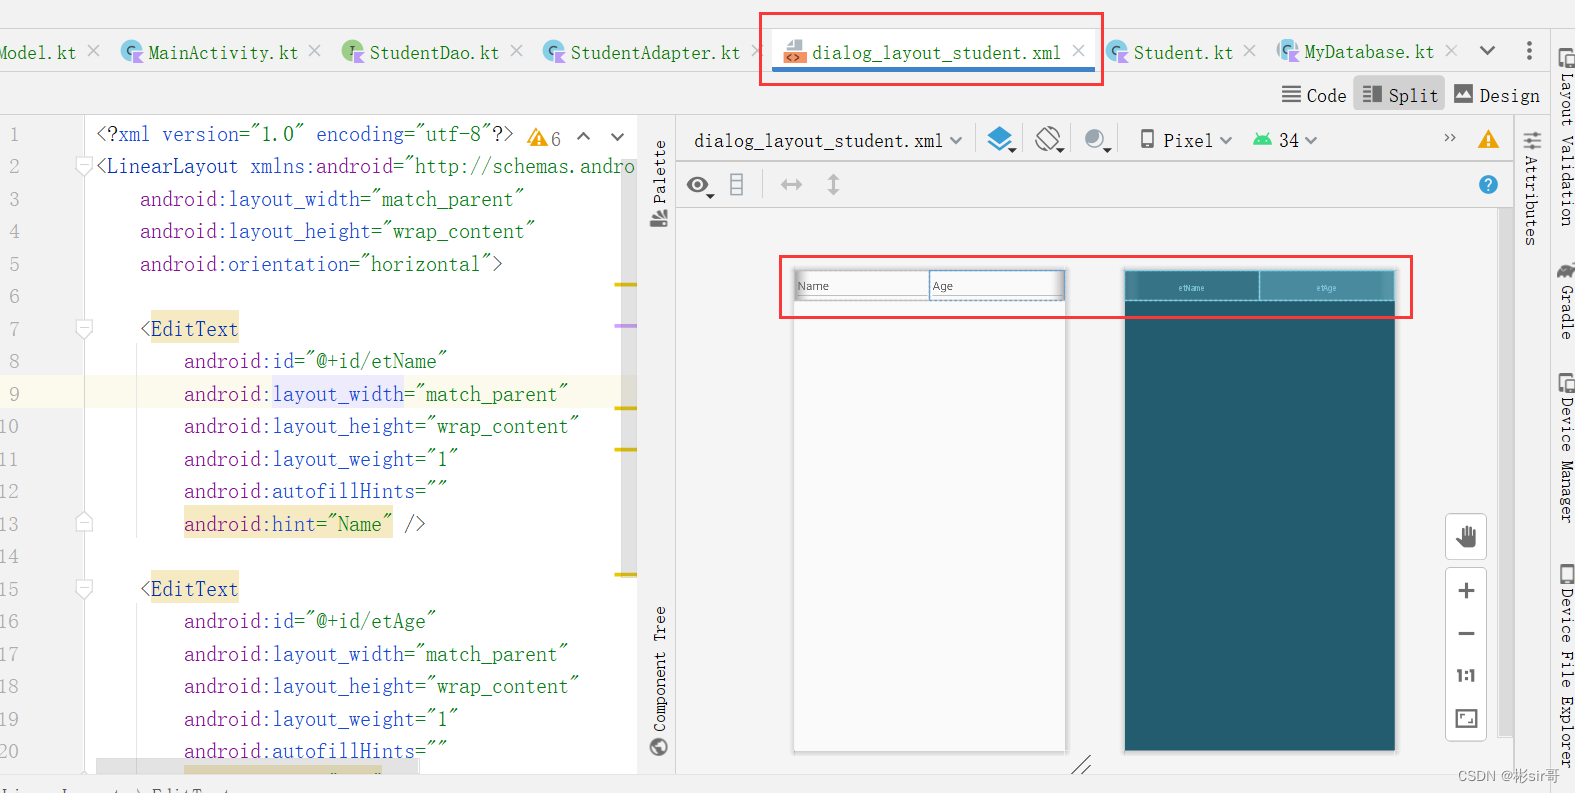
新建dialog_layout_student.xml,布局如下:
<?xml version="1.0" encoding="utf-8"?>
<LinearLayout xmlns:android="http://schemas.android.com/apk/res/android"
    android:layout_width="match_parent"
    android:layout_height="wrap_content"
    android:orientation="horizontal">

    <EditText
        android:id="@+id/etName"
        android:layout_width="match_parent"
        android:layout_height="wrap_content"
        android:layout_weight="1"
        android:autofillHints=""
        android:hint="Name" />

    <EditText
        android:id="@+id/etAge"
        android:layout_width="match_parent"
        android:layout_height="wrap_content"
        android:layout_weight="1"
        android:autofillHints=""
        android:hint="Age" />

</LinearLayout>
在com.bignerdranch.roomdemo下新建一个adapter包,包下新建StudentAdapter类,作为列表数据的适配器。代码如下:
2. 列表适配器
package com.bignerdranch.roomdemo.adapter

import com.bignerdranch.roomdemo.R
import com.bignerdranch.roomdemo.db.bean.Student
import com.chad.library.adapter.base.BaseQuickAdapter
import com.chad.library.adapter.base.viewholder.BaseViewHolder
import kotlinx.android.synthetic.main.list_item_student.view.*

class StudentAdapter(layoutResId: Int = R.layout.list_item_student) :
    BaseQuickAdapter<Student, BaseViewHolder>(layoutResId) {

    override fun convert(holder: BaseViewHolder, item: Student) {

        holder.itemView.run {
            tvId.text = item.id.toString()
            tvName.text = item.name
            tvAge.text = item.age
        }

    }
}
然后,在MainActivity中初始化List,实例化StudentViewModel并监听其LiveData的变化,代码如下:
package com.bignerdranch.roomdemo

import android.content.DialogInterface
import android.os.AsyncTask
import android.os.Bundle
import android.text.TextUtils
import android.view.View
import android.widget.EditText
import android.widget.Toast
import androidx.appcompat.app.AlertDialog
import androidx.appcompat.app.AppCompatActivity
import androidx.lifecycle.ViewModelProvider
import androidx.recyclerview.widget.LinearLayoutManager
import com.bignerdranch.roomdemo.adapter.StudentAdapter
import com.bignerdranch.roomdemo.db.MyDatabase
import com.bignerdranch.roomdemo.db.bean.Student
import com.bignerdranch.roomdemo.jetpackroomwithlivedataandviewmodeltest.StudentViewModel
import com.chad.library.adapter.base.BaseQuickAdapter
import com.chad.library.adapter.base.listener.OnItemLongClickListener
import kotlinx.android.synthetic.main.activity_main.recyclerView

/**
 *
 * @date
 */
class MainActivity : AppCompatActivity(), OnItemLongClickListener {

    private val mStudentAdapter by lazy {
        StudentAdapter().apply {
            setOnItemLongClickListener(this@MainActivity)
        }
    }

    private var myDatabase: MyDatabase? = null
    private var studentList: MutableList<Student>? = null

    override fun onCreate(savedInstanceState: Bundle?) {
        super.onCreate(savedInstanceState)
        setContentView(R.layout.activity_main)
        findViewById<View>(R.id.btnInsertStudent).setOnClickListener {
            openAddStudentDialog()
        }
        studentList = ArrayList()

        val layoutManager = LinearLayoutManager(this@MainActivity)
        layoutManager.orientation = LinearLayoutManager.VERTICAL
        recyclerView.layoutManager = layoutManager
        recyclerView.adapter = mStudentAdapter
//        mStudentAdapter.setList(studentList)

        myDatabase = MyDatabase.getInstance(this)
        val studentViewModel: StudentViewModel =
            ViewModelProvider(this)[StudentViewModel::class.java]
        studentViewModel.liveDataStudent!!.observe(this) { students ->
            (studentList as ArrayList<Student?>).clear()
            (studentList as ArrayList<Student?>).addAll(students!!)
//            studentAdapter2!!.notifyDataSetChanged()
            mStudentAdapter.setList(studentList)
            mStudentAdapter.notifyDataSetChanged()
        }
    }

    private fun updateOrDeleteDialog(student: Student?) {
        val options = arrayOf("更新", "删除")
        AlertDialog.Builder(this@MainActivity)
            .setTitle("")
            .setItems(options) { _, which ->
                if (which == 0) {
                    openUpdateStudentDialog(student)
                } else if (which == 1) {
                    if (student != null) {
                        DeleteStudentTask(student).execute()
                    }
                }
            }.show()
    }

    private fun openAddStudentDialog() {
        val customView: View = this.layoutInflater.inflate(R.layout.dialog_layout_student, null)
        val etName = customView.findViewById<EditText>(R.id.etName)
        val etAge = customView.findViewById<EditText>(R.id.etAge)
        val builder = AlertDialog.Builder(this@MainActivity)
        val dialog = builder.create()
        dialog.setTitle("Add Student")
        dialog.setButton(DialogInterface.BUTTON_POSITIVE, "OK") { dialog, which ->
            if (TextUtils.isEmpty(etName.text.toString()) || TextUtils.isEmpty(etAge.text.toString())) {
                Toast.makeText(this@MainActivity, "输入不能为空", Toast.LENGTH_SHORT).show()
            } else {
                InsertStudentTask(etName.text.toString(), etAge.text.toString()).execute()
            }
        }
        dialog.setButton(
            DialogInterface.BUTTON_NEGATIVE,
            "CANCEL"
        ) { dialog, which -> dialog.dismiss() }
        dialog.setView(customView)
        dialog.show()
    }

    private fun openUpdateStudentDialog(student: Student?) {
        if (student == null) {
            return
        }
        val customView: View = this.layoutInflater.inflate(R.layout.dialog_layout_student, null)
        val etName = customView.findViewById<EditText>(R.id.etName)
        val etAge = customView.findViewById<EditText>(R.id.etAge)
        etName.setText(student.name)
        etAge.setText(student.age)
        val builder = AlertDialog.Builder(this@MainActivity)
        val dialog = builder.create()
        dialog.setTitle("Update Student")
        dialog.setButton(DialogInterface.BUTTON_POSITIVE, "OK") { dialog, which ->
            if (TextUtils.isEmpty(etName.text.toString()) || TextUtils.isEmpty(etAge.text.toString())) {
                Toast.makeText(this@MainActivity, "输入不能为空", Toast.LENGTH_SHORT).show()
            } else {
                UpdateStudentTask(
                    student.id,
                    etName.text.toString(),
                    etAge.text.toString()
                ).execute()
            }
        }
        dialog.setButton(
            DialogInterface.BUTTON_NEGATIVE,
            "CANCEL"
        ) { dialog, which -> dialog.dismiss() }
        dialog.setView(customView)
        dialog.show()
    }

    private inner class InsertStudentTask(var name: String, var age: String) :
        AsyncTask<Void?, Void?, Void?>() {
        override fun doInBackground(vararg params: Void?): Void? {
            myDatabase!!.studentDao()!!.insertStudent(Student(name, age))
            return null
        }
    }

    private inner class UpdateStudentTask(var id: Int, var name: String, var age: String) :
        AsyncTask<Void?, Void?, Void?>() {
        override fun doInBackground(vararg params: Void?): Void? {
            myDatabase!!.studentDao()!!.updateStudent(Student(id, name, age))
            return null
        }
    }

    private inner class DeleteStudentTask(var student: Student) : AsyncTask<Void?, Void?, Void?>() {
        override fun doInBackground(vararg params: Void?): Void? {
            myDatabase!!.studentDao()!!.deleteStudent(student)
            return null
        }
    }

    override fun onItemLongClick(
        adapter: BaseQuickAdapter<*, *>,
        view: View,
        position: Int
    ): Boolean {
        updateOrDeleteDialog((studentList as ArrayList<Student?>)[position])
        return true
    }
}
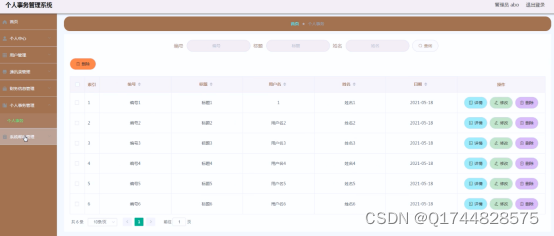
运行后,当LiveData数据变化时,更新UI即可,而不需要每次增删改后都必须用QueryStudentTask() 来手动查询一次数据库,简化了系统,效果如下:
三、下载源码
下载源码github地址:https://github.com/caobin10/RoomDemo