大数据单机学习环境搭建(11)Azkaban单机部署,关于Azkaban和gradle下载,本文编译不限于单机solo模式。
一.大多数报错处理
1.1首先操作
1)安装 git yum install git -y
2)替换 azkaban 目录下的 build.gradle 文件的 2处 repositories 信息。改为 阿里云的镜像路径
buildscript {
repositories {
    maven{ url 'http://maven.aliyun.com/nexus/content/groups/public/'}
  }
....
}

allprojects {
  ....
  repositories {
    maven{ url 'http://maven.aliyun.com/nexus/content/groups/public/'}
  }
}
1.2重新执行编译可解决大多数问题
azkaban目录下执行./gradlew build installDist -x test编译时,报错大多数情况下是网络慢问题,大多数可以通过重新执行编译语句解决, -x test 跳过测试建议添加,否则问题更多。例如如下报错:
* What went wrong:
Could not resolve all files for configuration ':az-reportal:compileClasspath'.
> Could not download pig.jar (org.apache.pig:pig:0.11.0)
   > Could not get resource 'http://maven.aliyun.com/nexus/content/groups/public/org/apache/pig/pig/0.11.0/pig-0.11.0.jar'.
      > Could not GET 'http://maven.aliyun.com/nexus/content/groups/public/org/apache/pig/pig/0.11.0/pig-0.11.0.jar'.
         > Read timed out


* What went wrong:
Could not resolve all files for configuration ':az-hadoop-jobtype-plugin:compileClasspath'.
> Could not download scala-compiler.jar (org.scala-lang:scala-compiler:2.10.0)
   > Could not get resource 'http://maven.aliyun.com/nexus/content/groups/public/org/scala-lang/scala-compiler/2.10.0/scala-compiler-2.10.0.jar'.
      > Read timed out
> Could not download scala-reflect.jar (org.scala-lang:scala-reflect:2.10.4)
   > Could not get resource 'http://maven.aliyun.com/nexus/content/groups/public/org/scala-lang/scala-reflect/2.10.4/scala-reflect-2.10.4.jar'.
      > Read timed out
二.node报错
2.1报错信息
这个时候发现无论怎么重试都会卡在某一个进度,并且退出的非常快,报错信息均如下:
* What went wrong:
Execution failed for task ':azkaban-web-server:nodeSetup'.
> Could not resolve all files for configuration ':azkaban-web-server:detachedConfiguration1'.
   > Could not resolve org.nodejs:node:8.10.0.
     Required by:
         project :azkaban-web-server
      > Could not resolve org.nodejs:node:8.10.0.
         > Could not get resource 'https://nodejs.org/dist/v8.10.0/ivy.xml'.
            > Could not GET 'https://nodejs.org/dist/v8.10.0/ivy.xml'. Received status code 403 from server: Forbidden
2.2解决方案
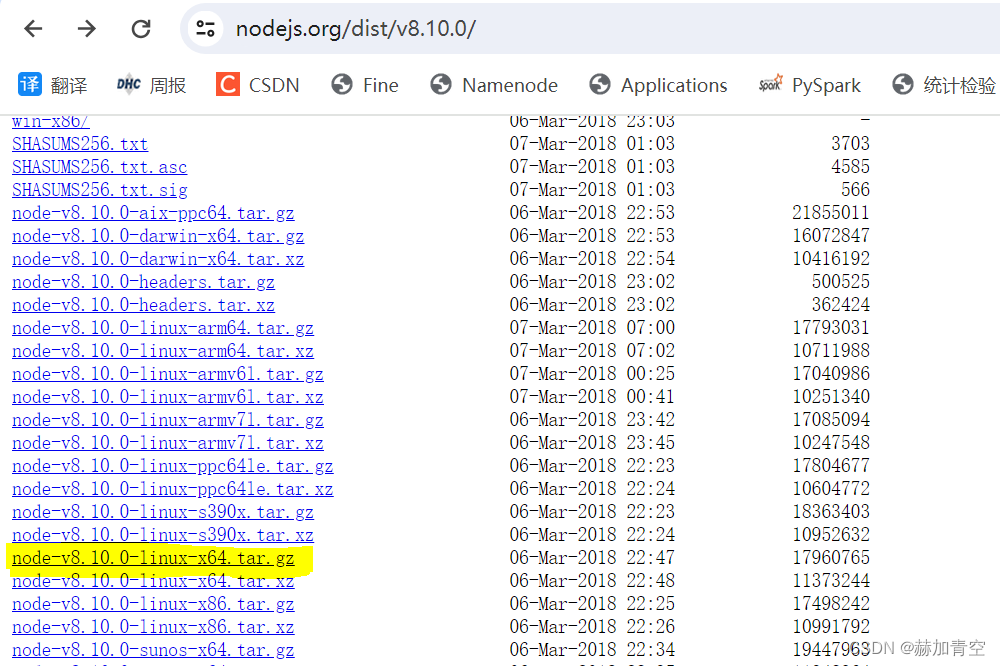
1.下载 node tar 包
node的下载地址,版本根据报错来自行下载
2.安装node
上传文件到 /usr/lib/ 目录下并执行解压到文件目录下。
tar -zxvf node-v8.10.0-linux-x64.tar.gz
修改环境变量
vim /etc/profile
export NODE_HOME="/usr/lib/node-v8.10.0-linux-x64"
export PATH=$PATH:$NODE_HOME/bin
source /etc/profile 并使其生效
建立软连接,否则 node -v 无法查到版本,也就无法离线使用解决报错问题
ln -s /usr/lib/node-v8.10.0-linux-x64/lib/node_modules/npm/bin/npm-cli.js /usr/bin/npm
ln -s /usr/lib/node-v8.10.0-linux-x64/bin/node /usr/bin/node
验证是否安装配置成功
[root@localhost lib]# node -v
v8.10.0
[root@localhost lib]# npm -v
5.6.0
3.修改gradle编译
azkaban目录下修改 azkaban-web-server/build.gradle 的 download 属性为 false
// If true, it will download node using above parameters.
 // If false, it will try to use globally installed node.
 download = false
azkaban目录下的 azkaban-web-server 目录下执行 npm install 将所有前端组件加载到node_module模块中,会有个 npm WARN 不用管。
这一步不可以少,否则azkaban的 azkaban-web-server/build 目录下没有 distributions 文件夹也就不会有 azkaban-web-server-0.1.0-SNAPSHOT.tar.gz
重新执行 ./gradlew build installDist -x test 编译
> Task :azkaban-web-server:npm_install
added 39 packages in 4.025s


BUILD SUCCESSFUL in 13s
103 actionable tasks: 6 executed, 97 up-to-date
出现了 绿色显眼的 BUILD SUCCESSFUL 就是成功了
三.编译好的tar包
azkaban目录下可以找到4个tar包,有了这4个包安装部署solo-server mode、two-server mode、multiple-server mode哪种模式都可以了。
azkaban-db/build/distributions/azkaban-db-0.1.0-SNAPSHOT.tar.gz
azkaban-exec-server/build/distributions/azkaban-exec-server-0.1.0-SNAPSHOT.tar.gz
azkaban-solo-server/build/distributions/azkaban-solo-server-0.1.0-SNAPSHOT.tar.gz
azkaban-web-server/build/distributions/azkaban-web-server-0.1.0-SNAPSHOT.tar.gz
