博客已同步微信公众号:GIS茄子;若博客出现纰漏或有更多问题交流欢迎关注GIS茄子,或者邮箱联系(推荐-见主页).

00 前言
之前一段时间一直使用ENVI IDL处理遥感数据,但是确实对于一些比较新鲜的东西IDL并没有python那么好的及时性,封装的东西也较为底层需要自己实现的东西相对python还是不那么方便,当然它也训练了我对于数据的处理能力。另外最近一直在探索深度学习,IDL相对小众,在时间不充裕的情况,我将倾向于使用Python进行学习而非IDL。因此,目前相当长一段时间我将同时兼容Python和IDL两门语言,但正如你所见,IDL的趋势正在减弱。
目前网络上似乎没有关于MODIS GRID产品预处理的完整处理流程而仅仅是片段代码,因此本博客持续更新,希望可以完善这方面的内容,如果代码处理过程中遇到问题或者存在纰漏,请公众号私信我或者邮箱联系(CSDN联系时常无法接收)。
处理流程包括:
- 数据集无效值去除(依据数据集属性)、单位换算(土地利用无需)
- 相同时间尺度的图像镶嵌
- 重投影(Sinu正弦投影转WGS84)
- HDF4文件输出为GeoTIFF文件
另外该脚本支持:
- 支持并行处理
- 批量处理
程序所需环境:
| numpy | pyhdf | gdal |
|---|---|---|
| 1.24.4 | 0.10.5 | 3.4.3 |
01 数据说明
目前由于一些关系,地理空间数据云下载的NDVI、地表温度产品无法满足需求,需要移步NASA官网进行下载原始数据集,包括
- MCD12Q1(土地利用数据集)
- MOD12A2(地表温度数据集)
- MOD13A2(NDVI数据集)
数据集情况如下:
-
MCD12Q1数据集:

包括2001~2020年,一年4景影像(需要进行拼接) -
MOD12A2数据集
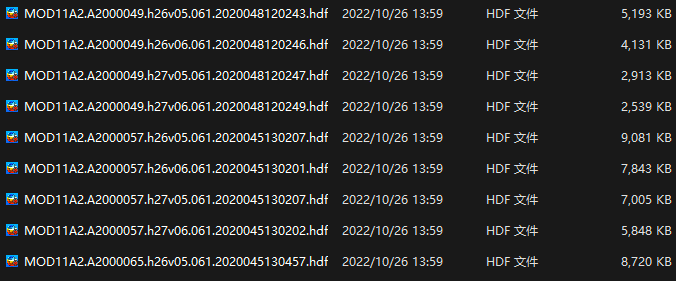
包括2000~2022年,每8天4景影像(同样需要拼接),处理上与上面稍有不同,体现在时间维度上。 -
MOD13A2数据集
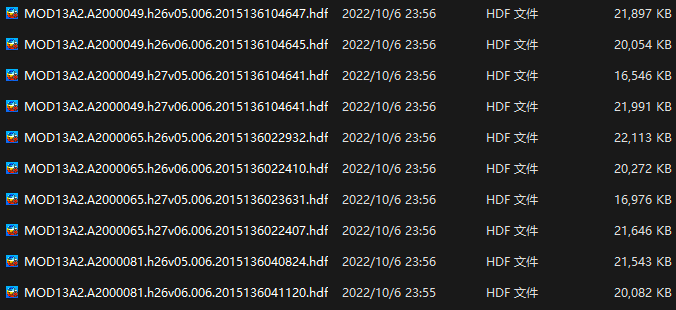
上述三个数据集均为MODIS GRID格式(Sinusoidal正弦投影),关于正弦投影内容见:
Python:如何解决MODIS GRID(正弦投影/GCTP_SNSOID)的重投影问题?
02 自定义函数说明
2.1 镶嵌函数(not just mosaic)
镶嵌函数img_mosaic实际上包含从多个HDF4文件 ⇒ 镶嵌得到的栅格矩阵(np.ndarray)的整个过程,其中包含:
- HDF4文件的数据集读取和属性获取
- 数据集的无效值设定、单位换算
- 投影参数的获取、仿射参数的获取
- 镶嵌
如下为详细代码:
def img_mosaic(mosaic_paths: list, mosaic_ds_name: str, return_all: bool = True, img_nodata: Union[int, float] = np.nan,
               img_type: Union[np.int32, np.float32, None] = None, unit_conversion: bool = False,
               scale_factor_op: str = 'multiply'):
    """
    该函数用于对列表中的所有HDF4文件进行镶嵌
    :param scale_factor_op: 比例因子的运算符, 默认是乘以(可选: multiply, divide), 该参数尽在unit_conversion为True时生效
    :param unit_conversion: 是否进行单位换算
    :param mosaic_ds_name: 待镶嵌的数据集名称
    :param mosaic_paths: 多个HDF4文件路径组成的字符串列表
    :param return_all: 是否一同返回仿射变换、镶嵌数据集的坐标系等参数
    :return: 默认返回镶嵌好的数据集
    :param img_type: 待镶嵌影像的数据类型
    :param img_nodata: 影像中的无效值设置

    镶嵌策略是last模式, 即如果有存在像元重叠, mosaic_paths中靠后影像的像元将覆盖其.
    """

    # 获取镶嵌范围
    x_mins, x_maxs, y_mins, y_maxs = [], [], [], []
    for mosaic_path in mosaic_paths:
        hdf = SD(mosaic_path)  # 默认只读
        # 获取元数据
        metadata = hdf.__getattr__('StructMetadata.0')
        # 获取角点信息
        ul_pt = [float(x) for x in re.findall(r'UpperLeftPointMtrs=\((.*)\)', metadata)[0].split(',')]
        lr_pt = [float(x) for x in re.findall(r'LowerRightMtrs=\((.*)\)', metadata)[0].split(',')]
        x_mins.append(ul_pt[0])
        x_maxs.append(lr_pt[0])
        y_mins.append(lr_pt[1])
        y_maxs.append(ul_pt[1])
    else:
        # 计算分辨率
        col = int(re.findall(r'XDim=(.*?)\n', metadata)[0])
        row = int(re.findall(r'YDim=(.*?)\n', metadata)[0])
        x_res = (lr_pt[0] - ul_pt[0]) / col
        y_res = (ul_pt[1] - lr_pt[1]) / row
        # 如果img_type没有指定, 那么数据类型默认为与输入相同
        if img_type is None:
            img_type = hdf.select(mosaic_ds_name)[:].dtype
        # 获取数据集的坐标系参数并转化为proj4字符串格式
        projection_param = [float(_param) for _param in re.findall(r'ProjParams=\((.*?)\)', metadata)[0].split(',')]
        mosaic_img_proj4 = "+proj={} +R={:0.4f} +lon_0={:0.4f} +lat_0={:0.4f} +x_0={:0.4f} " \
                           "+y_0={:0.4f} ".format('sinu', projection_param[0], projection_param[4], projection_param[5],
                                                  projection_param[6], projection_param[7])
        # 关闭文件, 释放资源
        hdf.end()
    x_min, x_max, y_min, y_max = min(x_mins), max(x_maxs), min(y_mins), max(y_maxs)

    # 镶嵌
    col = ceil((x_max - x_min) / x_res)
    row = ceil((y_max - y_min) / y_res)
    mosaic_img = np.full((col, row), img_nodata, dtype=img_type)  # 初始化
    for ix, mosaic_path in enumerate(mosaic_paths):
        hdf = SD(mosaic_path)
        target_ds = hdf.select(mosaic_ds_name)
        # 读取数据集和预处理
        target = target_ds.get().astype(img_type)
        valid_range = target_ds.attributes()['valid_range']
        target[(target < valid_range[0]) | (target > valid_range[1])] = img_nodata  # 限定有效范围
        if unit_conversion:  # 进行单位换算
            scale_factor = target_ds.attributes()['scale_factor']
            add_offset = target_ds.attributes()['add_offset']
            # 判断比例因子的运算符
            if scale_factor_op == 'multiply':
                target[target != img_nodata] = target[target != img_nodata] * scale_factor + add_offset
            elif scale_factor_op == 'divide':
                target[target != img_nodata] = target[target != img_nodata] / scale_factor + add_offset
            # 计算当前镶嵌范围
        start_col = floor(((x_mins[ix] + x_res / 2) - x_min) / x_res)
        start_row = floor((y_max - (y_maxs[ix] - x_res / 2)) / y_res)
        end_col = start_col + target.shape[0]
        end_row = start_row + target.shape[1]
        mosaic_img[start_row:end_row, start_col:end_col] = target  # 覆盖

        # 释放资源
        target_ds.endaccess()
        hdf.end()

    if return_all:
        return mosaic_img, [x_min, x_res, 0, y_max, 0, -y_res], mosaic_img_proj4

    return mosaic_img
2.2 重投影(GLT校正)
重投影核心部分通过gdal.Warp函数实现,并没有自己从底层写,因为GDAL已经封装的很好.其中对于正弦投影的关键部分在上文博客提及,这里我们通过proj4进行坐标系的简洁表达。
def img_warp(src_img: np.ndarray, out_path: str, transform: list, src_proj4: str, out_res: float,
             nodata: Union[int, float] = None, resample: str = 'nearest') -> None:
    """
    该函数用于对正弦投影下的栅格矩阵进行重投影(GLT校正), 得到WGS84坐标系下的栅格矩阵并输出为TIFF文件
    :param src_img: 待重投影的栅格矩阵
    :param out_path: 输出路径
    :param transform: 仿射变换参数([x_min, x_res, 0, y_max, 0, -y_res], 旋转参数为0是常规选项)
    :param out_res: 输出的分辨率(栅格方形)
    :param nodata: 设置为NoData的数值
    :param out_type: 输出的数据类型
    :param resample: 重采样方法(默认是最近邻, ['nearest', 'bilinear', 'cubic'])
    :param src_proj4: 表达源数据集(src_img)的坐标系参数(以proj4字符串形式)
    :return: None
    """

    # 输出数据类型
    if np.issubdtype(src_img.dtype, np.integer):
        out_type = gdal.GDT_Int32
    elif np.issubdtype(src_img.dtype, np.floating):
        out_type = gdal.GDT_Float32
    else:
        raise ValueError("当前待校正数组类型为不支持的数据类型")
    resamples = {'nearest': gdal.GRA_NearestNeighbour, 'bilinear': gdal.GRA_Bilinear, 'cubic': gdal.GRA_Cubic}
    # 原始数据集创建(正弦投影)
    driver = gdal.GetDriverByName('MEM')  # 在内存中临时创建
    src_ds = driver.Create("", src_img.shape[1], src_img.shape[0], 1, out_type)  # 注意: 先传列数再传行数, 1表示单波段
    srs = osr.SpatialReference()
    srs.ImportFromProj4(src_proj4)  # 依据
    """
    对于src_proj4, 依据元数据StructMetadata.0知:
        Projection=GCTP_SNSOID; ProjParams=(6371007.181000,0,0,0,0,0,0,0,0,0,0,0,0)
    或数据集属性(MODIS_Grid_8Day_1km_LST/Data_Fields/Projection)知:
        :grid_mapping_name = "sinusoidal";
        :longitude_of_central_meridian = 0.0; // double
        :earth_radius = 6371007.181; // double
    """
    src_ds.SetProjection(srs.ExportToWkt())  # 设置投影信息
    src_ds.SetGeoTransform(transform)  # 设置仿射参数
    src_ds.GetRasterBand(1).WriteArray(src_img)  # 写入数据
    src_ds.GetRasterBand(1).SetNoDataValue(nodata)
    # 重投影信息(WGS84)
    dst_srs = osr.SpatialReference()
    dst_srs.ImportFromEPSG(4326)
    # 重投影
    dst_ds = gdal.Warp(out_path, src_ds, dstSRS=dst_srs, xRes=out_res, yRes=out_res, dstNodata=nodata,
                       outputType=out_type, multithread=True, format='GTiff', resampleAlg=resamples[resample])
    if dst_ds:  # 释放缓存和资源
        dst_ds.FlushCache()
        src_ds, dst_ds = None, None
2.3 年积日转年月日函数
这个实现基本上就是调用datetime模块即可,也无需自己重写。
def ydays2ym(file_path: str) -> str:
    """
    获取路径中的年积日并转化为年月日
    :param file_path: 文件路径
    :return: 返回表达年月日的字符串
    """

    file_name = os.path.basename(file_path)
    ydays = file_name[9:16]
    date = datetime.strptime(ydays, "%Y%j")

    return date.strftime("%Y_%m")
2.4 并行处理相关函数
由于对于相同的数据集例如NDVI,不同时间点上的镶嵌过程都是类似,这里为了更好处理并行处理的简洁性,对原先的process_id闭包,这使得process_id可以记住被创建的环境,无需在每次调用process_id函数时调用重复的变量。
def process_task(union_id, process_paths, ds_name, out_dir, description, nodata, out_res, resamlpe='nearest',
                 temperature=False, img_type=np.float32, unit_conversion=True, scale_factor_op='multiply'):
    print_lock = Lock()  # 线程锁
    # 处理
    def process_id(id: any = None):
        start_time = time.time()
        cur_mosaic_ixs = [_ix for _ix, _id in enumerate(union_id) if _id == id]
        # 镶嵌
        mosaic_paths = [process_paths[_ix] for _ix in cur_mosaic_ixs]
        mosaic_img, transform, mosaic_img_proj4 = img_mosaic(mosaic_paths, ds_name, img_nodata=nodata,
                                                             img_type=img_type, unit_conversion=unit_conversion,
                                                             scale_factor_op=scale_factor_op)
        if temperature:  # 若设置temperature, 则说明当前处理数据集为地表温度, 需要开尔文 ==> 摄氏度
            mosaic_img[mosaic_img != nodata] -= 273.15
        # 重投影
        reproj_path = os.path.join(out_dir, description + '_' + id + '.tiff')
        img_warp(mosaic_img, reproj_path, transform, mosaic_img_proj4, out_res, nodata, resample=resamlpe)
        end_time = time.time()

        with print_lock:  # 避免打印混乱
            print("{}-{} 处理完毕: {:0.2f}s".format(description, id, end_time - start_time))

    return process_id
当然,为了更好了解数据处理的过程,后面也会以注释形式贴出非并行处理的代码。
03 完整代码
完整代码如下:
# @Author   : ChaoQiezi
# @Time     : 2023/12/14  6:31
# @Email    : chaoqiezi.one@qq.com

"""
This script is used to 对MODIS GRID产品(hdf4文件)进行批量镶嵌和重投影并输出为GeoTIFF文件

<说明>
# pyhdf模块相关
对于读取HDF4文件的pyhdf模块需要依据python版本安装指定的whl文件才可正常运行,
下载wheel文件见: https://www.lfd.uci.edu/~gohlke/pythonlibs/
安装: cmd ==> where python ==> 跳转指定python路径 ==> cd Scripts ==> pip install wheel文件的绝对路径

# 数据集
MCD12Q1为土地利用数据
MOD11A2为地表温度数据
MOD13A2为植被指数数据(包括NDVI\EVI)

temp: 数据对比 + 无效值的指定
"""

import os
import re
import time
from glob import glob
from typing import Union
from datetime import datetime
from math import ceil, floor
from threading import Lock
from concurrent.futures import ThreadPoolExecutor  # 线程池

import numpy as np
from pyhdf.SD import SD
from osgeo import gdal, osr


def img_mosaic(mosaic_paths: list, mosaic_ds_name: str, return_all: bool = True, img_nodata: Union[int, float] = np.nan,
               img_type: Union[np.int32, np.float32, None] = None, unit_conversion: bool = False,
               scale_factor_op: str = 'multiply'):
    """
    该函数用于对列表中的所有HDF4文件进行镶嵌
    :param scale_factor_op: 比例因子的运算符, 默认是乘以(可选: multiply, divide), 该参数尽在unit_conversion为True时生效
    :param unit_conversion: 是否进行单位换算
    :param mosaic_ds_name: 待镶嵌的数据集名称
    :param mosaic_paths: 多个HDF4文件路径组成的字符串列表
    :param return_all: 是否一同返回仿射变换、镶嵌数据集的坐标系等参数
    :return: 默认返回镶嵌好的数据集
    :param img_type: 待镶嵌影像的数据类型
    :param img_nodata: 影像中的无效值设置

    镶嵌策略是last模式, 即如果有存在像元重叠, mosaic_paths中靠后影像的像元将覆盖其.
    """

    # 获取镶嵌范围
    x_mins, x_maxs, y_mins, y_maxs = [], [], [], []
    for mosaic_path in mosaic_paths:
        hdf = SD(mosaic_path)  # 默认只读
        # 获取元数据
        metadata = hdf.__getattr__('StructMetadata.0')
        # 获取角点信息
        ul_pt = [float(x) for x in re.findall(r'UpperLeftPointMtrs=\((.*)\)', metadata)[0].split(',')]
        lr_pt = [float(x) for x in re.findall(r'LowerRightMtrs=\((.*)\)', metadata)[0].split(',')]
        x_mins.append(ul_pt[0])
        x_maxs.append(lr_pt[0])
        y_mins.append(lr_pt[1])
        y_maxs.append(ul_pt[1])
    else:
        # 计算分辨率
        col = int(re.findall(r'XDim=(.*?)\n', metadata)[0])
        row = int(re.findall(r'YDim=(.*?)\n', metadata)[0])
        x_res = (lr_pt[0] - ul_pt[0]) / col
        y_res = (ul_pt[1] - lr_pt[1]) / row
        # 如果img_type没有指定, 那么数据类型默认为与输入相同
        if img_type is None:
            img_type = hdf.select(mosaic_ds_name)[:].dtype
        # 获取数据集的坐标系参数并转化为proj4字符串格式
        projection_param = [float(_param) for _param in re.findall(r'ProjParams=\((.*?)\)', metadata)[0].split(',')]
        mosaic_img_proj4 = "+proj={} +R={:0.4f} +lon_0={:0.4f} +lat_0={:0.4f} +x_0={:0.4f} " \
                           "+y_0={:0.4f} ".format('sinu', projection_param[0], projection_param[4], projection_param[5],
                                                  projection_param[6], projection_param[7])
        # 关闭文件, 释放资源
        hdf.end()
    x_min, x_max, y_min, y_max = min(x_mins), max(x_maxs), min(y_mins), max(y_maxs)

    # 镶嵌
    col = ceil((x_max - x_min) / x_res)
    row = ceil((y_max - y_min) / y_res)
    mosaic_img = np.full((col, row), img_nodata, dtype=img_type)  # 初始化
    for ix, mosaic_path in enumerate(mosaic_paths):
        hdf = SD(mosaic_path)
        target_ds = hdf.select(mosaic_ds_name)
        # 读取数据集和预处理
        target = target_ds.get().astype(img_type)
        valid_range = target_ds.attributes()['valid_range']
        target[(target < valid_range[0]) | (target > valid_range[1])] = img_nodata  # 限定有效范围
        if unit_conversion:  # 进行单位换算
            scale_factor = target_ds.attributes()['scale_factor']
            add_offset = target_ds.attributes()['add_offset']
            # 判断比例因子的运算符
            if scale_factor_op == 'multiply':
                target[target != img_nodata] = target[target != img_nodata] * scale_factor + add_offset
            elif scale_factor_op == 'divide':
                target[target != img_nodata] = target[target != img_nodata] / scale_factor + add_offset
            # 计算当前镶嵌范围
        start_col = floor(((x_mins[ix] + x_res / 2) - x_min) / x_res)
        start_row = floor((y_max - (y_maxs[ix] - x_res / 2)) / y_res)
        end_col = start_col + target.shape[0]
        end_row = start_row + target.shape[1]
        mosaic_img[start_row:end_row, start_col:end_col] = target  # 覆盖

        # 释放资源
        target_ds.endaccess()
        hdf.end()

    if return_all:
        return mosaic_img, [x_min, x_res, 0, y_max, 0, -y_res], mosaic_img_proj4

    return mosaic_img


def img_warp(src_img: np.ndarray, out_path: str, transform: list, src_proj4: str, out_res: float,
             nodata: Union[int, float] = None, resample: str = 'nearest') -> None:
    """
    该函数用于对正弦投影下的栅格矩阵进行重投影(GLT校正), 得到WGS84坐标系下的栅格矩阵并输出为TIFF文件
    :param src_img: 待重投影的栅格矩阵
    :param out_path: 输出路径
    :param transform: 仿射变换参数([x_min, x_res, 0, y_max, 0, -y_res], 旋转参数为0是常规选项)
    :param out_res: 输出的分辨率(栅格方形)
    :param nodata: 设置为NoData的数值
    :param out_type: 输出的数据类型
    :param resample: 重采样方法(默认是最近邻, ['nearest', 'bilinear', 'cubic'])
    :param src_proj4: 表达源数据集(src_img)的坐标系参数(以proj4字符串形式)
    :return: None
    """

    # 输出数据类型
    if np.issubdtype(src_img.dtype, np.integer):
        out_type = gdal.GDT_Int32
    elif np.issubdtype(src_img.dtype, np.floating):
        out_type = gdal.GDT_Float32
    else:
        raise ValueError("当前待校正数组类型为不支持的数据类型")
    resamples = {'nearest': gdal.GRA_NearestNeighbour, 'bilinear': gdal.GRA_Bilinear, 'cubic': gdal.GRA_Cubic}
    # 原始数据集创建(正弦投影)
    driver = gdal.GetDriverByName('MEM')  # 在内存中临时创建
    src_ds = driver.Create("", src_img.shape[1], src_img.shape[0], 1, out_type)  # 注意: 先传列数再传行数, 1表示单波段
    srs = osr.SpatialReference()
    srs.ImportFromProj4(src_proj4)  # 依据
    """
    对于src_proj4, 依据元数据StructMetadata.0知:
        Projection=GCTP_SNSOID; ProjParams=(6371007.181000,0,0,0,0,0,0,0,0,0,0,0,0)
    或数据集属性(MODIS_Grid_8Day_1km_LST/Data_Fields/Projection)知:
        :grid_mapping_name = "sinusoidal";
        :longitude_of_central_meridian = 0.0; // double
        :earth_radius = 6371007.181; // double
    """
    src_ds.SetProjection(srs.ExportToWkt())  # 设置投影信息
    src_ds.SetGeoTransform(transform)  # 设置仿射参数
    src_ds.GetRasterBand(1).WriteArray(src_img)  # 写入数据
    src_ds.GetRasterBand(1).SetNoDataValue(nodata)
    # 重投影信息(WGS84)
    dst_srs = osr.SpatialReference()
    dst_srs.ImportFromEPSG(4326)
    # 重投影
    dst_ds = gdal.Warp(out_path, src_ds, dstSRS=dst_srs, xRes=out_res, yRes=out_res, dstNodata=nodata,
                       outputType=out_type, multithread=True, format='GTiff', resampleAlg=resamples[resample])
    if dst_ds:  # 释放缓存和资源
        dst_ds.FlushCache()
        src_ds, dst_ds = None, None


def ydays2ym(file_path: str) -> str:
    """
    获取路径中的年积日并转化为年月日
    :param file_path: 文件路径
    :return: 返回表达年月日的字符串
    """

    file_name = os.path.basename(file_path)
    ydays = file_name[9:16]
    date = datetime.strptime(ydays, "%Y%j")

    return date.strftime("%Y_%m")


# 闭包
def process_task(union_id, process_paths, ds_name, out_dir, description, nodata, out_res, resamlpe='nearest',
                 temperature=False, img_type=np.float32, unit_conversion=True, scale_factor_op='multiply'):
    print_lock = Lock()  # 线程锁
    # 处理
    def process_id(id: any = None):
        start_time = time.time()
        cur_mosaic_ixs = [_ix for _ix, _id in enumerate(union_id) if _id == id]
        # 镶嵌
        mosaic_paths = [process_paths[_ix] for _ix in cur_mosaic_ixs]
        mosaic_img, transform, mosaic_img_proj4 = img_mosaic(mosaic_paths, ds_name, img_nodata=nodata,
                                                             img_type=img_type, unit_conversion=unit_conversion,
                                                             scale_factor_op=scale_factor_op)
        if temperature:  # 若设置temperature, 则说明当前处理数据集为地表温度, 需要开尔文 ==> 摄氏度
            mosaic_img[mosaic_img != nodata] -= 273.15
        # 重投影
        reproj_path = os.path.join(out_dir, description + '_' + id + '.tiff')
        img_warp(mosaic_img, reproj_path, transform, mosaic_img_proj4, out_res, nodata, resample=resamlpe)
        end_time = time.time()

        with print_lock:  # 避免打印混乱
            print("{}-{} 处理完毕: {:0.2f}s".format(description, id, end_time - start_time))

    return process_id

# 准备
in_dir = 'F:\Cy_modis'  # F:\Cy_modis\MCD12Q1_2001_2020、F:\Cy_modis\MOD11A2_2000_2022、F:\Cy_modis\MOD13A2_2001_2020
out_dir = 'H:\Datasets\Objects\Veg'
landuse_name = 'LC_Type1'  # Land Cover Type 1: Annual International Geosphere-Biosphere Programme (IGBP) classification
lst_name = 'LST_Day_1km'
ndvi_name = '1 km 16 days NDVI'  # 注意panoply上显示为: 1_km_16_days_NDVI, 实际上是做了显示上的优化, 原始名称为当前
out_landuse_res = 0.0045  # 500m
out_lst_res = 0.009  # 1000m
out_ndvi_res = 0.009
# 预准备
out_landuse_dir = os.path.join(out_dir, 'landuse')
out_lst_dir = os.path.join(out_dir, 'lst')
out_ndvi_dir = os.path.join(out_dir, 'ndvi')
_ = [os.makedirs(_dir, exist_ok=True) for _dir in [out_landuse_dir, out_lst_dir, out_ndvi_dir]]

# 对MCD12Q1数据集(土地利用数据集)进行镶嵌和重投影(GLT校正)
landuse_paths = glob(os.path.join(in_dir, '**', 'MCD12Q1*.hdf'), recursive=True)  # 迭代
union_id = [os.path.basename(_path)[9:13] for _path in landuse_paths]  # 基于年份进行合并镶嵌的字段(年份-此处)
unique_id = set(union_id)  # unique_id = np.unique(np.asarray(union_id))  # 不使用set是为保证原始顺序
# 多线程处理
with ThreadPoolExecutor() as executer:
    start_time = time.time()
    process_id = process_task(union_id, landuse_paths, landuse_name, out_landuse_dir, 'Landuse', 255, out_landuse_res,
                              img_type=np.int32, unit_conversion=False)
    executer.map(process_id, unique_id)
    end_time = time.time()
    print('MCD12Q1(土地利用数据集预处理完毕: {:0.2f})'.format(end_time - start_time))
# # 常规处理
# for id in unique_id:
#     start_time = time.time()
#     cur_mosaic_ixs = [_ix for _ix, _id in enumerate(union_id) if _id == id]
#     # 镶嵌
#     mosaic_paths = [landuse_paths[_ix] for _ix in cur_mosaic_ixs]
#     mosaic_img, transform, mosaic_img_proj4 = img_mosaic(mosaic_paths, landuse_name, img_nodata=255, img_type=np.int32)
#     # 重投影
#     reproj_path = os.path.join(out_landuse_dir, 'landuse_' + id + '.tiff')
#     img_warp(mosaic_img, reproj_path, transform, mosaic_img_proj4, out_landuse_res, 255, resample='nearest')
#
#     # 打印输出
#     end_time = time.time()
#     print("Landuse-{} 处理完毕: {:0.2f}s".format(id, end_time - start_time))

# 对MOD12A2数据集(地表温度数据集)进行镶嵌和重投影(GLT校正)
lst_paths = glob(os.path.join(in_dir, '**', 'MOD11A2*.hdf'), recursive=True)
union_id = [ydays2ym(_path) for _path in lst_paths]
unique_id = set(union_id)
# 多线程处理
with ThreadPoolExecutor() as executer:
    start_time = time.time()
    process_id = process_task(union_id, lst_paths, lst_name, out_lst_dir, 'LST', -65535, out_lst_res, resamlpe='cubic',
                              temperature=True, unit_conversion=True)
    executer.map(process_id, unique_id)
    end_time = time.time()
    print('MCD11A2(地表温度数据集预处理完毕: {:0.2f})s'.format(end_time - start_time))
# # 常规处理
# for id in unique_id:
#     start_time = time.time()
#     cur_mosaic_ixs = [_ix for _ix, _id in enumerate(union_id) if _id == id]
#     # 镶嵌
#     mosaic_paths = [lst_paths[_ix] for _ix in cur_mosaic_ixs]
#     mosaic_img, transform, mosaic_img_proj4 = img_mosaic(mosaic_paths, lst_name, img_nodata=-65535,
#                                                          img_type=np.float32, unit_conversion=True)
#     # 开尔文 ==> 摄氏度
#     mosaic_img -= 273.15
#     # 重投影
#     reproj_path = os.path.join(out_lst_dir, 'lst_' + id + '.tiff')
#     img_warp(mosaic_img, reproj_path, transform, mosaic_img_proj4, out_lst_res, -65535, resample='cubic')
#
#     # 打印输出
#     end_time = time.time()
#     print("LST-{} 处理完毕: {:0.2f}s".format(id, end_time - start_time))

# 对MOD13A2数据集(NDVI数据集)进行镶嵌和重投影(GLT校正)
ndvi_paths = glob(os.path.join(in_dir, '**', 'MOD13A2*.hdf'), recursive=True)
union_id = [ydays2ym(_path) for _path in ndvi_paths]
unique_id = np.unique(np.asarray(union_id))
# 多线程处理
with ThreadPoolExecutor() as executer:
    start_time = time.time()
    process_id = process_task(union_id, ndvi_paths, ndvi_name, out_ndvi_dir, 'NDVI', -65535, out_ndvi_res,
                              resamlpe='cubic', unit_conversion=True, scale_factor_op='divide')
    executer.map(process_id, unique_id)
    end_time = time.time()
    print('MCD13A2(NDVI数据集预处理完毕: {:0.2f})s'.format(end_time - start_time))
# 常规处理
# for id in unique_id:
#     start_time = time.time()
#     cur_mosaic_ixs = [_ix for _ix, _id in enumerate(union_id) if _id == id]
#     # 镶嵌
#     mosaic_paths = [ndvi_paths[_ix] for _ix in cur_mosaic_ixs]
#     mosaic_img, transform, mosaic_img_proj4 = img_mosaic(mosaic_paths, ndvi_name, img_nodata=-65535, img_type=np.float32,
#                                                          unit_conversion=True, scale_factor_op='divide')
#     # 重投影
#     reproj_path = os.path.join(out_ndvi_dir, 'ndvi_' + id + '.tiff')
#     img_warp(mosaic_img, reproj_path, transform, mosaic_img_proj4, out_ndvi_res, -65535, resample='cubic')
#
#     # 打印输出
#     end_time = time.time()
#     print("NDVI-{} 处理完毕: {:0.2f}s".format(id, end_time - start_time))
当然,由于水平有限,代码中可能仍存在细节方面的纰漏。希望指正,这将对我帮助很大,这里表示我的感谢。


![[原创][R语言]股票分析实战:周级别涨幅趋势的相关性](https://img-blog.csdnimg.cn/direct/f5c2a47ff1db41f79d0f9a1b7e797938.png)