一、导入Druid依赖
<dependency>
    <groupId>com.alibaba</groupId>
    <artifactId>druid-spring-boot-starter</artifactId>
    <version>1.1.22</version>
</dependency>
二、生成密文
方式1. 找到存放druid jar包的目录
1-1、在目录栏执行cmd,调出命令行窗口
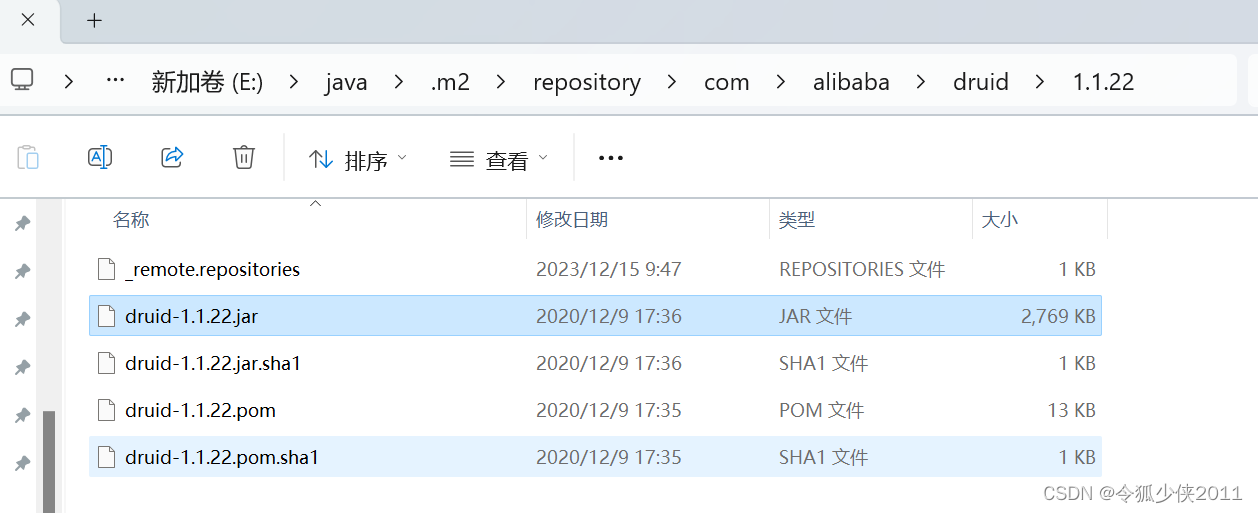
1-2、在命令行窗口执行
java -cp druid-1.1.22.jar com.alibaba.druid.filter.config.ConfigTools 数据库密码

## 如下
E:\java\.m2\repository\com\alibaba\druid\1.1.22> java -cp .\druid-1.1.22.jar com.alibaba.druid.filter.config.ConfigTools ltkj.test
privateKey:MIIBVAIBADANBgkqhkiG9w0BAQEFAASCAT4wggE6AgEAAkEAsQxrpzOi7BscR8nc5YIxRS8XUk3vN92V1wMUqu5EOKKr9D9MGVCZ3+7REzTB2uHUbRZgd4oCu7XwuLAx3GdOvwIDAQABAkAVDS2FuYGPQl/39zwhO/xAxisnOaYOhfXplW+xLViGRTqC4dTQ2h2LVMGpYhOPXCMNeMAO6ZhH4mSqNNMs16ClAiEAwaV1H8gjwFAfpMNhX76YjhtNkyt9dc8A2NbCqYvi6rMCIQDqDshX465wOSbnpXacW/8Uwi2Ku727YNFDKXJ9I6oBxQIgbjf0wFA0OSPhvvAOHmbnggr8ToX0dPeLreAfEE20rI0CIQCLSZrOOu9/V3OgnSZV7KWDW/8wNYO2s+o0tsCsWgH9JQIgPzjgmBX8s5CZwzxd2JIxAjH761CdNhTAmZjPPYuNLJg=
publicKey:MFwwDQYJKoZIhvcNAQEBBQADSwAwSAJBALEMa6czouwbHEfJ3OWCMUUvF1JN7zfdldcDFKruRDiiq/Q/TBlQmd/u0RM0wdrh1G0WYHeKAru18LiwMdxnTr8CAwEAAQ==
password:omjlkBmUL7vXvuiOUEsYBNejb9j1GuD7aCQWxWLSR9LohB5H7M+X8LR63wBUeyws7yRPNq/zejMAsZ82DX3z1A==

PS E:\java\.m2\repository\com\alibaba\druid\1.1.22>
复制password和publickey
方式2. 工具类生成
利用工具类生成加密后密码和公钥
public static void main(String[] args) throws Exception {
        String password = "root123";
        System.out.println("明文密码: " + password);
        String[] keyPair = ConfigTools.genKeyPair(512);
        //私钥
        String privateKey = keyPair[0];
        //公钥
        String publicKey = keyPair[1];
        //用私钥加密后的密文
        password = ConfigTools.encrypt(privateKey, password);

        System.out.println("privateKey:" + privateKey);
        System.out.println("publicKey:" + publicKey);

        System.out.println("password:" + password);

        String decryptPassword = ConfigTools.decrypt(publicKey, password);
        System.out.println("解密后:" + decryptPassword);
    }
三、项目配置
修改yml配置文件
1. filters添加config
2. 配置解密,同时指定公钥
2-1. 生产环境 建议如下配置
启动时,通过java -jar 启动命令,指定spring.druid.publickey的值,如(java -jar xx.jar --spring.druid.publickey=公钥),
避免通过yml获取到公钥。
2-2 . 开发环境可将公钥直接配置在idea启动参数内。
connectionProperties: config.decrypt=true;config.decrypt.key=${spring.druid.publickey}
datasource:
    username: root
    password: RuacV1QzH80HVwZpR5MqagLoOWbRPYPj+yXKJrfEXJxIVchnWfGpdi2PTJCAlWoi7hNN+y4hhDmiGEvdYscW4w==
    url: jdbc:mysql://localhost:3306/article?useUnicode=true&characterEncoding=UTF-8&serverTimezone=Asia/Shanghai
    driver-class-name: com.mysql.jdbc.Driver
    type: com.alibaba.druid.pool.DruidDataSource
    #druid 数据源专有配置
    druid:
      #配置druid监控页面
      stat-view-servlet:
        enabled: true
        url-pattern: /druid/*
        loginUsername: admin
        loginPassword: 123456
    initialSize: 5
    minIdle: 5
    maxActive: 20
    maxWait: 60000
    timeBetweenEvictionRunsMillis: 60000
    minEvictableIdleTimeMillis: 300000
    validationQuery: SELECT 1 FROM DUAL
    testWhileIdle: true
    testOnBorrow: false
    testOnReturn: false
    # 打开PSCache
    poolPreparedStatements: true
    #配置监控统计拦截的filters,stat:监控统计、log4j:日志记录、wall:防御sql注入
    #如果运行时报错  java.lang.ClassNotFoundException: org.apache.log4j.Priority
    #则导入 log4j 依赖即可,Maven 地址: https://mvnrepository.com/artifact/log4j/log4jDruidDataSourceFactory
    filters: stat,wall,config
    #指定每个连接上PSCache的大小
    maxPoolPreparedStatementPerConnectionSize: 20
    #合并多个DruidDataSource的监控数据
    useGlobalDataSourceStat: true
    #通过connectProperties属性来打开mergeSql功能;慢SQL记录;配置数据库密码解密;
    connectionProperties: druid.stat.mergeSql=true;druid.stat.slowSqlMillis=2000;config.decrypt=true;config.decrypt.key=${spring.druid.publickey}
四、ConfigFilter解密原理分析
对于上面为何通过dataSource.setFilters(“config”)一行代码就能实现数据库密码的解密功能,你心中是否有疑惑,它具体又是如何配置了一个ConfigFilter实例的呢?带着这个疑问,我们看下DruidDataSource类中两个重要的方法入手:setFilters和setConnectionproperties,通过这两个入口方法找到与数据库连接密码解密有关的源码实现
3.1 DruidDataSource#setFilters方法
public void setFilters(String filters) throws SQLException {
        if (filters != null && filters.startsWith("!")) {
            filters = filters.substring(1);
            this.clearFilters();
        }
        this.addFilters(filters);
    }

    public void addFilters(String filters) throws SQLException {
        if (filters == null || filters.length() == 0) {
            return;
        }
        // 多个filter通过逗号分隔
        String[] filterArray = filters.split("\\,");

        for (String item : filterArray) {
            FilterManager.loadFilter(this.filters, item.trim());
        }
    }
在上面的addFilters方法中会去遍历配置的filter数组并调用FilterManager#loadFilter方法加载过滤器
3.2 FilterManager类静态代码块
而在FilterManager类中有这样一段静态代码
static {
        try {
            Properties filterProperties = loadFilterConfig();
            for (Map.Entry<Object, Object> entry : filterProperties.entrySet()) {
                String key = (String) entry.getKey();
                if (key.startsWith("druid.filters.")) {
                    String name = key.substring("druid.filters.".length());
                    aliasMap.put(name, (String) entry.getValue());
                }
            }
        } catch (Throwable e) {
            LOG.error("load filter config error", e);
        }
    }
上面这段静态代码首先会去调用无参的loadFilterConfig方法加载过滤器配置
public static Properties loadFilterConfig() throws IOException {
        Properties filterProperties = new Properties();

        loadFilterConfig(filterProperties, ClassLoader.getSystemClassLoader());
        loadFilterConfig(filterProperties, FilterManager.class.getClassLoader());
        loadFilterConfig(filterProperties, Thread.currentThread().getContextClassLoader());

        return filterProperties;
    }
而上面的静态方法中又会去调用带两个参数的loadFilterConfig方法,加载druid.jar包中类路径下的META-INF/druid-filter.properties属性配置文件
我们来看下druid-filter.properties文件中有哪些过滤器
druid.filters.default=com.alibaba.druid.filter.stat.StatFilter
druid.filters.stat=com.alibaba.druid.filter.stat.StatFilter
druid.filters.mergeStat=com.alibaba.druid.filter.stat.MergeStatFilter
druid.filters.counter=com.alibaba.druid.filter.stat.StatFilter
druid.filters.encoding=com.alibaba.druid.filter.encoding.EncodingConvertFilter
druid.filters.log4j=com.alibaba.druid.filter.logging.Log4jFilter
druid.filters.log4j2=com.alibaba.druid.filter.logging.Log4j2Filter
druid.filters.slf4j=com.alibaba.druid.filter.logging.Slf4jLogFilter
druid.filters.commonlogging=com.alibaba.druid.filter.logging.CommonsLogFilter
druid.filters.commonLogging=com.alibaba.druid.filter.logging.CommonsLogFilter
druid.filters.wall=com.alibaba.druid.wall.WallFilter
druid.filters.config=com.alibaba.druid.filter.config.ConfigFilter
druid.filters.haRandomValidator=com.alibaba.druid.pool.ha.selector.RandomDataSourceValidateFilter
可以看到总共有13个过滤器,ConfigFilter类对应的key为druid.filters.config
然后我们回到最上面的静态代码块中可以看到程序会遍历加载并读取druid-filter.properties文件中属性变量后返回的filterProperties, 并将其中的key截取掉druid.filters.前缀后的字符串作为name和过滤器的全类名作为键值对保存在ConcurrentHashMap<String, String>数据结构的aliasMap属性中。
3.3 FilterManager#loadFilter方法
————————————————
public static void loadFilter(List<Filter> filters, String filterName) throws SQLException {
        if (filterName.length() == 0) {
            return;
        }

        String filterClassNames = getFilter(filterName);

        if (filterClassNames != null) {
            for (String filterClassName : filterClassNames.split(",")) {
                if (existsFilter(filters, filterClassName)) {
                    continue;
                }

                Class<?> filterClass = Utils.loadClass(filterClassName);

                if (filterClass == null) {
                    LOG.error("load filter error, filter not found : " + filterClassName);
                    continue;
                }

                Filter filter;

                try {
                    filter = (Filter) filterClass.newInstance();
                } catch (ClassCastException e) {
                    LOG.error("load filter error.", e);
                    continue;
                } catch (InstantiationException e) {
                    thrownew SQLException("load managed jdbc driver event listener error. " + filterName, e);
                } catch (IllegalAccessException e) {
                    thrownew SQLException("load managed jdbc driver event listener error. " + filterName, e);
                } catch (RuntimeException e) {
                    thrownew SQLException("load managed jdbc driver event listener error. " + filterName, e);
                }

                filters.add(filter);
            }

            return;
        }

        if (existsFilter(filters, filterName)) {
            return;
        }

        Class<?> filterClass = Utils.loadClass(filterName);
        if (filterClass == null) {
            LOG.error("load filter error, filter not found : " + filterName);
            return;
        }

        try {
            Filter filter = (Filter) filterClass.newInstance();
            filters.add(filter);
        } catch (Exception e) {
            thrownew SQLException("load managed jdbc driver event listener error. " + filterName, e);
        }
    }
————————————————
上面这个方法的目的就是去根据配置的filterName去aliasMap中找到全类名,然后使用类加载器根据filter的全类名加载Filter类并实例化,完成实例化后将Filter类实例添加到DruidDataSource类List数据结构的filters属性中;当然这个过程首先会去判断filters中是否已经有了配置的Filter类实例,有的化则无需再次加载和实例化。
3.4 数据库连接密文解密的具体实现
在ConfigFilter类中有个init方法,正是在这个初始化方法中完成了数据源加密密码的解密
public void init(DataSourceProxy dataSourceProxy) {
      // 传入的dataSourceProxy就是我们的DruidDatasource实例
     if (!(dataSourceProxy instanceof DruidDataSource)) {
            LOG.error("ConfigLoader only support DruidDataSource");
        }
        // DruidDataSource 转 DruidDataSource
        DruidDataSource dataSource = (DruidDataSource) dataSourceProxy;
        // 获取数据源中的连接属性
        Properties connectionProperties = dataSource.getConnectProperties();
        // 加载连接属性中配置的加密属性文件
        Properties configFileProperties = loadPropertyFromConfigFile(connectionProperties);

        // 判断是否需要解密,如果需要就进行解密
        boolean decrypt = isDecrypt(connectionProperties, configFileProperties);

        if (configFileProperties == null) {
            if (decrypt) {
                decrypt(dataSource, null);
            }
            return;
        }
        if (decrypt) {
            decrypt(dataSource, configFileProperties);
        }

        try {
            DruidDataSourceFactory.config(dataSource, configFileProperties);
        } catch (SQLException e) {
            thrownew IllegalArgumentException("Config DataSource error.", e);
        }
    }
1
上面这个ConfigFilter#init方法是在DruidDatasource#init方法中触发的
for (Filter filter : filters) {
       filter.init(this);
}
loadPropertyFromConfigFile方法源码
publics tatic final String CONFIG_FILE = "config.file";
public static final String SYS_PROP_CONFIG_FILE = "druid.config.file";

Properties loadPropertyFromConfigFile(Properties connectionProperties) {
        String configFile = connectionProperties.getProperty(CONFIG_FILE);

        if (configFile == null) {
            configFile = System.getProperty(SYS_PROP_CONFIG_FILE);
        }

        if (configFile != null && configFile.length() > 0) {
            if (LOG.isInfoEnabled()) {
                LOG.info("DruidDataSource Config File load from : " + configFile);
            }

            Properties info = loadConfig(configFile);

            if (info == null) {
                thrownew IllegalArgumentException("Cannot load remote config file from the [config.file=" + configFile
                                                   + "].");
            }

            return info;
        }

        return null;
    }
阅读loadPropertyFromConfigFile方法中的源码可见,加密属性文件主要从连接属性中key为config.file的属性文件位置或系统属性中key为druid.config.file映射的加密属性文件位置加载
isDecrypt方法源码
public static final String CONFIG_DECRYPT = "config.decrypt";
public static final String SYS_PROP_CONFIG_DECRYPT = "druid.config.decrypt";
public boolean isDecrypt(Properties connectionProperties, Properties configFileProperties) {
        String decrypterId = connectionProperties.getProperty(CONFIG_DECRYPT);
        if (decrypterId == null || decrypterId.length() == 0) {
            if (configFileProperties != null) {
                decrypterId = configFileProperties.getProperty(CONFIG_DECRYPT);
            }
        }
        if (decrypterId == null || decrypterId.length() == 0) {
            decrypterId = System.getProperty(SYS_PROP_CONFIG_DECRYPT);
        }
        return Boolean.valueOf(decrypterId);
    }
由isDecrypt方法中源码分析可见判断是否需要解密主要看连接属性或者加载的加密属性文件变量中key为config.decrypt的值是否为true;如果以上两个的值都不存在,则继续判断系统属性key为druid.config.decrypt的值是否为true
decrypt方法源码分析
public void decrypt(DruidDataSource dataSource, Properties info) {

        try {
            String encryptedPassword = null;
            // 若连接属性不为空,则从连接属性中获取加密密码,否则从数据源实例中获取加密密码
            if (info != null) {
                encryptedPassword = info.getProperty(DruidDataSourceFactory.PROP_PASSWORD);
            }

            if (encryptedPassword == null || encryptedPassword.length() == 0) {
                encryptedPassword = dataSource.getConnectProperties().getProperty(DruidDataSourceFactory.PROP_PASSWORD);
            }

            if (encryptedPassword == null || encryptedPassword.length() == 0) {
                encryptedPassword = dataSource.getPassword();
            }
            // 获取公钥
            PublicKey publicKey = getPublicKey(dataSource.getConnectProperties(), info);
            // 调用ConfigTools#decrypt方法获得解密后的密文
            String passwordPlainText = ConfigTools.decrypt(publicKey, encryptedPassword);

            if (info != null) {
                info.setProperty(DruidDataSourceFactory.PROP_PASSWORD, passwordPlainText);
            } else {
                dataSource.setPassword(passwordPlainText);
            }
        } catch (Exception e) {
            thrownew IllegalArgumentException("Failed to decrypt.", e);
        }
    }
getPublicKey方法源码
publicstaticfinal String CONFIG_KEY;

static {
       CONFIG_KEY = "config.decrypt.key";
}
public static final String SYS_PROP_CONFIG_KEY = "druid.config.decrypt.key";
// 获取公钥
public PublicKey getPublicKey(Properties connectionProperties, Properties configFileProperties) {
        String key = null;
        if (configFileProperties != null) {
            key = configFileProperties.getProperty(CONFIG_KEY);
        }

        if (StringUtils.isEmpty(key) && connectionProperties != null) {
            key = connectionProperties.getProperty(CONFIG_KEY);
        }

        if (StringUtils.isEmpty(key)) {
            key = System.getProperty(SYS_PROP_CONFIG_KEY);
        }

        return ConfigTools.getPublicKey(key);
    }
首先会去从解析加密配制文件后的属性变量中获取公钥, 获取公钥的key为config.decrypt.key;若加密配制文件属性中不存在公钥,则去数据源的连接属性中获取key为config.decrypt.key对应的公钥,如果仍然没有则去系统属性变量中获取key为druid.config.decrypt.key对应的公钥。最后调用ConfigTools#getPublicKey方法根据传入的公钥返回一个PublicKey对象
3.5 DruidAbstractDataSource#setConnectionProperties方法源码
public void setConnectionProperties(String connectionProperties) {
        if (connectionProperties == null || connectionProperties.trim().length() == 0) {
            setConnectProperties(null);
            return;
        }
        // 多个连接属性使用分号分隔
        String[] entries = connectionProperties.split(";");
        Properties properties = new Properties();
        for (int i = 0; i < entries.length; i++) {
            String entry = entries[i];
            if (entry.length() > 0) {
                // 每个连接属性以=号分割成name和value两部分保存到properties属性中
                int index = entry.indexOf('=');
                if (index > 0) {
                    String name = entry.substring(0, index);
                    String value = entry.substring(index + 1);
                    properties.setProperty(name, value);
                } else {
                    // no value is empty string which is how java.util.Properties works
                    properties.setProperty(entry, "");
                }
            }
        }
        // 最后通过抽象方法调用实现类DruidDatasource类的setConnectProperties方法
        setConnectProperties(properties);
    }
其他的源码这里就不继续深入分析了,druid.jar包中涉及到ConfigTools,DruidDatasource和ConfigFilter三个类的源码掌握到这里对于实现数据库连接密码的加密和解密也已经足够了
————————————————
五 SpringBoot 2.X 同时整合 druid连接池加密 + dynamic-datasource 动态数据源
官方文档: dynamic-datasource-spring-boot-starter
1. 引入依赖
		 <dependency>
                <groupId>com.alibaba</groupId>
                <artifactId>druid-spring-boot-starter</artifactId>

    			<version>1.1.22</version>
         </dependency>
         <dependency>
                <groupId>com.baomidou</groupId>
                <artifactId>dynamic-datasource-spring-boot-starter</artifactId>
                <version>3.5.2</version>
          </dependency>
————————————————
2. 编写配置文件
# 数据源配置
spring:
  autoconfigure:
  	# 排除 Druid 自动配置
    exclude: com.alibaba.druid.spring.boot.autoconfigure.DruidDataSourceAutoConfigure
  datasource:
  	# 指定使用 Druid 数据源
    type: com.alibaba.druid.pool.DruidDataSource
    # 动态数据源文档 https://www.kancloud.cn/tracy5546/dynamic-datasource/content
    dynamic:
      #设置默认的数据源或者数据源组,默认值即为 master
      primary: master
      datasource:
        # 主库数据源
        master:
          driverClassName: com.mysql.cj.jdbc.Driver
          url: jdbc:mysql://192.168.0.121:3306/test1?useUnicode=true&characterEncoding=utf8&zeroDateTimeBehavior=convertToNull&useSSL=true&serverTimezone=GMT%2B8&autoReconnect=true
          username: root
          password: root
        # 从库数据源
        slave:
          driverClassName: com.mysql.cj.jdbc.Driver
          url: jdbc:mysql://192.168.0.122:3306/test2?useUnicode=true&characterEncoding=utf8&zeroDateTimeBehavior=convertToNull&useSSL=true&serverTimezone=GMT%2B8&autoReconnect=true
          username: root
          password: root
    druid:
      # 初始连接数
      initialSize: 5
      # 最小连接池数量
      minIdle: 10
      # 最大连接池数量
      maxActive: 20
      # 配置获取连接等待超时的时间
      maxWait: 60000
      # 配置间隔多久才进行一次检测,检测需要关闭的空闲连接,单位是毫秒
      timeBetweenEvictionRunsMillis: 60000
      # 配置一个连接在池中最小生存的时间,单位是毫秒
      minEvictableIdleTimeMillis: 300000
      # 配置一个连接在池中最大生存的时间,单位是毫秒
      maxEvictableIdleTimeMillis: 900000
      # 配置检测连接是否有效
      validationQuery: SELECT 1 FROM DUAL
————————————————
3、测试
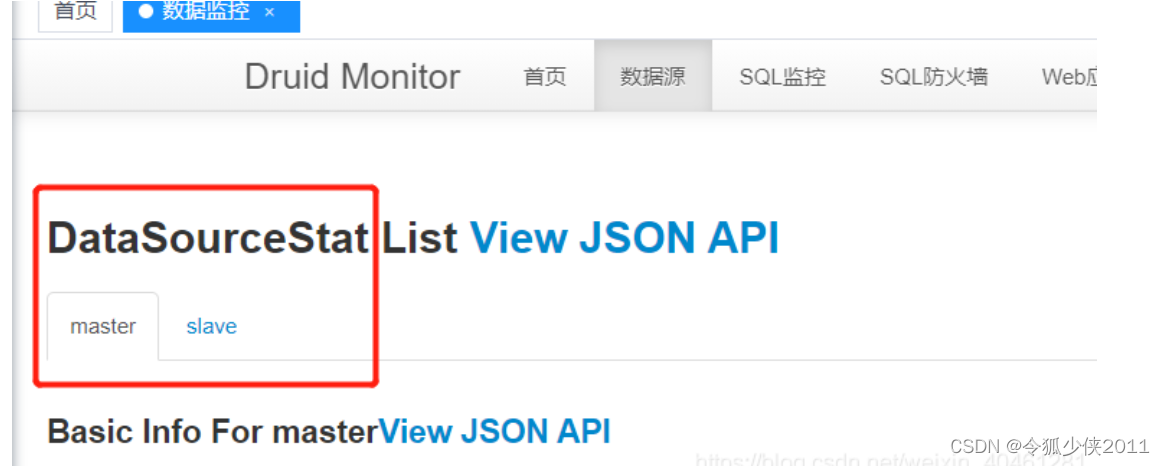
进入 Druid 控制台