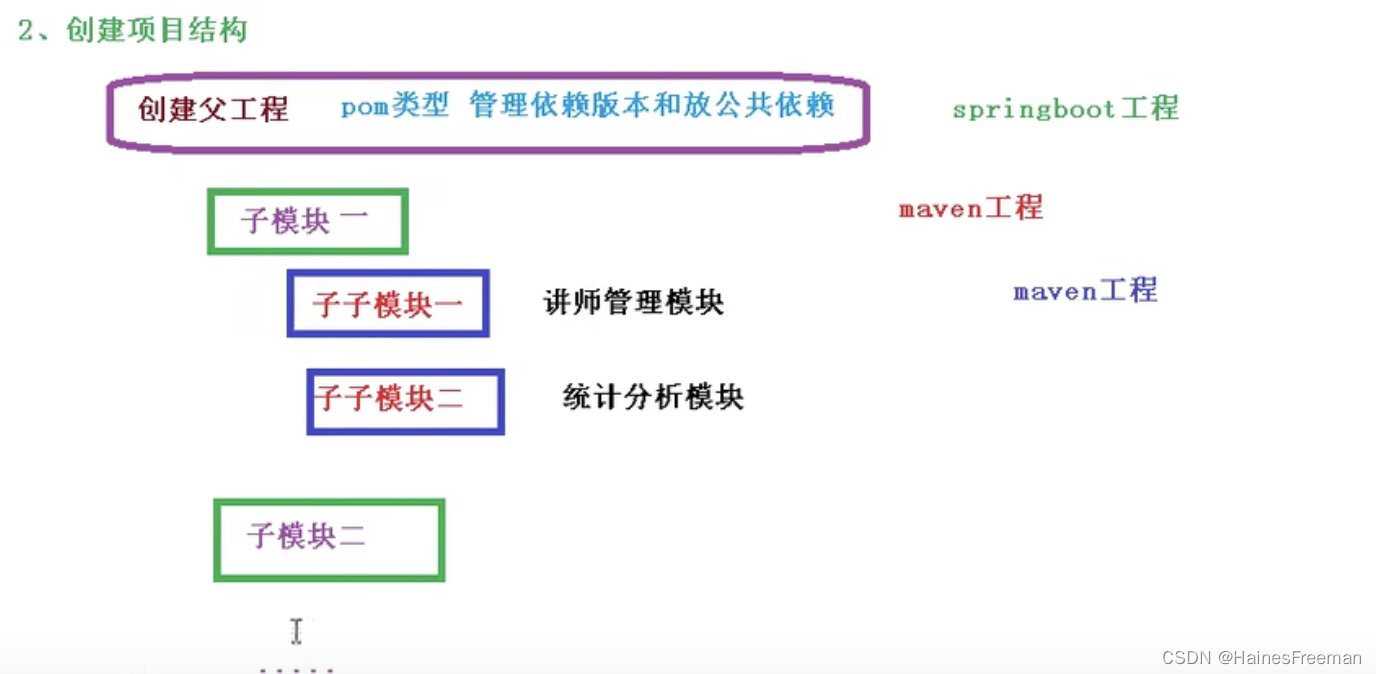
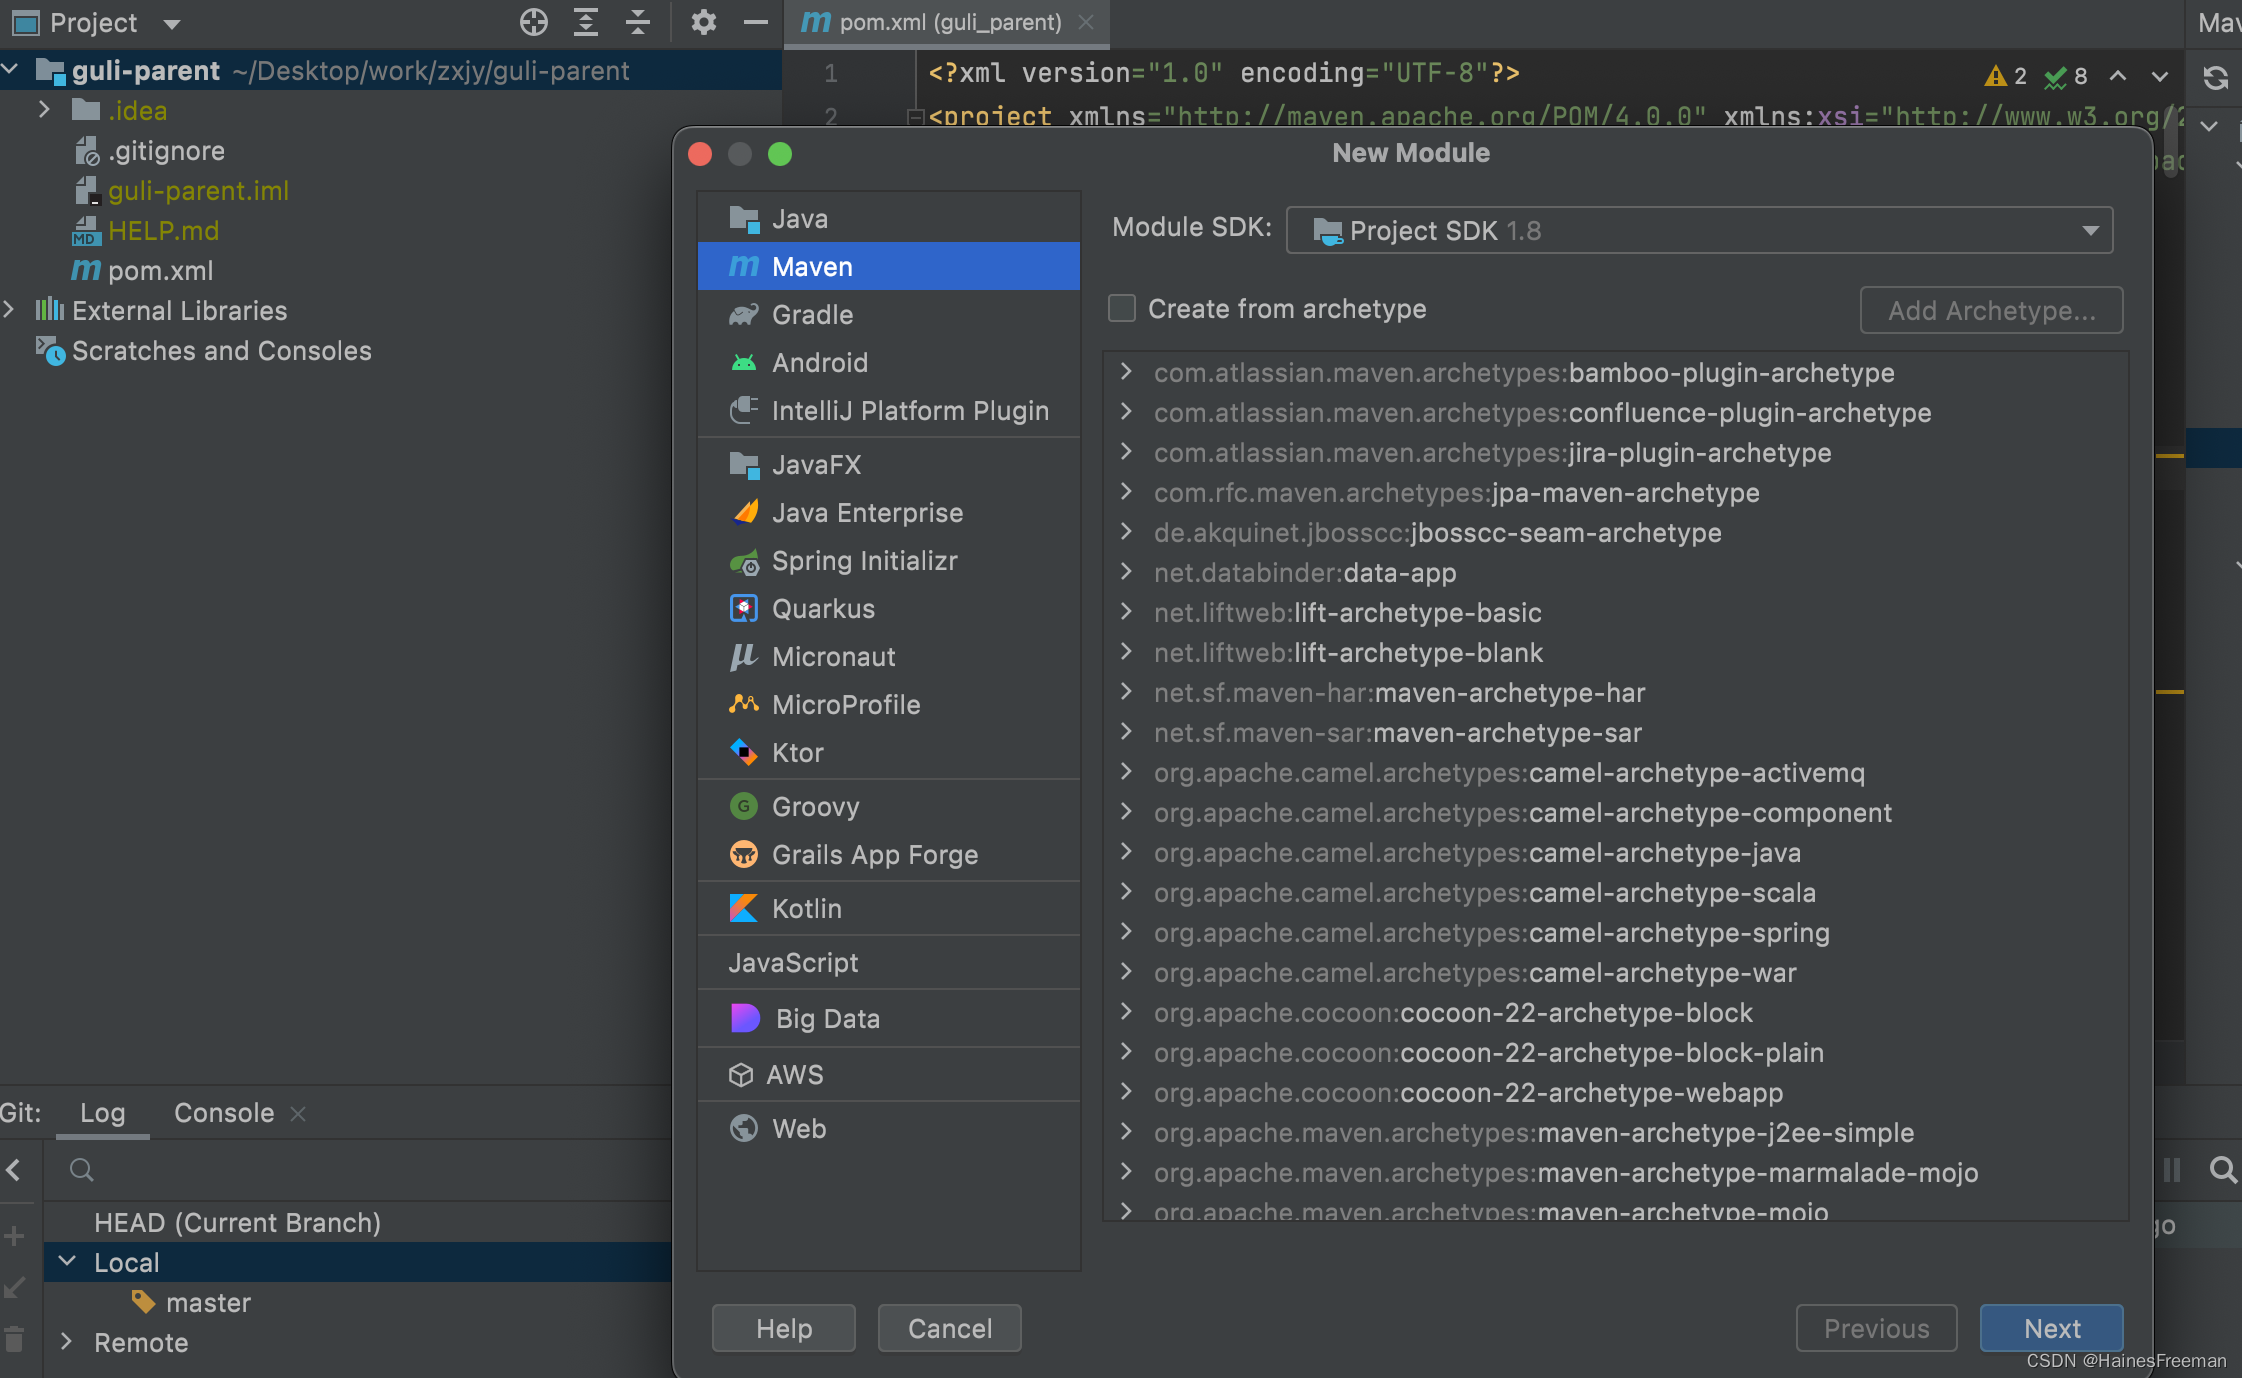
1、新建service module(maven工程,子模块)
1.1 右键 --> new moduel --->选择maven --->完成
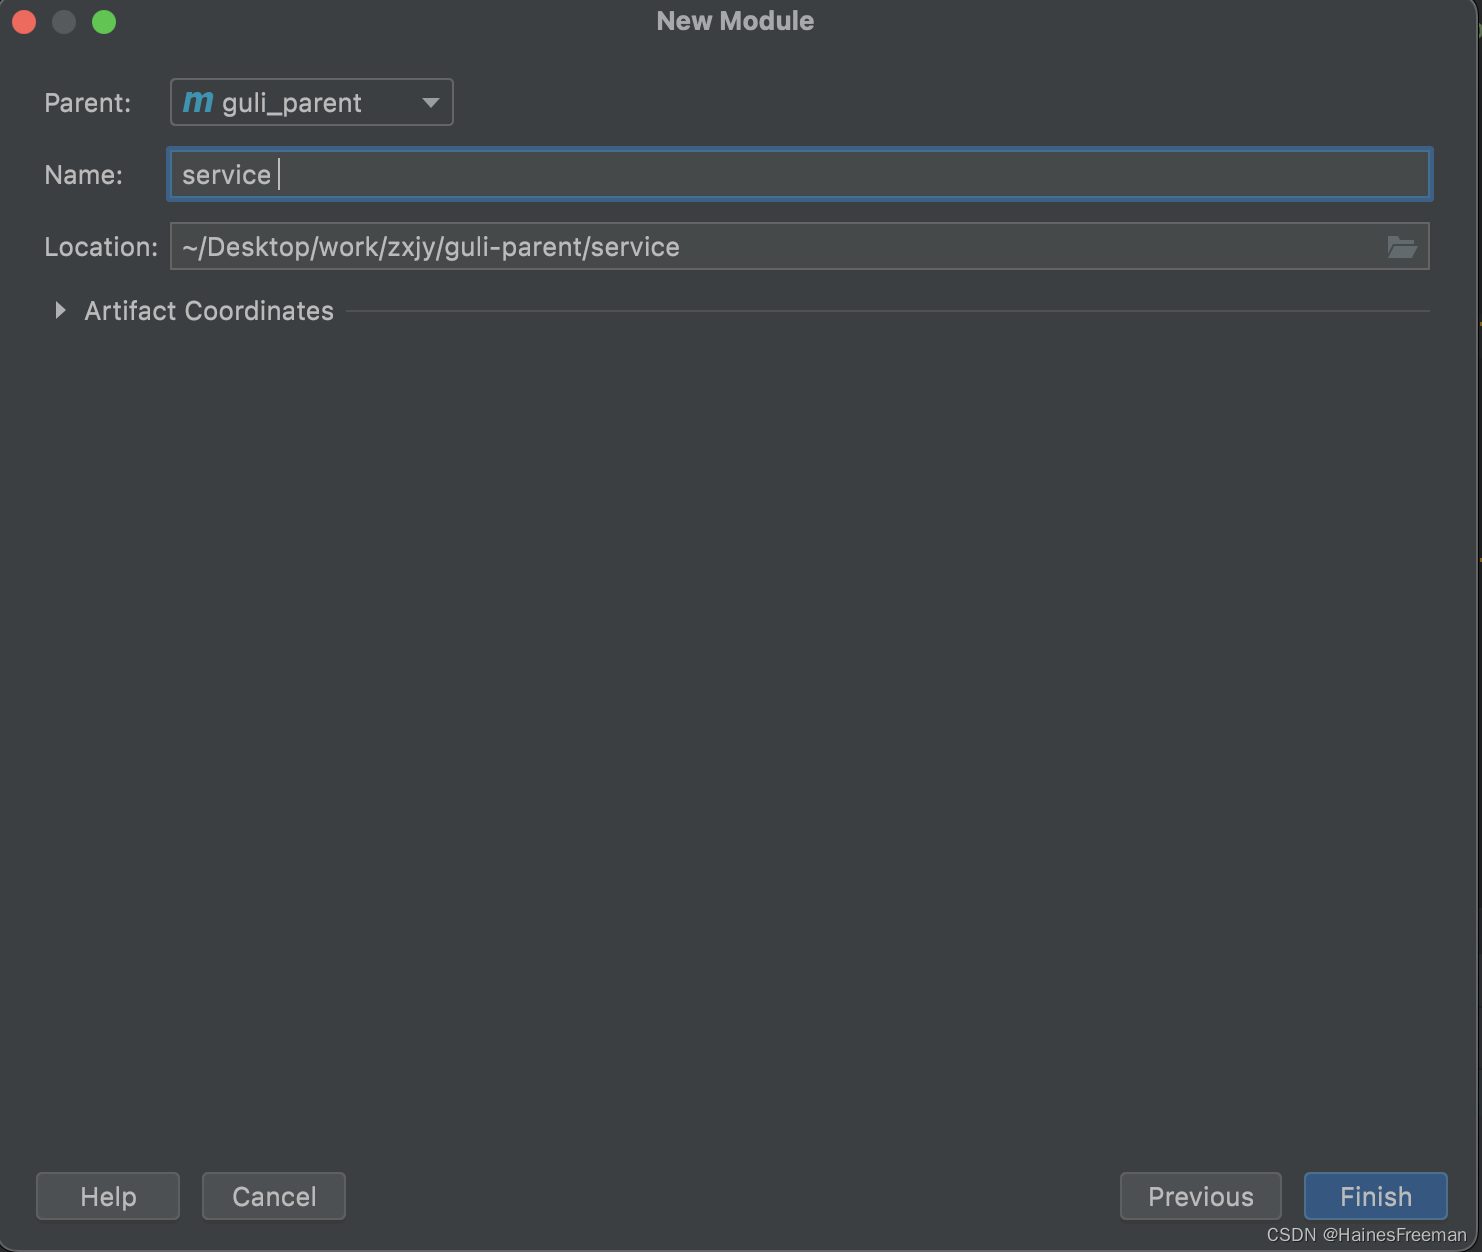
1.2. 添加模块类型是
pom
2、引入项目需要的依赖
<?xml version="1.0" encoding="UTF-8"?>
<project xmlns="http://maven.apache.org/POM/4.0.0"
         xmlns:xsi="http://www.w3.org/2001/XMLSchema-instance"
         xsi:schemaLocation="http://maven.apache.org/POM/4.0.0 http://maven.apache.org/xsd/maven-4.0.0.xsd">
    <parent>
        <artifactId>guli_parent</artifactId>
        <groupId>com.atguigu</groupId>
        <version>0.0.1-SNAPSHOT</version>
    </parent>
    <modelVersion>4.0.0</modelVersion>

    <artifactId>service</artifactId>
    <packaging>pom</packaging>
    <dependencies>
        <dependency>
            <groupId>org.springframework.cloud</groupId>
            <artifactId>spring-cloud-starter-netflix-ribbon</artifactId>
        </dependency>

        <!--hystrix依赖,主要是用  @HystrixCommand -->
        <dependency>
            <groupId>org.springframework.cloud</groupId>
            <artifactId>spring-cloud-starter-netflix-hystrix</artifactId>
        </dependency>

        <!-- 服务注册 -->
        <dependency>
            <groupId>org.springframework.cloud</groupId>
            <artifactId>spring-cloud-starter-alibaba-nacos-discovery</artifactId>
        </dependency>
        <!-- 服务调用 -->
        <dependency>
            <groupId>org.springframework.cloud</groupId>
            <artifactId>spring-cloud-starter-openfeign</artifactId>
        </dependency>

        <dependency>
            <groupId>org.springframework.boot</groupId>
            <artifactId>spring-boot-starter-web</artifactId>
        </dependency>

        <!--mybatis-plus-->
        <dependency>
            <groupId>com.baomidou</groupId>
            <artifactId>mybatis-plus-boot-starter</artifactId>
        </dependency>

        <!--mysql-->
        <dependency>
            <groupId>mysql</groupId>
            <artifactId>mysql-connector-java</artifactId>
        </dependency>

        <!-- velocity 模板引擎, Mybatis Plus 代码生成器需要 -->
        <dependency>
            <groupId>org.apache.velocity</groupId>
            <artifactId>velocity-engine-core</artifactId>
        </dependency>

        <!--swagger-->
        <dependency>
            <groupId>io.springfox</groupId>
            <artifactId>springfox-swagger2</artifactId>
        </dependency>
        <dependency>
            <groupId>io.springfox</groupId>
            <artifactId>springfox-swagger-ui</artifactId>
        </dependency>

        <!--lombok用来简化实体类:需要安装lombok插件-->
        <dependency>
            <groupId>org.projectlombok</groupId>
            <artifactId>lombok</artifactId>
        </dependency>

        <!--xls-->
        <dependency>
            <groupId>org.apache.poi</groupId>
            <artifactId>poi</artifactId>
        </dependency>

        <dependency>
            <groupId>org.apache.poi</groupId>
            <artifactId>poi-ooxml</artifactId>
        </dependency>

        <dependency>
            <groupId>commons-fileupload</groupId>
            <artifactId>commons-fileupload</artifactId>
        </dependency>

        <!--httpclient-->
        <dependency>
            <groupId>org.apache.httpcomponents</groupId>
            <artifactId>httpclient</artifactId>
        </dependency>
        <!--commons-io-->
        <dependency>
            <groupId>commons-io</groupId>
            <artifactId>commons-io</artifactId>
        </dependency>
        <!--gson-->
        <dependency>
            <groupId>com.google.code.gson</groupId>
            <artifactId>gson</artifactId>
        </dependency>

        <dependency>
            <groupId>junit</groupId>
            <artifactId>junit</artifactId>
            <version>4.12</version>
        </dependency>
    </dependencies>

    <!-- 项目打包时会将java目录中的*.xml文件也进行打包 -->
    <build>
        <resources>
            <resource>
                <directory>src/main/java</directory>
                <includes>
                    <include>**/*.xml</include>
                </includes>
                <filtering>false</filtering>
            </resource>
        </resources>
    </build>
</project>
3、添加service-edu模块 (maven工程,子子模块)
一级父工程已经引入了依赖及版本,二级模块只需要引入,三级模块只需要直接使用即可。
1.选中service ---> 右键 ----> new ----> module --->选择maven --->命名service-edu
总结:
pom.xml文件中:
01 表示当前模块的父级模块,会引入其依赖
    <parent>
        <artifactId>guli_parent</artifactId>
        <groupId>com.atguigu</groupId>
        <version>0.0.1-SNAPSHOT</version>
    </parent>
02 表示当前模块有哪些子模块
   <modules>
        <module>service_edu</module>
    </modules>