- 在Spring Cloud项目的pom文件中添加eureka-server的starter依赖坐标
-
<project xmlns="http://maven.apache.org/POM/4.0.0" xmlns:xsi="http://www.w3.org/2001/XMLSchema-instance"
         xsi:schemaLocation="http://maven.apache.org/POM/4.0.0 http://maven.apache.org/maven-v4_0_0.xsd">
    <modelVersion>4.0.0</modelVersion>
    <parent>
        <groupId>com.app</groupId>
        <artifactId>study-spring-cloud</artifactId>
        <version>1.0.0</version>
    </parent>

    <artifactId>eureka-server</artifactId>

    <dependencies>
        <!-- eureka-server依赖 -->
        <dependency>
            <groupId>org.springframework.cloud</groupId>
            <artifactId>spring-cloud-starter-netflix-eureka-server</artifactId>
        </dependency>
    </dependencies>

    <build>
        <finalName>app</finalName>
        <plugins>
            <plugin>
                <groupId>org.springframework.boot</groupId>
                <artifactId>spring-boot-maven-plugin</artifactId>
            </plugin>
        </plugins>
    </build>

</project>
-
- 编写spring boot启动类,并在启动类上添加注解@EnableEurekaServer
-
package com.app.eureka;

import org.springframework.boot.SpringApplication;
import org.springframework.boot.autoconfigure.SpringBootApplication;
import org.springframework.cloud.netflix.eureka.server.EnableEurekaServer;

/**
 * 添加Eureka的服务启动类
 *
 * @author Administrator
 */
@SpringBootApplication
@EnableEurekaServer
public class EurekaApplication {

    public static void main(String[] args) {
        SpringApplication.run(EurekaApplication.class, args);
    }

}
-
- 添加并编写application.yml文件
-
server:
  port: 9000
spring:
  application:
    name: eureka-server
eureka:
  client:
    service-url:
      # 服务端暴露的地址
      defaultZone: http://127.0.0.1:9000/eureka
-
- 启动eureka-server服务,启动成功后访问地址Eureka
 http://127.0.0.1:9000/
- 看到以下结果则表示已经启动成功
-
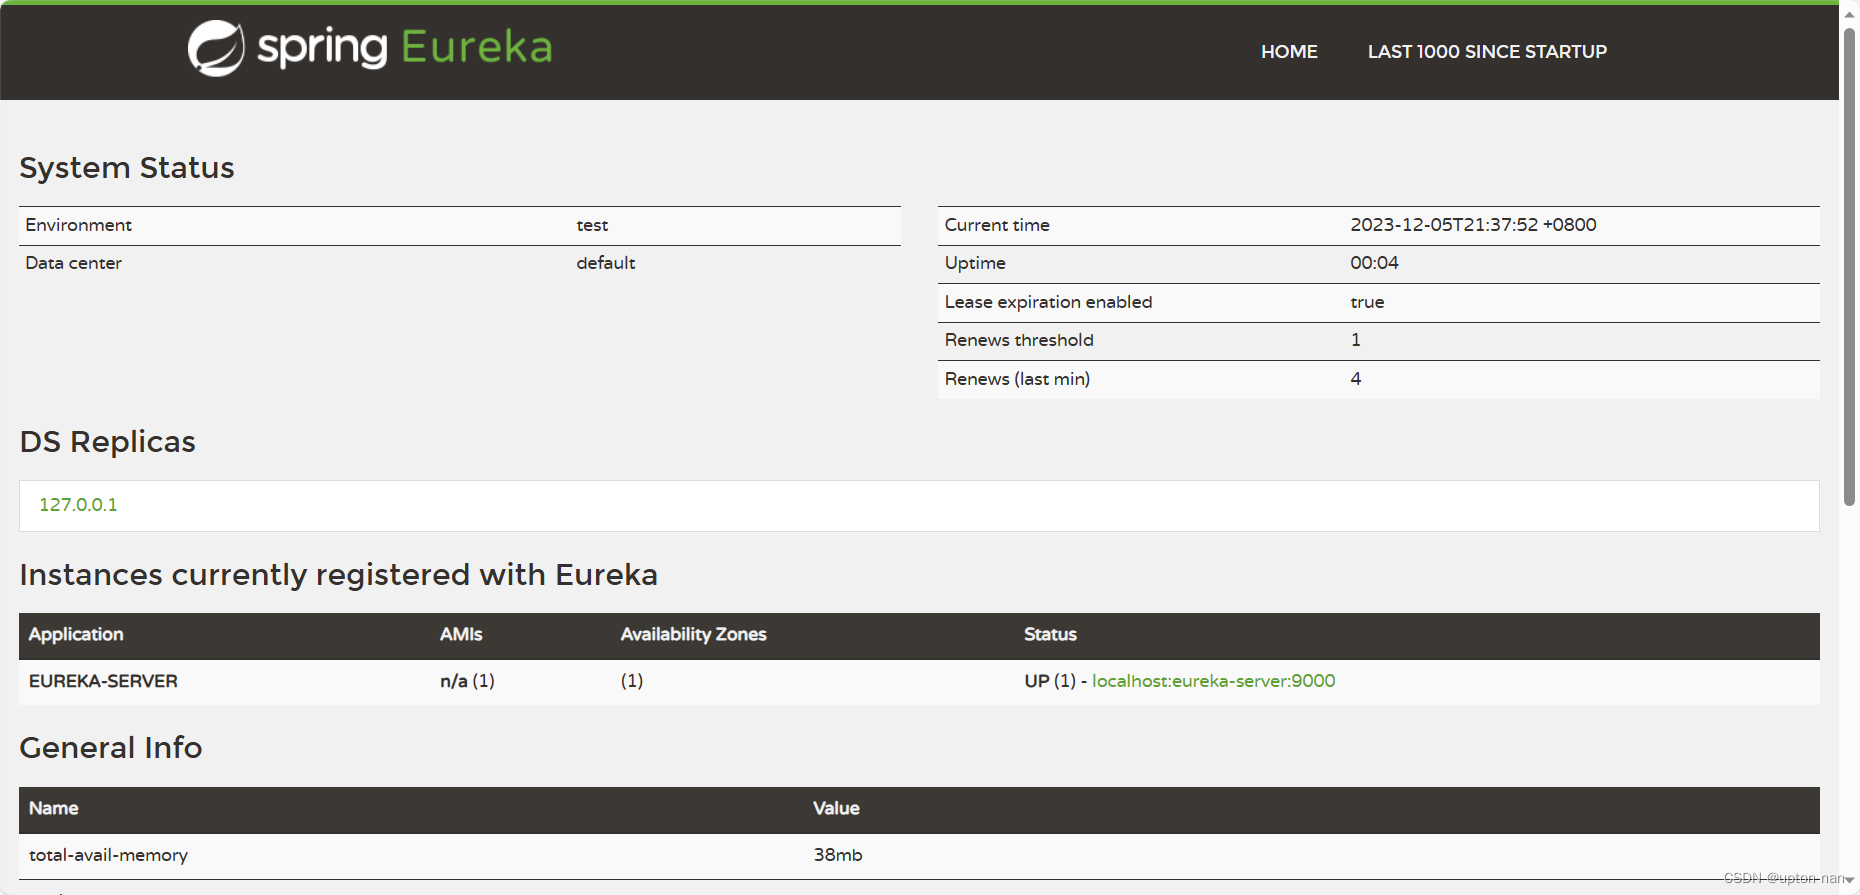
-
- 看到以下结果则表示已经启动成功
- 同时可以看出eureka-server即作为服务的注册中心,同时也将自己的服务注册到eureka-server上面,这是为了进行集群部署的时候需要用到的
如何搭建eureka-server
news2026/2/12 21:43:48
本文来自互联网用户投稿,该文观点仅代表作者本人,不代表本站立场。本站仅提供信息存储空间服务,不拥有所有权,不承担相关法律责任。如若转载,请注明出处:http://www.coloradmin.cn/o/1286828.html
如若内容造成侵权/违法违规/事实不符,请联系多彩编程网进行投诉反馈,一经查实,立即删除!相关文章
科技论文中的Assumption、Remark、Property、Lemma、Theorem、Proof含义
一、背景
学控制、数学、自动化专业的学生在阅读论文时,经常会看到Assumption、Remark、Property、Lemma、Theorem、Proof等单词,对于初学者可能不太清楚他们之间的区别,因此这里做一下详细的说明。
以机器人领域的论文为例。 论文题目&…
Footprint Analytics x Future3 万字研报:AI 与 Web3 数据行业融合的现状、竞争格局与未来机遇探析(上)
GPT的横空出世将全球的目光吸引至大语言模型,各行各业都尝试着利用这个“黑科技”提高工作效率,加速行业发展。Future3 Campus携手Footprint Analytics共同深入研究AI与Web3结合的无限可能,联合发布了《AI与Web3数据行业融合现状、竞争格局与…
1-4节电池升降压充电IC解决方案
描述
MP2760是一款集成窄电压DC(NVDC)电源路径管理功能和USB On-the-Go(OTG)功能的升降压充电IC,兼容USB PD,适用于单节至4节串联的电池包应用。该芯片的充电输入电压范围广,可支持最高22V。
当启用电池放电模式&…
HITOS_LAB5 进程运行轨迹的跟踪与统计
5. 进程运行轨迹的跟踪与统计
5.1. 实验目的
掌握 Linux 下的多进程编程技术;通过对进程运行轨迹的跟踪来形象化进程的概念;在进程运行轨迹跟踪的基础上进行相应的数据统计,从而能对进程调度算法进行实际的量化评价, 更进一步加…
基于Transformer的U型医学图像分割网络综述
基于Transformer的U型医学图像分割网络综述 论文来自 计算机应用 2023 摘 要:目前,医学图像分割模型广泛采用基于全卷积网络(FCN)的U型网络(U-Net)作为骨干网,但卷积神经网络(CNN&am…
十三、FreeRTOS之FreeRTOS时间管理
本节主要介绍以下内容:
1,延时函数介绍(了解)
2,延时函数解析(熟悉)
3,延时函数演示实验(掌握)
4,课堂总结(掌握) 一、…
【Transformer论文精读系列】(一)如何理解Transformer里的注意力机制?
论文:Attention Is All You Need 参考李沐老师的讲解视频: Transformer论文逐段精读【论文精读】_哔哩哔哩_bilibili 其他参考: 超强动画,一步一步深入浅出解释Transformer原理!_哔哩哔哩_bilibili Transformer论文逐段…
2023年【A特种设备相关管理(锅炉压力容器压力管道)】考试内容及A特种设备相关管理(锅炉压力容器压力管道)复审考试
题库来源:安全生产模拟考试一点通公众号小程序
A特种设备相关管理(锅炉压力容器压力管道)考试内容根据新A特种设备相关管理(锅炉压力容器压力管道)考试大纲要求,安全生产模拟考试一点通将A特种设备相关管理…
1970-2022年中国省级国家级开发区数据集
1970-2022年Z国省级国家级开发区数据集
1、时间:1970-2022年
2、指标:单位名称、所属区域、所属省份、所属级别、开发区类型、关注热度、成立时间、核准面积、主导产业、地址、联系电话、经纬度
3、范围:2781个开发区
4、来源:…
机器学习---朴素贝叶斯分类器的实现(对文本进行侮辱性言论和非侮辱性言论的分类)
1. loadDataSet函数
import numpy as np# 构造loadDataSet函数用于生成实验样本
def loadDataSet(): postingList[[my, dog, has, flea, problems, help, please],[maybe, not, take, him, to, dog, park, stupid],[my, dalmation, is, so, cute, I, love, him],[stop, postin…
2005-2021年地级市绿色发展注意力数据(根据政府报告文本词频统计)
2005-2021年地级市绿色发展注意力数据(根据政府报告文本词频统计)
1、时间:2005-2021年
2、指标:省、市、年份、一级指标、关键词、关键词词频、总词频
3、范围:270个地级市
4、来源:地级市政府工作报告…
python自动化测试之破解滑动验证码
在Web自动化测试的过程中,经常会被登录的验证码给卡住,不知道如何去通过验证码的验证。 一般的情况下遇到验证码我们可以都可以找开发去帮忙解决,关闭验证码,或者给一个万能的验证码! 那么如果开发不提供帮助的话&…
金蝶云星空单据编辑界面,不允许批量填充操作
文章目录 金蝶云星空单据编辑界面,不允许批量填充操作案例演示开发设计测试 金蝶云星空单据编辑界面,不允许批量填充操作
案例演示
售后单,明细信息单据体,物料编码字段禁止批量填充。
开发设计
编写表单插件,在Be…
【C++】POCO学习总结(九):网络
【C】郭老二博文之:C目录
1、Poco::Net::IPAddress IP地址
Poco::Net::IPAddress类存储IPv4或IPv6主机地址。 Poco::Net::IPAddress可以从字符串解析,也可以格式化为字符串。支持IPv4格式(d.d.d.d)和IPv6格式(x: x: x: x: x: x: x: x)。
常用函数&…
行业内卷严重到什么程度了?
一.内卷现状 最近大家都吐槽找工作难,确实很难。
不得不说,现在找工作的难度是以前的很多倍。甚至可以说地狱级都不为过。
以前只要简历一挂到网上,就有很多电话打过来。特别是在一线城市,各种类型企业的HR都来找,希…
《opencv实用探索·十》opencv双边滤波的简单理解
1、引言 OpenCV中的双边滤波(Bilateral Filtering)是一种保持边缘清晰的滤波方法,它考虑像素的空间关系和像素值之间的差异。双边滤波对于去除噪声的同时保持图像的边缘非常有效,它也是一种非线性滤波。
双边滤波采用了两个高斯滤…

