GKE是 Google Cloud Platform 提供的托管 Kubernetes 服务,允许用户在 Google 的基础设施上部署、管理和扩展容器。本文介绍如何部署一个简单的springboot项目到GKE.
本文使用podman.
如果你用的是docker, 只需要把本文中所有命令中的podman替换成docker即可
- 非Helm部署方式
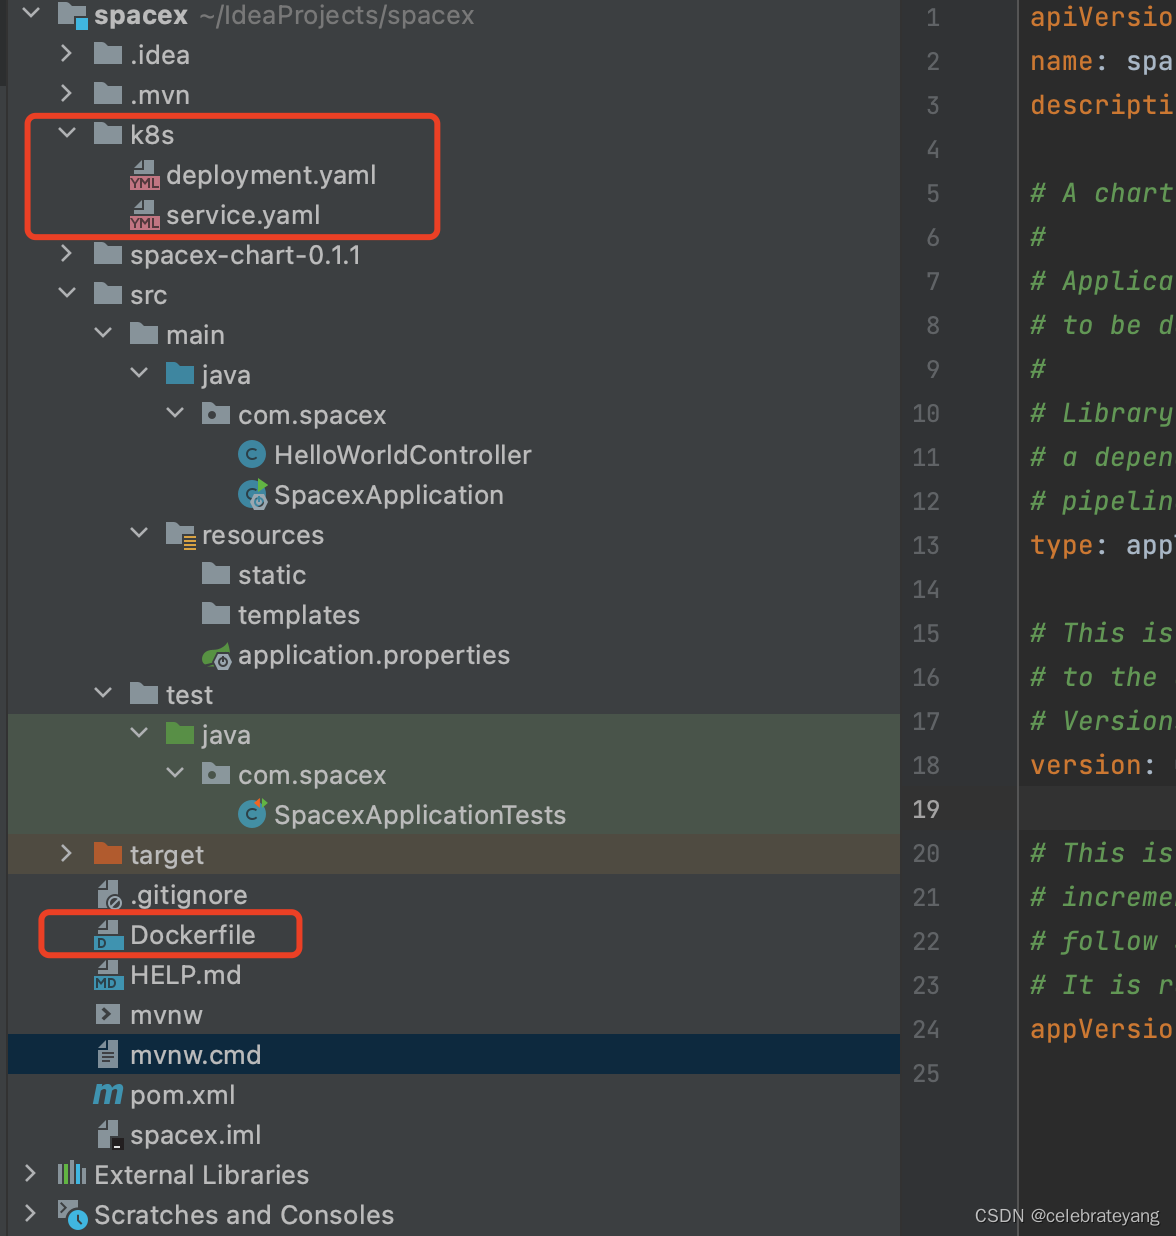
准备工作: 在springboot项目路径下,新增3个文件:deployment.yaml,service.yaml,Dockerfile:
结构如下:
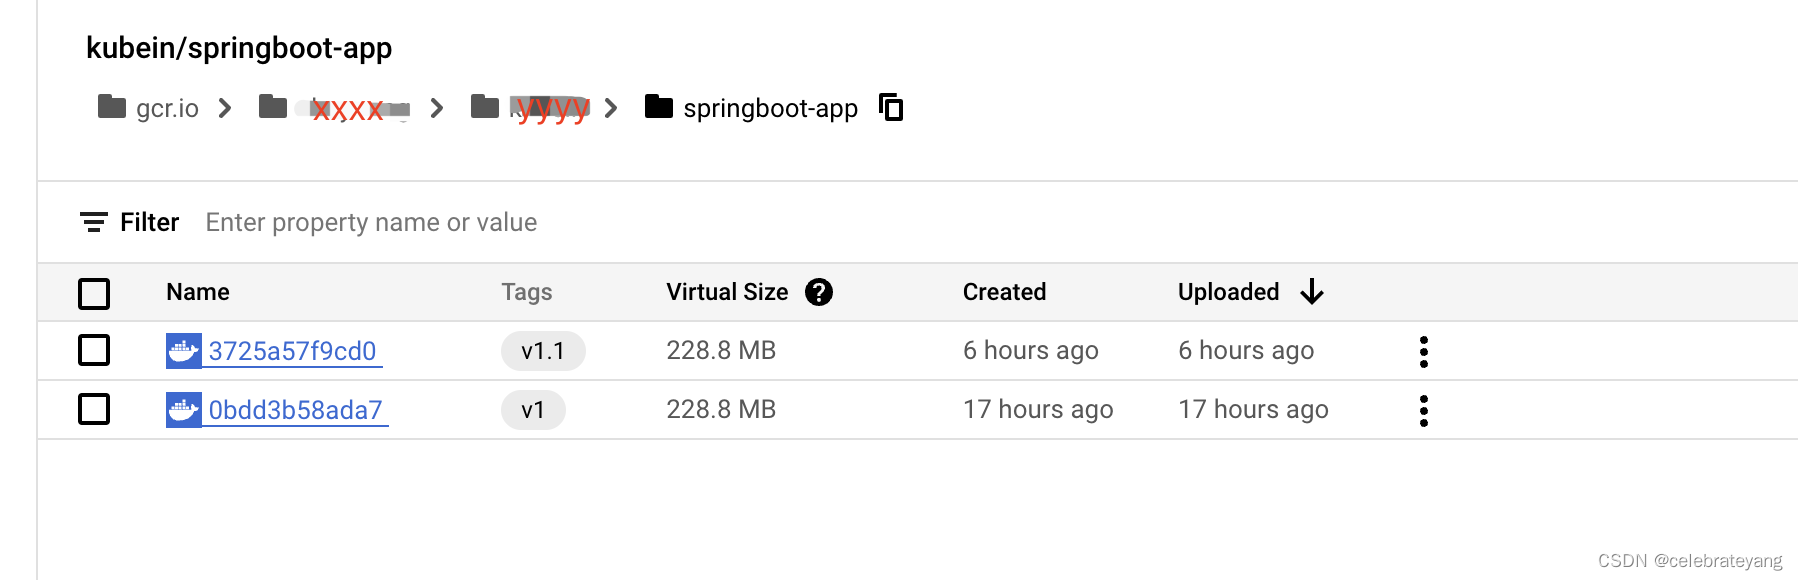
deployment.yaml, 注意文件里的image地址,由后续podman push image gcr.io后得到
apiVersion: apps/v1
kind: Deployment
metadata:
  name: springboot-app
spec:
  replicas: 1
  selector:
    matchLabels:
      app: springboot-app
  template:
    metadata:
      labels:
        app: springboot-app
    spec:
      containers:
        - name: springboot-app
          image: gcr.io/xxxx/yyyy/springboot-app@sha256:3725a57f9cd0b6fb63eb91e49c2305a6b684abd129f3f075838a80b54472455c
          ports:
            - containerPort: 8080
service.yaml
apiVersion: v1
kind: Service
metadata:
  name: springboot-app-service
spec:
  type: LoadBalancer
  selector:
    app: springboot-app
  ports:
    - protocol: TCP
      port: 80
      targetPort: 8080
Dockerfile
# 使用Amazon Corretto 17作为构建环境
FROM amazoncorretto:17 as build
WORKDIR /workspace/app

# 复制Maven Wrapper和其他构建文件
COPY mvnw .
COPY .mvn .mvn
COPY pom.xml .
COPY src src

# 使用Maven Wrapper进行构建,跳过测试
RUN ./mvnw install -DskipTests

# 使用Amazon Corretto 17作为生产环境
FROM amazoncorretto:17
VOLUME /tmp
ARG JAR_FILE=/workspace/app/target/*.jar
COPY --from=build ${JAR_FILE} app.jar
ENTRYPOINT ["java","-jar","/app.jar"]
podman build -t gcr.io/xxxx/yyyy/springboot-app:v1 .
podman push gcr.io/xxxx/yyyy/springboot-app:v1
会生成如下路径
kubectl apply -f deployment.yaml -n infra --使用这个命令之前,先修改一下image的地址。
kubectl apply -f service.yaml -n infra
ok啦,此时你应该可以访问你的应用了。
- Helm部署方式
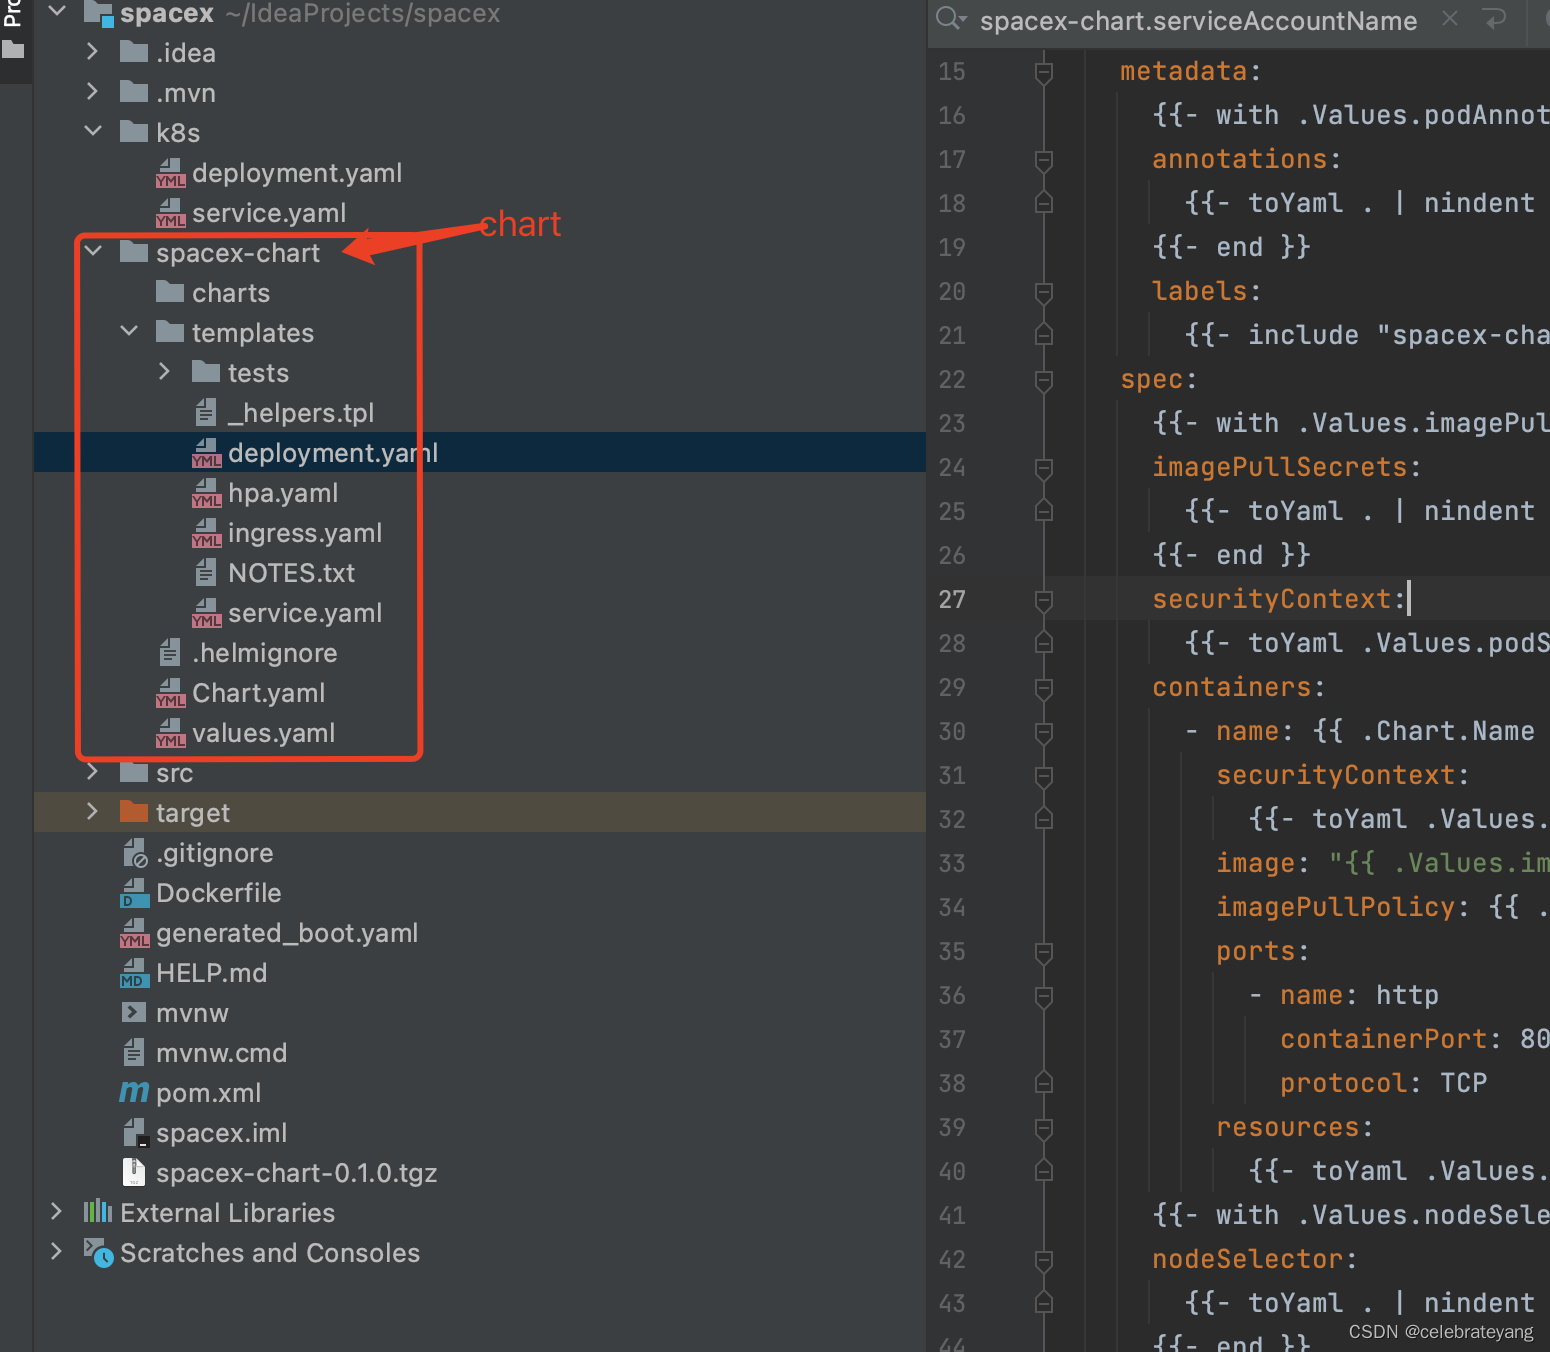
a. helm create spacex-chart -n infra
生成的chart目录结构如下:
关于values的优先级:
命令行参数或自定义 values.yaml > 集群中存储的值 > Chart 的默认 values.yaml
可以用这个命令查看生成的k8s组件是否符合你的预期。
helm template spacex-chart ./spacex-chart
--values=./spacex-chart/values.yaml > generated_boot.yaml
b. 修改一些文件,修改过的文件如下: 另外还移除了service-account等一些不必要的文件
values.yaml
# Default values for spacex-chart.
# This is a YAML-formatted file.
# Declare variables to be passed into your templates.

replicaCount: 1

image:
  repository: gcr.io/ebay-mag/kubein/springboot-app
  pullPolicy: IfNotPresent
  # Overrides the image tag whose default is the chart appVersion.
  tag: "v1.1"

imagePullSecrets: []
nameOverride: ""
fullnameOverride: ""

service:
  type: LoadBalancer
  port: 80
  targetPort: 8080

ingress:
  enabled: false
  className: ""
  annotations: {}
    # kubernetes.io/ingress.class: nginx
    # kubernetes.io/tls-acme: "true"
  hosts:
    - host: chart-example.local
      paths:
        - path: /
          pathType: ImplementationSpecific
  tls: []
  #  - secretName: chart-example-tls
  #    hosts:
  #      - chart-example.local

resources: {}
  # We usually recommend not to specify default resources and to leave this as a conscious
  # choice for the user. This also increases chances charts run on environments with little
  # resources, such as Minikube. If you do want to specify resources, uncomment the following
  # lines, adjust them as necessary, and remove the curly braces after 'resources:'.
  # limits:
  #   cpu: 100m
  #   memory: 128Mi
  # requests:
  #   cpu: 100m
  #   memory: 128Mi

autoscaling:
  enabled: false
  minReplicas: 1
  maxReplicas: 2
  targetCPUUtilizationPercentage: 80
  # targetMemoryUtilizationPercentage: 80

nodeSelector: {}

tolerations: []

affinity: {}
deployment.yaml
apiVersion: apps/v1
kind: Deployment
metadata:
  name: {{ include "spacex-chart.fullname" . }}
  labels:
    {{- include "spacex-chart.labels" . | nindent 4 }}
spec:
  {{- if not .Values.autoscaling.enabled }}
  replicas: {{ .Values.replicaCount }}
  {{- end }}
  selector:
    matchLabels:
      {{- include "spacex-chart.selectorLabels" . | nindent 6 }}
  template:
    metadata:
      {{- with .Values.podAnnotations }}
      annotations:
        {{- toYaml . | nindent 8 }}
      {{- end }}
      labels:
        {{- include "spacex-chart.selectorLabels" . | nindent 8 }}
    spec:
      {{- with .Values.imagePullSecrets }}
      imagePullSecrets:
        {{- toYaml . | nindent 8 }}
      {{- end }}
      securityContext:
        {{- toYaml .Values.podSecurityContext | nindent 8 }}
      containers:
        - name: {{ .Chart.Name }}
          securityContext:
            {{- toYaml .Values.securityContext | nindent 12 }}
          image: "{{ .Values.image.repository }}:{{ .Values.image.tag | default .Chart.AppVersion }}"
          imagePullPolicy: {{ .Values.image.pullPolicy }}
          ports:
            - name: http
              containerPort: 80
              protocol: TCP
          resources:
            {{- toYaml .Values.resources | nindent 12 }}
      {{- with .Values.nodeSelector }}
      nodeSelector:
        {{- toYaml . | nindent 8 }}
      {{- end }}
      {{- with .Values.affinity }}
      affinity:
        {{- toYaml . | nindent 8 }}
      {{- end }}
      {{- with .Values.tolerations }}
      tolerations:
        {{- toYaml . | nindent 8 }}
      {{- end }}
service.yaml
apiVersion: v1
kind: Service
metadata:
  name: {{ include "spacex-chart.fullname" . }}
  labels:
    {{- include "spacex-chart.labels" . | nindent 4 }}
spec:
  type: {{ .Values.service.type }}
  ports:
    - port: {{ .Values.service.port }}
      targetPort: {{ .Values.service.targetPort }}
      protocol: TCP
      name: http
  selector:
    {{- include "spacex-chart.selectorLabels" . | nindent 4 }}
c. 安装 helm install boot-chart-release-001 spacex-chart -n infra
命令解释 helm install [release-name] [chart-name] -n infra,此时我们用helm ls可以查看安装chart后的一些对应关系

ok, 此时应用已经部署到GKE中了,你可以通过ip访问你的应用了。Happy Helming!
安装完后,如果发现需要修改values.yaml里面的值.在修改完values.yaml文件后,用如下命令更新。
helm upgrade boot-chart-release-001 spacex-chart -f spacex-chart/values.yaml -n infra
查看更新后的值
helm get values boot-chart-release-001 -n infra