1 Visual Studio 2022 开发基于.NET 6的OpenCV桌面程序
1.1 为什么选择.NET 6开发桌面应用?
选择 .NET 6(最早称为 .NET Core)而非 Frameworks.NET 的理由是:(1)跨平台;已经支持Windows,Linux及其国产操作系统和国产龙芯CPU;(2).NET 完全开源;没有授权问题;(3)经过多年发展,已经成熟;
1.2 为什么选择开发桌面应用而非 Console 程序?
恰恰是我们这些从Unix,AIX,DOS等走过来的古董级程序员,不想让用户用键盘输入的方式使用软件。Console程序不过是自嗨的代码,不能称为程序,这个太low了。
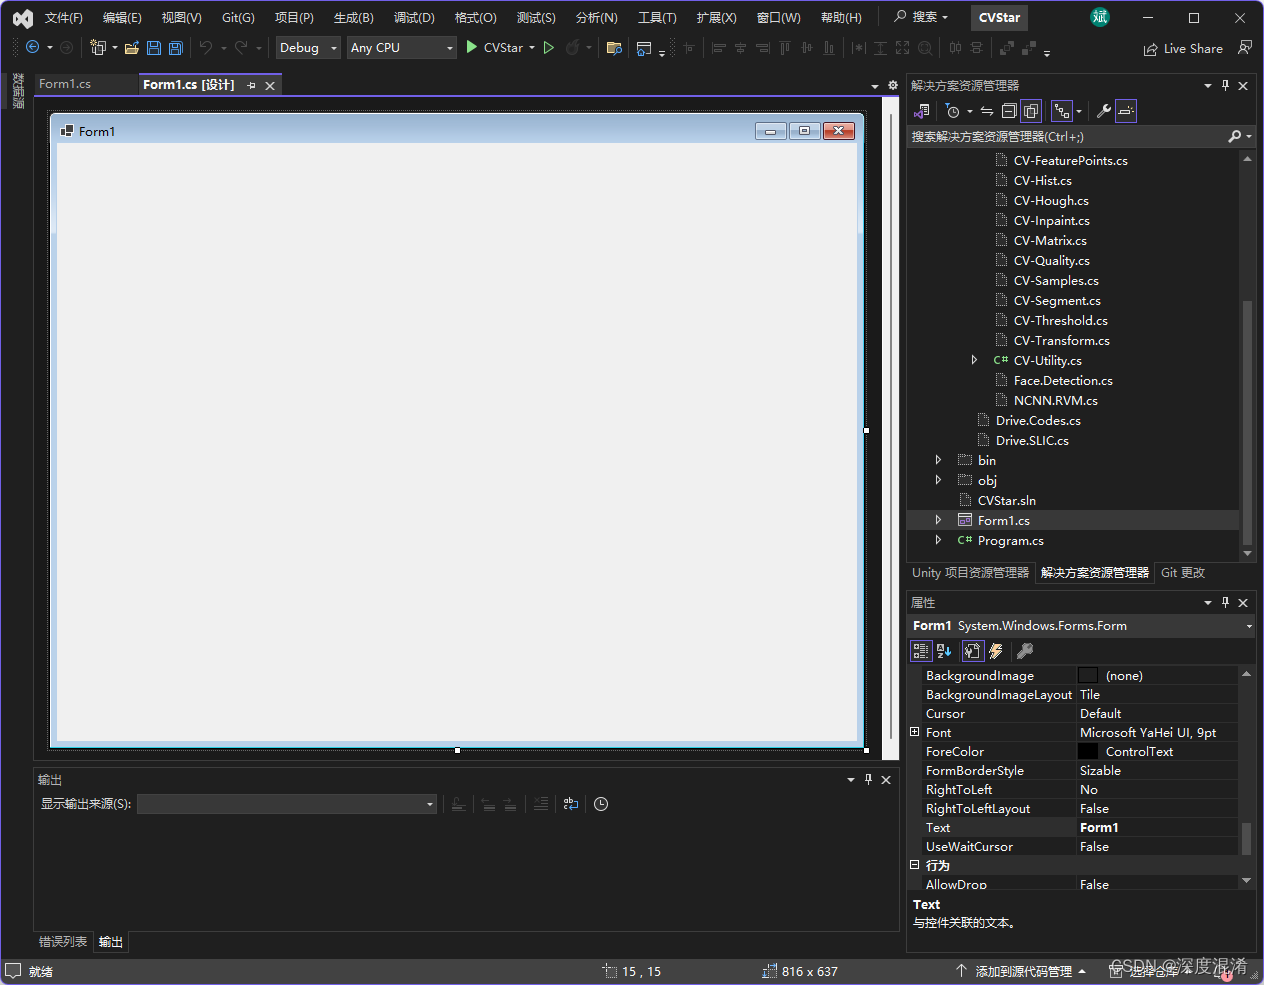
1.3 如何开始创建基于.NET 6的桌面程序?
这里有个动画演示,比较清楚,可供参考学习。

最后出现这样的画面即可。
1.4 安装OpenCvSharp开发环境。
这个请阅读另外一篇博客。
OpenCvSharp开发环境的安装、搭建之可视化教程![]() https://blog.csdn.net/beijinghorn/article/details/125528673
https://blog.csdn.net/beijinghorn/article/details/125528673
2 开发OpenCvSharp桌面程序的实践
2.1 需求分析
凡是程序,而非代码,必须有其需求与分析。
本桌面程序的基本功能需求是:
(1)可读取任意文件夹的各种图片文件,并显示于窗口;
(2)图片可自动缩放;
(3)窗口可缩放;
(4)窗口居中;
(5)图片可转为灰色图;
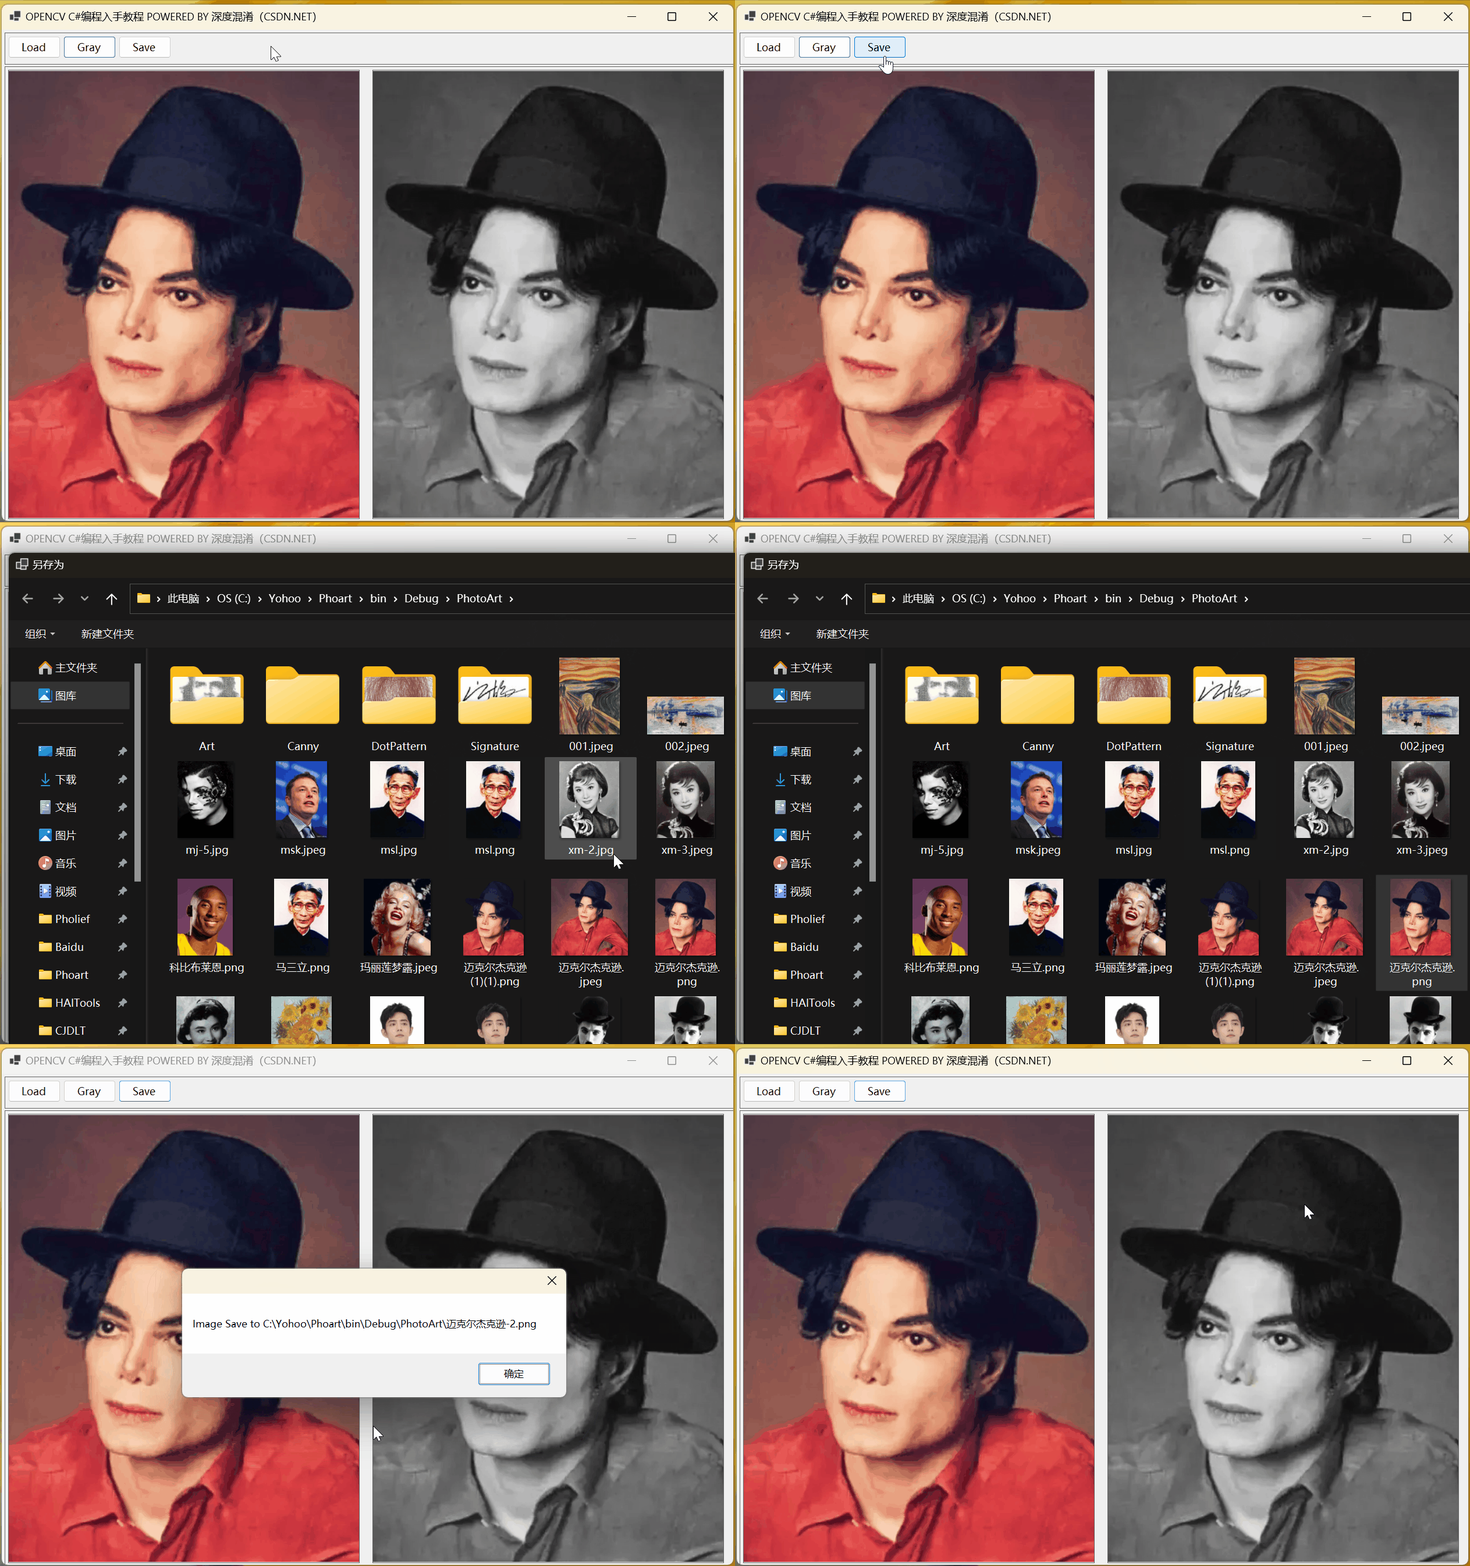
(6)结果可指定文件夹、文件名保存(另存为);
2.2 相关核心代码
核心代码集中于 Form1.cs 文件。下面分别做一个介绍,最后在归总。
2.2.1 定义图片文件的后缀
string[] ImgExtentions = {
    "*.*|*.*",
    "JPEG|*.jpg;*.jpeg",
    "GIF|*.gif",
    "PNG|*.png",
    "TIF|*.tif;*.tiff",
    "BMP|*.bmp"
};
2.2.2 定义窗口内的各种控件
Panel? panelTop { get; set; } = null;
Panel? panelBotton { get; set; } = null;
PictureBox? picSource { get; set; } = null;
PictureBox? picResult { get; set; } = null;
Button? btnLoad { get; set; } = null;
Button? btnGray { get; set; } = null;
Button? btnSave { get; set; } = null;

private int original_width { get; set; } = 0;
private int original_height { get; set; } = 0;
2.2.3 图片自适应(大小、比例)
private void PicAutosize(PictureBox pb)
{
    if (pb == null) return;
    if (pb.Image == null) return;
    Image img = pb.Image;
    int w = original_width;
    int h = w * img.Height / img.Width;
    if (h > original_height)
    {
        h = original_height;
        w = h * img.Width / img.Height;
    }
    pb.SizeMode = PictureBoxSizeMode.Zoom;
    pb.Width = w;
    pb.Height = h;
    pb.Image = img;
    pb.Refresh();
}
2.2.4 创建窗口内的相关控件(按钮、图片)
private void GUI()
{
    if (panelTop == null) panelTop = new Panel();
    panelTop.Parent = this;
    panelTop.Top = 5;
    panelTop.Left = 5;
    panelTop.Width = this.Width - 26;
    panelTop.Height = 55;
    panelTop.BorderStyle = BorderStyle.FixedSingle;

    if (panelBotton == null) panelBotton = new Panel();
    panelBotton.Parent = this;
    panelBotton.Top = panelTop.Top + panelTop.Height + 3;
    panelBotton.Left = 5;
    panelBotton.Width = panelTop.Width;
    panelBotton.Height = this.Height - panelBotton.Top - 55;
    panelBotton.BorderStyle = BorderStyle.FixedSingle;

    if (picSource == null) picSource = new PictureBox();
    picSource.Parent = panelBotton;
    picSource.Left = 5;
    picSource.Top = 5;
    picSource.Width = (panelBotton.Width - 10) / 2;
    picSource.Height = (panelBotton.Height - 10);
    picSource.BorderStyle = BorderStyle.FixedSingle;

    if (picResult == null) picResult = new PictureBox();
    picResult.Parent = panelBotton;
    picResult.Left = picSource.Left + picSource.Width + 5;
    picResult.Top = picSource.Top;
    picResult.Width = picSource.Width;
    picResult.Height = picSource.Height;
    picResult.BorderStyle = BorderStyle.FixedSingle;

    original_width = picSource.Width;
    original_height = picSource.Height;

    if (btnLoad == null) btnLoad = new Button();
    btnLoad.Parent = panelTop;
    btnLoad.Left = 5;
    btnLoad.Top = 5;
    btnLoad.Width = 90;
    btnLoad.Height = 38;
    btnLoad.Cursor = Cursors.Hand;
    btnLoad.Text = "Load";
    btnLoad.Click += Load_Image;

    if (btnGray == null) btnGray = new Button();
    btnGray.Parent = panelTop;
    btnGray.Left = btnLoad.Left + btnLoad.Width + 5;
    btnGray.Top = btnLoad.Top;
    btnGray.Width = 90;
    btnGray.Height = 38;
    btnGray.Cursor = Cursors.Hand;
    btnGray.Text = "Gray";
    btnGray.Click += ToGray;

    if (btnSave == null) btnSave = new Button();
    btnSave.Parent = panelTop;
    btnSave.Left = btnGray.Left + btnGray.Width + 5;
    btnSave.Top = btnLoad.Top;
    btnSave.Width = 90;
    btnSave.Height = 38;
    btnSave.Cursor = Cursors.Hand;
    btnSave.Text = "Save";
    btnSave.Click += Save;

    PicAutosize(picSource);
    PicAutosize(picResult);
}
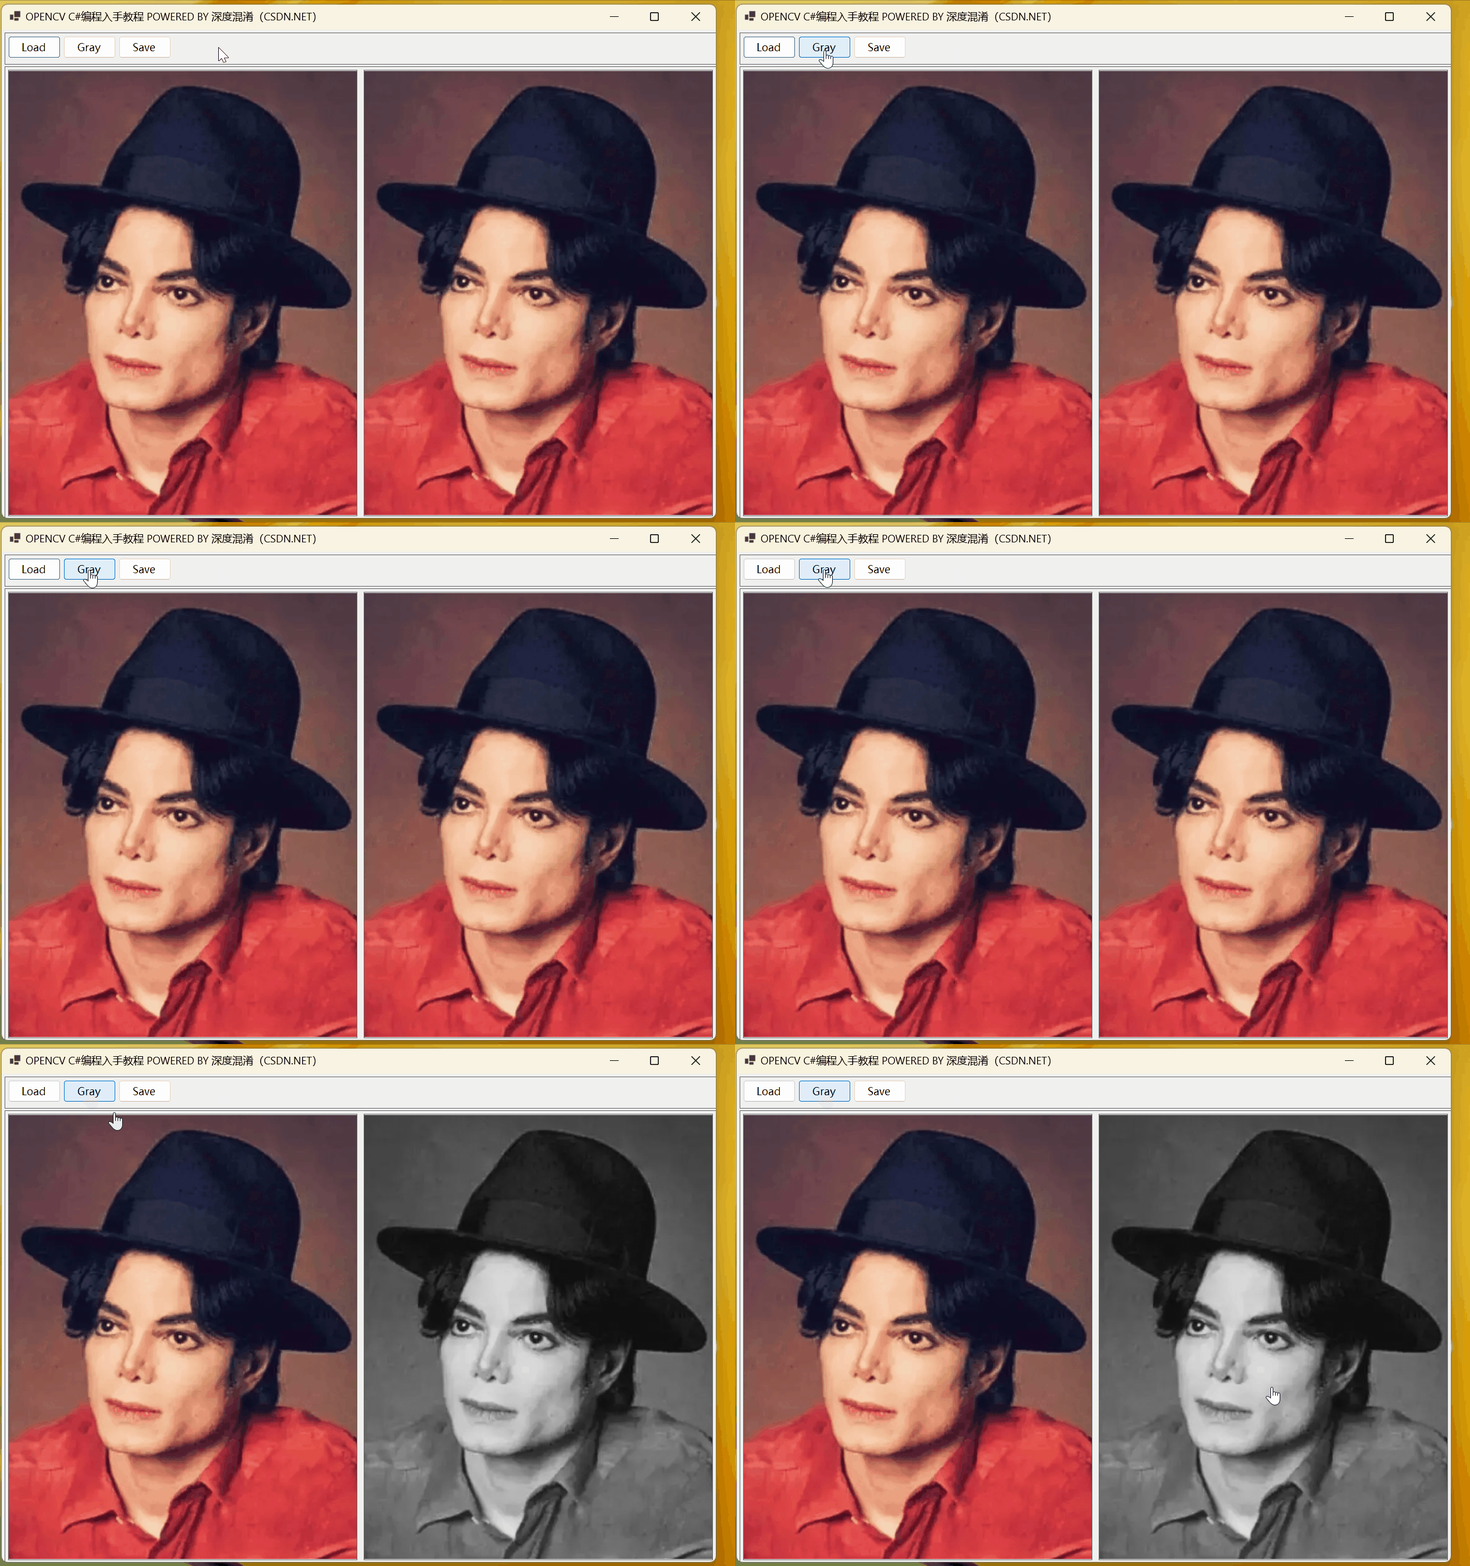
运行时是这样滴。

2.2.5 支持窗口、图片同步缩放的代码
private void FormResize(object? sender, EventArgs? e)
{
    if (this.Width < 200) { this.Width = 320; return; }
    if (this.Height < 200) { this.Height = 320; return; }
    GUI();
}
2.2.6 读取图片并显示
private void Load_Image(object? sender, EventArgs? e)
{
    OpenFileDialog openFileDialog = new OpenFileDialog();
    openFileDialog.Filter = String.Join("|", ImgExtentions);
    if (openFileDialog.ShowDialog() == DialogResult.OK)
    {
        sourceImage = openFileDialog.FileName;
        picSource.Image = Image.FromFile(sourceImage);
        picResult.Image = picSource.Image;
        PicAutosize(picSource);
        PicAutosize(picResult);
    }
}
2.2.7 转为灰色图片
private void ToGray(object? sender, EventArgs? e)
{
    Mat src = Cv2.ImRead(sourceImage);
    Mat dst = new Mat();
    Cv2.CvtColor(src, dst, ColorConversionCodes.BGR2GRAY);
    picResult.Image = CVUtility.Mat2Bitmap(dst);
    PicAutosize(picResult);
}
2.2.8 图片另存为
private void Save(object? sender, EventArgs? e)
{
    SaveFileDialog saveFileDialog = new SaveFileDialog();
    if (saveFileDialog.ShowDialog() == DialogResult.OK)
    {
        picResult.Image.Save(saveFileDialog.FileName);
        MessageBox.Show("Image Save to " + saveFileDialog.FileName);
    }
}
2.3 运行效果
读取图片
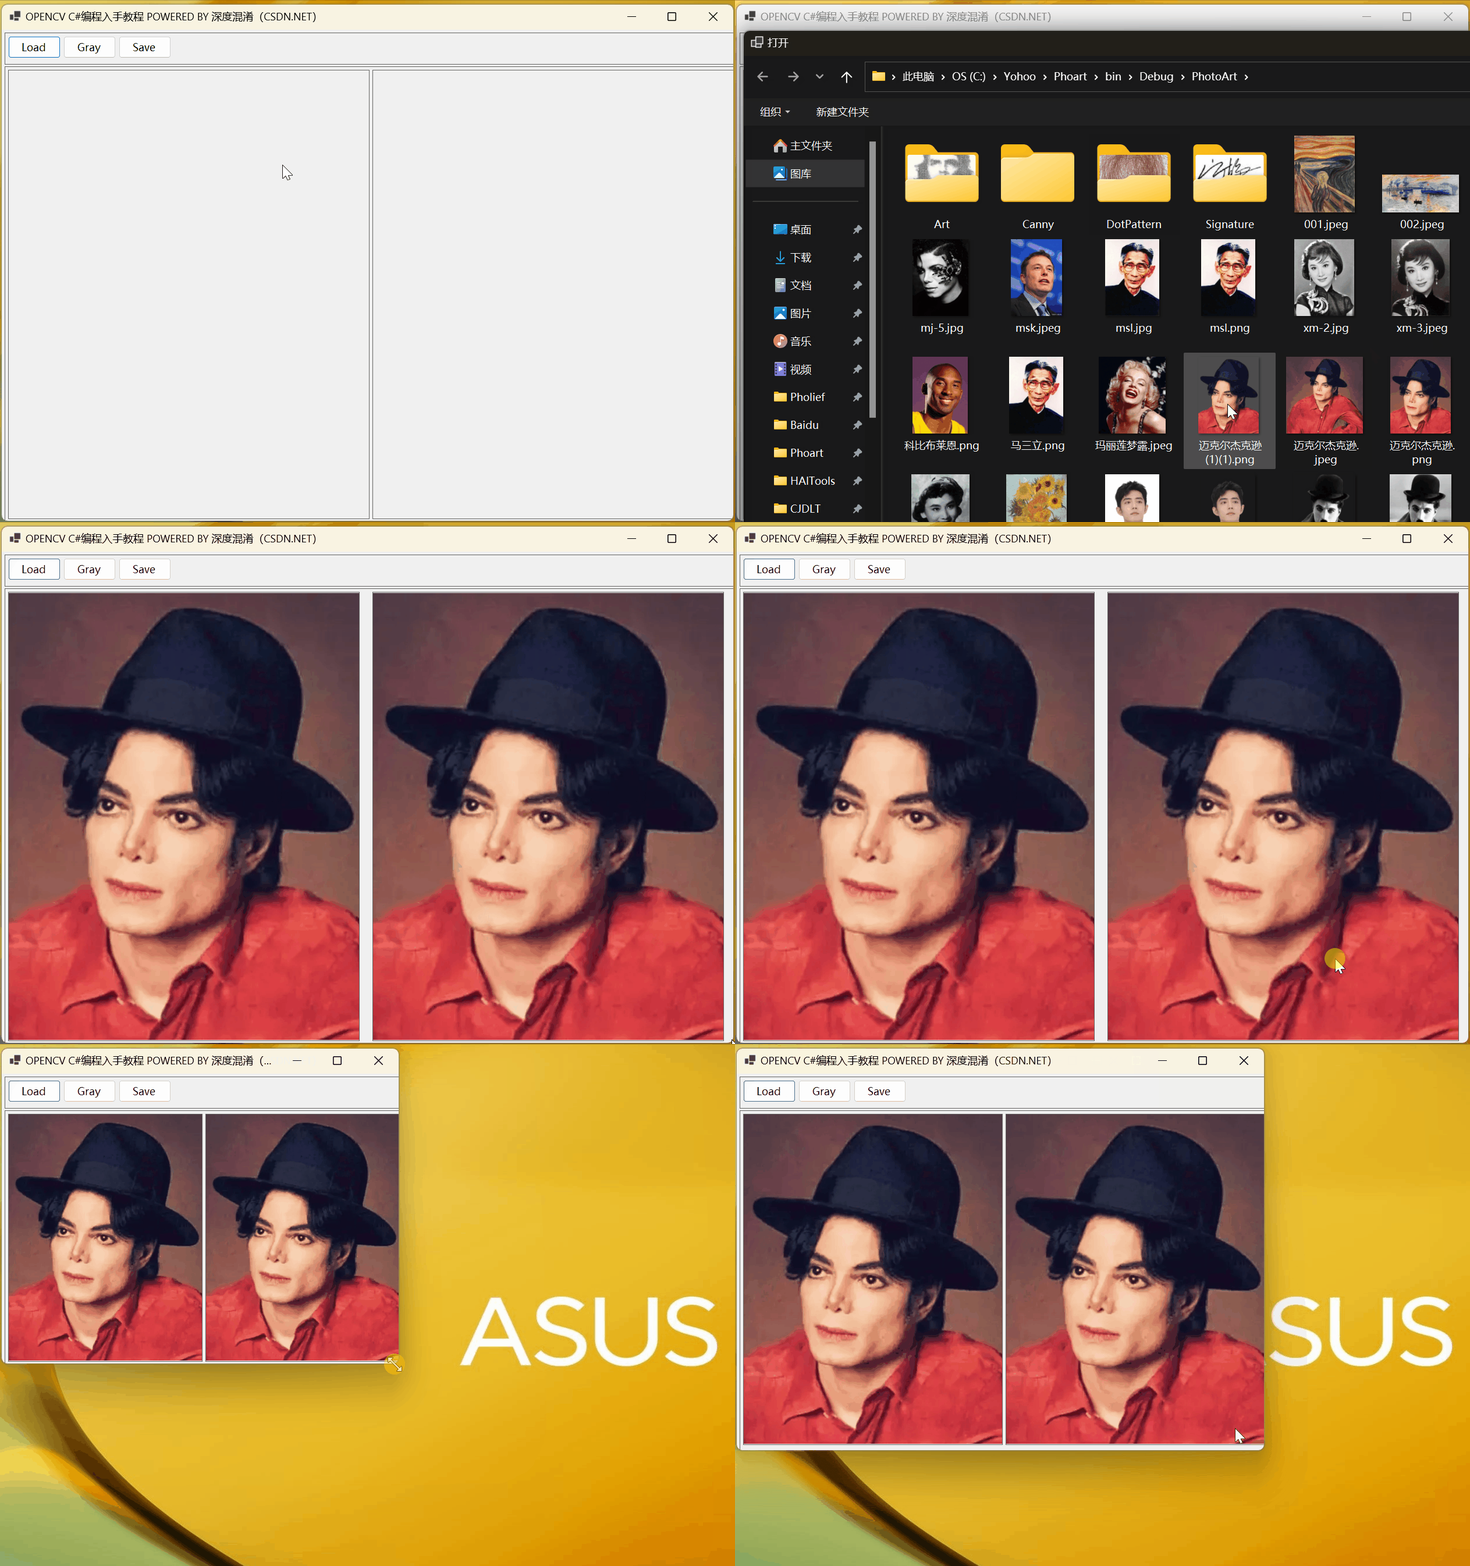
转为灰度图
图片另存为
2.4 完整的 Form1.cs 文件
using OpenCvSharp;

#pragma warning disable CS8602

namespace Legal.Truffer.CVStar
{
    public partial class Form1 : Form
    {
        string[] ImgExtentions = {
            "*.*|*.*",
            "JPEG|*.jpg;*.jpeg",
            "GIF|*.gif",
            "PNG|*.png",
            "TIF|*.tif;*.tiff",
            "BMP|*.bmp"
        };
        private int original_width { get; set; } = 0;
        private int original_height { get; set; } = 0;
        private string sourceImage { get; set; } = "";

        Panel? panelTop { get; set; } = null;
        Panel? panelBotton { get; set; } = null;
        PictureBox? picSource { get; set; } = null;
        PictureBox? picResult { get; set; } = null;
        Button? btnLoad { get; set; } = null;
        Button? btnGray { get; set; } = null;
        Button? btnSave { get; set; } = null;


        public Form1()
        {
            InitializeComponent();

            this.Text = "OPENCV C#编程入手教程 POWERED BY 深度混淆(CSDN.NET)";
            this.StartPosition = FormStartPosition.CenterScreen;

            GUI();
            this.Resize += FormResize;
        }


        private void FormResize(object? sender, EventArgs? e)
        {
            if (this.Width < 200) { this.Width = 320; return; }
            if (this.Height < 200) { this.Height = 320; return; }
            GUI();
        }

        private void GUI()
        {
            if (panelTop == null) panelTop = new Panel();
            panelTop.Parent = this;
            panelTop.Top = 5;
            panelTop.Left = 5;
            panelTop.Width = this.Width - 26;
            panelTop.Height = 55;
            panelTop.BorderStyle = BorderStyle.FixedSingle;

            if (panelBotton == null) panelBotton = new Panel();
            panelBotton.Parent = this;
            panelBotton.Top = panelTop.Top + panelTop.Height + 3;
            panelBotton.Left = 5;
            panelBotton.Width = panelTop.Width;
            panelBotton.Height = this.Height - panelBotton.Top - 55;
            panelBotton.BorderStyle = BorderStyle.FixedSingle;

            if (picSource == null) picSource = new PictureBox();
            picSource.Parent = panelBotton;
            picSource.Left = 5;
            picSource.Top = 5;
            picSource.Width = (panelBotton.Width - 10) / 2;
            picSource.Height = (panelBotton.Height - 10);
            picSource.BorderStyle = BorderStyle.FixedSingle;

            if (picResult == null) picResult = new PictureBox();
            picResult.Parent = panelBotton;
            picResult.Left = picSource.Left + picSource.Width + 5;
            picResult.Top = picSource.Top;
            picResult.Width = picSource.Width;
            picResult.Height = picSource.Height;
            picResult.BorderStyle = BorderStyle.FixedSingle;

            original_width = picSource.Width;
            original_height = picSource.Height;

            if (btnLoad == null) btnLoad = new Button();
            btnLoad.Parent = panelTop;
            btnLoad.Left = 5;
            btnLoad.Top = 5;
            btnLoad.Width = 90;
            btnLoad.Height = 38;
            btnLoad.Cursor = Cursors.Hand;
            btnLoad.Text = "Load";
            btnLoad.Click += Load_Image;

            if (btnGray == null) btnGray = new Button();
            btnGray.Parent = panelTop;
            btnGray.Left = btnLoad.Left + btnLoad.Width + 5;
            btnGray.Top = btnLoad.Top;
            btnGray.Width = 90;
            btnGray.Height = 38;
            btnGray.Cursor = Cursors.Hand;
            btnGray.Text = "Gray";
            btnGray.Click += ToGray;

            if (btnSave == null) btnSave = new Button();
            btnSave.Parent = panelTop;
            btnSave.Left = btnGray.Left + btnGray.Width + 5;
            btnSave.Top = btnLoad.Top;
            btnSave.Width = 90;
            btnSave.Height = 38;
            btnSave.Cursor = Cursors.Hand;
            btnSave.Text = "Save";
            btnSave.Click += Save;

            PicAutosize(picSource);
            PicAutosize(picResult);
        }

        private void Load_Image(object? sender, EventArgs? e)
        {
            OpenFileDialog openFileDialog = new OpenFileDialog();
            openFileDialog.Filter = String.Join("|", ImgExtentions);
            if (openFileDialog.ShowDialog() == DialogResult.OK)
            {
                sourceImage = openFileDialog.FileName;
                picSource.Image = Image.FromFile(sourceImage);
                picResult.Image = picSource.Image;
                PicAutosize(picSource);
                PicAutosize(picResult);
            }
        }

        private void PicAutosize(PictureBox pb)
        {
            if (pb == null) return;
            if (pb.Image == null) return;
            Image img = pb.Image;
            int w = original_width;
            int h = w * img.Height / img.Width;
            if (h > original_height)
            {
                h = original_height;
                w = h * img.Width / img.Height;
            }
            pb.SizeMode = PictureBoxSizeMode.Zoom;
            pb.Width = w;
            pb.Height = h;
            pb.Image = img;
            pb.Refresh();
        }

        private void ToGray(object? sender, EventArgs? e)
        {
            Mat src = Cv2.ImRead(sourceImage);
            Mat dst = new Mat();
            Cv2.CvtColor(src, dst, ColorConversionCodes.BGR2GRAY);
            picResult.Image = CVUtility.Mat2Bitmap(dst);
            PicAutosize(picResult);
        }

        private void Save(object? sender, EventArgs? e)
        {
            SaveFileDialog saveFileDialog = new SaveFileDialog();
            saveFileDialog.Filter = String.Join("|", ImgExtentions);
            if (saveFileDialog.ShowDialog() == DialogResult.OK)
            {
                picResult.Image.Save(saveFileDialog.FileName);
                MessageBox.Show("Image Save to " + saveFileDialog.FileName);
            }
        }
    }
}
本代码尽量为你着想,无需设计、修改 Form1.Design.cs 及资源文件。
用该文件替换原来的 Form1.cs 文件即可运行。
3 支持函数
一个基本的支持函数特意摘录出来,以后也需要用上。
using OpenCvSharp;
using OpenCvSharp.Extensions;

public static partial class CVUtility
{
    /// <summary>
    /// Mat 转 Bitmap(32bits)
    /// </summary>
    /// <param name="img"></param>
    /// <returns></returns>
    public static Bitmap Mat2Bitmap(Mat img)
    {
        //if (bytes == 32) return BitmapConverter.ToBitmap(img, PixelFormat.Format32bppArgb);
        //else if (bytes == 24) return BitmapConverter.ToBitmap(img, PixelFormat.Format24bppRgb);
        //else
        return BitmapConverter.ToBitmap(img);
    }
}
够详细吗?
