1.下载
nginx官网下载
Index of /download/
2.解压
这里我下载的1.25.3版本,系统是ubuntu
解压
tar -zxvf nginx-1.25.3.tar.gz 3.编译安装
安装前需要执行安装一些系统依赖
3.1安装PCRE库
ubuntu:执行以下命令
sudo apt-get install libpcre3 libpcre3-dev
centos:执行以下命令
sudo yum install pcre pcre-devel
不安装会报错:
./configure: error: the HTTP rewrite module requires the PCRE library.
You can either disable the module by using --without-http_rewrite_module
option, or install the PCRE library into the system, or build the PCRE library
statically from the source with nginx by using --with-pcre=<path> option.
3.2 安装Zlib
官网:zlib Home Site
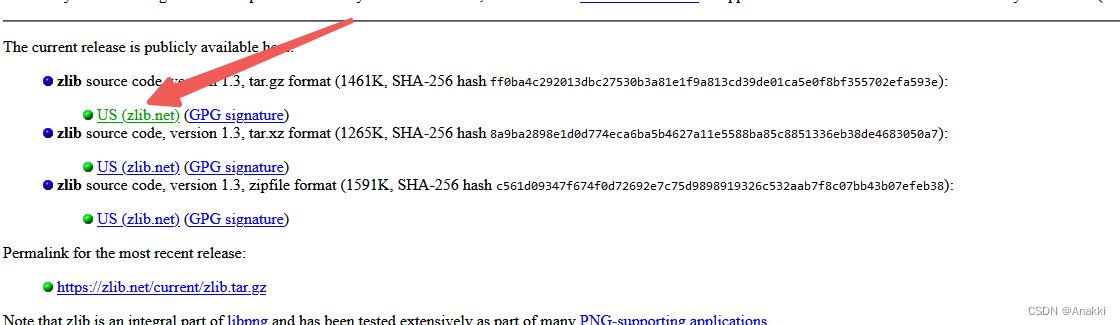
将tar包上传服务器,上传路径自定义

3.2.1 解压
tar -zxvf zlib-1.3.tar.gz 3.2.2 安装
进入解压目录zlib-1.3
cd zlib-1.3执行三条安装命令
./configure
make
make install
不安装zlib就安装nginx会报错:
./configure: error: the HTTP gzip module requires the zlib library.
You can either disable the module by using --without-http_gzip_module
option, or install the zlib library into the system, or build the zlib library
statically from the source with nginx by using --with-zlib=<path> option.
3.3 安装SSL模组依赖
一般nginx都需要ssl模组,此版本nginx不安装ssl组件不会报错,之前版本可能会报错
ubuntu安装
sudo apt-get install libssl-devcentos安装
sudo yum install openssl openssl-devel3.4 安装Nginx
再次进入nginx解压目录安装nginx,--prefix命令是我指定的安装目录,你们运行的时候自己指定一下nginx的安装目录
./configure --prefix=/home/software/nginx/install --with-http_ssl_module安装命令
make && make install4 配置Nginx开机自启
在目录/lib/systemd/system创建文件nginx.service
vim /lib/systemd/system/nginx.service注意修改/home/software/nginx/install/sbin/路径为你安装nginx的路径

ExecStart=/home/software/nginx/install/sbin/nginx
ExecReload=/home/software/nginx/install/sbin/nginx reload
ExecStop=/home/software/nginx/install/sbin/nginx quit
配置文件内容,注意修改nignx命令位置
# Stop dance for nginx
# =======================
#
# ExecStop sends SIGSTOP (graceful stop) to the nginx process.
# If, after 5s (--retry QUIT/5) nginx is still running, systemd takes control
# and sends SIGTERM (fast shutdown) to the main process.
# After another 5s (TimeoutStopSec=5), and if nginx is alive, systemd sends
# SIGKILL to all the remaining processes in the process group (KillMode=mixed).
#
# nginx signals reference doc:
# http://nginx.org/en/docs/control.html
#
[Unit]
Description=A high performance web server and a reverse proxy server
Documentation=man:nginx(8)
After=network.target

[Service]
Type=forking
ExecStart=/home/software/nginx/install/sbin/nginx
ExecReload=/home/software/nginx/install/sbin/nginx reload
ExecStop=/home/software/nginx/install/sbin/nginx quit
PrivateTmp=true
TimeoutStopSec=5
KillMode=mixed

[Install]
WantedBy=multi-user.target
修改完成后
4.1 启动nginx服务
systemctl enable nginx.service4.2 重启nginx服务
systemctl restart nginx4.3 查看Nginx状态
systemctl status nginx5 Nginx配置
#user  nobody;
worker_processes  2;

#error_log  logs/error.log;
#error_log  logs/error.log  notice;
#error_log  logs/error.log  info;

#pid        logs/nginx.pid;


events {
    worker_connections  1024;
}


http {
    include       mime.types;
    default_type  application/octet-stream;

    sendfile        on;
    keepalive_timeout  65;

    #gzip  on;

    server {
        listen [::]:80 default_server;
        server_name _;
        return 301 https://$host$request_uri;

        #charset koi8-r;

        #access_log  logs/host.access.log  main;

        location / {
            root   html;
            index  index.html index.htm;
        }
        error_page   500 502 503 504  /50x.html;
        location = /50x.html {
            root   html;
        }

    }

    server {
        listen       443 ssl;
        server_name  localhost;
        #修改你的证书存放位置
        ssl_certificate      /home/software/nginx/install/cert/anakkix.cn_bundle.pem;
        ssl_certificate_key  /home/software/nginx/install/cert/anakkix.cn.key;

        ssl_session_cache    shared:SSL:1m;
        ssl_session_timeout  5m;

        ssl_ciphers  HIGH:!aNULL:!MD5;
        ssl_prefer_server_ciphers  on;

        location / {
            proxy_set_header Host $host;
            proxy_pass      http://localhost:8080; # 当你访问80端口可以实现向8080端口转发
            root   html;
            index  index.html index.htm;
        }
    }
}


![[UGUI]Unity背包系统制作详细步骤](https://img-blog.csdnimg.cn/10a5f75849864c00921ab56b2c96ca75.gif)