Socket.IO 是一个库,可以在客户端和服务器之间实现 低延迟, 双向 和 基于事件的 通信。
一、Socket.IO的特点
以下是 Socket.IO 在普通 WebSockets 上提供的功能:
1、HTTP 长轮询回退
如果无法建立 WebSocket 连接,连接将回退到 HTTP 长轮询。
这个特性是人们在十多年前创建项目时使用 Socket.IO 的原因(!),因为浏览器对 WebSockets 的支持仍处于起步阶段。
即使现在大多数浏览器都支持 WebSockets(超过97%),它仍然是一个很棒的功能,因为我们仍然会收到来自用户的报告,这些用户无法建立 WebSocket 连接,因为他们使用了一些错误配置的代理。
2、自动重新连接
在某些特定情况下,服务器和客户端之间的 WebSocket 连接可能会中断,而双方都不知道链接的断开状态。
这就是为什么 Socket.IO 包含一个心跳机制,它会定期检查连接的状态。
当客户端最终断开连接时,它会以指数回退延迟自动重新连接,以免使服务器不堪重负。
3、数据包缓冲
当客户端断开连接时,数据包会自动缓冲,并在重新连接时发送。
4、收到后的回调
Socket.IO 提供了一种方便的方式来发送事件和接收响应
5、广播
在服务器端,您可以向所有连接的客户端或客户端的子集发送事件
6、多路复用
命名空间允许您在单个共享连接上拆分应用程序的逻辑。例如,如果您想创建一个只有授权用户才能加入的“管理员”频道
更多信息请访问socketIO的介绍文档
二、Socket.IO发送消息常见的方式
socket.io用on函数给调用的时间注册调用函数,用emit函数来发送时间,以此来时间客户端和服务器两端的通信,常用的使用方式如下:
1、只发送事件
发送端代码:
socket.emit('action');
表示发送了一个action命令,命令是字符串的,在另一端接收时,可以这么写:
socket.on('action',function(){
	...
});
2、发送事件和一个数据
发送端:
socket.emit('action',data);
表示发送了一个action命令,还有data数据,在另一端接收时,可以这么写:
socket.on('action',function(data){
	...
});
3、发送事件和多个数据
发送端:
socket.emit('action',arg1,arg2);
表示发送了一个action命令,还有两个数据,在另一端接收时,可以这么写:
socket.on('action',function(arg1,arg2){
	...
});
如果是多个参数,就在后面加参数就行了
4、发送事件和数据及回调函数
在emit方法中包含回调函数,例如:
socket.emit('action',data, function(arg1,arg2){
	...
} );
那么这里面有一个回调函数可以在另一端调用,另一端可以这么写:
socket.on('action',function(data,fn){
    ...
    fn('a','b');
    ...
 });
三、emit发送消息的范围
下面是emit不同方法发送消息的范围:
  // 只发给sender。 sending to the client
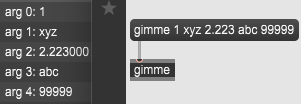
  socket.emit('hello', 'can you hear me?', 1, 2, 'abc');

  // 发给所有人,除了sender。 sending to all clients except sender
  socket.broadcast.emit('broadcast', 'hello friends!');

  // 发给game房间所有人,除了sender。 sending to all clients in 'game' room except sender
  socket.to('game').emit('nice game', "let's play a game");

  // 发给game1和/或game2所有人,除了sender。 sending to all clients in 'game1' and/or in 'game2' room, except sender
  socket.to('game1').to('game2').emit('nice game', "let's play a game (too)");

  // 发给game房间所有人,包含sender。 sending to all clients in 'game' room, including sender
  io.in('game').emit('big-announcement', 'the game will start soon');

  // 发给域名myNamespacs所有人,包含sender。 sending to all clients in namespace 'myNamespace', including sender
  io.of('myNamespace').emit('bigger-announcement', 'the tournament will start soon');

  // 发给域名myNamespace里room房间的所有人,包含sender。 sending to a specific room in a specific namespace, including sender
  io.of('myNamespace').to('room').emit('event', 'message');

  // 发给某一个人 sending to individual socketid (private message)
  io.to(`${socketId}`).emit('hey', 'I just met you');
四、聊天室实现
1、项目结构
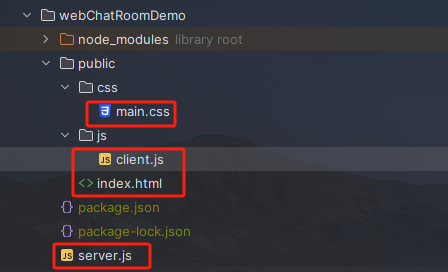
2、server.js
server.js实现了一个web服务器,主要的功能有两个
- 实现一个nodejs的服务器,让浏览器能够加载到聊天网页
- 用socket.io实现服务端接受客户连接和发送消息的功能
其代码如下:
'use strict'

// 配置日志
const log4j = require('log4js');
const logger = log4j.getLogger();

// 配置http服务器
const {createServer} = require('http');
const express = require('express');
const serveIndex = require('serve-index');

const app = express();
// 配置静态文件,位置不能乱
app.use(serveIndex('./public'));
app.use(express.static('./public'));

// 创建http服务器
const http_server = createServer(app);

// 配置socket io
const {Server} = require("socket.io");
// 让socketIo监听https服务器

const io = new Server(http_server);


// 配置socket发送消息逻辑
io.on('connection', (socket) => {
    logger.info('socket connection : ', socket);
    //socket.emit('joined',room,socket.id);只给当前用户发送
    //socket.to(room).emit('joined', room, socket.id);//除自己之外
    //io.in(room).emit('joined', room, socket.id)//房间内所有人
    //socket.broadcast.emit('joined', room, socket.id);//除自己,全部站点
    // 加入房间的处理逻辑
    socket.on('join', (room, userName) => {
        logger.info(`user join in. userName=${userName},room=${room}`);
        // socket加入room中
        socket.join(room);
        // 发送给当前用户用户加入成功
        socket.emit('joined', room, socket.id);
    });

    // 离开房间的处理逻辑
    socket.on('leave', (room, userName) => {
        logger.info(`user leave. userName=${userName},room=${room}`);
        socket.leave(room);
        socket.emit('leaved', room, socket.id);
    })

    // 发送消息逻辑
    socket.on('message', (room, data) => {
        // 给房间内的所有人发送消息(包括自己)
        io.in(room).emit('message', data);
        //不给自己发,只给别人发(前端需要适配自己发送的内容到消息显示框)
        //socket.to(room).emit('message', data);
    })

});

//启动服务器
http_server.listen(80);
3、index.html
index.html是聊天的网页,代码如下:
<html>
<head>
    <title>Chat room</title>
    <link rel="stylesheet" href="./css/main.css">
</head>

<body>
<table align="center">
    <tr>
        <td>
            <label>UserName:</label>
            <input type="text" id="userName">
        </td>
    </tr>
    <tr>
        <td>
            <label>Room:</label>
            <input type="text" id="room">
            <button id="connect">Connect</button>
            <button id="leave">Leave</button>
        </td>
    </tr>
    <tr>
        <td>
            <label>Content: </label><br>
            <textarea disabled style="line-height: 1.5;" id="content" rows="10" cols="100"></textarea>
        </td>
    </tr>
    <tr>
        <td>
            <label>Input: </label><br>
            <textarea disabled id="input" rows="3" cols="100"></textarea>
        </td>
    </tr>
    <tr>
        <td>
            <button disabled id="send">Send</button>
        </td>
    </tr>
</table>


<script src="/socket.io/socket.io.js"></script>
<script src="./js/client.js"></script>
</body>

</html>
4、main.css
main.css是index.html的布局格式文件,代码如下:
/*
 *  Copyright (c) 2015 The WebRTC project authors. All Rights Reserved.
 *
 *  Use of this source code is governed by a BSD-style license
 *  that can be found in the LICENSE file in the root of the source
 *  tree.
 */
button {
  margin: 0 20px 25px 0;
  vertical-align: top;
  width: 134px;
}

div#getUserMedia {
  padding: 0 0 8px 0;
}

div.input {
  display: inline-block;
  margin: 0 4px 0 0;
  vertical-align: top;
  width: 310px;
}

div.input > div {
  margin: 0 0 20px 0;
  vertical-align: top;
}

div.output {
  background-color: #eee;
  display: inline-block;
  font-family: 'Inconsolata', 'Courier New', monospace;
  font-size: 0.9em;
  padding: 10px 10px 10px 25px;
  position: relative;
  top: 10px;
  white-space: pre;
  width: 270px;
}

section#statistics div {
  display: inline-block;
  font-family: 'Inconsolata', 'Courier New', monospace;
  vertical-align: top;
  width: 308px;
}

section#statistics div#senderStats {
  margin: 0 20px 0 0;
}

section#constraints > div {
  margin: 0 0 20px 0;
}

section#video > div {
  display: inline-block;
  margin: 0 20px 0 0;
  vertical-align: top;
  width: calc(50% - 22px);
}

section#video > div div {
  font-size: 0.9em;
  margin: 0 0 0.5em 0;
  width: 320px;
}

h2 {
  margin: 0 0 1em 0;
}

section#constraints label {
  display: inline-block;
  width: 156px;
}

section {
  margin: 0 0 20px 0;
  padding: 0 0 15px 0;
}

section#video {
  width: calc(100% + 20px);
}

video {
  --width: 90%;
  display: inline-block;
  width: var(--width);
  height: calc(var(--width) * 0.75);
  margin: 0 0 10px 0;
}

@media screen and (max-width: 720px) {
  button {
    font-weight: 500;
    height: 56px;
    line-height: 1.3em;
    width: 90px;
  }

  div#getUserMedia {
    padding: 0 0 40px 0;
  }

  section#statistics div {
    width: calc(50% - 14px);
  }

  video {
    display: inline-block;
    width: var(--width);
    height: 96px;
  }
}
5、client.js
client.js文件是客户端的处理逻辑文件,包括发送和显示消息,连接服务器等
'use strict'

// 获取页面组建
const userNameInput = document.querySelector('input#userName');
const roomInput = document.querySelector('input#room');

const connectBtn = document.querySelector('button#connect');
const leaveBtn = document.querySelector('button#leave');

const contentArea = document.querySelector('textarea#content');
const inputArea = document.querySelector('textarea#input');

const sendBtn = document.querySelector('button#send');

var socket;
// 连接逻辑
connectBtn.onclick = () => {
    //连接
    socket = io();

    // 成功加入后的逻辑
    socket.on('joined', (room, id) => {
        console.log(`join in successful,room=${room},socketId=${id}`);
        connectBtn.disabled = true;
        leaveBtn.disabled = false;
        inputArea.disabled = false;
        sendBtn.disabled = false;
        roomInput.disabled = true;
        userNameInput.disabled = true;
    });

    //离开成功的逻辑
    socket.on('leaved', (room, id) => {
        console.log(`user leave ,room=${room},socketId=${id}`);
        connectBtn.disabled = false;
        leaveBtn.disabled = true;
        inputArea.disabled = true;
        sendBtn.disabled = true;
        roomInput.disabled = false;
        userNameInput.disabled = false;
        socket.disconnect();
    });

    // 断开连接
    socket.on('disconnect', (socket) => {
        connectBtn.disabled = false;
        leaveBtn.disabled = true;
        inputArea.disabled = true;
        sendBtn.disabled = true;
        roomInput.disabled = false;
        userNameInput.disabled = false;
    });

    // 接受到消息的逻辑
    socket.on('message', (data) => {
        //窗口总是显示最后的内容
        contentArea.scrollTop = contentArea.scrollHeight;
        contentArea.value = contentArea.value + data + '\r';
    });

    // 发送加入的信令
    socket.emit('join', roomInput.value, userNameInput.value);
}

//断开连接
leaveBtn.onclick = () => {
    socket.emit('leave', roomInput.value, userNameInput.value);
}

//发送消息的逻辑
sendBtn.onclick = () => {
    sendMessage();
}

// 回车发送消息的逻辑
inputArea.onkeypress = (event) => {
    //回车发送消息
    if (event.keyCode !== 13) {
        return;
    }
    sendMessage();
    //阻止默认行为
    event.preventDefault();
}

function sendMessage() {
    let data = userNameInput.value + ' : ' + inputArea.value;
    socket.emit('message', roomInput.value, data);
    inputArea.value = '';
}
6、启动服务器
找到项目所在的目录,安装项目需要的模块
npm install express serve-index log4js socket.io
用以下命令启动服务器
node server.js
7、功能演示
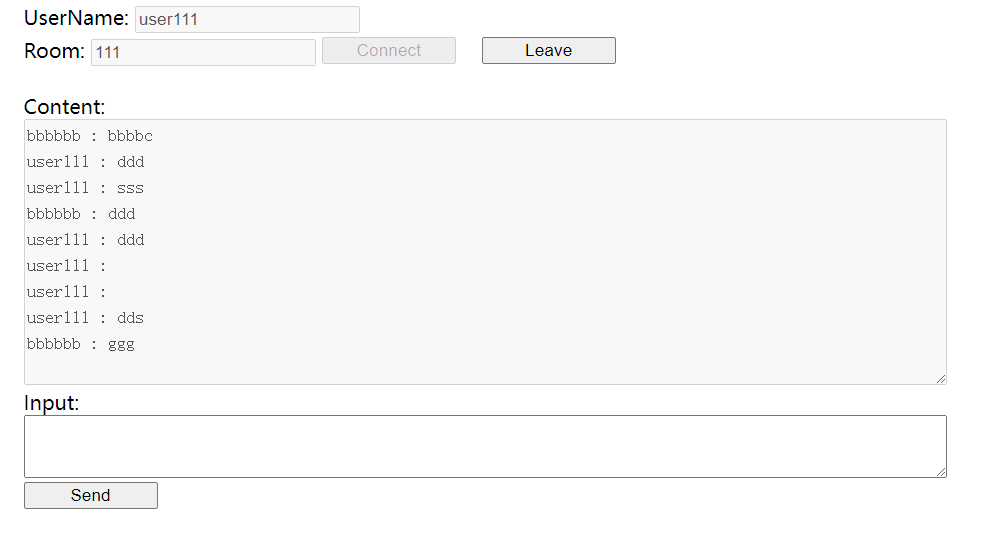
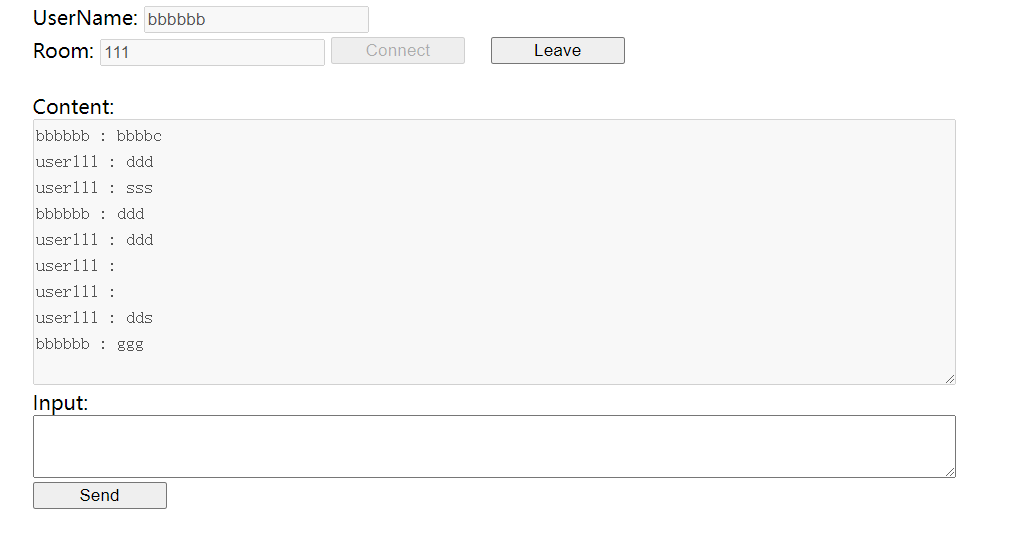
打开两个浏览器的窗口,分别输入项目地址http://localhost/index.html(如果是别的ip,将localhost换成对应的ip地址),在浏览器上面输入用户名(不同),房间room(相同),点击connect按钮就可以发送消息。
另一个客户端:
后记
个人总结,欢迎转载、评论、批评指正


