环境
node 18.14.2
yarn 1.22.19
windows 11
vite快速创建vue项目
参考
安装vue-touter
官网
yarn add vue-router@4
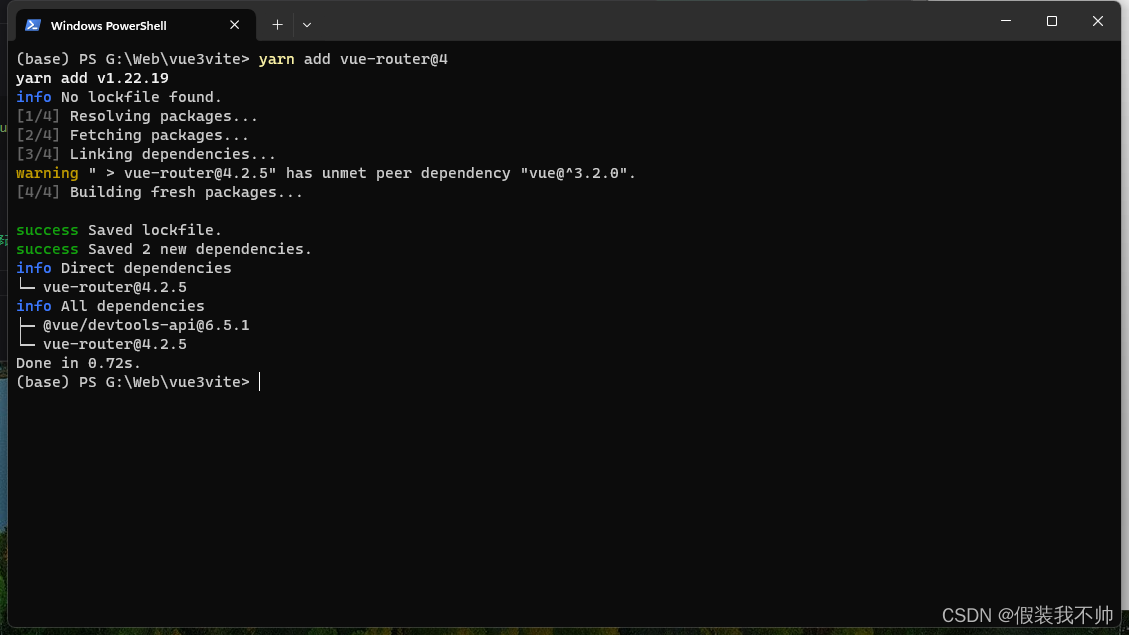
src下新建router文件夹,该文件夹下新建index.ts
// router/index.ts 文件
import { createRouter, createWebHashHistory, RouterOptions, Router, RouteRecordRaw } from 'vue-router'
//由于router的API默认使用了类型进行初始化,内部包含类型定义,所以本文内部代码中的所有数据类型是可以省略的
//RouterRecordRaw是路由组件对象
const routes: RouteRecordRaw[] = []
// RouterOptions是路由选项类型
const options: RouterOptions = {
 history: createWebHashHistory(),
 routes,
}

// Router是路由对象类型
const router: Router = createRouter(options)

export default router
修改mian.ts
import { createApp } from "vue";
import "./style.css";
import App from "./App.vue";
import router from "./router/index";

const app = createApp(App);
app.use(router);
app.mount("#app");
修改app.vue
<script setup lang="ts">
import { RouterView } from 'vue-router';
</script>

<template>
  <router-view></router-view>
</template>

<style scoped></style>
新建views文件夹,该文件夹下新建Home.vue和About.vue
<script lang="ts" setup>
</script>
<template>
    <h1>Home</h1>
</template>

<script lang="ts" setup>
</script>
<template>
    <h1>About Us</h1>
</template>
修改ruouter下index.ts
// router/index.ts 文件
import { createRouter, createWebHashHistory, RouterOptions, Router, RouteRecordRaw } from 'vue-router'
//由于router的API默认使用了类型进行初始化,内部包含类型定义,所以本文内部代码中的所有数据类型是可以省略的
//RouterRecordRaw是路由组件对象
const routes: RouteRecordRaw[] = [
 { path: '/', name: 'Home', component: () => import('../views/Home.vue') },
 { path: '/about', name: 'About', component: () => import('../views/About.vue') },
]

// RouterOptions是路由选项类型
const options: RouterOptions = {
 history: createWebHashHistory(),
 routes,
}

// Router是路由对象类型
const router: Router = createRouter(options)

export default router
访问


说明配置成功了





![[HTML]Web前端开发技术1,meta,HBuilder等——喵喵画网页](https://img-blog.csdnimg.cn/b7a382b2692248c2a83227ad0bbe8160.png)


