角色订制:roles
① 简介
对于以上所有的方式有个弊端就是无法实现复用假设在同时部署Web、db、ha 时或不同服务器组合不同的应用就需要写多个yml文件。很难实现灵活的调用。 roles 用于层次性、结构化地组织playbook。roles 能够根据层次型结构自动装载变量文件、tasks以及handlers等。要使用roles只需要在playbook中使用include指令即可。简单来讲,roles就是通过分别将变量(vars)、文件(file)、任务(tasks)、模块(modules)及处理器(handlers)放置于单独的目录中,并可以便捷地include它们的一种机制。角色一般用于基于主机构建服务的场景中,但也可以是用于构建守护进程等场景中。
② 角色集合
角色集合:roles/ mysql/ httpd/ nginx/ files/:存储由copy或script等模块调用的文件; tasks/:此目录中至少应该有一个名为main.yml的文件,用于定义各task;其它的文件需要由main.yml进行“包含”调用; handlers/:此目录中至少应该有一个名为main.yml的文件,用于定义各handler;其它的文件需要由main.yml进行“包含”调用; vars/:此目录中至少应该有一个名为main.yml的文件,用于定义各variable;其它的文件需要由main.yml进行“包含”调用; templates/:存储由template模块调用的模板文本; meta/:此目录中至少应该有一个名为main.yml的文件,定义当前角色的特殊设定及其依赖关系;其它的文件需要由main.yml进行“包含”调用; default/:此目录中至少应该有一个名为main.yml的文件,用于设定默认变量;
实验:
192.168.231.210 安装ansible机器 管理机
192.168.231.214
192.168.231.215 被管理的俩台机器
在roles目录下生成对应的目录结构
[root@localhost ~]# mkdir roles
[root@localhost ~]# cd  roles

[root@localhost roles]# ansible-galaxy init nginx
- Role nginx was created successfully
[root@localhost roles]# ansible-galaxy init mysql
- Role mysql was created successfully
[root@localhost roles]# ansible-galaxy init php
- Role php was created successfully

[root@localhost roles]# tree
.
├── mysql
│   ├── defaults
│   │   └── main.yml
│   ├── files
│   ├── handlers
│   │   └── main.yml
│   ├── meta
│   │   └── main.yml
│   ├── README.md
│   ├── tasks
│   │   └── main.yml
│   ├── templates
│   ├── tests
│   │   ├── inventory
│   │   └── test.yml
│   └── vars
│       └── main.yml
├── nginx
│   ├── defaults
│   │   └── main.yml
│   ├── files
│   ├── handlers
│   │   └── main.yml
│   ├── meta
│   │   └── main.yml
│   ├── README.md
│   ├── tasks
│   │   └── main.yml
│   ├── templates
│   ├── tests
│   │   ├── inventory
│   │   └── test.yml
│   └── vars
│       └── main.yml
└── php
    ├── defaults
    │   └── main.yml
    ├── files
    ├── handlers
    │   └── main.yml
    ├── meta
    │   └── main.yml
    ├── README.md
    ├── tasks
    │   └── main.yml
    ├── templates
    ├── tests
    │   ├── inventory
    │   └── test.yml
    └── vars
        └── main.yml

27 directories, 24 files
分别定义配置文件 ,nginx配置文件
[root@localhost roles]# vim nginx/tasks/main.yml
---
# tasks file for nginx
    - name: 下载yum源
      shell: curl -o /opt/yum-server.sh http://10.36.192.100/yum-server.sh

    - name: 安装yum源
      shell: sh /opt/yum-server.sh

    - name: 安装nginx
      yum: name=nginx state=present

    - name: nginx配置文件
      template: src=/root/nginx.conf dest=/etc/nginx/
    - name: 拷贝php
      copy: src=/root/roles/wp-config.php  dest=/usr/share/nginx/html/wordpress

    - name: 启动Nginx
      service: name=nginx state=started enabled=true

    - name: 拷贝wordpress源代码
      unarchive: src=/root/wordpress-6.4.1-zh_CN.tar.gz dest=/usr/share/nginx/html
-
创建 /root/roles/wp-config.php文件写入一下内容
[root@localhost roles]# vim wp-config.php
<?php
/**
* The base configuration for WordPress
*
* The wp-config.php creation script uses this file during the installation.
* You don't have to use the web site, you can copy this file to "wp-config.php"
* and fill in the values.
*
* This file contains the following configurations:
*
* * Database settings
* * Secret keys
* * Database table prefix
* * ABSPATH
*
* @link https://wordpress.org/documentation/article/editing-wp-config-php/
*
* @package WordPress
*/
// ** Database settings - You can get this info from your web host ** //
/** The name of the database for WordPress */
define( 'DB_NAME', 'wordpress' );
/** Database username */
define( 'DB_USER', 'wordpress' );
/** Database password */
define( 'DB_PASSWORD', 'Qianfeng@123' );
/** Database hostname */
define( 'DB_HOST', '192.168.231.214' );
/** Database charset to use in creating database tables. */
define( 'DB_CHARSET', 'utf8mb4' );
/** The database collate type. Don't change this if in doubt. */
define( 'DB_COLLATE', '' );
/**#@+
* Authentication unique keys and salts.
*
* Change these to different unique phrases! You can generate these using
* the {@link https://api.wordpress.org/secret-key/1.1/salt/ WordPress.org secret-key service}.
*
* You can change these at any point in time to invalidate all existing cookies.
* This will force all users to have to log in again.
*
* @since 2.6.0
*/
define( 'AUTH_KEY', 'U^UE ~}t)n(9.~=_qMaI:,K`X;Iji<Bsuh[b%yL-VpltA#_zRAX<~kJ>`D;PB:g4' );
define( 'SECURE_AUTH_KEY', 'mZcTrBj{U/-M#+AX:U +&?.&sXlV~/Dlm:rO|=/XL66gI+pl#IcwWUe(<p6HzYs1' );
define( 'LOGGED_IN_KEY', 'D(a}-NENZ{u[& =;|fSIDZt]`z aVKYyt|wt$5[jC#<yvgaM9mvvZCn|W(Wo=8rY' );
define( 'NONCE_KEY', 'MRC+QQ+o6`uE?S^`A1cwBP1I2jC#S?%xoR9dQSSs1+S}n.F{Cf7l*%c:dUSbo' );
define( 'AUTH_SALT', 'Ai6`CEc,KaGUmk-/mLFEU $:b0#!Mjg6_qTB)+*tx=SRsuD6+;z[Ji6gL|@8.TRn' );
define( 'SECURE_AUTH_SALT', '`NL:<P=!HtaQ> q]*}_TB9LA!%Kmh7CjXeM-s-/;>U0o8huC7&KPq{i_wNX%3OI{' );
define( 'LOGGED_IN_SALT', 'q9p;a=$q|m}NI*z!?UKgMzs*xKsF)L.TPhnZ/|U[5bw+RzDv.|$W#vMzu<g5!xYb' );
define( 'NONCE_SALT', 'F+/f&;FTu yZ^(qtdT3 zY%s~FN6lS71iic:X1&q4f^pzi4w3e/$b %,tRt?),$4' );
/**#@-*/
/**
* WordPress database table prefix.
*
* You can have multiple installations in one database if you give each
* a unique prefix. Only numbers, letters, and underscores please!
*/
$table_prefix = 'wp_';
/**
* For developers: WordPress debugging mode.
*
* Change this to true to enable the display of notices during development.
* It is strongly recommended that plugin and theme developers use WP_DEBUG
* in their development environments.
*
* For information on other constants that can be used for debugging,
* visit the documentation.
*
* @link https://wordpress.org/documentation/article/debugging-in-wordpress/
*/
define( 'WP_DEBUG', false );
/* Add any custom values between this line and the "stop editing" line. */
/* That's all, stop editing! Happy publishing. */
/** Absolute path to the WordPress directory. */
if ( ! defined( 'ABSPATH' ) ) {
define( 'ABSPATH', __DIR__ . '/' );
}
/** Sets up WordPress vars and included files. */
require_once ABSPATH . 'wp-settings.php';
修改变量文件
[root@localhost roles]# vim    nginx/vars/main.yml
---
# vars file for nginx
  nginx_user: root
  nginx_port: 80
放置我们所需要的文件到指定目录
直接 cp /root/nginx.conf  /root/roles/nginx/templates/nginx.conf
也可以直接写
[root@localhost roles]# vim nginx/templates/nginx.conf
# For more information on configuration, see:
#   * Official English Documentation: http://nginx.org/en/docs/
#   * Official Russian Documentation: http://nginx.org/ru/docs/

user {{ nginx_user }};
worker_processes auto;
error_log /var/log/nginx/error.log;
pid /run/nginx.pid;

# Load dynamic modules. See /usr/share/doc/nginx/README.dynamic.
include /usr/share/nginx/modules/*.conf;

events {
    worker_connections 1024;
}

http {
    log_format  main  '$remote_addr - $remote_user [$time_local] "$request" '
                      '$status $body_bytes_sent "$http_referer" '
                      '"$http_user_agent" "$http_x_forwarded_for"';

    access_log  /var/log/nginx/access.log  main;

    sendfile            on;
    tcp_nopush          on;
    tcp_nodelay         on;
    keepalive_timeout   65;
    types_hash_max_size 4096;

    include             /etc/nginx/mime.types;
    default_type        application/octet-stream;

    # Load modular configuration files from the /etc/nginx/conf.d directory.
    # See http://nginx.org/en/docs/ngx_core_module.html#include
    # for more information.
    include /etc/nginx/conf.d/*.conf;

    server {
        listen       {{ nginx_port }};
        listen       [::]:80;
        server_name  _;
        root         /usr/share/nginx/html/wordpress;

        # Load configuration files for the default server block.
        include /etc/nginx/default.d/*.conf;
        location / {
	    root /usr/share/nginx/html/wordpress;
	    index index.php;
	}
        location ~ \.php$ {
            root          /usr/share/nginx/html/wordpress;  #指定网站目录
            fastcgi_pass   127.0.0.1:9000;    #指定访问地址
            fastcgi_index  index.php;		#指定默认文件
            fastcgi_param  SCRIPT_FILENAME  $document_root$fastcgi_script_name;
            include        fastcgi_params;  #包含nginx常量定义

        }

        error_page 404 /404.html;
        location = /404.html {
        }

        error_page 500 502 503 504 /50x.html;
        location = /50x.html {
        }
    }

# Settings for a TLS enabled server.
#
#    server {
#        listen       443 ssl http2;
#        listen       [::]:443 ssl http2;
#        server_name  _;
#        root         /usr/share/nginx/html;
#
#        ssl_certificate "/etc/pki/nginx/server.crt";
#        ssl_certificate_key "/etc/pki/nginx/private/server.key";
#        ssl_session_cache shared:SSL:1m;
#        ssl_session_timeout  10m;
#        ssl_ciphers HIGH:!aNULL:!MD5;
#        ssl_prefer_server_ciphers on;
#
#        # Load configuration files for the default server block.
#        include /etc/nginx/default.d/*.conf;
#
#        error_page 404 /404.html;
#            location = /40x.html {
#        }
#
#        error_page 500 502 503 504 /50x.html;
#            location = /50x.html {
#        }
#    }

}
php配置文件
[root@localhost roles]# vim php/tasks/main.yml
---
# tasks file for php
  - name: 安装PHP
    yum: name=php80-php-xsl,php80-php,php80-php-cli,php80-php-devel,php80-php-gd,php80-php-pdo,php80-php-mysql,php80-php-fpm state=present

  - name: 启动PHP
    service: name=php80-php-fpm state=started enabled=true
mysql配置文件
[root@localhost roles]# cat mysql/tasks/main.yml
---
# tasks file for mysql
 - name: 安装数据库
   yum: name=mariadb-server,mariadb state=present disablerepo=mysql-5.7-community

 - name: 启动数据库
   service: name=mariadb state=started enabled=true

 - name: 配置数据库
   shell: mysql -e "create database {{ db_name }}; grant all on wordpress.* to 'wordpress'@'%' identified by '{{ db_passwd }}'; flush privileges"
mysql变量文件
[root@localhost roles]# vim mysql/vars/main.yml
---
# vars file for mysql
db_passwd: 'Qianfeng@123'
db_name: 'wordpress'
定义剧本文件
接下来,我们就来定义剧本文件,由于大部分设置我们都单独配置在了roles里面,所以,接下来剧本就只需要写一点点内容即可:
[root@localhost roles]# vim roles.yml
---

- hosts: web
  remote_user: root
  roles:
     - nginx
     - php
     - mysql
启动服务
[root@localhost roles]# ansible-playbook roles.yml

PLAY [web] ********************************************************************************

TASK [Gathering Facts] ********************************************************************
ok: [web1]
ok: [web2]

TASK [nginx : 下载yum源] *********************************************************************
[WARNING]: Consider using the get_url or uri module rather than running 'curl'.  If you
need to use command because get_url or uri is insufficient you can add 'warn: false' to
this command task or set 'command_warnings=False' in ansible.cfg to get rid of this
message.
changed: [web1]
changed: [web2]

TASK [nginx : 安装yum源] *********************************************************************
changed: [web1]
changed: [web2]

TASK [安装nginx] ****************************************************************************
changed: [web1]
changed: [web2]

TASK [nginx配置文件] **************************************************************************
changed: [web1]
changed: [web2]

TASK [nginx : 启动Nginx] ********************************************************************
changed: [web2]
changed: [web1]

TASK [nginx : 拷贝wordpress源代码] *************************************************************
changed: [web2]
changed: [web1]

TASK [php : 安装PHP] ************************************************************************
changed: [web1]
changed: [web2]

TASK [php : 启动PHP] ************************************************************************
changed: [web1]
changed: [web2]

TASK [mysql : 安装数据库] **********************************************************************
changed: [web1]
changed: [web2]

TASK [mysql : 启动数据库] **********************************************************************
changed: [web1]
changed: [web2]

TASK [mysql : 配置数据库] **********************************************************************
changed: [web1]
changed: [web2]

PLAY RECAP ********************************************************************************
web1                       : ok=12   changed=11   unreachable=0    failed=0    skipped=0    rescued=0    ignored=0
web2                       : ok=12   changed=11   unreachable=0    failed=0    skipped=0    rescued=0    ignored=0
查看所有服务的端口
[root@localhost roles]# ansible web -m shell -a 'ss -nplt'
web1 | CHANGED | rc=0 >>
State      Recv-Q Send-Q Local Address:Port               Peer Address:Port
LISTEN     0      128    127.0.0.1:9000                     *:*                   users:(("php-fpm",pid=2504,fd=9),("php-fpm",pid=2503,fd=9),("php-fpm",pid=2502,fd=9),("php-fpm",pid=2501,fd=9),("php-fpm",pid=2500,fd=9),("php-fpm",pid=2499,fd=7))
LISTEN     0      50           *:3306                     *:*                   users:(("mysqld",pid=2986,fd=14))
LISTEN     0      128          *:80                       *:*                   users:(("nginx",pid=2057,fd=6),("nginx",pid=2056,fd=6),("nginx",pid=2055,fd=6))
LISTEN     0      128          *:22                       *:*                   users:(("sshd",pid=922,fd=3))
LISTEN     0      100    127.0.0.1:25                       *:*                   users:(("master",pid=1115,fd=13))
LISTEN     0      128       [::]:80                    [::]:*                   users:(("nginx",pid=2057,fd=7),("nginx",pid=2056,fd=7),("nginx",pid=2055,fd=7))
LISTEN     0      128       [::]:22                    [::]:*                   users:(("sshd",pid=922,fd=4))
LISTEN     0      100      [::1]:25                    [::]:*                   users:(("master",pid=1115,fd=14))
web2 | CHANGED | rc=0 >>
State      Recv-Q Send-Q Local Address:Port               Peer Address:Port
LISTEN     0      128    127.0.0.1:9000                     *:*                   users:(("php-fpm",pid=2499,fd=9),("php-fpm",pid=2498,fd=9),("php-fpm",pid=2497,fd=9),("php-fpm",pid=2496,fd=9),("php-fpm",pid=2495,fd=9),("php-fpm",pid=2494,fd=7))
LISTEN     0      50           *:3306                     *:*                   users:(("mysqld",pid=2983,fd=14))
LISTEN     0      128          *:80                       *:*                   users:(("nginx",pid=2052,fd=6),("nginx",pid=2051,fd=6),("nginx",pid=2050,fd=6))
LISTEN     0      128          *:22                       *:*                   users:(("sshd",pid=920,fd=3))
LISTEN     0      100    127.0.0.1:25                       *:*                   users:(("master",pid=1115,fd=13))
LISTEN     0      128       [::]:80                    [::]:*                   users:(("nginx",pid=2052,fd=7),("nginx",pid=2051,fd=7),("nginx",pid=2050,fd=7))
LISTEN     0      128       [::]:22                    [::]:*                   users:(("sshd",pid=920,fd=4))
LISTEN     0      100      [::1]:25                    [::]:*                   users:(("master",pid=1115,fd=14))
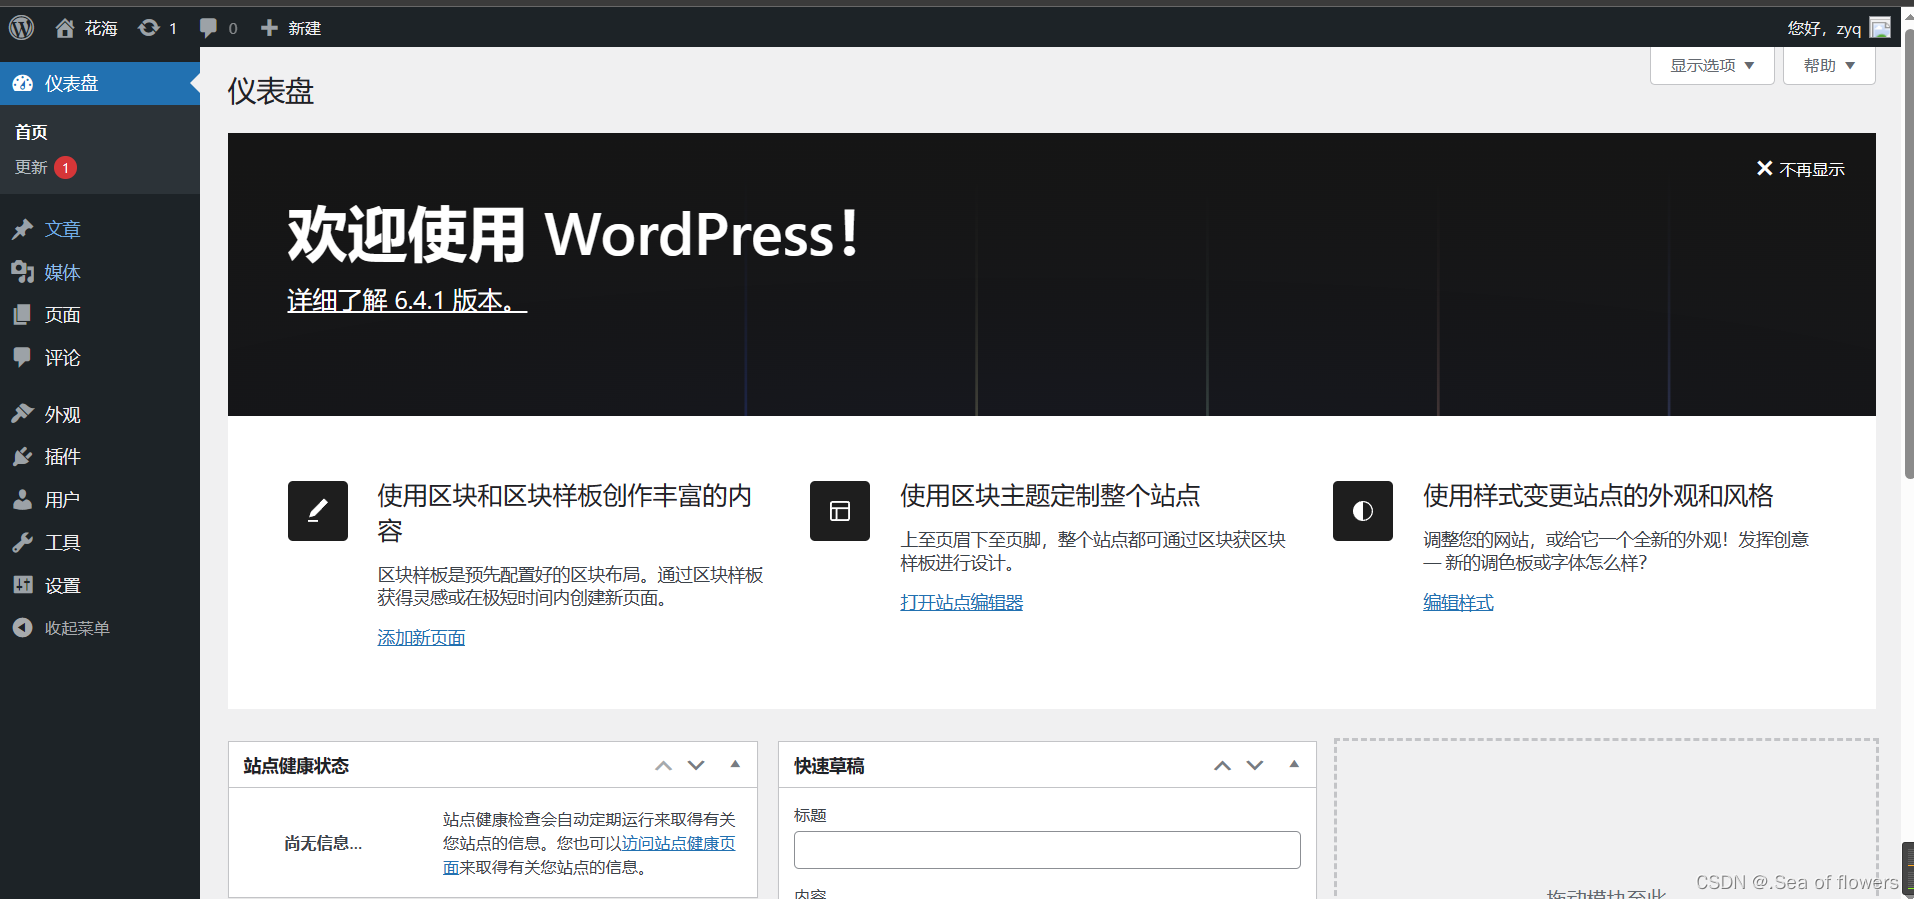
进去浏览器查看