DDIM反转
设置
# !pip install -q transformers diffusers accelerate
import torch
import requests
import torch.nn as nn
import torch.nn.functional as F
from PIL import Image
from io import BytesIO
from tqdm.auto import tqdm
from matplotlib import pyplot as plt
from torchvision import transforms as tfms
from diffusers import StableDiffusionPipeline, DDIMScheduler

# Useful function for later
def load_image(url, size=None):
    response = requests.get(url,timeout=0.2)
    img = Image.open(BytesIO(response.content)).convert('RGB')
    if size is not None:
        img = img.resize(size)
    return img
device = torch.device("cuda" if torch.cuda.is_available() else "cpu")
加载一个已训练的pipeline
# Load a pipeline
pipe = StableDiffusionPipeline.from_pretrained("runwayml/stable-diffusion-v1-5").to(device)
# Set up a DDIM scheduler:
pipe.scheduler = DDIMScheduler.from_config(pipe.scheduler.config)

```python
# Sample an image to make sure it is all working
prompt = 'Beautiful DSLR Photograph of a penguin on the beach, golden hour'
negative_prompt = 'blurry, ugly, stock photo'
im = pipe(prompt, negative_prompt=negative_prompt).images[0]
im.resize((256, 256)) # resize for convenient viewing

DDIM取样过程
在给定时间 t t t, 带噪图像 x t x_t xt 是原始图像( x 0 x_0 x0)与一些噪声 ( ϵ \epsilon ϵ)的叠加。这是在DDIM论文中 x t x_t xt的定义式,我们把它引用到此节里:
x t = α t x 0 + 1 − α t ϵ x_t = \sqrt{\alpha_t}x_0 + \sqrt{1-\alpha_t}\epsilon xt=αtx0+1−αtϵ
ϵ
\epsilon
ϵ 是一些归一方差的高斯噪声
α
t
\alpha_t
αt (‘alpha’)在DDPM论文中也被叫做
α
ˉ
\bar{\alpha}
αˉ (‘alpha_bar’),被用来定义噪声调度器(scheduler)。在扩散模型中,alpha调度器是被计算出来并排序存储在scheduler.alphas_cumprod中。这令人费解,我理解!我们把这些值画出来,然后在下文中我们会使用DDIM的标注方式。
# Plot 'alpha' (alpha_bar in DDPM language, alphas_cumprod in diffusers for clarity)
timesteps = pipe.scheduler.timesteps.cpu()
alphas = pipe.scheduler.alphas_cumprod[timesteps]
plt.plot(timesteps, alphas, label='alpha_t');
plt.legend();
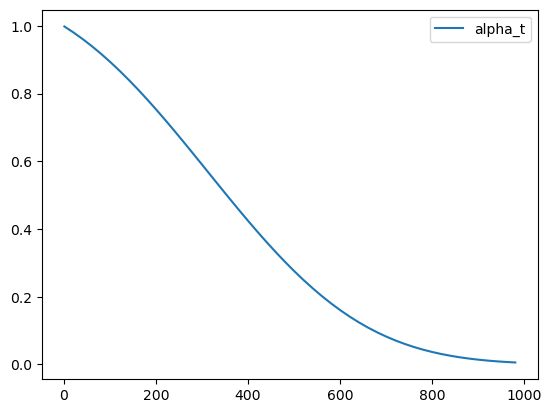
最初(timestep 0 ,图中左侧)是从一个无噪的干净图像开始, α t = 1 \alpha_t = 1 αt=1。当我们到达更高的timesteps,我们得到一个几乎全是噪声的图像, α t \alpha_t αt也几乎下降到0。
在采样过程,我们从timestep1000的纯噪声开始,慢慢地向timestep0前进。为了计算采样轨迹中的下一时刻( x t − 1 x_{t-1} xt−1因为我们是从后向前移动)的值,我们预测噪声( ϵ θ ( x t ) \epsilon_\theta(x_t) ϵθ(xt),这就是我们模型的输出),用它来预测出无噪的图片 x 0 x_0 x0。在这之后我们用这个预测结果朝着’ x t x_t xt的方向’方向移动一小步。最终,我们可以加一些带 σ t \sigma_t σt系数的额外噪声。这是论文中与上述操作相关的章节内容:
好,我们有了在可控量度噪声下,从 x t x_t xt 移动到 x t − 1 x_{t-1} xt−1的公式。今天我们所说案例是不需要再额外添加噪声的 - 即完全确定的DDIM采样。我们来看看这些是如何用代码表达的。
# Sample function (regular DDIM)
@torch.no_grad()
def sample(prompt, start_step=0, start_latents=None,
           guidance_scale=3.5, num_inference_steps=30,
           num_images_per_prompt=1, do_classifier_free_guidance=True,
           negative_prompt='', device=device):

    # Encode prompt
    text_embeddings = pipe._encode_prompt(
            prompt, device, num_images_per_prompt, do_classifier_free_guidance, negative_prompt
    )

    # Set num inference steps
    pipe.scheduler.set_timesteps(num_inference_steps, device=device)

    # Create a random starting point if we don't have one already
    if start_latents is None:
        start_latents = torch.randn(1, 4, 64, 64, device=device)
        start_latents *= pipe.scheduler.init_noise_sigma

    latents = start_latents.clone()

    for i in tqdm(range(start_step, num_inference_steps)):

        t = pipe.scheduler.timesteps[i]

        # expand the latents if we are doing classifier free guidance
        latent_model_input = torch.cat([latents] * 2) if do_classifier_free_guidance else latents
        latent_model_input = pipe.scheduler.scale_model_input(latent_model_input, t)

        # predict the noise residual
        noise_pred = pipe.unet(latent_model_input, t, encoder_hidden_states=text_embeddings).sample

        # perform guidance
        if do_classifier_free_guidance:
            noise_pred_uncond, noise_pred_text = noise_pred.chunk(2)
            noise_pred = noise_pred_uncond + guidance_scale * (noise_pred_text - noise_pred_uncond)


        # Normally we'd rely on the scheduler to handle the update step:
        # latents = pipe.scheduler.step(noise_pred, t, latents).prev_sample

        # Instead, let's do it ourselves:
        prev_t = max(1, t.item() - (1000//num_inference_steps)) # t-1
        alpha_t = pipe.scheduler.alphas_cumprod[t.item()]
        alpha_t_prev = pipe.scheduler.alphas_cumprod[prev_t]
        predicted_x0 = (latents - (1-alpha_t).sqrt()*noise_pred) / alpha_t.sqrt()
        direction_pointing_to_xt = (1-alpha_t_prev).sqrt()*noise_pred
        latents = alpha_t_prev.sqrt()*predicted_x0 + direction_pointing_to_xt

    # Post-processing
    images = pipe.decode_latents(latents)
    images = pipe.numpy_to_pil(images)

    return images
# Test our sampling function by generating an image
sample('Watercolor painting of a beach sunset', negative_prompt=negative_prompt, num_inference_steps=50)[0].resize((256, 256))

看看你是否能把这些代码和论文中的公式对应起来。注意 σ \sigma σ=0是因为我们只注意 无-额外-噪声 的场景,所以我们略去了公式中的那部分。
反转
反转的目标就是’颠倒’取样的过程。我们想最终得到一个带噪的隐式(latent),如果把它作为我们正常取样过程的起始点,结果将生成一副原图像。
这里我们先加载一个原始图像,当然你也可以生成一副图像来代替。
# https://www.pexels.com/photo/a-beagle-on-green-grass-field-8306128/
input_image = load_image('https://images.pexels.com/photos/8306128/pexels-photo-8306128.jpeg', size=(512, 512))
input_image

我们可以用包含随意分类指引(classifier-free-guidance)的prompt来做反转操作,输入一个图片的描述:
input_image_prompt = "Photograph of a puppy on the grass"
接下来我们来把这个PIL图像变成一些列隐式,它们会被用来当作反转的起点:
# encode with VAE
with torch.no_grad(): latent = pipe.vae.encode(tfms.functional.to_tensor(input_image).unsqueeze(0).to(device)*2-1)
l = 0.18215 * latent.latent_dist.sample()
好了,到有趣的部分了。这个函数看起来和上面的取样函数很像,但我们在timesteps上是在向相反的方向移动,从t=0开始,向越来越多的噪声前进。代替更新隐式时噪声会越来越少,我们估计所预测出的噪声,用它来撤回一步更新操作,把它们从t移动到t+1。
## Inversion
@torch.no_grad()
def invert(start_latents, prompt, guidance_scale=3.5, num_inference_steps=80,
           num_images_per_prompt=1, do_classifier_free_guidance=True,
           negative_prompt='', device=device):

    # Encode prompt
    text_embeddings = pipe._encode_prompt(
            prompt, device, num_images_per_prompt, do_classifier_free_guidance, negative_prompt
    )

    # latents are now the specified start latents
    latents = start_latents.clone()

    # We'll keep a list of the inverted latents as the process goes on
    intermediate_latents = []

    # Set num inference steps
    pipe.scheduler.set_timesteps(num_inference_steps, device=device)

    # Reversed timesteps <<<<<<<<<<<<<<<<<<<<
    timesteps = reversed(pipe.scheduler.timesteps)

    for i in tqdm(range(1, num_inference_steps), total=num_inference_steps-1):

        # We'll skip the final iteration
        if i >= num_inference_steps - 1: continue

        t = timesteps[i]

        # expand the latents if we are doing classifier free guidance
        latent_model_input = torch.cat([latents] * 2) if do_classifier_free_guidance else latents
        latent_model_input = pipe.scheduler.scale_model_input(latent_model_input, t)

        # predict the noise residual
        noise_pred = pipe.unet(latent_model_input, t, encoder_hidden_states=text_embeddings).sample

        # perform guidance
        if do_classifier_free_guidance:
            noise_pred_uncond, noise_pred_text = noise_pred.chunk(2)
            noise_pred = noise_pred_uncond + guidance_scale * (noise_pred_text - noise_pred_uncond)

        current_t = max(0, t.item() - (1000//num_inference_steps))#t
        next_t = t # min(999, t.item() + (1000//num_inference_steps)) # t+1
        alpha_t = pipe.scheduler.alphas_cumprod[current_t]
        alpha_t_next = pipe.scheduler.alphas_cumprod[next_t]

        # Inverted update step (re-arranging the update step to get x(t) (new latents) as a function of x(t-1) (current latents)
        latents = (latents - (1-alpha_t).sqrt()*noise_pred)*(alpha_t_next.sqrt()/alpha_t.sqrt()) + (1-alpha_t_next).sqrt()*noise_pred


        # Store
        intermediate_latents.append(latents)

    return torch.cat(intermediate_latents)
把它在小狗图片的隐式表达上运行,我们可以在反转的中间过程得到一系列的隐式:
inverted_latents = invert(l, input_image_prompt,num_inference_steps=50)
inverted_latents.shape
  0%|          | 0/49 [00:00<?, ?it/s]


torch.Size([48, 4, 64, 64])
我们可以来看一下最终的隐式 - 希望这可以作为我们尝试新的取样过程的起点噪声:
# Decode the final inverted latents:
with torch.no_grad():
  im = pipe.decode_latents(inverted_latents[-1].unsqueeze(0))
pipe.numpy_to_pil(im)[0]

你可以把这个反转隐式通过正常的 call 方法来传递给pipeline。
pipe(input_image_prompt, latents=inverted_latents[-1][None], num_inference_steps=50, guidance_scale=3.5).images[0]
0%| | 0/50 [00:00<?, ?it/s]

但这里我们遇见了第一个问题:这 并不是我们一开始的那张图片!这是因为DDIM的反转依赖一个重要的假设,在t时刻预测的噪声与t+1时刻会是相同的 - 这在我们只反转50或100步时是不陈立的。我们可以寄希望于更多的timesteps开得到一个更准确的反转,但我们也可以’作弊’一下,就是说直接从做对应反转过程中的第20/50步的隐式开始:
# The reason we want to be able to specify start step
start_step=20
sample(input_image_prompt, start_latents=inverted_latents[-(start_step+1)][None],
       start_step=start_step, num_inference_steps=50)[0]
0%| | 0/30 [00:00<?, ?it/s]

距离我们的输入图像已经很接近了!我们为什么要这么做?嗯,这是因为如果我们现在若要用一个新的prompt来生成图像,我们会得到一个匹配于源图像,除了,与新prompt相关的内容。例如,把’小狗’替换为’猫’,我们能看到一只猫在几乎一样草地背景上:
# Sampling with a new prompt
start_step=10
new_prompt = input_image_prompt.replace('puppy', 'cat')
sample(new_prompt, start_latents=inverted_latents[-(start_step+1)][None],
       start_step=start_step, num_inference_steps=50)[0]
0%| | 0/40 [00:00<?, ?it/s]

为什么不直接用 img2img?
为什么要做反转,不是多此一举吗?为什么不直接对输入图片加入噪声,然后用新的promt直接来去噪呢?我们可以这么做,但这会带来一个到处都被改变得夸张得多的照片(如果我们加入了很多噪声),或哪也没怎么变的图像(如果加了太少的噪声)。来自己试试:
start_step = 10
num_inference_steps=50
pipe.scheduler.set_timesteps(num_inference_steps)
noisy_l = pipe.scheduler.add_noise(l, torch.randn_like(l), pipe.scheduler.timesteps[start_step])
sample(new_prompt, start_latents=noisy_l, start_step=start_step, num_inference_steps=num_inference_steps)[0]
0%| | 0/40 [00:00<?, ?it/s]

注意背景和草坪有着非常大的变化。
把它们都组装起来
来把我们目前所写的代码都组装在一个简单的函数里,输入一张图像和两个prompts,就会得到一个通过反转得到的修改后的图片:
def edit(input_image, input_image_prompt, edit_prompt, num_steps=100, start_step=30, guidance_scale=3.5):
    with torch.no_grad(): latent = pipe.vae.encode(tfms.functional.to_tensor(input_image).unsqueeze(0).to(device)*2-1)
    l = 0.18215 * latent.latent_dist.sample()
    inverted_latents = invert(l, input_image_prompt,num_inference_steps=num_steps)
    final_im = sample(edit_prompt, start_latents=inverted_latents[-(start_step+1)][None],
                      start_step=start_step, num_inference_steps=num_steps, guidance_scale=guidance_scale)[0]
    return final_im
And in action:
实际操作起来:
edit(input_image, 'A puppy on the grass', 'an old grey dog on the grass', num_steps=50, start_step=10)
  0%|          | 0/49 [00:00<?, ?it/s]


  0%|          | 0/40 [00:00<?, ?it/s]

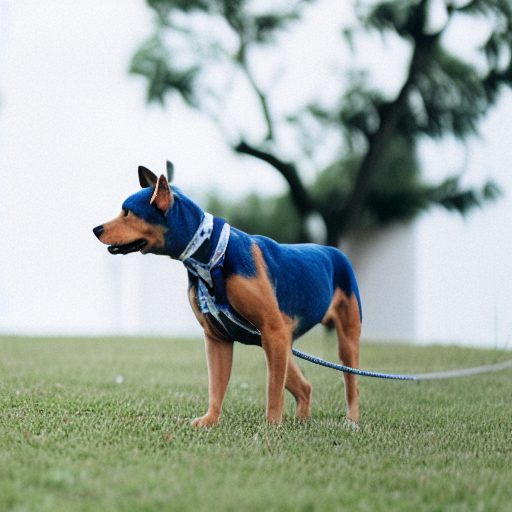
edit(input_image, 'A puppy on the grass', 'A blue dog on the lawn', num_steps=50, start_step=12, guidance_scale=6)
  0%|          | 0/49 [00:00<?, ?it/s]


  0%|          | 0/38 [00:00<?, ?it/s]
