CocoaPods
- 环境
- Homebrew
- Ruby
- rbenv
- RubyGems 和 Bundler
- 安装Ruby
- 管理Ruby
- 更新Ruby
- 替换Ruby镜像
- 方式1
- 方式2
- CocoaPods
- 安装CocoaPods
- CocoaPods使用
- 如何插入一段漂亮的代码片
- 安装的一些问题
- 参考的链接
环境
Homebrew
Ruby
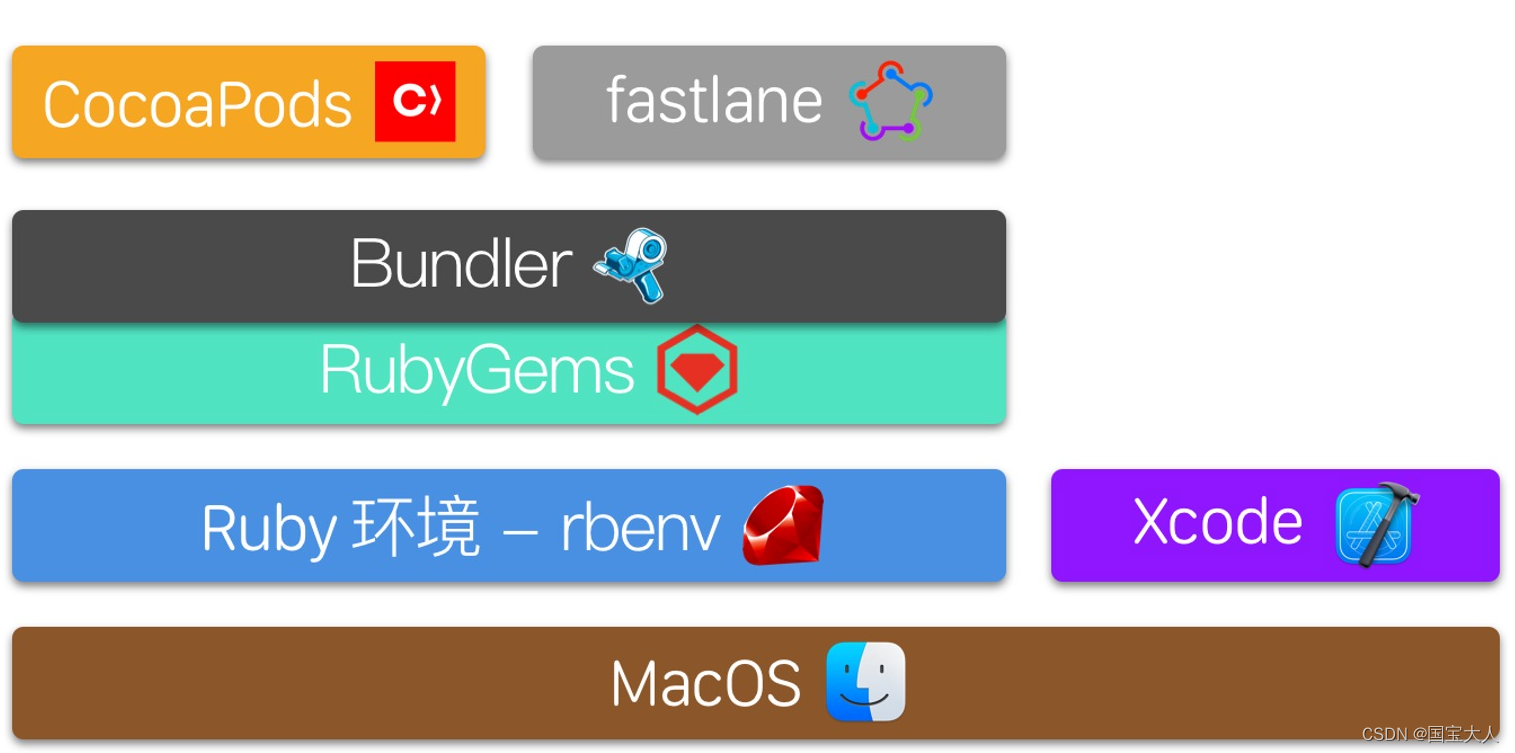
目前流行的Ruby环境管理工具有 RVM 和 rbenv。这里推荐使用 rbenv,因为它使用shims 文件夹来分离各个 Ruby版本,相对于RVM更加方便。
rbenv
rbenv 是 Ruby的环境管理工具,能够安装、管理、隔离以及在多个Ruby版本之间切换。rbenv使用Homebrew来安装,下面是安装的脚本。
$ /bin/bash -c "$(curl -fsSL https://raw.githubusercontent.com/Homebrew/install/master/install.sh)"
brew install rbenv ruby-build rbenv-vars
一旦安装 rbenv 完毕,我们需要把以下的设置信息放到你的 Shell 配置文件里面,例如 ~/.bash_profile 或者 ~/.zshrc 等文件,这样能保证每次打开终端的时候都会初始化 rbenv。
export PATH="$HOME/.rbenv/bin:$PATH"
eval "$(rbenv init -)"
接着我们就可以安装和设置项目的 Ruby 环境了。
$ cd $(PROJECT_DIR)
$ rbenv install 2.7.1   //安装2.7.1版本,位置在/Users/_pc_name_/.rbenv/versions/
$ rbenv local 2.7.1		//在项目文件下生成一个文件:.ruby-version
RubyGems 和 Bundler
RubyGems和Bundler这两个主要用来管理CocoaPods和fastlane等第三方工具。
在Ruby的世界,包叫做Gem,可以用 gem install 命令来安装。但是因为RubyGems在管理 Gem 版本时有些缺陷,就有了Bundler,用来检查和安装Gem的特定版本,以此为Ruby项目提供一致性的环境。
//安装Bundler
gem install bundler
安装Ruby
管理Ruby
$ brew update
$ brew install rbenv
在文件 .bashrc 内添加下面内容
eval “$(rbenv init -)”
查看可以安装的ruby版本,并安装
rbenv install -l
rbenv install 3.2.1
设置为全局使用这个ruby版本,并重新‘启用/运行’这个版本的ruby
$ rbenv global 3.2.1
$ rbenv rehash
$ which ruby
$ ruby -v
更新Ruby
替换Ruby镜像
方式1
查看当前的ruby源
$ gem sources -l
打印:
*** CURRENT SOURCES ***
https://rubygems.org/
移除ruby当前源,并替换国内镜像
$ gem sources --remove https://rubygems.org/
$ gem sources -a https://gems.ruby-china.com/
替换国内最新镜像源(淘宝的Ruby镜像已经不更新了,https://gems.ruby-china.org域名更新为https://gems.ruby-china.com)
再次查看是否成功替换
$ gem sources -l
方式2
解决brew update 无法访问问题:
// 执行下面这句命令,更换为中科院的镜像:
$ git clone git://mirrors.ustc.edu.cn/homebrew-core.git/ /usr/local/Homebrew/Library/Taps/homebrew/homebrew-core --depth=1
// 把homebrew-core的镜像地址也设为中科院的国内镜像
$ cd “$(brew --repo)”
$ git remote set-url origin https://mirrors.ustc.edu.cn/brew.git
$ cd “$(brew --repo)/Library/Taps/homebrew/homebrew-core”
$ git remote set-url origin https://mirrors.ustc.edu.cn/homebrew-core.git
// 更新
$ brew update
// 使用
brew install node/xx1/某个组件2/
CocoaPods
安装CocoaPods
$ sudo gem install cocoapods
*可能会报错:ERROR: While executing gem … (Gem::FilePermissionError)
You don’t have write permissions for the /Library/Ruby/Gems/2.3.0 directory
改成下面的方式
$ sudo gem install -n /usr/local/bin cocoapods
然后执行
$ pod setup
*这个执行很慢,耐心等待… pod setup在执行时,会输出Setting up CocoaPods master repo,然后会卡一会儿。这步其实是 Cocoapods 将它的信息下载到 ~/.cocoapods目录下,你可以command+n新建一个终端窗口,执行cd ~/.cocoapods/进入到该文件夹下,然后du -sh *查看文件大小,这个目录最终大小是900多M。出现Setup completed 的时候说明已经完成了
CocoaPods使用
$ pod search AFNetworking
$ cd /user/filename/Your Project
$ vim Podfile
*输入下面的内容
platform :ios, ‘12.0’
target ‘dssf’ do
pod ‘AFNetworking’
end
*退出并保存
$ pod install
创建方式2:
$ pod init
*会自动创建Podfile,打开文件夹,添加需要的‘三方库’,最后
$ pod install
我们对Markdown编辑器进行了一些功能拓展与语法支持,除了标准的Markdown编辑器功能,我们增加了如下几点新功能,帮助你用它写博客:
- 全新的界面设计 ,将会带来全新的写作体验;
- 在创作中心设置你喜爱的代码高亮样式,Markdown 将代码片显示选择的高亮样式 进行展示;
如何插入一段漂亮的代码片
去博客设置页面,选择一款你喜欢的代码片高亮样式,下面展示同样高亮的 代码片.
// An highlighted block
var foo = 'bar';
安装的一些问题
参考的链接
MacOS 配置Ruby环境安装 Cocoapods
2023最新cocoaPods、Homebrew、RVM、Ruby 安装教程
M1电脑上升级Ruby
