滑块验证实现
- 一、后端
- 1)首先引入maven:
- 2)再在application.yml中自定义水印,直接启动后前端就可以请求接口了
- 3)重写CaptchaCacheServiceRedisImpl
- ①先新建一个文件夹
- ②重写impl
- 二、前端:
- 1)复制文件
- 2)安装请求和加密依赖
- 3)之后就可以直接使用了(引入、使用组件)
- vue使用:
- js引入:
- 三、后端二次校验接口
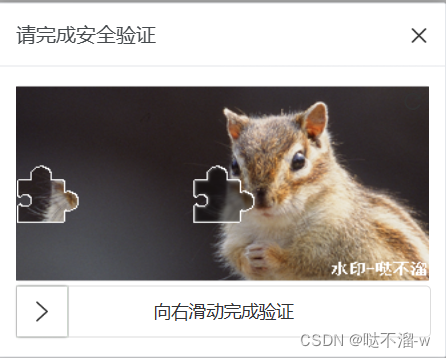
- 最后效果展示
GitHub地址:https://github.com/anji-plus/captcha/blob/master/README_CN.md
AJ-Captcha文档:https://ajcaptcha.beliefteam.cn/captcha-doc/
本人是spring boot – vue 项目:
一、后端
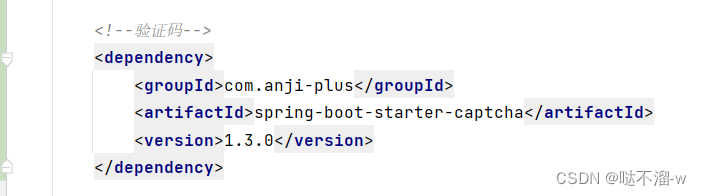
1)首先引入maven:
<dependency>
   <groupId>com.anji-plus</groupId>
   <artifactId>spring-boot-starter-captcha</artifactId>
   <version>1.3.0</version>
</dependency>
2)再在application.yml中自定义水印,直接启动后前端就可以请求接口了
我这边就写了最简单的,具体可以看文档
# 验证码相关
aj:
  captcha:
    #jigsaw: classpath:images/jigsaw
    cache-type: redis
    water-mark: 水印-哒不溜
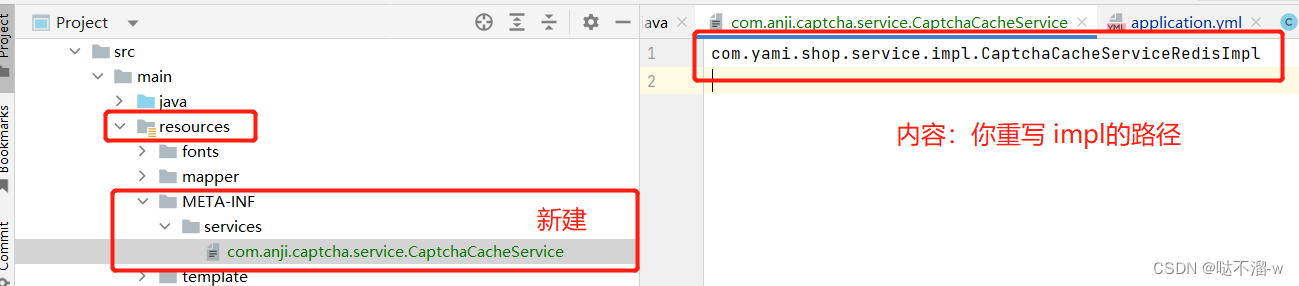
3)重写CaptchaCacheServiceRedisImpl
因为这个插件原本自带的impl好像有点问题,你们也可以不重写先试试;
①先新建一个文件夹
FileName:com.anji.captcha.service.CaptchaCacheService
内容:写自己的路径
②重写impl
我直接把内容复制出来吧,新建CaptchaCacheServiceRedisImpl
import com.anji.captcha.service.CaptchaCacheService;
import lombok.extern.slf4j.Slf4j;
import org.springframework.beans.factory.annotation.Autowired;
import org.springframework.data.redis.core.StringRedisTemplate;
import org.springframework.stereotype.Service;

import java.util.concurrent.TimeUnit;

@Service
@Slf4j
public class CaptchaCacheServiceRedisImpl implements CaptchaCacheService {

    private static final String REDIS = "redis";

    @Autowired
    private StringRedisTemplate stringRedisTemplate;

    @Override
    public void set(String key, String value, long expiresInSeconds) {
        stringRedisTemplate.opsForValue().set(key, value, expiresInSeconds, TimeUnit.SECONDS);
    }

    @Override
    public boolean exists(String key) {
        return stringRedisTemplate.hasKey(key);
    }

    @Override
    public void delete(String key) {
        stringRedisTemplate.delete(key);
    }

    @Override
    public String get(String key) {
        return stringRedisTemplate.opsForValue().get(key);
    }

    @Override
    public String type() {
        return REDIS;
    }
}
二、前端:
1)复制文件
复制整个verifition文件夹,到自己工程对应目录下
进链接复制文件夹:https://github.com/anji-plus/captcha/tree/master/view/vue/src/components
2)安装请求和加密依赖
npm install axios crypto-js -S
3)之后就可以直接使用了(引入、使用组件)
vue使用:
   	<!-- 自己可以做其它的调整大小什么的 -->
    <Verify
        @success="verifySuccess"
        @cancel="loading = false"
        :mode="'pop'"
        :captchaType="'blockPuzzle'"
        :imgSize="{ width: '330px', height: '155px' }"
        ref="verify"
      />
        <el-button type="primary"
                   @click="dialogtelSubmit()">滑动验证</el-button>
js引入:
import Verify from '@/components/verifition/Verify'

export default {
  components: {
    Verify
  },
  data() {...},
  methods: {
	// 打开滑动验证码
  	dialogtelSubmit() {
      this.$refs.verify.show();
  	},
    // 滑动验证成功后执行的方法
    verifySuccess(params) {
    	// params:滑块验证返回的信息,传参params.captchaVerification
    	// 如果直接把params传过去接收不到(我自己是这样,不知道你们)
    	this.$http({
            url: this.$http.adornUrl('/sendCode/captcha'),
            method: 'post',
            params: this.$http.adornParams({
              captchaVerification: params.captchaVerification,
            })
          }).then(({data}) => {
          	if(data) {
            	this.$message.success('验证成功!')
          	}
          }).catch(() => {
          })
    },
  }
}
三、后端二次校验接口
	@PostMapping("/sendCode/captcha")
	public ResponseEntity<Boolean> sendLoginCodeCaptcha(String captchaVerification) {
		boolean flag = false;
		// 新创建个对象,再赋值 进行解析
		CaptchaVO captchaVO = new CaptchaVO();
		captchaVO.setCaptchaVerification(captchaVerification);
		ResponseModel response = captchaService.verification(captchaVO);

		if(response.isSuccess() == false) {
			//验证码校验失败,返回信息告诉前端
	        //repCode  0000  无异常,代表成功
	        //repCode  9999  服务器内部异常
	        //repCode  0011  参数不能为空
	        //repCode  6110  验证码已失效,请重新获取
	        //repCode  6111  验证失败
	        //repCode  6112  获取验证码失败,请联系管理员
	        //repCode  6113  底图未初始化成功,请检查路径
	        //repCode  6201  get接口请求次数超限,请稍后再试!
	        //repCode  6206  无效请求,请重新获取验证码
	        //repCode  6202  接口验证失败数过多,请稍后再试
	        //repCode  6204  check接口请求次数超限,请稍后再试!
	        /** 抛出异常 (这是自己的方法↓↓↓) 或者你做其它操作 **/
			throw new YamiShopBindException(response.getRepMsg());
		}else if("0000".equals(response.getRepCode())) {// repCode  0000  无异常,代表成功
			flag = response.isSuccess();
		}
		return ResponseEntity.ok(flag);
	}
最后效果展示