Wordpress 作为一款小型的内容管理系统,受到很多站长的欢迎,特别是作为个人博客,丰富的插件和主题提供了更多的定制和自由度。
自从前后端分离的开发模式兴起之后,Wordpress 又被作为数据存储的后端服务提供接口给第三方的前端页面使用,得益于自身提供的 REST API 功能,在后台设置中可自行开启。还有开发者通过插件的形式进行了更多功能的拓展,开发了博客小程序、商城小程序、社区小程序等。
花生小店[1] —— 一款结合 Wordpress 开发的微信电商小程序 SAAS 平台;
WooCommerce 微信小程序[2] —— 结合 Wordpress 商城插件 WooCommerce 开发的商城类小程序
微慕小程序[3] —— 将 WordPress 网站快速转换为小程序,开源提供了 Wordpress 后台插件和小程序端代码。
Next.js + Wordpress
Next.js 作为新兴的以 React 为底层技术,用于构建现代的、高性能的 Web 应用程序的框架,并具有服务端渲染能力。于是 Next.js 与 Wordpress 的结合变得理所当然。
这就有了开源项目 nextjs-wordpress[4](https://github.com/gregrickaby/nextjs-wordpress ) ,该仓库就是利用 GraphQL 技术查询 Wordpress 端提供的数据并采用 Next.js 和 Tailwind CSS 来搭建和操作前端页面及样式。
以下是提供的站点案例:
It's headless WordPress! - https://nextjswp.com[5]
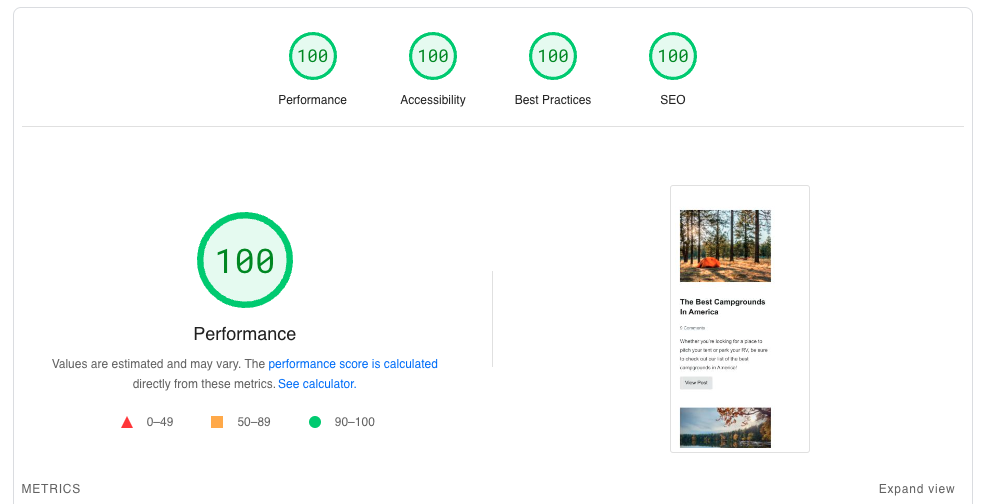
样式异常的简洁,但是优点在于优越的渲染性能,并给了测试结果:
准备工作
假设你已经有了一个 Wordpress 站点,比如我的 前端开发笔记站点[6] (https://i-fanr.com) 就是采用 Wordpress 程序搭建而成。
如果你还没有,也可以利用集成安装环境工具 Wampserver64[7] 快速搭建一个本地的测试站点,这里假设你使用的电脑是 Windows 系统。安装好软件之后,相当于你本地有了一套 Apache + PHP + MySQL 的开发环境套装。

下载地址[8]
将下载好的 Wordpress 源码[9] 放到 Wampserver 软件的安装目录 wamp64\www\wordpress 位置,启动服务后,默认访问 80 端口,在浏览器打开访问地址:http://localhost/wordpress/
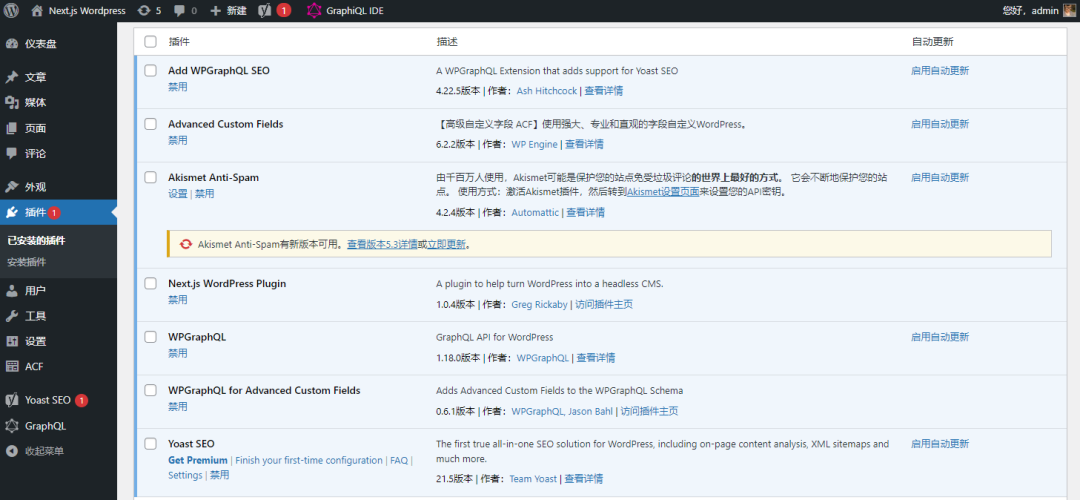
接下来,你还需要为你的 Wordpress 站点准备好安装下面这些插件:
Advanced Custom Fields[10] (free version is fine)
Next.js WordPress Plugin[11]
Next.js WordPress Theme[12]
WPGraphQL Yoast SEO[13]
WPGraphQL for Advanced Custom Fields[14]
WPGraphQL[15]
Yoast SEO[16]
启动本地 Next.js App
克隆仓库代码到本地
git clone git@github.com:gregrickaby/nextjs-wordpress.git安装包
npm i配置环境变量
cp .env.example .env.local修改文件中的变量
# WordPress GraphQL API URL. No trailing slash.
NEXT_PUBLIC_WORDPRESS_GRAPHQL_URL="http://localhost/wordpress/graphql"

# Preview Secret. Must match the constant in wp-config.php.
NEXTJS_PREVIEW_SECRET="preview"

# Revalidation Secret. Must match the constant in wp-config.php.
NEXTJS_REVALIDATION_SECRET="revalidate"
修改 next.config.js
/** @type {import('next').NextConfig} */
const nextConfig = {
  images: {
    domains: ['localhost'],
    remotePatterns: [
      {
        protocol: 'http',
        hostname: 'http://localhost/wordpress' // <-- Change to your WordPress site
      },
      {
        protocol: 'https',
        hostname: '**.gravatar.com'
      }
    ]
  }
}

module.exports = nextConfig
接下来确保 Wordpress 已经安装好并启用相关的插件和主题,然后修改配置文件 wp-config.php,添加以下全局常量定义
// The URL of your Next.js frontend. Include the trailing slash.
define( 'NEXTJS_FRONTEND_URL', 'http://localhost/wordpress' );

// Any random string. This must match the .env variable in the Next.js frontend.
define( 'NEXTJS_PREVIEW_SECRET', 'preview' );

// Any random string. This must match the .env variable in the Next.js frontend.
define( 'NEXTJS_REVALIDATION_SECRET', 'revalidate' );
本地开启服务
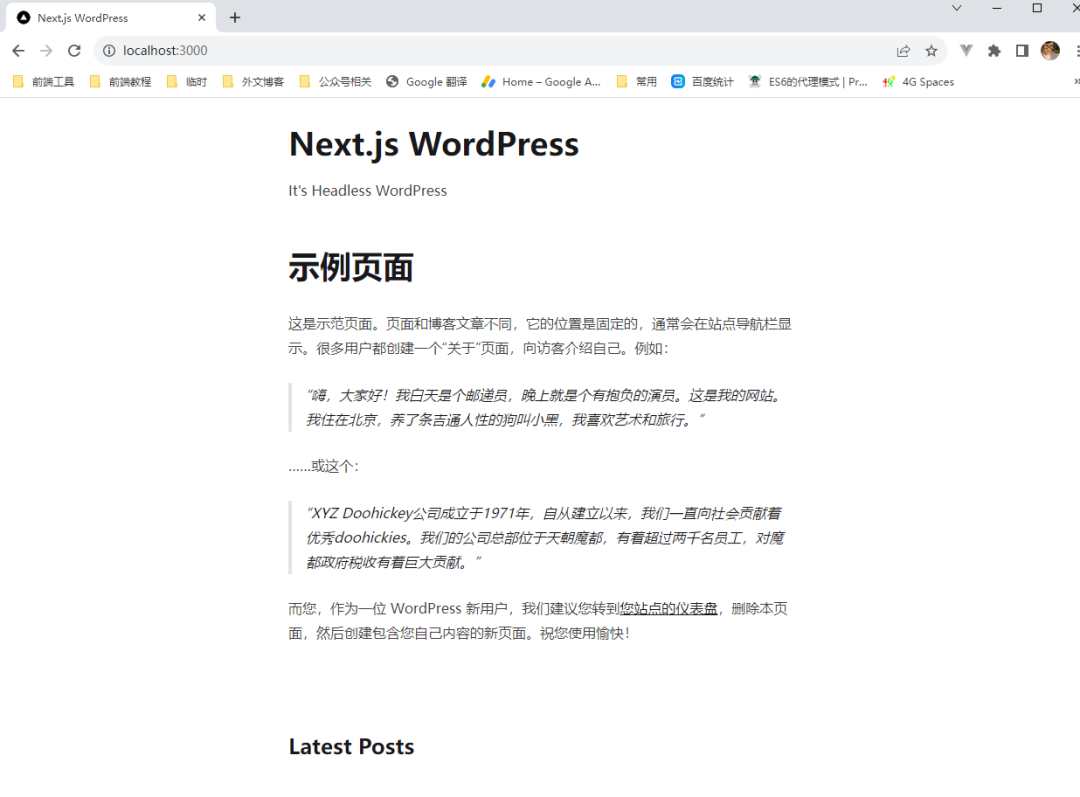
npm run dev打开 http://localhost:3000[17] 进行预览
参考资料
[1]
花生小店: https://www.97866.com
[2]WooCommerce 微信小程序: https://www.qwqoffice.com/article-30.html
[3]微慕小程序: https://www.minapper.com
[4]nextjs-wordpress: https://github.com/gregrickaby/nextjs-wordpress
[5]https://nextjswp.com: https://nextjswp.com/
[6]前端开发笔记站点: https://i-fanr.com
[7]Wampserver64: https://www.wampserver.com
[8]下载地址: https://www.wampserver.com/en/download-wampserver-64bits
[9]Wordpress 源码: https://cn.wordpress.org/download/source/
[10]Advanced Custom Fields: https://wordpress.org/plugins/advanced-custom-fields/
[11]Next.js WordPress Plugin: https://github.com/gregrickaby/nextjs-wordpress-plugin
[12]Next.js WordPress Theme: https://github.com/gregrickaby/nextjs-wordpress-theme
[13]WPGraphQL Yoast SEO: https://wordpress.org/plugins/add-wpgraphql-seo/
[14]WPGraphQL for Advanced Custom Fields: https://www.wpgraphql.com/acf/
[15]WPGraphQL: https://www.wpgraphql.com/
[16]Yoast SEO: https://wordpress.org/plugins/wordpress-seo/
[17]http://localhost:3000: http://localhost:3000/
