本文简介
最近有工友问我前端怎么给图片做标注。使用 Fabric.js 或者 Konva.js 等库确实可以实现,但我又好奇有没有专门做图片标注的工具呢?
在网上搜了一下发现 Annotorious 可以实现这个功能。Annotorious 提供了图片注释和标注功能,而且用法很简单。

本文分为 【快速入门】和【API讲解】两部分。
【快速入门】部分包含 Annotorious 的安装、使用、导入导出的讲解。这几点应该是项目中比较核心的流程,给希望快速入门的工友提供一丢丢帮助。
【API讲解】这部分主要讲一下我认为比较常用的功能。注意:是“我认为”。
快速入门
快速入门部分会讲解Annotorious 的安装、使用、导入和导出数据功能。
安装 Annotorious
CDN
<!-- 引入样式 -->
<link rel="stylesheet" href="https://cdn.jsdelivr.net/npm/@recogito/annotorious@2.7.10/dist/annotorious.min.css">

<!-- 引入js -->
<script src="https://cdn.jsdelivr.net/npm/@recogito/annotorious@2.7.10/dist/annotorious.min.js"></script>
你可以把这两份文件下载到自己的项目里再引入。
NPM
用以下命令安装 Annotorious
npm install @recogito/annotorious然后在项目中引入
import { Annotorious } from '@recogito/annotorious'
import '@recogito/annotorious/dist/annotorious.min.css'
使用 annotorious
把 Annotorious 安装到项目后就可以使用了。
Annotorious 的用法很简单,只需做以下2步:
- 在html部分插入图片
- 初始化
Annotorious,并绑定图片元素(元素的ID或者元素本身)

CDN 和 NPM 在初始化时的用法稍微有点不同。
CDN
<img src="./img.jpg" id="my-image" />

<script>
let anno = Annotorious.init({
  image: 'my-image' // 元素ID
})
</script>
使用 CDN 的方式引入 Annotorious,在初始化时要 Annotorious.init 这样写。
NPM
<img src="./img.jpg" id="my-image" />

<script>
const anno = new Annotorious({
  image: document.getElementById('my-image') // 元素本身
})
</script>
使用 NPM 的方式引入 Annotorious 在初始化时需要 new Annotorious 这样写。
注意:在 Annotorious 初始化代码最好放在你所使用的框架的页面加载完成后的生命周期函数里!
导出数据 getAnnotations()
如果你需要将图片上的标注保存到服务器,就需要把数据导出。
所用到的方法是 getAnnotations()。
<button οnclick="save()">保存</button>
<img src="./44.jpg" id="img" />
<script>
let anno = null
onload = function() {
anno = Annotorious.init({
image: 'img'
})
}
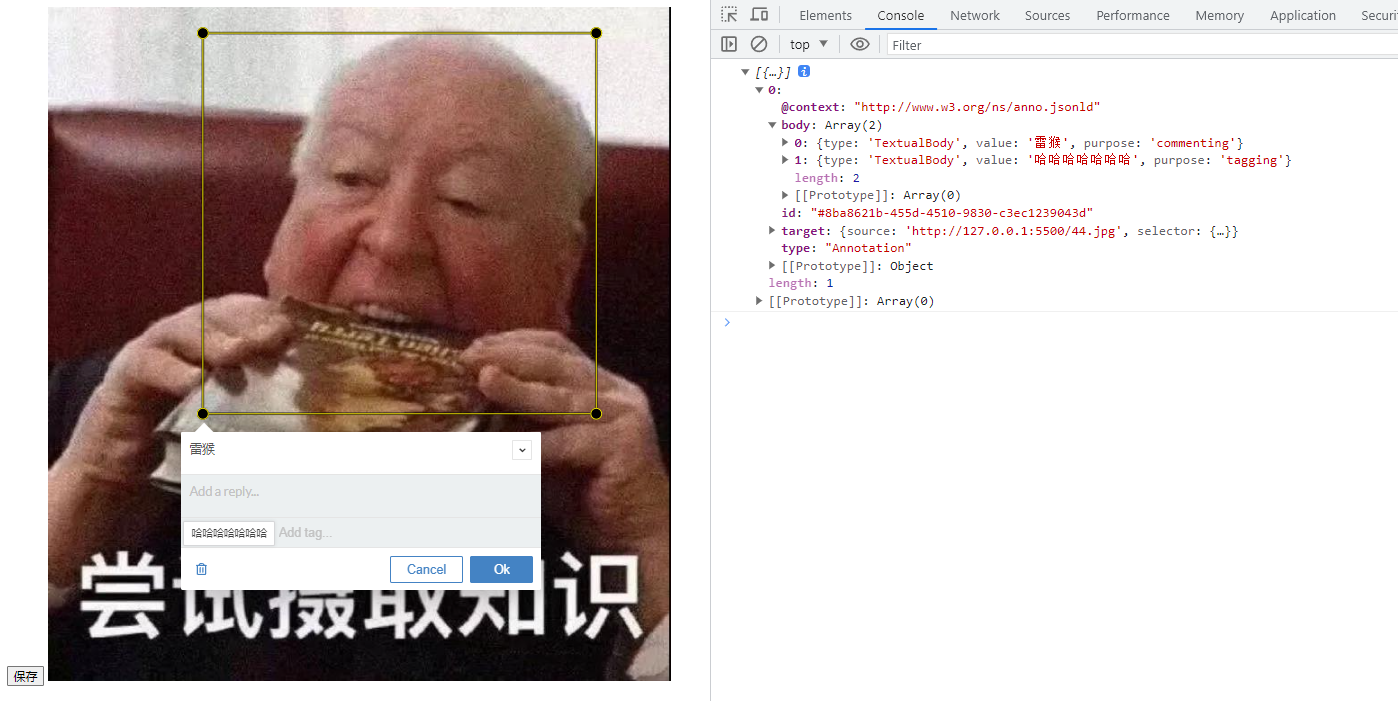
function save() {
let res = anno.getAnnotations()
console.log(res)
}
</script>导入数据 loadAnnotations(url)
Annotorious 可以通过 loadAnnotations() 方法加载数据。
loadAnnotations(url) 支持传入一个 URL 参数,这个 URL 所指的是数据文件地址。
比如我在本地创建一个 data.json 文件,文件内容是使用前面讲到的 getAnnotations() 方法导出的数据,我的数据内容如下:
[
  {
    "@context": "http://www.w3.org/ns/anno.jsonld",
    "type": "Annotation",
    "body": [
      {
        "type": "TextualBody",
        "value": "1",
        "purpose": "commenting"
      }
    ],
    "target": {
      "source": "http://127.0.0.1:5500/44.jpg",
      "selector": {
        "type": "FragmentSelector",
        "conformsTo": "http://www.w3.org/TR/media-frags/",
        "value": "xywh=pixel:100,100,500,300"
      }
    },
    "id": "#cabe2e71-b19f-4499-80c6-235882fd50ba"
  }
]
在本地测试时,我使用了本地服务器把 data.json 管理起来,在浏览器可以通过 http://127.0.0.1:5500/data.json 访问到该文件。
然后再使用 loadAnnotations(url) 方法把数据渲染出来即可。
<button οnclick="load()">加载</button>
<img src="./44.jpg" id="img" />
<script>
let anno = null
onload = function() {
anno = Annotorious.init({
image: 'img'
})
}
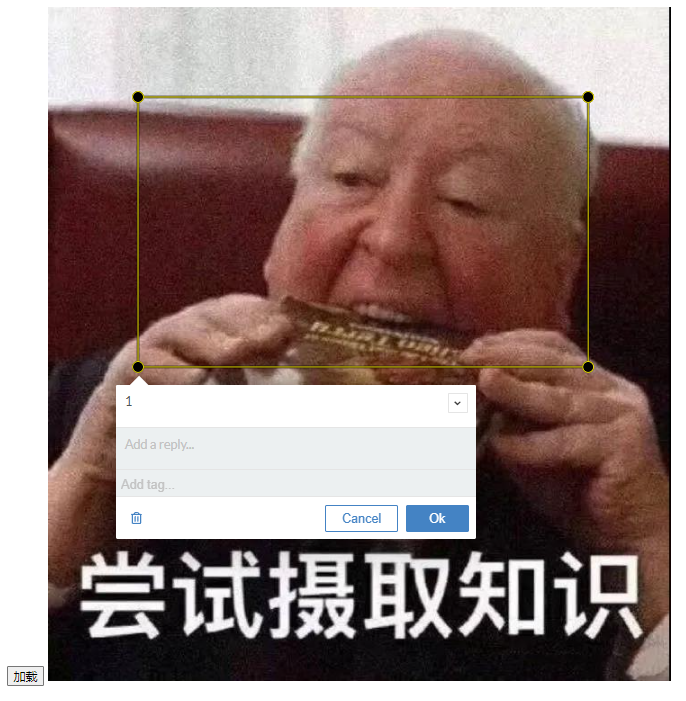
function load() {
anno.loadAnnotations("http://127.0.0.1:5500/data.json")
}
</script>点击加载按钮后,图片上就会出现一个选框,点击选框可以看到数据已经成功加载出来。
添加数据 addAnnotation()
但在实际项目中,后台不一定会给前端返回一个文件地址,后台可能会直接返回一个json数据。
这时候如果使用 loadAnnotations() 方法加载 json 数据是行不通的,要通过遍历读取数据中心的 data 里的数据,然后调用 addAnnotation() 方法将元素添加到页面。
我使用 json-server 简单的在本地搭建一个服务器给前端访问对应的资源,前端用 axios 请求资源。
<button οnclick="load()">加载</button>
<img src="./44.jpg" id="img" />

<script>
let anno = null

onload = function() {
  anno = Annotorious.init({
    image: 'img'
  })
}

function load() {
  axios.get('http://localhost:3000/anno')
    .then(res => {
      res.data.data.forEach(item => {
        anno.addAnnotation(item)
      })
  })
}
</script>
很久之前写过一篇 《『前端必备』本地数据接口 —— json-server 从入门到膨胀》 文章介绍 json-server 的基础用法,有兴趣的工友可以去瞧瞧。
API讲解
这部分主要讲一些我关注到的功能,如果想全面了解 Annotorious 可以查看文档。
汉化 locale
Annotorious 是根据浏览器的设置来确定使用哪种语言。
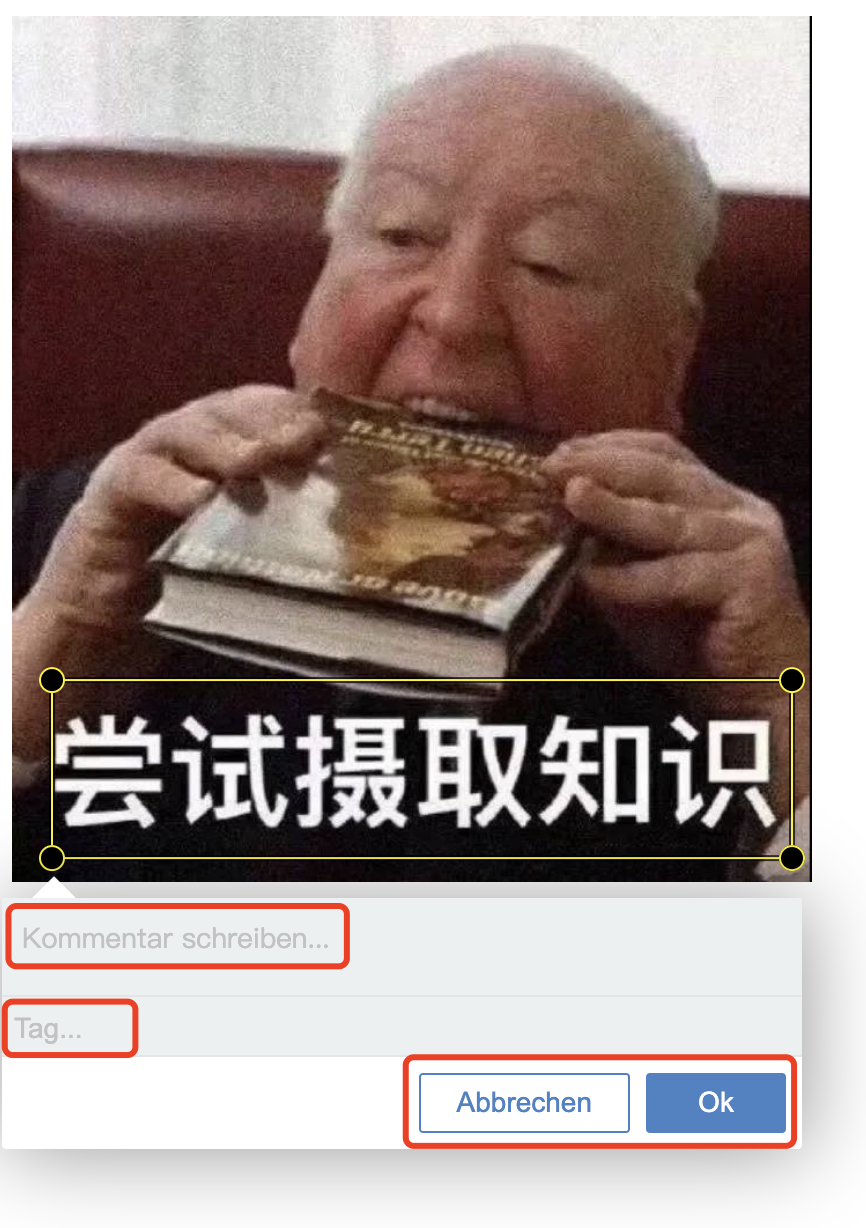
如果需要修改 Annotorious 使用的语言,可以在初始化时配置一下 locale 字段。
比如配置简体中文可以用 zh-CN,配置繁体中文可以用 zh-TW。
<img src="./img.jpg" id="my-image" />

<script>
let anno = Annotorious.init({
  image: 'my-image',
  locale: 'zh-CN' // 修改语言
})
</script>
自定义提示文本 messages
如果想自定义按钮或者输入框的提示文本可以配置 messages 。
<img src="./img.jpg" id="my-image" />

<script>

// 创建一个包含自定义消息的对象
var customMessages = {
  "Add a comment...": "评论评论",
  "Add a reply...": "回复两句",
  "Add tag...": "这是标签啊",
  "Cancel": "取消",
  "Close": "关闭",
  "Edit": "编辑~",
  "Delete": "删除❌",
  "Ok": "确定"
}

let anno = Annotorious.init({
  image: 'my-image',
  messages: customMessages // 自定义消息内容
})
</script>
如果同时配置了 locale 和 messages ,会优先使用 message 的值。
空注释 allowEmpty
默认情况下,如果框选后没输入标签或者评论就按确定是不会保存选框的。

如果想保存空选框,可以将 allowEmpty 设置为 true 。

<img src="./img.jpg" id="my-image" />
<script>
let anno = Annotorious.init({
image: 'my-image',
allowEmpty: true // 允许空注释
})
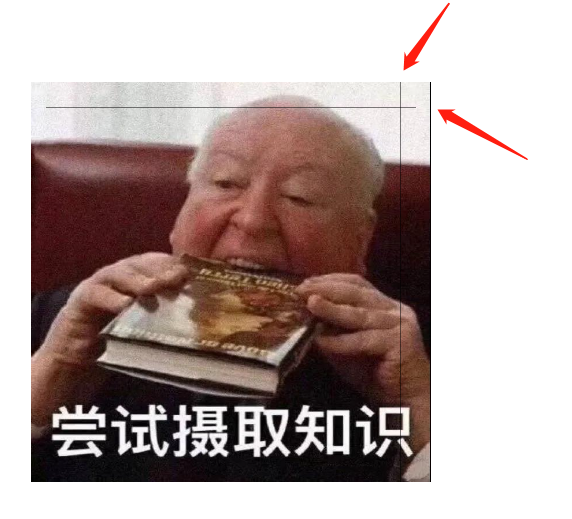
</script>框选辅助线 crosshair
有些鼠标指针可能并不是那么标准,会影响你框选的准确性。
如果需要非常准确去框选,可以开启辅助线功能,只需将 crosshair 设置为 true 即可。
<img src="./img.jpg" id="my-image" />

<script>
let anno = Annotorious.init({
  image: 'my-image',
  crosshair: true // 开启辅助线
})
</script>
只读 readOnly
如果不打算提供框选、添加和删除信息的操作给用户,可以将 readOnly 设置为 true 。
<img src="./img.jpg" id="my-image" />

<script>
let anno = Annotorious.init({
  image: 'my-image',
  readOnly: true // 只读模式
})
</script>
禁止编辑 disableEditor
如果只需要画框框,不需要写注释,可以将 disableEditor 和 allowEmpty 同时设置为 true。

<img src="./img.jpg" id="my-image" />

<script>
let anno = Annotorious.init({
  image: 'my-image',
  allowEmpty: true, // 允许空注释
  disableEditor: true // 禁用编辑
})
</script>
为什么要同时将 allowEmpty 设为 true ?
因为如果你不允许注释为空的话,当你点击空白处时选框就会消失。
禁止选中选框 disableSelect
将 disableSelect 设置为 true 后,画布上的选框就无法再次选中了。
<img src="./img.jpg" id="my-image" />

<script>
let anno = Annotorious.init({
  image: 'my-image',
  disableSelect: true // 禁止选中选框
})
</script>
虽然还没想到有什么引用场景,但还是打算记录一下。
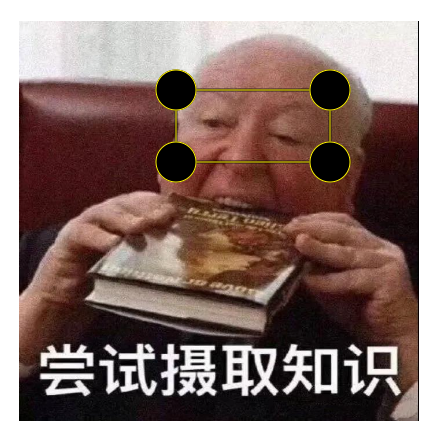
手柄半径 handleRadius
箭头所指的就是手柄。

手柄的默认半径是6。如果需要修改手柄半径可以设置 handleRadius 属性。
<img src="./img.jpg" id="my-image" />
<script>
let anno = Annotorious.init({
image: 'my-image',
handleRadius: 20 // 设置手柄半径
})
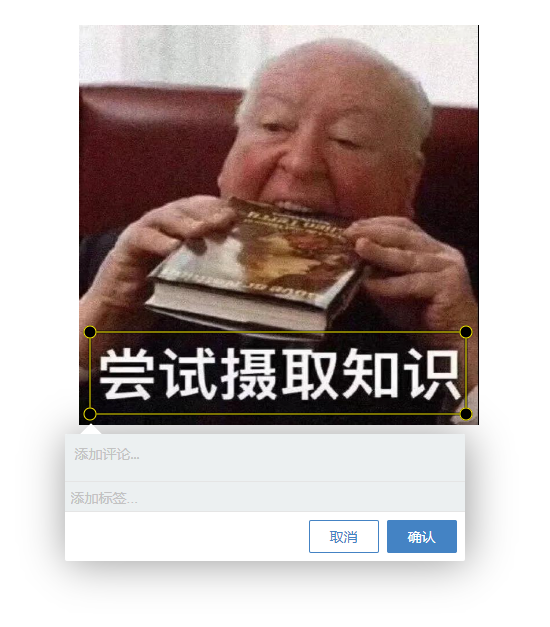
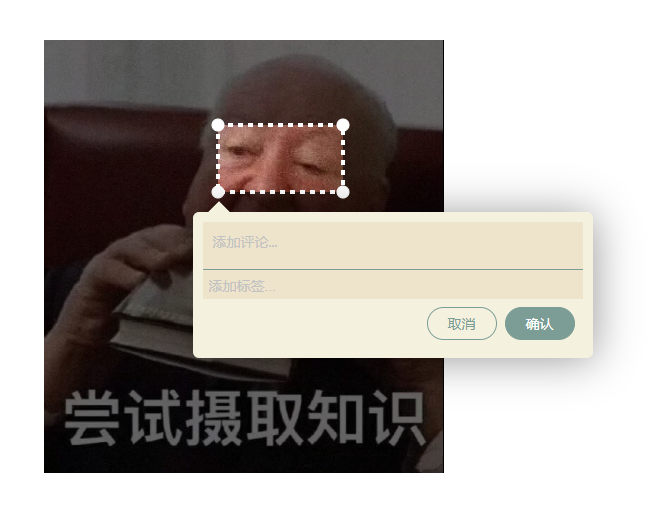
</script>自定义选框样式
Annotorious 的选框和编辑器都是可以使用 css 设置样式的。
选框部分使用了 SVG ,编辑器部分直接用了 HTML 元素。
对 SVG 不了解的工友可以阅读 《SVG专栏》。
回到 Annotorious ,官方也有给出一个自定义样式的案例 《Customizing Visual Appearance》。
<style>
  /* 选框 */
  /* 隐藏外部形状-对于这种风格,我们只需要一个 */
  svg.a9s-annotationlayer .a9s-selection .a9s-outer,
  svg.a9s-annotationlayer .a9s-annotation .a9s-outer {
    display:none;
  }
  svg.a9s-annotationlayer .a9s-handle .a9s-handle-outer {
    display:none;
  }

  /* 虚线边框 */
  svg.a9s-annotationlayer .a9s-selection .a9s-inner,
  svg.a9s-annotationlayer .a9s-annotation .a9s-inner  {
    stroke-width:4;
    stroke:white;
    stroke-dasharray:5;
  }

  /* 选中时的填充色 */
  svg.a9s-annotationlayer .a9s-annotation.editable:hover .a9s-inner {
    fill:transparent;
  }

  /* 手柄颜色 */
  svg.a9s-annotationlayer .a9s-handle .a9s-handle-inner {
    fill:white;
    stroke:white;
  }

  /* 选中选框时,遮罩层颜色 */
  svg.a9s-annotationlayer .a9s-selection-mask {
    fill:rgba(0, 0, 0, 0.6);
  }

  /* 编辑器 */
  /* 容器 */
  .r6o-editor .r6o-editor-inner {
    box-sizing: border-box;
    padding: 10px;
    border-radius: 6px;
    background: #F4F2DE;
  }

  /* 箭头 */
  .r6o-editor .r6o-arrow:after {
    background-color: #F4F2DE;
  }

  /* 编辑器 */
  .r6o-widget.comment.editable,
  .r6o-widget.r6o-tag {
    background-color: #EEE3CB;
  }
  .r6o-widget.comment {
    background-color: #D7C0AE;
  }

  .r6o-editor .r6o-editor-inner .r6o-widget {
    border-bottom-color: #7C9D96;
  }

  .r6o-editor .r6o-editor-inner .r6o-widget.r6o-tag {
    border-bottom: none;
  }

  /* 按钮 */
  .r6o-editor .r6o-btn {
    border-radius: 100px;
    background-color: #7C9D96;
    border-color: #7C9D96;
    color: #fff;
  }

  /* 线框按钮 */
  .r6o-editor .r6o-btn.outline {
    color: #7C9D96;
    background-color: transparent;
  }
</style>

<img src="./img.jpg" id="my-image" />

<script>
let anno = Annotorious.init({
  image: 'my-image',
  locale: 'zh-CN' // 修改语言
})
</script>
上面这份代码选框的样式是从 Annotorious 官网教程搬过来的。
编辑器的样式我随便配了一下,工友们也可以打开浏览器控制台看 Elements 面板的 HTML 代码,根据结构去修改样式即可。
筛选功能
输入时需要快速添加预选项时,可以这样配置:
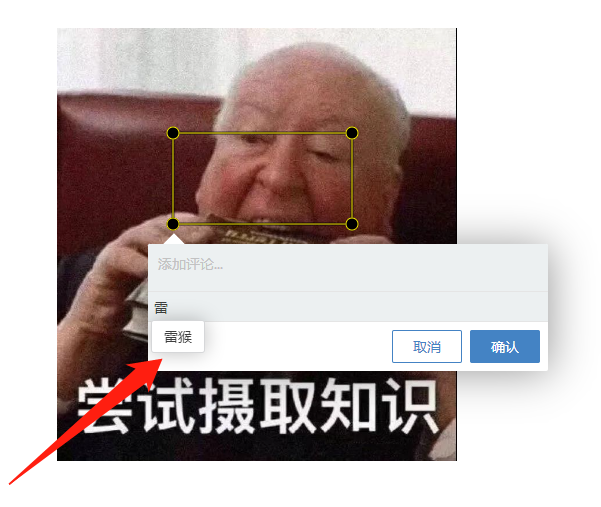
<img src="./img.jpg" id="my-image" />
<script>
let anno = Annotorious.init({
image: 'my-image',
widgets: [
'COMMENT',
{ widget: 'TAG', vocabulary: [ '雷猴', '鲨鱼辣椒', '蝎子莱莱'] }
]
})
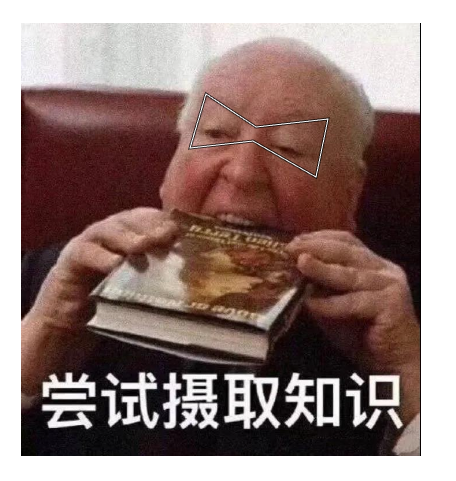
</script>多边形选框
使用 setDrawingTool(toolName) 方法可以设置不同的绘制工具。
如果需要讲选框设置成多边形,可以传入 'polygon'。
<img src="./img.jpg" id="my-image" />
<script>
let anno = Annotorious.init({
image: 'my-image'
})
anno.setDrawingTool("polygon")
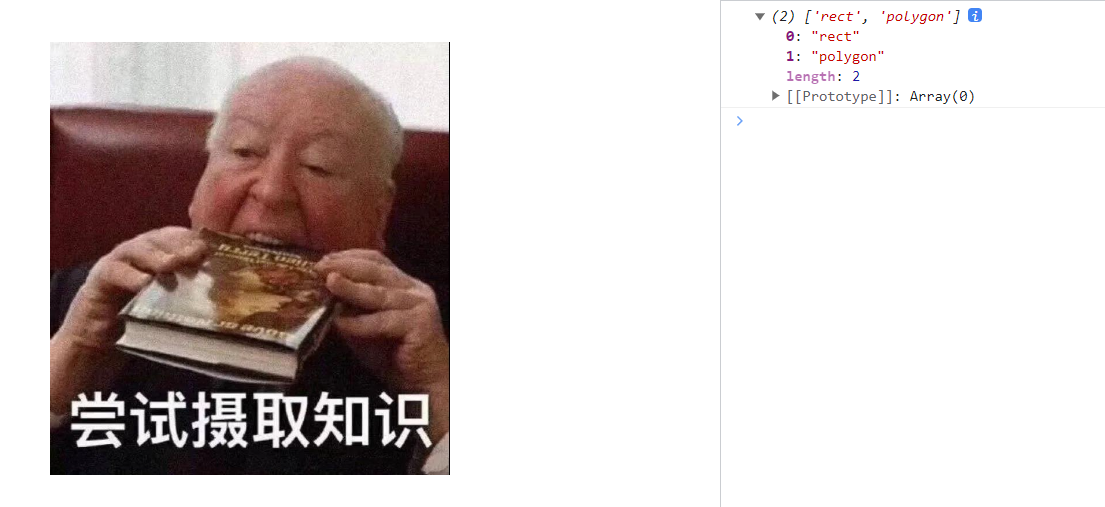
</script>想要知道当前有哪些绘图工具,可以使用 anno.listDrawingTools() 方法查看
<img src="./img.jpg" id="my-image" />

<script>
let anno = Annotorious.init({
  image: 'my-image'
})

const toolNames = anno.listDrawingTools()
console.log(toolNames)
</script>
其他
除了上面介绍到的 API 外,Annotorious 还有很多玩法的,比如删除指定注释、清空所有注释等。
详情请看 《annotorious API文档》
插件
Annotorious 也有一些好玩的插件,有兴趣的可以看看 《Annotorious 插件推荐》。
推荐阅读
👍《提升日期处理效率:day.js 实战经验分享》
👍《OpenLayers.js 入门教程:打造互动地图的入门指南》
👍《物理世界的互动之旅:Matter.js入门指南》
👍《p5.js 光速入门》
👍《眨个眼就学会了Pixi.js》
👍《Fabric.js 从入门到膨胀》
点赞 + 关注 + 收藏 = 学会了 代码仓库