说明
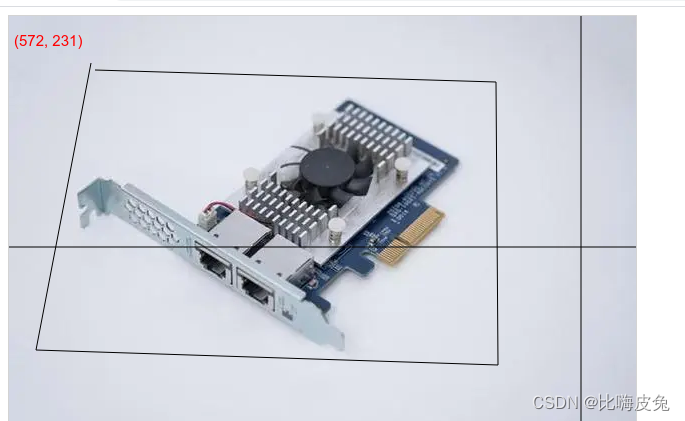
项目中可能需要用户根据展示的图片,然后绘制需要裁剪的路径,再根据绘制的坐标进行裁剪,以下是前端的裁剪路径绘制的代码示例,后端可以根据当前的获取到的坐标进行裁剪,裁剪的坐标保存在coordinate数组中。
代码
<!DOCTYPE html>
<html>
<body>
<canvas id="myCanvas" style="border:1px solid #d3d3d3;">
Your browser does not support the HTML5 canvas tag.
</canvas>
<script>
var canvas = document.getElementById("myCanvas");
var ctx = canvas.getContext("2d");
var img = new Image();

img.onload = function() {
    canvas.width = img.width;
    canvas.height = img.height;
    ctx.drawImage(img, 0, 0, img.width, img.height);
}
img.src = 'https://img0.baidu.com/it/u=2604378473,1820239902&fm=253&fmt=auto&app=120&f=JPEG?w=627&h=418';

var x = 0;
var y = 0;
var coordinate = []
canvas.onmousemove = function(e) {
    handleClearCanvas();
    handleMouseMove(e);
    handleClickShape();
}

// 点击获取坐标
canvas.onclick = function(e) {
    coordinate.push({
        x: x,
        y: y
    })
}

canvas.ondblclick = function(e) {
    handleClearCanvas();
    coordinate = [];
}

// 清理画布
function handleClearCanvas() {
    ctx.clearRect(0, 0, canvas.width, canvas.height);
    ctx.drawImage(img, 0, 0, img.width, img.height);
}

// 移动光标时的线
function handleMouseMove(e) {
    x = e.clientX - canvas.offsetLeft;
    y = e.clientY - canvas.offsetTop;

    ctx.beginPath()
    ctx.moveTo(x, 0);
    ctx.lineTo(x, img.height);
    ctx.moveTo(0, y);
    ctx.lineTo(img.width, y);
    ctx.stroke();

    // 显示光标位置信息
    ctx.font = "15px Arial";
    ctx.fillStyle = "red";
    // 在canvas外显示光标位置
    ctx.fillText("(" + x + ", " + y + ")", 5, 30);
}

// 选择的线
function handleClickShape() {
    if (coordinate.length === 0){
        return
    }
    if (coordinate.length === 1) {
        const item = coordinate[0]
        ctx.fillText("☆", item.x, item.y);
        return
    }
    for (let index = 1 ; index < coordinate.length; index++){
        const prev = coordinate[index - 1]
        const next = coordinate[index]

        ctx.beginPath();
        ctx.moveTo(prev.x, prev.y);
        ctx.lineTo(next.x, next.y);
        ctx.stroke();
    }
}
</script>

</body>
</html>
结果
