系统的安装得分两个步骤,第一步得配置一台电脑,选配 cpu,内存,磁盘,网卡等硬
件。第二步才是安装系统。
一、配置电脑
1、 进入 VMware
双击
VMware
图标,看到如下界面。

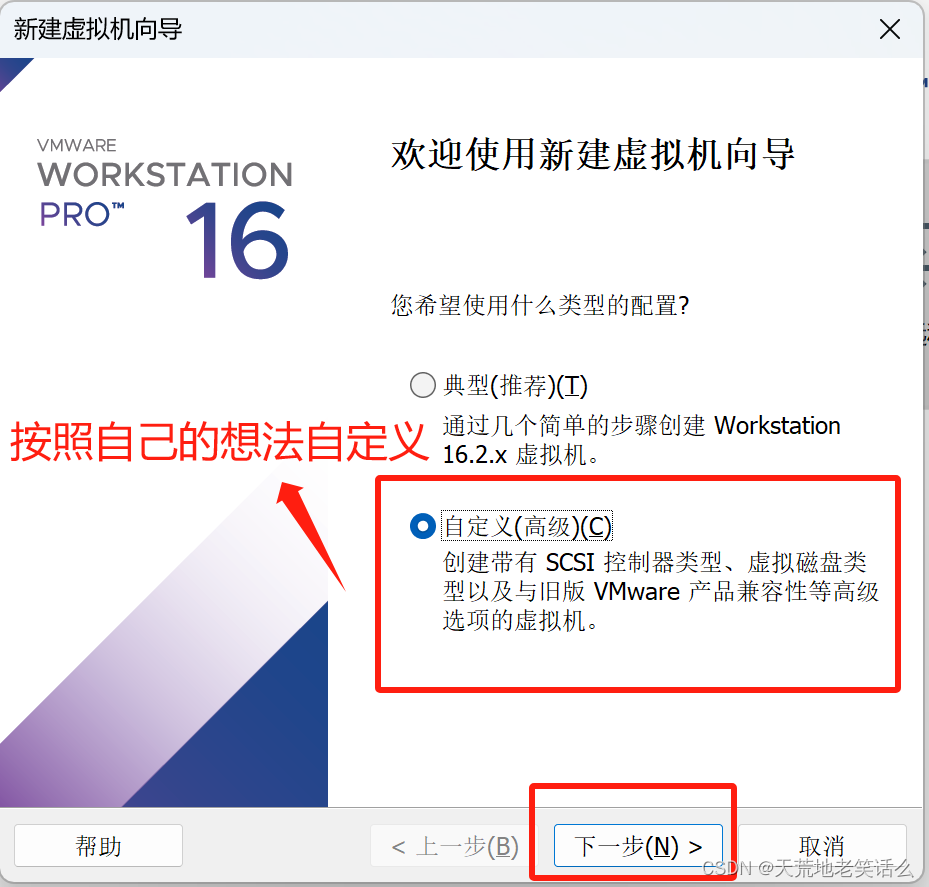
2、 自定义新的虚拟机
3、 解决虚拟机的兼容性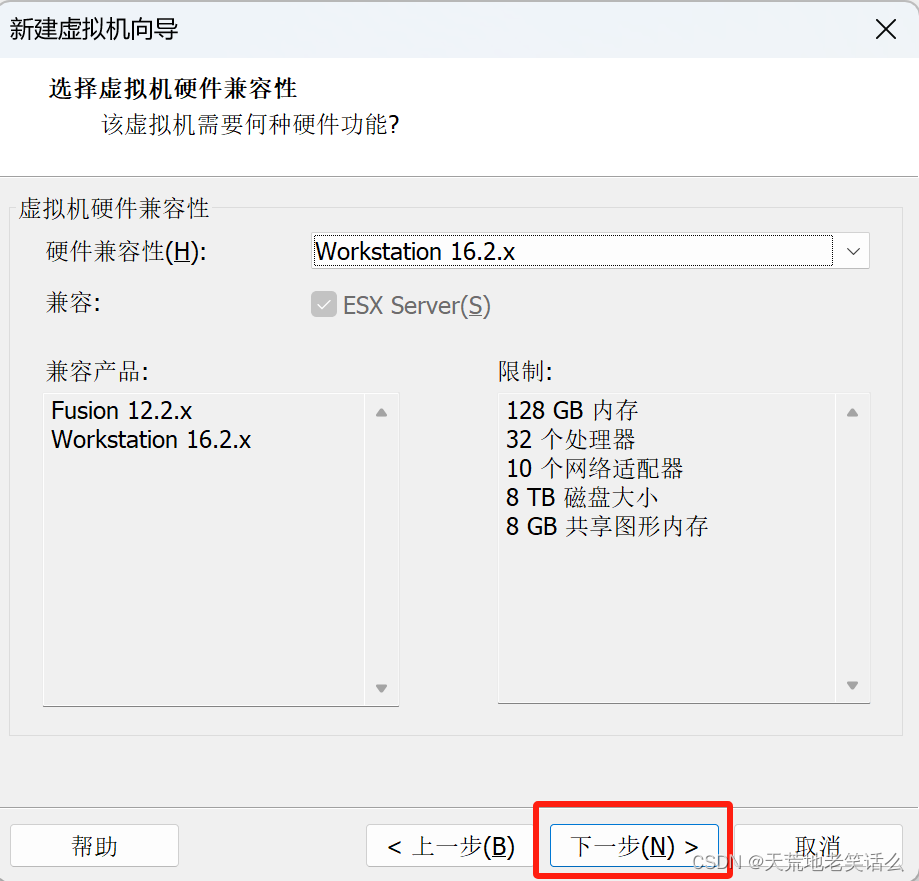
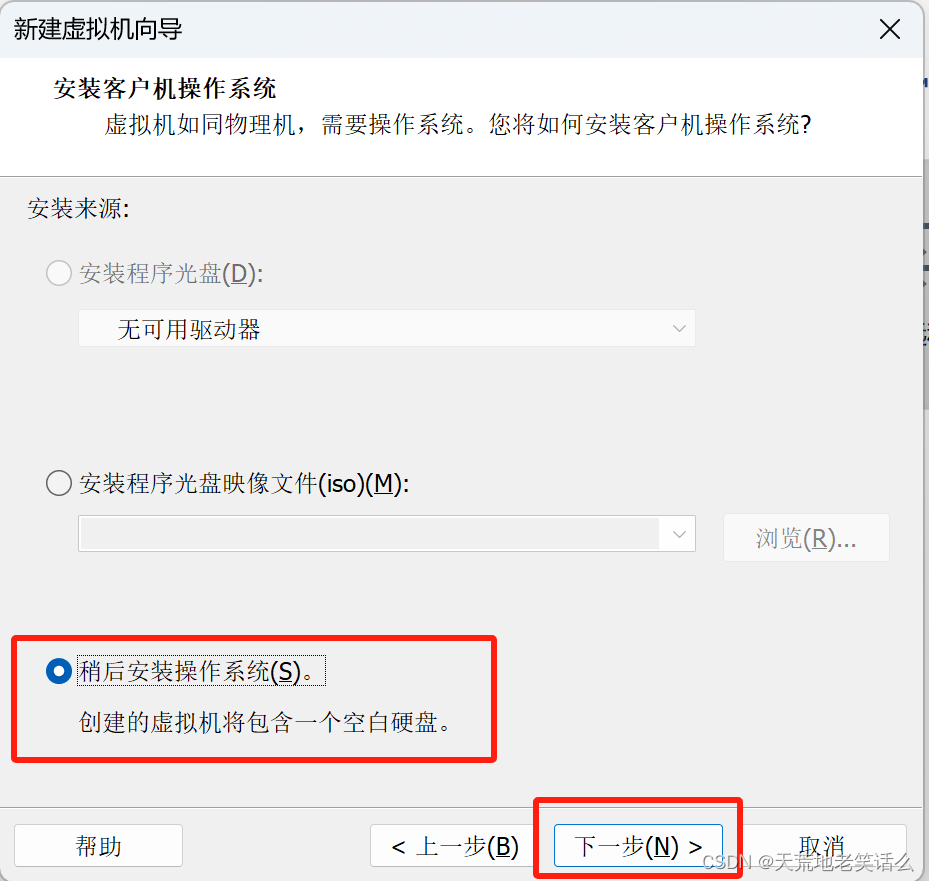
4 、选择当前虚拟机的操作系统
我们先配置电脑,再安装系统。
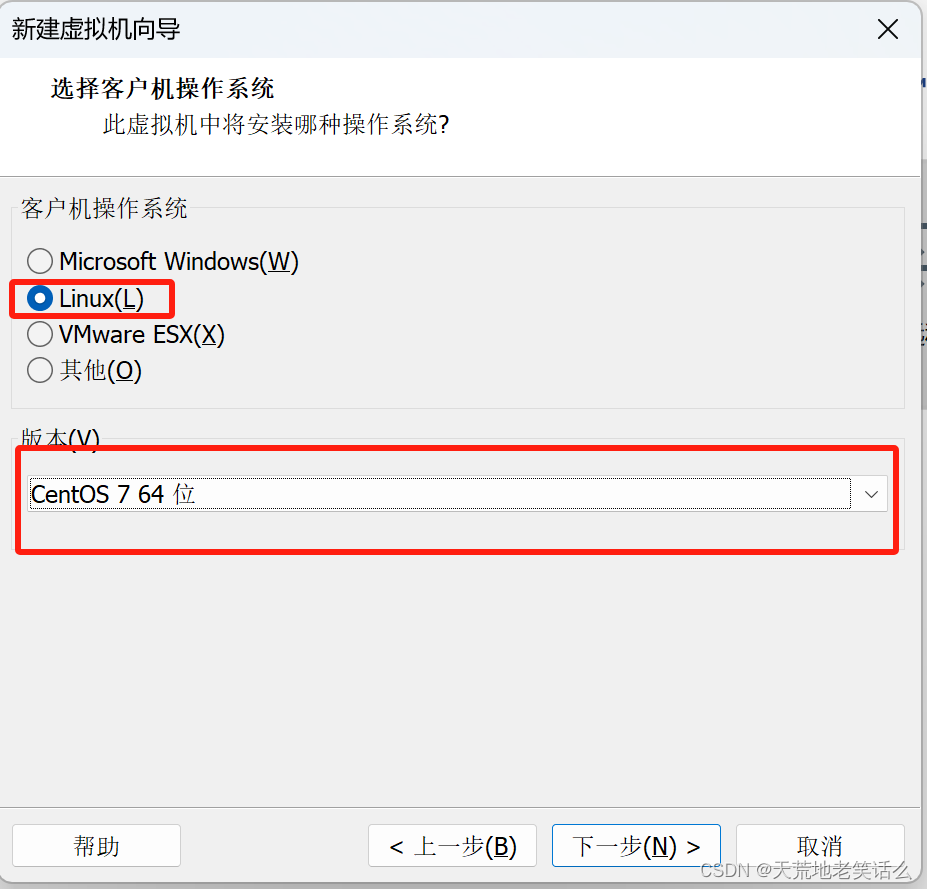
5、 选择虚拟机将来需要安装的系统
因为不同的操作系统需要解决不同的兼容性问题,所以需要选择将来用什么系统,提前
做适配。
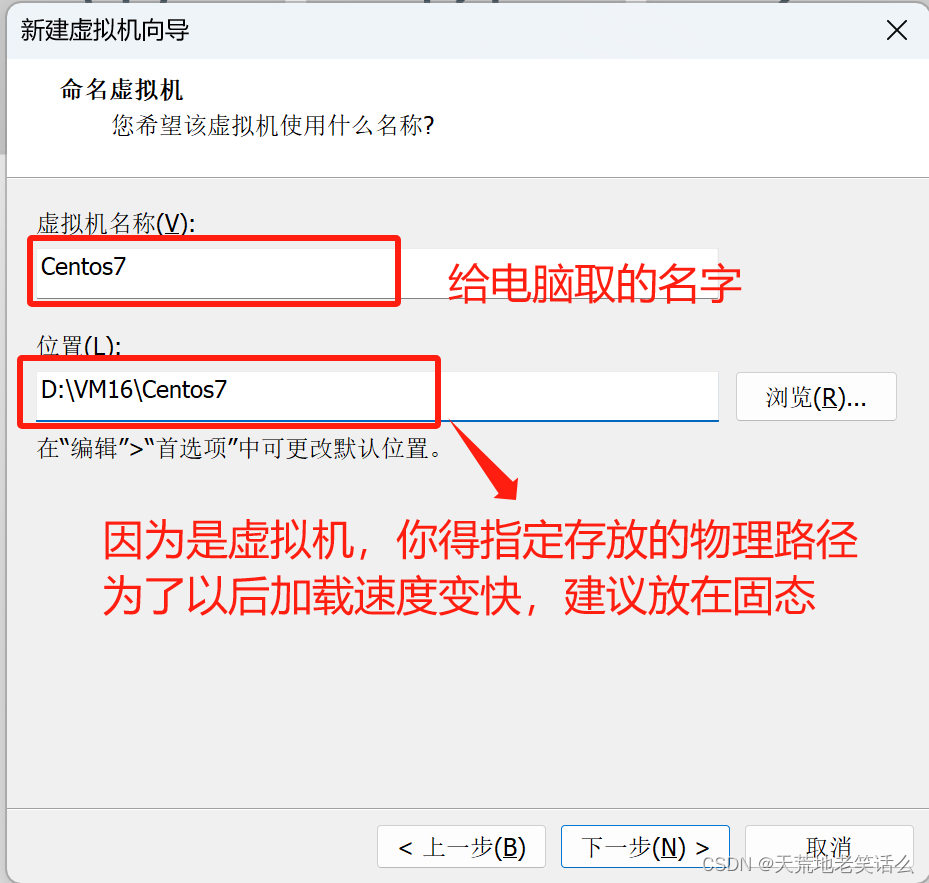
6、 配置电脑
给自己配置电脑取个名字,并存放在物理机的位置在哪。
7、 选择 CPU 的个数
设置虚拟机处理器的数量
有个原则就是选满(跟物理机的 CPU 个数相同,但是不能超过)。
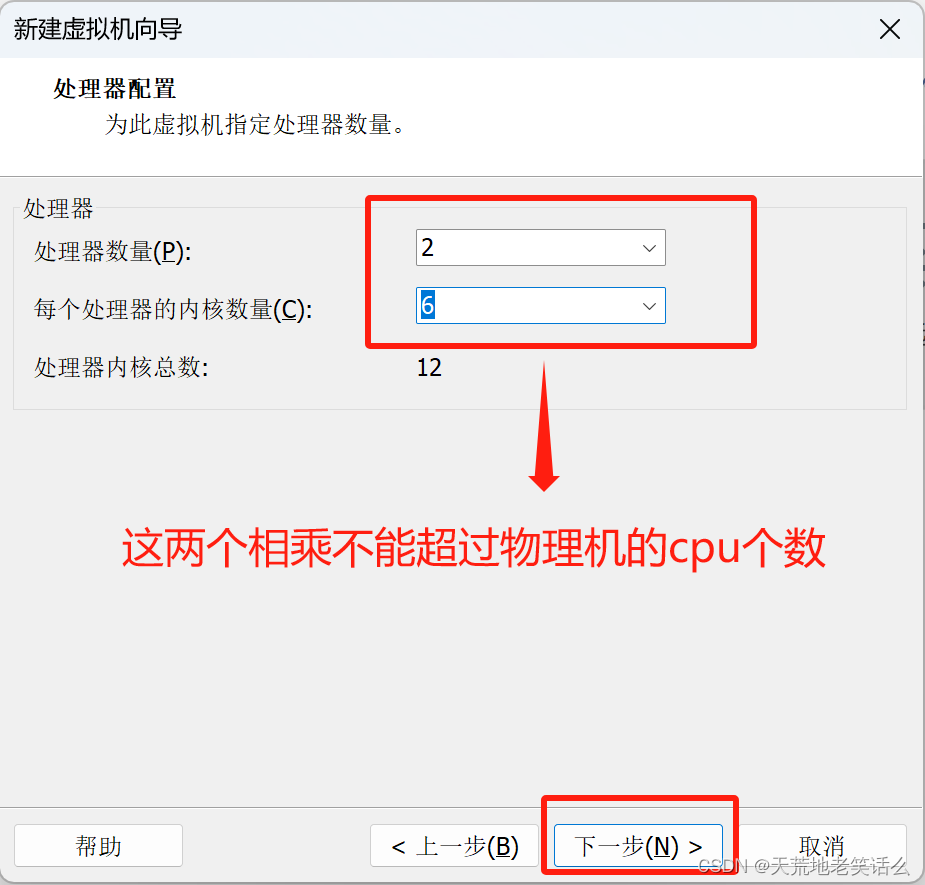
1
) 查看物理机
CPU
个数(
windows10
为例)
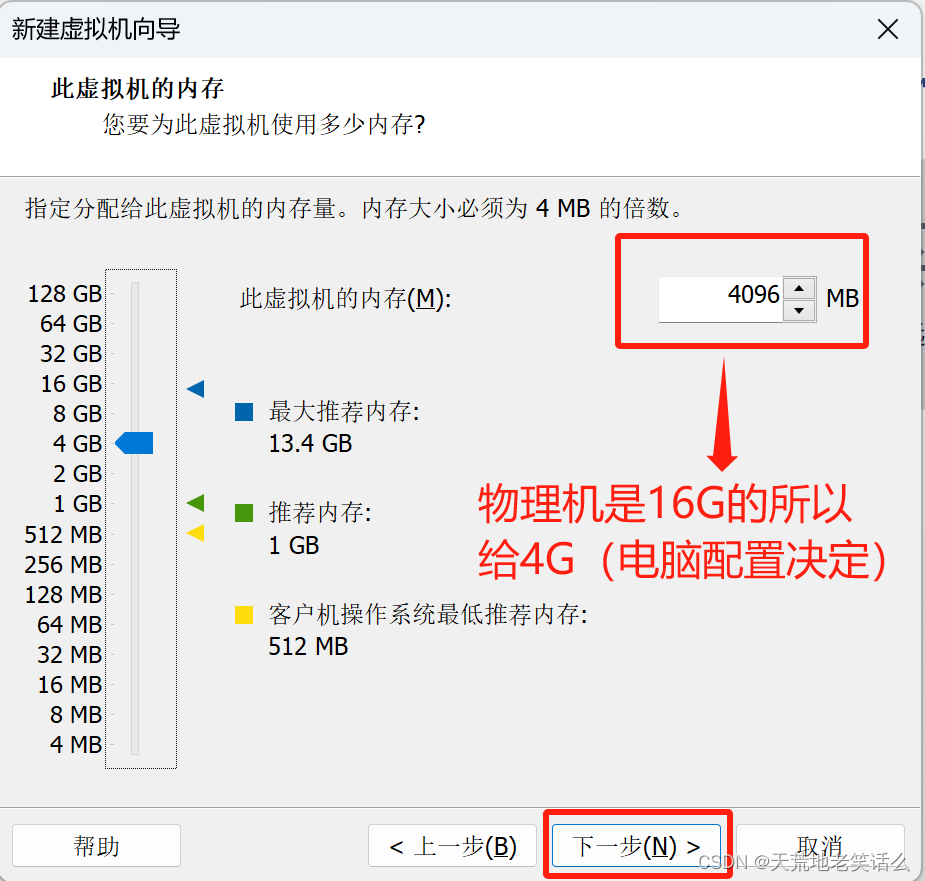
8、 设置虚拟机的内存
内存大小有一定要求,建议 4g,不能给太多,后期会有多台虚拟机同时启动。
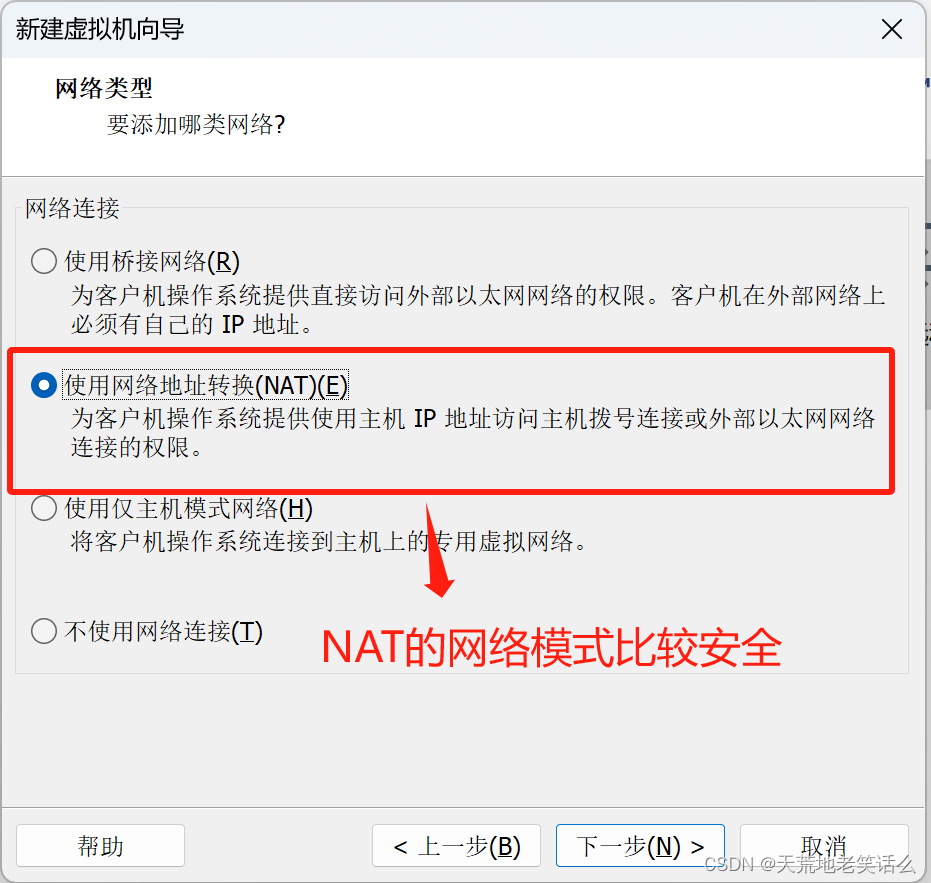
1
) 选择 NAT 的方式
2
)没有
VMware
之前物理机的网络适配器信息(每个人不同,我只有
3
个)
3
)安装
VMware
之后物理机的网络适配器信息(会多两个
vmnet1
和
vmnet8
)
注:
vmnet8
是虚拟机使用
NAT
模式上网的网卡
9、选择对应的文件系统的 IO 方式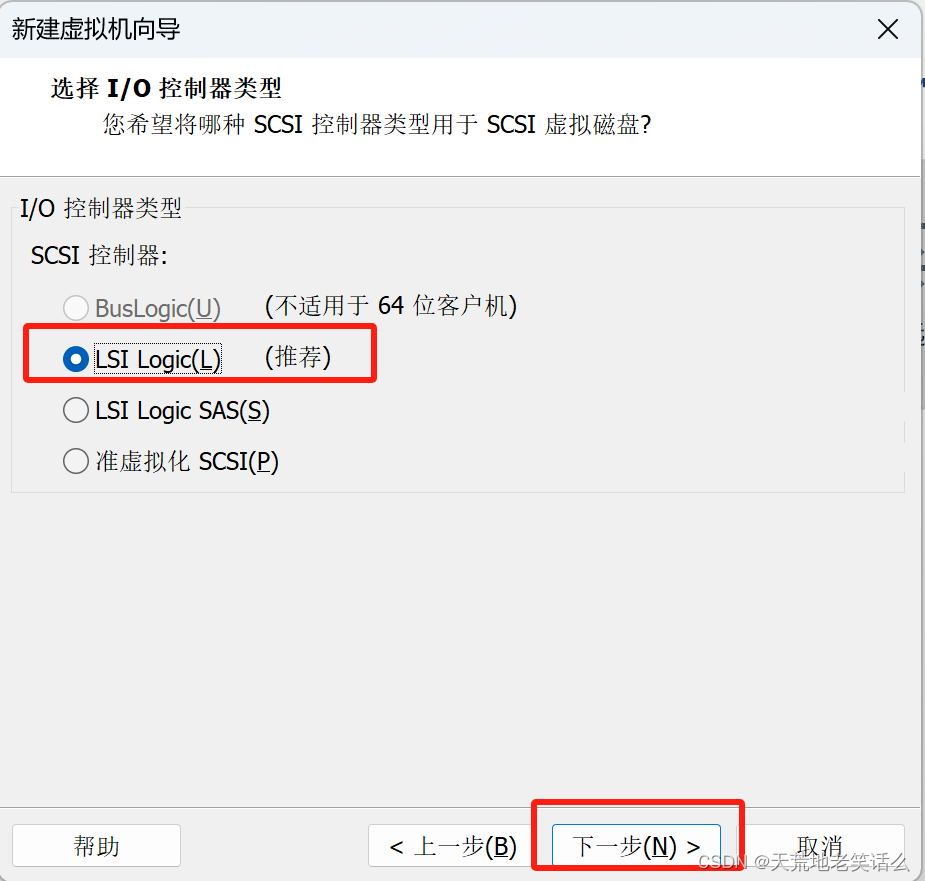
10、选择磁盘的类型

11、选择磁盘的种类
12、选择虚拟机的磁盘大小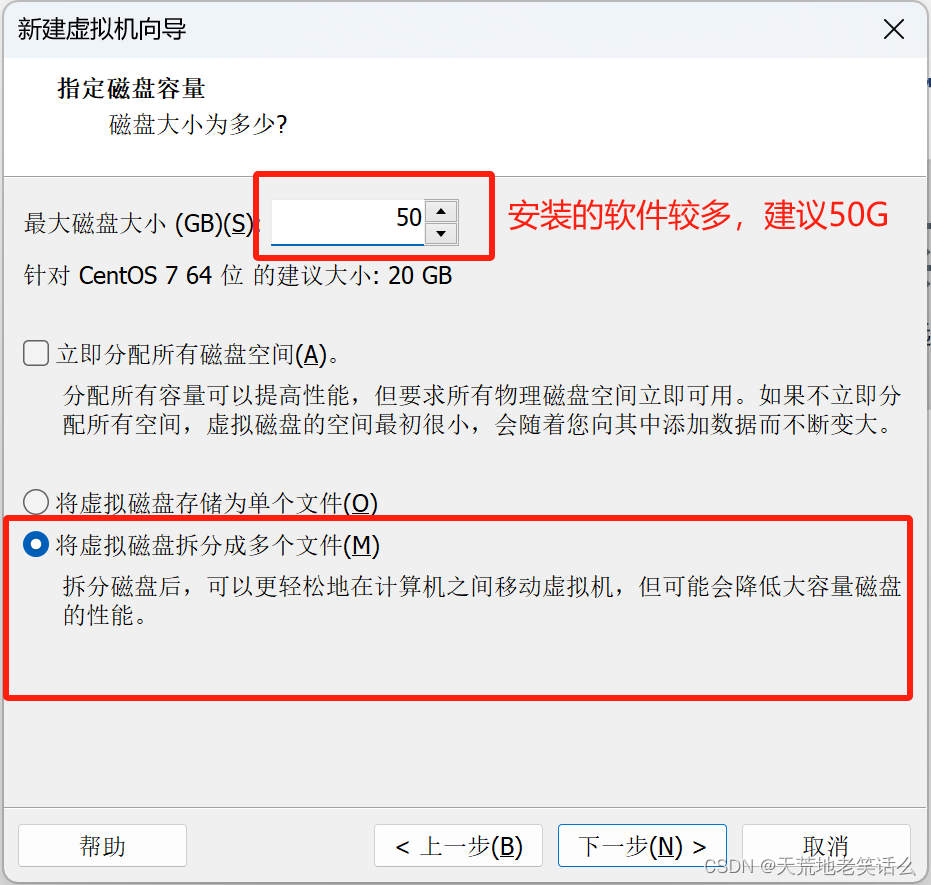
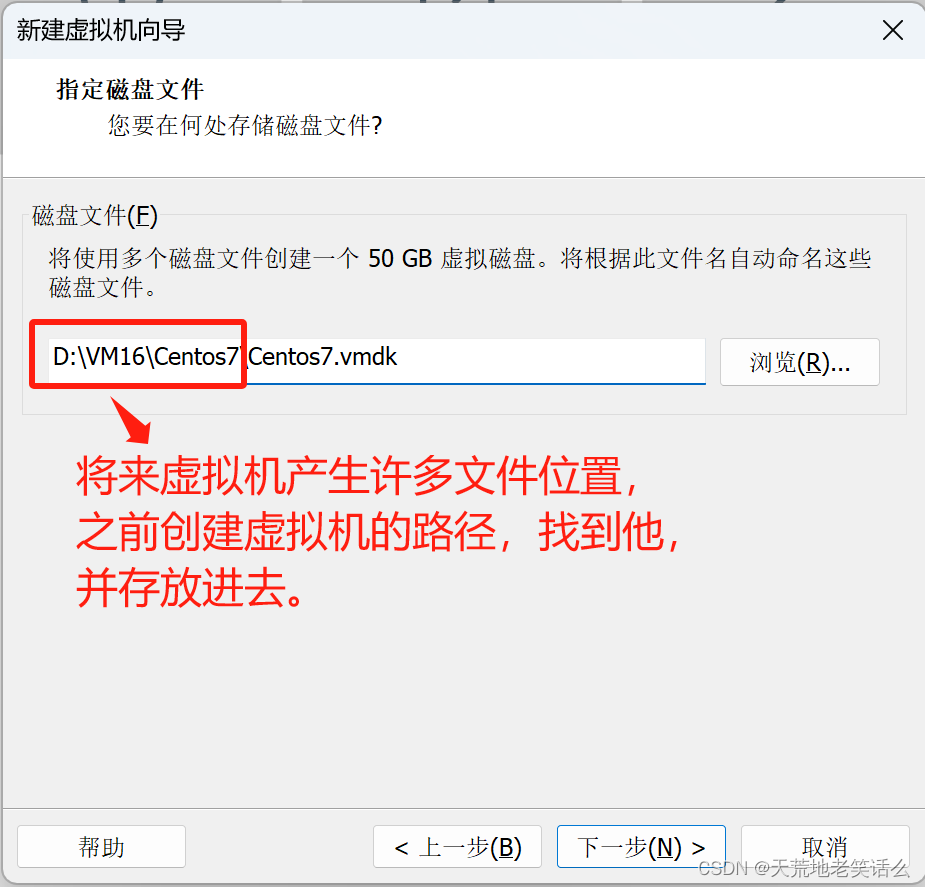
13、虚拟机文件的存放位置
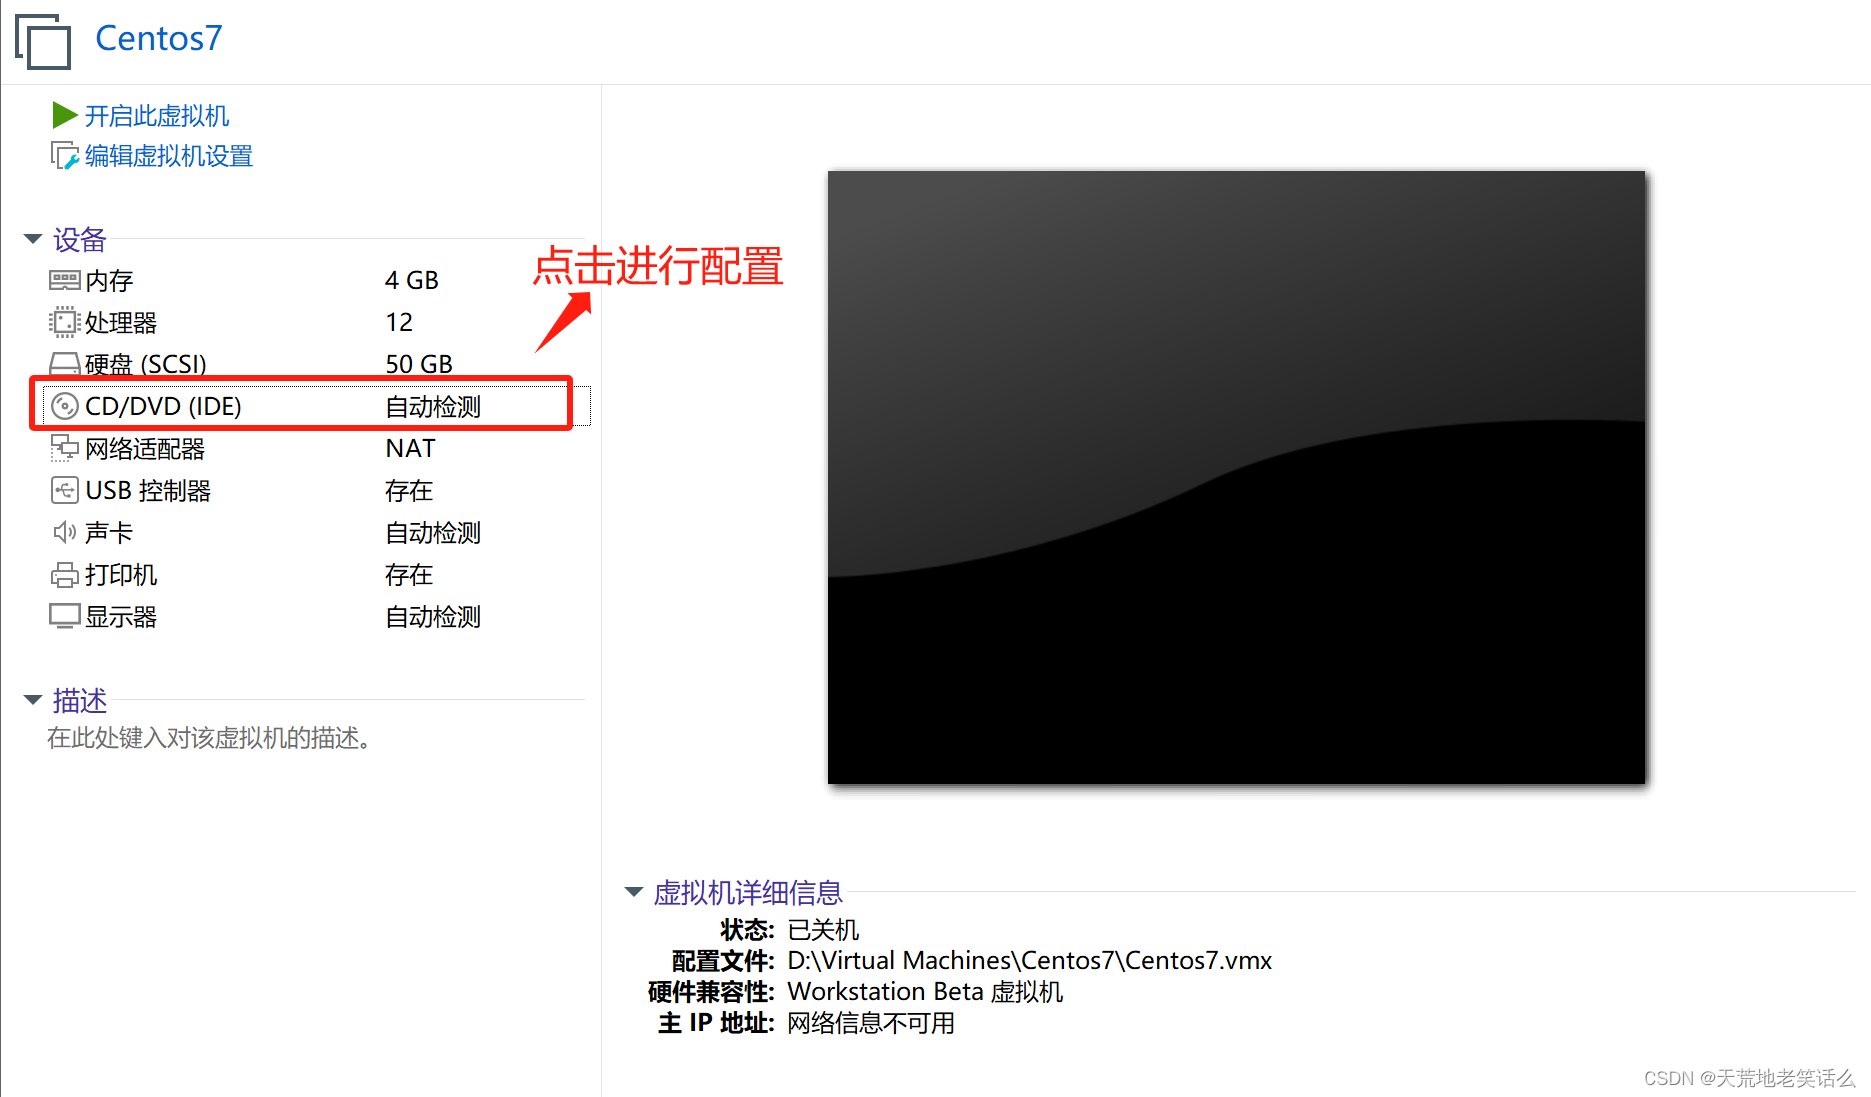
14、 电脑配置完毕

二、安装系统(CentOS7)
注:在安装系统之前需要检查自己
bios
的虚拟化设置是否打开(大部分的电脑都是打
开的,大家可以先尝试直接安装,如果出现错误再去调试,没有出错就不用管了)
以下是查看虚拟机
bios
是否开启的方式。
(
1
)
window10
(
2
)
window7
里面看不到(得去
bios
里面看)
(
3
)如果发现
bios
虚拟化没有开启怎么办,重启电脑,在加载界面时按
f1-f10,
或者电
脑旁边一个小洞,具体怎么进入得去查一下(按照自己电脑的型号去查)
(
4
)修改虚拟化为开启(
thinkpad
为例)找到
security
里面的
VT
并改成
enabled
注:如果虚拟化没有开启报的是以下错误。
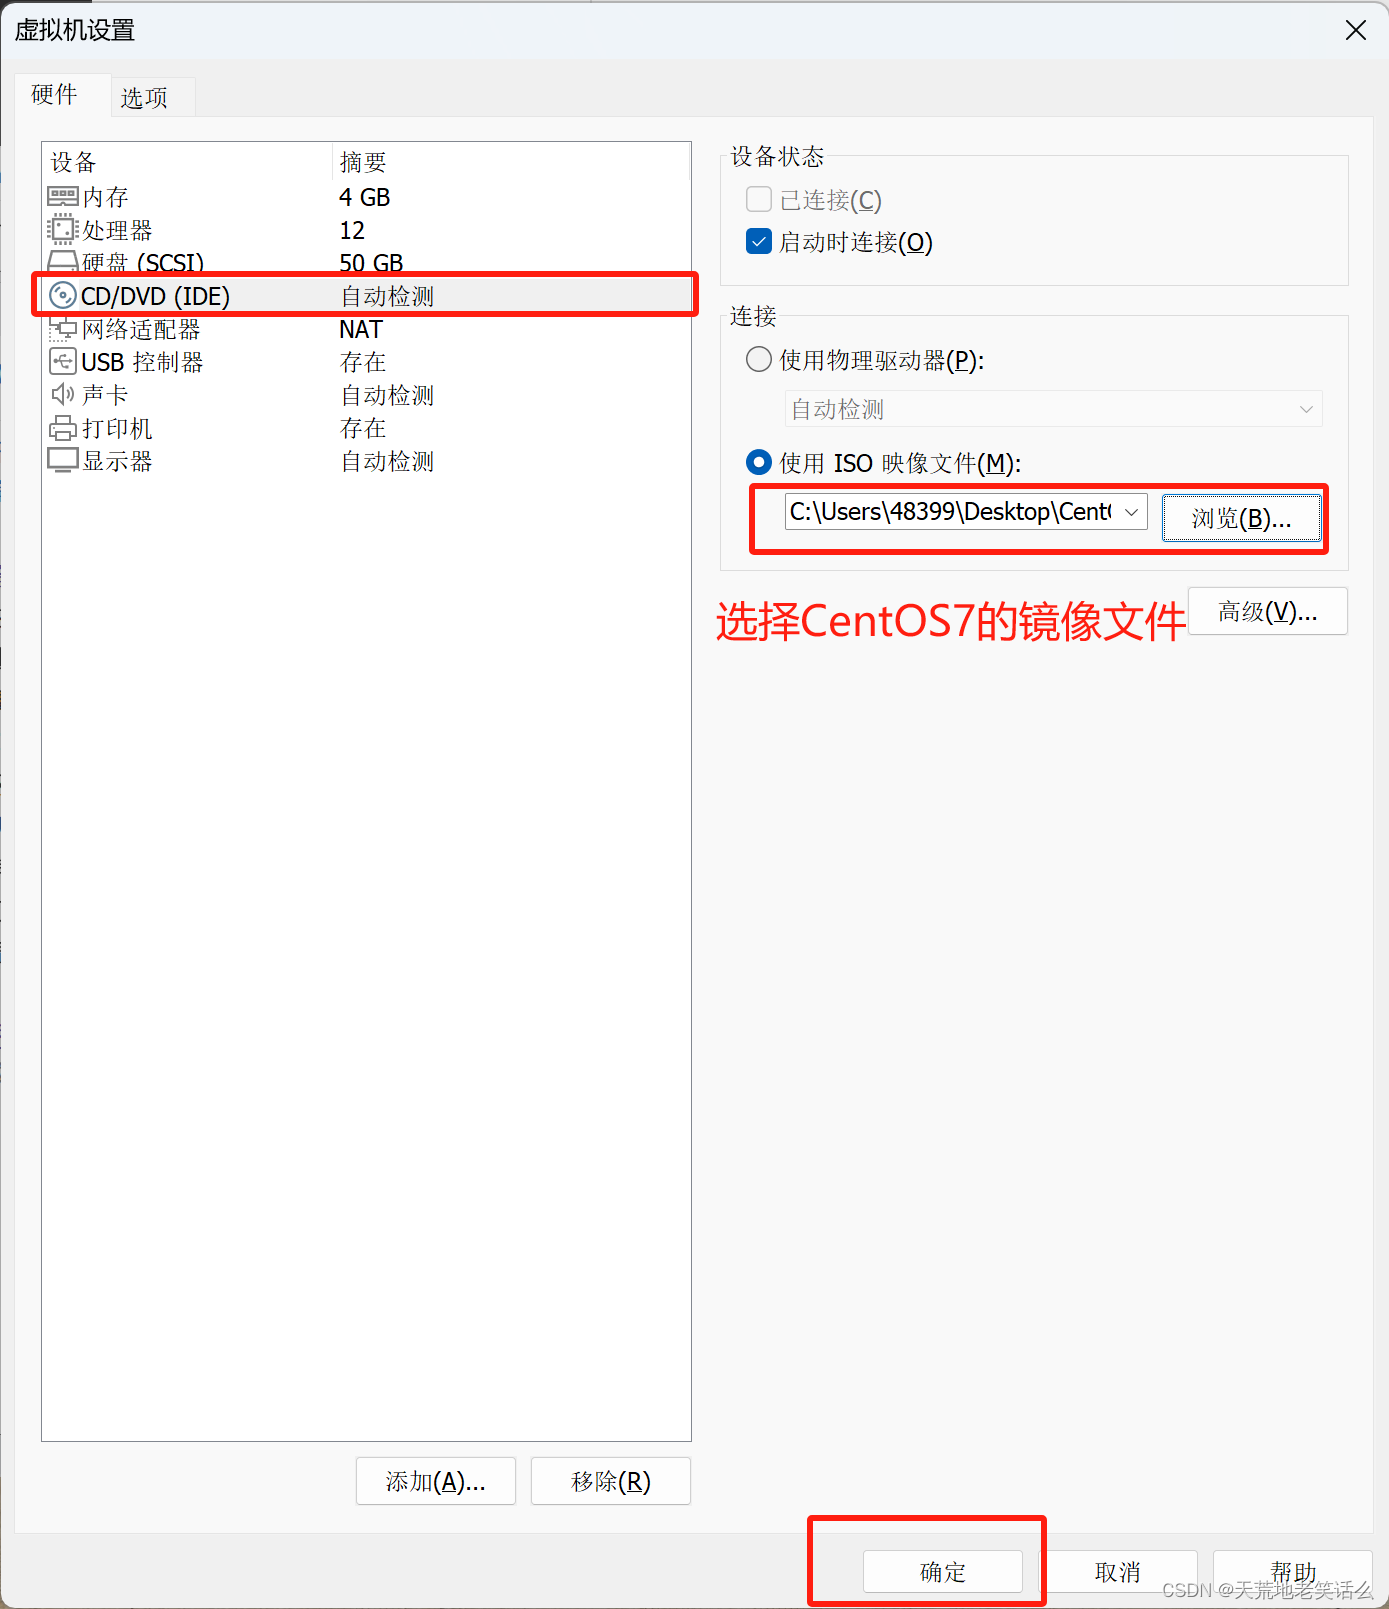
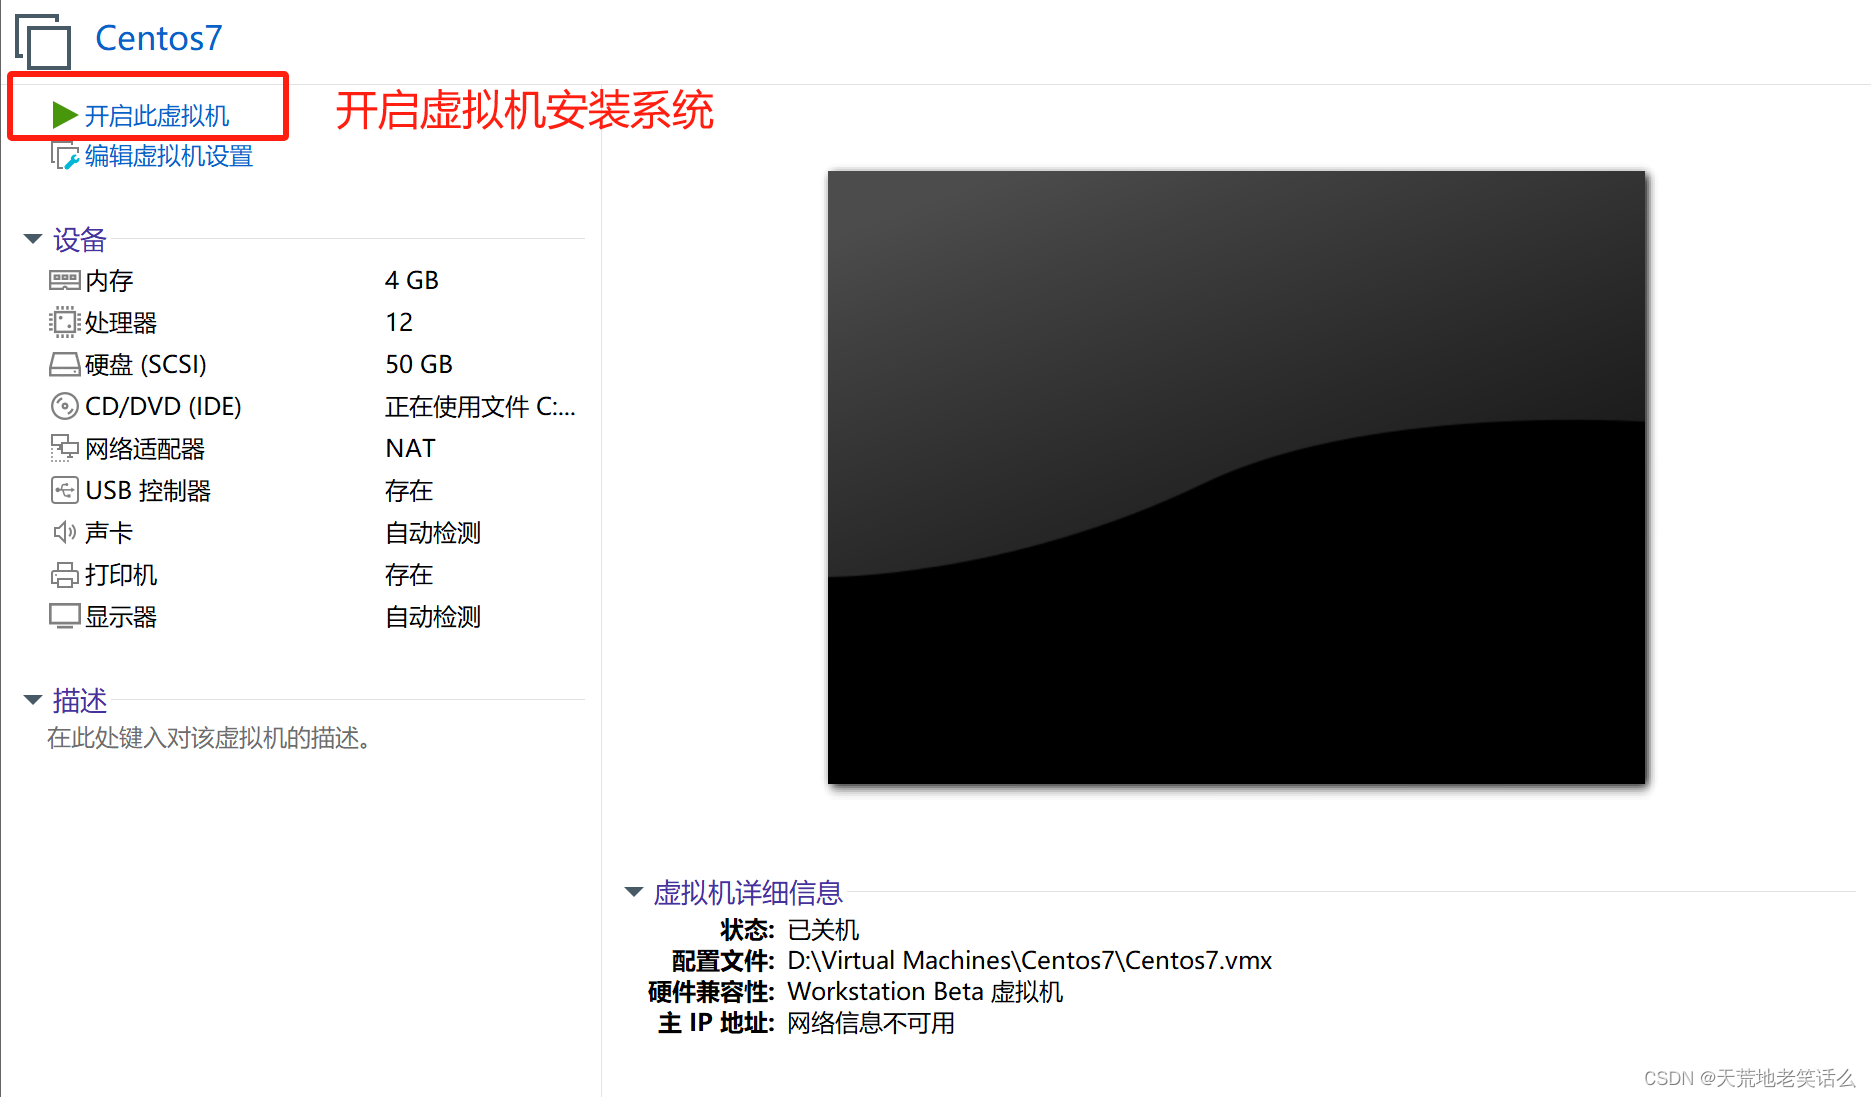
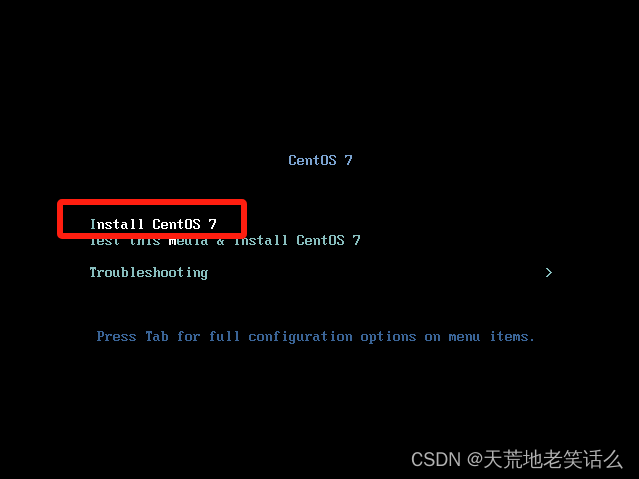
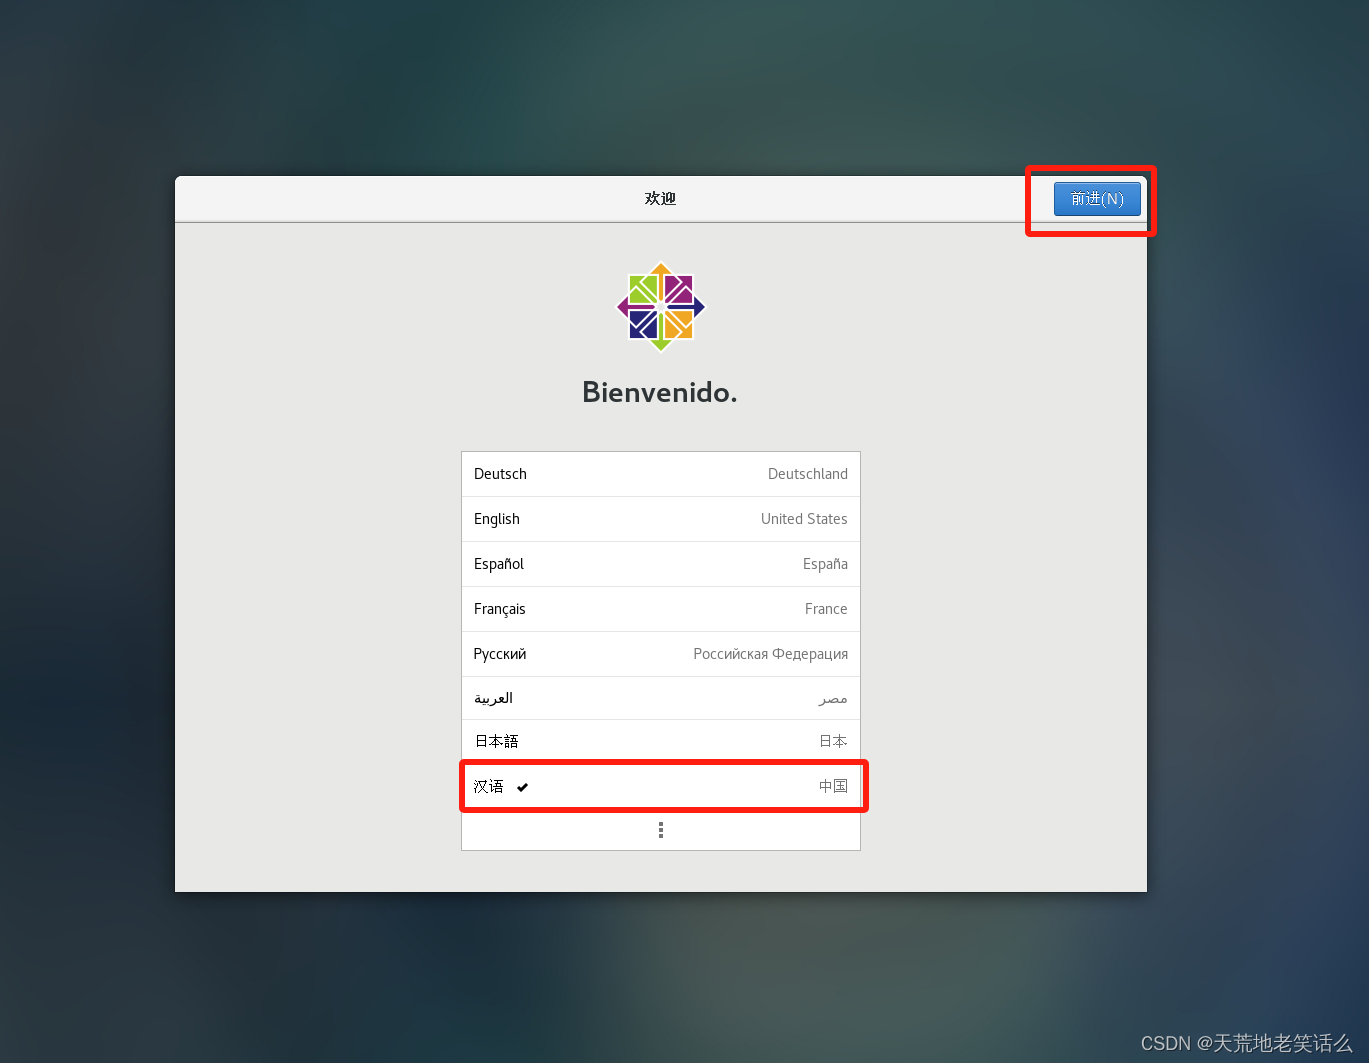
1、 选择 cd/dvd 的方式安装系统
2、 系统安装引导界面
你得需要将鼠标点击进入界面中,但是鼠标会消失,你此刻得用键盘的上下键来控制选
项,图标变白了表示当前选中的是哪个选项,然后敲回车,表示执行所选选项。
注:如果这个时候你需要鼠标可以使用 ctrl+alt 一起按呼出鼠标。
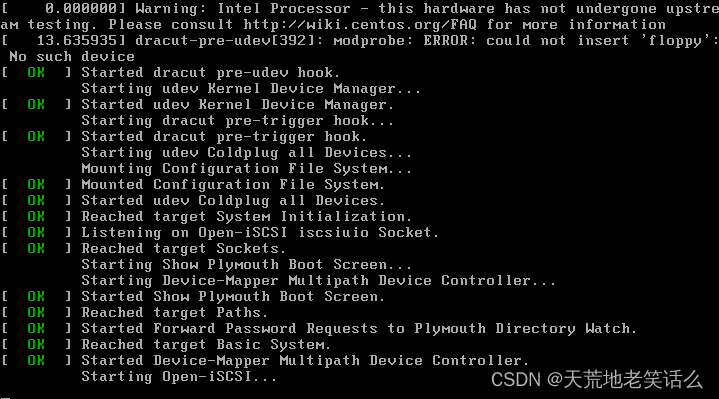
耐心等待它的安装。
会自动跳转下面的界面。
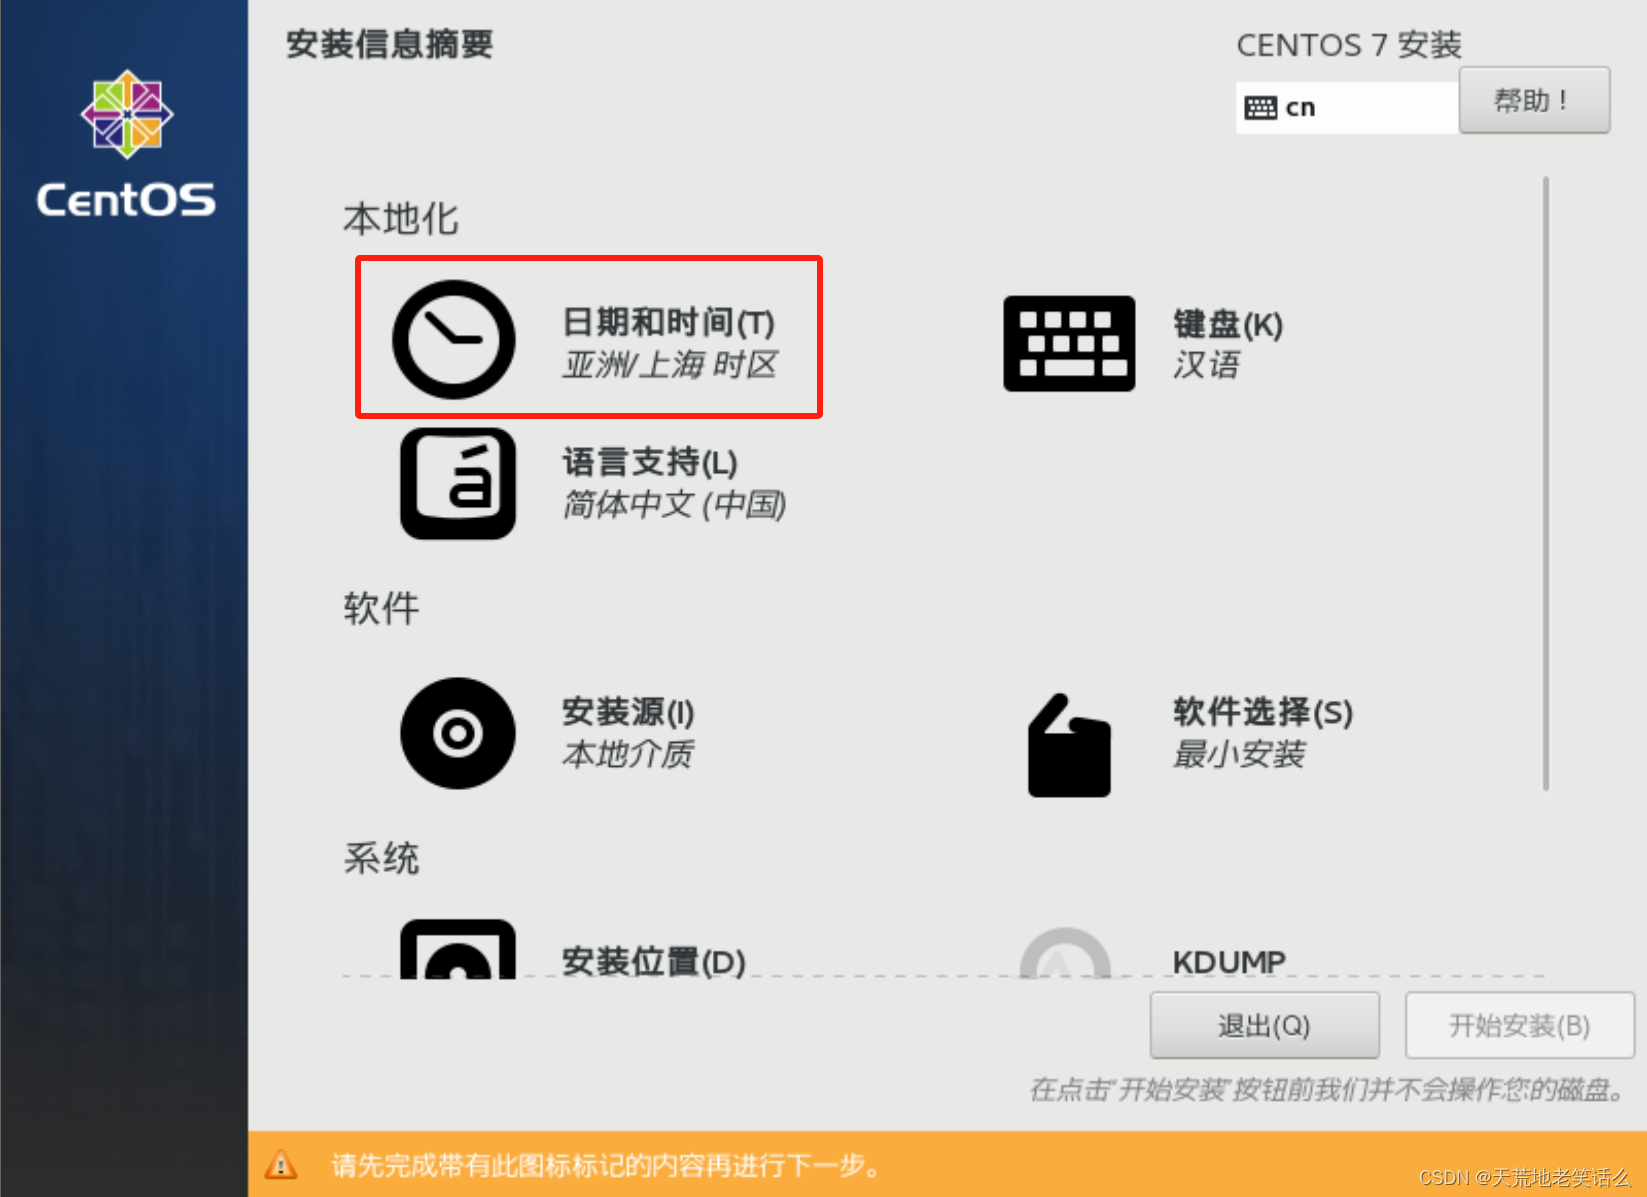
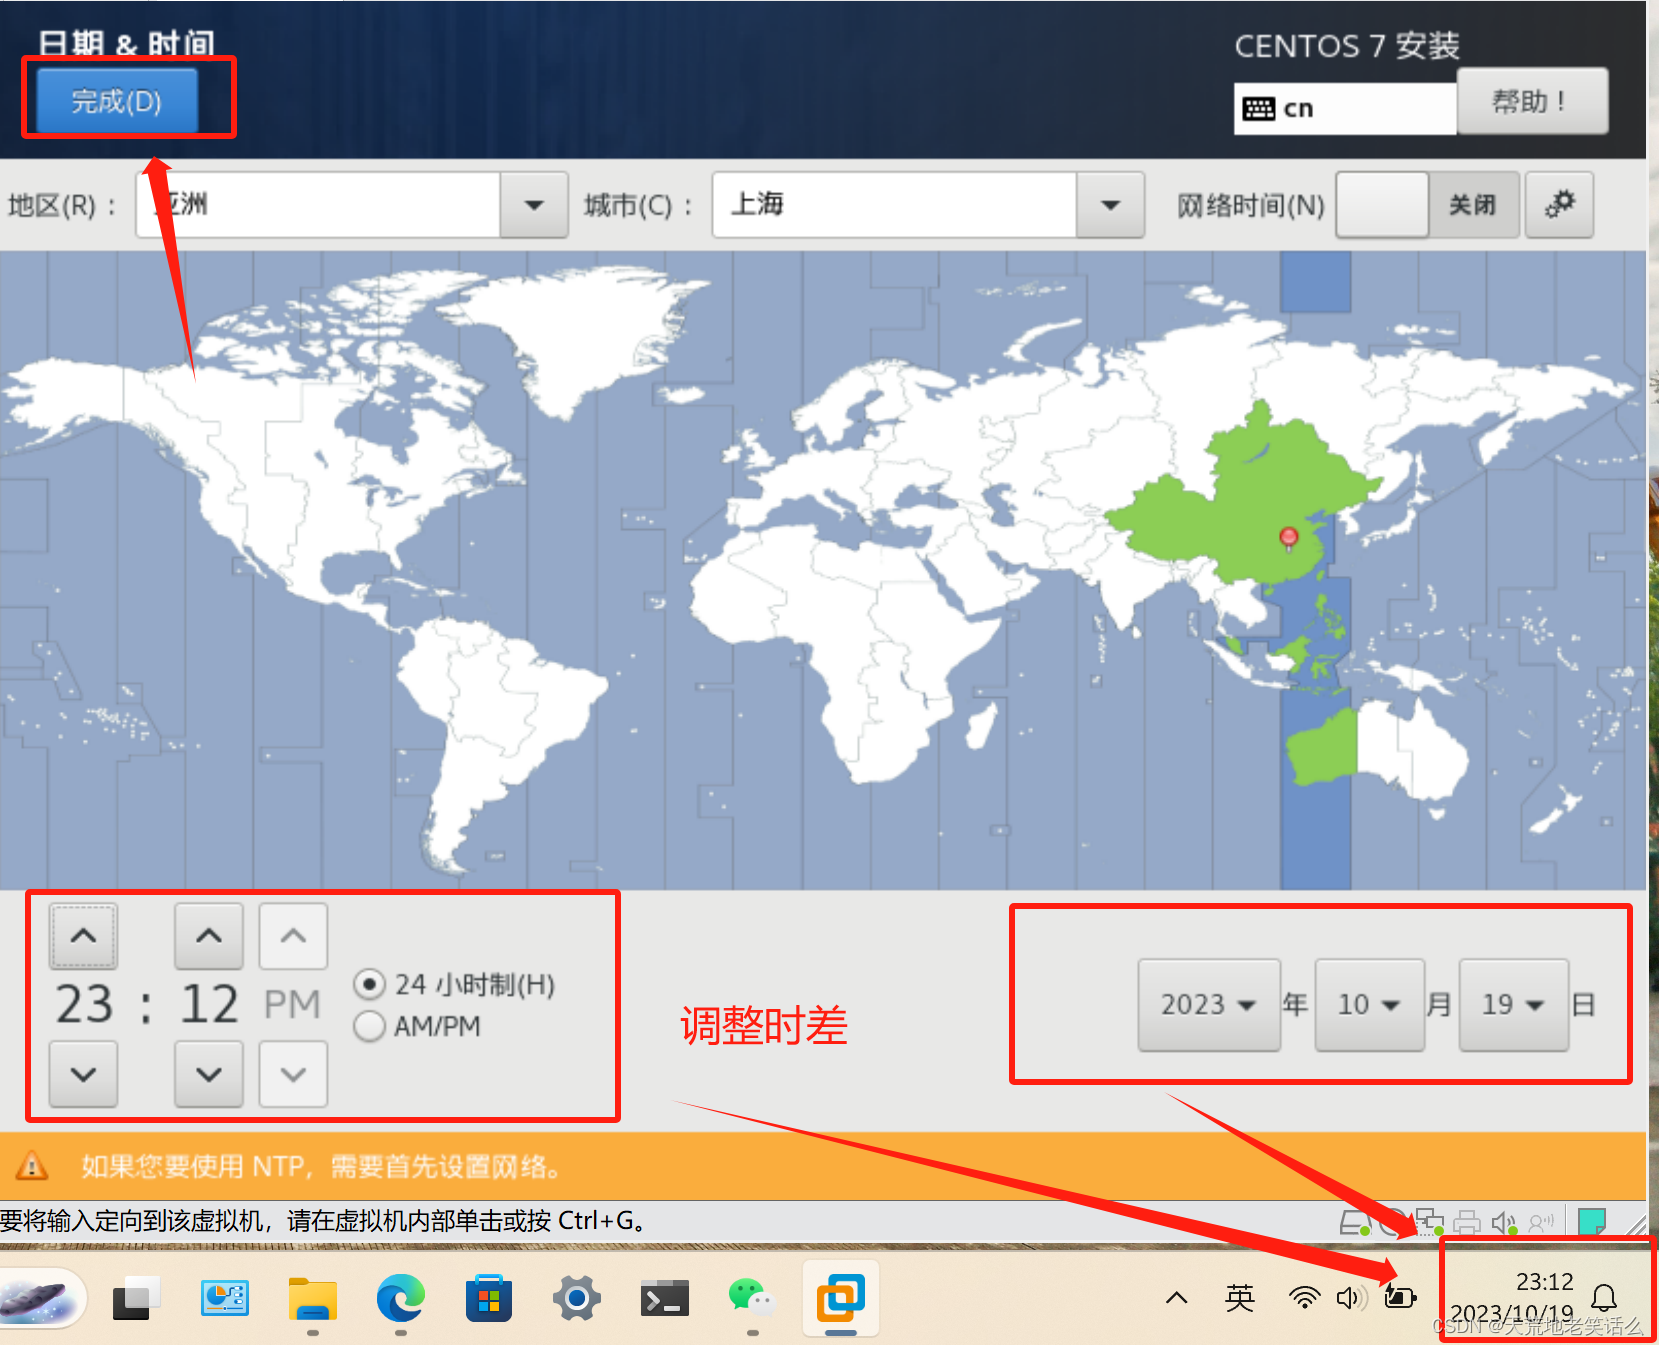
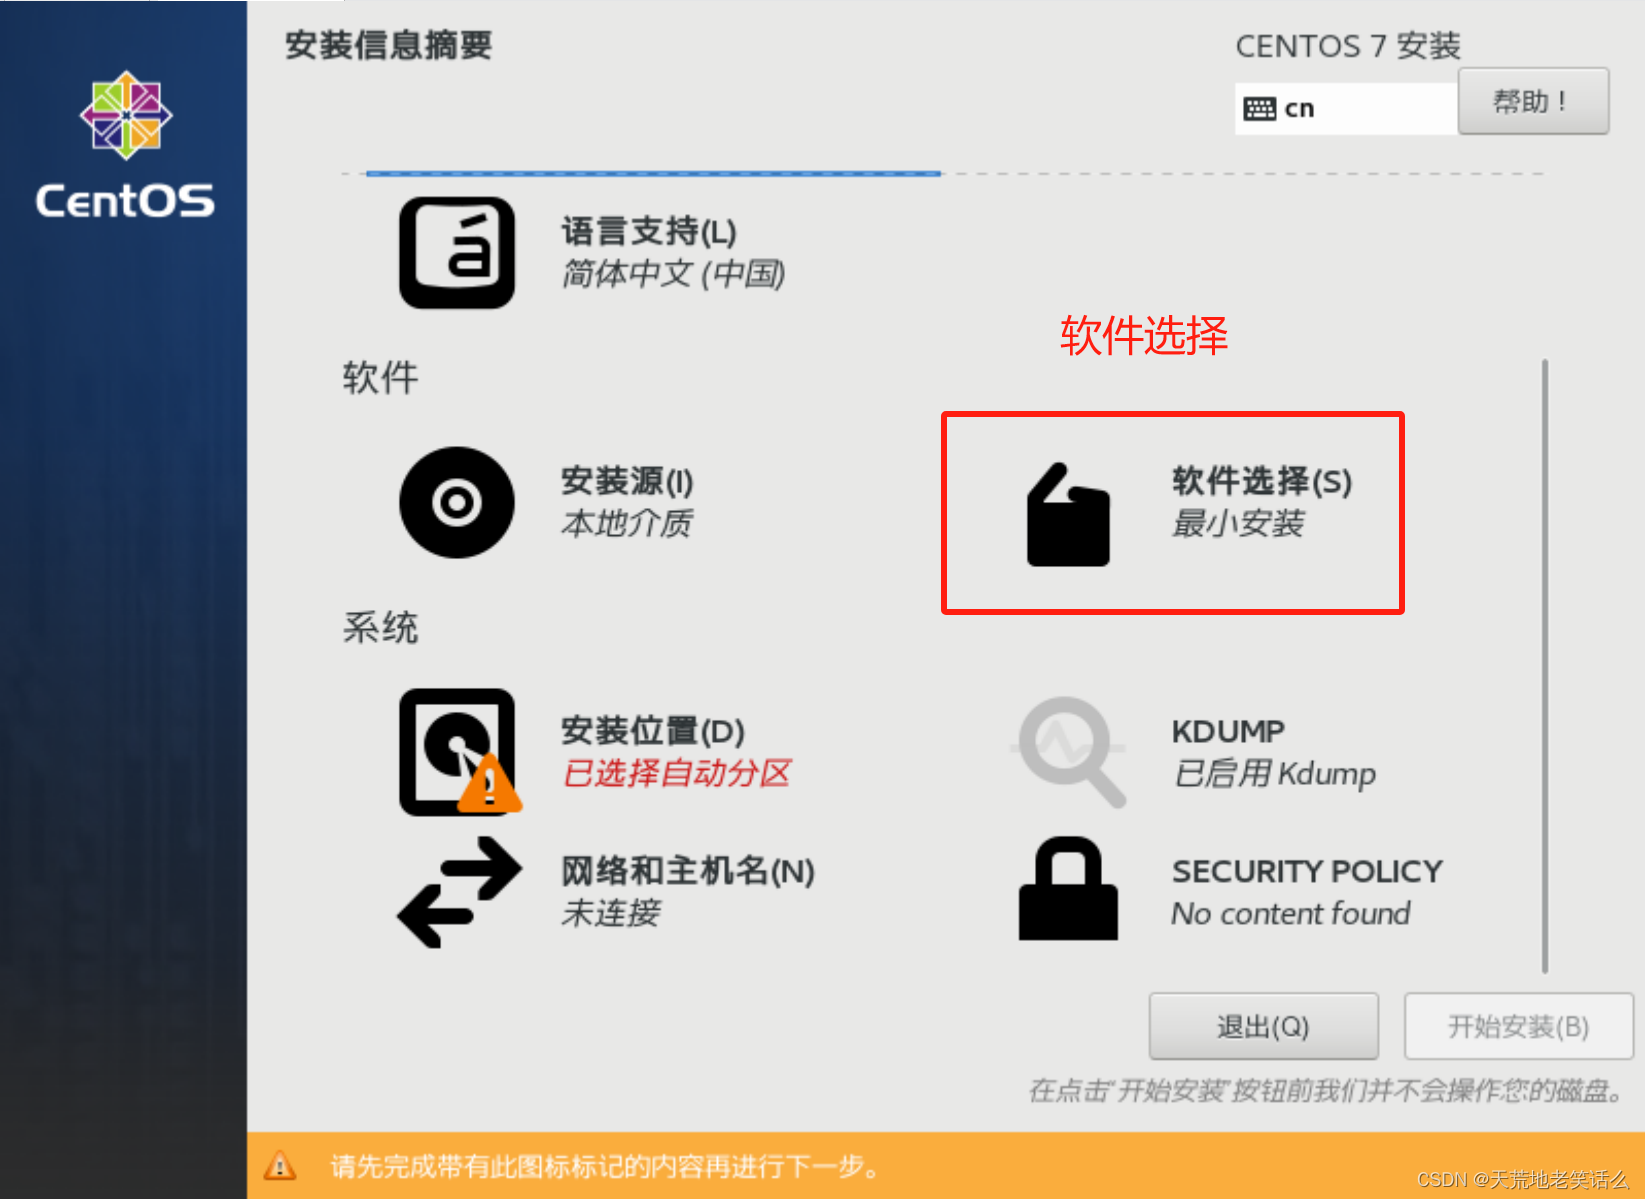
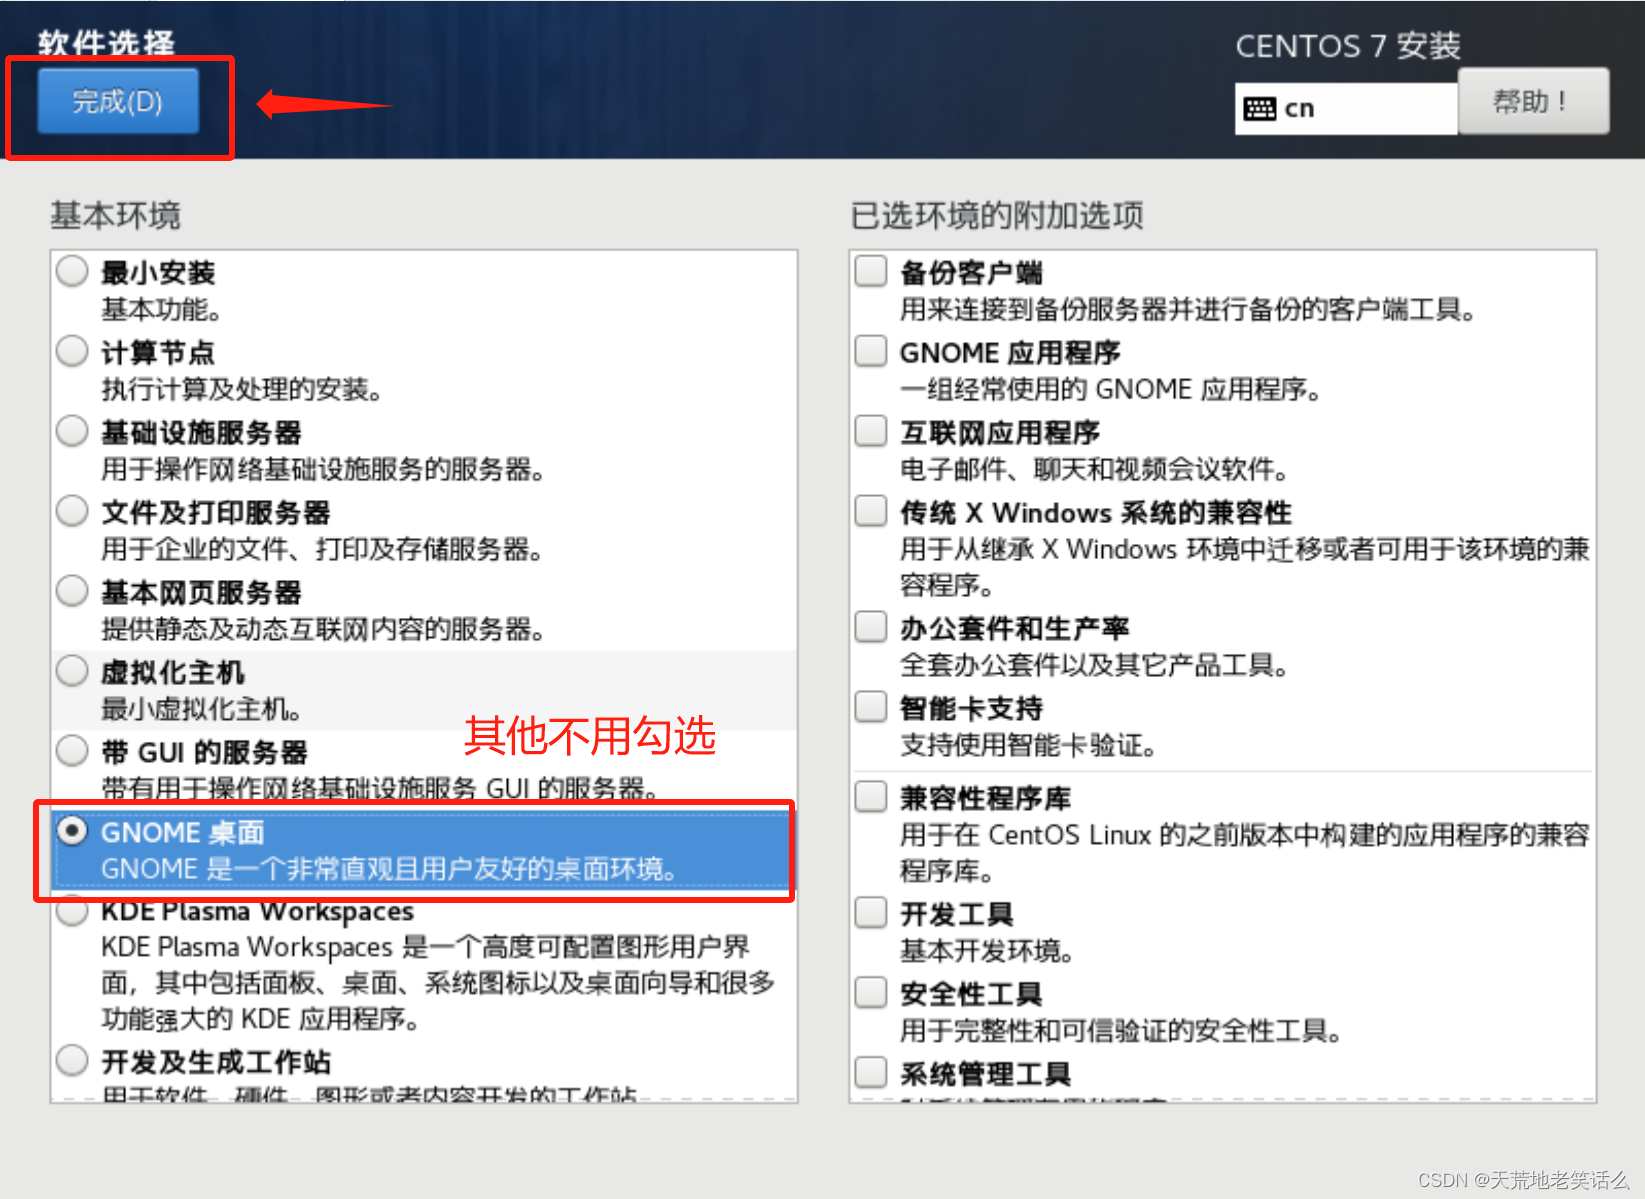
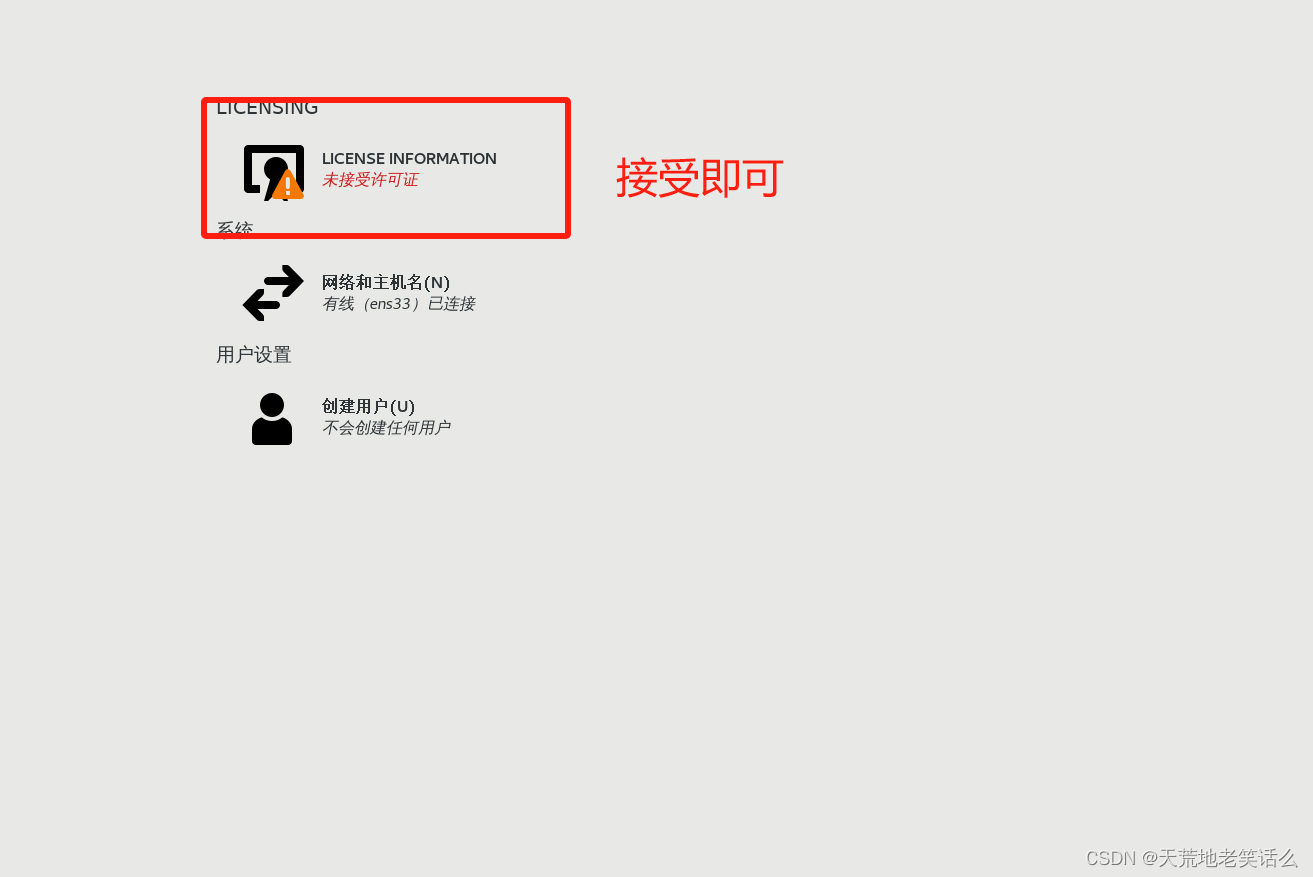
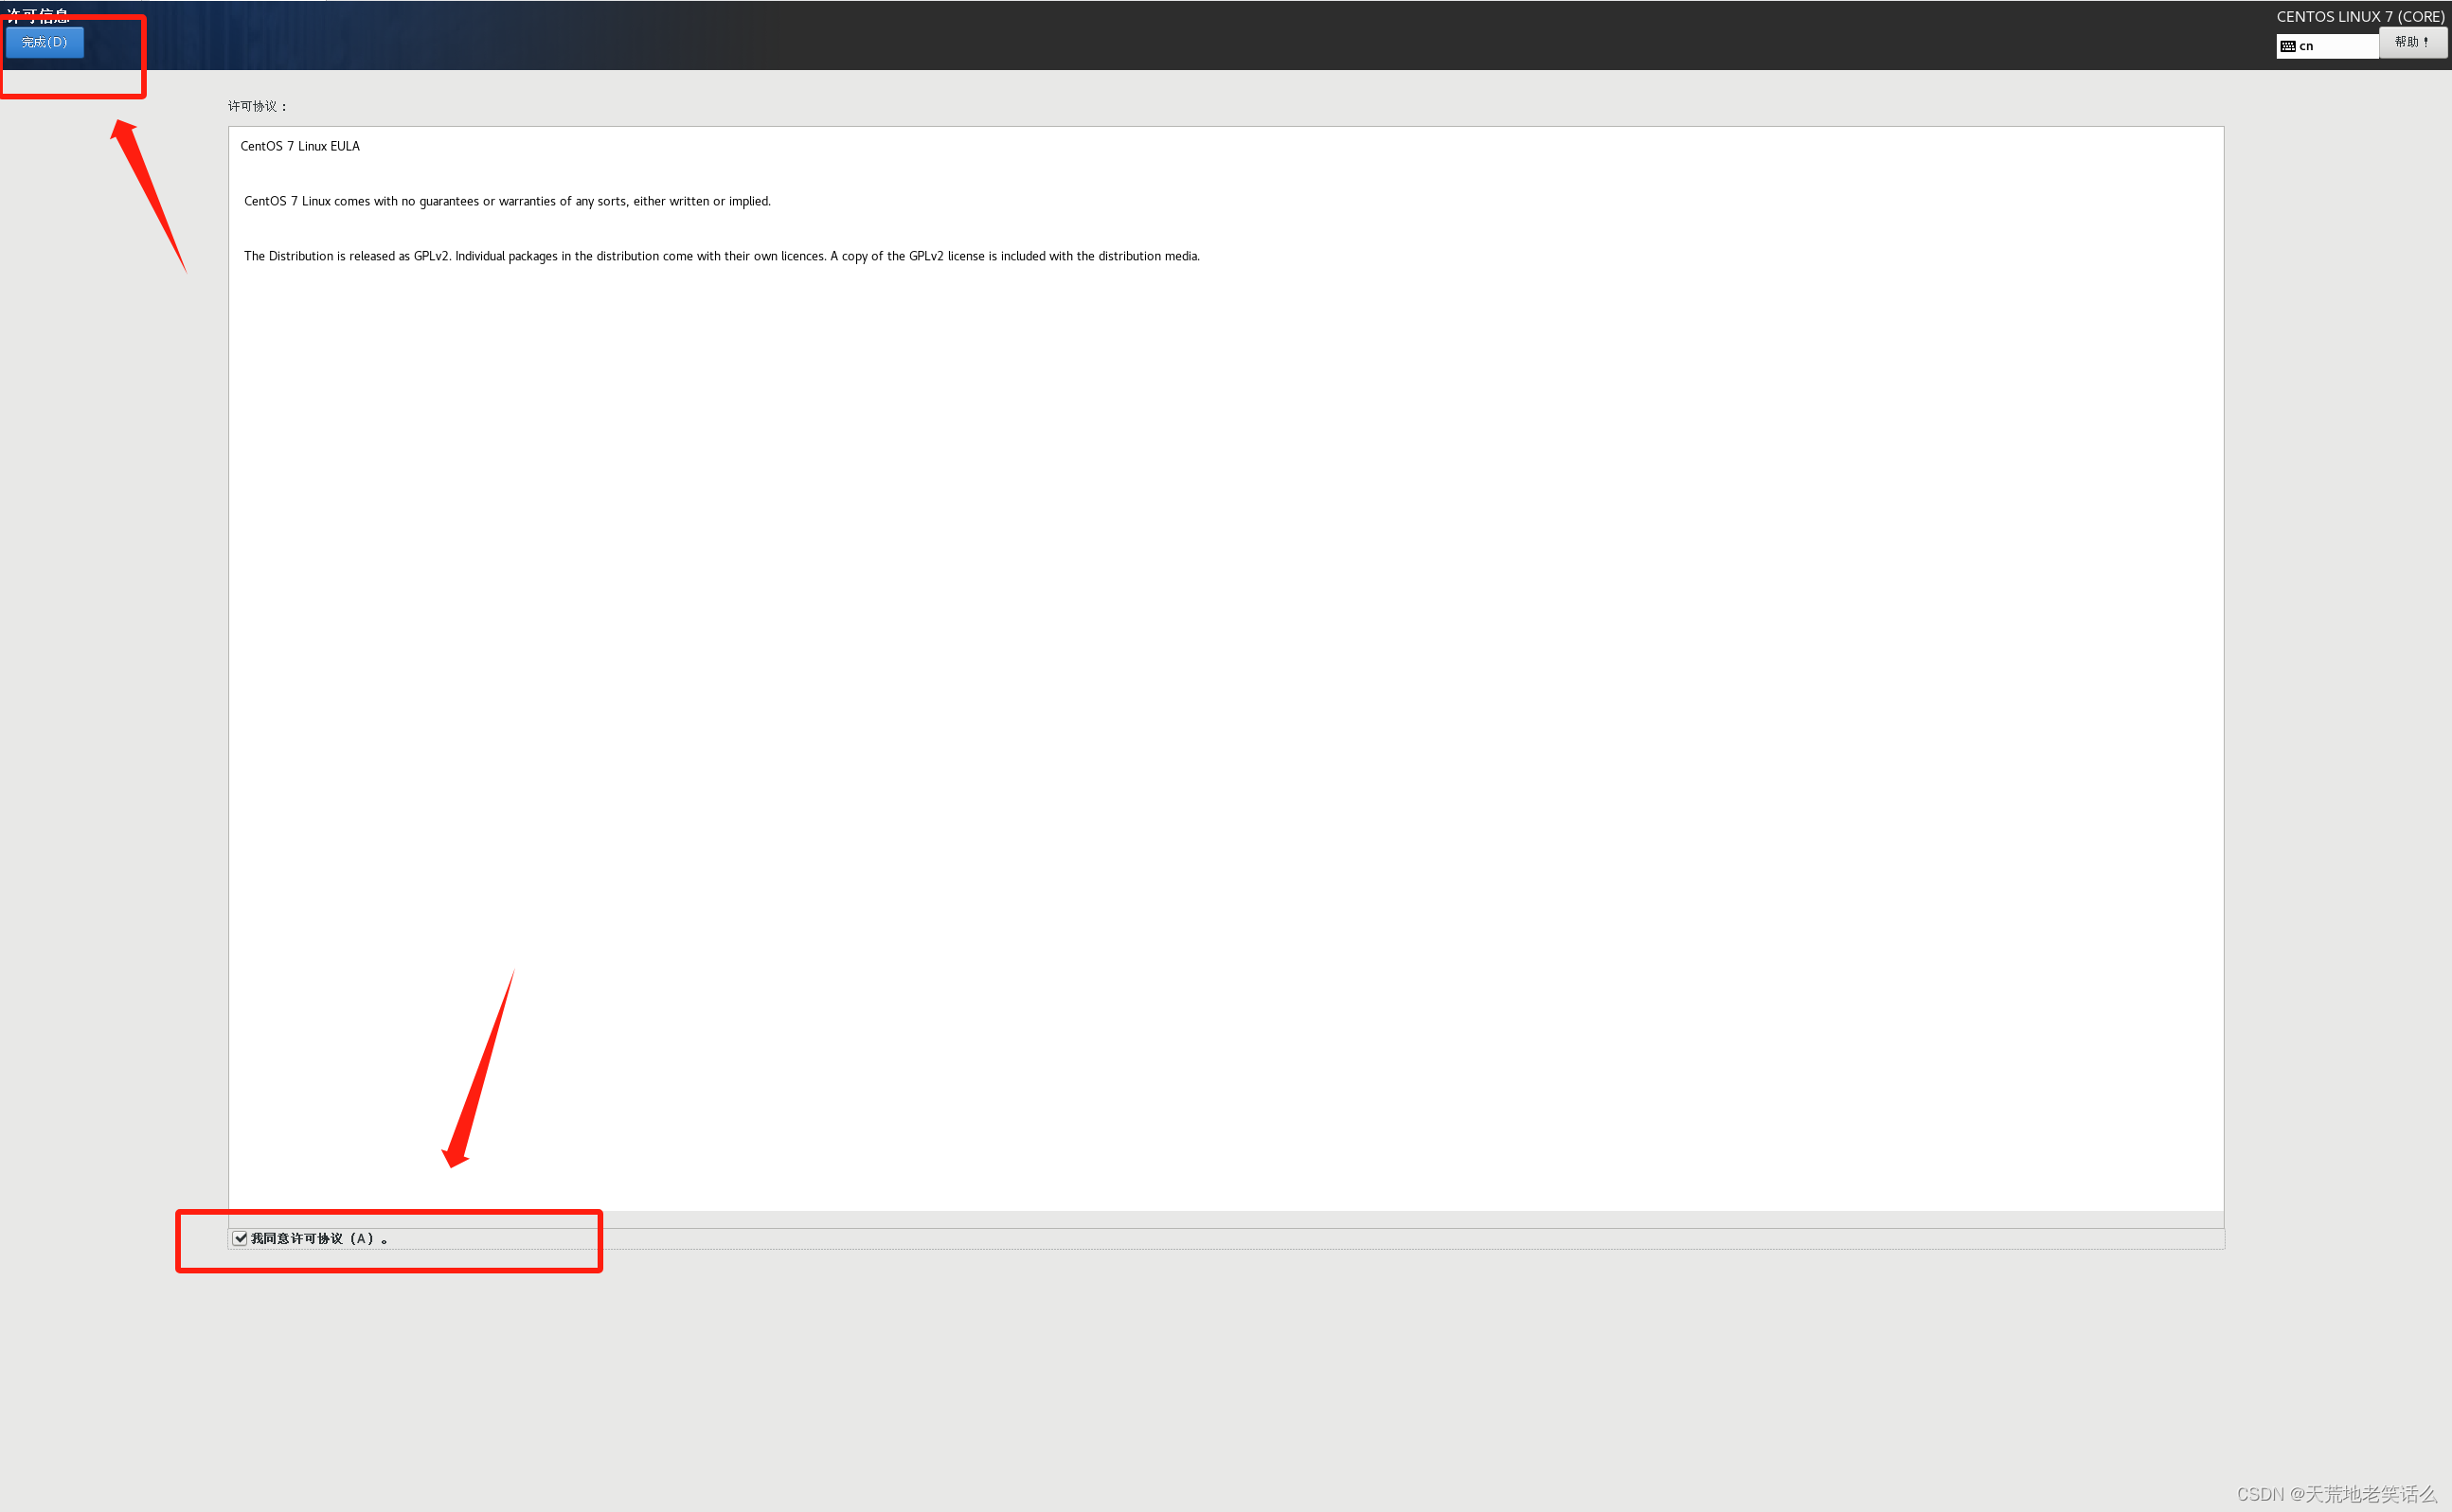
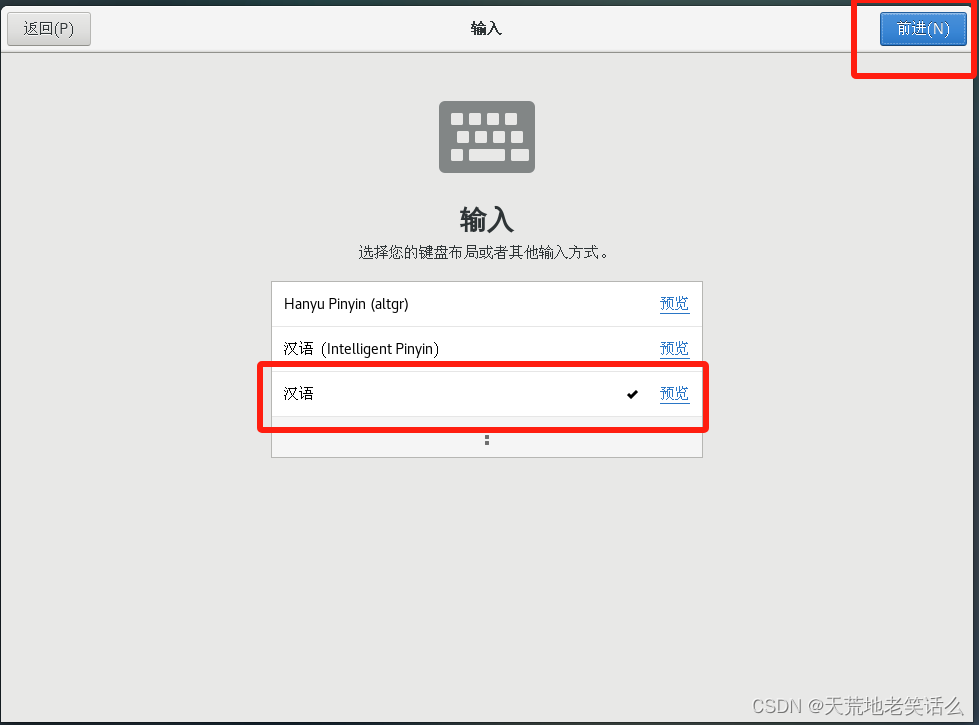
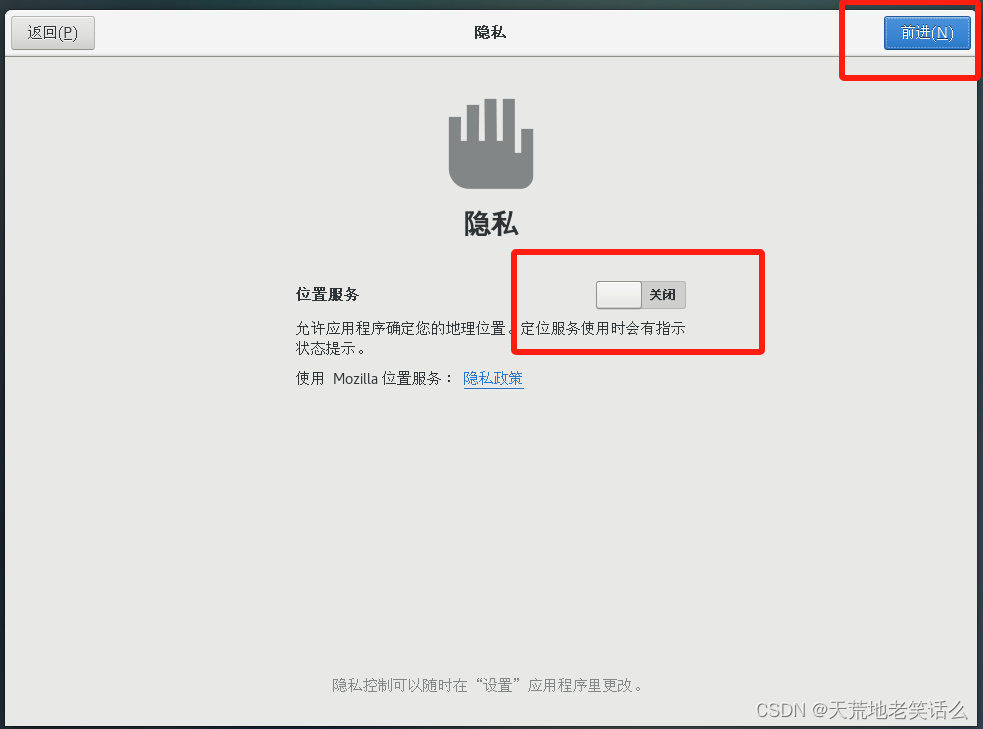
3、 需要定制化的内容
(1)调整时间差
(2)安装 GHOME(图形化界面的方式)
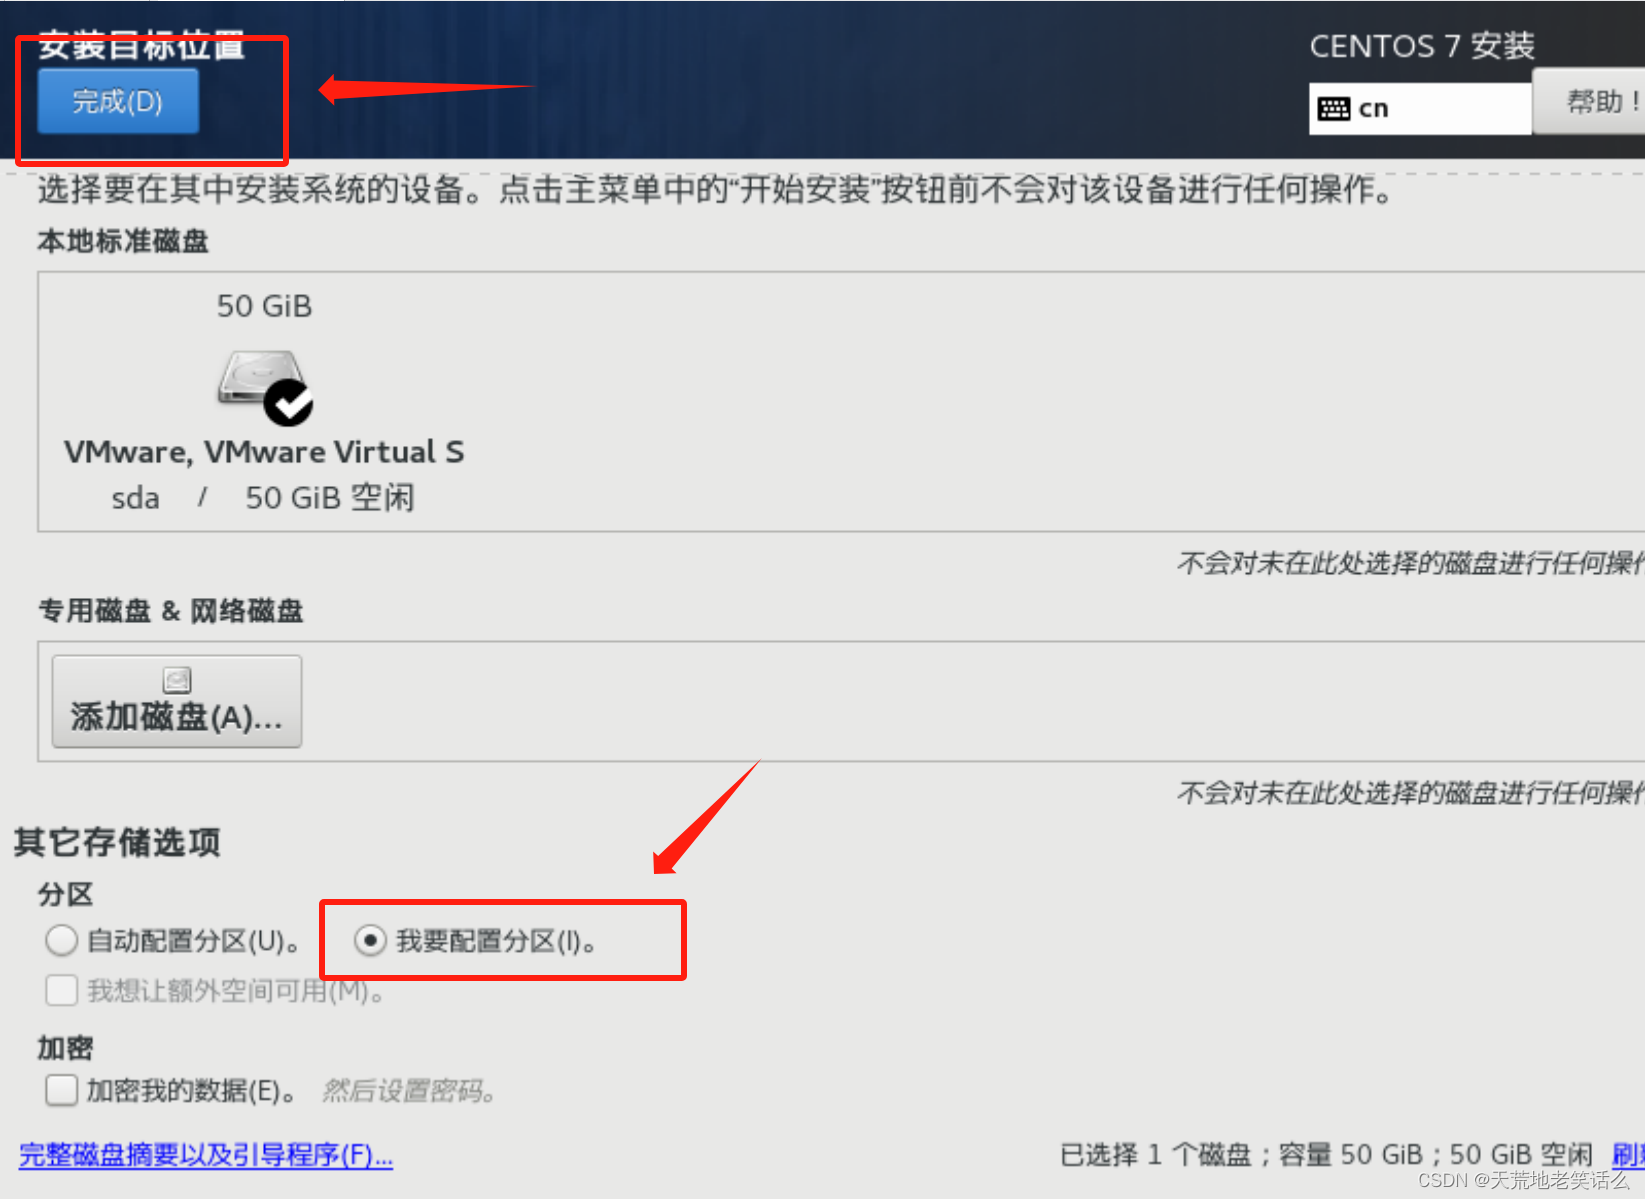
(3)配置磁盘分区

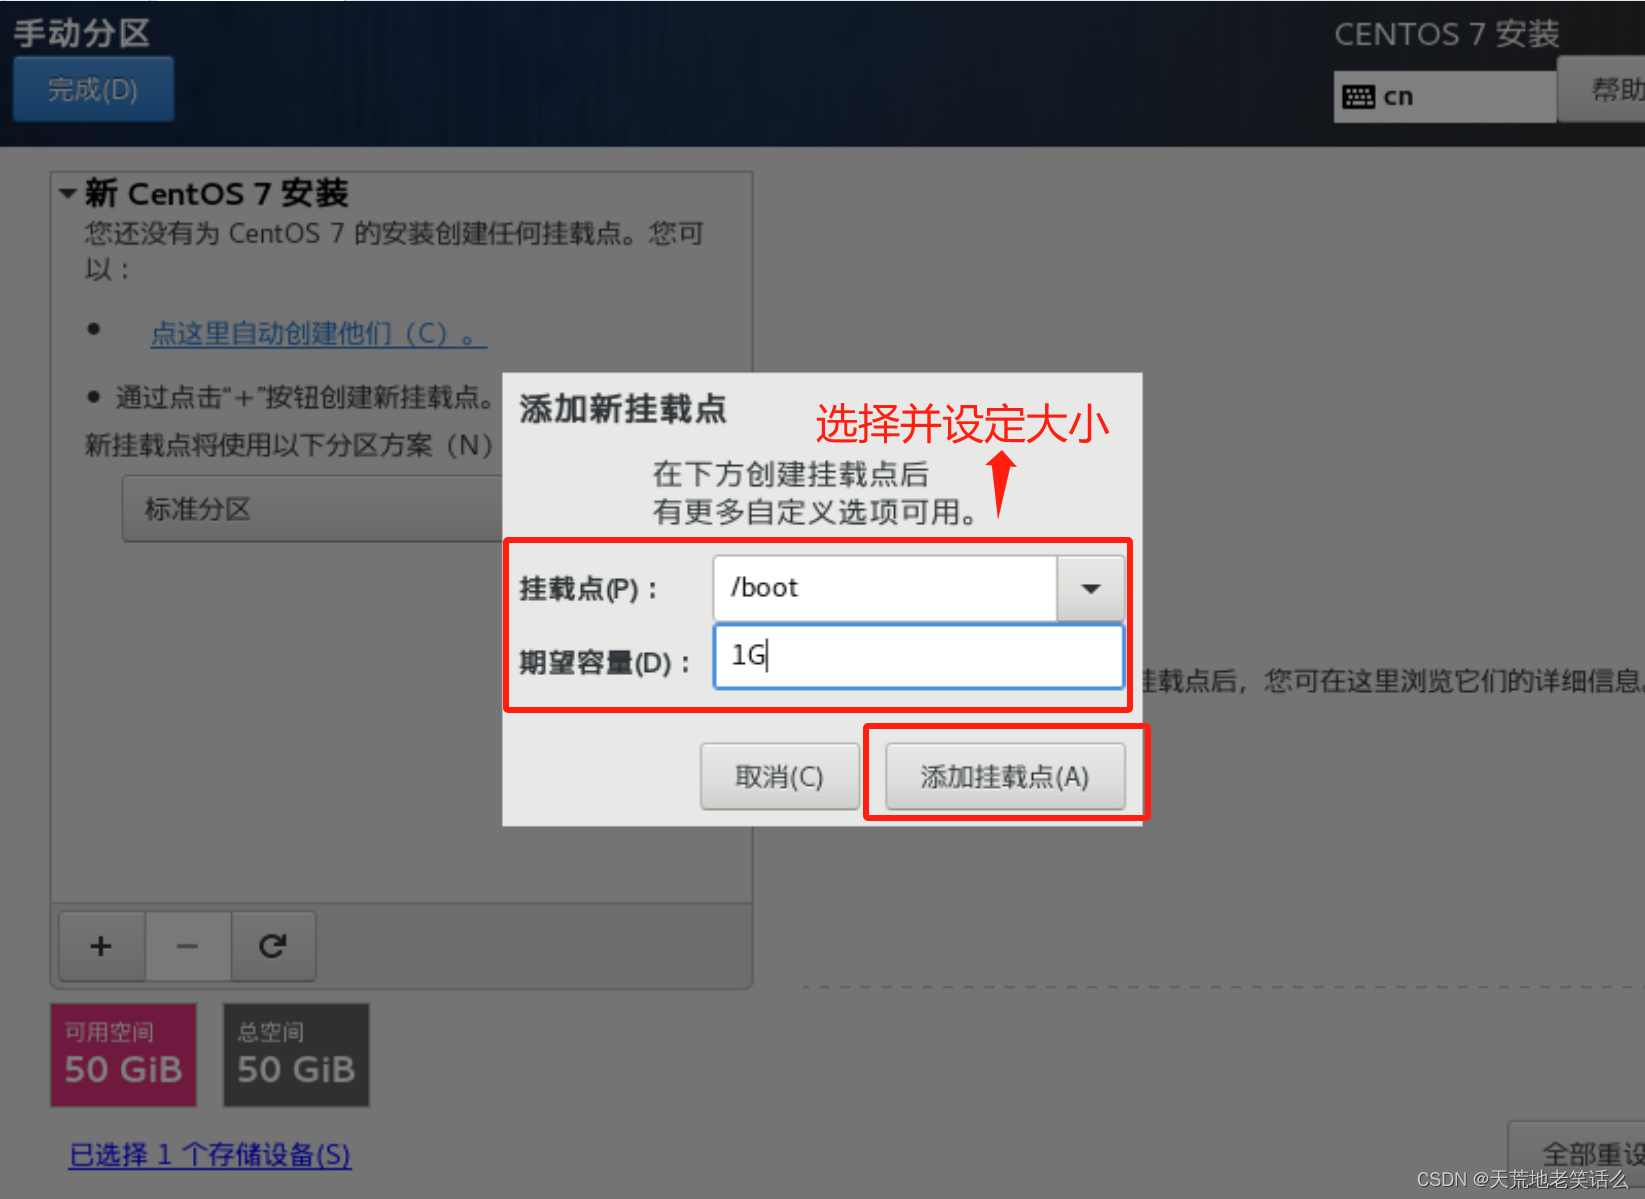
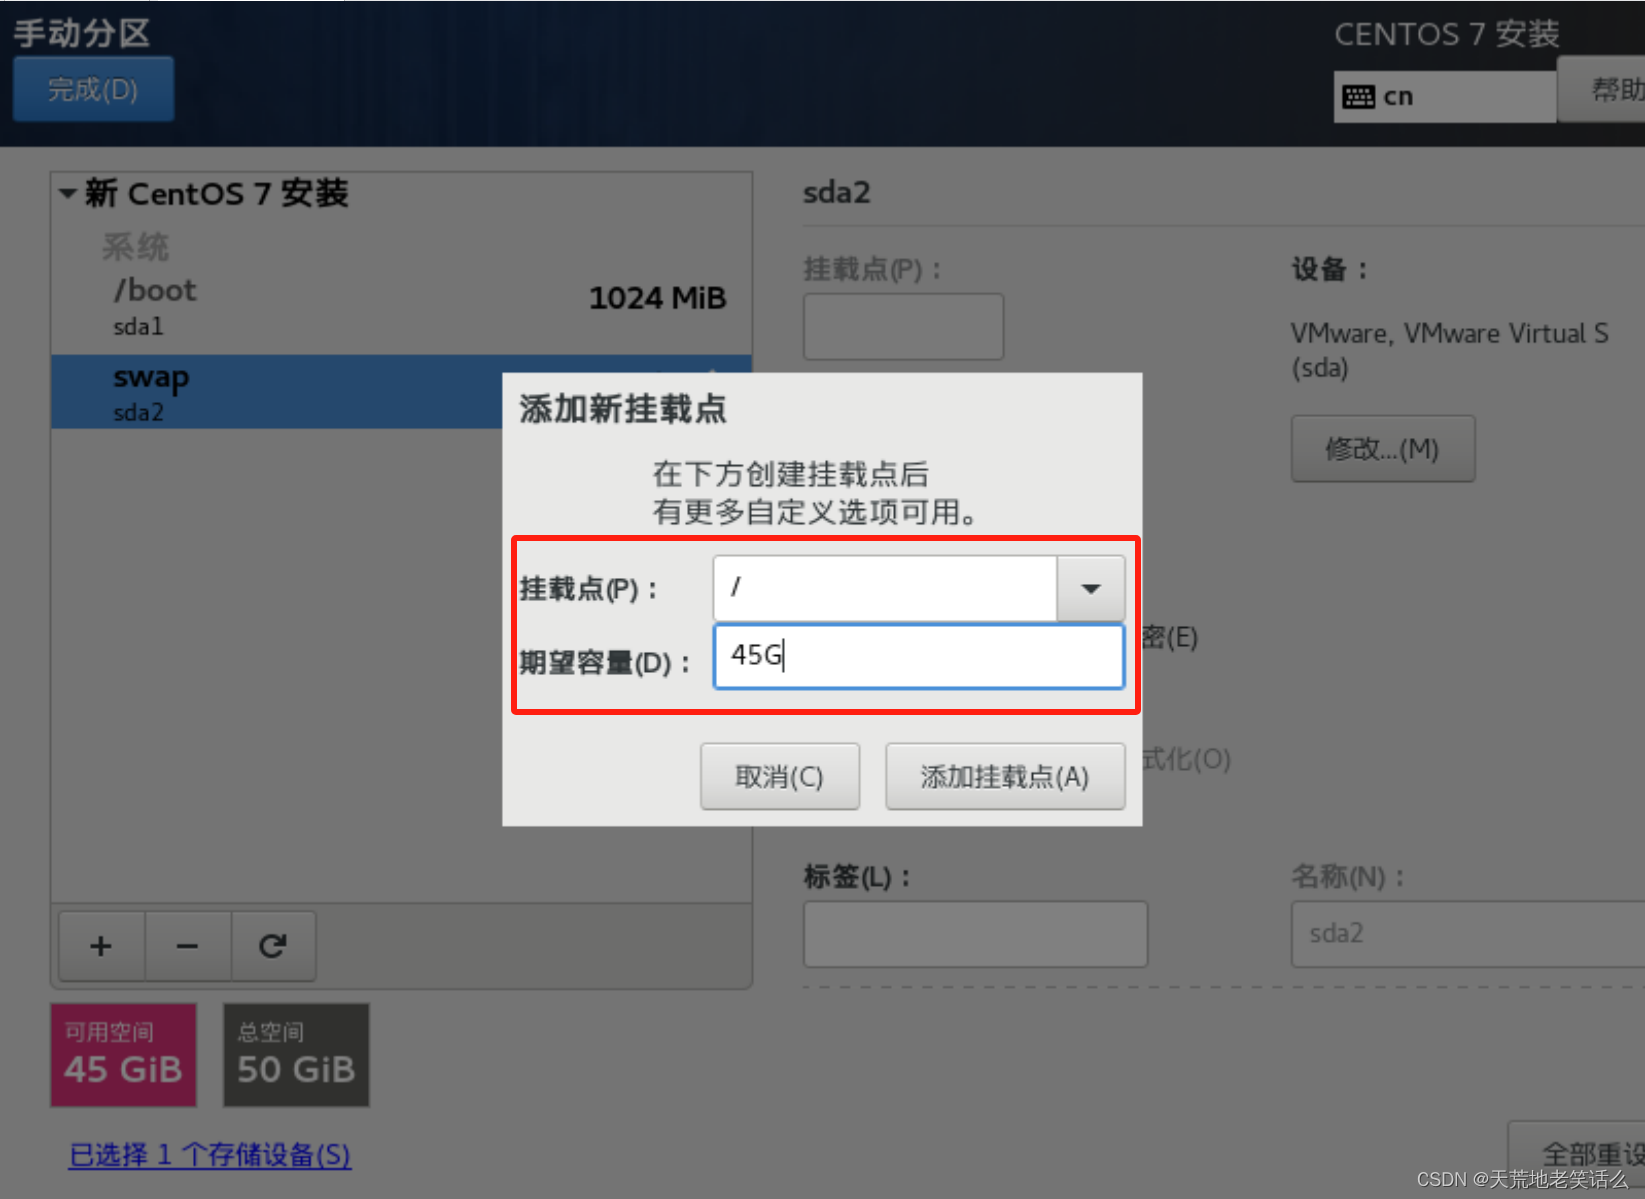
1)手动添加分区

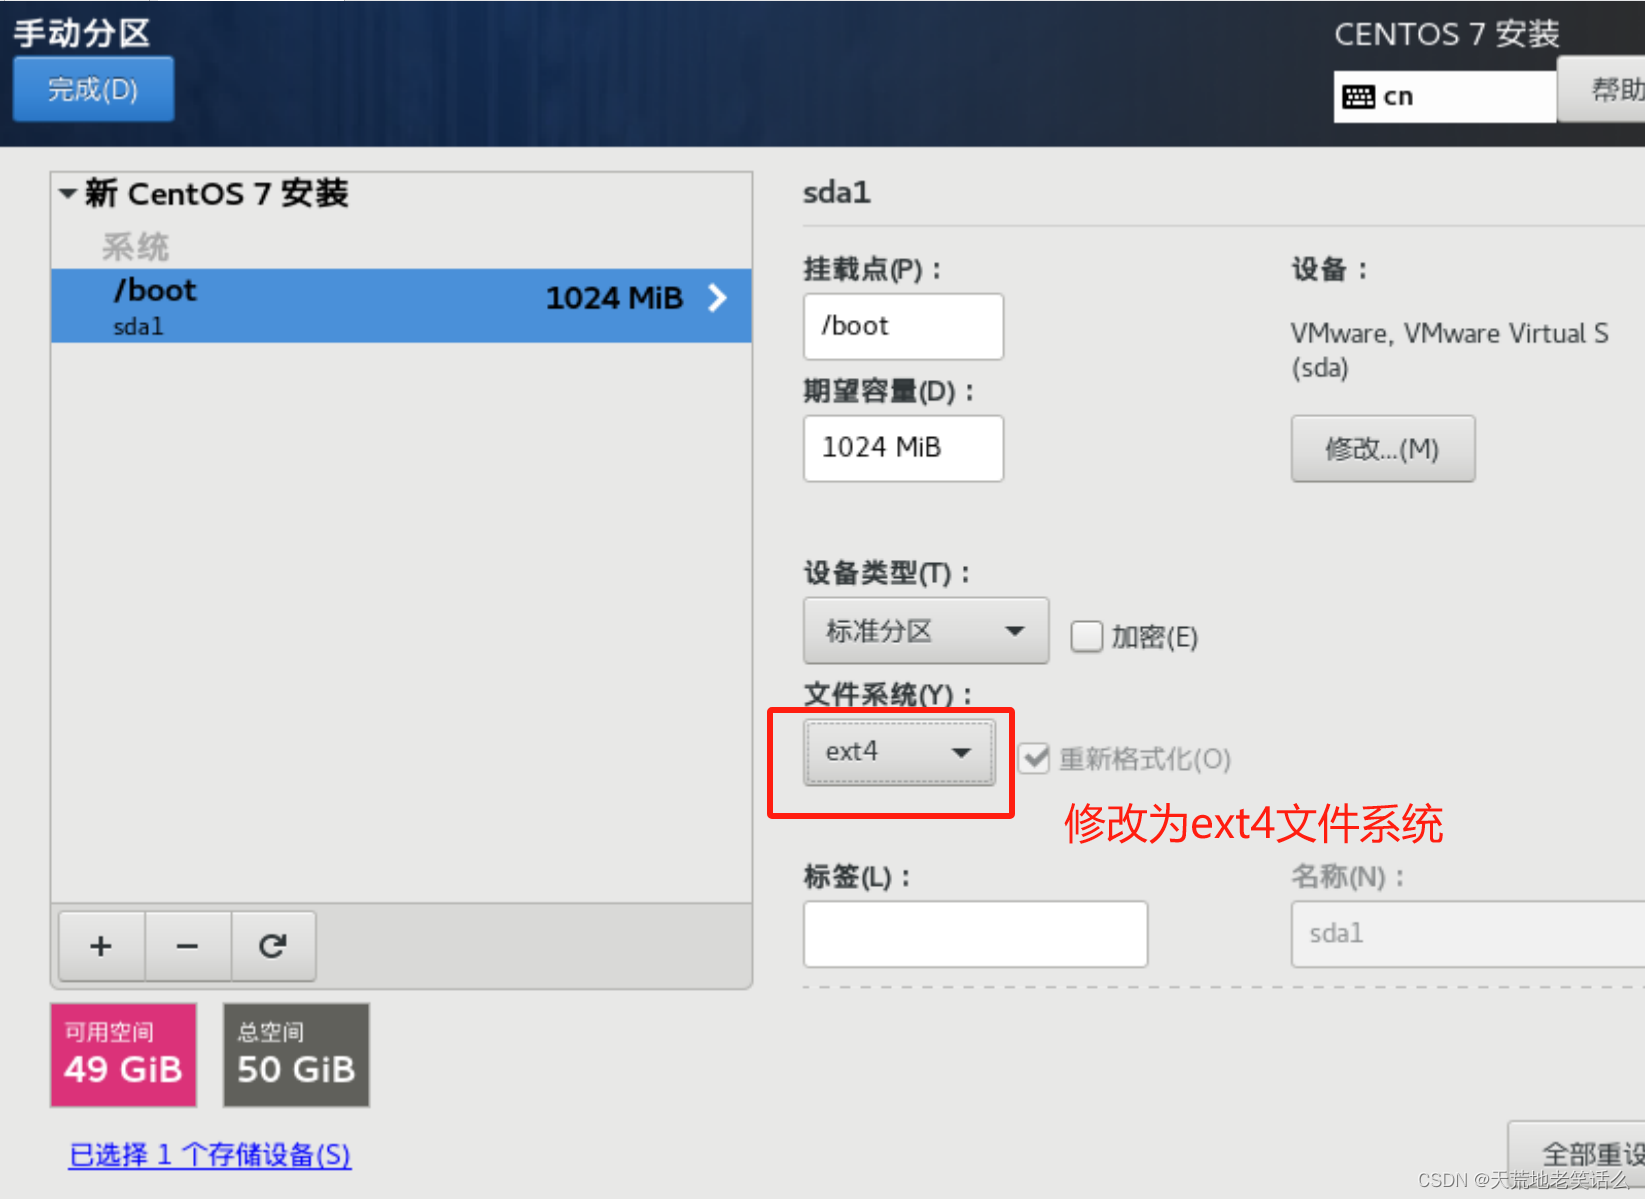
2) 添加 boot 区 给上 1G 容量后点击添加挂载点
3)添加 swap 交换分区
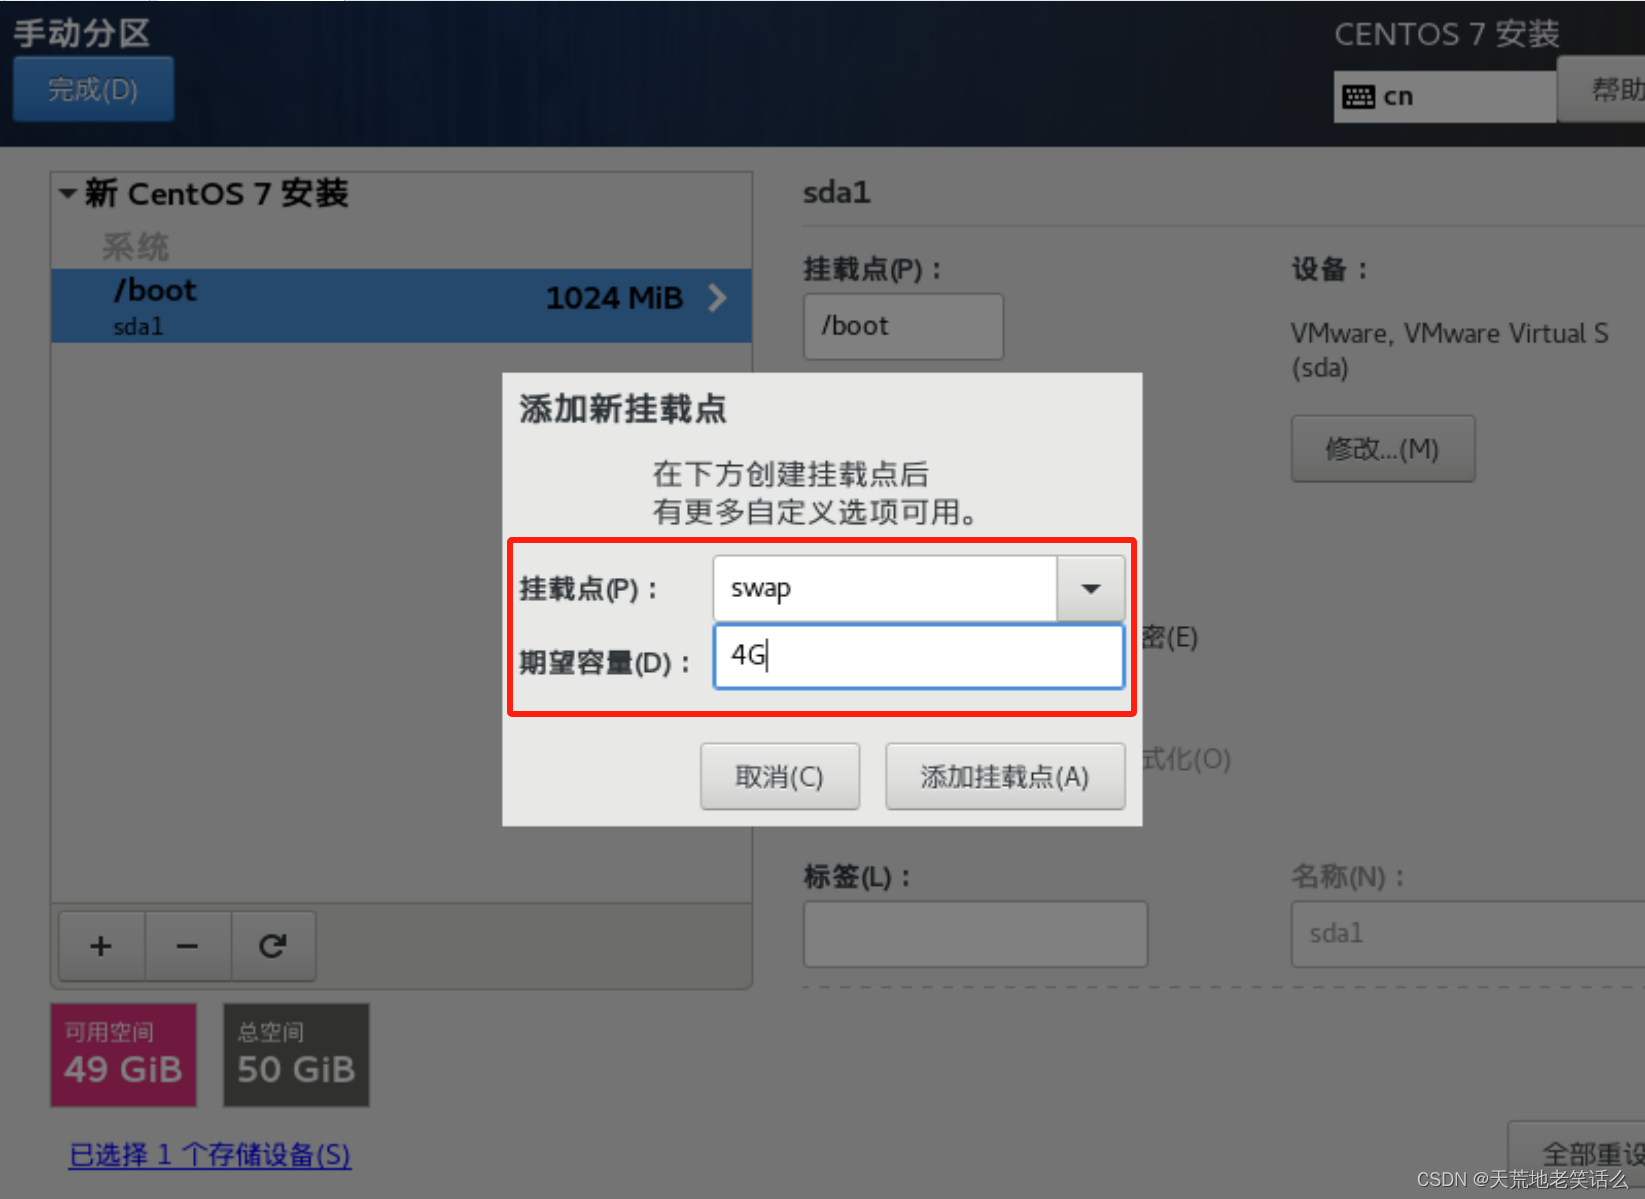
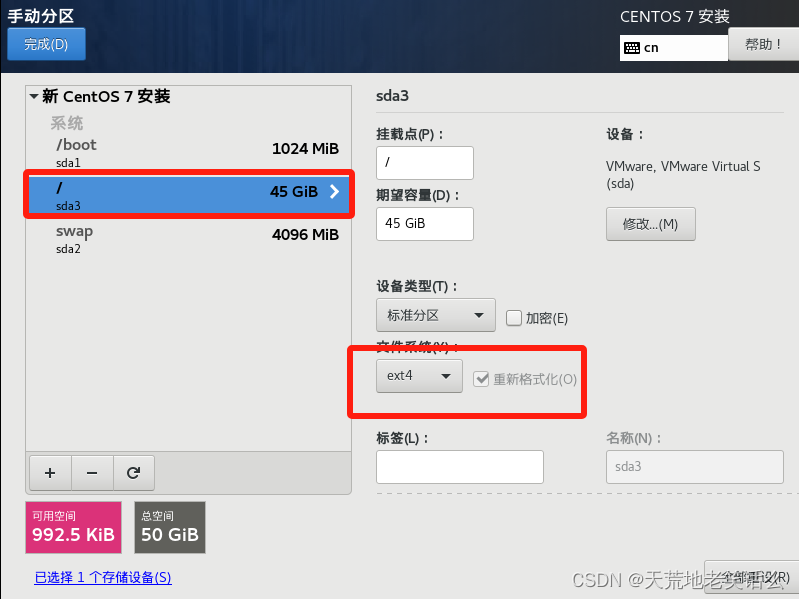
4)配置根(/)目录
根目录作为存储使用,将剩下的空间都给他
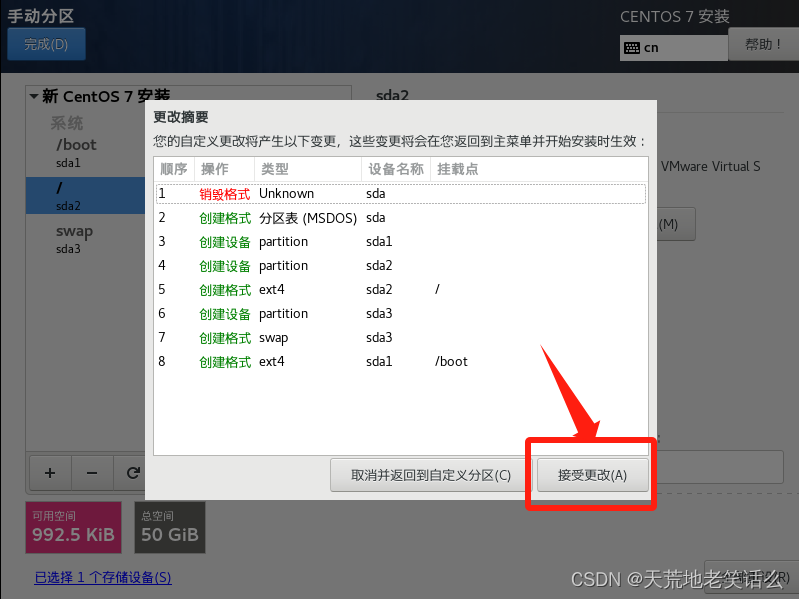
3 个分区都配置完毕过后可以点击完成。
5)分区配置完毕,点击接受更改
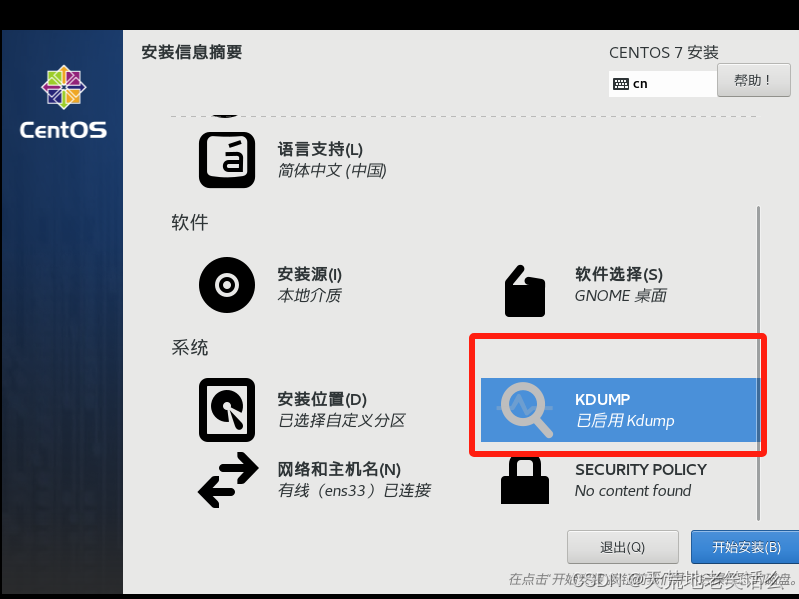
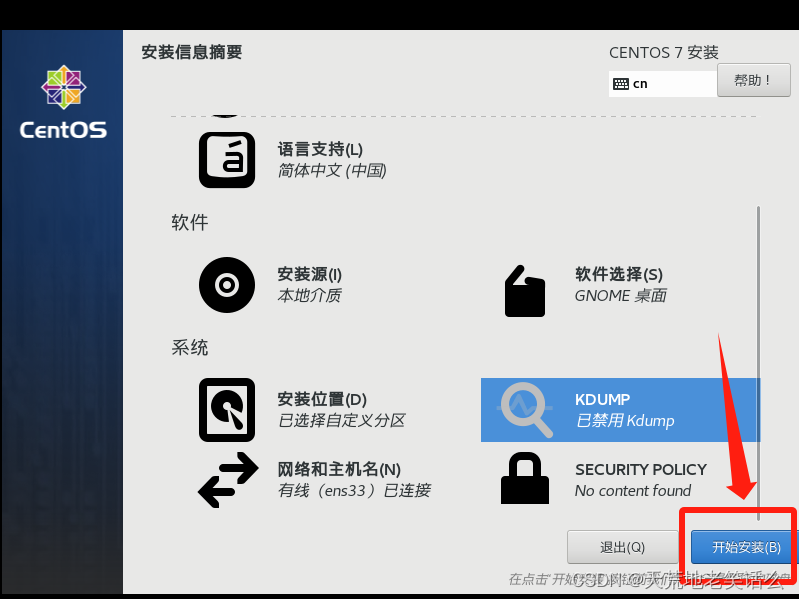
6)关闭 kdump 本身虚拟机内存就不够,他会吃掉一部分内存,我们尽量省一点

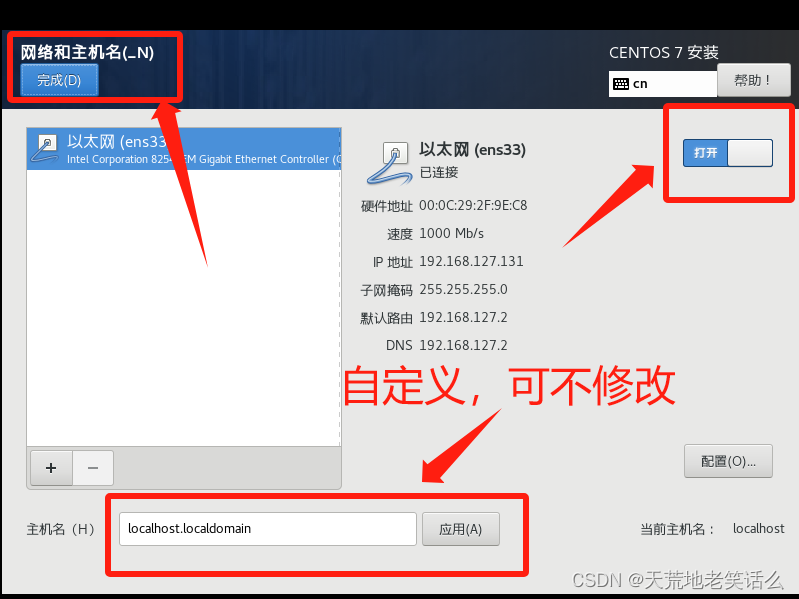
7)修改主机名

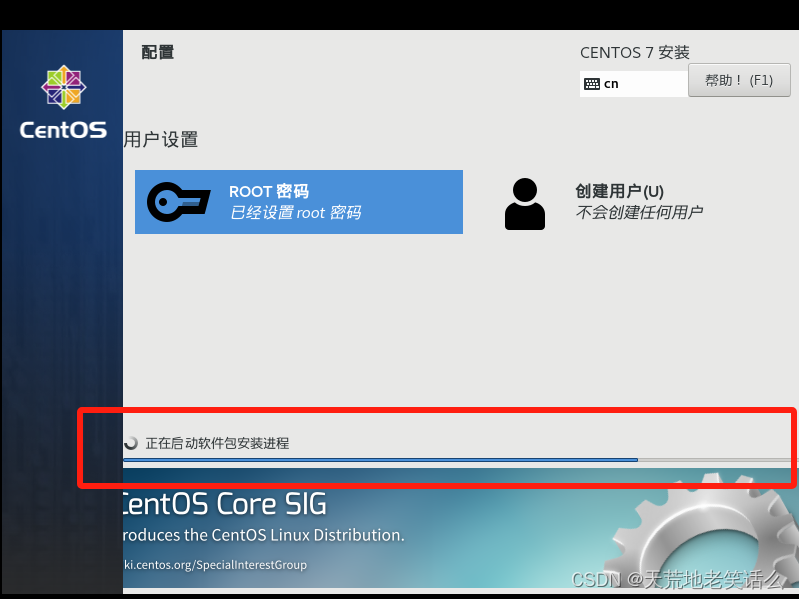
8)开始安装
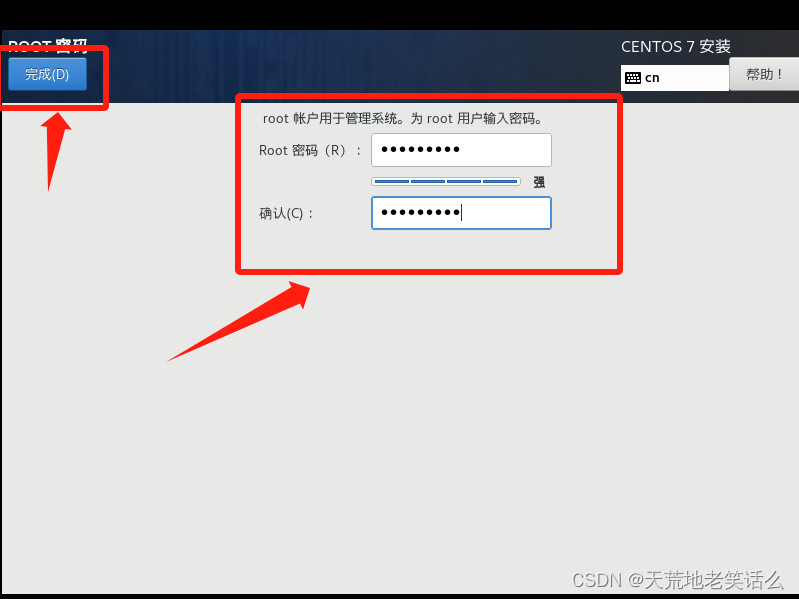
9)安装时间比较长 大概需要 10 几分钟(设置 root 用户密码,一定要设置)
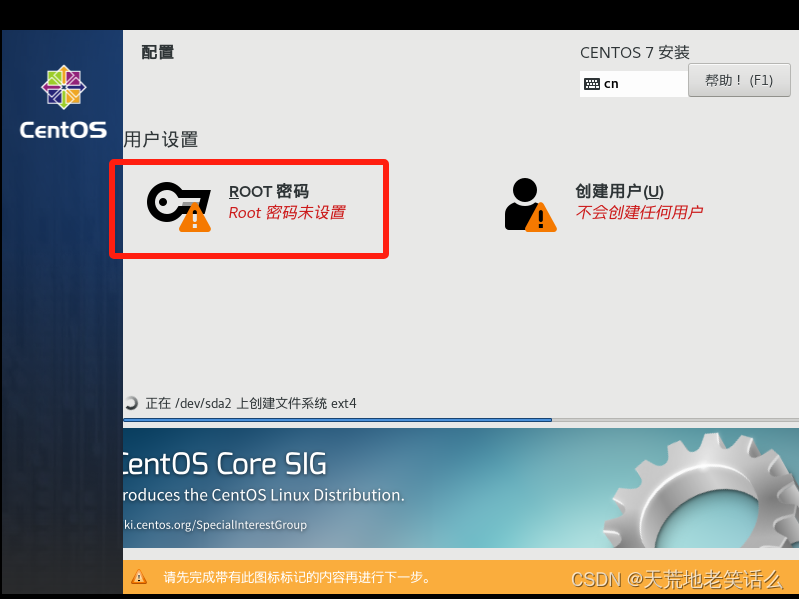
密码设置成什么自己决定,但是不要忘
安装时间会有些长,耐心等待
(4)、 虚拟机的使用引导界面
1) 安装完成 重启虚拟机
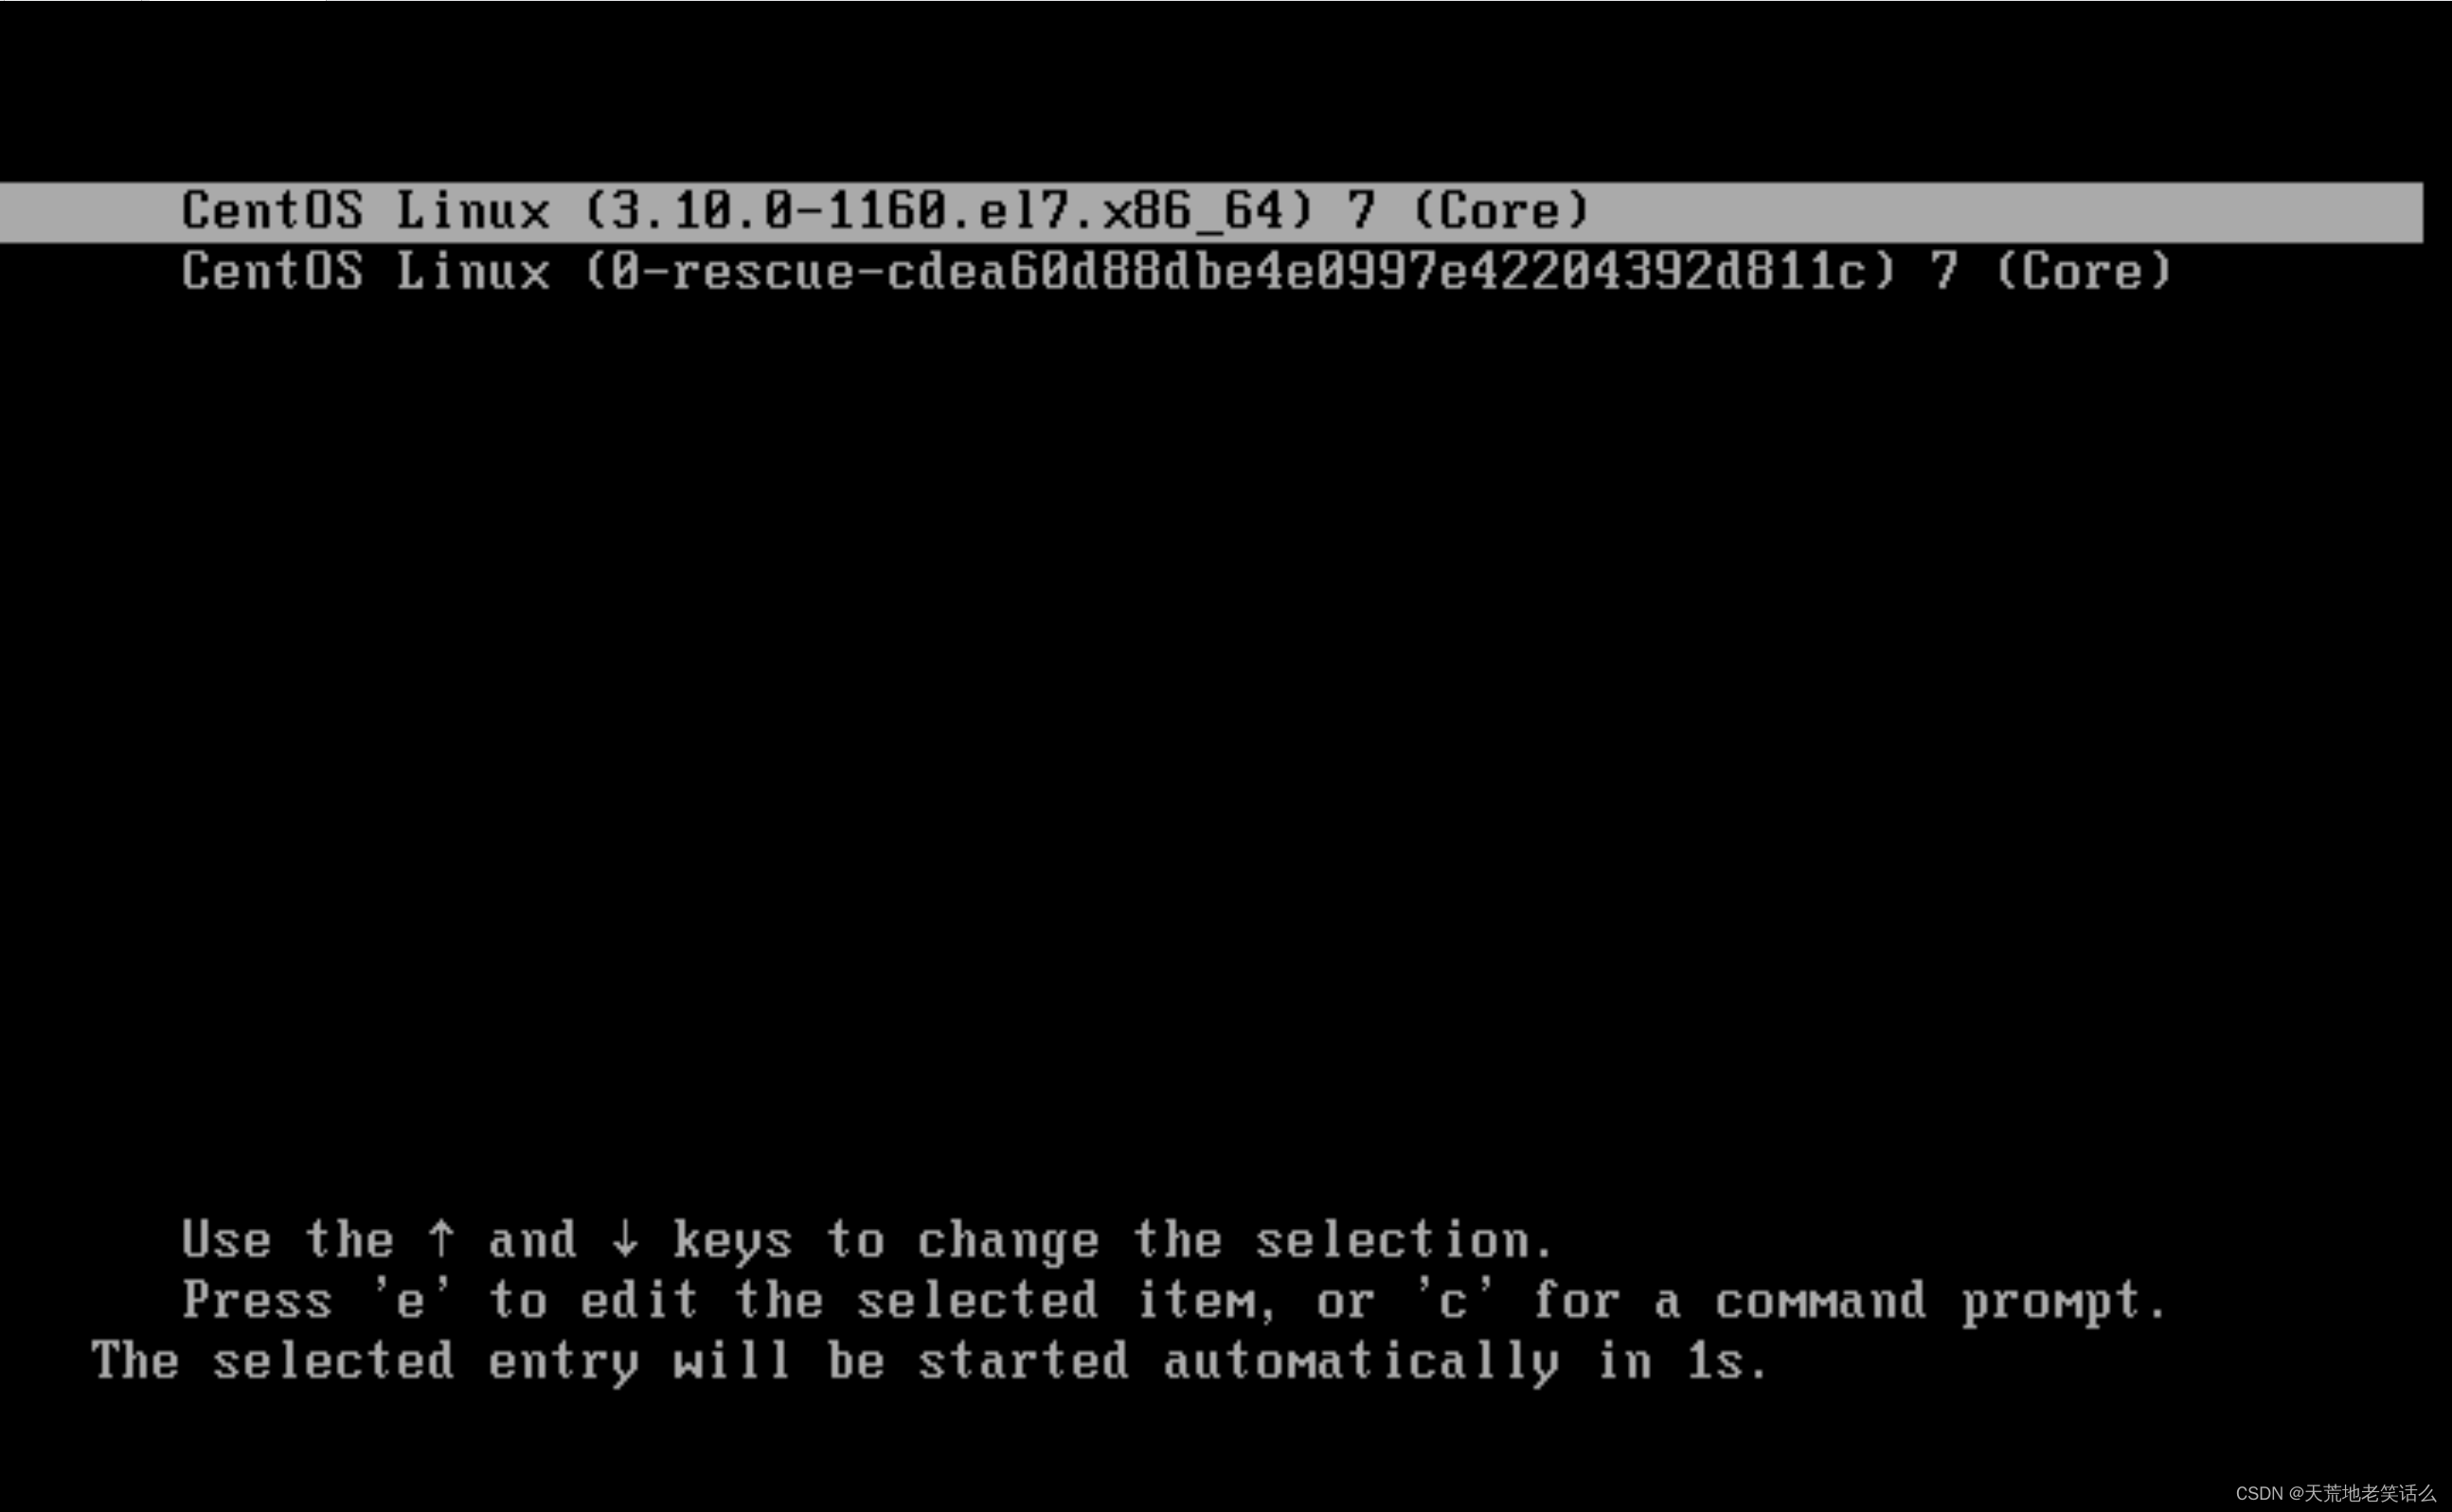
按回车即可
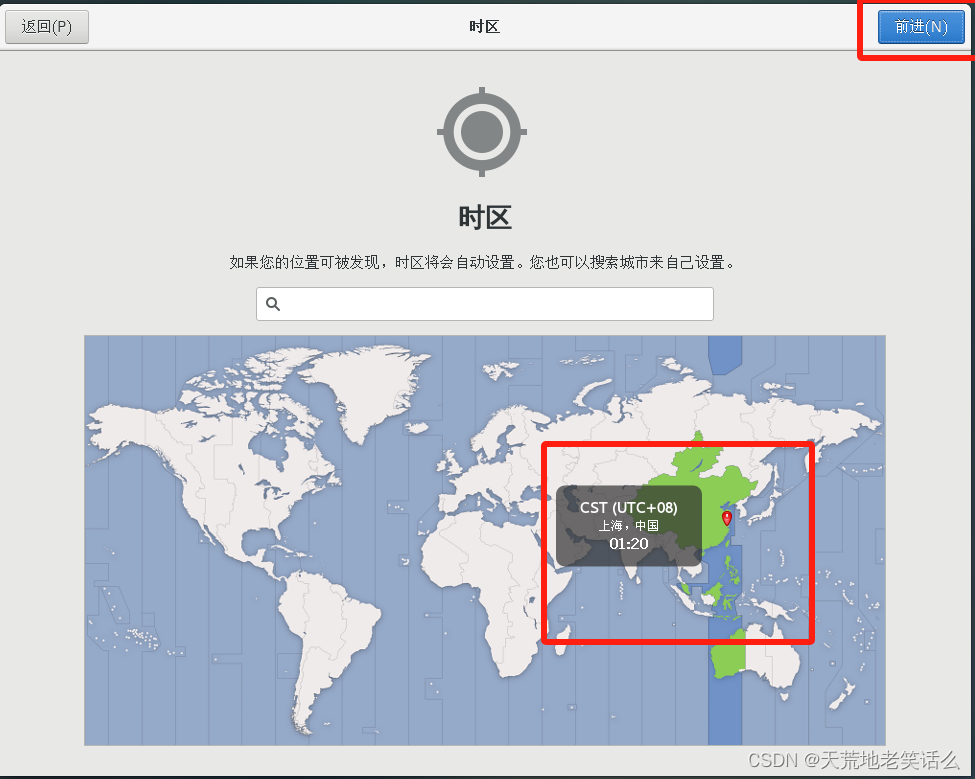
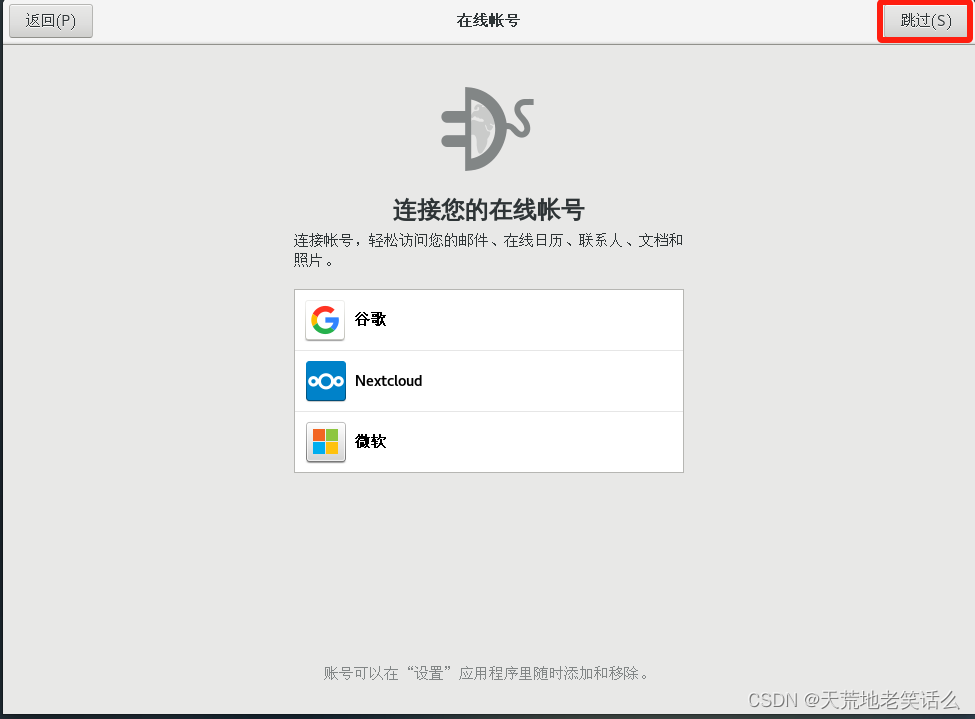
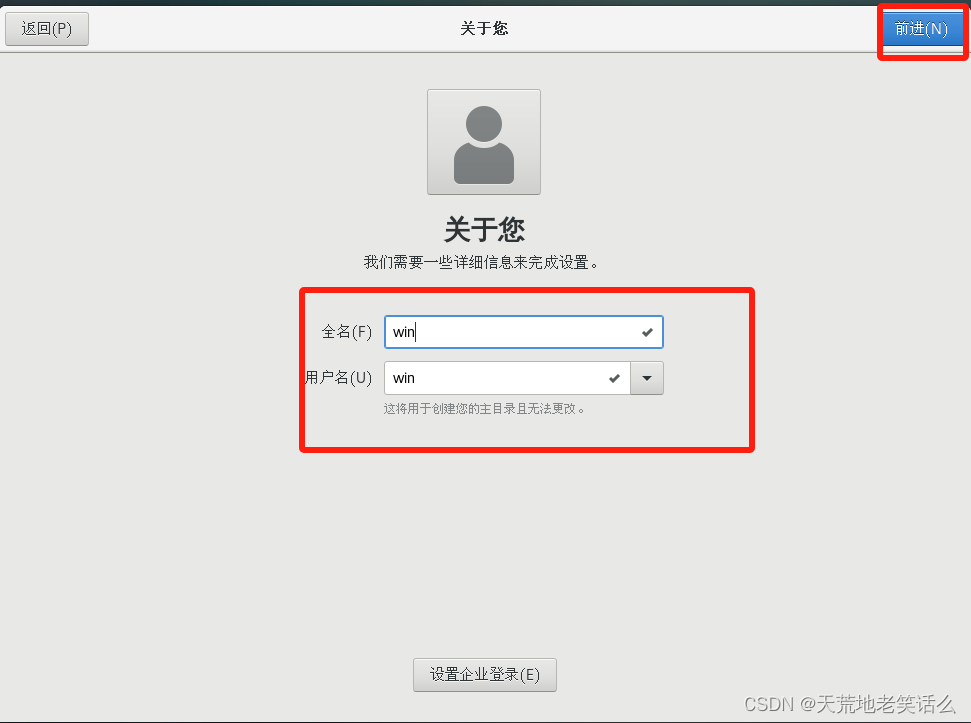
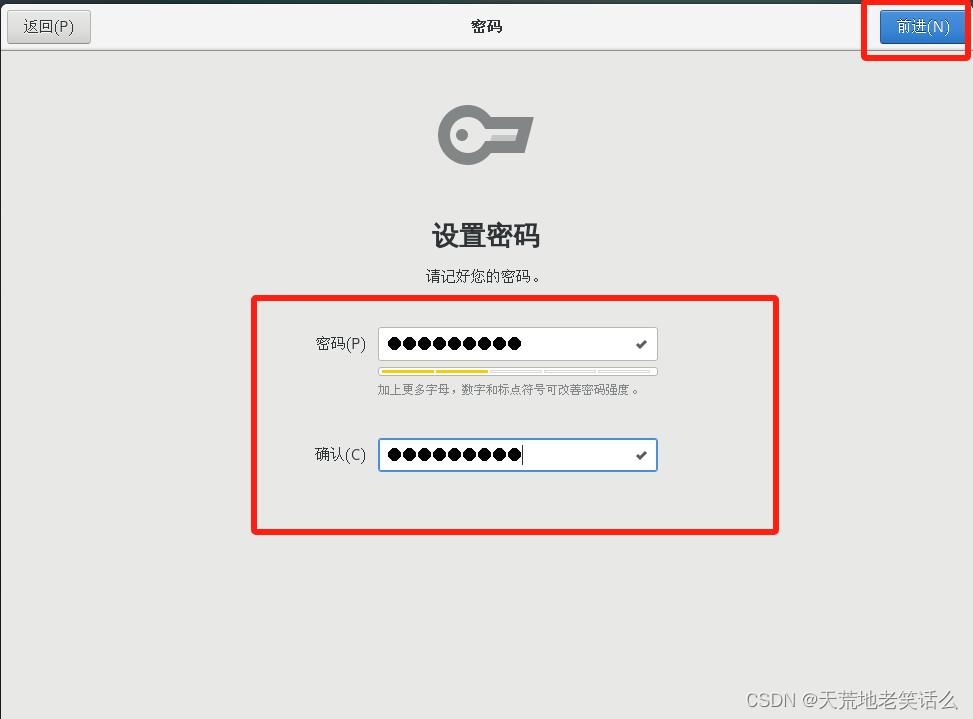
2)进入引导界面(以下内容就按照图片走,就不做过多解释)
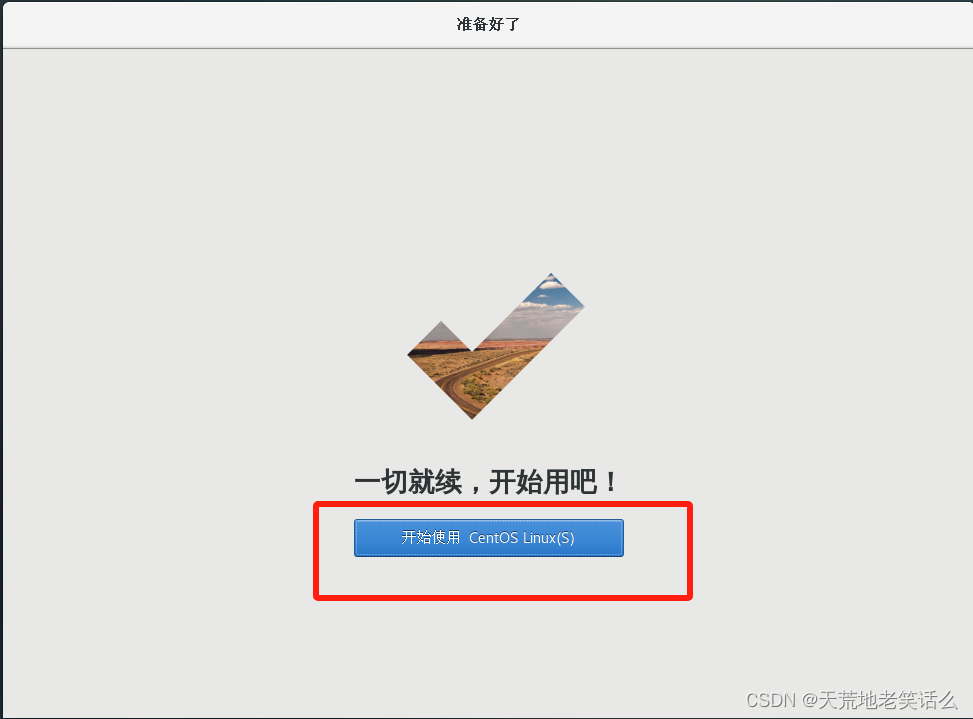
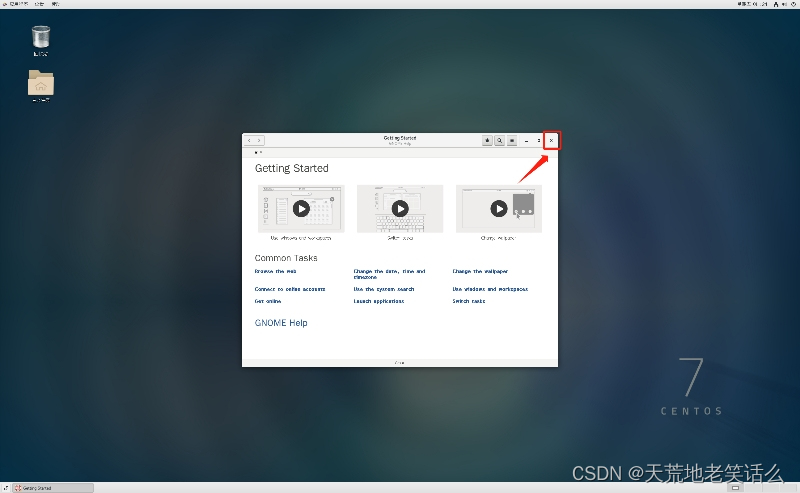
安装完成
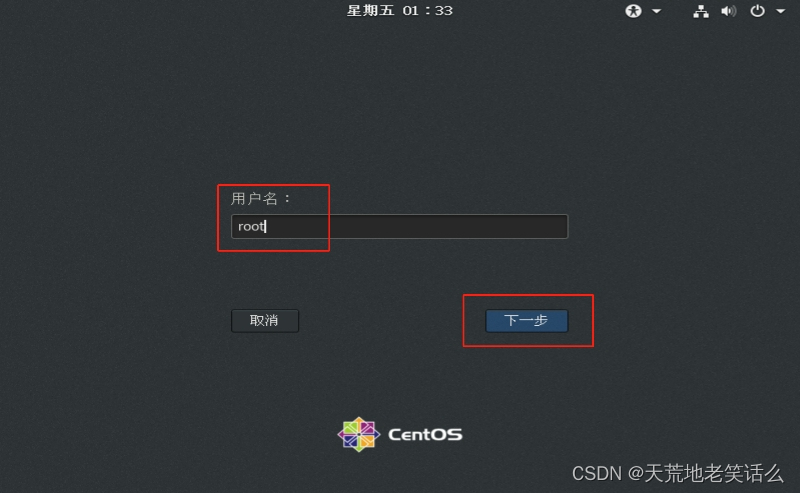
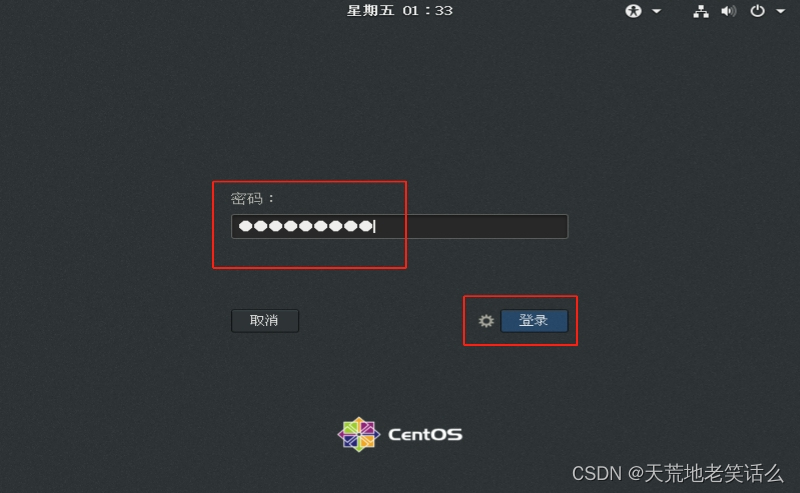
(5)、每次开机输入密码登陆即可

 (6)、 切换 root 用户
当前登录的用户是刚刚创建的用户,权限会缺少,所以使用
root
,修改一些内容更加方
便。
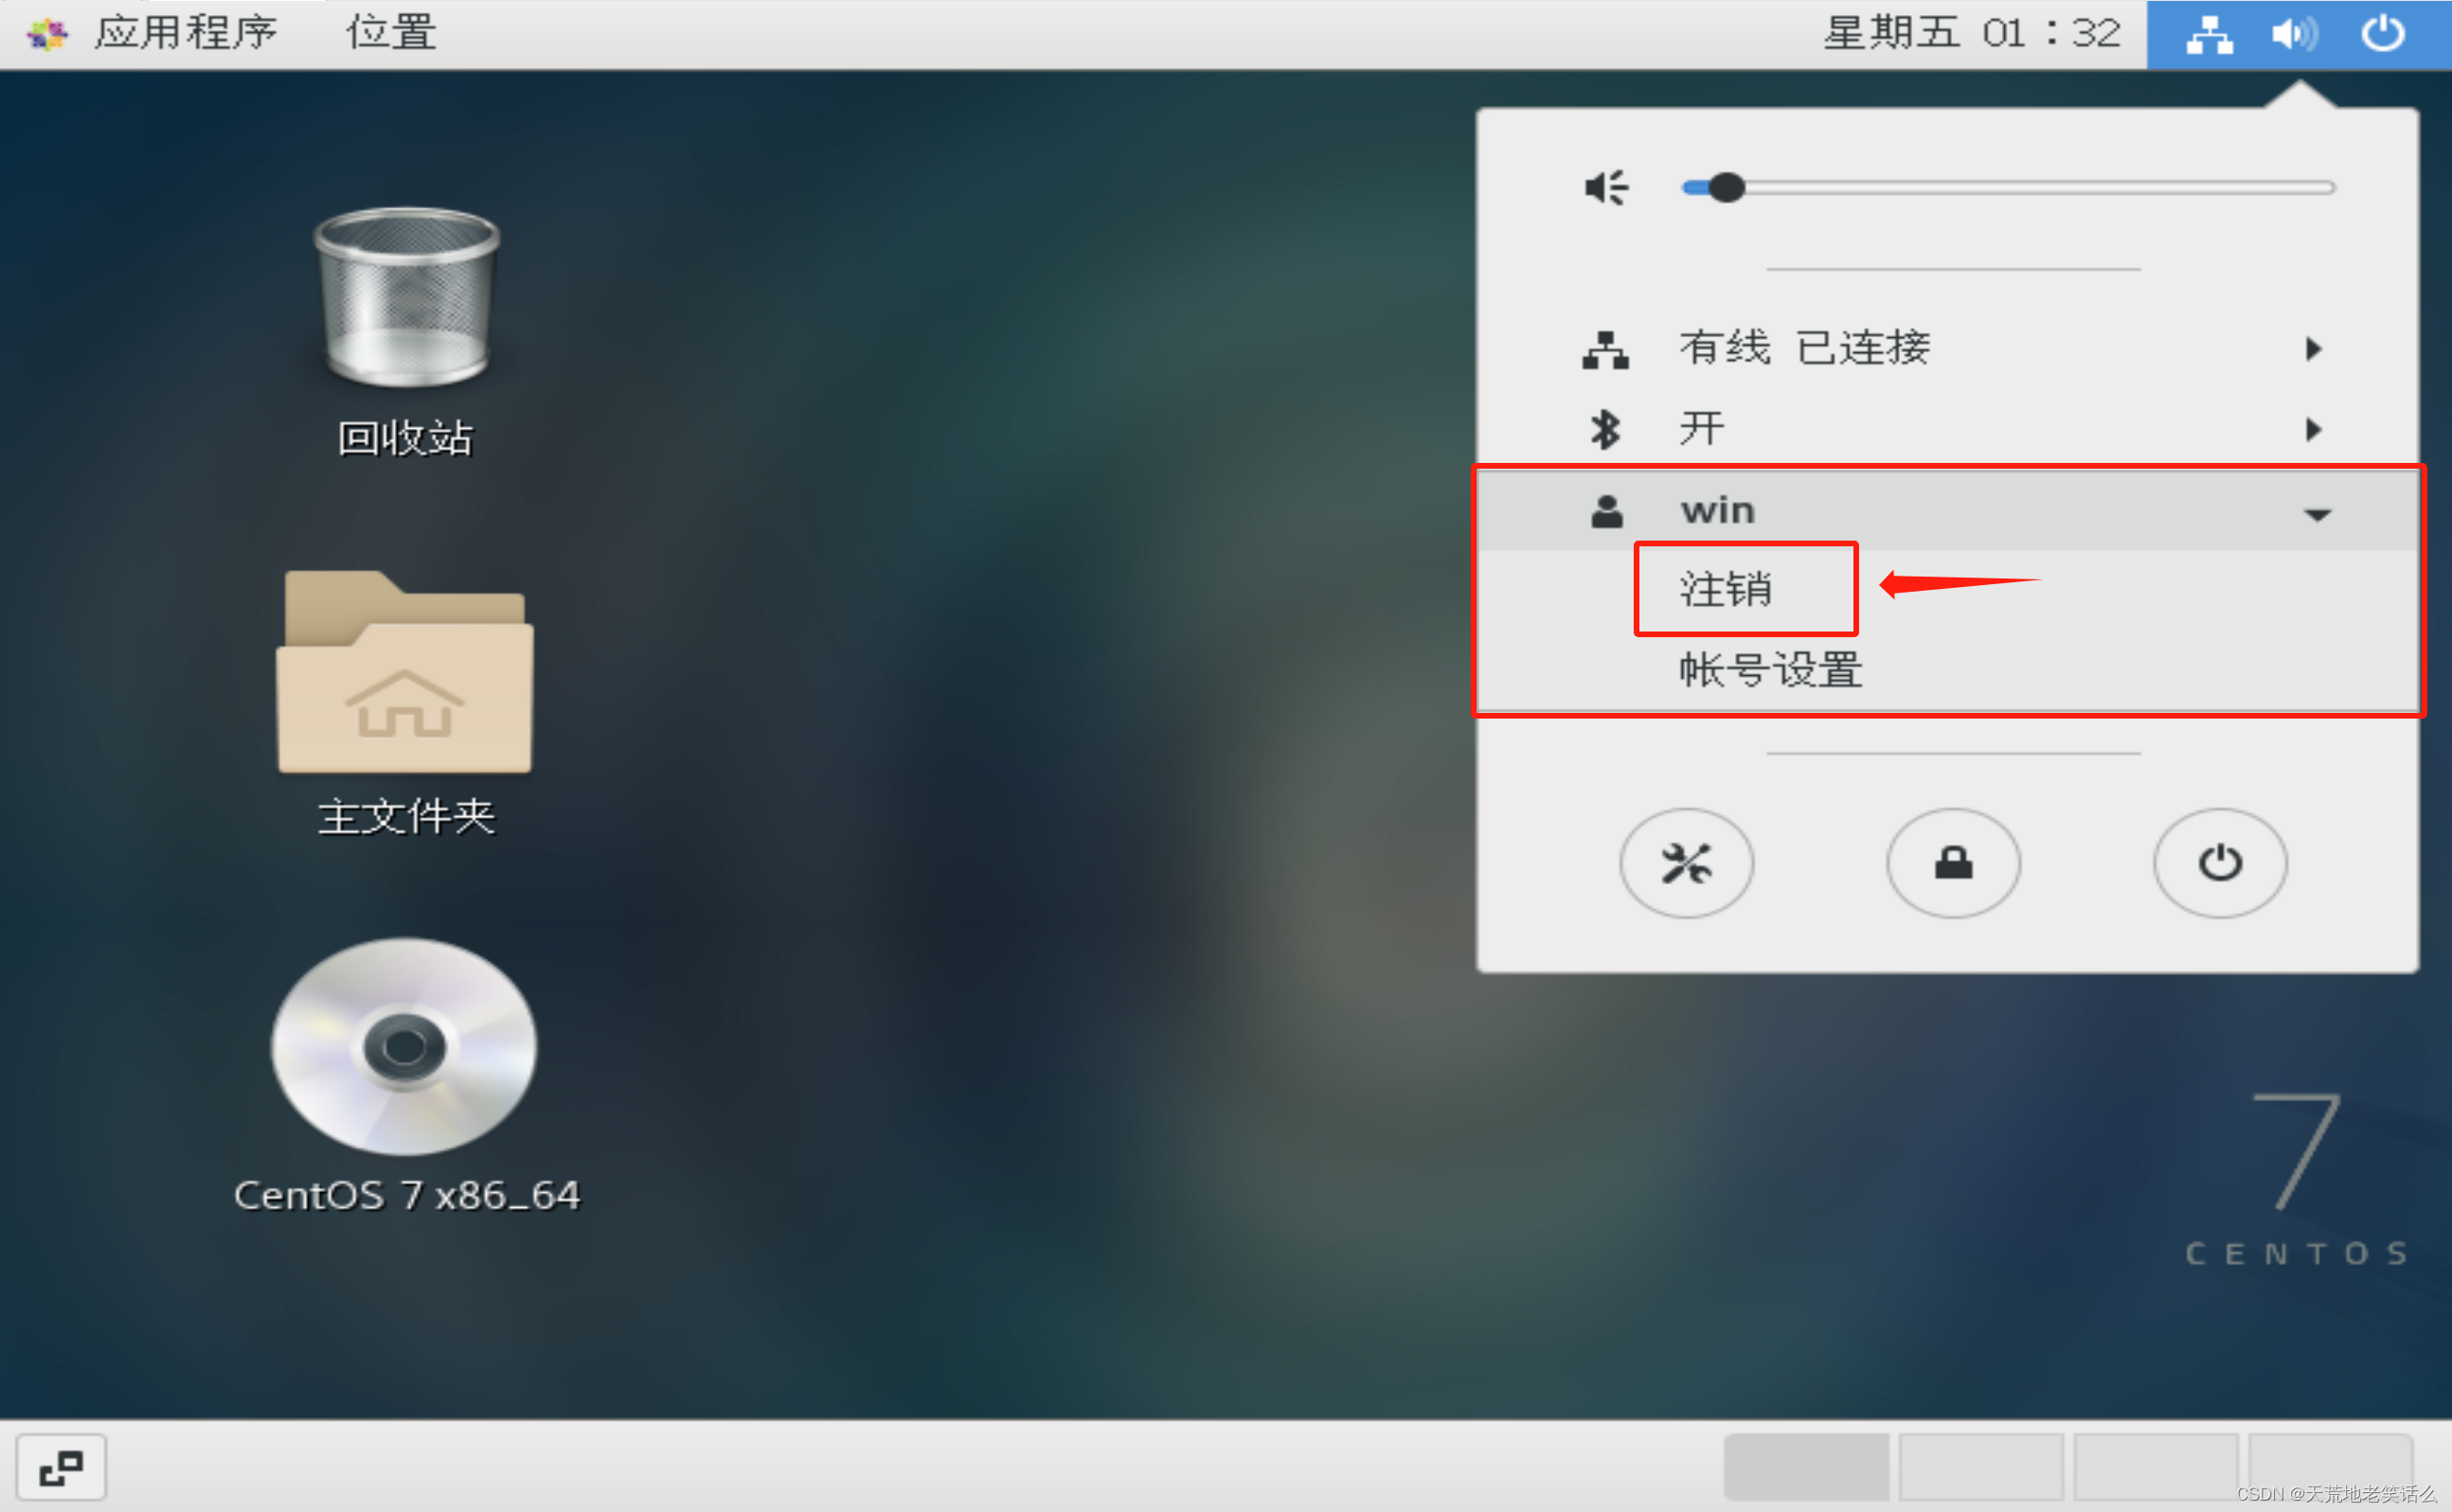
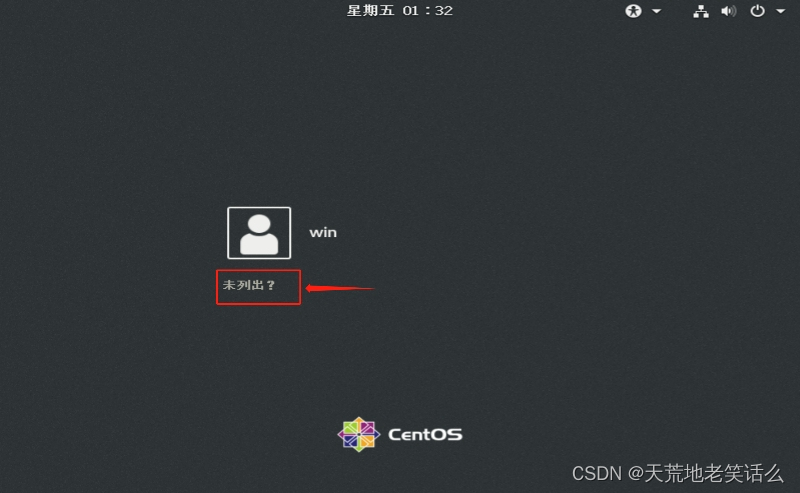 1)切换 root 用户
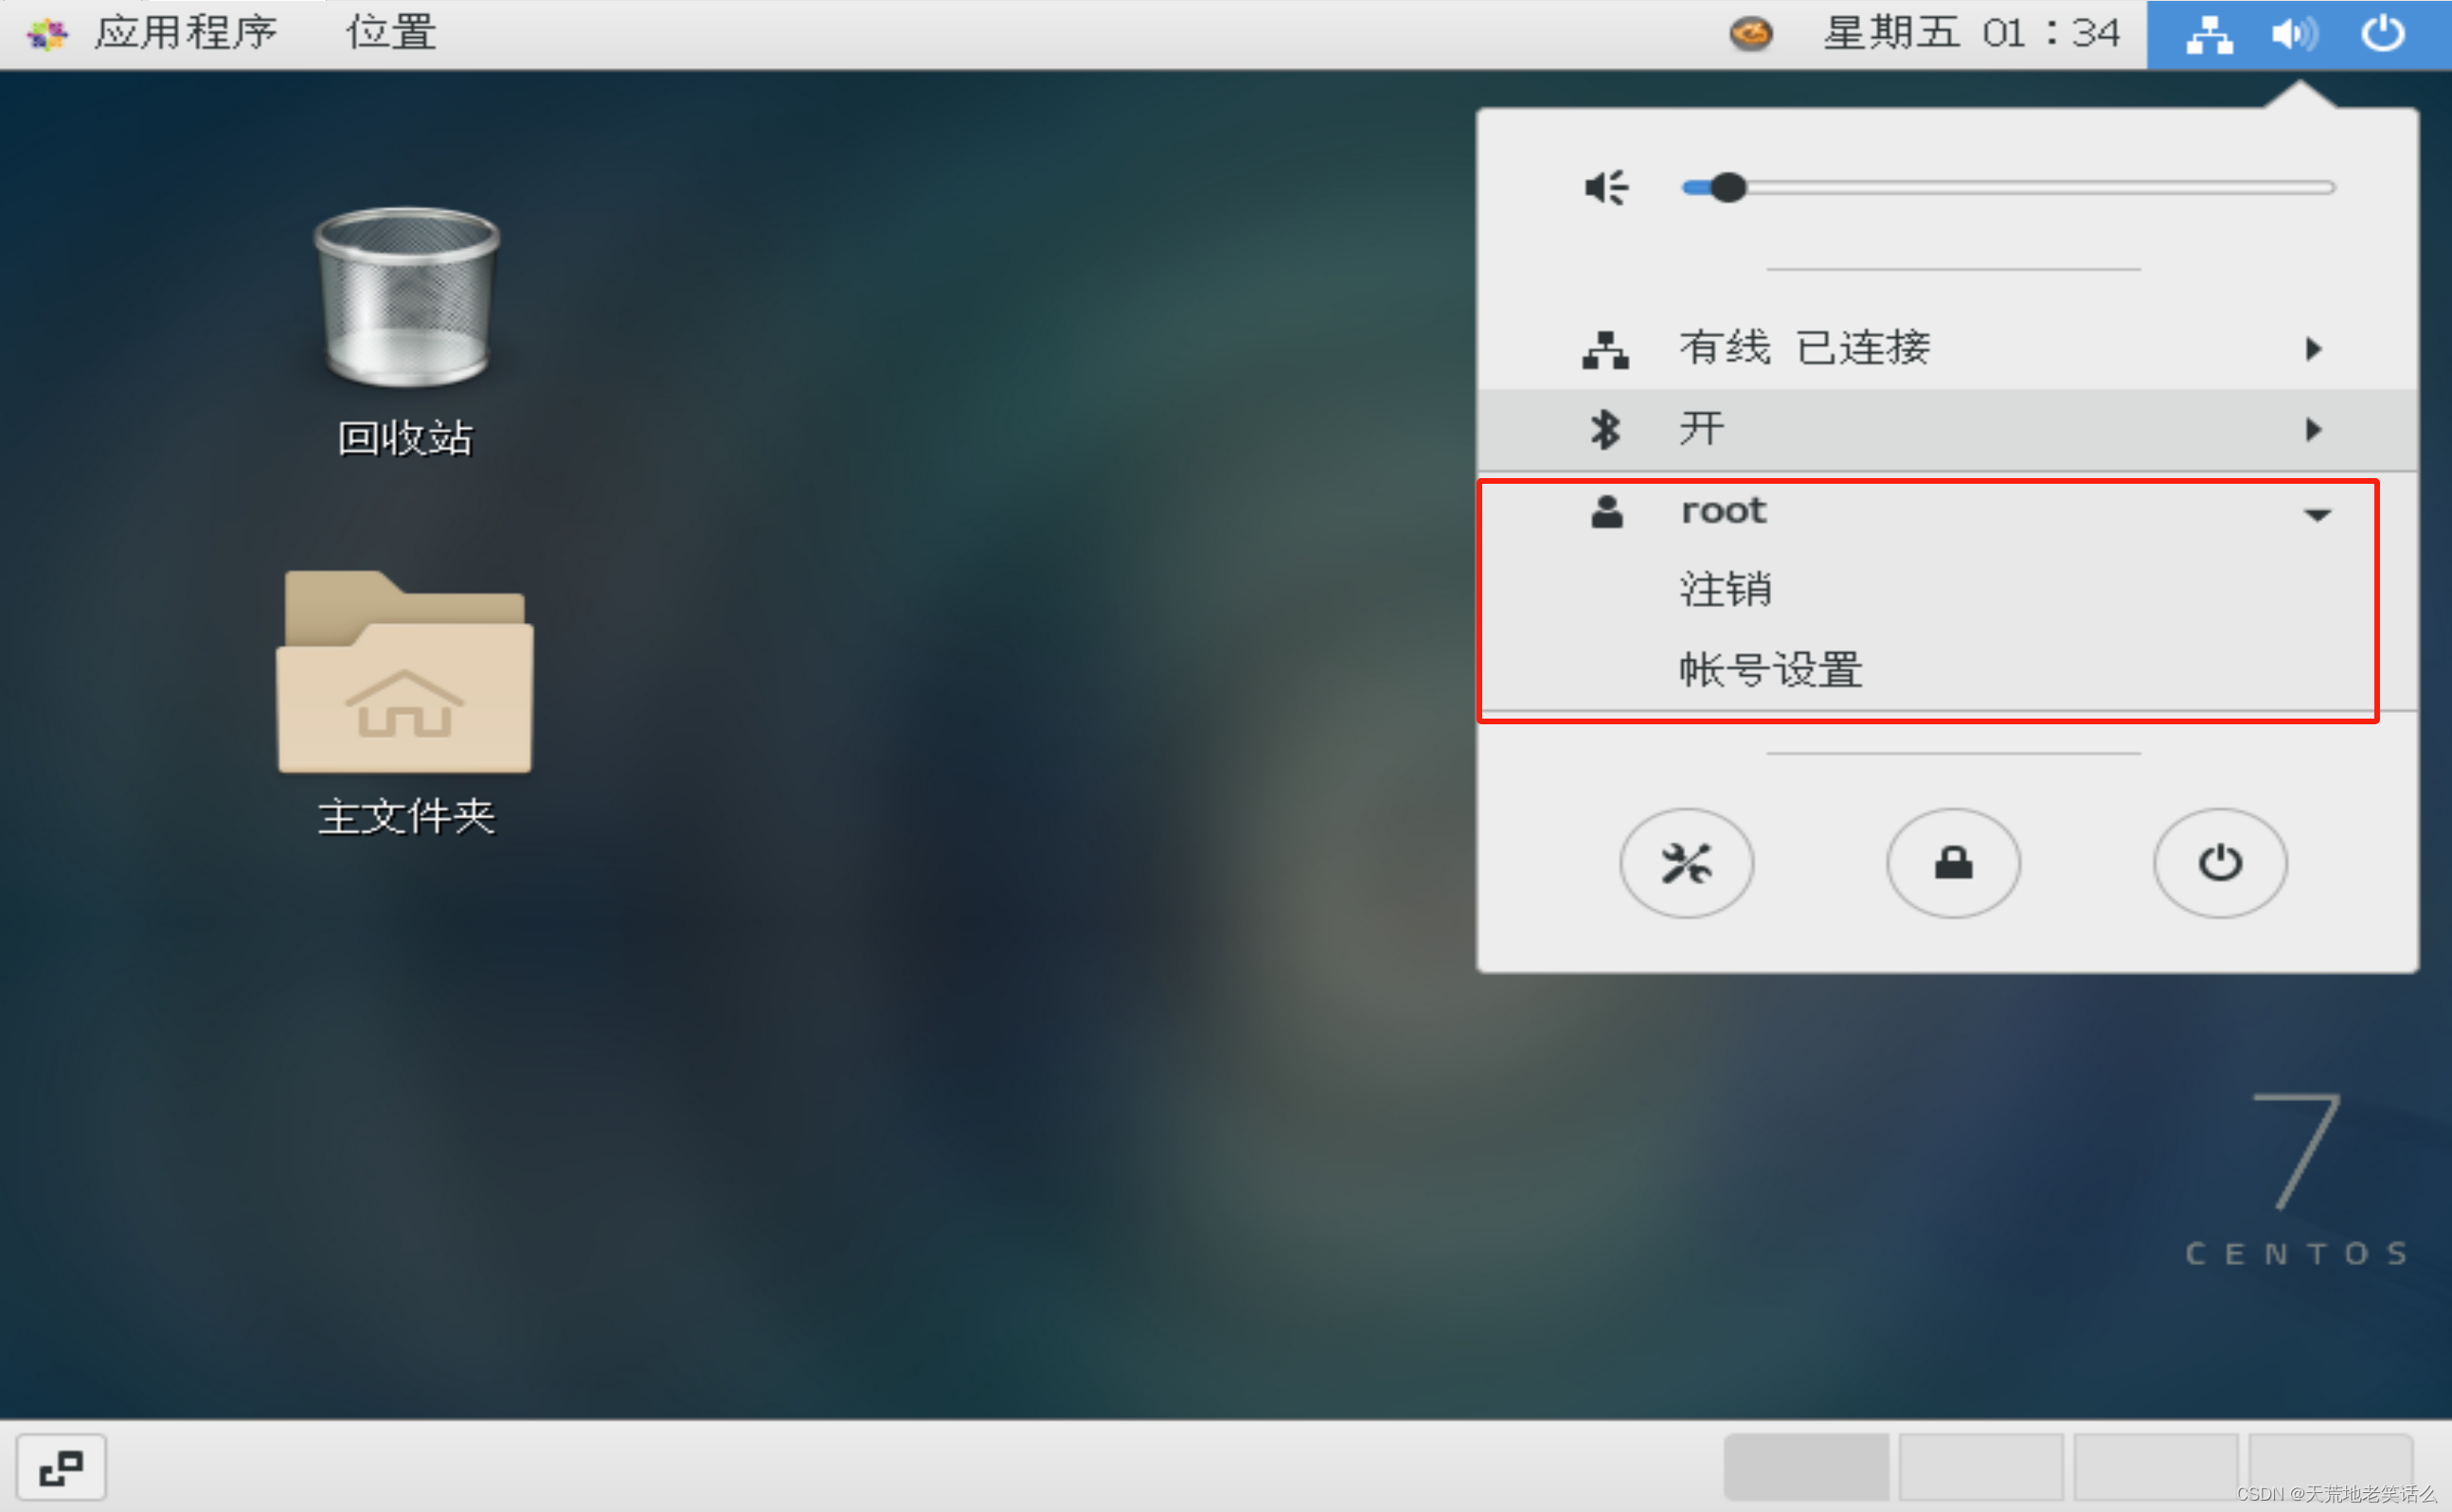
最后的用户变成
root
表示切换成功
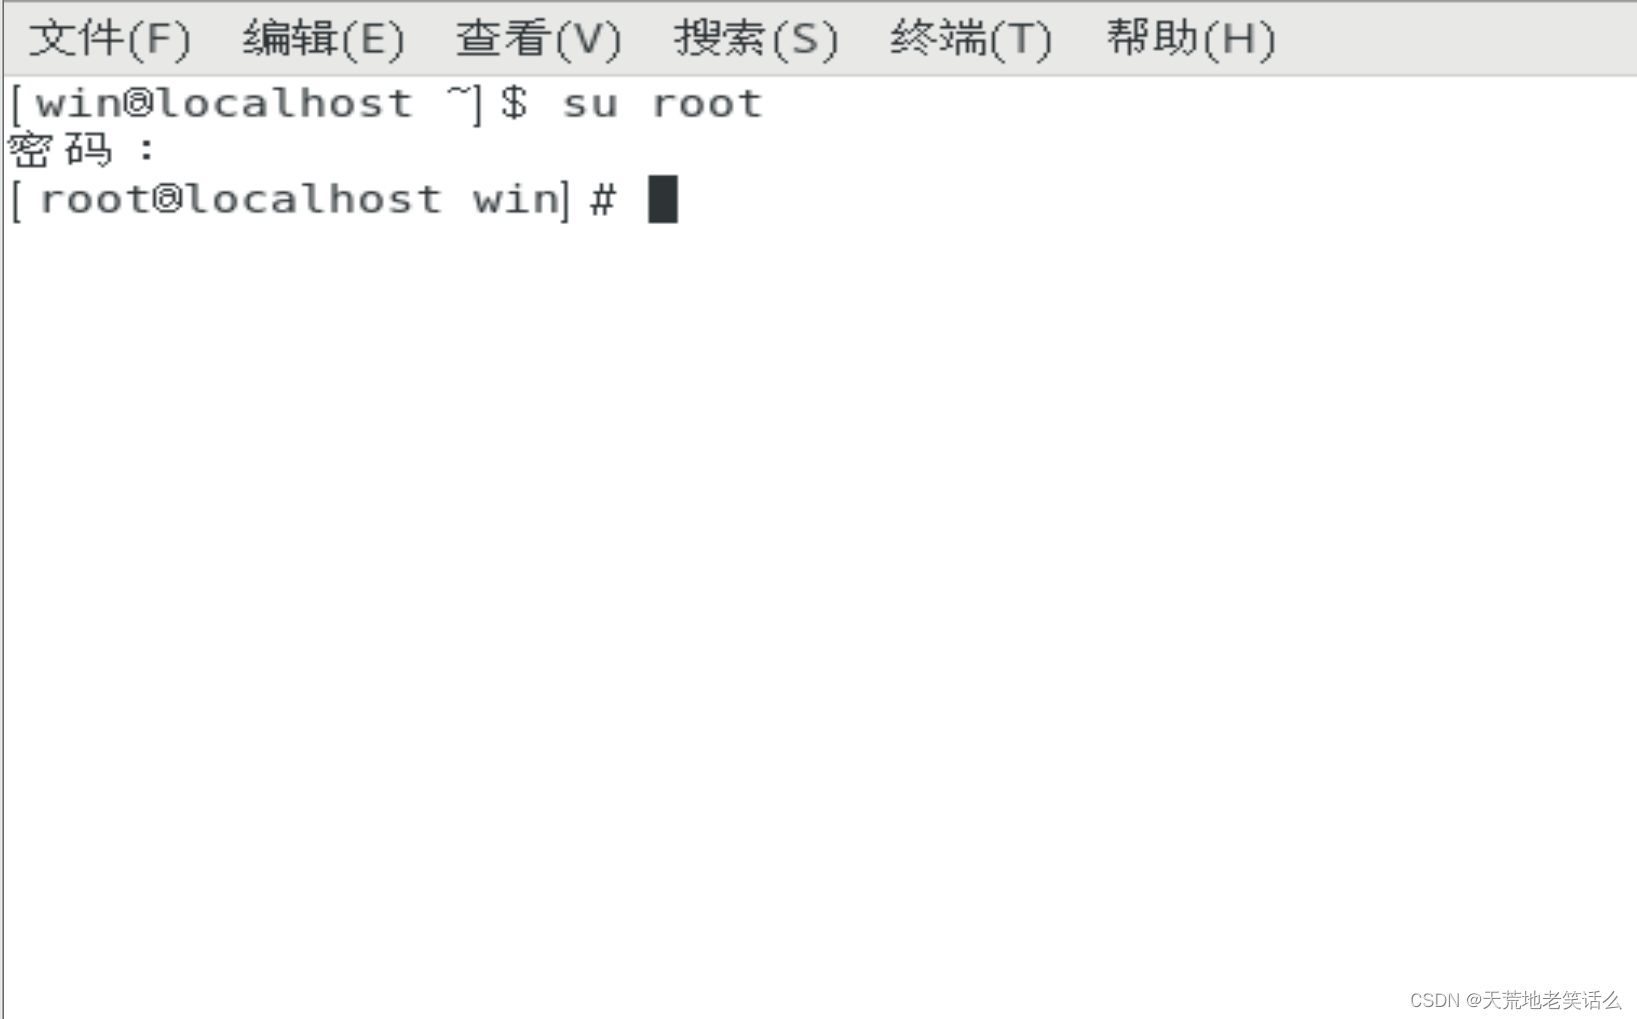
2)终端切换用户
打开终端-->输入“su root”-->输入密码(密码不可见,输入完回车即可)