1. 创建偏好设置键 CustomNavBarTitlePreferenceKey.swift
import Foundation
import SwiftUI

//@State private var showBackButton: Bool = true
//@State private var title: String = "Title" //""
//@State private var subtitle: String? = "SubTitle" //nil

/// 导航栏标题偏好设置
struct CustomNavBarTitlePreferenceKey: PreferenceKey{
    static var defaultValue: String = ""

    static func reduce(value: inout String, nextValue: () -> String) {
        value = nextValue()
    }
}

/// 导航栏子标题偏好设置
struct CustomNavBarSubtitlePreferenceKey: PreferenceKey{
    static var defaultValue: String? = nil

    static func reduce(value: inout String?, nextValue: () -> String?) {
        value = nextValue()
    }
}

/// 导航栏隐藏返回按钮偏好设置
struct CustomNavBarBackButtonHiddenPreferenceKey: PreferenceKey{
    static var defaultValue: Bool = false

    static func reduce(value: inout Bool, nextValue: () -> Bool) {
        value = nextValue()
    }
}

/// 扩展 View
extension View{
    /// 保存导航栏标题
    func customNavigationTitle(_ title: String) -> some View{
        preference(key: CustomNavBarTitlePreferenceKey.self, value: title)
    }

    /// 保存导航栏子标题
    func customNavigationSubtitle(_ subtitle: String?) -> some View{
        preference(key: CustomNavBarSubtitlePreferenceKey.self, value: subtitle)
    }

    /// 保存导航栏是否显示回退键
    func customNavigationBarBackButtonHidden(_ value: Bool) -> some View{
        preference(key: CustomNavBarBackButtonHiddenPreferenceKey.self, value: value)
    }

    /// 自定义导航栏选项
    func customNavBarItems(title: String = "", subtitle: String? = nil, backButtonHidden: Bool = false) -> some View{
        self
            .customNavigationTitle(title)
            .customNavigationSubtitle(subtitle)
            .customNavigationBarBackButtonHidden(backButtonHidden)
    }
}
2. 创建自定义导航栏视图 CustomNavBarView.swift
import SwiftUI

/// 自定义导航栏视图
struct CustomNavBarView: View {
    @Environment(\.presentationMode) var presentationMode
    let showBackButton: Bool
    let title: String //""
    let subtitle: String? //nil

    var body: some View {
        HStack {
            if showBackButton {
                backButton
            }
            Spacer()
            titleSection
            Spacer()
            if showBackButton {
                backButton
                    .opacity(0)
            }
        }
        .padding()
        .accentColor(.white)
        .foregroundColor(.white)
        .font(.headline)
        .background(
            Color.accentColor.ignoresSafeArea(edges: .top)
        )
    }
}

extension CustomNavBarView{
    /// 返回按钮
    private var backButton: some View{
        Button {
            presentationMode.wrappedValue.dismiss()
        } label: {
            Image(systemName: "chevron.left")
                .padding()
        }
    }

    /// 标题视图
    private var titleSection: some View{
        VStack(spacing: 4) {
            Text(title)
                .font(.title)
                .fontWeight(.semibold)
            if let subtitle = subtitle{
                Text(subtitle)
            }
        }
    }
}

struct CustomNavBarView_Previews: PreviewProvider {
    static var previews: some View {
        VStack {
            CustomNavBarView(showBackButton: true, title: "Title", subtitle: "Subtitle")
            Spacer()
        }
    }
}
3. 创建自定义导航栏容器视图 CustomNavBarContainerView.swift
import SwiftUI

/// 自定义导航栏容器视图
struct CustomNavBarContainerView<Context: View>: View {
    let context: Context
    @State private var showBackButton: Bool = true
    @State private var title: String = ""
    @State private var subtitle: String? = nil
    init(@ViewBuilder context: () -> Context) {
        self.context = context()
    }

    var body: some View {
        VStack(spacing: 0) {
            CustomNavBarView(showBackButton: showBackButton, title: title, subtitle: subtitle)
            context
                .frame(maxWidth: .infinity, maxHeight: .infinity)
        }
         // 监听偏好值
        .onPreferenceChange(CustomNavBarTitlePreferenceKey.self) { value in
            self.title = value
        }
        .onPreferenceChange(CustomNavBarSubtitlePreferenceKey.self) { value in
            self.subtitle = value
        }
        .onPreferenceChange(CustomNavBarBackButtonHiddenPreferenceKey.self) { value in
            self.showBackButton = !value
        }
    }
}

struct CustomNavBarContainerView_Previews: PreviewProvider {
    static var previews: some View {
        CustomNavBarContainerView {
            ZStack {
                Color.green.ignoresSafeArea()
                Text("Hello world")
                    .foregroundColor(.white)
                    .customNavigationTitle("Title")
                    .customNavigationSubtitle("Subtitle")
                    .customNavigationBarBackButtonHidden(true)
            }
        }
    }
}
4. 创建自定义导航视图 CustomNavView.swift
import SwiftUI

/// 自定义导航视图
struct CustomNavView<Content: View>: View {
    /// 泛型
    let context: Content

    init(@ViewBuilder context: () -> Content) {
        self.context = context()
    }

    var body: some View {
        NavigationView {
            CustomNavBarContainerView {
                context
            }
        }
        .navigationViewStyle(.stack)
    }
}

extension UINavigationController{
    open override func viewDidLoad() {
        super.viewDidLoad()
        // 手势识别器交互代理置为 nil,进入下一个导航页面,从左往右滑,能够移除当前页面
       interactivePopGestureRecognizer?.delegate = nil
    }
}

struct CustomNavView_Previews: PreviewProvider {
    static var previews: some View {
        CustomNavView {
            Color.red.ignoresSafeArea()
        }
    }
}
5. 创建自定义导航视图链接到下一个视图 CustomNavLink.swift
import SwiftUI

/// 自定义导航视图链接下个视图
struct CustomNavLink<Label: View, Destination: View>: View {

    let destination: Destination
    let lable: Label

    init(@ViewBuilder destination: () -> Destination, @ViewBuilder label: () -> Label) {
        self.destination = destination()
        self.lable = label()
    }

    var body: some View {
        NavigationLink {
            CustomNavBarContainerView {
                destination
            }
            .navigationBarHidden(true)

        } label: {
            lable
        }
    }
}

struct CustomNavLink_Previews: PreviewProvider {
    static var previews: some View {
        // 自定义导航试图
        CustomNavView {
            CustomNavLink {
                Text("Destination")
            } label: {
                Text("CLICK ME")
            }
        }
    }
}
6. 创建应用导航栏视图 AppNavBarView.swift
import SwiftUI

/// 应用导航栏视图
struct AppNavBarView: View {
    var body: some View {
        /// 系统默认导航栏
        //defaultNavBavView
        /// 自定义导航栏
        customNavBavView
    }
}

/// 扩展 View
extension AppNavBarView{
    /// 系统默认导航栏
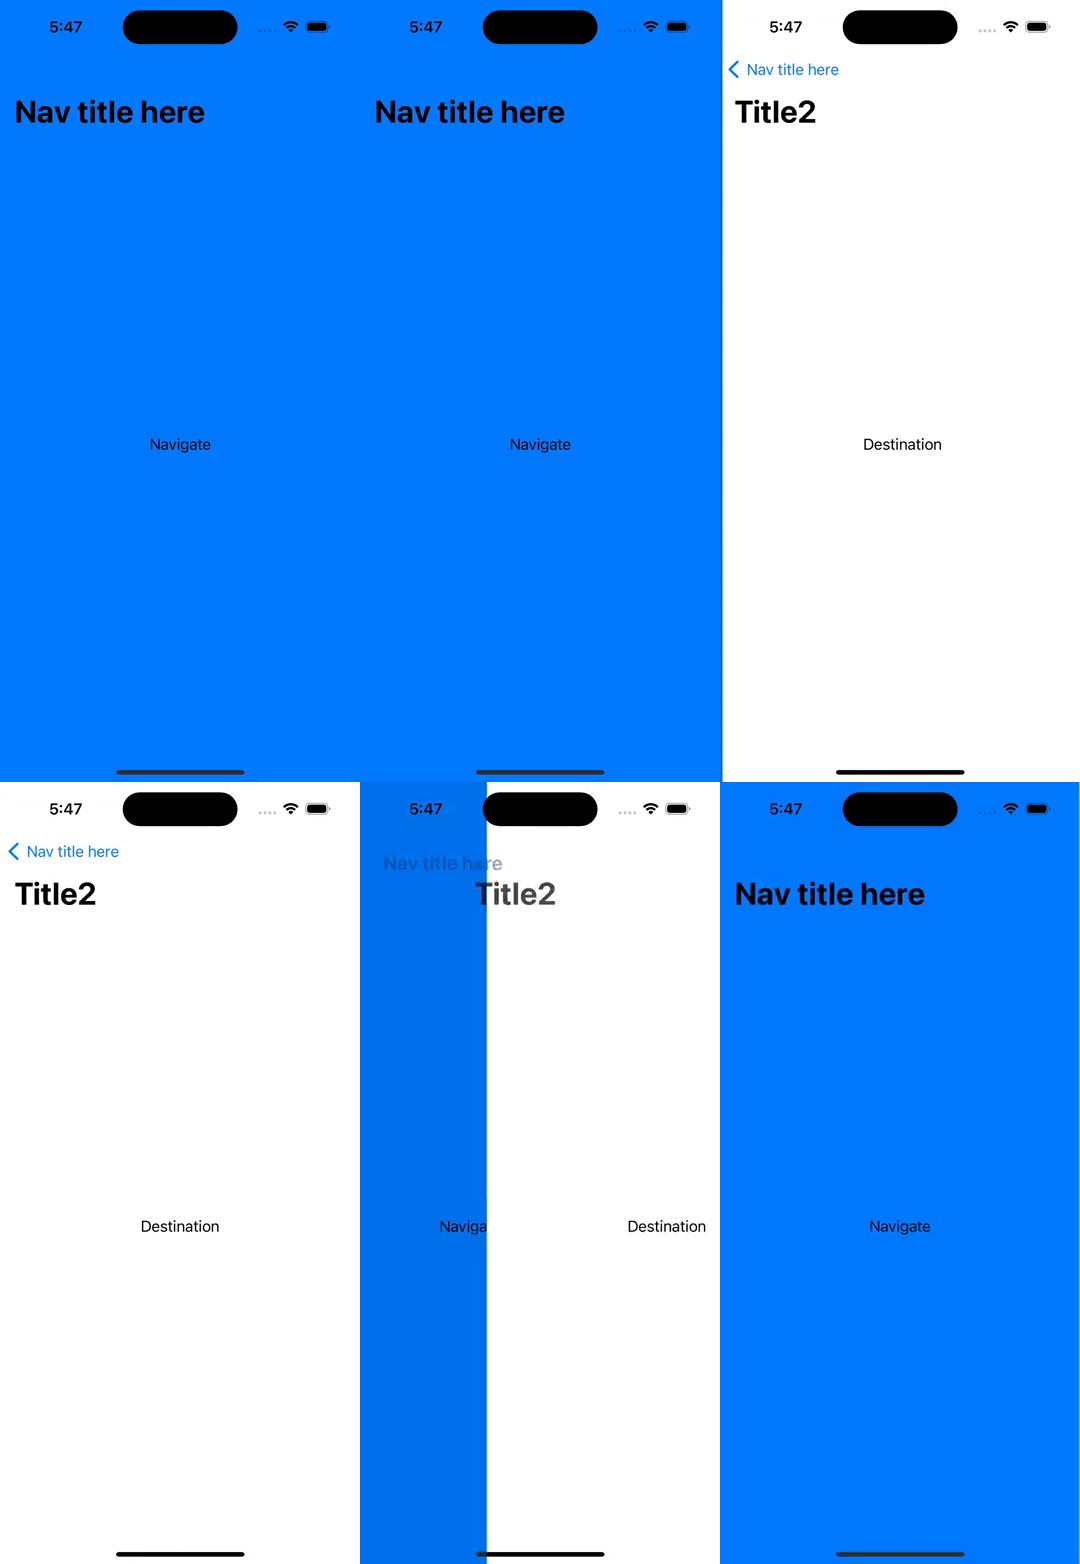
    private var defaultNavBavView: some View{
        NavigationView {
            ZStack {
                Color.green
                    .ignoresSafeArea()
                NavigationLink {
                    Text("Destination")
                        .navigationTitle("Title2")
                        .navigationBarBackButtonHidden(false)
                } label: {
                    Text("Navigate")
                        .foregroundColor(.black)
                }
            }
            .navigationTitle("Nav title here")
        }
    }

    /// 自定义导航栏
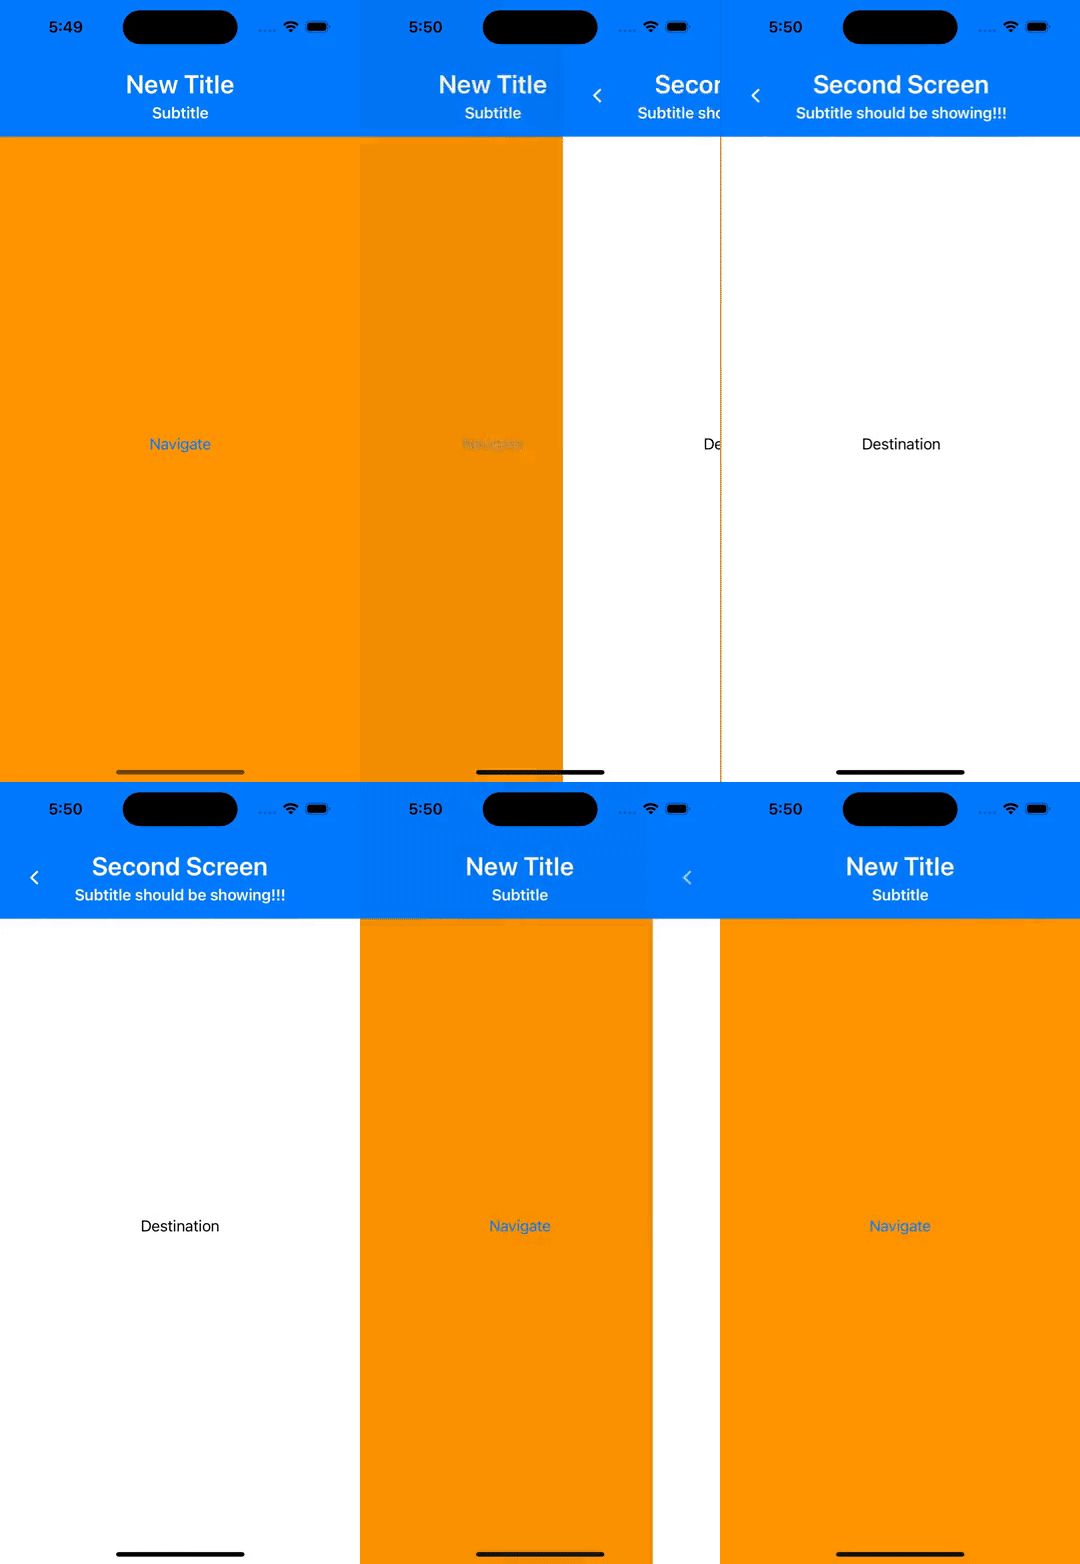
    private var customNavBavView: some View{
        CustomNavView {
            ZStack {
                Color.orange.ignoresSafeArea(edges: .bottom)
                CustomNavLink {
                    Text("Destination")
                        .customNavBarItems(title: "Second Screen", subtitle: "Subtitle should be showing!!!")
                } label: {
                    Text("Navigate")
                }
            }
            .customNavBarItems(title: "New Title", subtitle: "Subtitle", backButtonHidden: true)
        }
    }
}

struct AppNavBarView_Previews: PreviewProvider {
    static var previews: some View {
        AppNavBarView()
    }
}
7. 效果图:
