1、通过官网或其他方式下载安装包

2、安装Java,自行下载
[root@localhost ~]# ll
total 189992
-rw-------. 1 root root      1663 Oct  8 09:06 anaconda-ks.cfg
-rw-r--r--. 1 root root 194545143 Oct  8 17:43 jdk-8u241-linux-x64.tar.gz
[root@localhost ~]# tar xf jdk-8u241-linux-x64.tar.gz -C /usr/local/
[root@localhost ~]# tail -5 /etc/profile
export JAVA_HOME=/usr/local/jdk1.8.0_241/
export PATH=$JAVA_HOME/bin:$PATH
export CLASSPATH=.:$JAVA_HOME/lib/dt.jar:$JAVA_HOME/lib/tools.jar
[root@localhost ~]# source /etc/profile
[root@localhost ~]# java -version
java version "1.8.0_241"
Java(TM) SE Runtime Environment (build 1.8.0_241-b07)
Java HotSpot(TM) 64-Bit Server VM (build 25.241-b07, mixed mode)
3、解压nexus
[root@localhost ~]# tar xf nexus-3.42.0-01-unix.tar.gz -C /opt/
[root@localhost ~]# ll /opt/
total 0
drwxr-xr-x. 10 root root 181 Oct  8 18:40 nexus-3.42.0-01
drwxr-xr-x.  3 root root  20 Oct  8 18:40 sonatype-work
nexus-3.42.0-01:用于实现 nexus 功能
sonatype-work:用于存储数据
4、启动nexus
[root@localhost ~]# cd /opt/nexus-3.42.0-01/etc/
[root@localhost etc]# cat nexus-default.properties
## DO NOT EDIT - CUSTOMIZATIONS BELONG IN $data-dir/etc/nexus.properties
##
# Jetty section
application-port=8081
application-host=0.0.0.0
nexus-args=${jetty.etc}/jetty.xml,${jetty.etc}/jetty-http.xml,${jetty.etc}/jetty-requestlog.xml
nexus-context-path=/

# Nexus section
nexus-edition=nexus-pro-edition
nexus-features=\
 nexus-pro-feature

nexus.hazelcast.discovery.isEnabled=true

配置文件无其他要求则保持默认即可

启动nexus
[root@localhost etc]# cd /opt/nexus-3.42.0-01/bin/
[root@localhost bin]# ll
total 32
drwxr-xr-x. 2 root root  4096 Oct  8 18:40 contrib
-rwxr-xr-x. 1 root root 18620 Sep 24  2022 nexus
-rw-r--r--. 1 root root    15 Sep 24  2022 nexus.rc
-rw-r--r--. 1 root root  1635 Sep 24  2022 nexus.vmoptions
[root@localhost bin]# ./nexus start
WARNING: ************************************************************
WARNING: Detected execution as "root" user.  This is NOT recommended!
WARNING: ************************************************************
Starting nexus
[root@localhost bin]# netstat -lntup
Active Internet connections (only servers)
Proto Recv-Q Send-Q Local Address           Foreign Address         State       PID/Program name
tcp        0      0 127.0.0.1:42403         0.0.0.0:*               LISTEN      12630/java
tcp        0      0 0.0.0.0:8081            0.0.0.0:*               LISTEN      12630/java
tcp        0      0 0.0.0.0:22              0.0.0.0:*               LISTEN      1160/sshd
tcp        0      0 127.0.0.1:25            0.0.0.0:*               LISTEN      1404/master
tcp6       0      0 :::22                   :::*                    LISTEN      1160/sshd
tcp6       0      0 ::1:25                  :::*                    LISTEN      1404/master

可以看到默认8081端口已启动
5、其他相关命令
#停止
./nexus stop
#重启
./nexus restart
#强制重新加载
./nexus force-reload
#查看状态
./nexus status
6、网页登陆

浏览器访问Nexus的web首页,进行登陆输入账号和密码
默认用户名为admin,密码在 sonatype-work/nexus3 目录下 的 admin.password 文件中查看初始化密码。
[root@localhost ~]# cd /opt/sonatype-work/nexus3/
[root@localhost nexus3]# ls
admin.password  cache  elasticsearch  generated-bundles  karaf.pid  lock  orient  restore-from-backup
blobs           db     etc            instances          keystores  log   port    tmp
[root@localhost nexus3]# cat admin.password
167f1619-f8e5-4ab9-83e7-d040c2f9c8ae
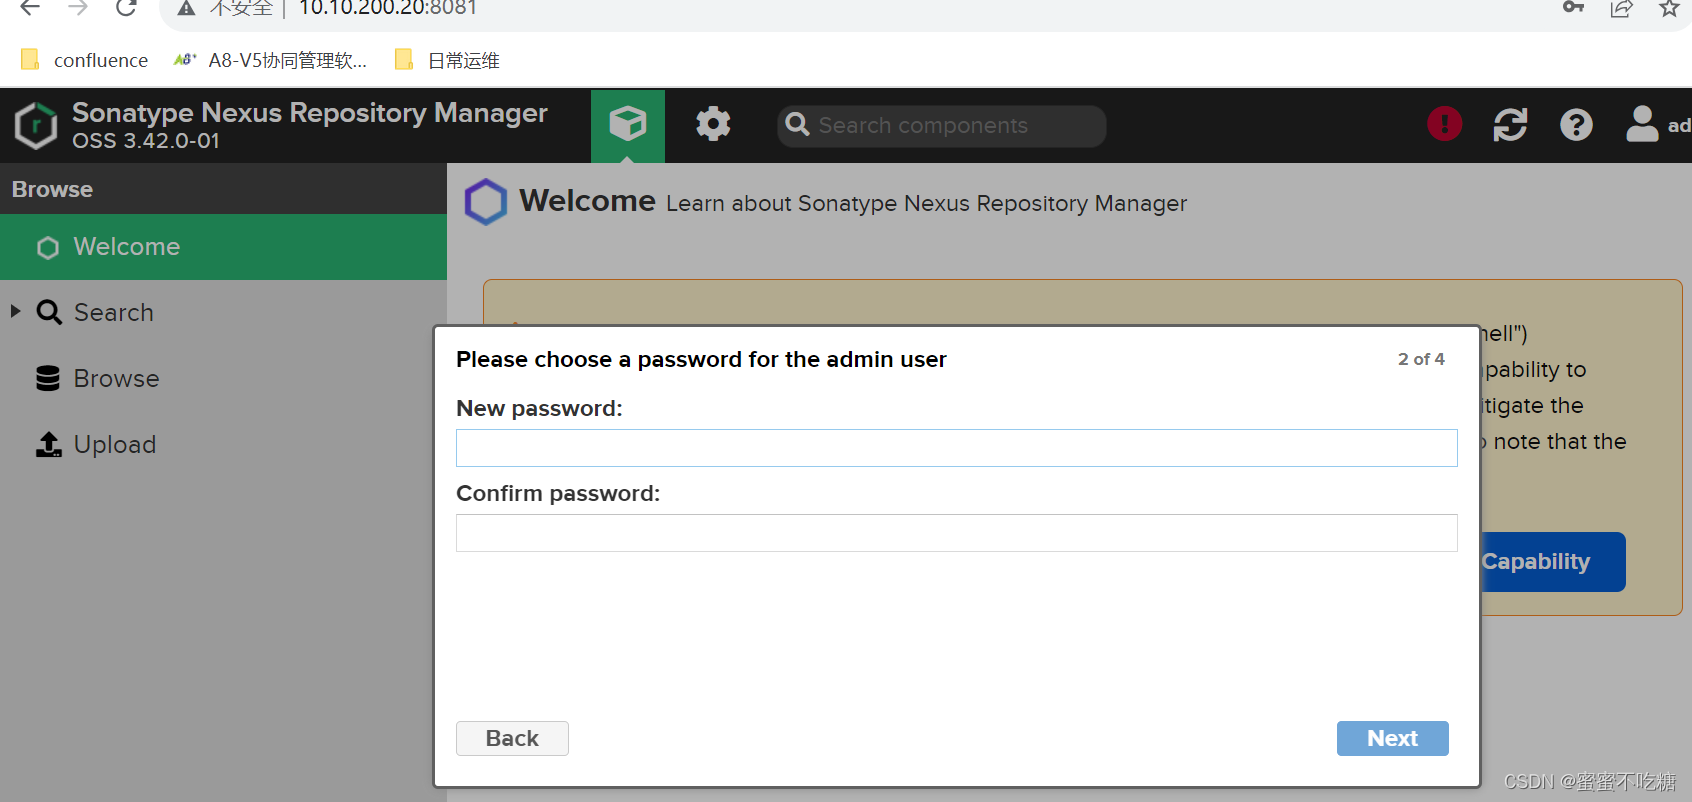
将账号密码输入
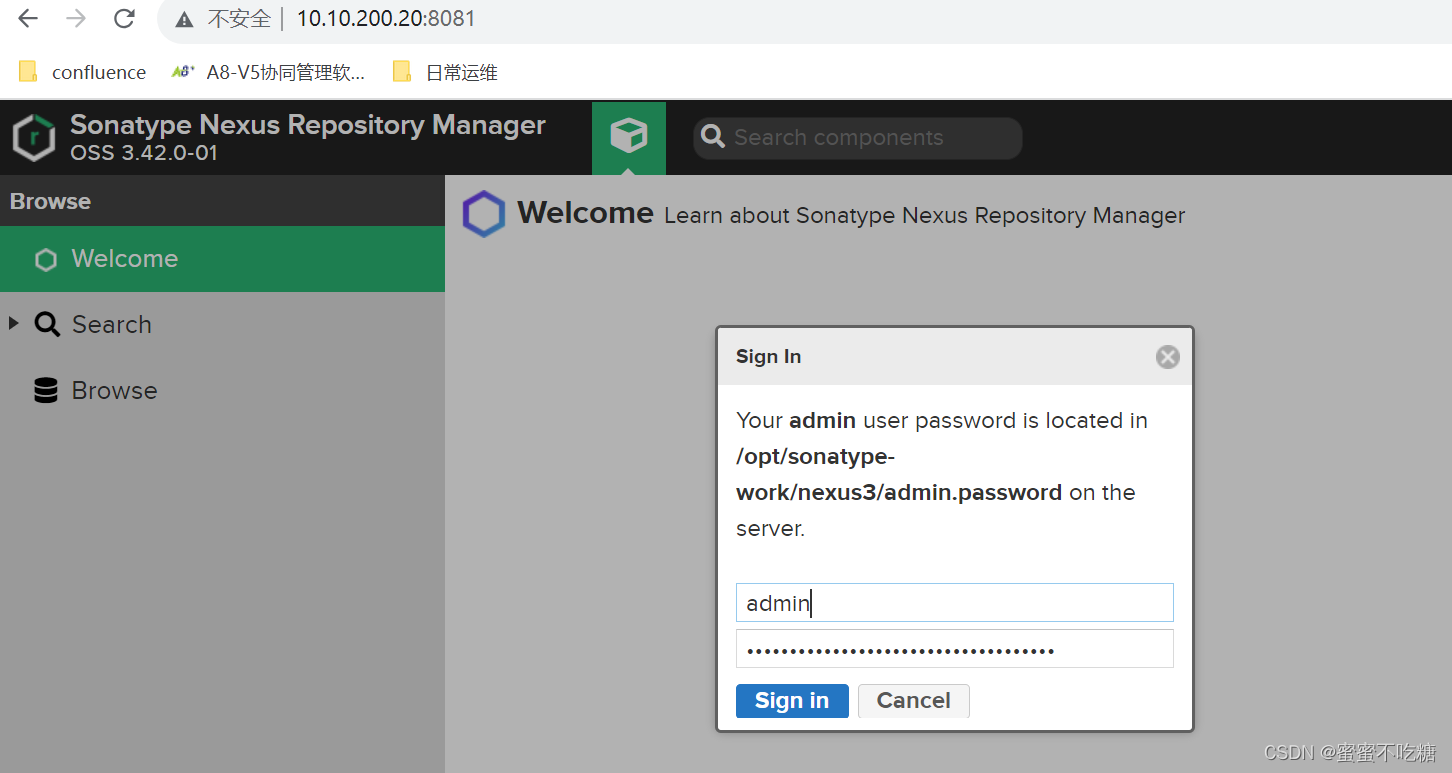
按照提示修改密码
修改完成后查看
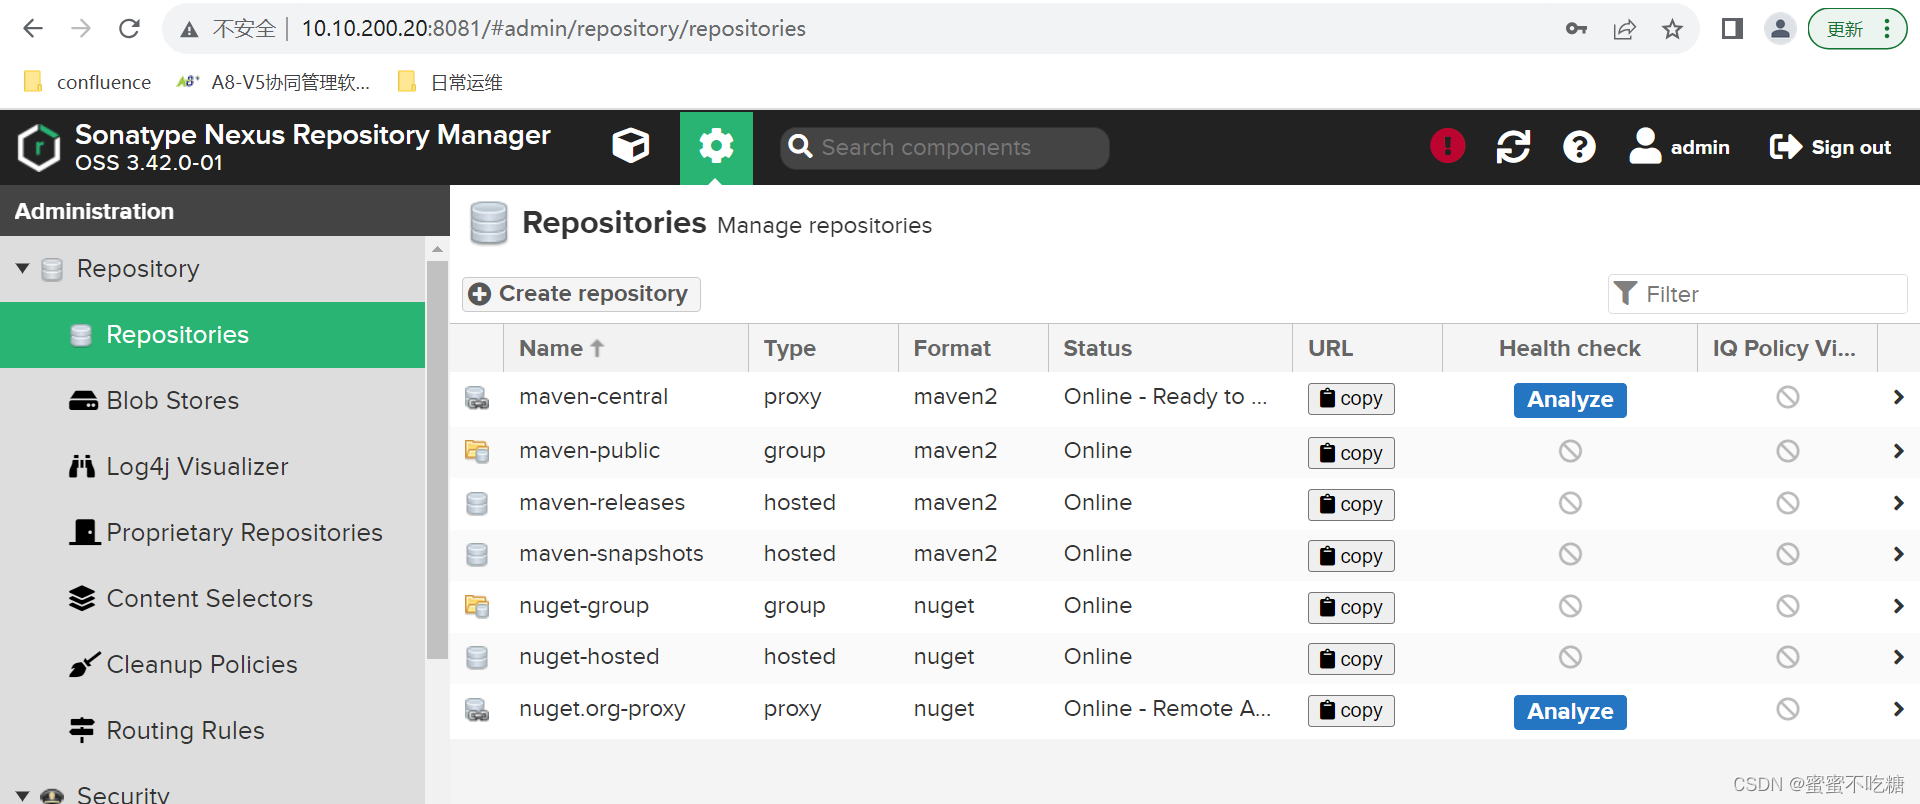
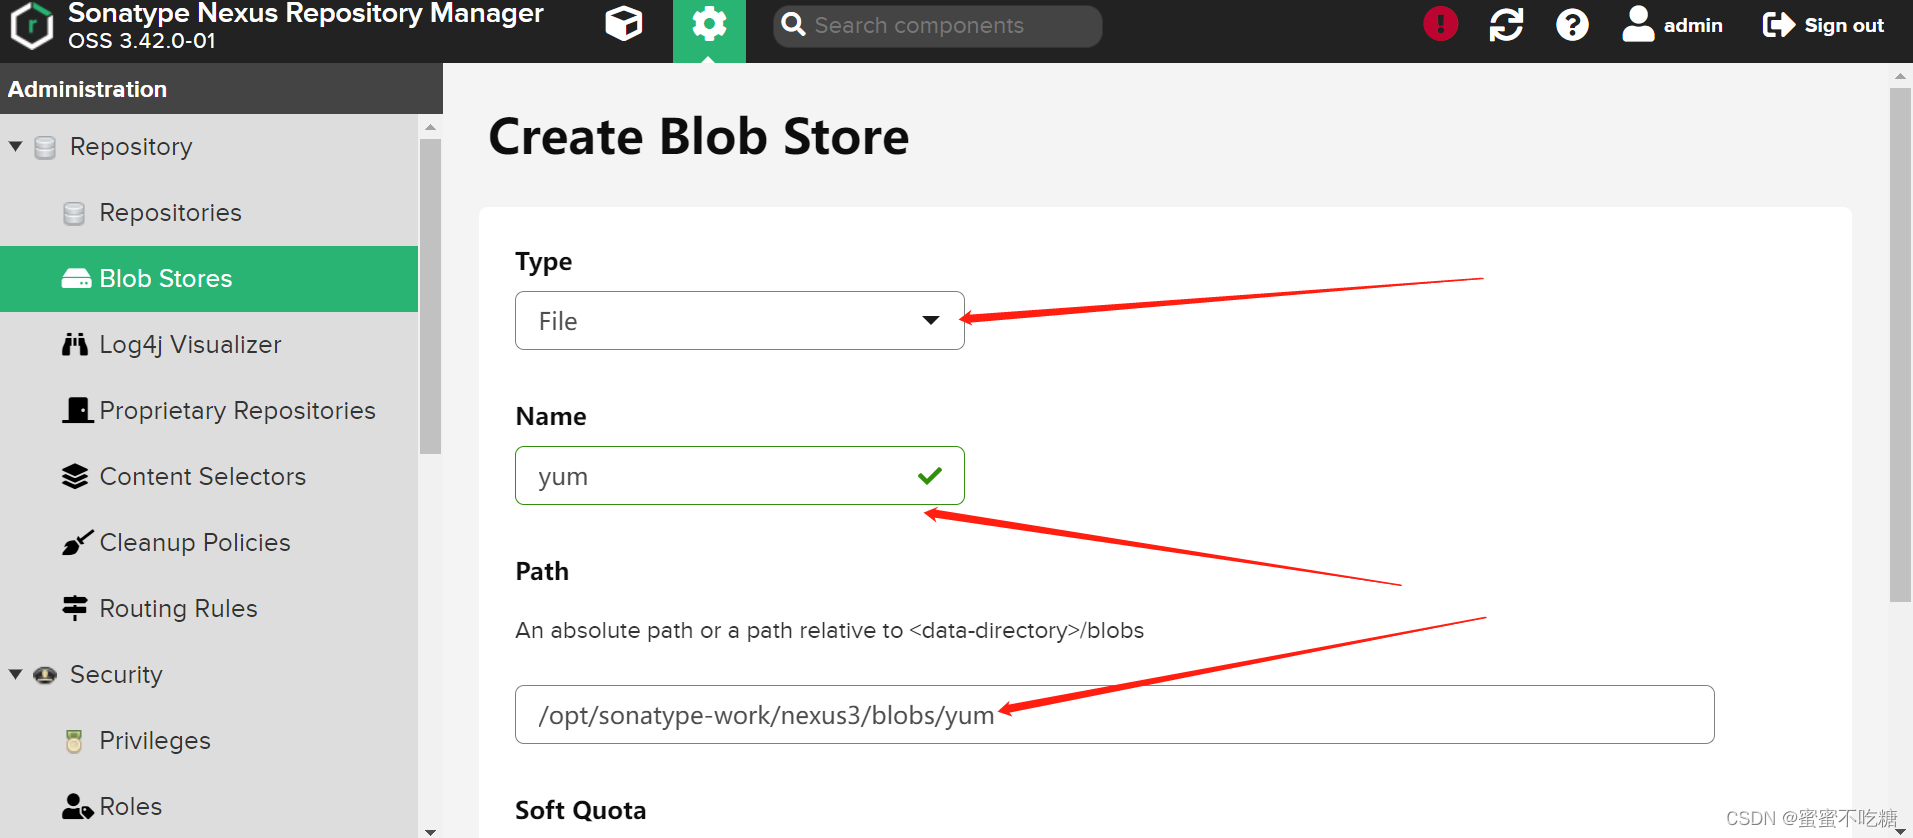
7、创建blob

8、创建repositories
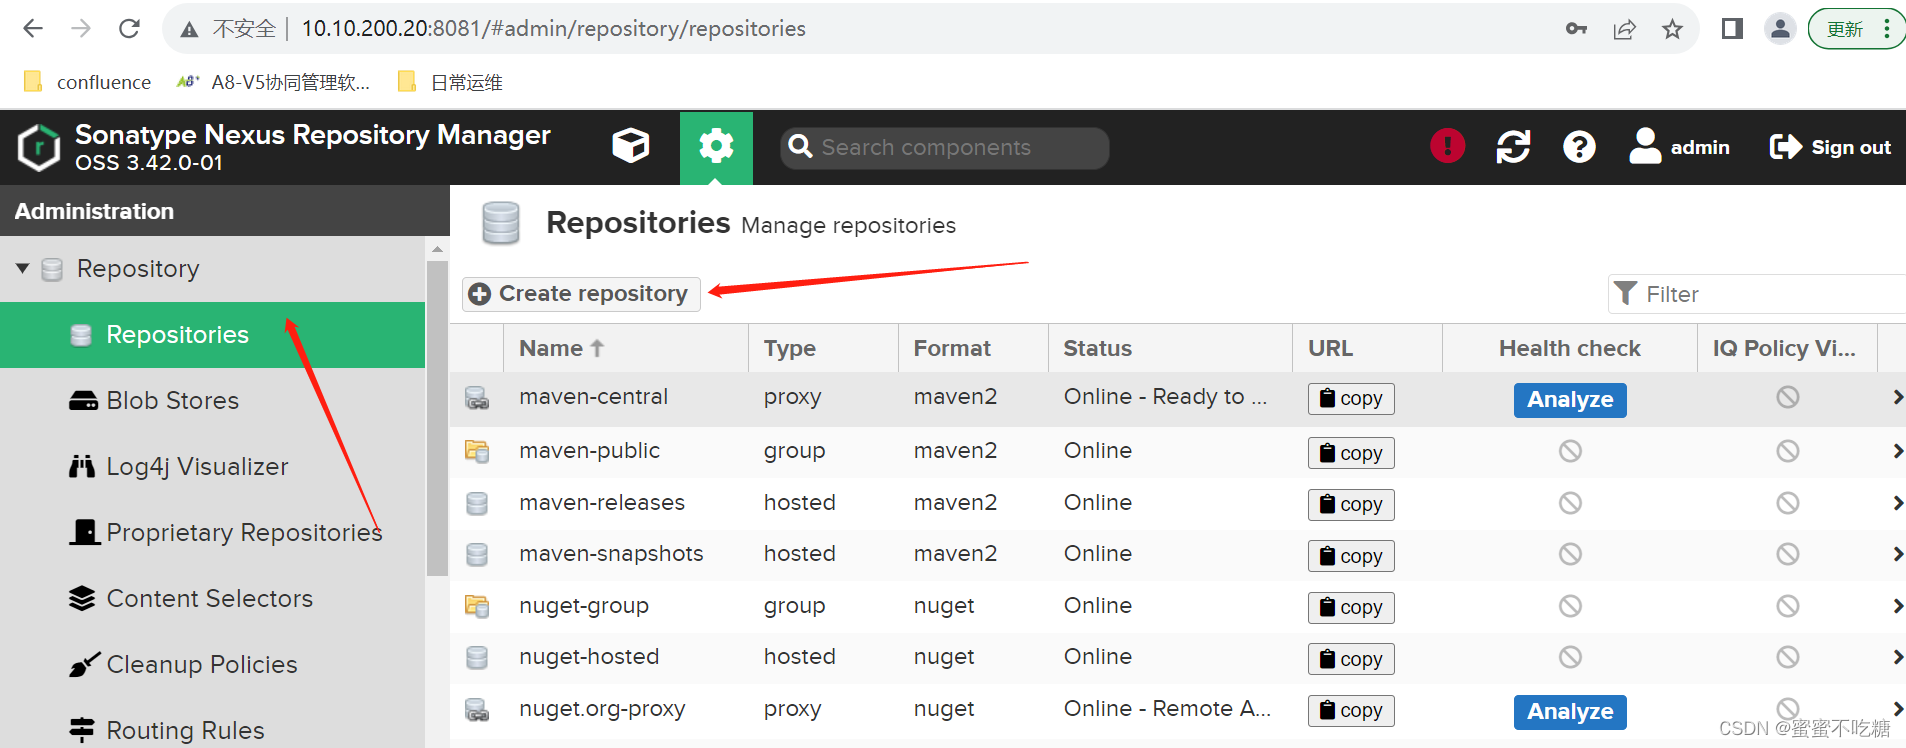
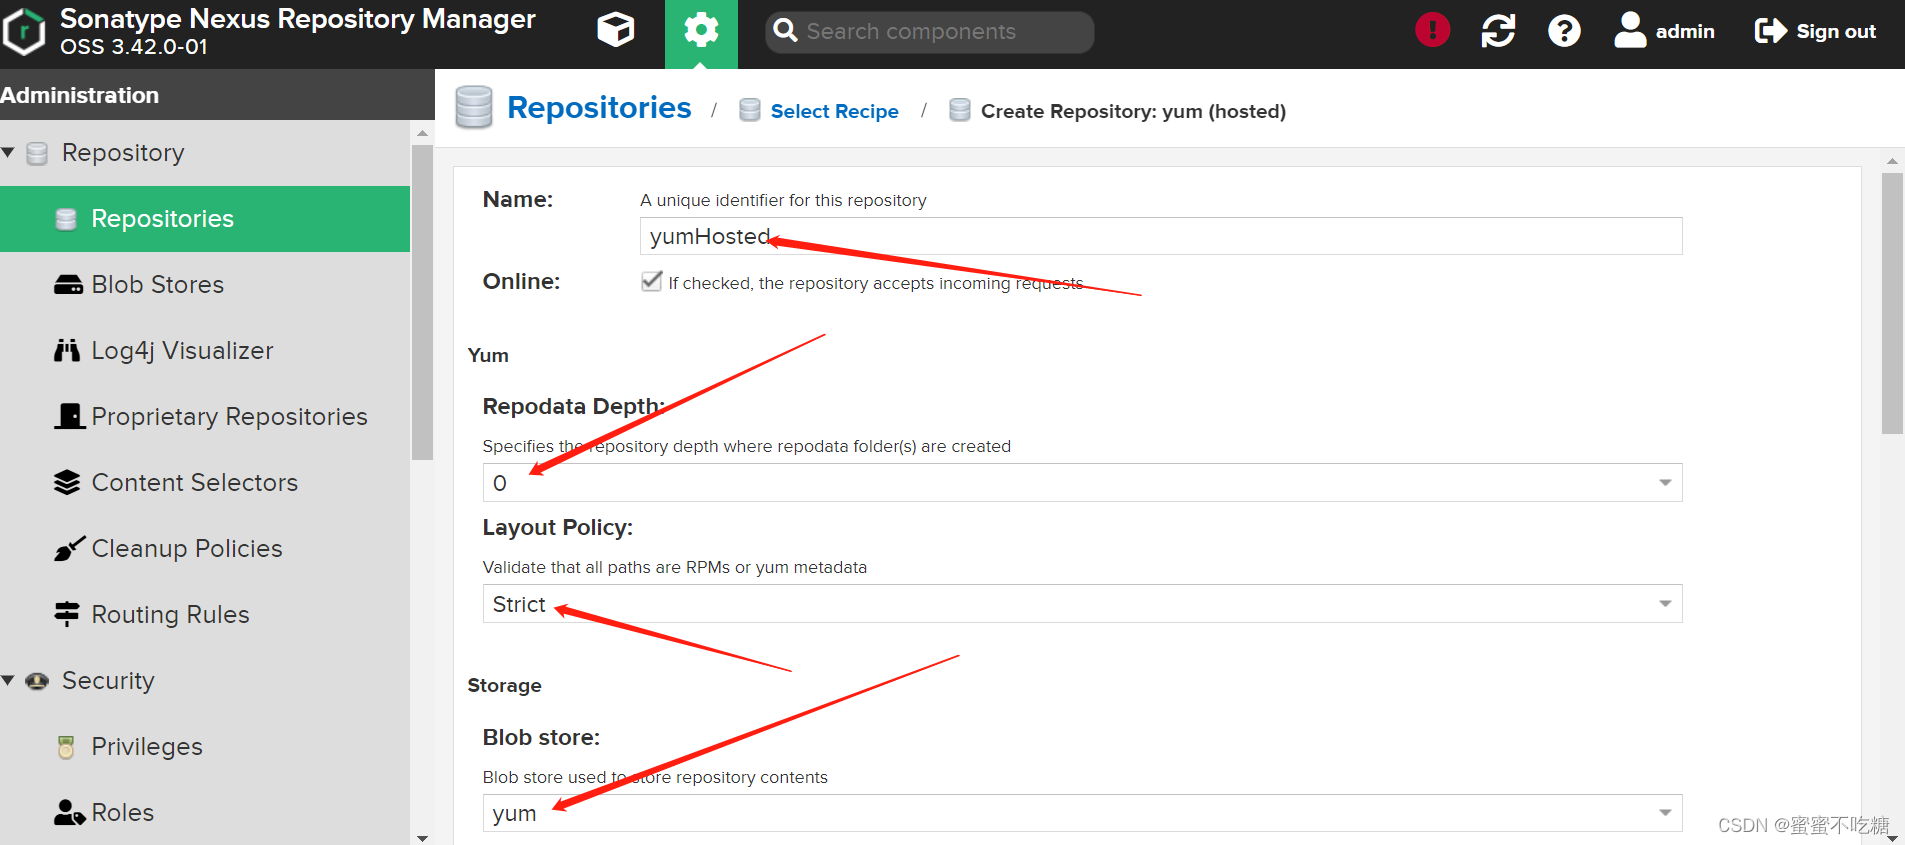
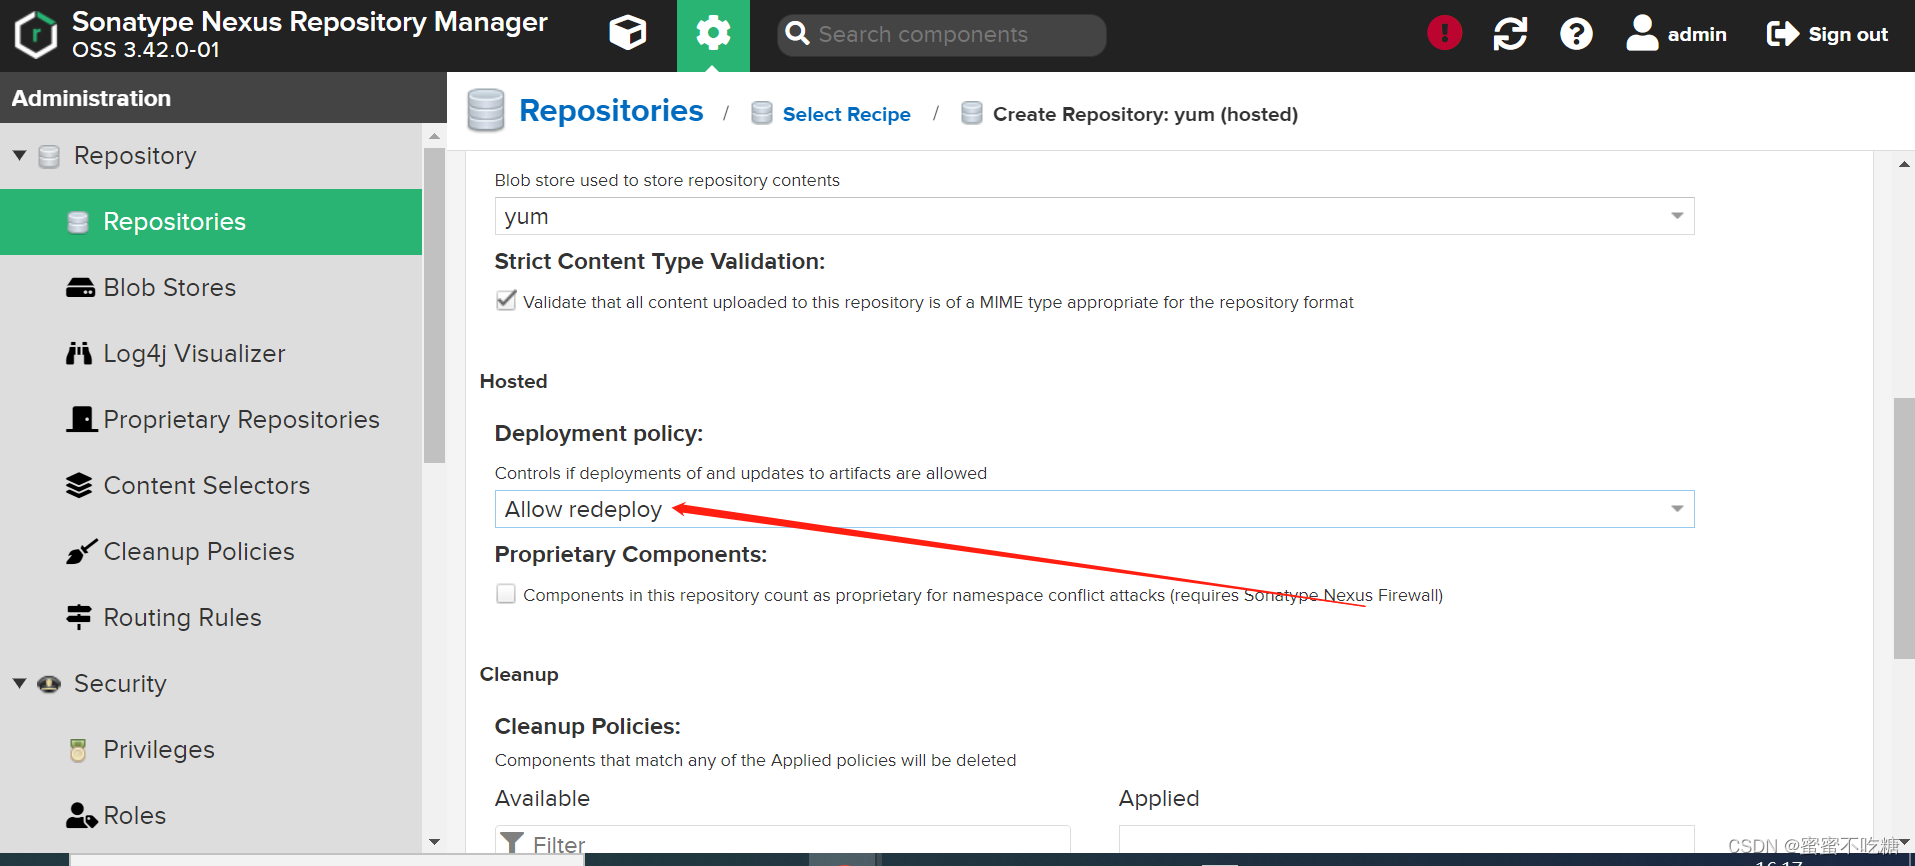
点击创建。
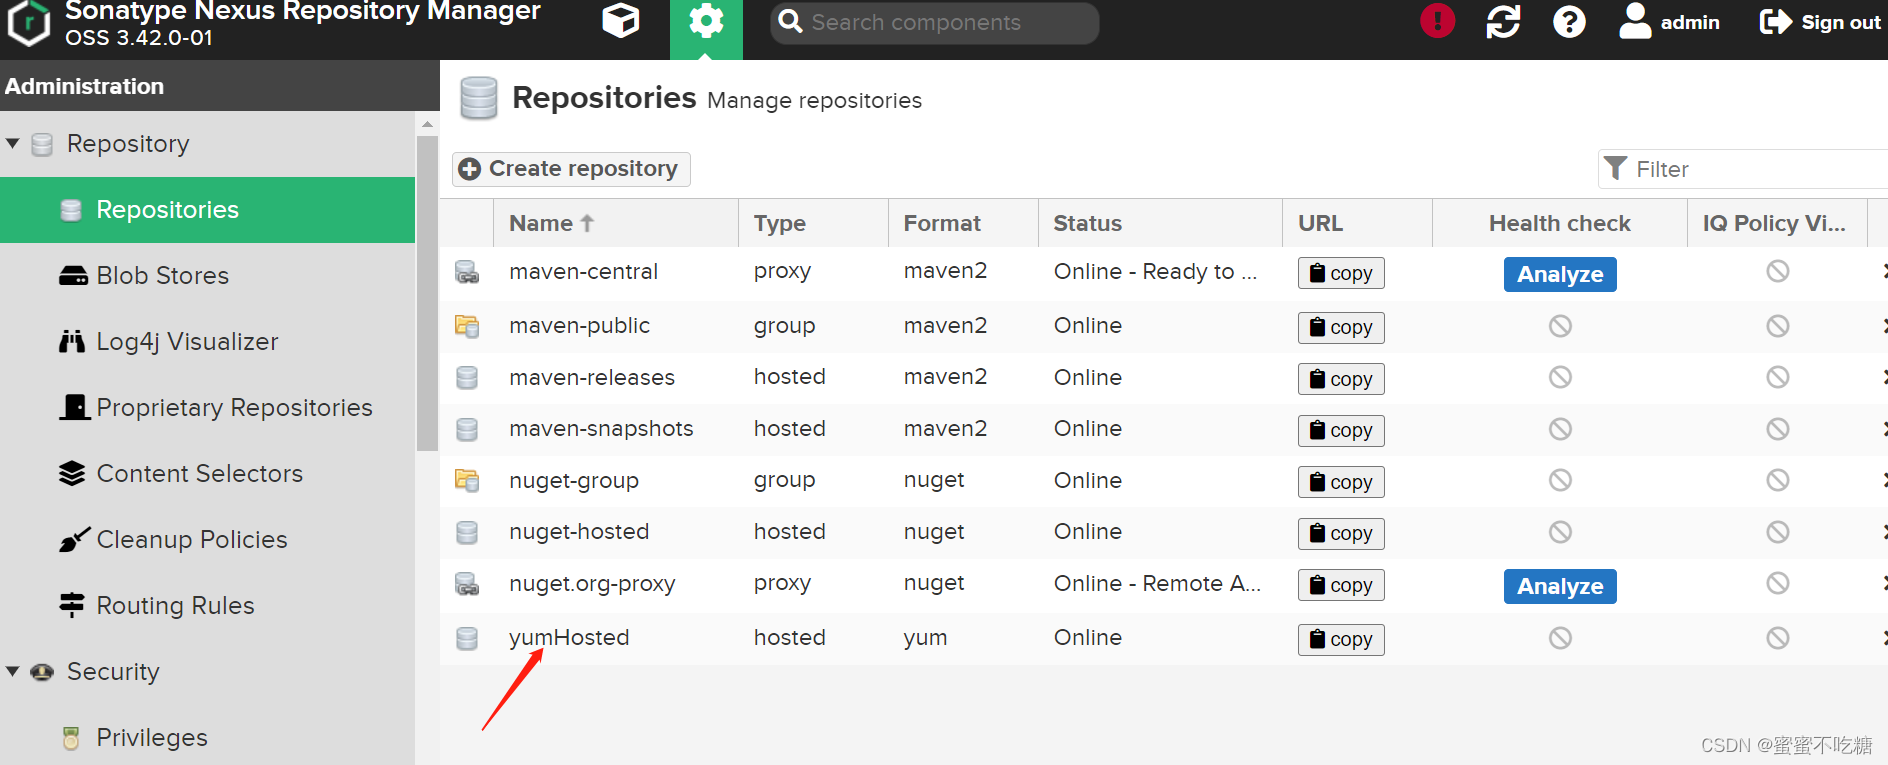

9、服务器后台搭建私有仓库(使用阿里云和epel源,通过reposync下载)
参照我之前文章:centos6&7&8搭建私有仓库
搭建成功后,可导入目录(所有rpm包所在的统一目录)到yumHosted里。
下载完成:
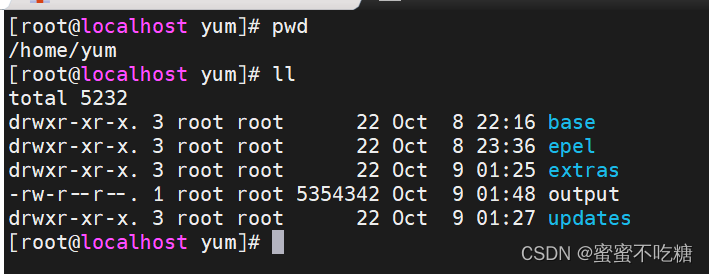
导入目录:
find . -type f -exec curl -v --user 'admin:密码' --upload-file {} http://10.10.200.20:8081/repository/yumHosted/{} \;
全部导入后,可对比大小确认一下:
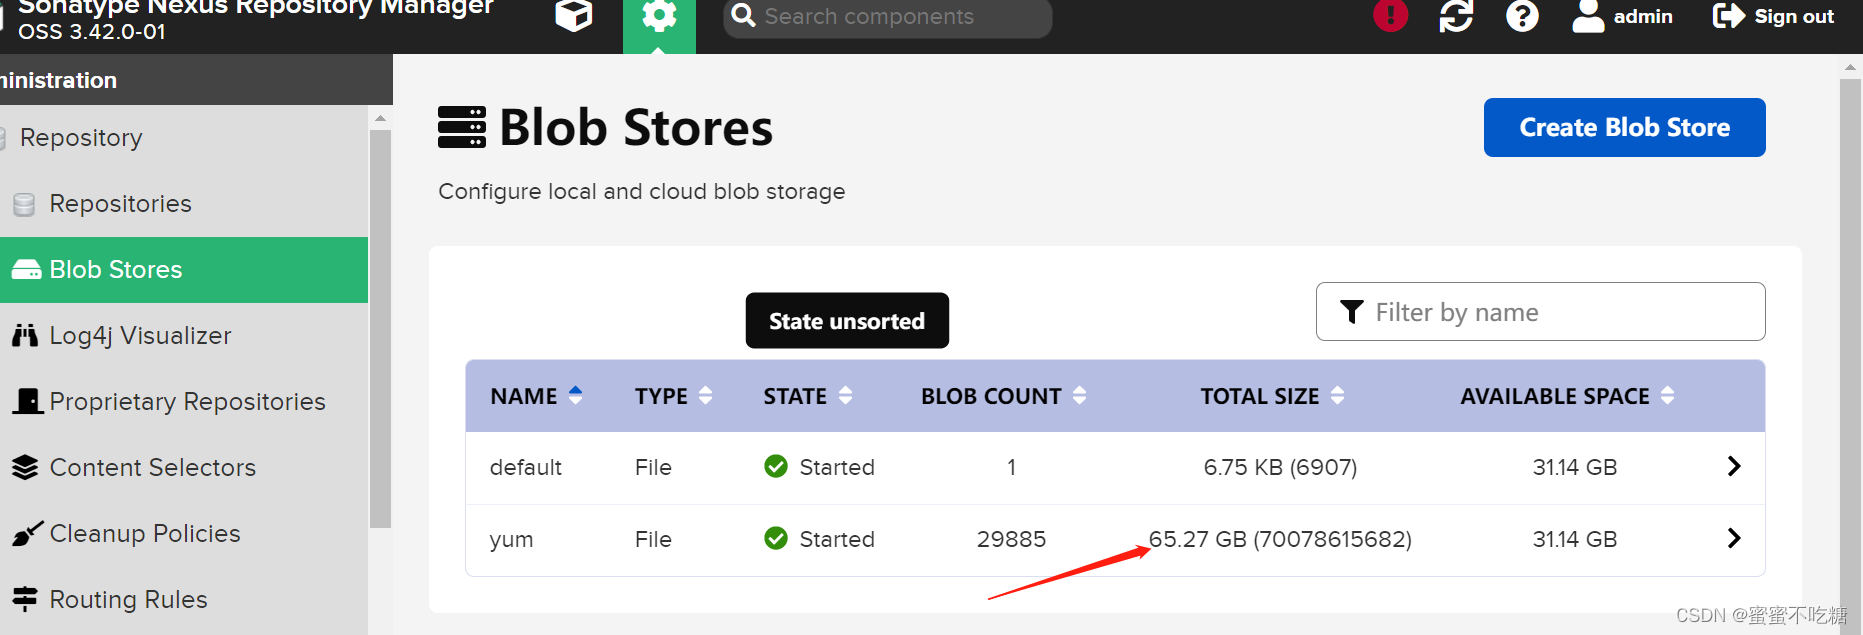

10、客户端配置yum源地址
直接使用上图所示url,repo文件内容如下:
[nexus]
name=Nexus Yum Repository
baseurl=http://10.10.200.20:8081/repository/yumHosted/
enabled=1
gpgcheck=0







![2023年中国MarTech服务商行业发展规模及趋势分析:逐渐呈现出场景化、行业化、定制化[图]](https://img-blog.csdnimg.cn/img_convert/f0b8e7d6b53ab6c9d15faa6780947e5c.png)
