一.配置
1.配置文件
SpringBoot 使用一个全局的配置文件,配置文件名称固定
- application.properties
- application.yml
配置文件的作用:修改 SpringBoot 自动配置的默认值;SpringBoot 在底层都给我们自动配置好
2.tomcat 配置
server:
  port: 8081
  error:
    path: /error
  servlet:
    session:
      timeout: 30m
    context-path: /start
  tomcat:
    uri-encoding: utf-8
    threads:
      max: 500
    basedir: /home/tmp
- server.port 配直了 Web 器的端口号。
- error.path 配直了当项目出错时跳转去的页面
- session .timeout 配置了 session 失效时间 30m 表示 30 分钟,如果不写单位 默认单位是秒,由于 Tomcat 中配直 session 过期时间以分钟为单位,因此这里单位如果是秒的话,该时间会被转换为一个不超过所配置秒数的大分钟数, 例如这里配置了 119 ,默认单位为秒,则实际 session 过期时间为 1 分钟
- context-path 表示项目名称,不配置时默认为/。如果配置了,就要在访问路径中加上配置的路径。
- uri-encoding 表示配置 Tomcat 请求编码。
- max threads 表示 Tomcat 最大线程数。
- basedir 是一个存放 Tomcat 运行日志和临时文件的目录,若不配置,则默认使用系统的临时目录
3.打包配置
<build>
  <plugins>
    <plugin>
      <groupId>org.springframework.boot</groupId>
      <artifactId>spring-boot-maven-plugin</artifactId>
    </plugin>
  </plugins>
</build>
4.读取配置内容
读取配置的内容有三种方式,
@ValueEnvironment@ConfigurationProperties
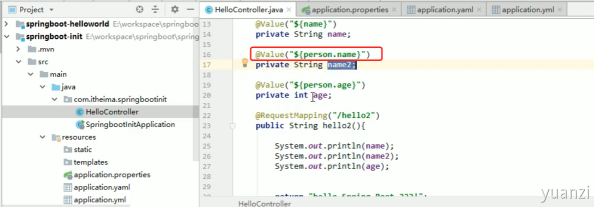
1.@Value
配置文件的名称要和表达式中的值一样, 表达式中有层级关系用.表示下一层
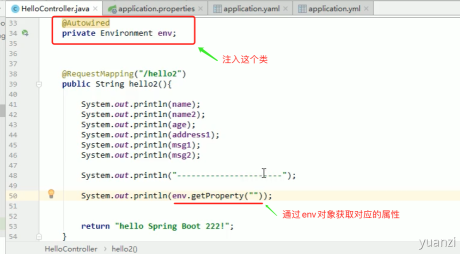
2.Environment
注入一个org.springframework.core.env.Environment的对象, 然后通过 env 对象来获取对象的属性
输入的参数方式和 value 的一样
3.@ConfigurationProperties
创建一个配置类, 将配置文件中的值全部注入到配置类中,在配置类中加上
Component,标识这是一个 spring 的 bean
ConfigurationProperties, 标识这是一个配置类
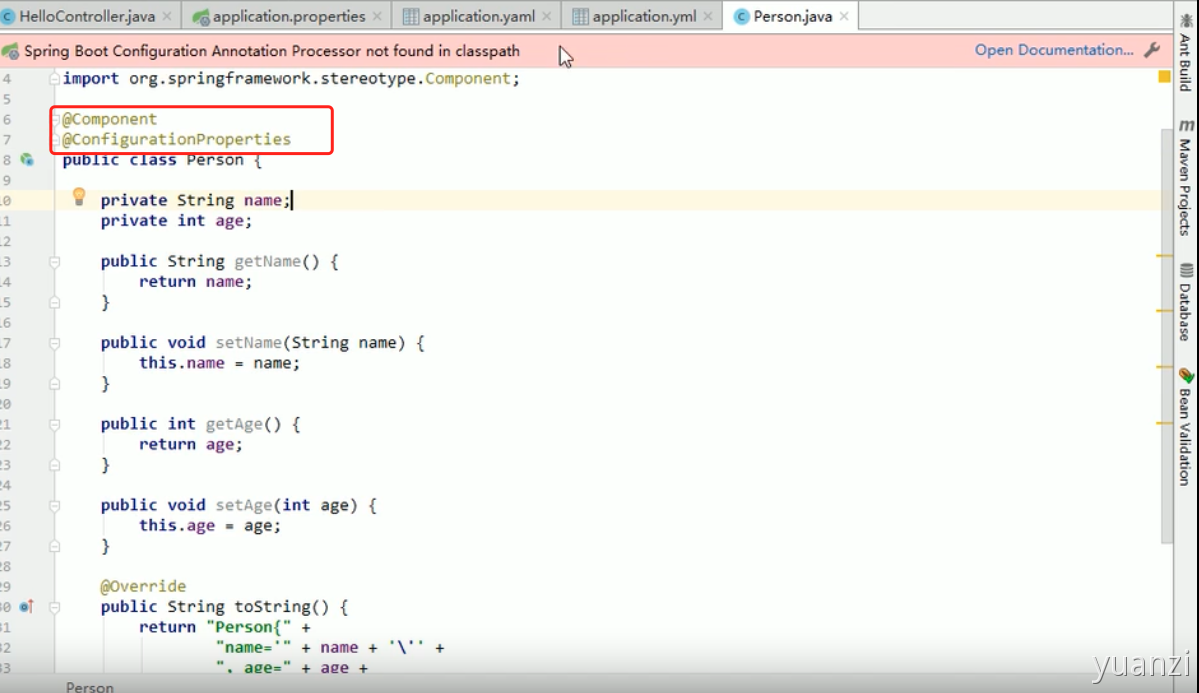
上面报红的是没有开启处理注解的依赖, 点击文档添加依赖的配置后,在写配置文件的时候会有对应的提示
但是使用时需要注意, ConfigurationProperties 需要指定前缀,不然无法读取到 person 类, 而是将整个 application.yml 文件当成 Person 类,按上面的运行只能读取到 name 是 abc。
5.profIle
我们在开发 Spring Boot 应用时,通常同一套程序会被安装到不同环境,比如:开发、测试、生产等。其中数据库地址、服务器端口等等配置都不同,如果每次打包时,都要修改配置文件,那么非常麻烦。profile 功能就是来进行动态配置切换,编写多个配置文件, 启动时用spring.profiles.active来激活对应的配置文件
profile 激活方式
profile 激活的方式有 3 种,第一种方式是静态的已经在代码中写死, 第 2 3 种在程序启动时给指定具体的参数
- 方式 1,配置文件
配置文件的方式, 就是上面那种在配置文件中指定
- 方式 2, 虚拟机参数
在 VM options 指定:-Dspring-profiles.active:=dev
- 方式 3, 命令行参数
java -jar xxx.jar --spring.profiles.active=dev
- 配置文件: 再配置文件中配置:spring.profiles.active=dev
- 虚拟机参数:在 VM options 指定:-Dspring.profiles.active=dev
- 命令行参数:java –jar xxx.jar --spring.profiles.active=dev
6.监控
<dependency>
  <groupId>org.springframework.boot</groupId>
  <artifactId>spring-boot-starter-actuator</artifactId>
</dependency>
http://localhost:8080/acruator
http://localhost:8080/actuator/info
info.name=lucy
info.age=99
http://localhost:8080/actuator/health
management.endpoint.health.show-details=always
management.endpoints.web.exposure.include=*
{
  "_links": {
    "self": {
      "href": "http://localhost:8080/actuator",
      "templated": false
    },
    "health": {
      "href": "http://localhost:8080/actuator/health",
      "templated": false
    },
    "health-component-instance": {
      "href": "http://localhost:8080/actuator/health/{component}/{instance}",
      "templated": true
    },
    "health-component": {
      "href": "http://localhost:8080/actuator/health/{component}",
      "templated": true
    },
    "info": {
      "href": "http://localhost:8080/actuator/info",
      "templated": false
    }
  }
}
二.yaml
说明:语法要求严格!
1、空格不能省略
2、以缩进来控制层级关系,只要是左边对齐的一列数据都是同一个层级的。
3、属性和值的大小写都是十分敏感的。
1.字面量
字面量:普通的值 [ 数字,布尔值,字符串 ]
k: v
2.对象和 Map
对象、Map(键值对)
#对象、Map格式
k:
    v1:
    v2:
student:
    name: qinjiang
    age: 3
student: {name: qinjiang,age: 3}
3.数组
数组( List、set )
pets:
 - cat
 - dog
 - pig
pets: [cat,dog,pig]
4.应用
@Component //注册bean
@ConfigurationProperties(prefix = "person")
public class Person {
    private String name;
    private Integer age;
    private Boolean happy;
    private Date birth;
    private Map<String,Object> maps;
    private List<Object> lists;
    private Dog dog;
}
person:
  name: qinjiang
  age: 3
  happy: false
  birth: 2000/01/01
  maps: {k1: v1,k2: v2}
  lists:
   - code
   - girl
   - music
  dog:
    name: 旺财
    age: 1
5.提示
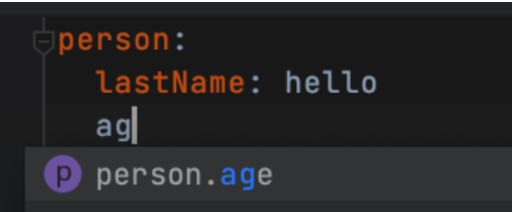
<!-- 导入配置文件处理器,配置文件进行绑定就会有提示,需要重启 -->
<dependency>
  <groupId>org.springframework.boot</groupId>
  <artifactId>spring-boot-configuration-processor</artifactId>
  <optional>true</optional>
</dependency>
三.常见问题
1.生成代码
https://start.spring.io/
或者使用阿里云提供的 spring 脚手架, 功能更加强大基本上覆盖前者所有,同时有更多阿里开源组件的选择
spring 脚手架
2.cros 跨域支持
@Configuration
public class MyConfiguration {

	@Bean
	public WebMvcConfigurer corsConfigurer() {
		return new WebMvcConfigurer() {
			@Override
			public void addCorsMappings(CorsRegistry registry) {
				registry.addMapping("/api/**");
			}
		};
	}
}
3.自定义过滤器
@Configuration
public class MyWebMvcConfig implements WebMvcConfigurer {
    @Override
    public void addResourceHandlers(ResourceHandlerRegistry registry) {
        registry.addResourceHandler("/static/**")
                .addResourceLocations("classpath:/static/");
    }
}
4.重定向
@GetMapping("/redirect/{id}")
public void redirect(@PathVariable("id") String id, HttpServletResponse resp) throws IOException {
  String redirectUri = "http://www.baidu.com";
  resp.sendRedirect(redirectUri);
}
